|
| Group |
Round |
C/R |
Comment |
Date |
Image |
| 65 |
Sep 20 |
Comment |
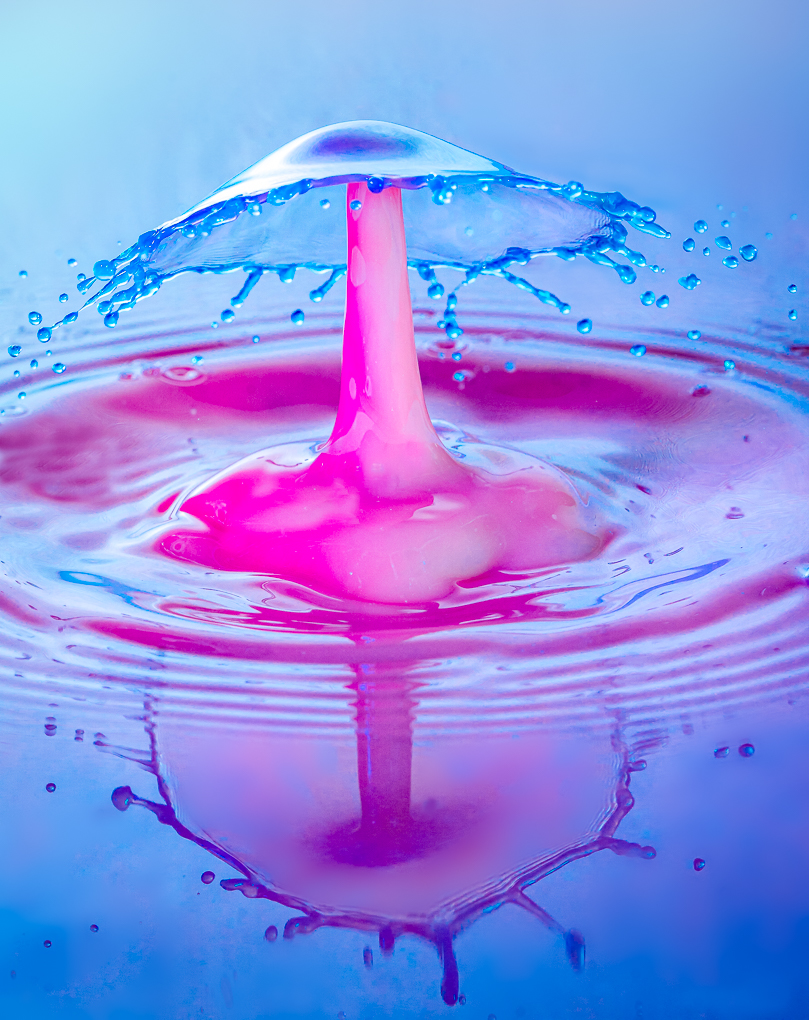
Thank you very much, Lynne.
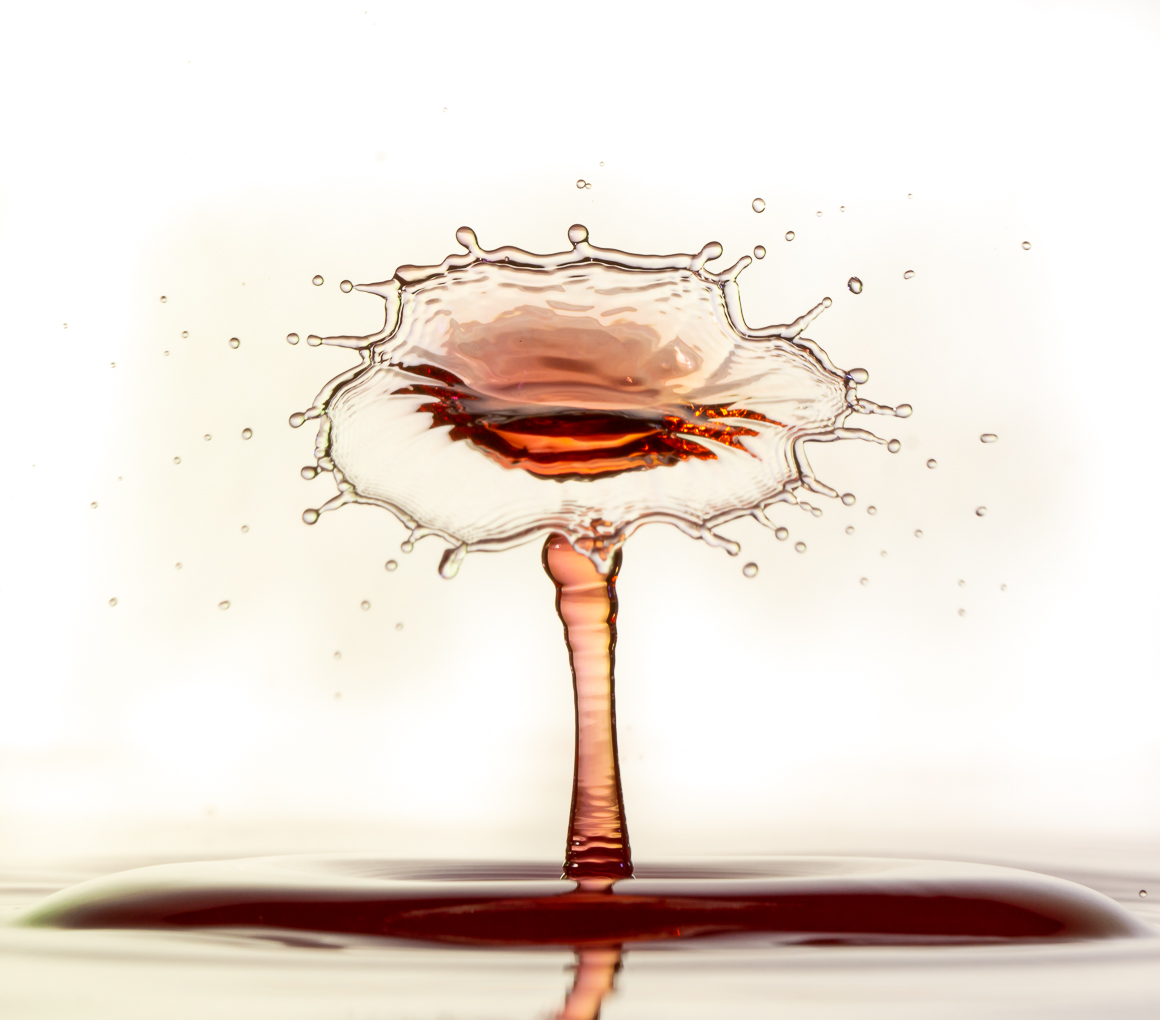
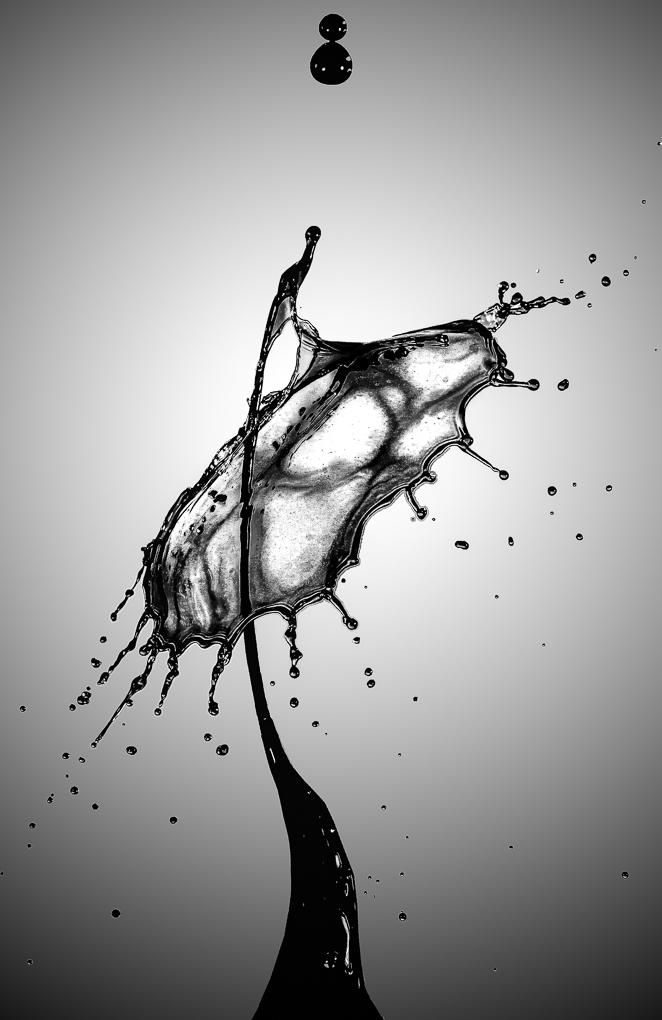
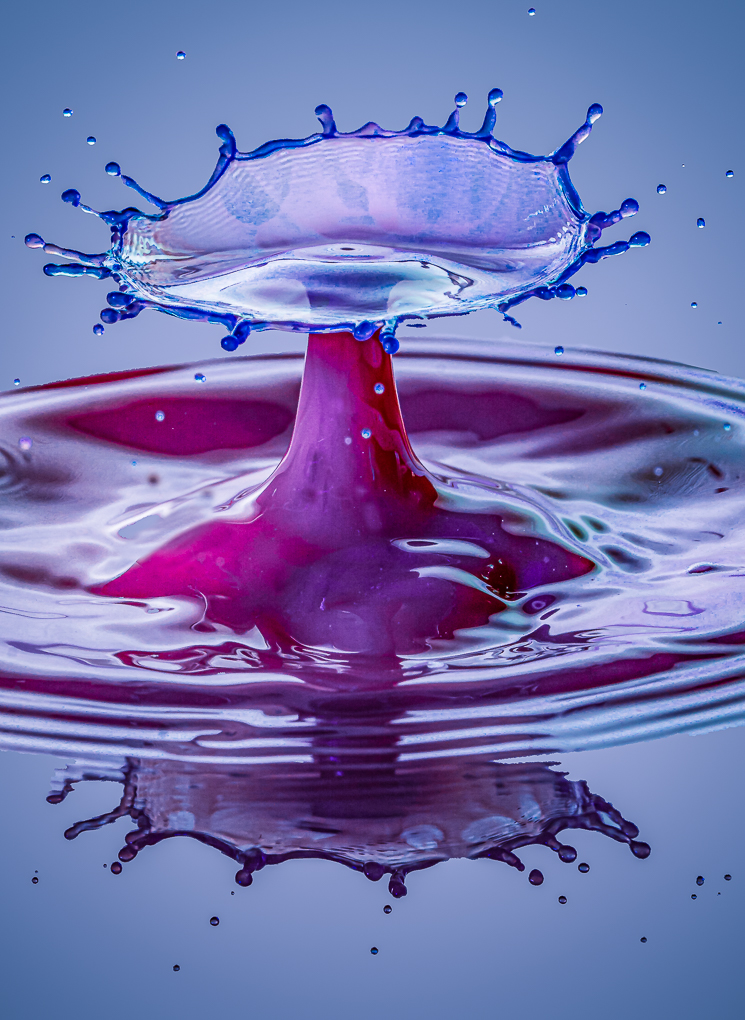
The base does not stand up very high above the bottom because if I incline the camera to catch more of the liquid at the base then the container will be in the image . I had a hard time getting rid of small bubbles etc from the far side of the container so I feel that just the profile is the easiest to deal with. Usually the only time I show the whole base and the fluid at the horizon is when I tilt the camera to catch the splash and its reflection in a large pan of fluid .
|
Sep 22nd |
 |
| 65 |
Sep 20 |
Reply |
Hi Peter,
I am the kind of person who always say that rules are meant to be broken. All the composition "rules" are suggestions as you said. The most important thing is..."Does it look good to you ?' That was why I said (I am used to seeing more space at the left hand side)..not...(It does not fit in rule of the third ).
I am not boasting but I frequently took images a certain way before I know about the rules of composition and found out later on that what I had been doing was following those famous rules...they are made "suggestions" because they are more pleasing to most eyes .
Actually my innate composition is "Golden ratio", not the rule of third .
There are some images that I would like the focal point to be very close to the edge but not in this one...This is only my own opinion....Beauty is in the eye of the beholder.
As long as the author like it , then it is a good image. |
Sep 14th |
| 65 |
Sep 20 |
Reply |
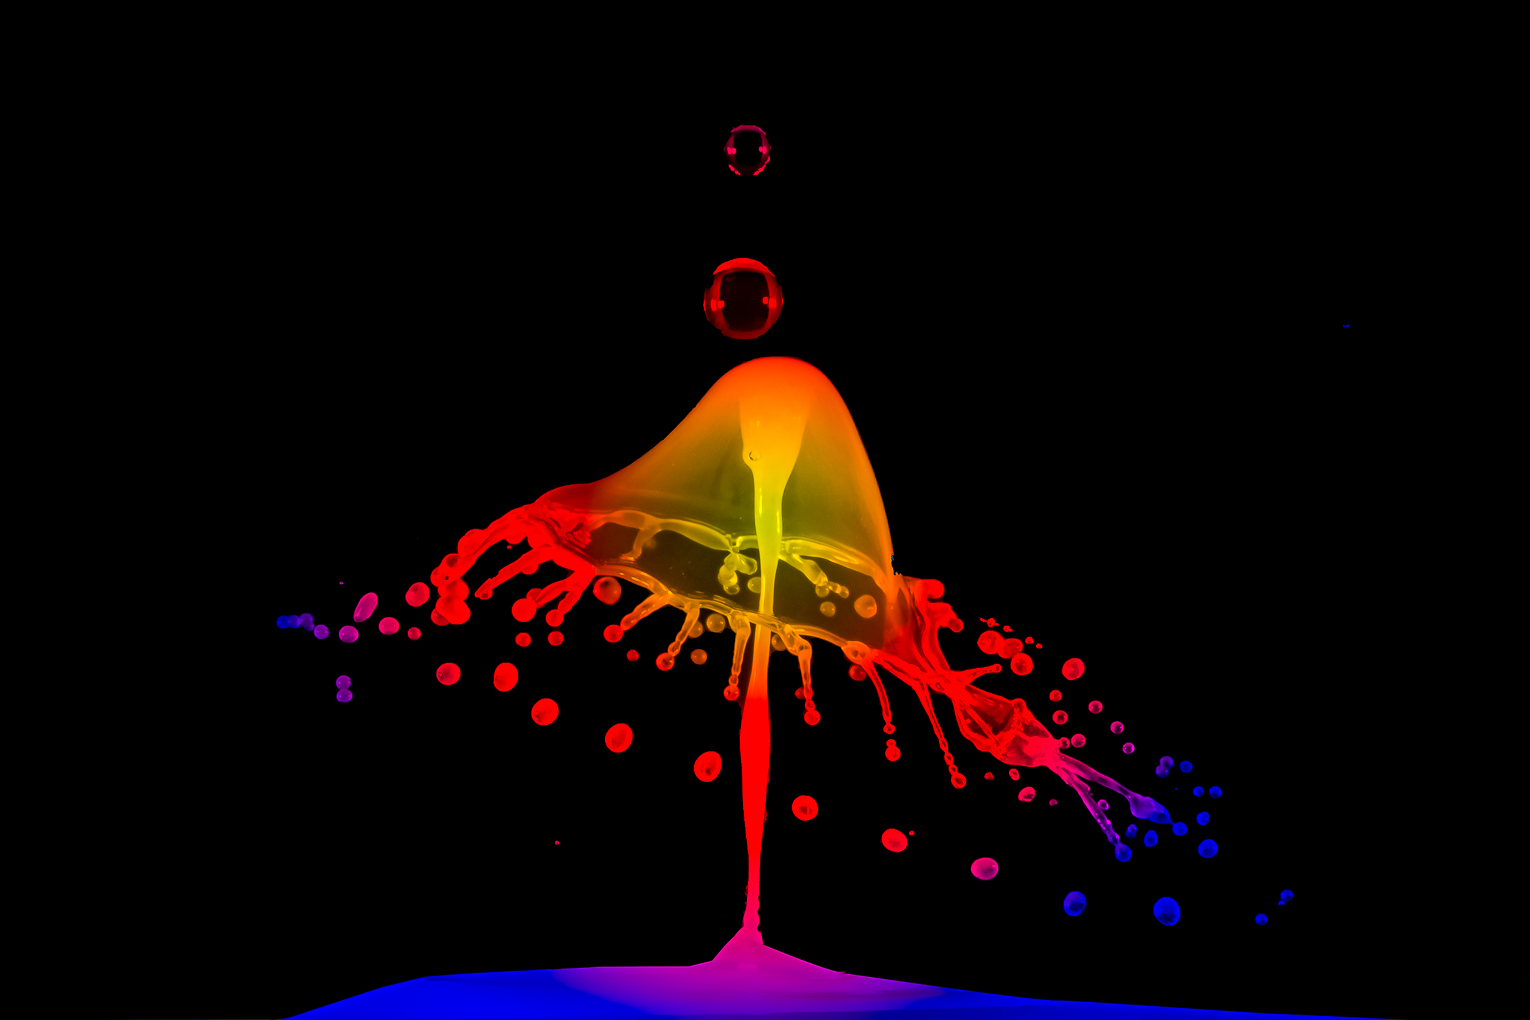
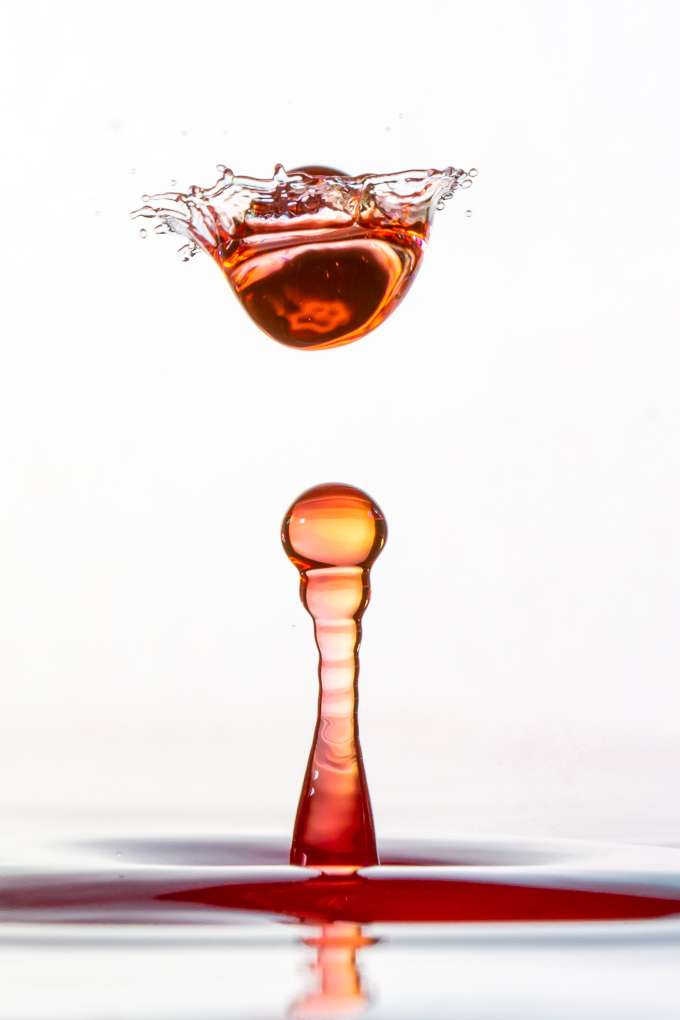
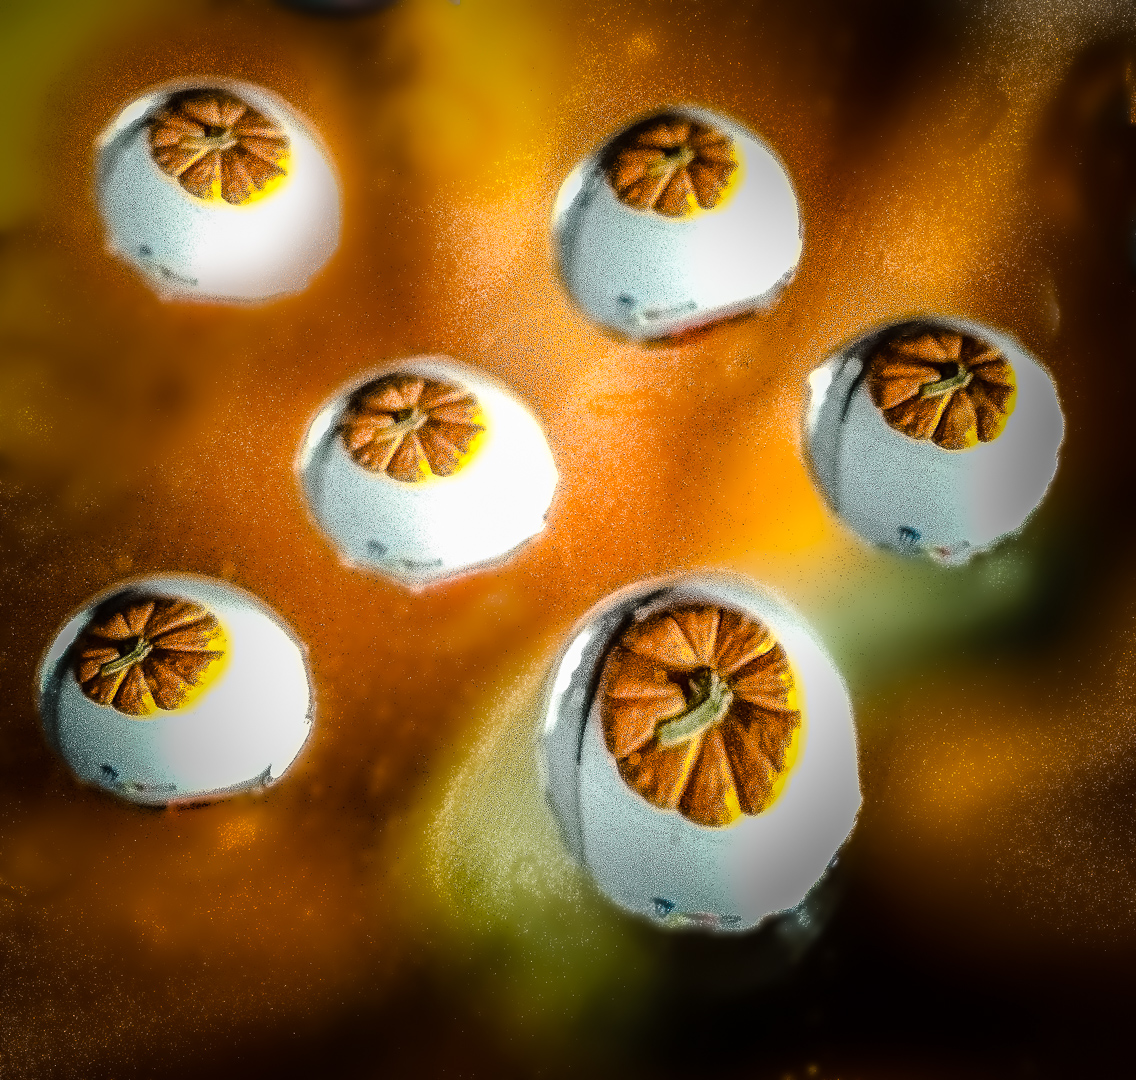
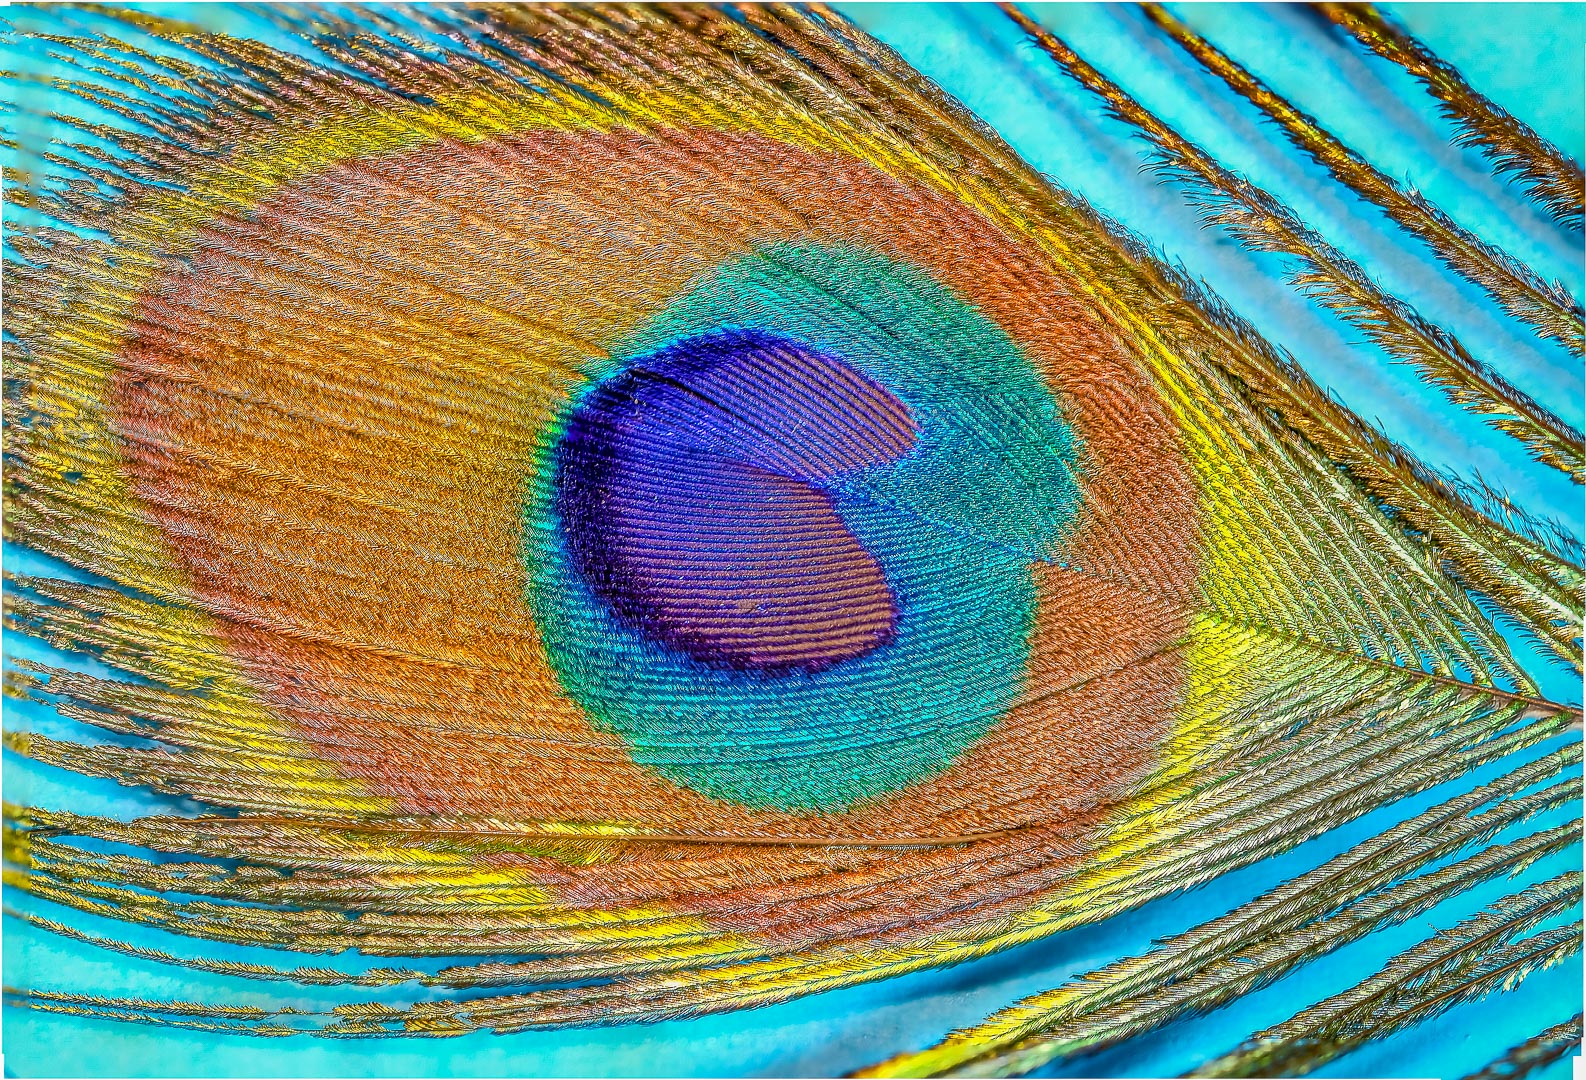
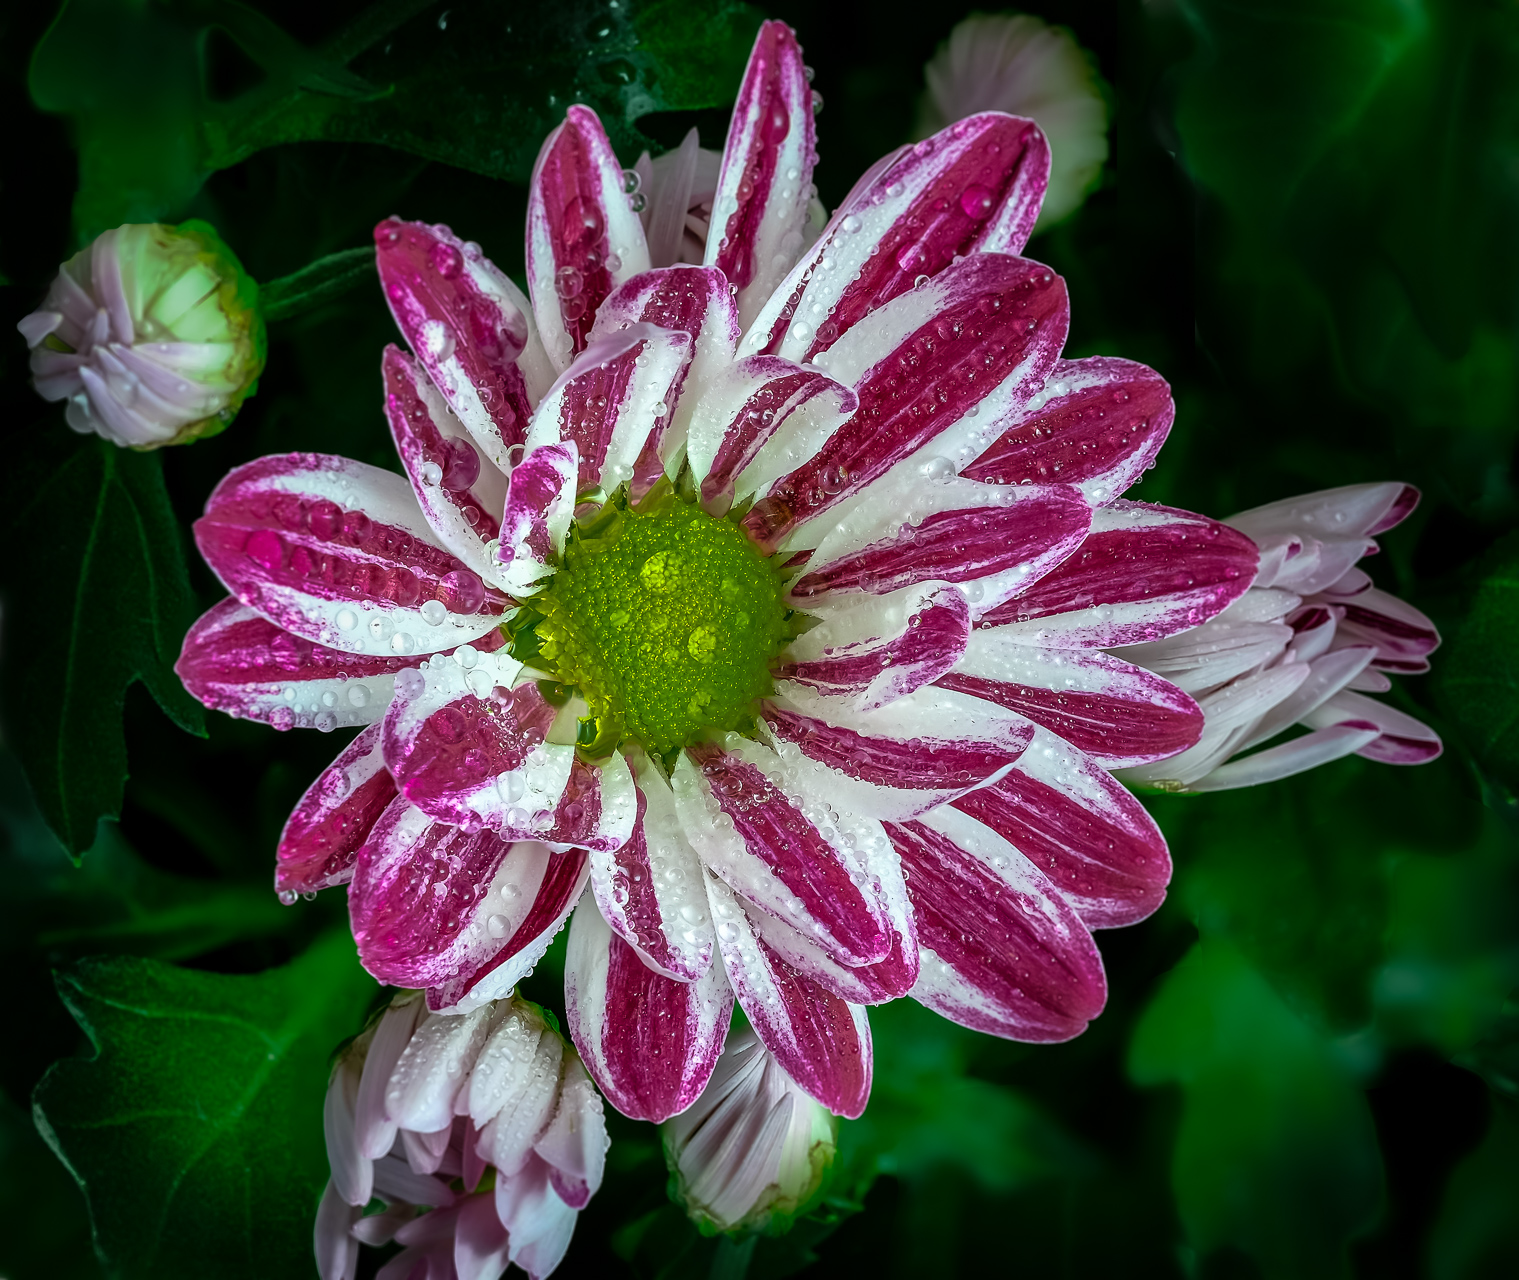
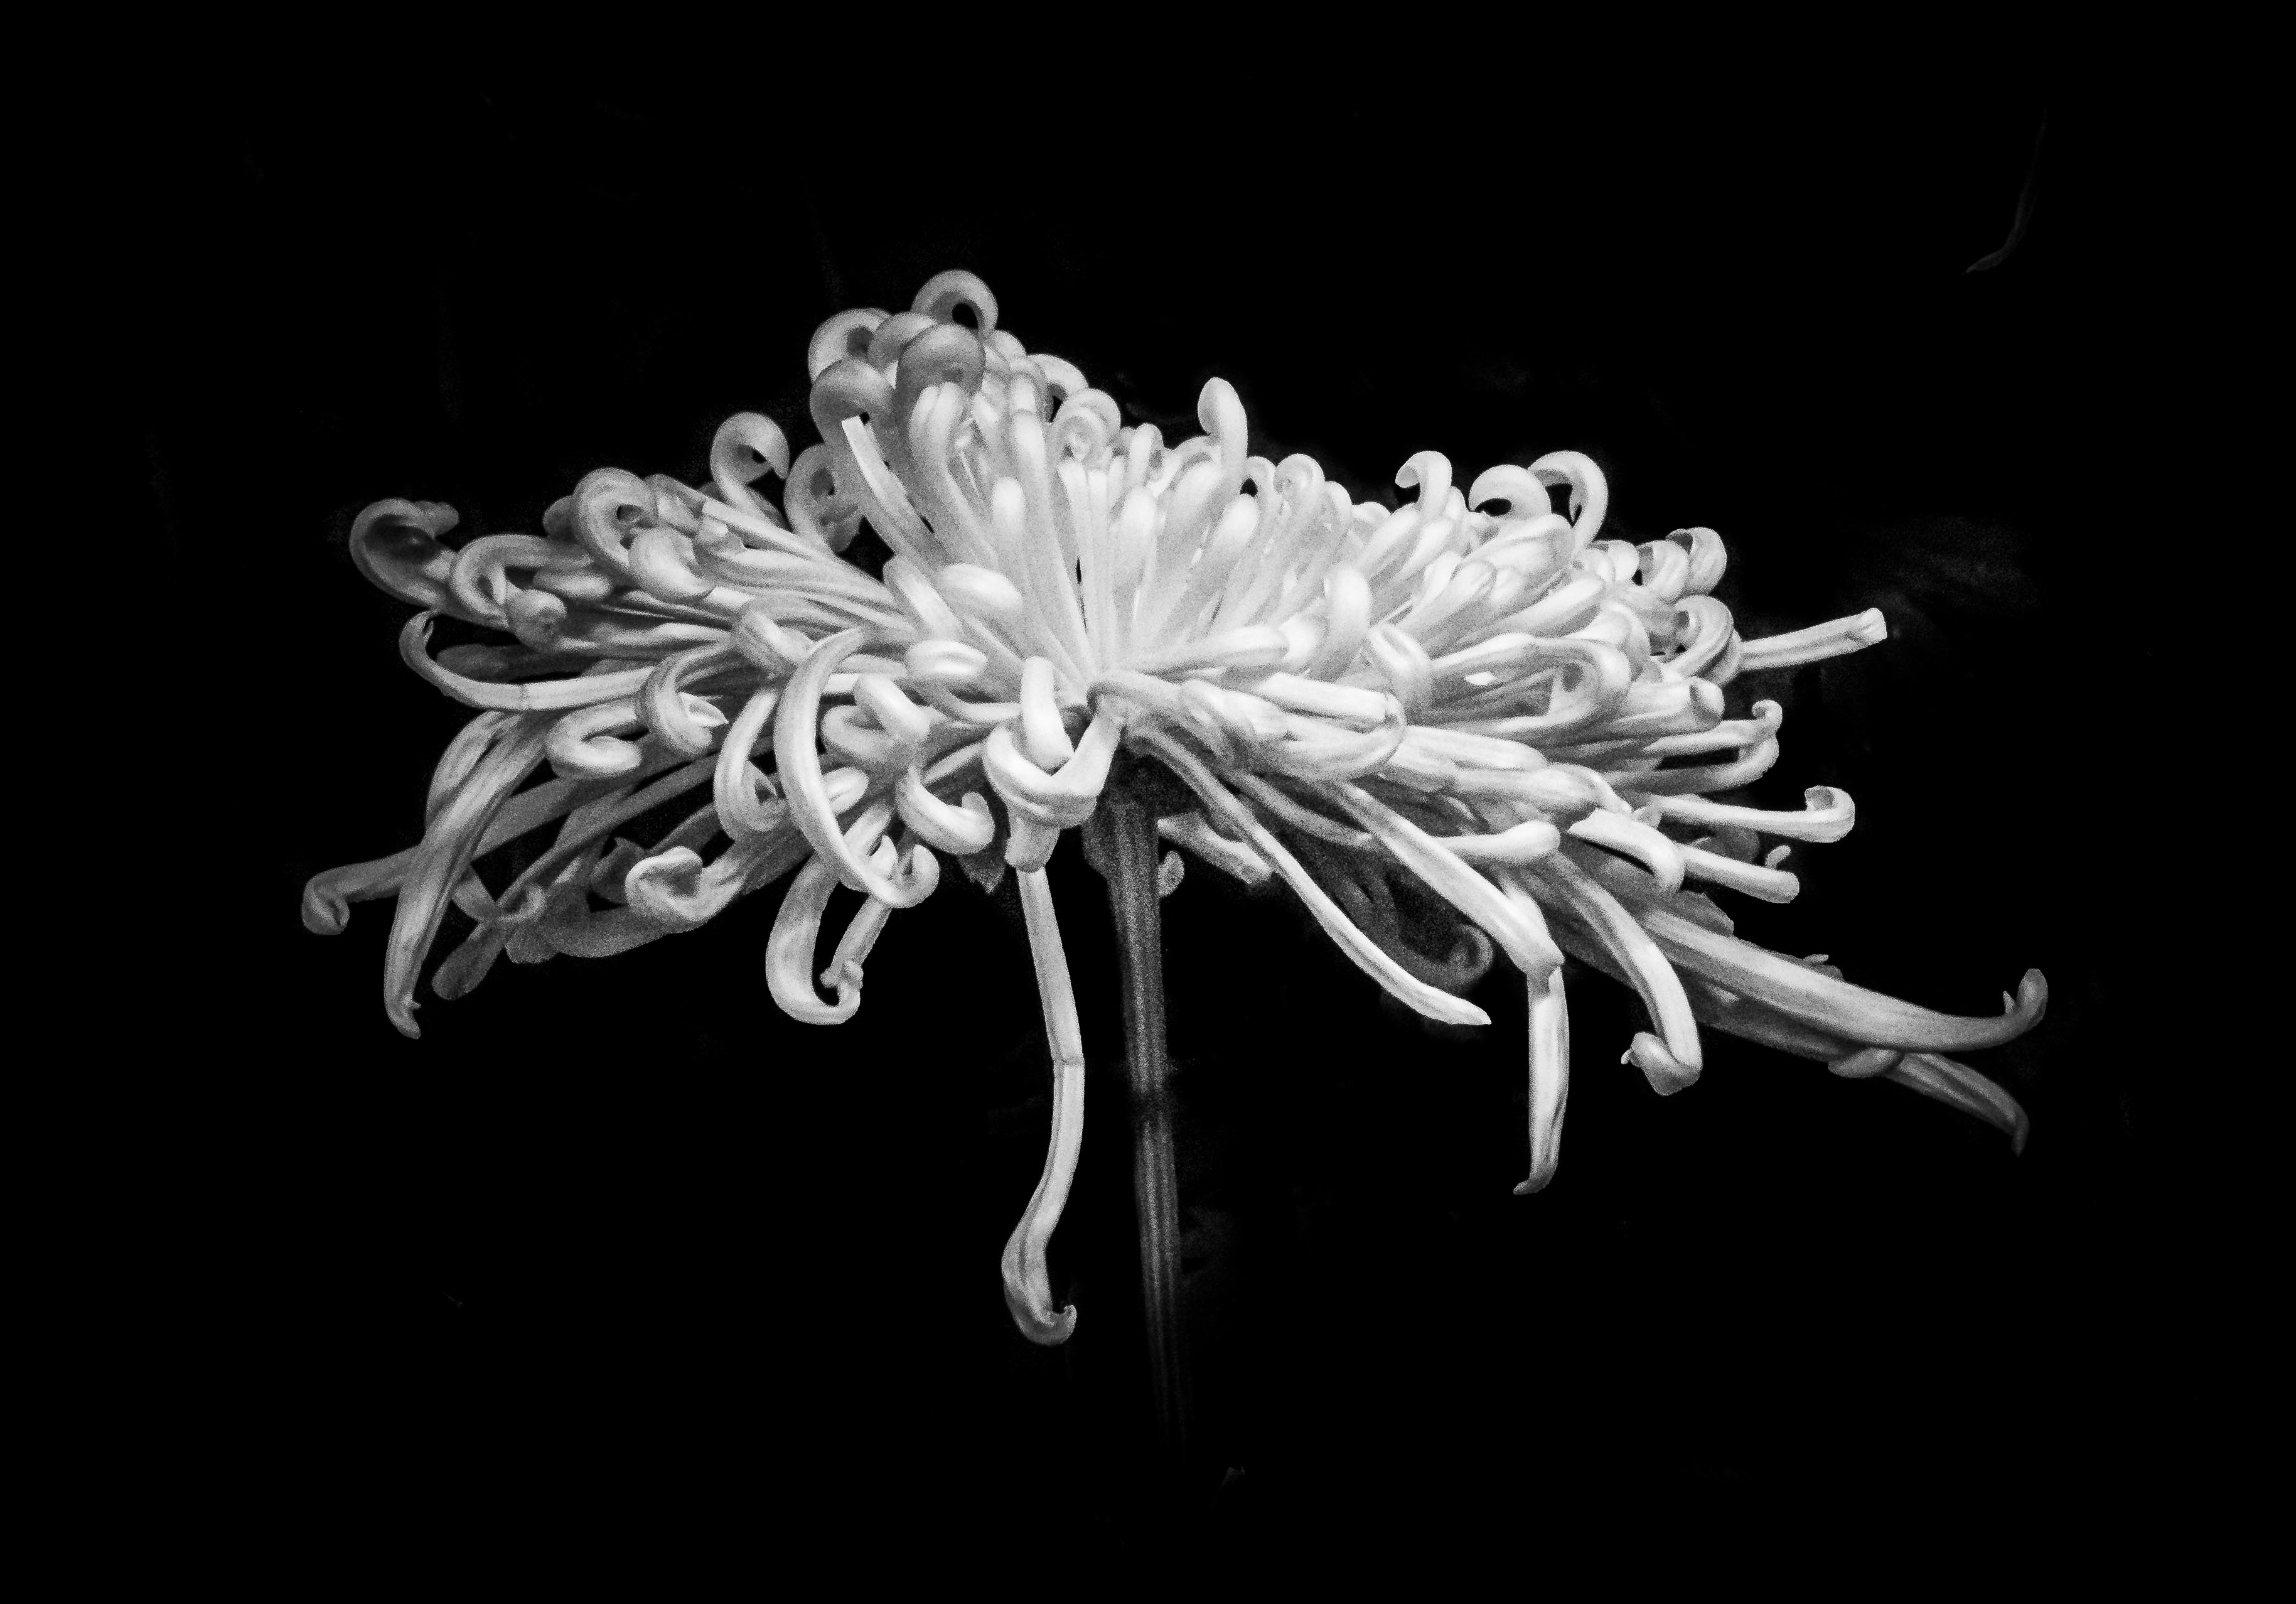
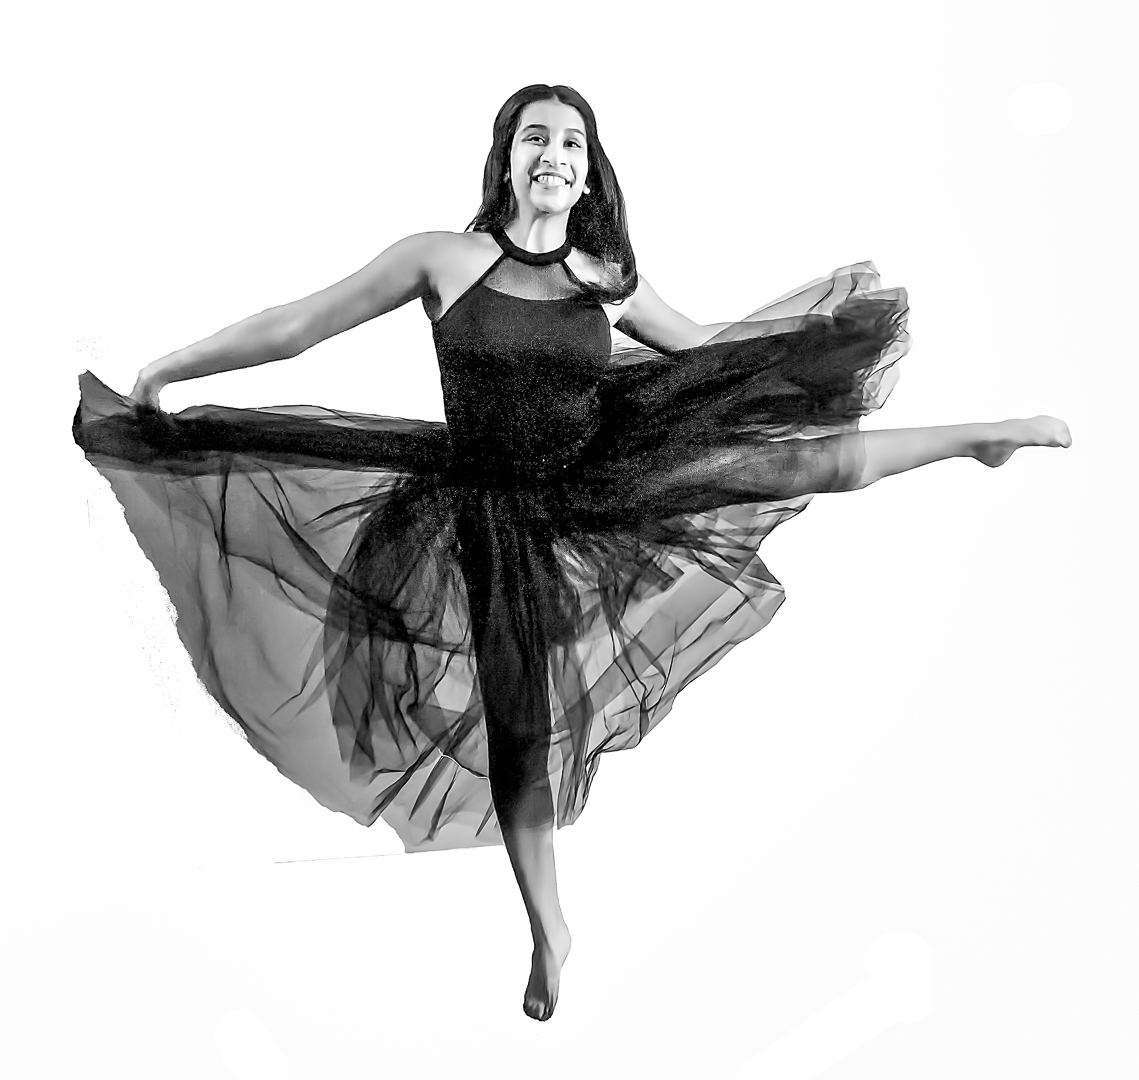
Thank you very much, Peter.
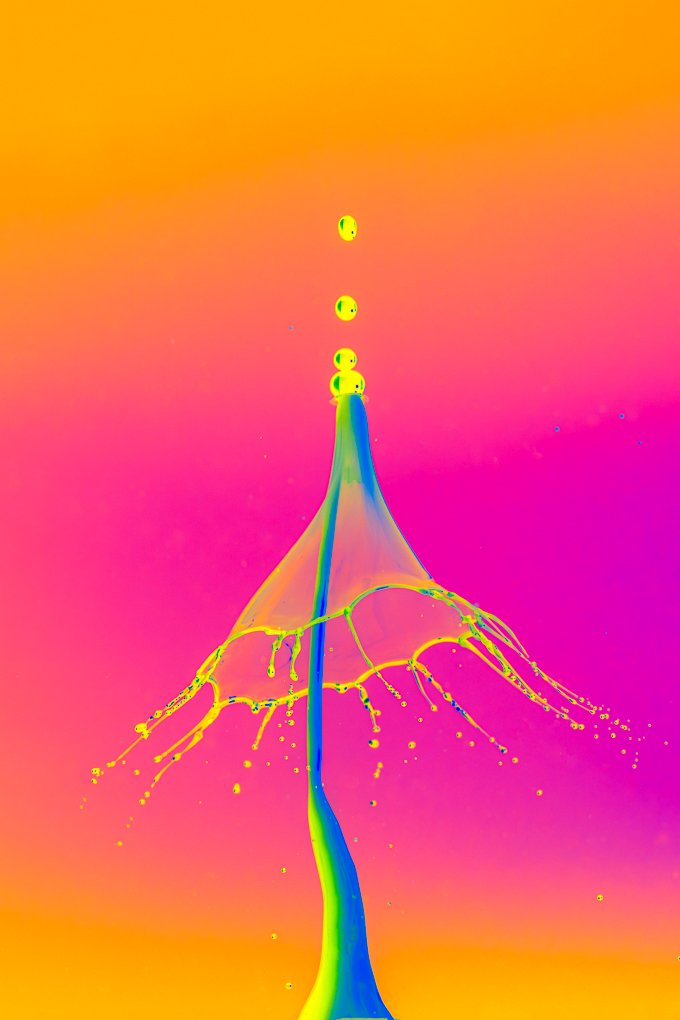
This is my favorite for now.
It reminds me of a tall slender lady in her little dress . |
Sep 12th |
| 65 |
Sep 20 |
Comment |
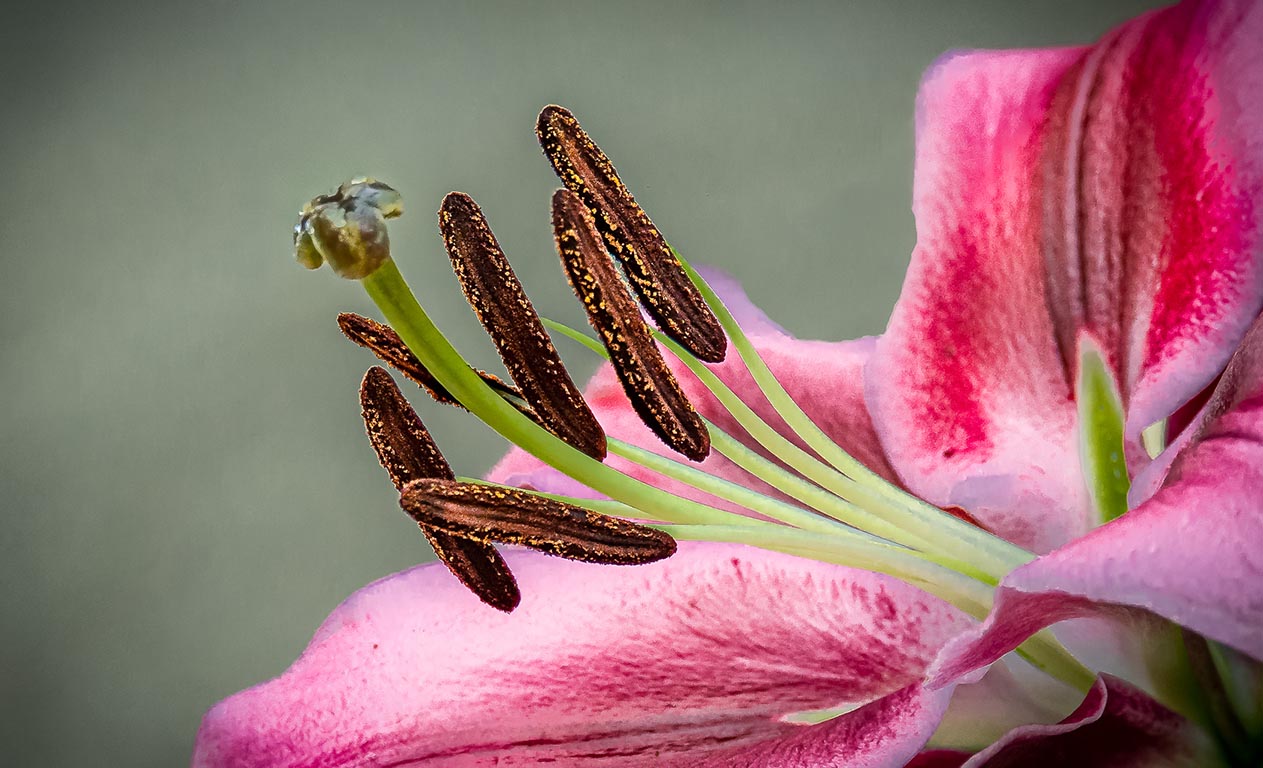
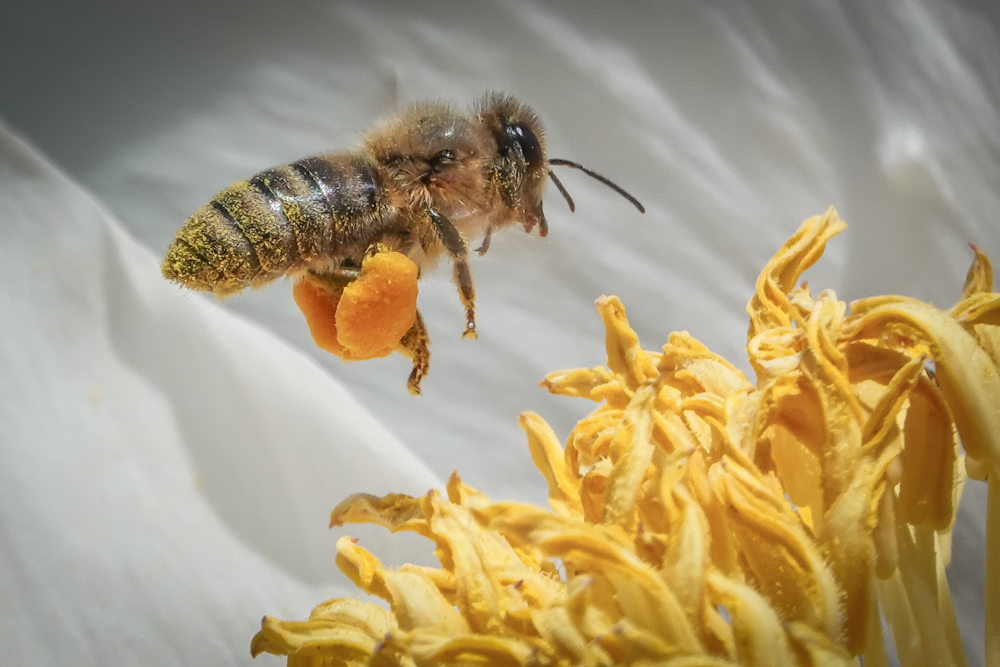
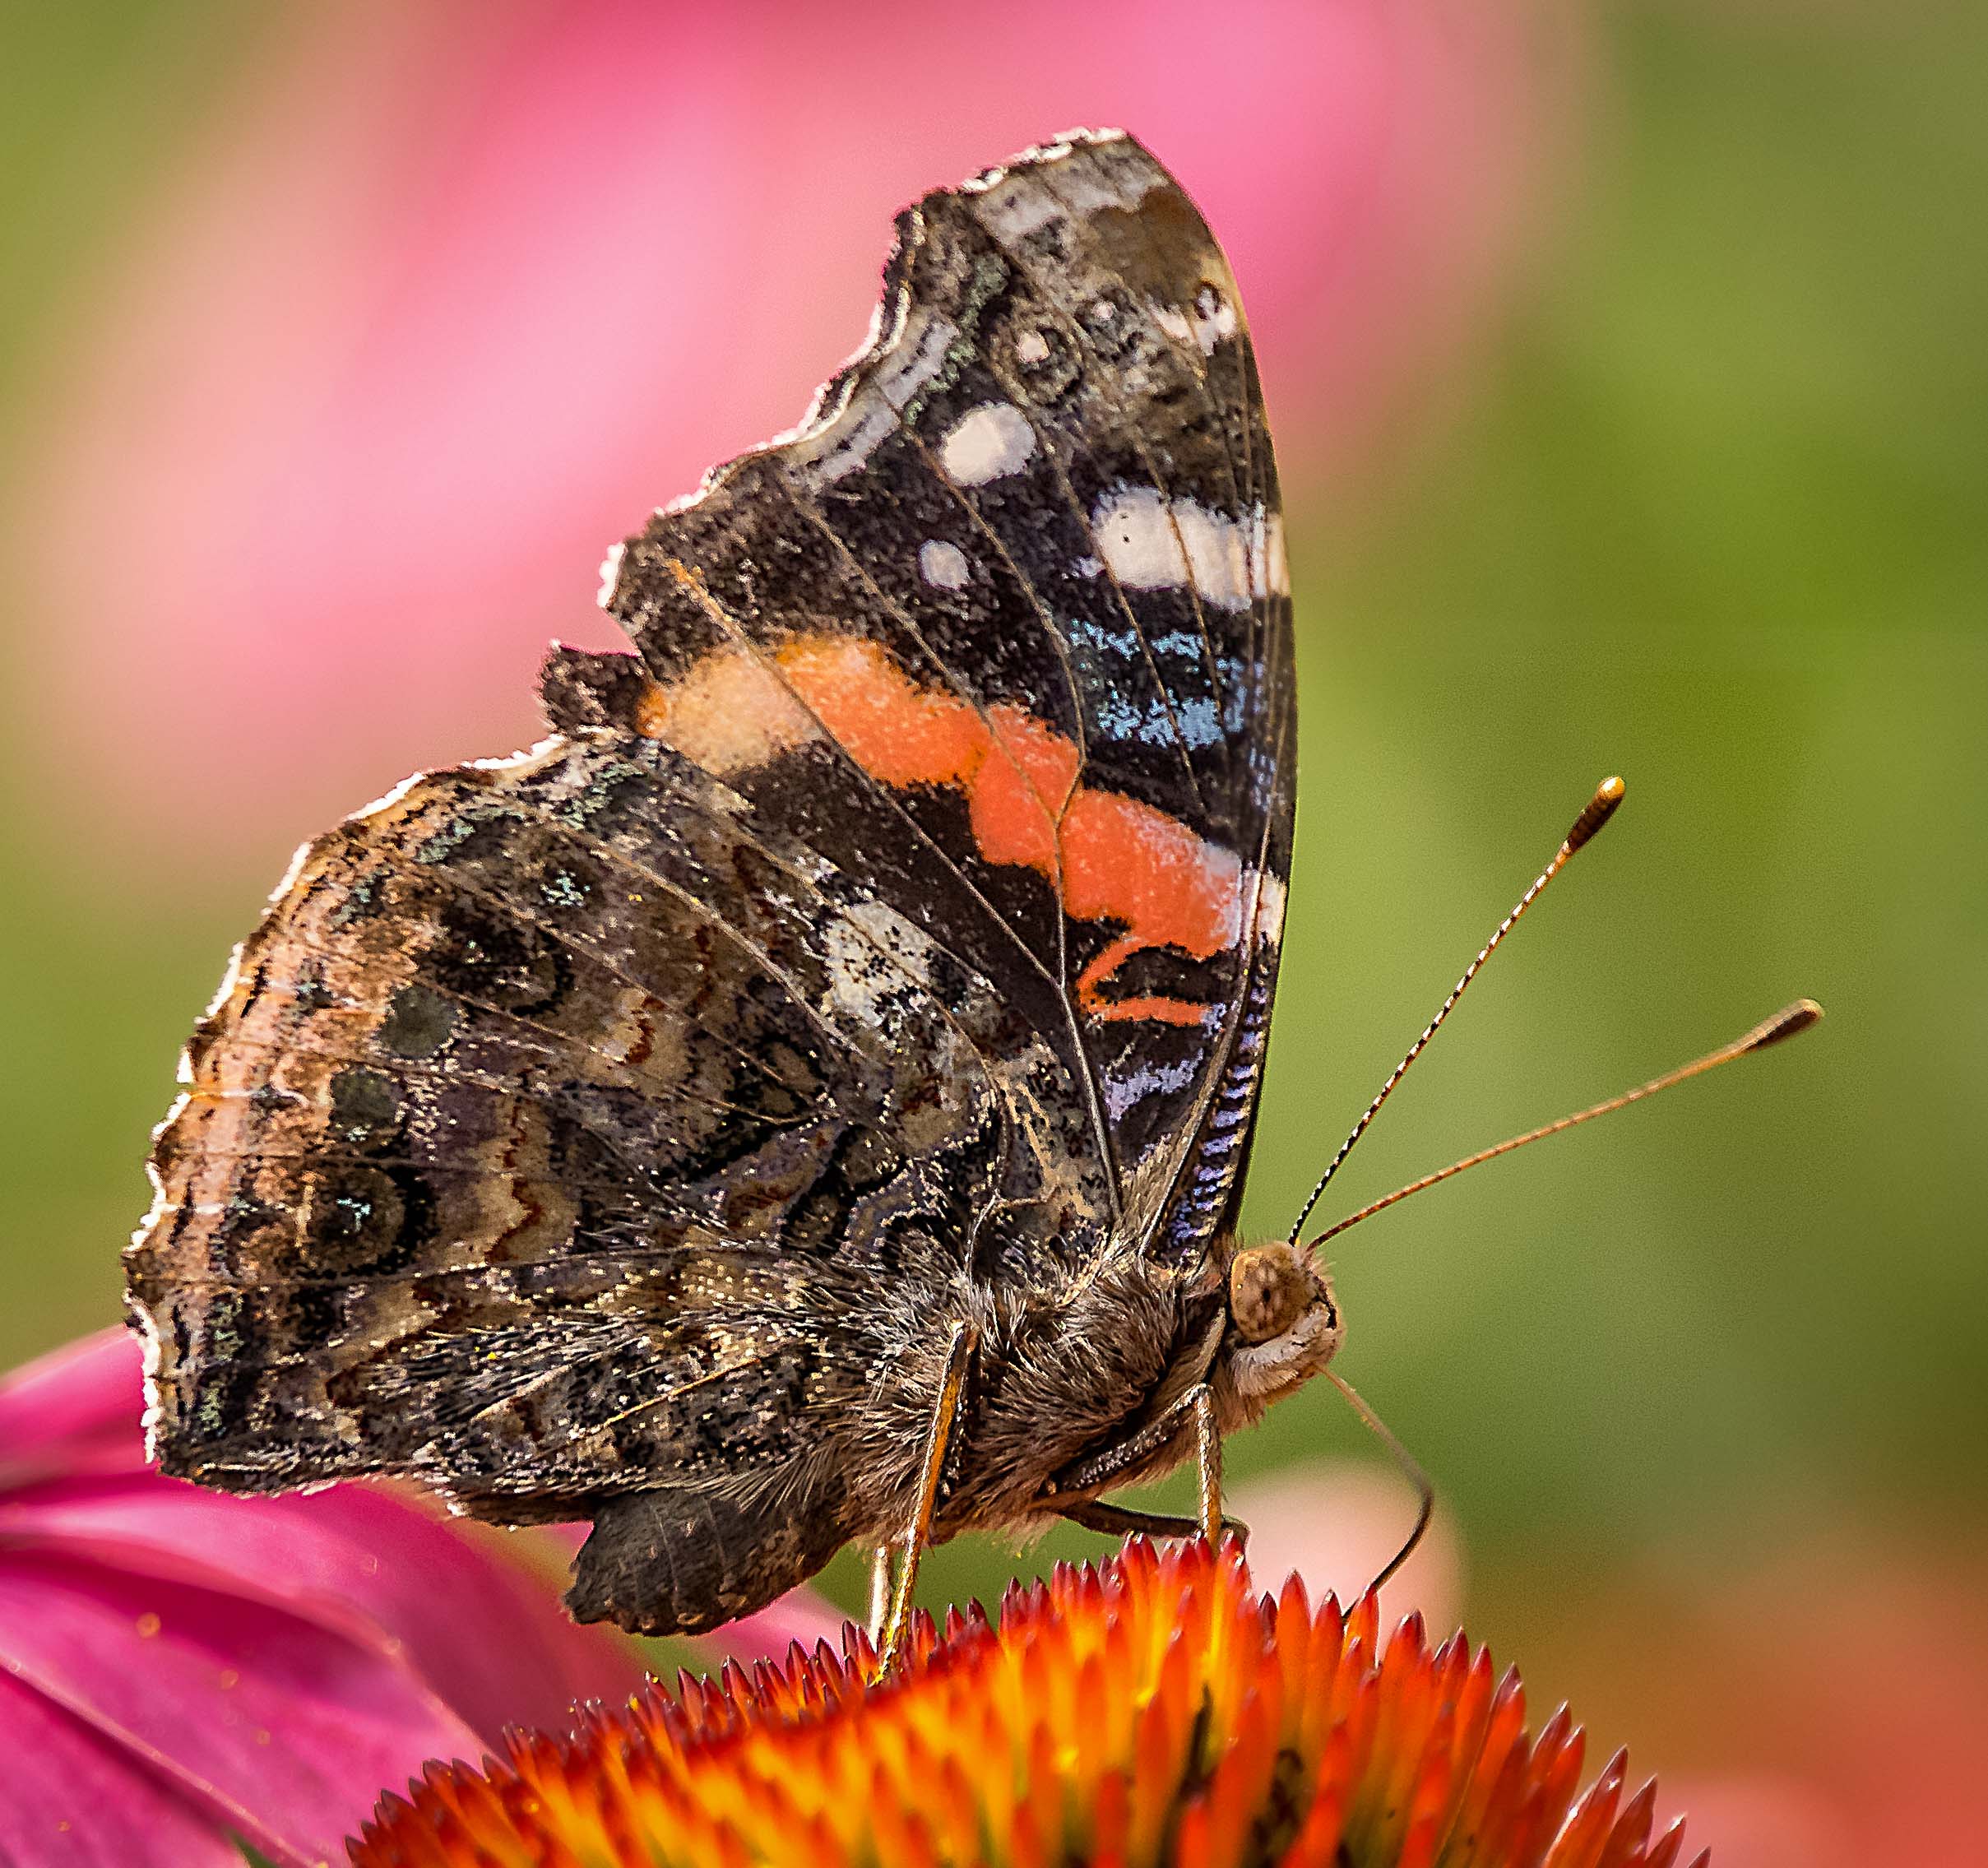
Nice shot.
Yes, I agree with the aperture used.
f8 is my favorite aperture to create sharp images without diffraction when you have the luxury of merging many images in focus stacking.
The back backing is the soul of this image and everything came to life.
The three blooms are in perfect heaven, man and earth orientation as in Ikebana flower arrangement ,
Thanks for sharing. |
Sep 12th |
| 65 |
Sep 20 |
Comment |
Welcome to the club, Jeff.
It is very nice to meet photographers who use different techniques ( and hopefully to learn from them ).
I once looked into the field but did not go far when my local camera store have no idea when I asked for a nodal tripod. Can you tell us something about the gear(s) you use please.
Yes, lots of detail on the cones and branches.
I am used to seeing more space at the left hand side but does the cone fit into golden spiral ?
The exposure seems fine to me.
Thanks for sharing. |
Sep 12th |
| 65 |
Sep 20 |
Comment |
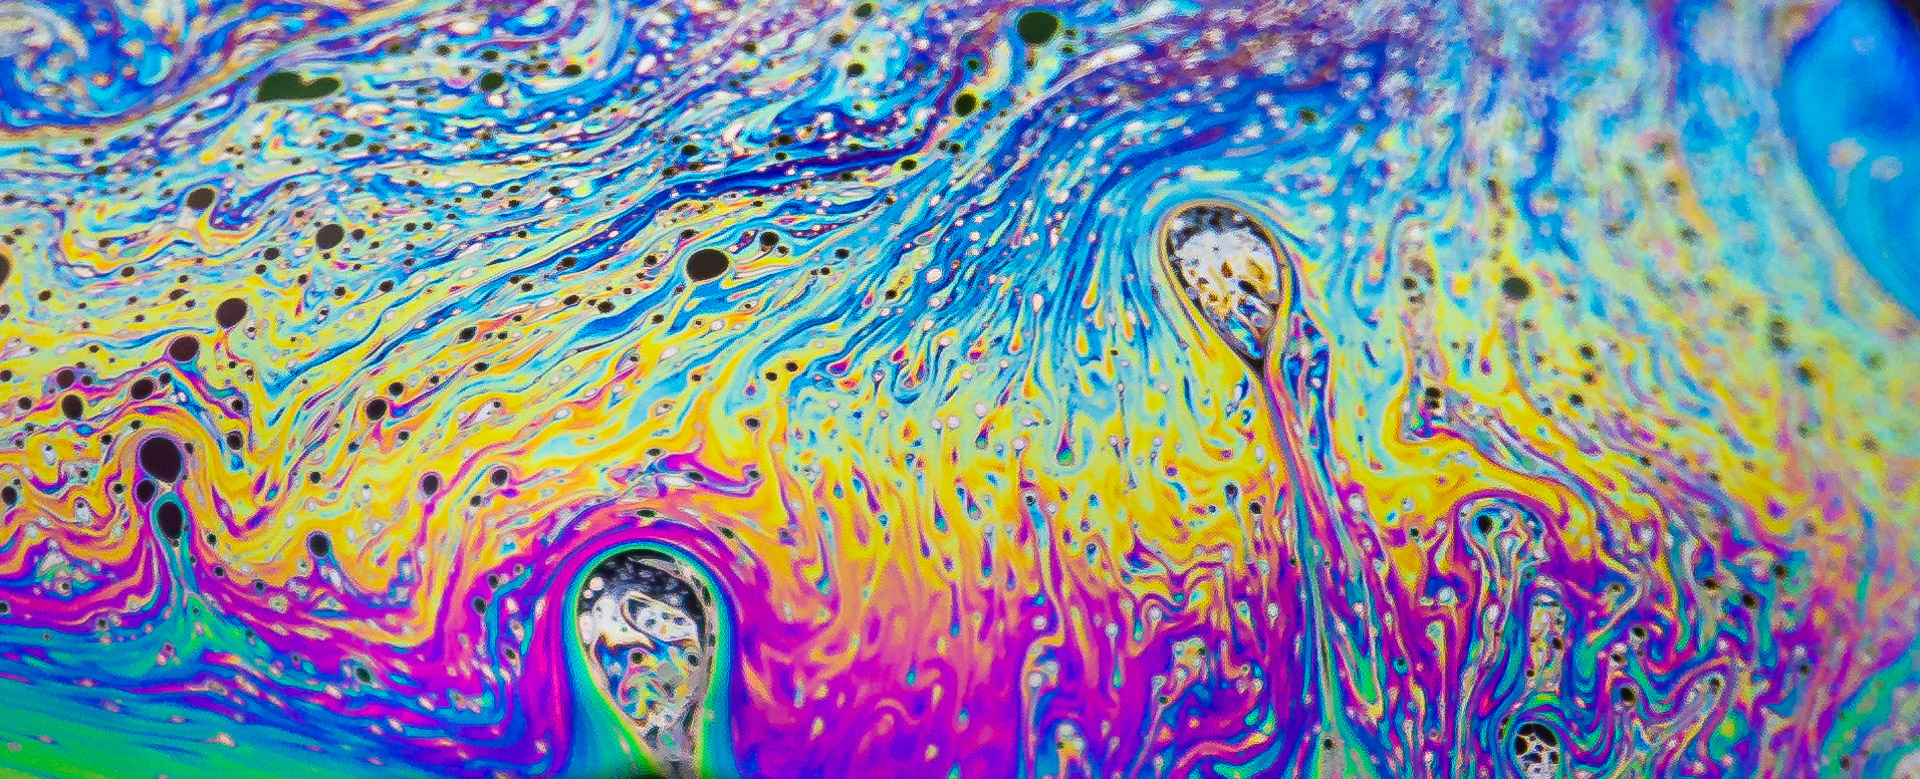
Yes, you can see the whole world in reflections...and your friends are having lots of fun. When I first see the mask it reminds me of a pacifier..LOL !!
A very successful image that show festivity and a wonderful world. The crop and placement of the glasses are perfect . |
Sep 12th |
| 65 |
Sep 20 |
Comment |
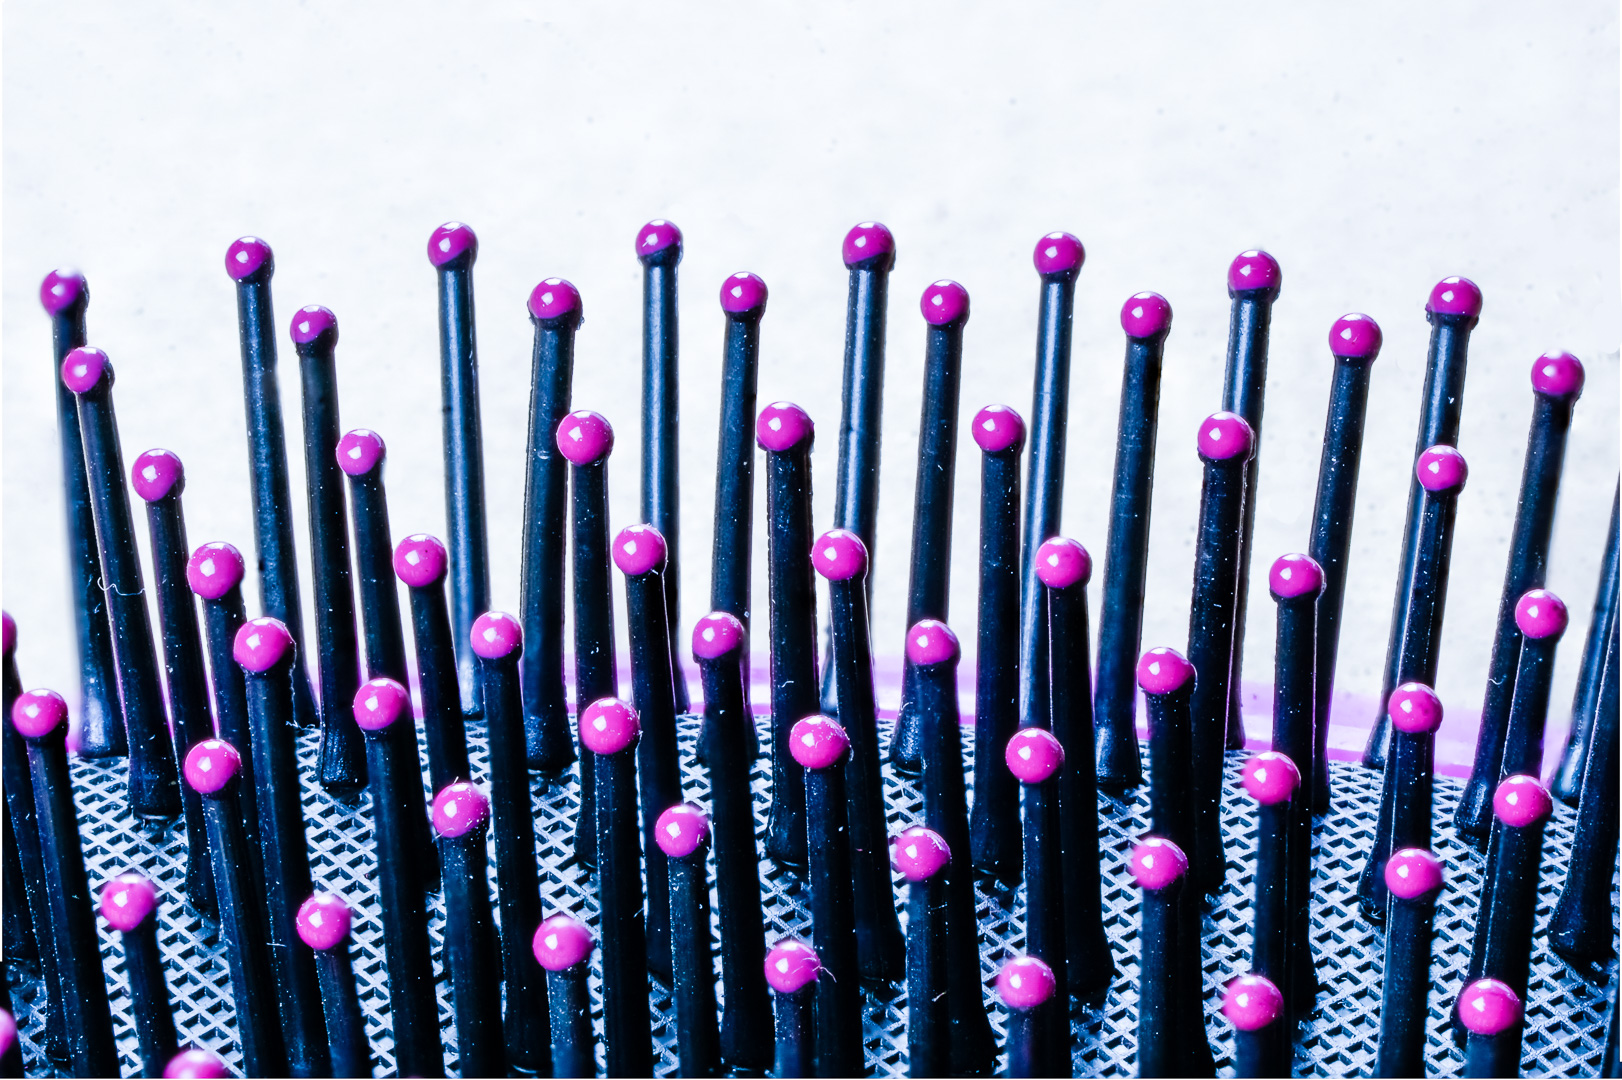
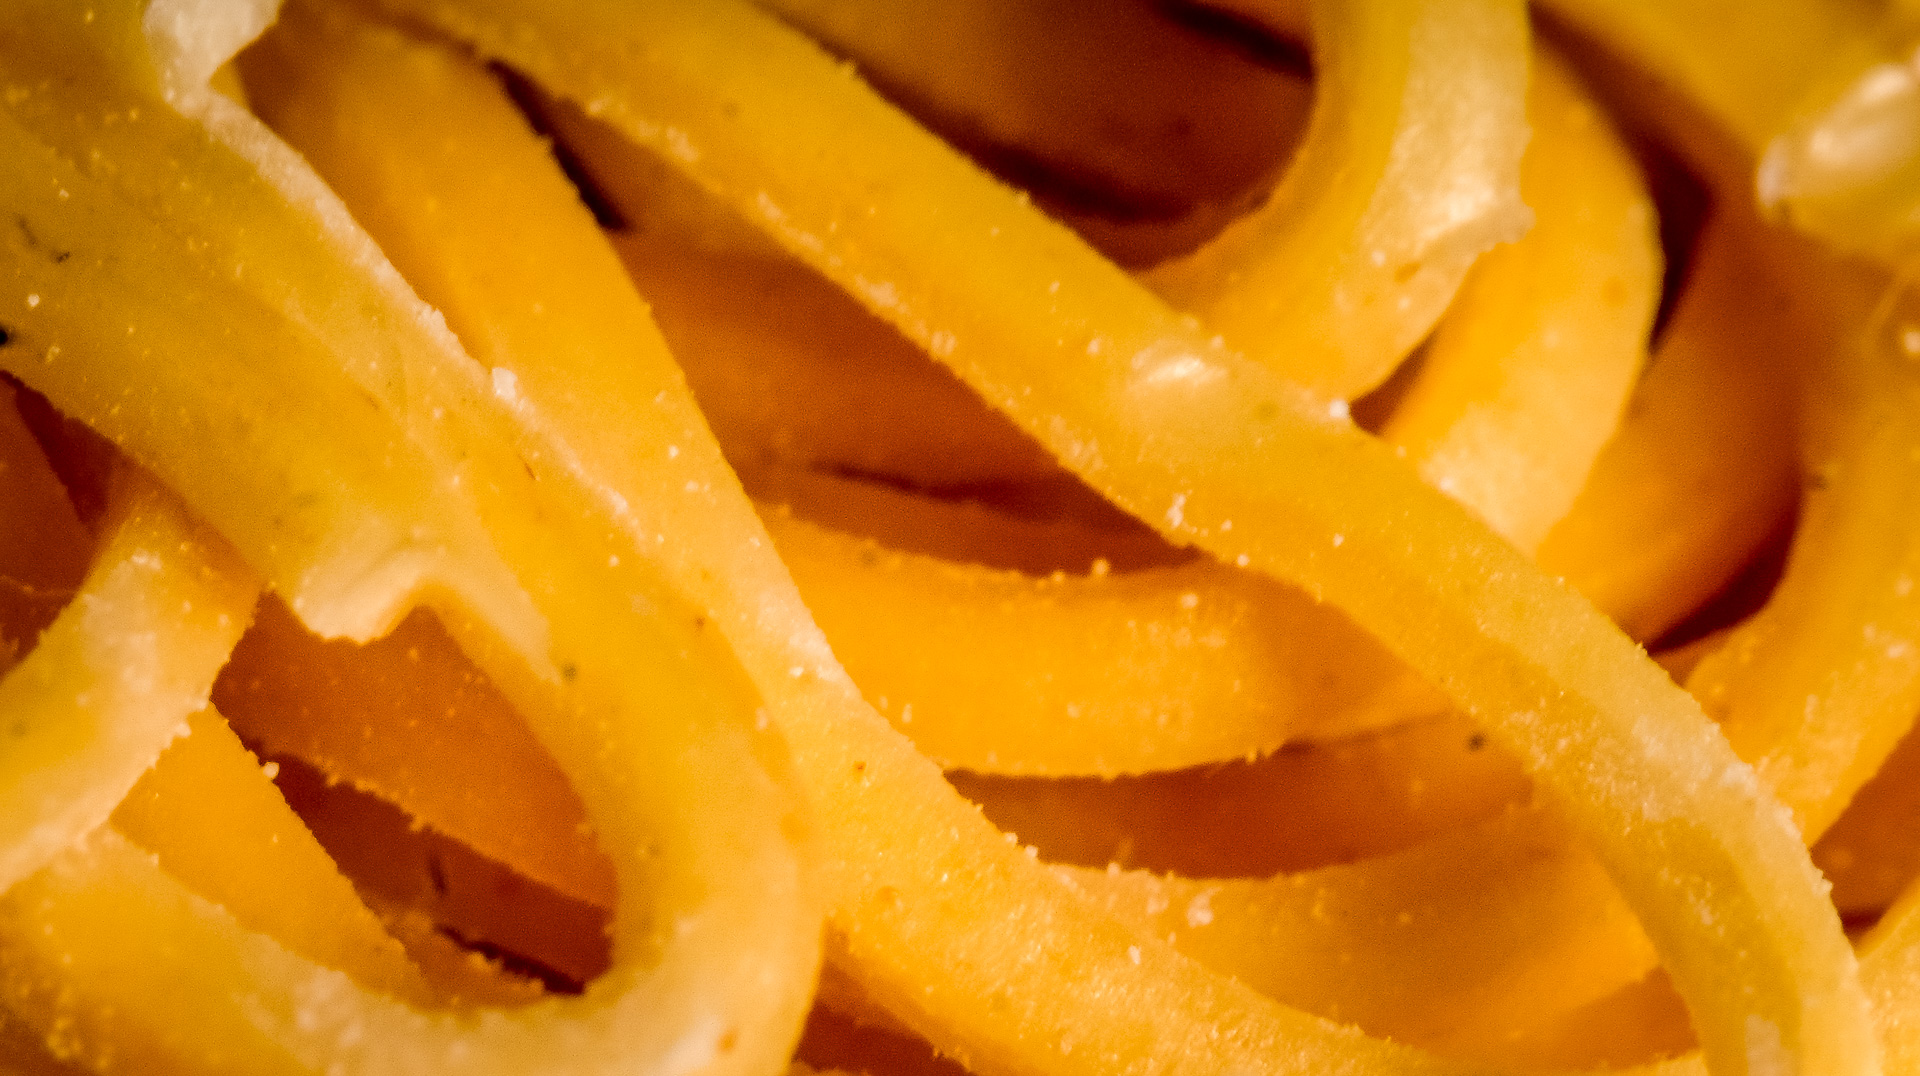
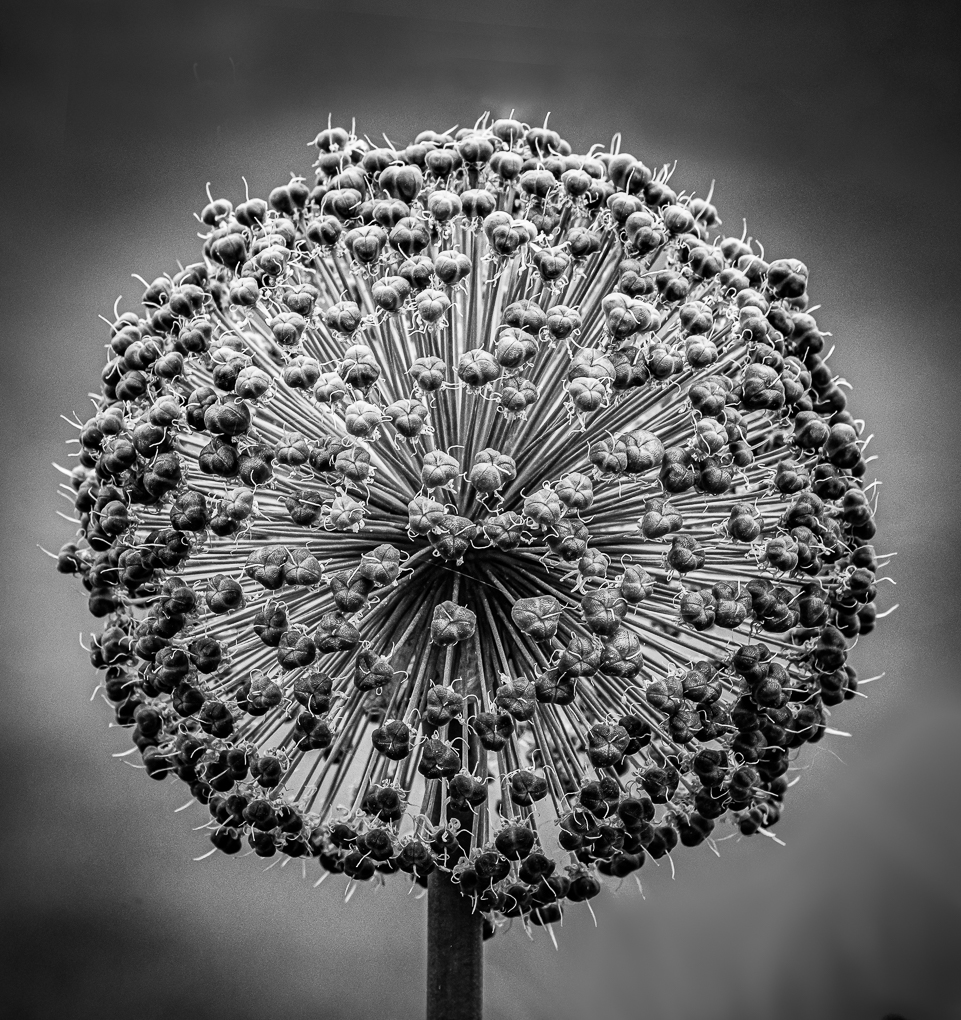
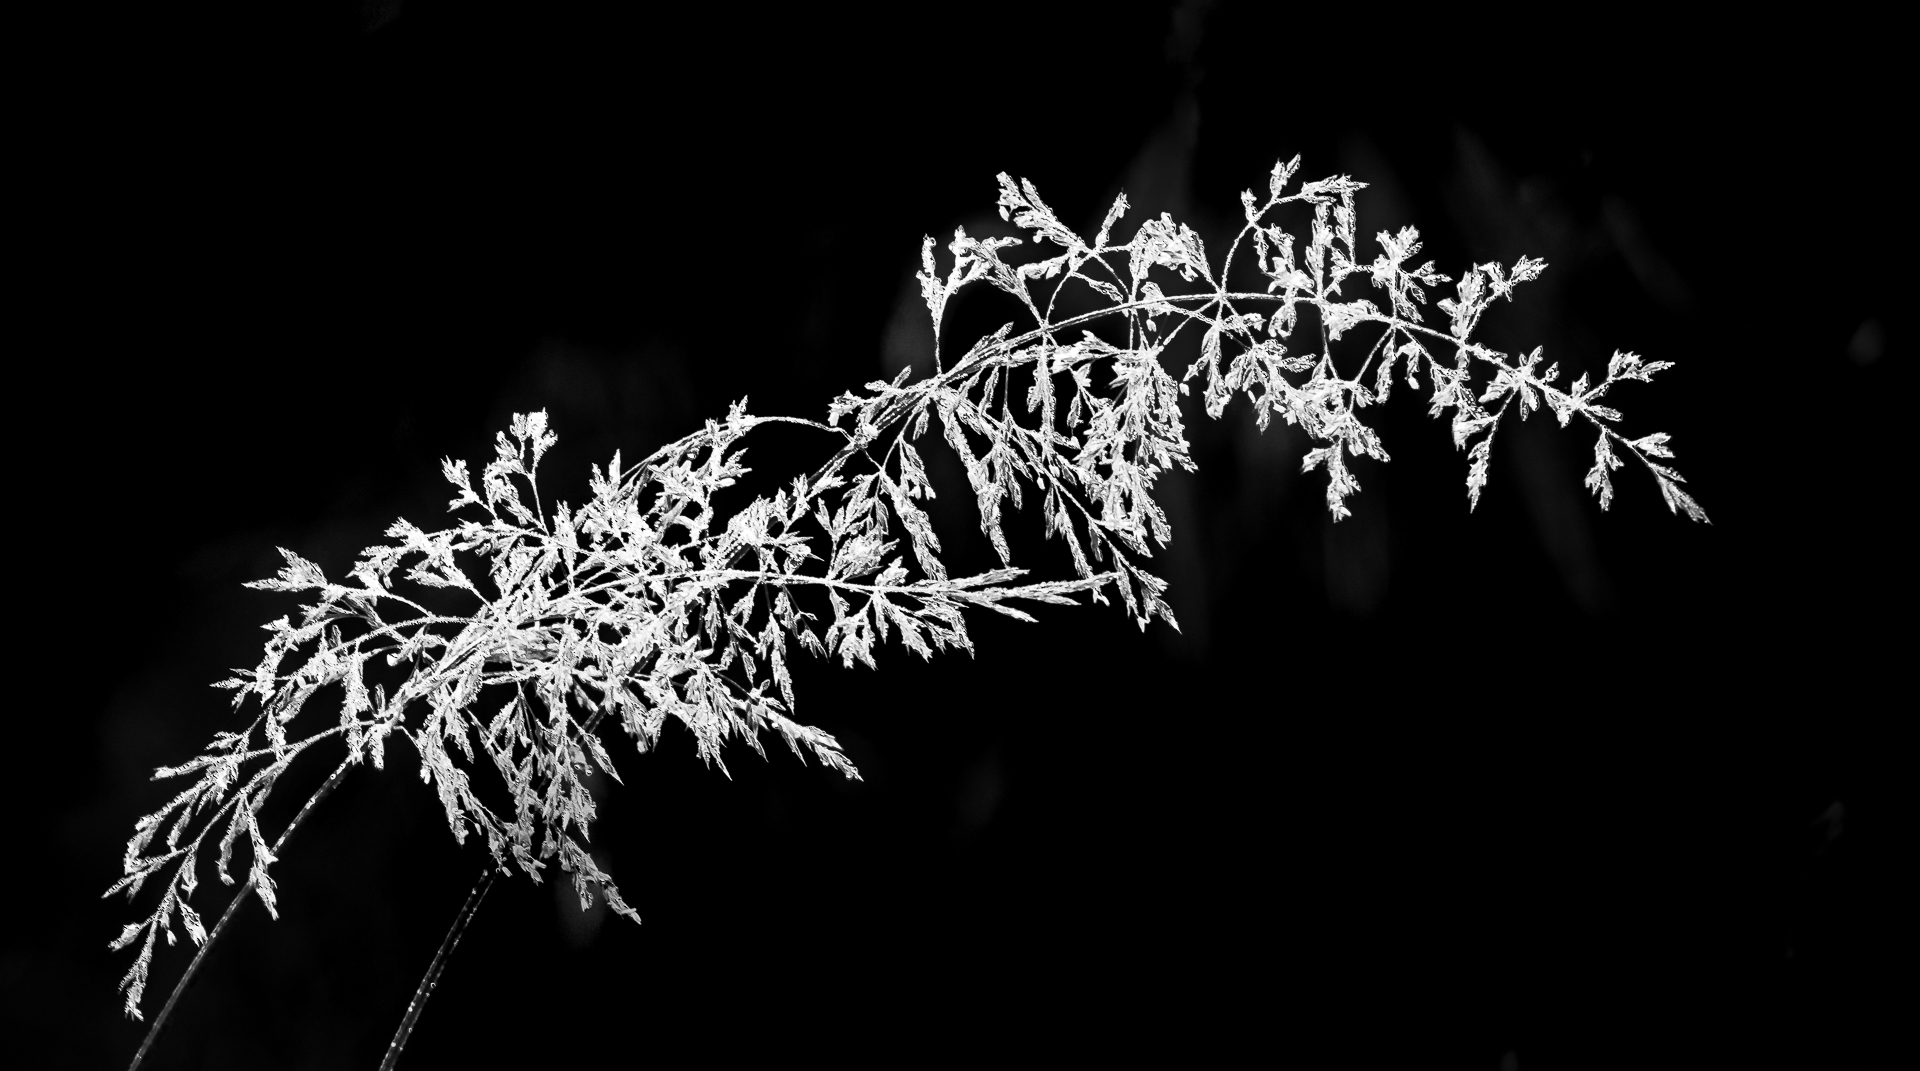
Thank you for sharing this interesting household beauty that not too many people will stop and appreciate . I enjoy seeing the texture of the white fiber ; especially the fly aways.
I would decrease the exposure of the highlight so that the textures can be seen more.
I find that in focus stacking there is a rectangle slightly inside the frame that comes out blurry so I usually leave some breathing space.
I like to see true black background that can be achieve with level on PS or adjustent brush in LR...plus many many other ways.
Thank you for sharing once again.
|
Sep 12th |
| 65 |
Sep 20 |
Reply |
Thank you very much, Peter.
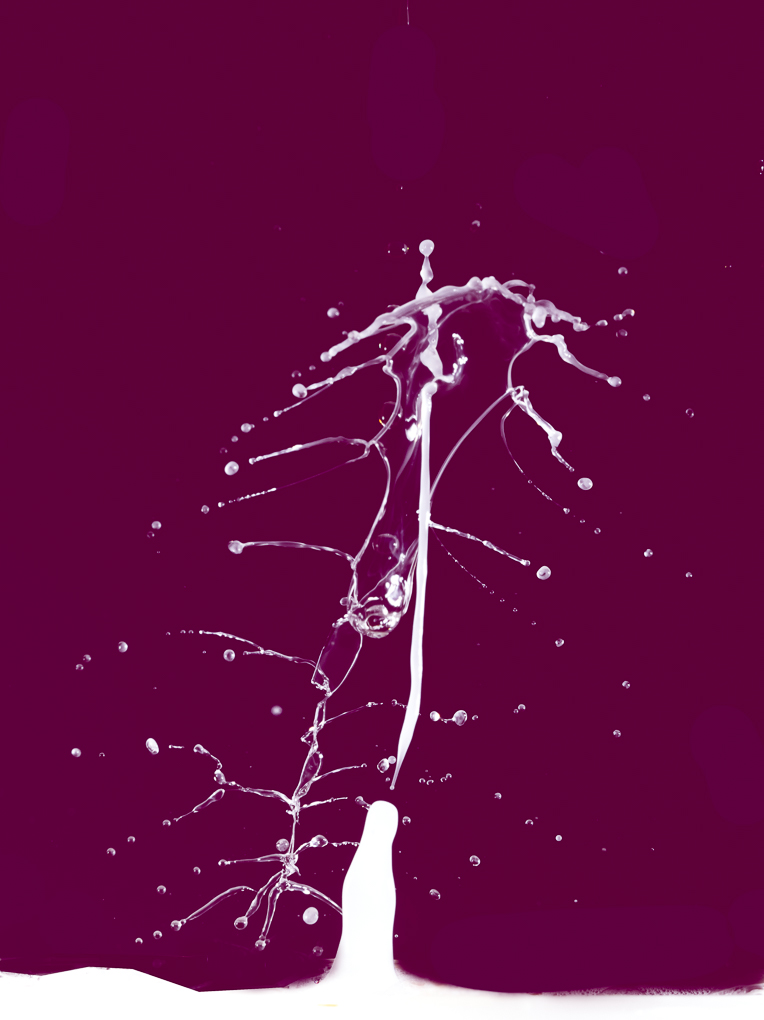
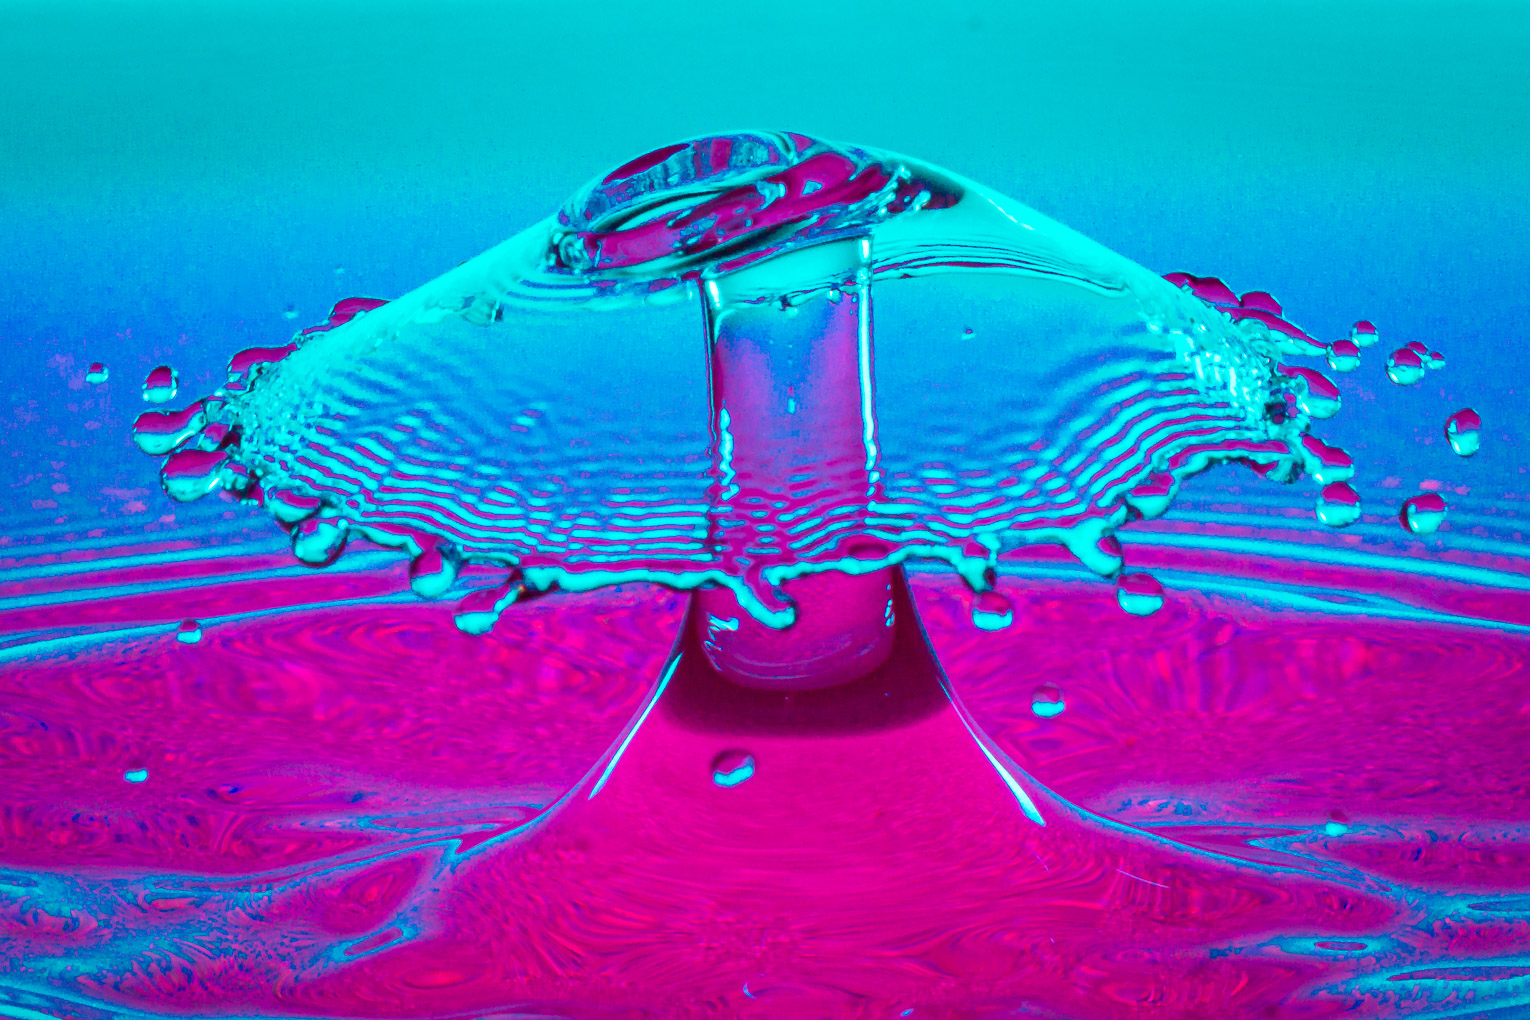
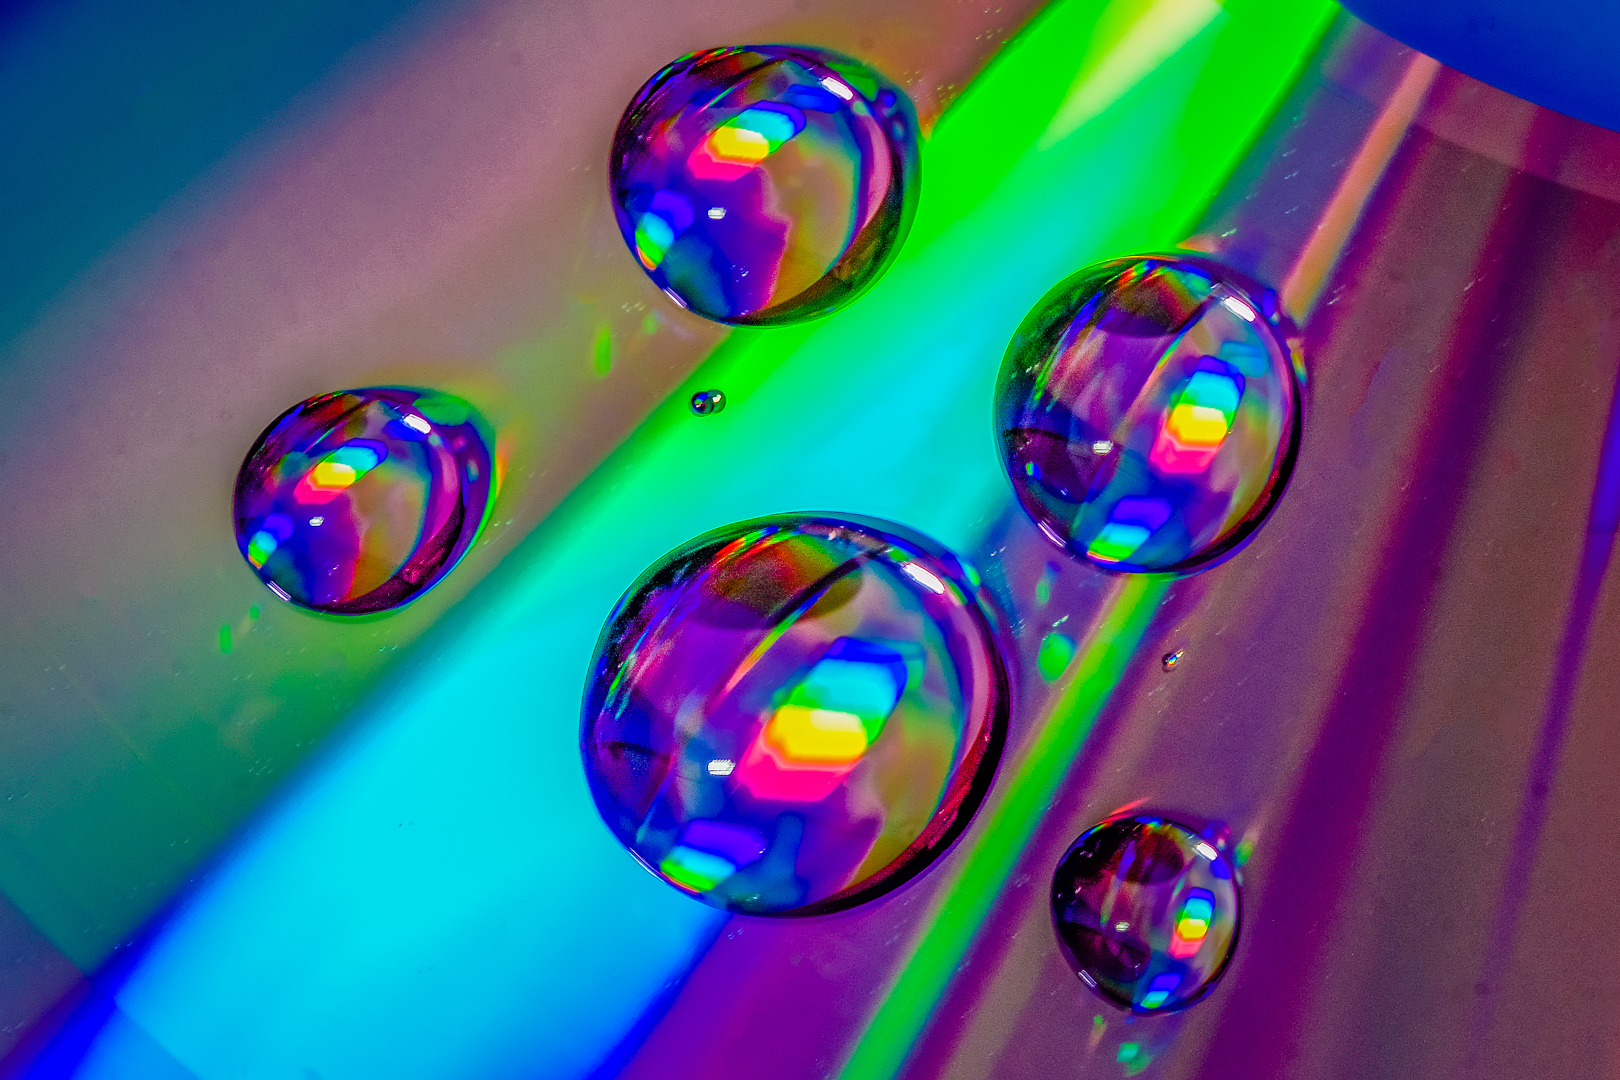
As I was saying to Jeff that I had been concentrating in creating the drops but only recently look at editing more.
Regardless of how I tried to spot heal, clone, etc the background always look dirty to me. I had just started to extract the subject and put in a new background (both solid and radial) works well for me. Different blend modes also create very different looks. My aim in doing this kind of photography is to produce material to play with in creating non-main stream arts. I had succeeded in digital flower arrangements before and am very happy with my experiment the last 2 weeks.
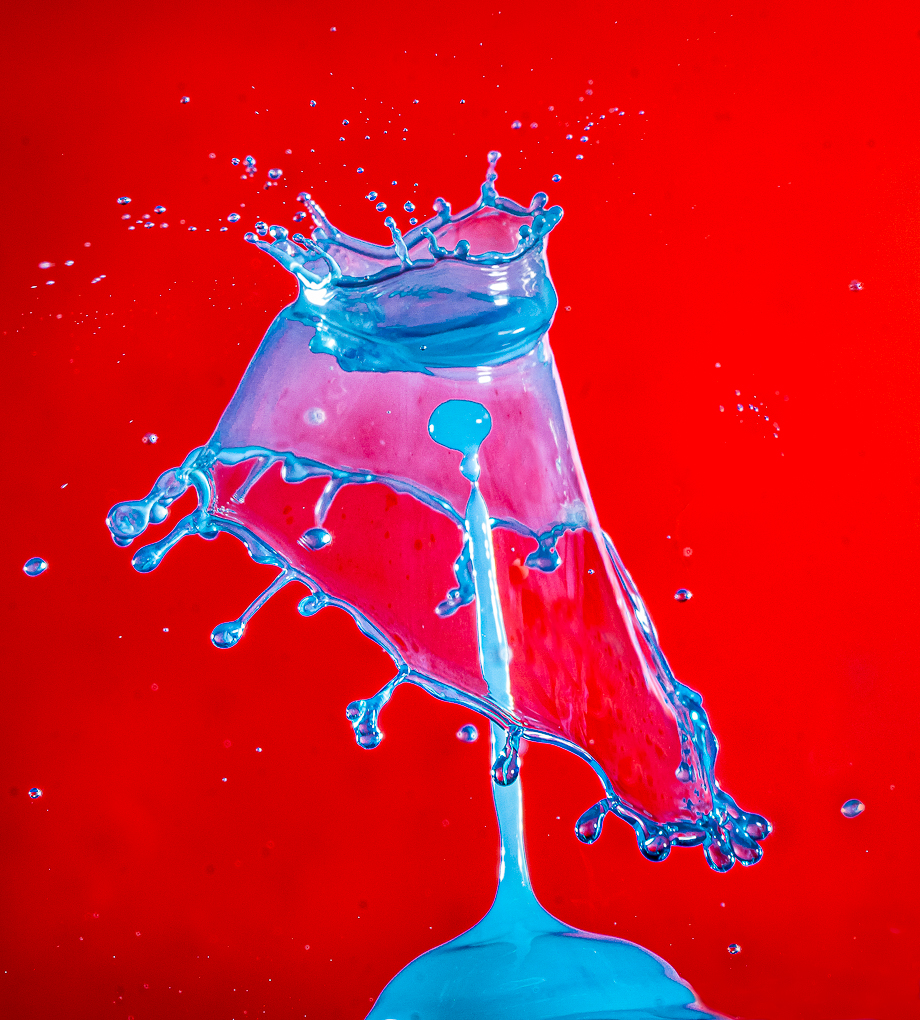
If I shorten the delay of second drop and the flash delay, then there is a time that the stem will be attached to the base. This is actually what most beginners will see first before they get the magic touch to make the stem fly off. LOL ! !
Beauty is in the eye of the beholder. Who is to say that harder technique produce more pleasing image ???
I am with you that I do not strive to get top techniques but to enjoy my images and it's spin off every step of the way.
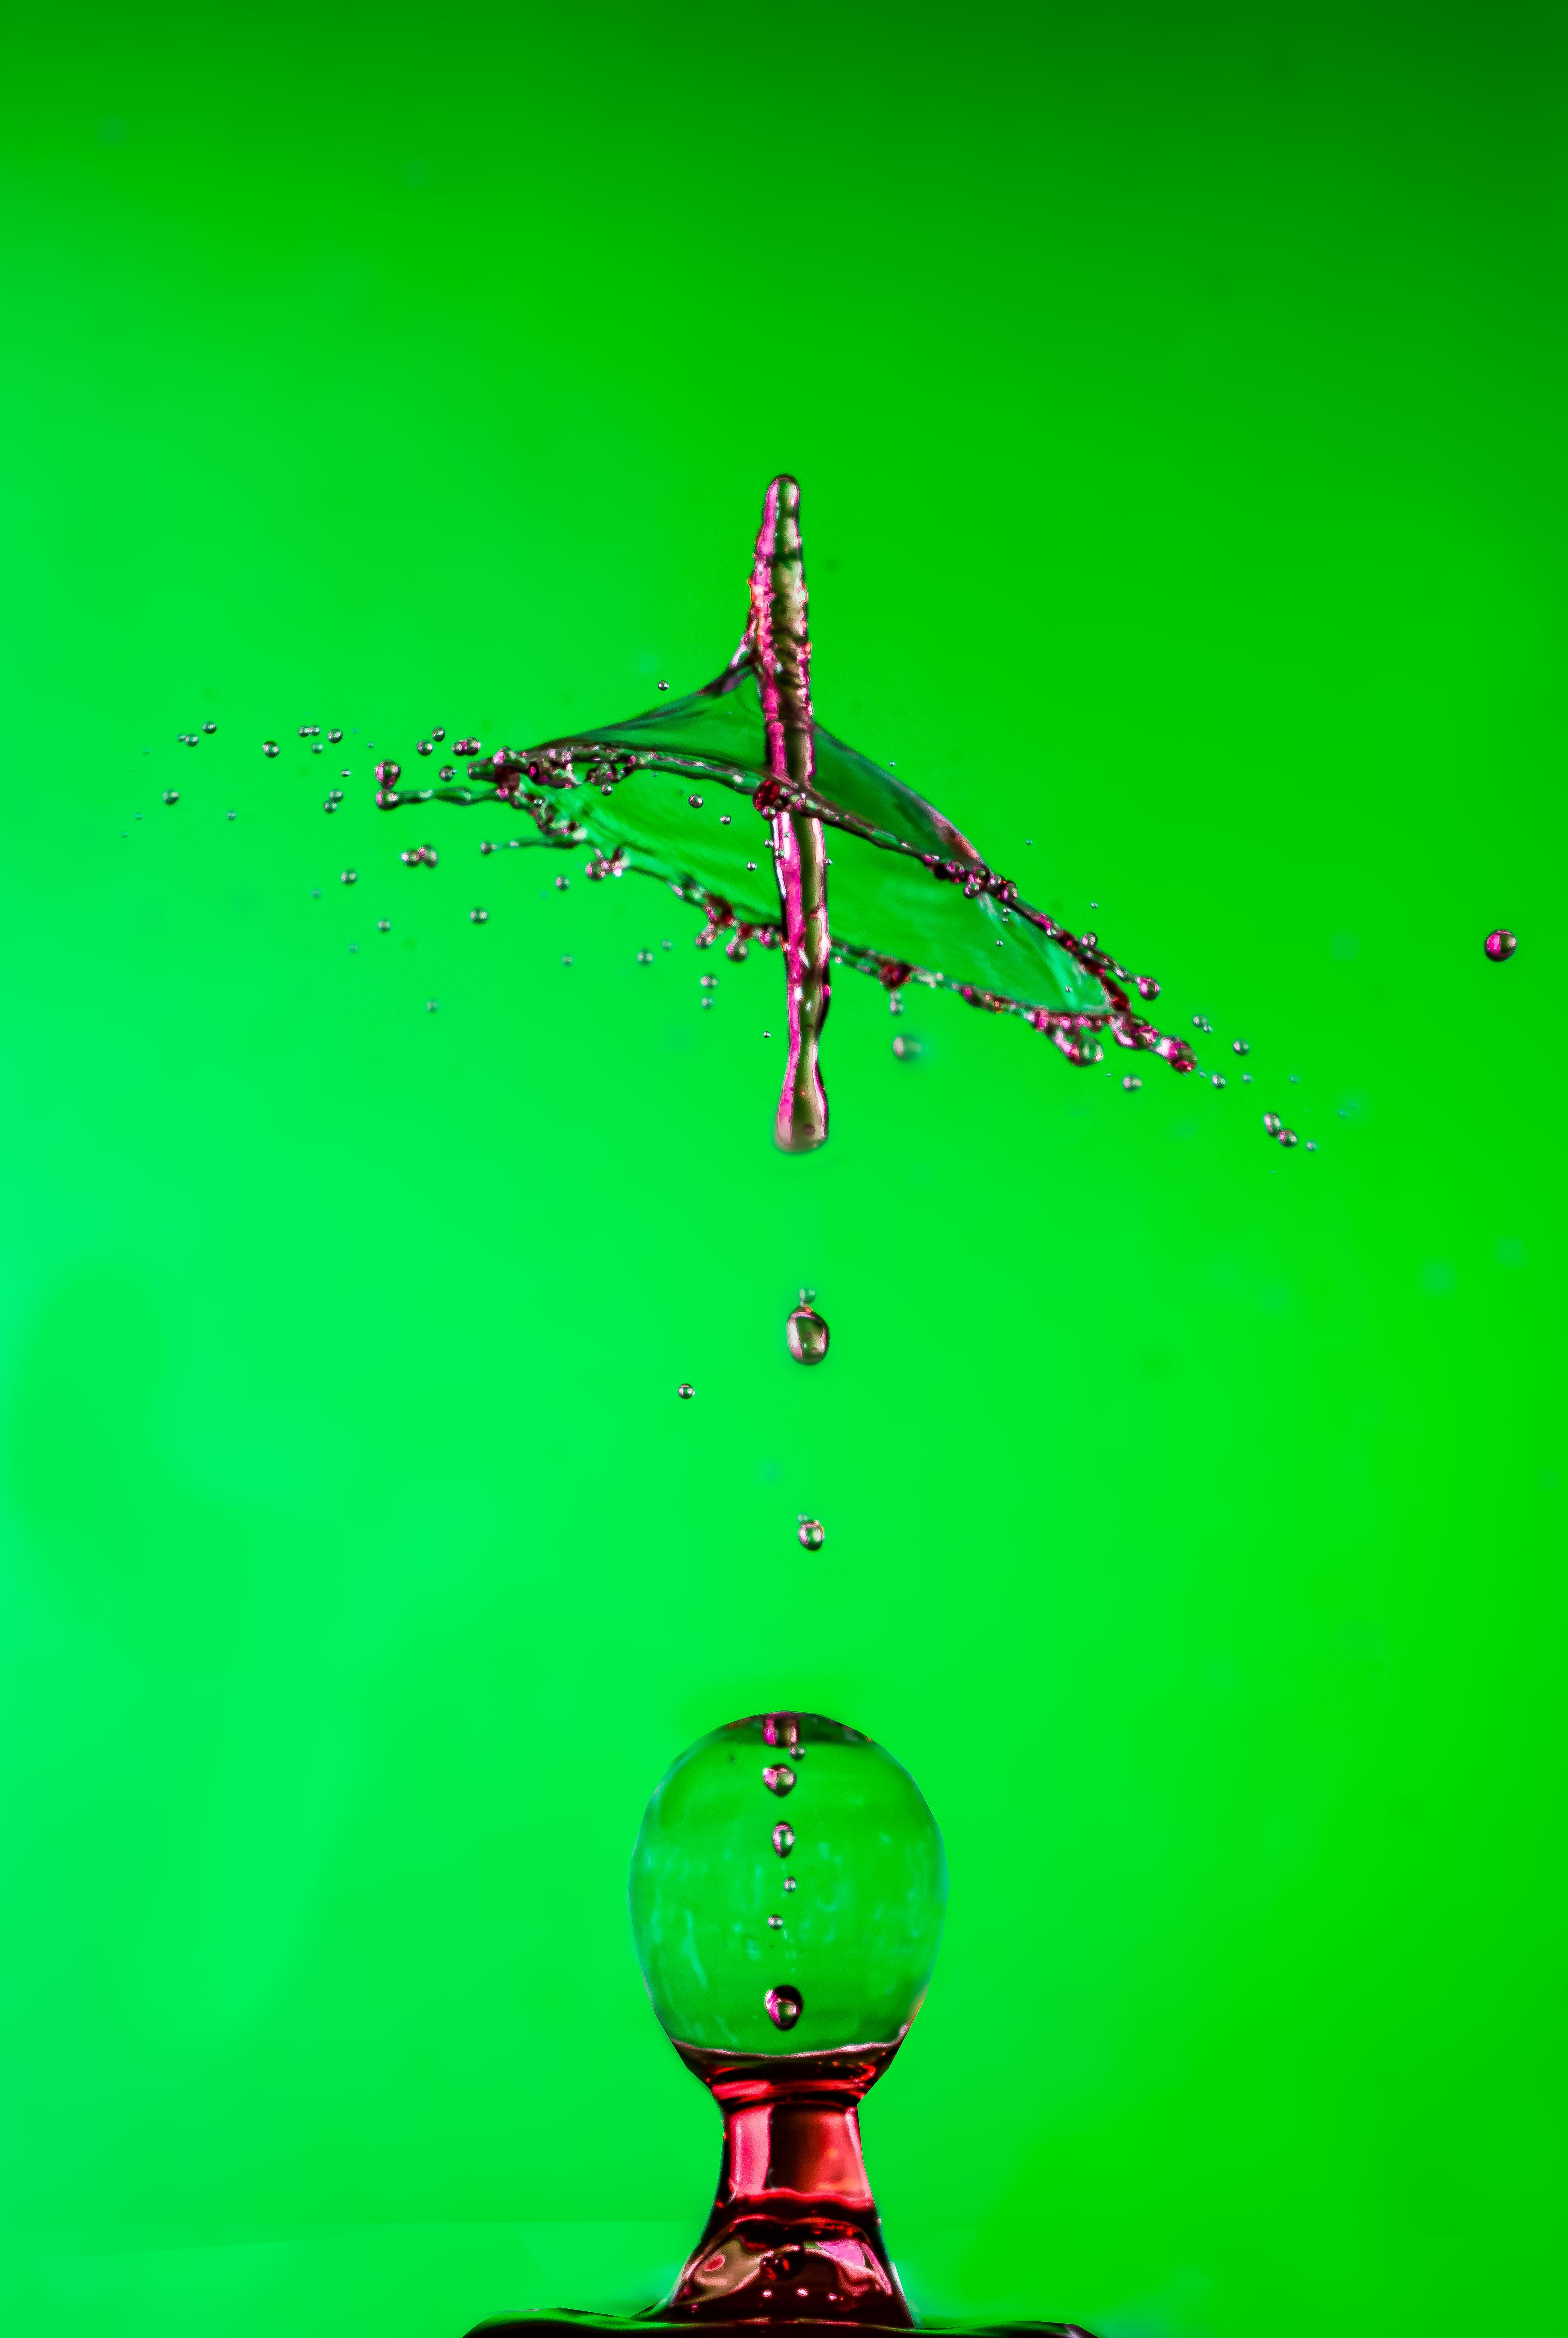
I hope it is not a problem to show another image here but it will illustrate how I like to use my starter images . (This one is still waiting for a final crop )
|
Sep 12th |
 |
| 65 |
Sep 20 |
Reply |
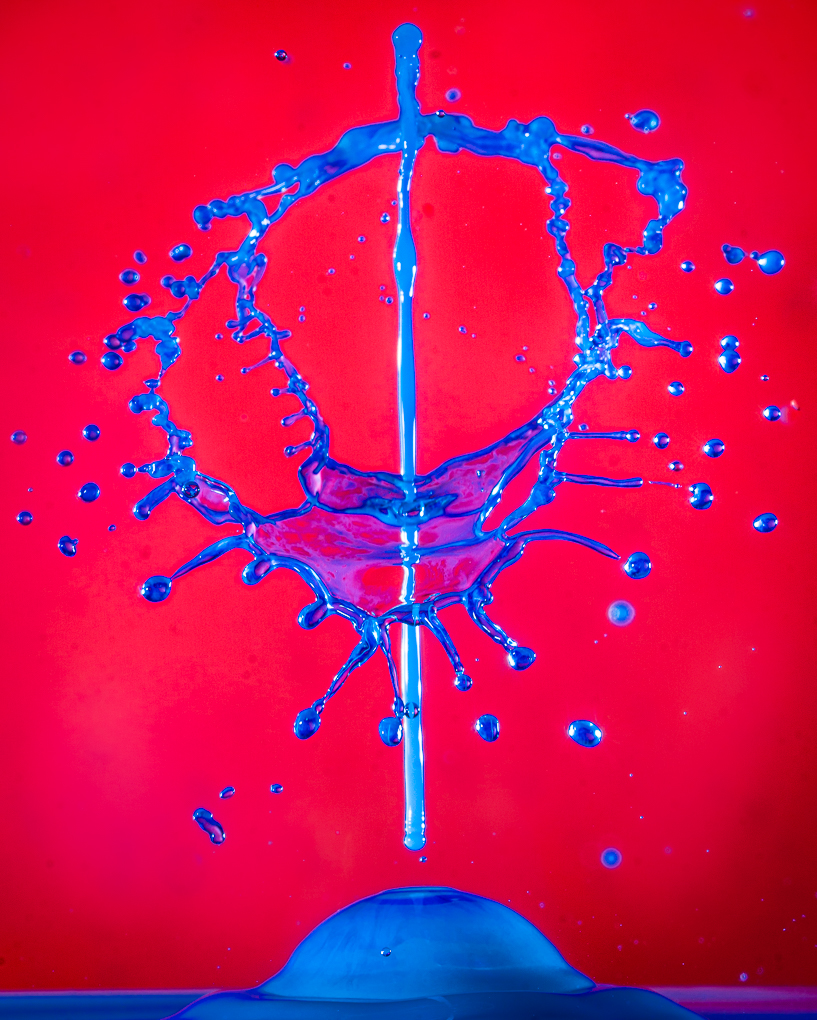
Very please to meet you Jeff, and thank you for your kind words.
The fun of this kind of photography to me is this :
Any change in one of the 3 variables ( drop size, subsequent drop's delay and flash delay) all produce a different image...the different medium and background adds to the variables so I never get the exact same image twice .
In the past I had concentrated in getting different kinds of images and was not happy about the editing because the background always look dirty to me. I had spent the last 2 weeks in experimenting with changing background and blend modes in post. I am still in the basement of water drops techniques but intent to use the images as material for digital arts and have made some headway. Looking forward to sharing them next month. |
Sep 12th |
5 comments - 4 replies for Group 65
|
| 74 |
Sep 20 |
Comment |
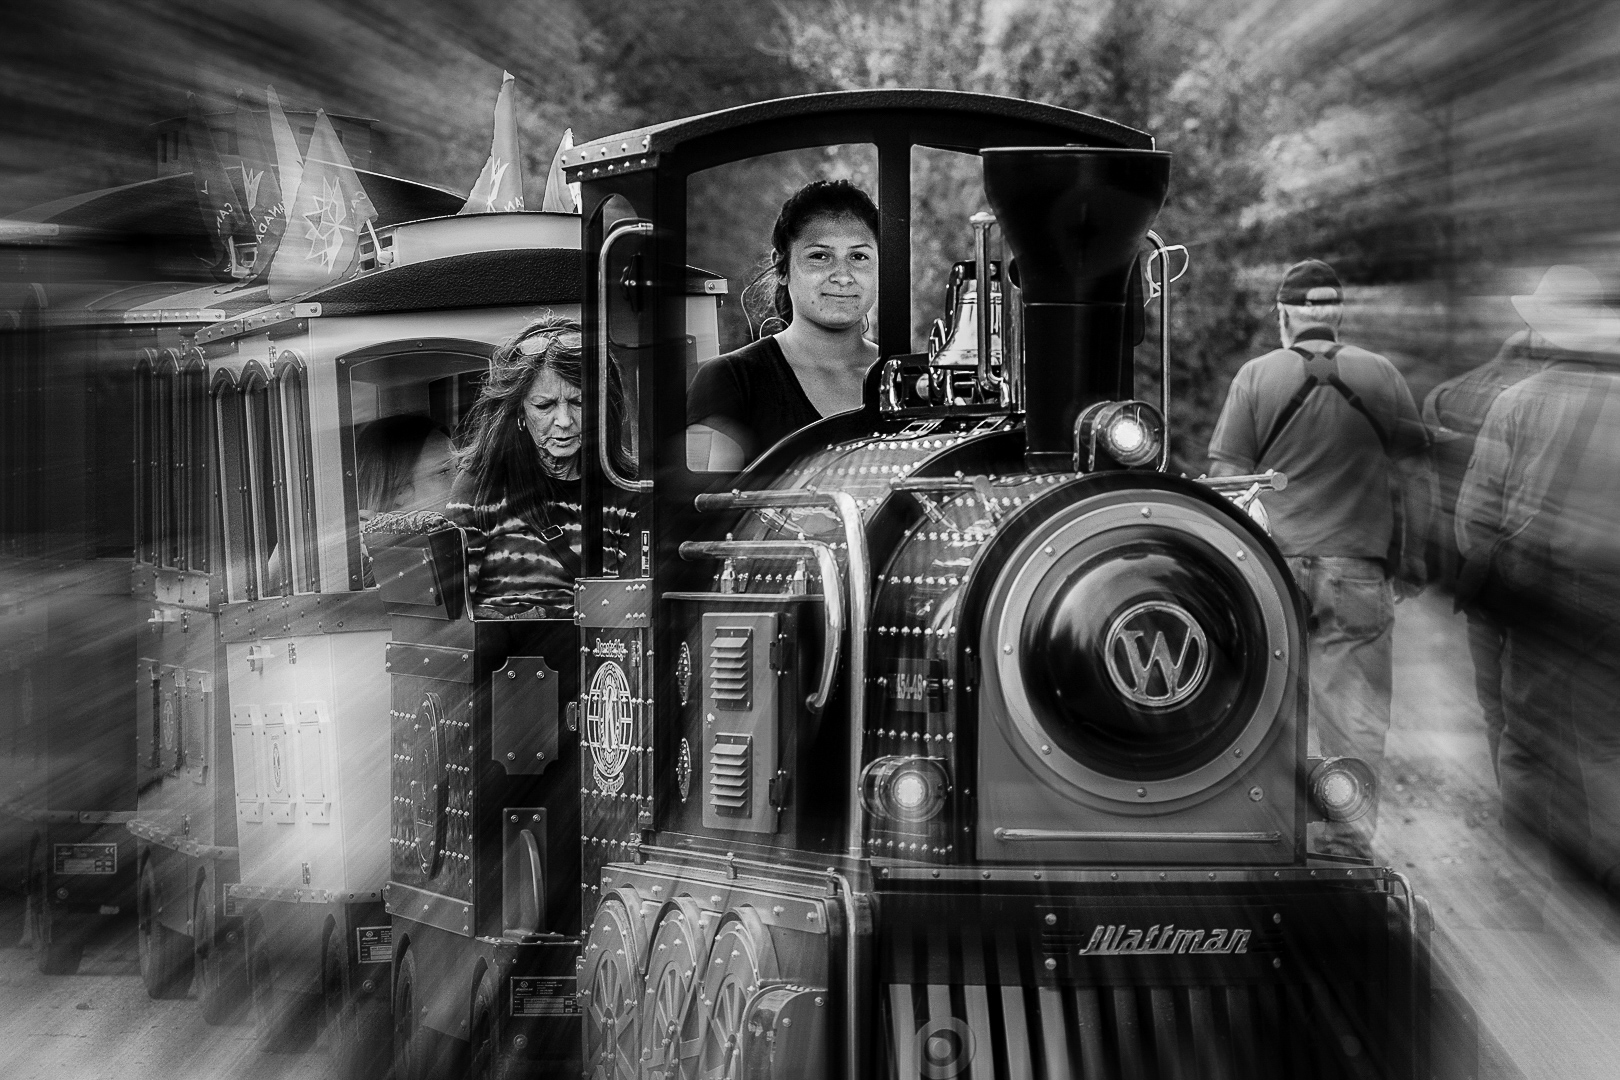
Yes. Ata, you are perfectly right. The shot that you can get is the best shot. ( The camera you have is the best camera ).
In cases like these , I would use my insect shot approach....Take what you can where you are first, then you can chance moving YOURSELF ( not your subject) just in case you can get a better shot. When you get to an area, there is an approach call " Working the scene ".Stay where you are and take images around you in the whole 360 degree so you can get lots of views. If the lady is agreeable, I would not mind circling around her and to take a few shots with different backgrounds. Sorry, I am going on and on again. It is not what other people say that is important. You are the artist and the way you like it is always best. Enjoy !!! |
Sep 28th |
| 74 |
Sep 20 |
Comment |
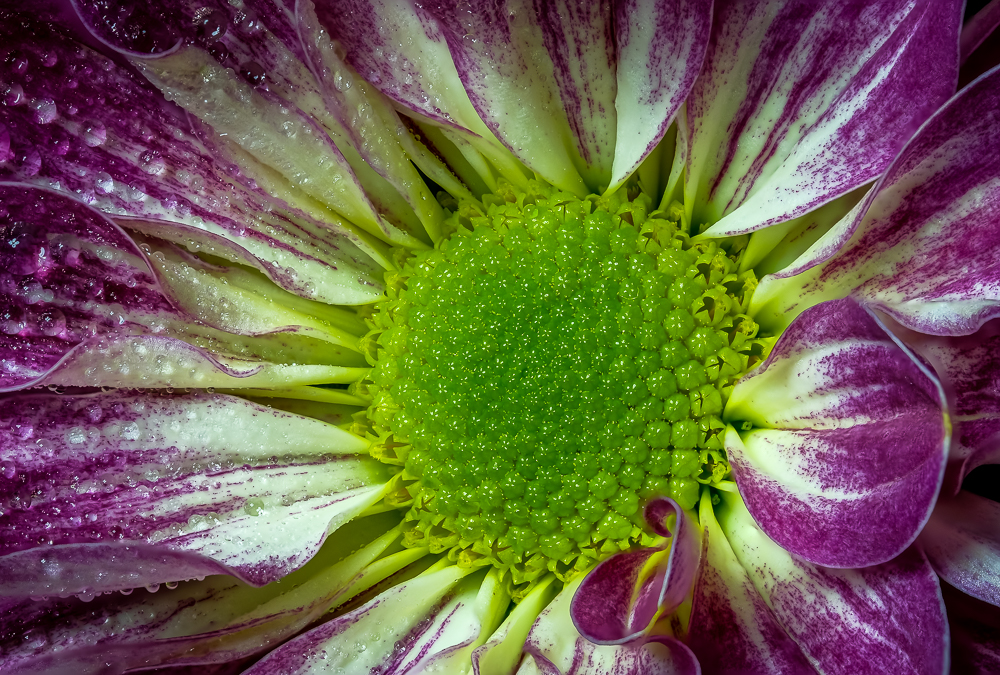
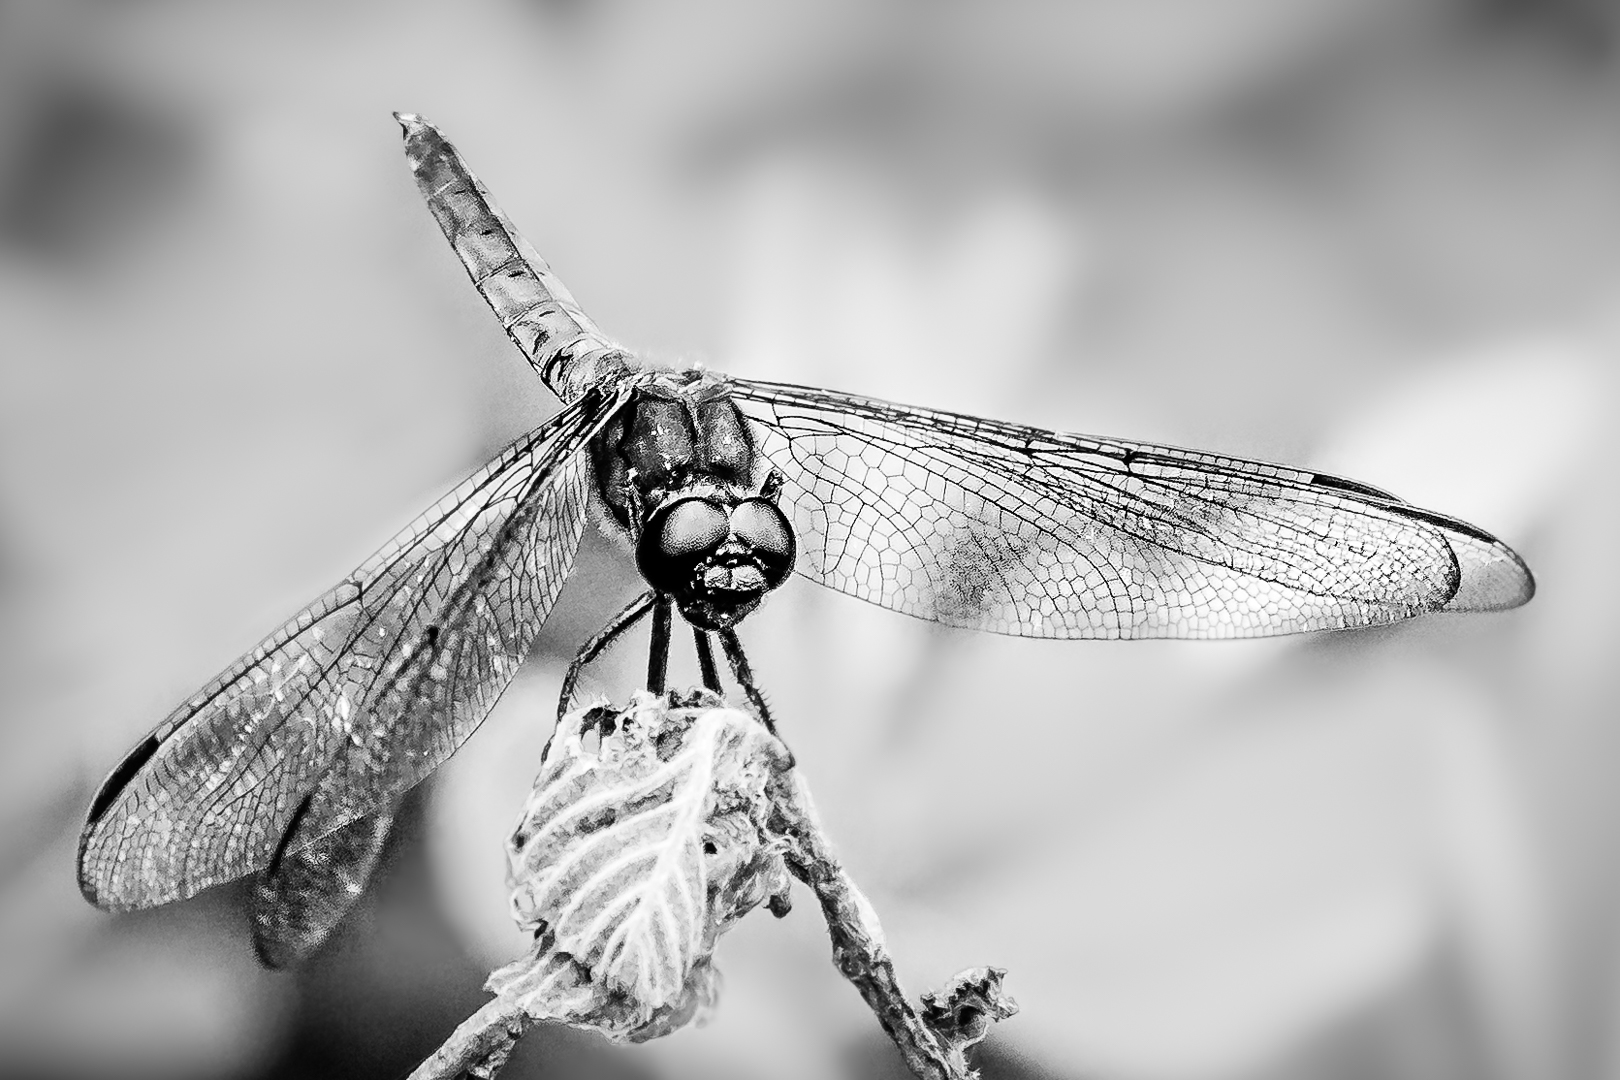
Very very nice image to illustrate ..Less is more.
The simple shape allow viewers to concentrate on the geometry and texture .
Thank you very much for sharing.
|
Sep 24th |
| 74 |
Sep 20 |
Comment |
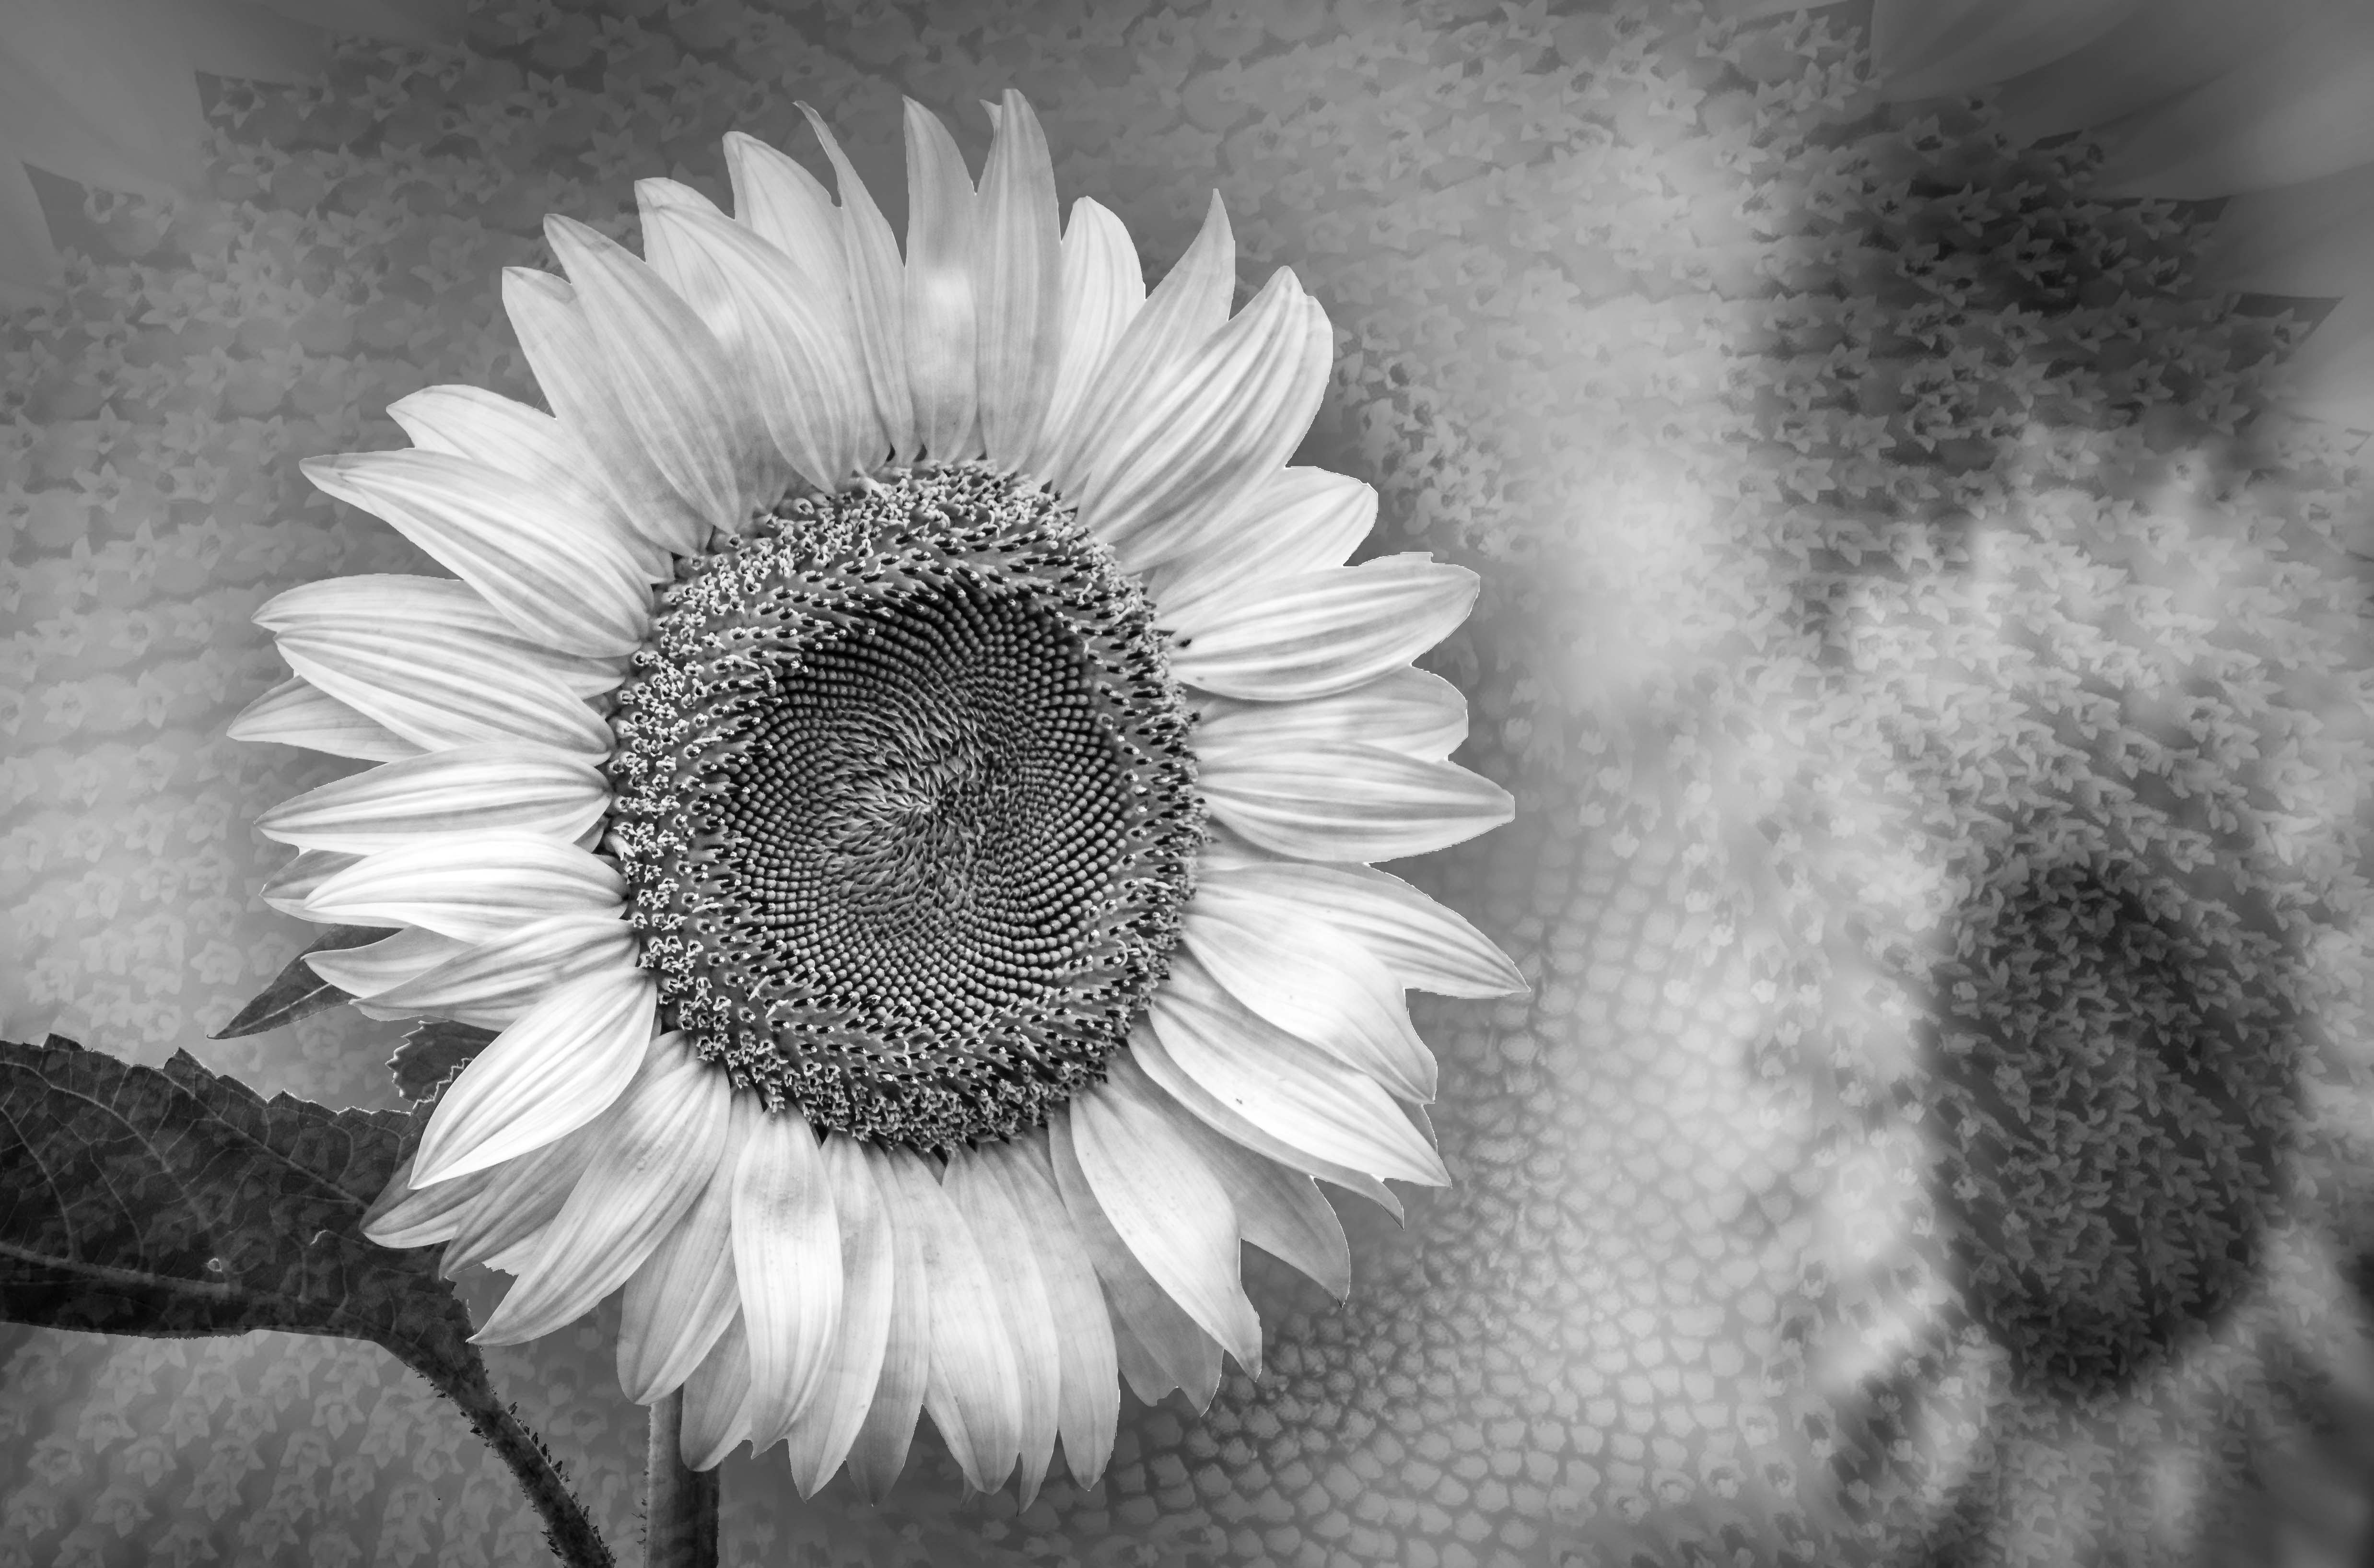
Great job, Haru.
I really enjoy seeing your progress and you really have done well.
The only point I see is that there is a kind of brighter area around the main bloom and this area is much more noticeable in your final version than the original. If there is my image I would have tone that down so that it does not look like you had over spilled the lightening ...LOL ! ! !
I am only kidding. This is the way I like it but you are free to like it your way.
If you use Lightroom it is very easy. Use Adjustment tool, turn on "AutoMask" and decrease highlight of the area outside the bloom .
In PS select the bloom first. Invert the selection, then decrease the exposure of the area outside the bloom .
|
Sep 24th |
| 74 |
Sep 20 |
Comment |
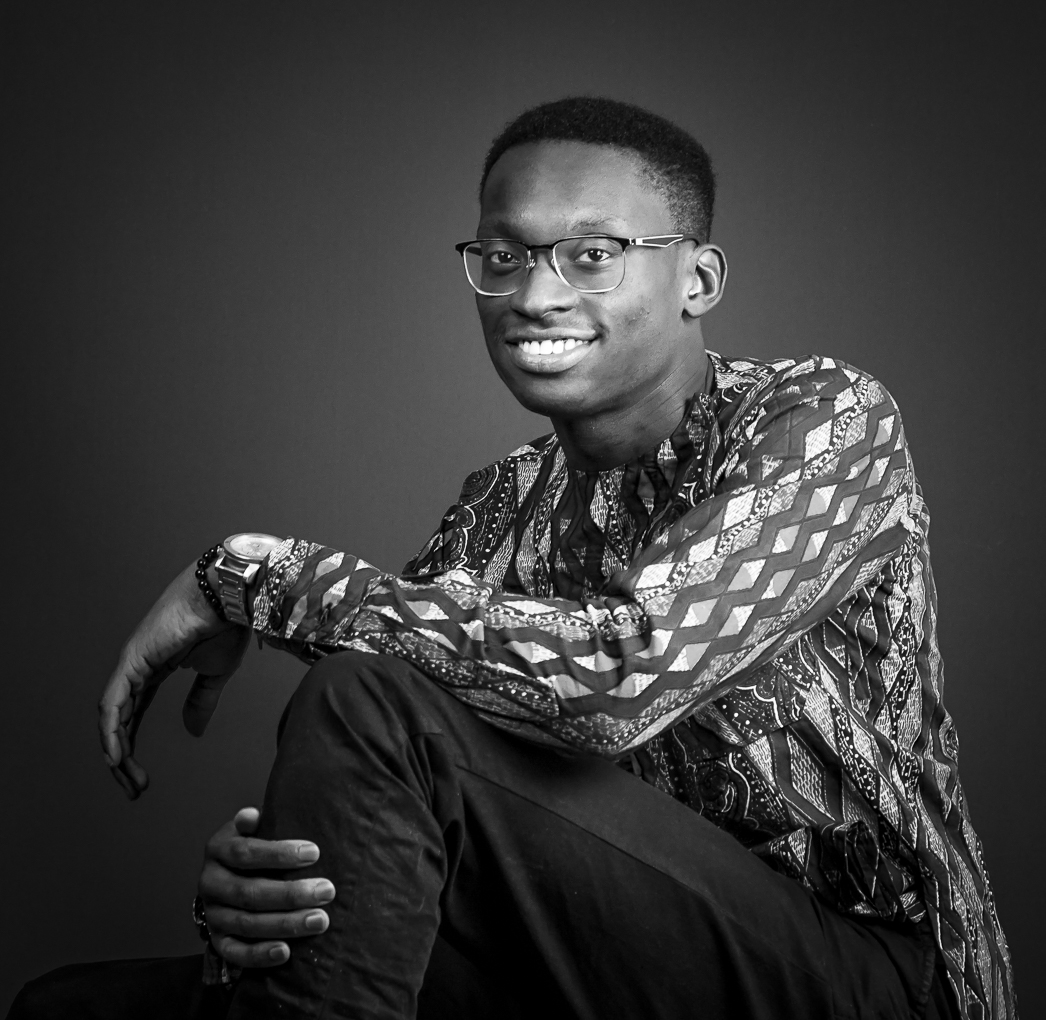
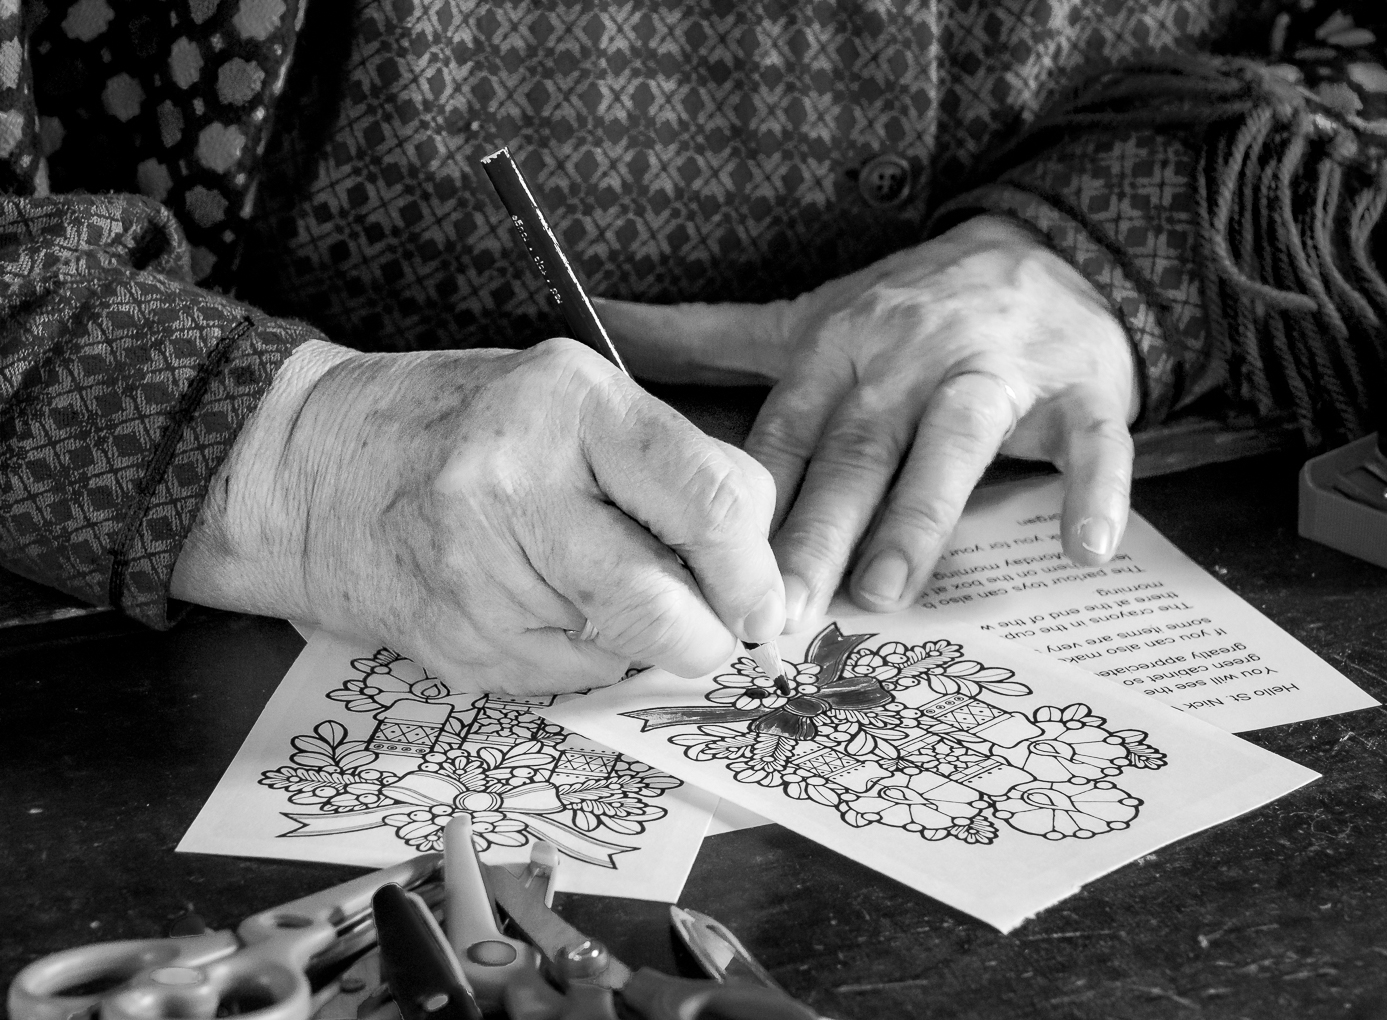
Another wonderful image to show me a country that I have lots to learn and enjoy.
There are already lots of very good comments so I shall give a different point of view : the view of a portrait photographer.
Two points to your favor are 1 The camera must not be in direct light. 2 The model is best not in direct light. I know that your subject is actually the architecture and street scene, my be shooting from the other angle or time to avoid lots of very bright direct sunlight might help.
Stephen has done a very good job in taming the harsh light. |
Sep 24th |
| 74 |
Sep 20 |
Comment |
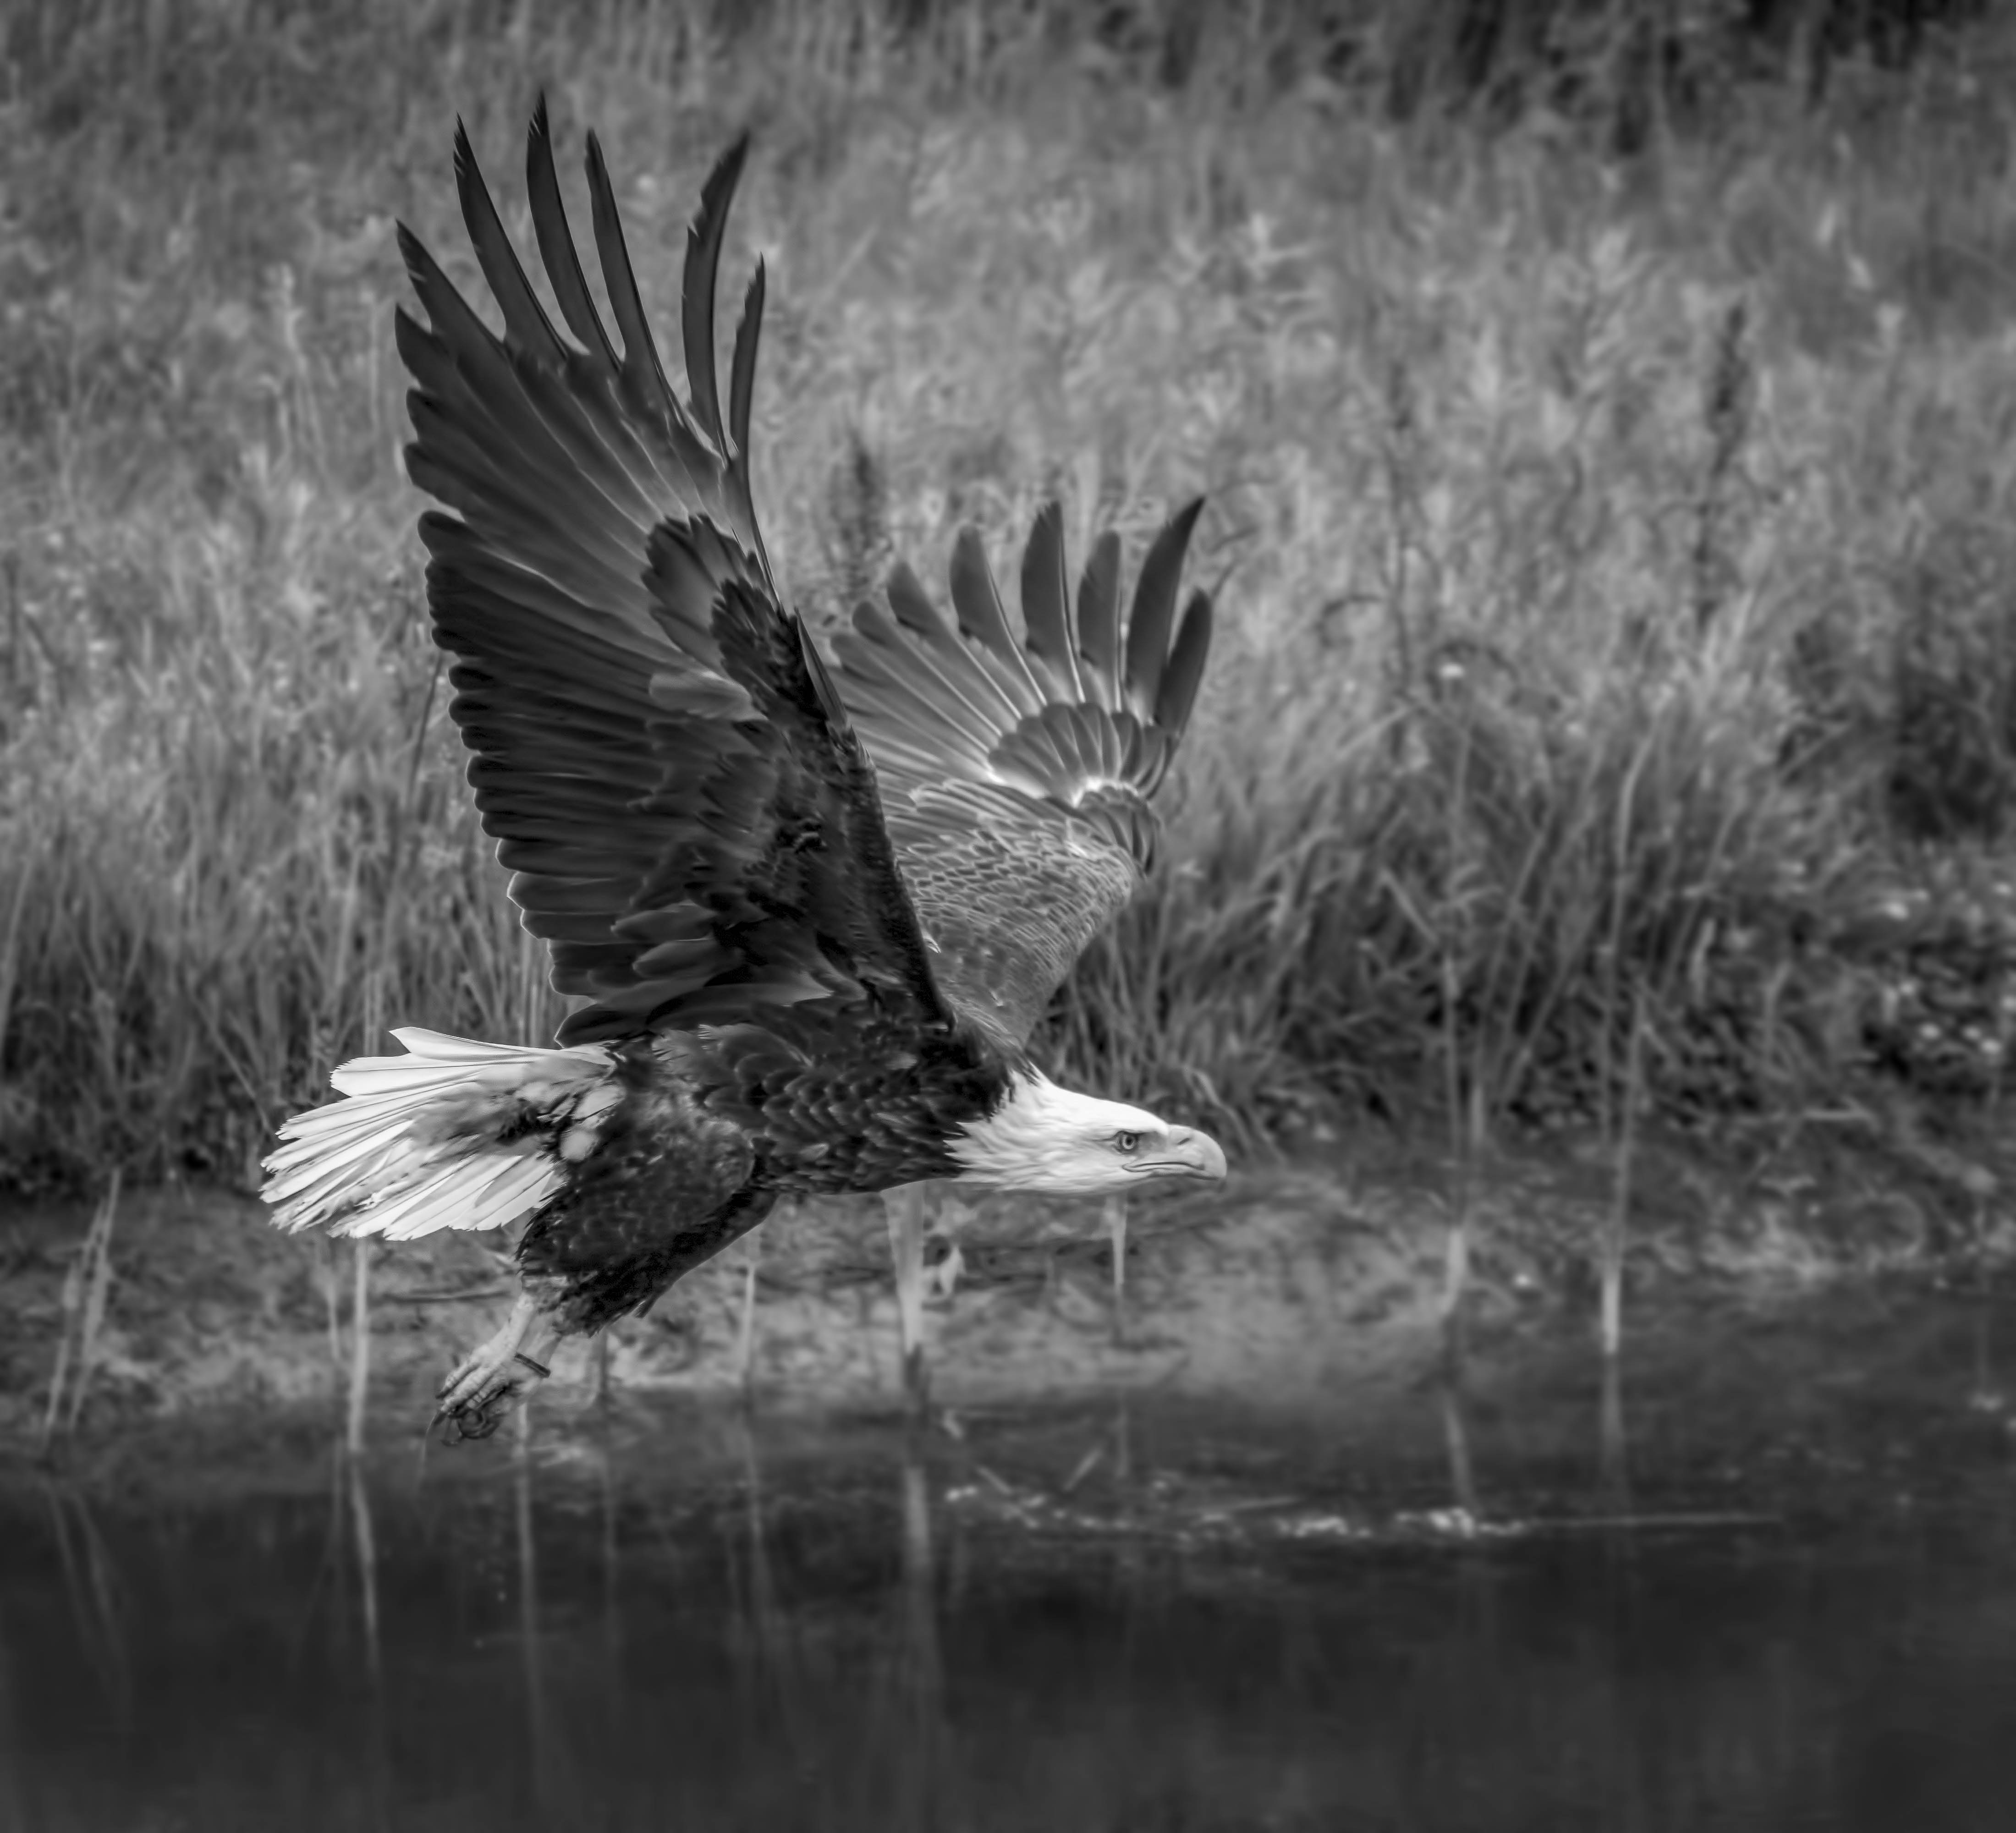
Beautiful image ! ! !
I think that a Wild-life photographer would love how BW shows off the flamingos and a Landscape photographer would love the colors of the lake.
Wonderful composition ! ! |
Sep 24th |
| 74 |
Sep 20 |
Reply |
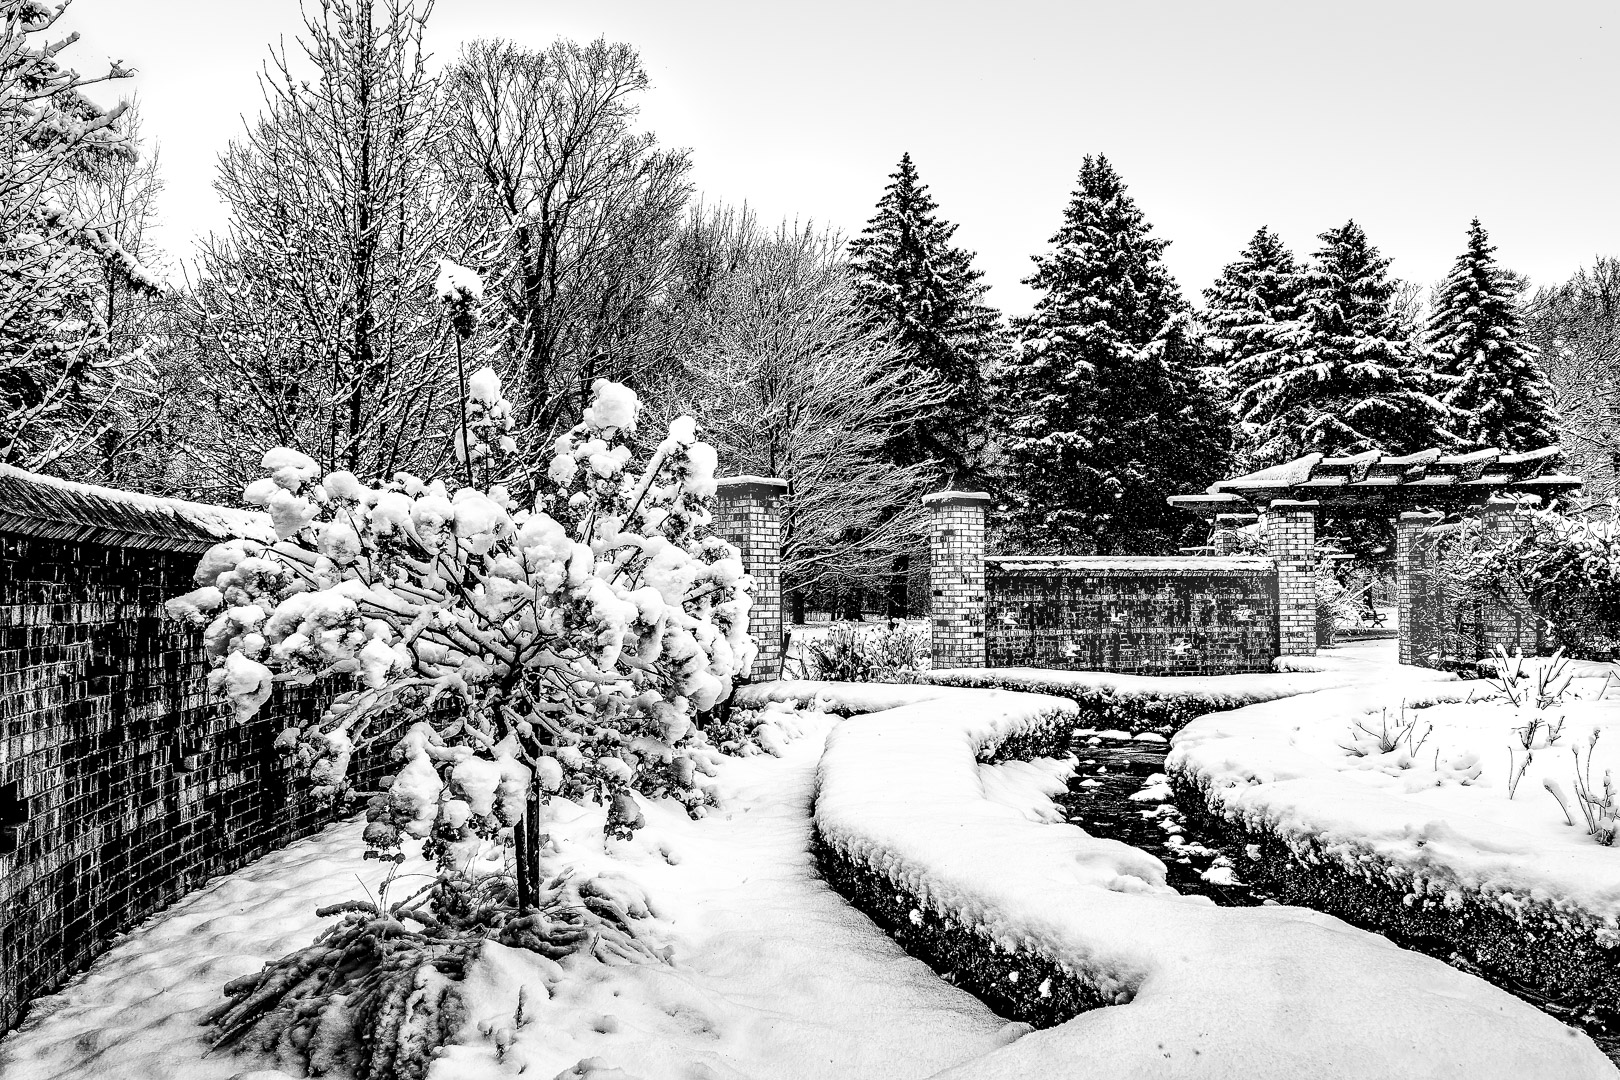
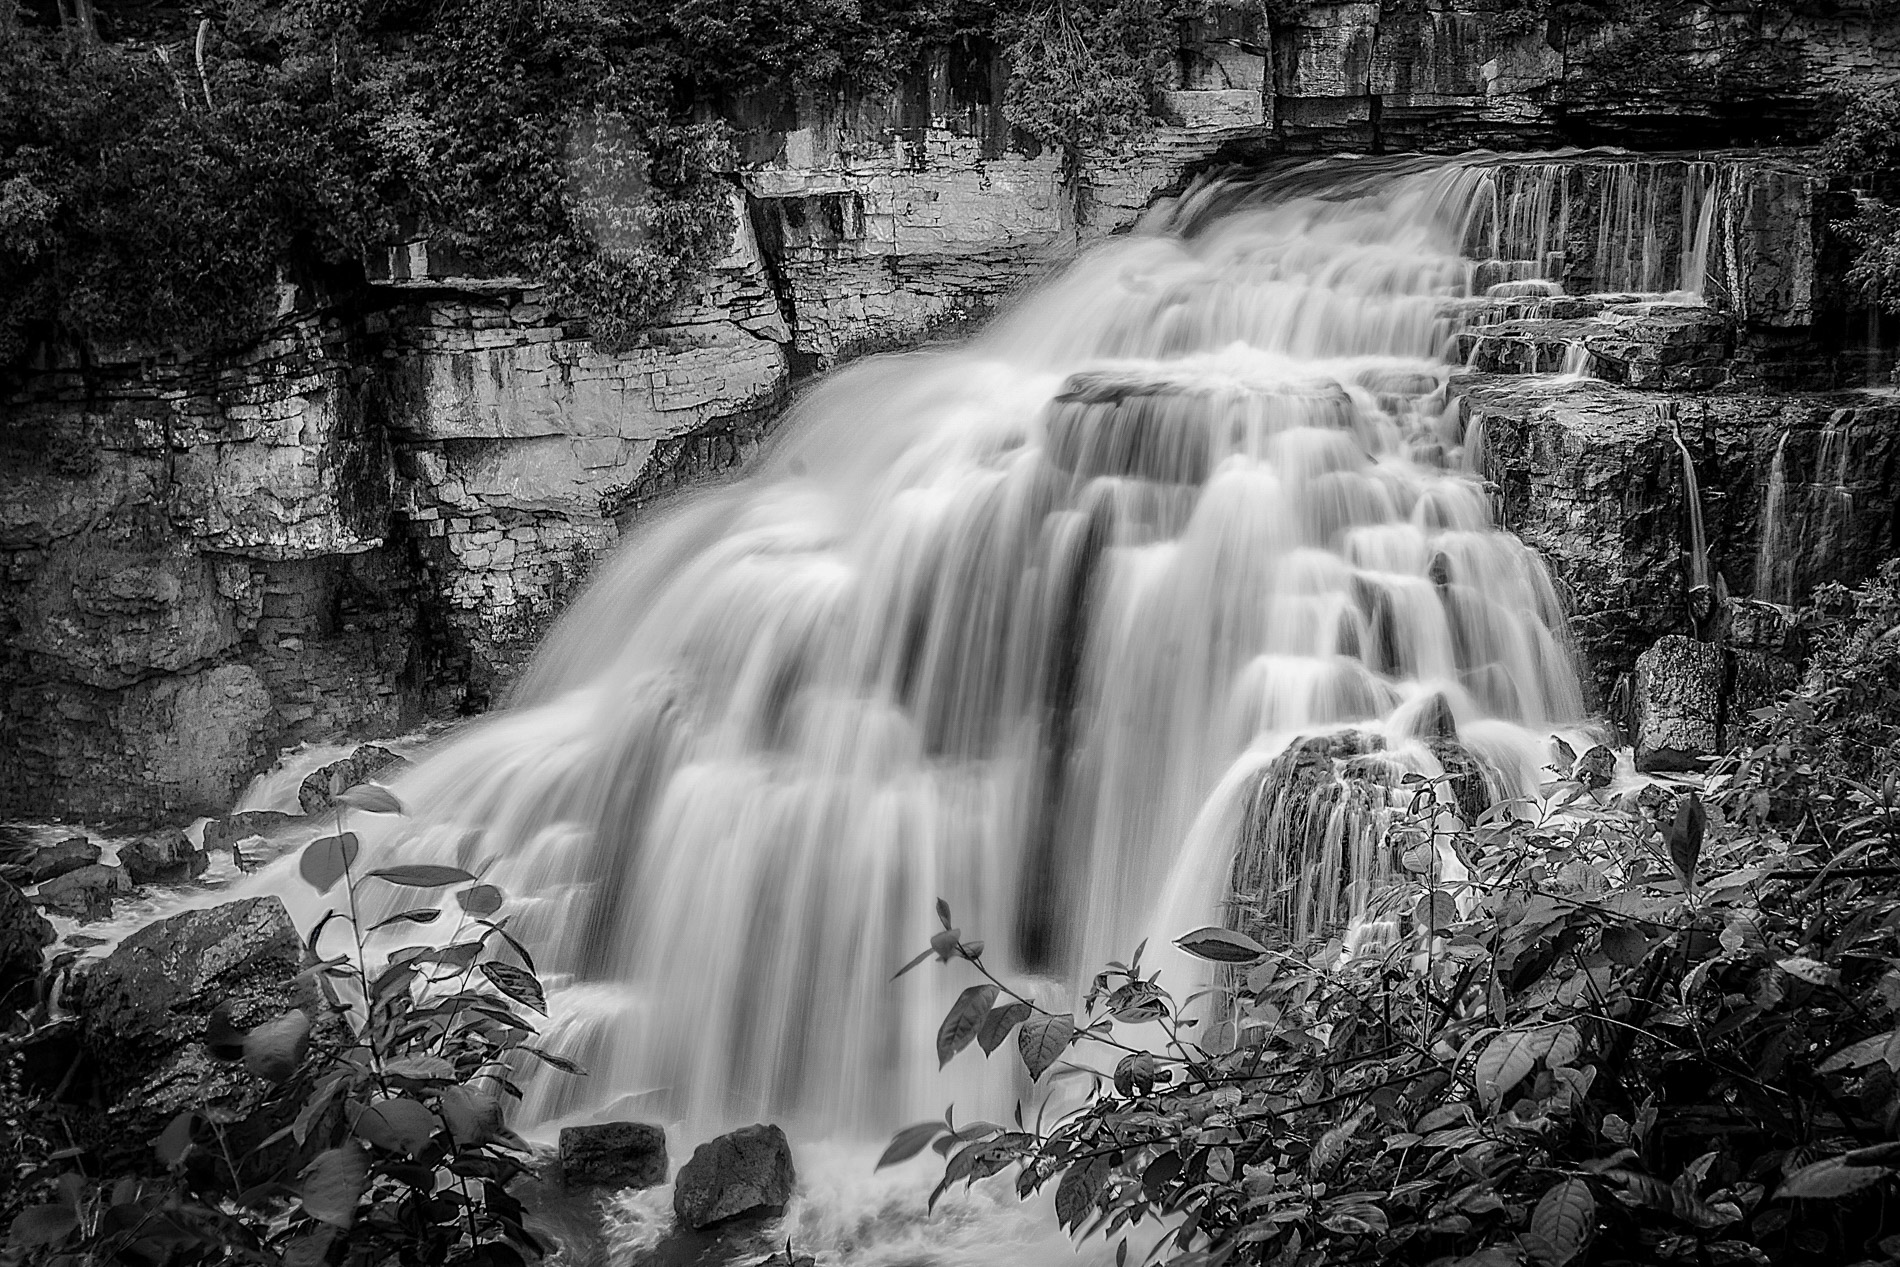
Hi Bill, I enjoy the nice scenery ( I also have a membership in my local Botanical Gardens for years ) .
You have done very well in the conversion because the original have mainly only different shades of one color..good job ! !
To darken or lighten any area, the best way is the make a selection of the area first ( quick selection usually will work well ). You can dodge or burn directly on a copy of the image or work on the selection in a different layer.
Use Ctr J ) to duplicate the selection while the selection is active first . Dodge and Burn Youtube videos :
https://www.youtube.com/watch?v=_A5XZPnzOP0
https://www.youtube.com/watch?v=2ftpsP4UZHQ
"IceFlow Studio tutorials" are a few years old but it is easy to follow and no nonsense. After you can handle the basic there are other teachers that are good if you have the time...such as "Phlearn" . I used to host editing groups for LR, PS and PSE. Please let me know if I can do more. |
Sep 24th |
| 74 |
Sep 20 |
Comment |
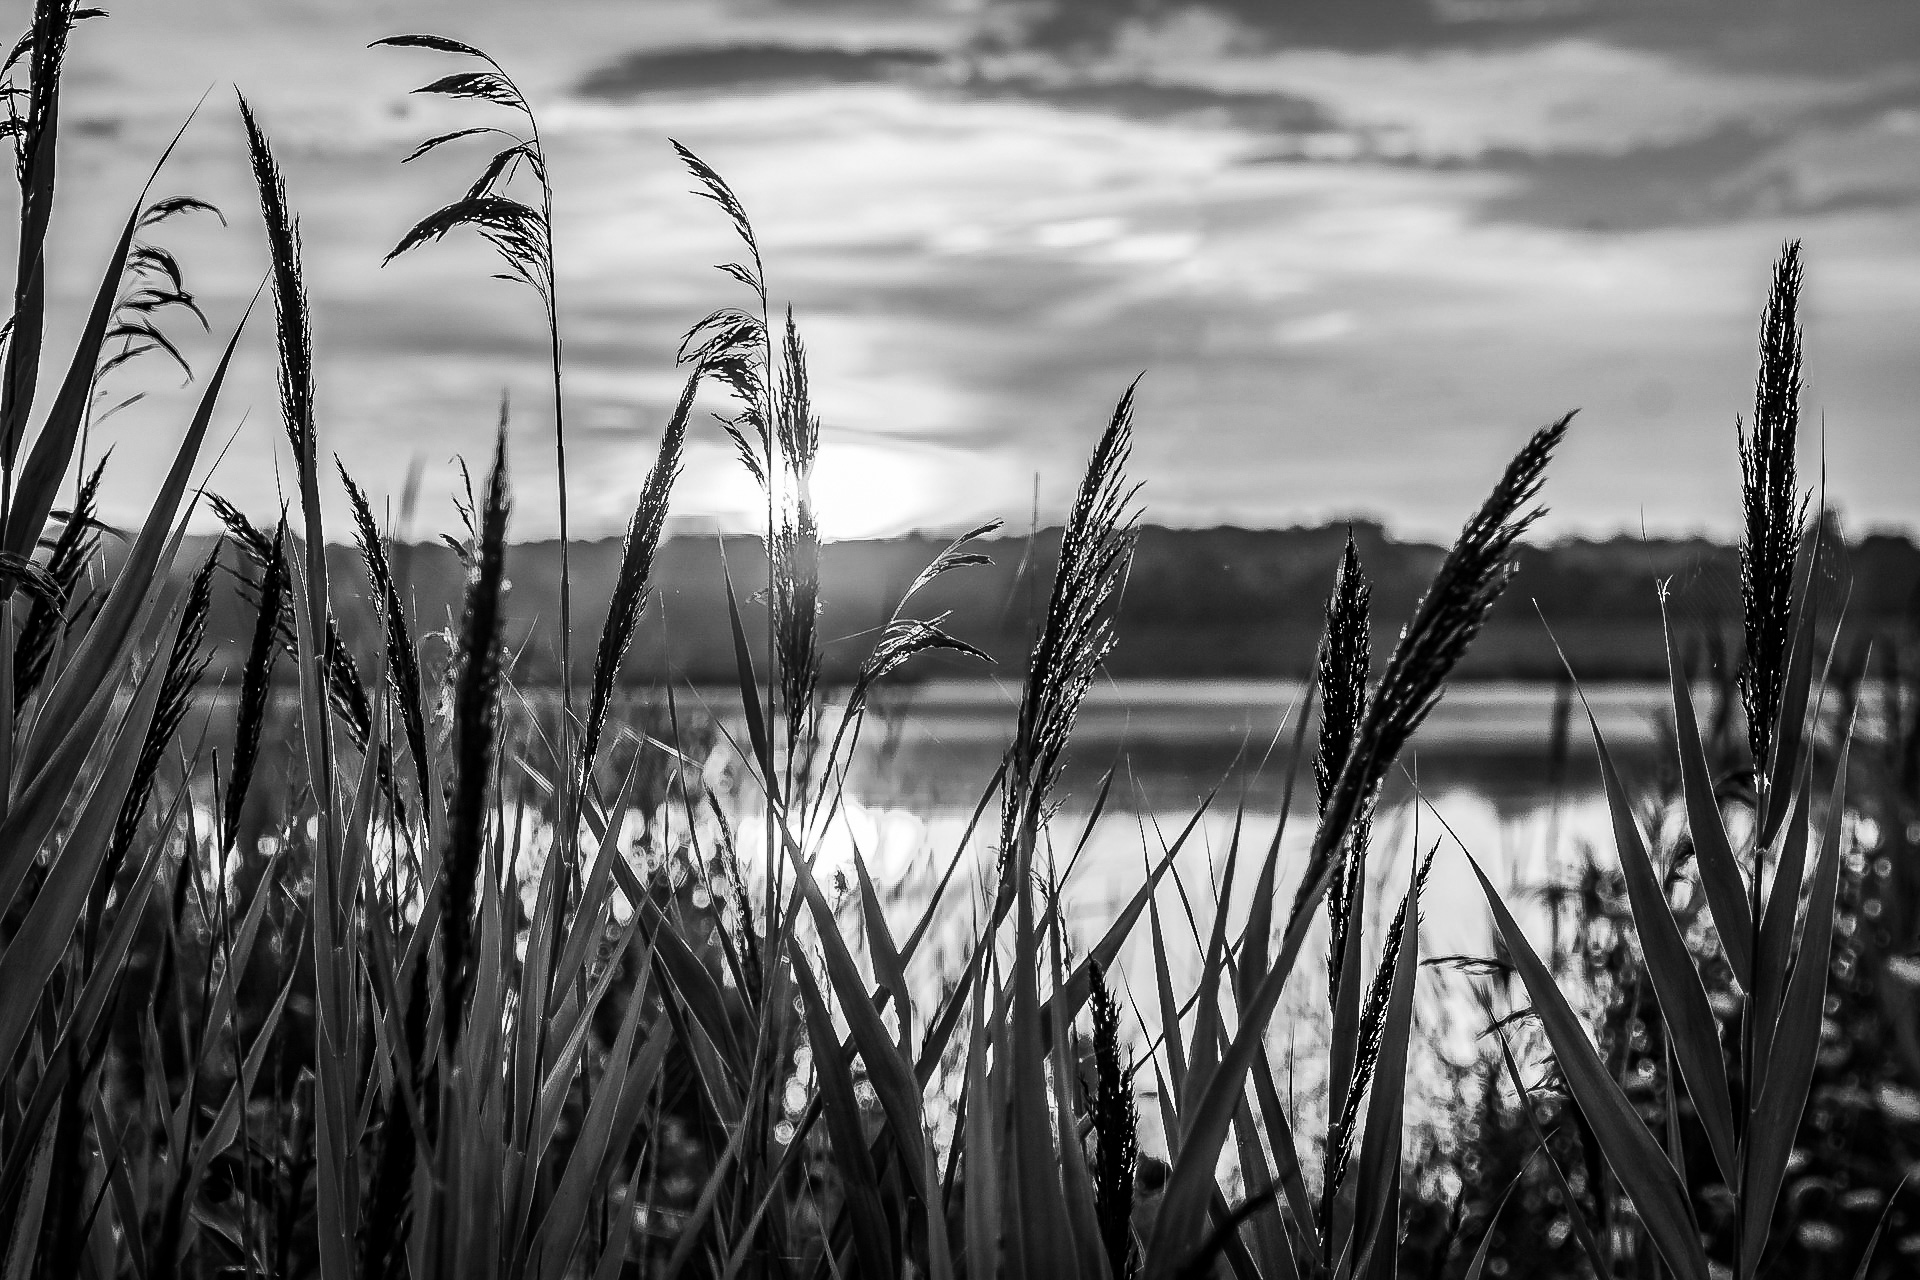
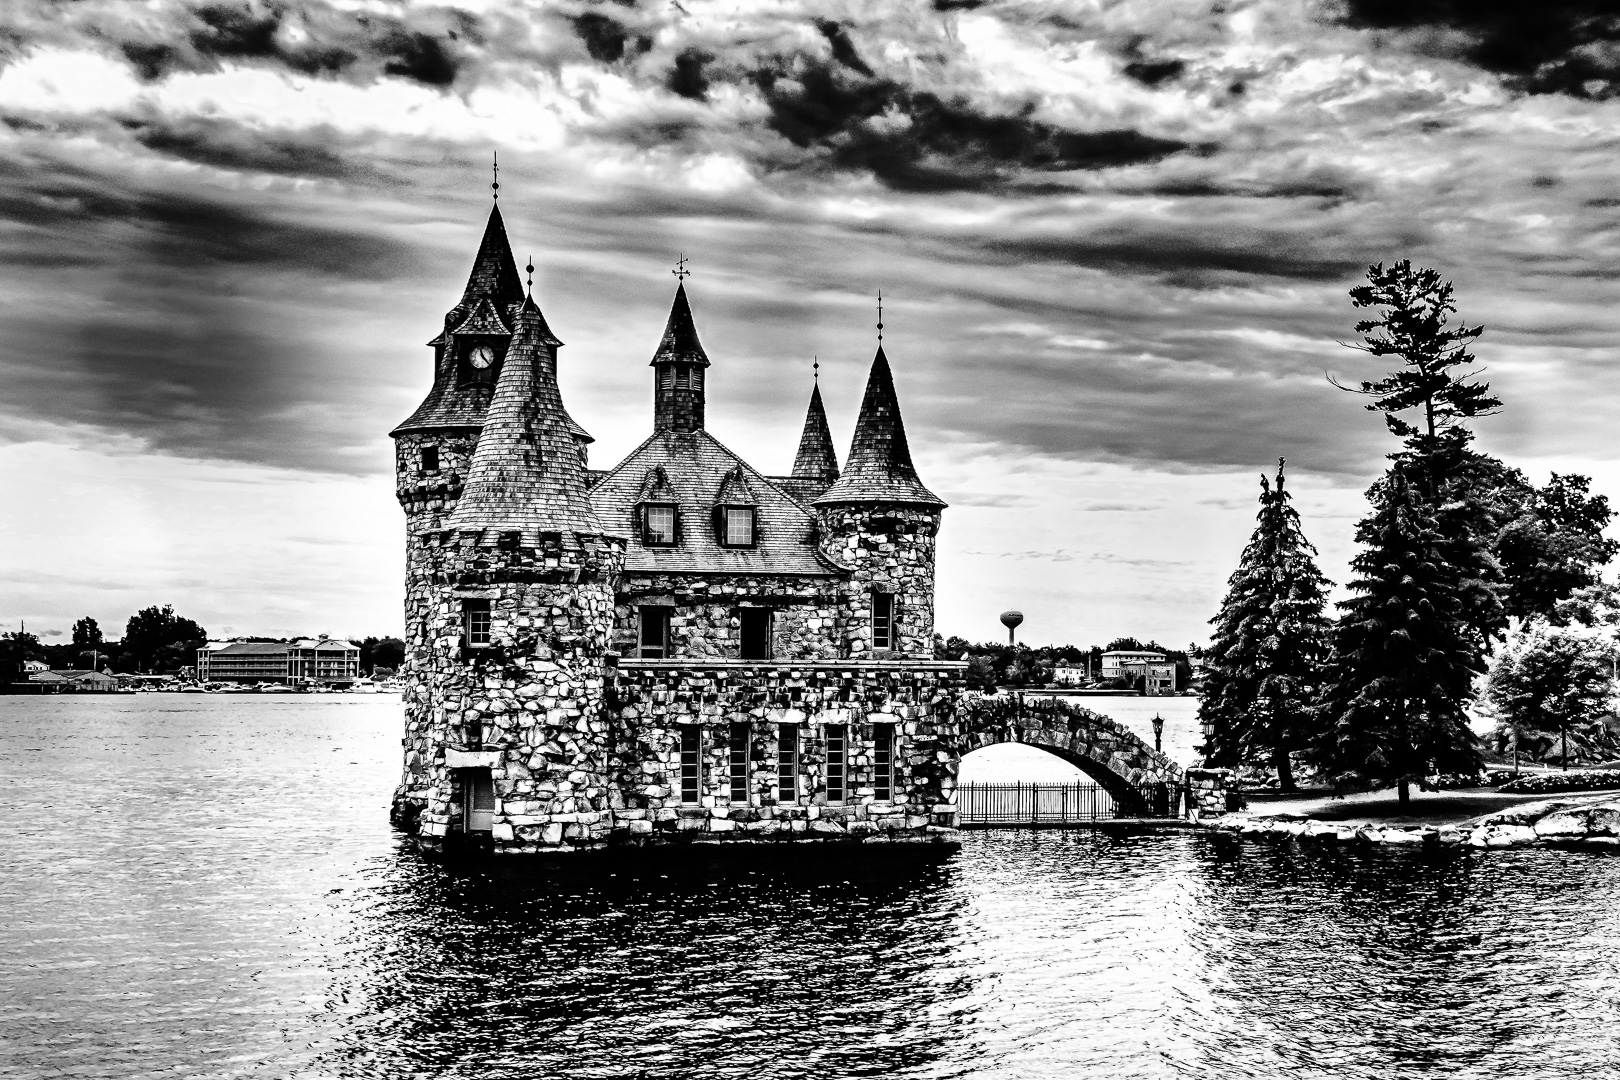
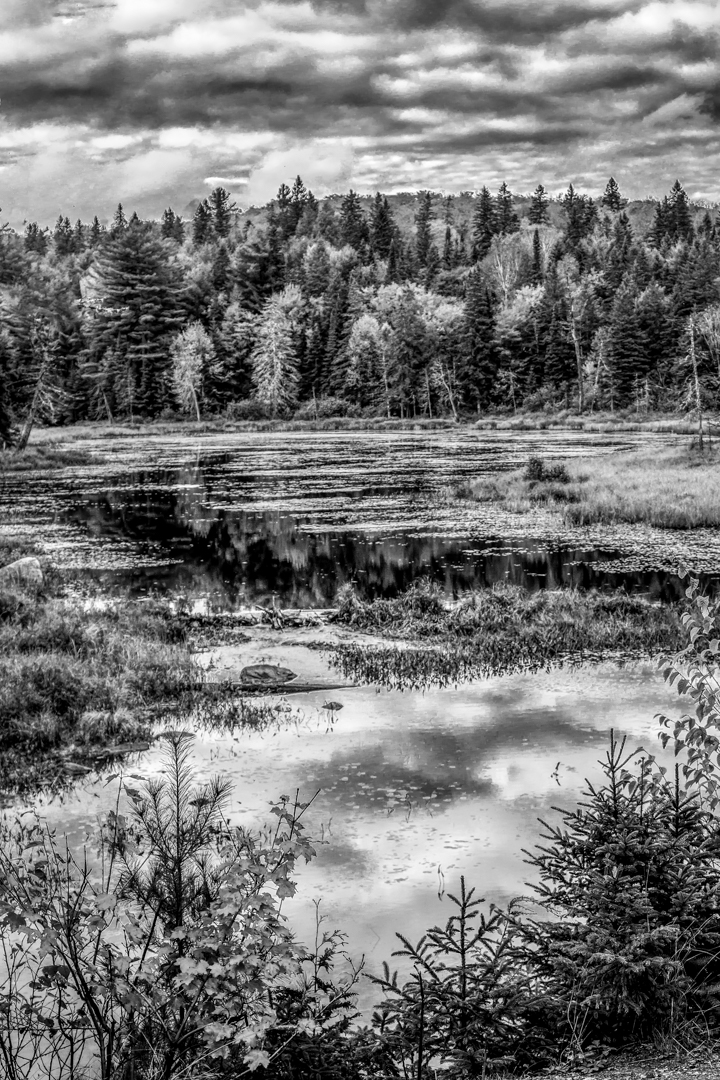
Nice country scenery .
May I ask a question ? What is your main subject ?
The fence, the house or the lawn ?
I would name the colored version: Peaceful lawn in front of the farmhouse.
To me, the BW version is all about the fence because this is what catches my eyes.
Overall, I feel that the farmhouse need something more to make it the center of attention. May be if the roof is darker ( or if the sky is darker), or if the farmhouse has more texture it will stand out a bit more.
This is only my humble opinion and I know that I am kind of different . LOL ! ! ! |
Sep 24th |
| 74 |
Sep 20 |
Reply |
Thank you very much for your kind words, Arne.
This is a hand held image.
New cameras are leaps and bounds better in stabilization than traditional ones.
Another factor is proper camera posture.
Quote from "The Human Tripod"a article :
https://greatescapepublishing.com/travel-photography/human-tripod/#:~:text=When%20hand%20holding%20your%20camera,arms%20tight%20against%20your%20body.
When hand holding your camera (not using a tripod), your body becomes the camera's support system and you need that to be a good sturdy base.
To achieve this, stand with your legs shoulder width apart. Bring your elbows into your ribs, with your arms tight against your body. This will provide more support.
If you have a lens that extends out from your camera (as is the case for SLR - Single Lens Reflect cameras), place the lens in the cup of your left hand.
Bring the eye piece to your eye .
Take a breath in�� start to exhale�� then stop and hold your breath just for a second while you click the shutter. ."
I know that this is fundamental but it never hurt to re-visit from time to time...as I appreciate being reminded of the reciprocal rule too . |
Sep 4th |
| 74 |
Sep 20 |
Reply |
Thank you very much for reminding me of the reciprocal rule .
This a a fundamental rule that was very very useful to me.
This camera ( Sony RX10) only has a fixed lens...24-600mm Raw and 1200 for Jpeg . After full extension the lens is not long at all.
When I first got this I tried different shutter speed vs focal length and find that there is minimal difference in clarity due to the camera's great stability and my personal habit.
Since then I find it OK to disregard the reciprocal rule with this camera when shooting RAW.
I do not shoot beyond 600 mm because Optical zoom with jpeg
..and not being able to use spot focusing...made me lean towards processing the RAW file myself.
I have a 100 to 400 mm Fuji lens.
1.4 convertor made the power around 1000 mm.
After factoring in the 1.6 crop sensor factor, the final power can be around 1600 mm.
When I go to Africa I can rest the camera on the vehicle I shall use the Fuji.
If I have to walk with the camera or to hand hold it this Sony RX10 always come first....
Another major point is : I am not a bird or wild=life photographer. LOL ! ! ! |
Sep 4th |
| 74 |
Sep 20 |
Reply |
Thank you very much for you suggestion , Ata.
Just wondering why you like f11 and up ?
I am the kind of person who like to know the reasoning of each choice.
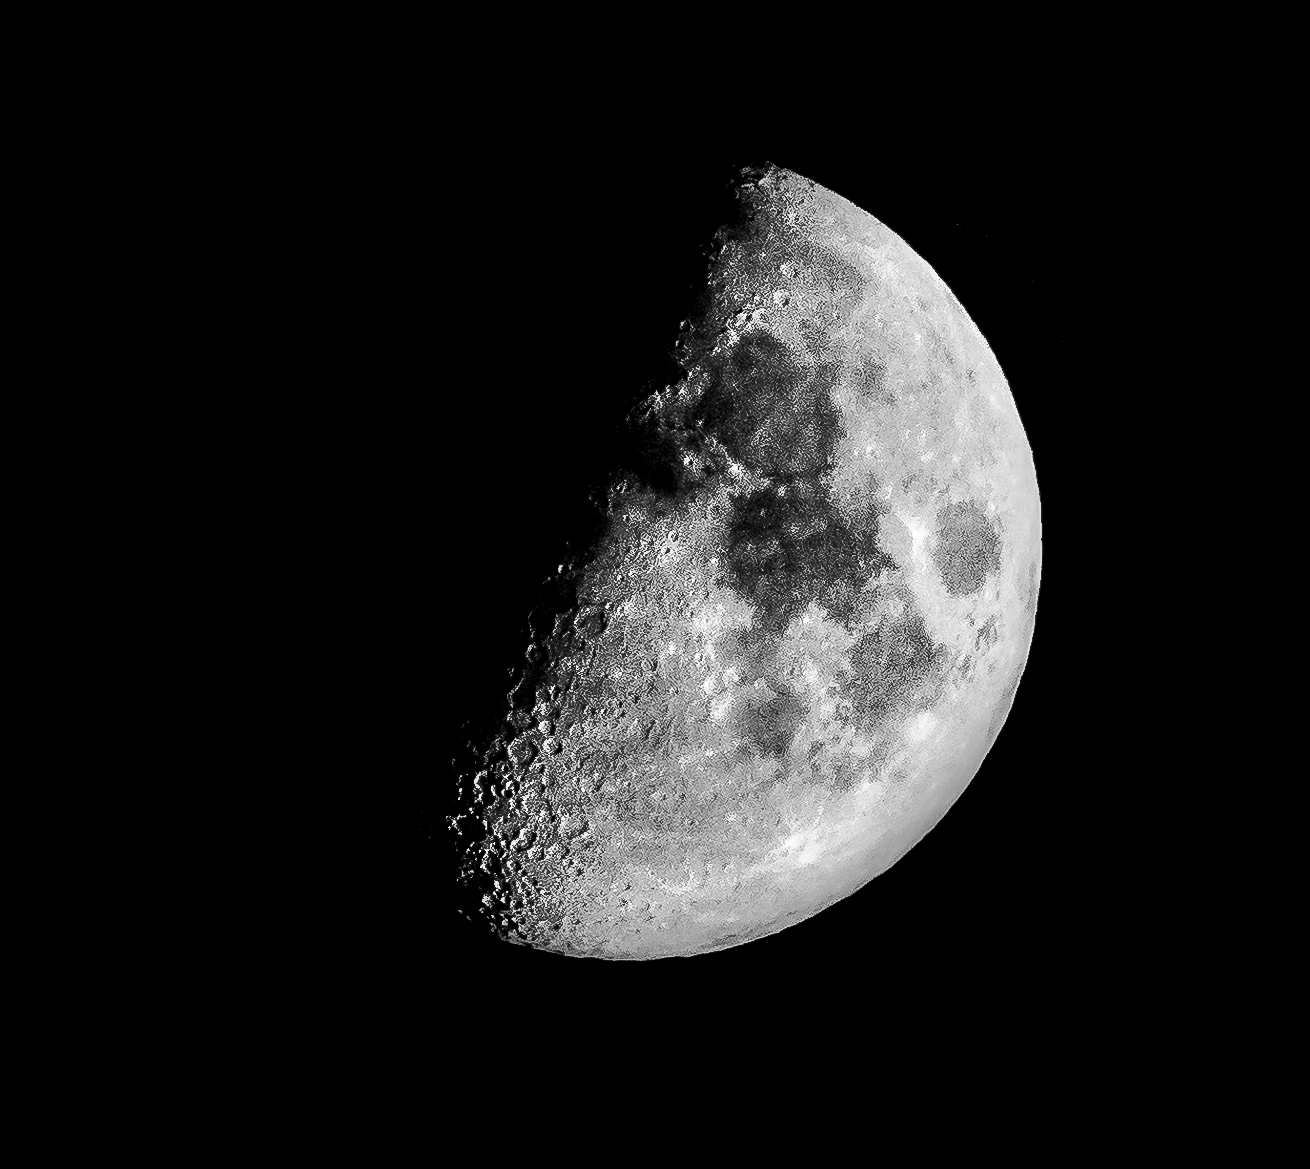
Everybody have a different approach and I think of f8 to 11 as the golden aperture for landscape. Any higher aperture will create diffraction and make the image softer. I use higher number of aperture in macro because of the shallow depth of field but If possible I would prefer to shoot at f8 and stack the images.
In Landscape the aim is to focus at 1/3 into the field because 1/3 in front of your focal plane and 2/3 behind the plane are in focus. With the moon so far away and nothing in between, I can only focus right on the moon so I do not need the increase depth of field that the higher aperture number might bring. I think that the camera would had focused on infinity with the distance anyway.
In hind sight, next time I should try a much shallower depth of field to see the difference .
In my portrait group there was a guy who always open his aperture to 1.4 and make the lighting so low that the rest of the group need to use high ISO. We finally asked him why he does that...he said that he was told to use the shallowest depth of field to blur the background. However, with our solid background there is nothing to blur...why worry about the background which is not a distraction and risk having the nose blurry when the eyes are sharp ?
At the time, I was shooting at campfire and I had the camera in manual mode. When we noticed the moon I just changed the speed, not the aperture.
My ISO was at auto...with a maximum limit of 2000 . In the early days I had a camera that always shoot at the highest limit when it is in auto. Since then, all the new cameras do fine in auto ISO. as long as the ISO is below 1000 and I use the histogram to expose to the right I never have any problem.
This is only my opinion and I respect that everybody have different and valid points . |
Sep 3rd |
6 comments - 4 replies for Group 74
|
11 comments - 8 replies Total
|