|
| Group |
Round |
C/R |
Comment |
Date |
Image |
| 64 |
Dec 21 |
Reply |
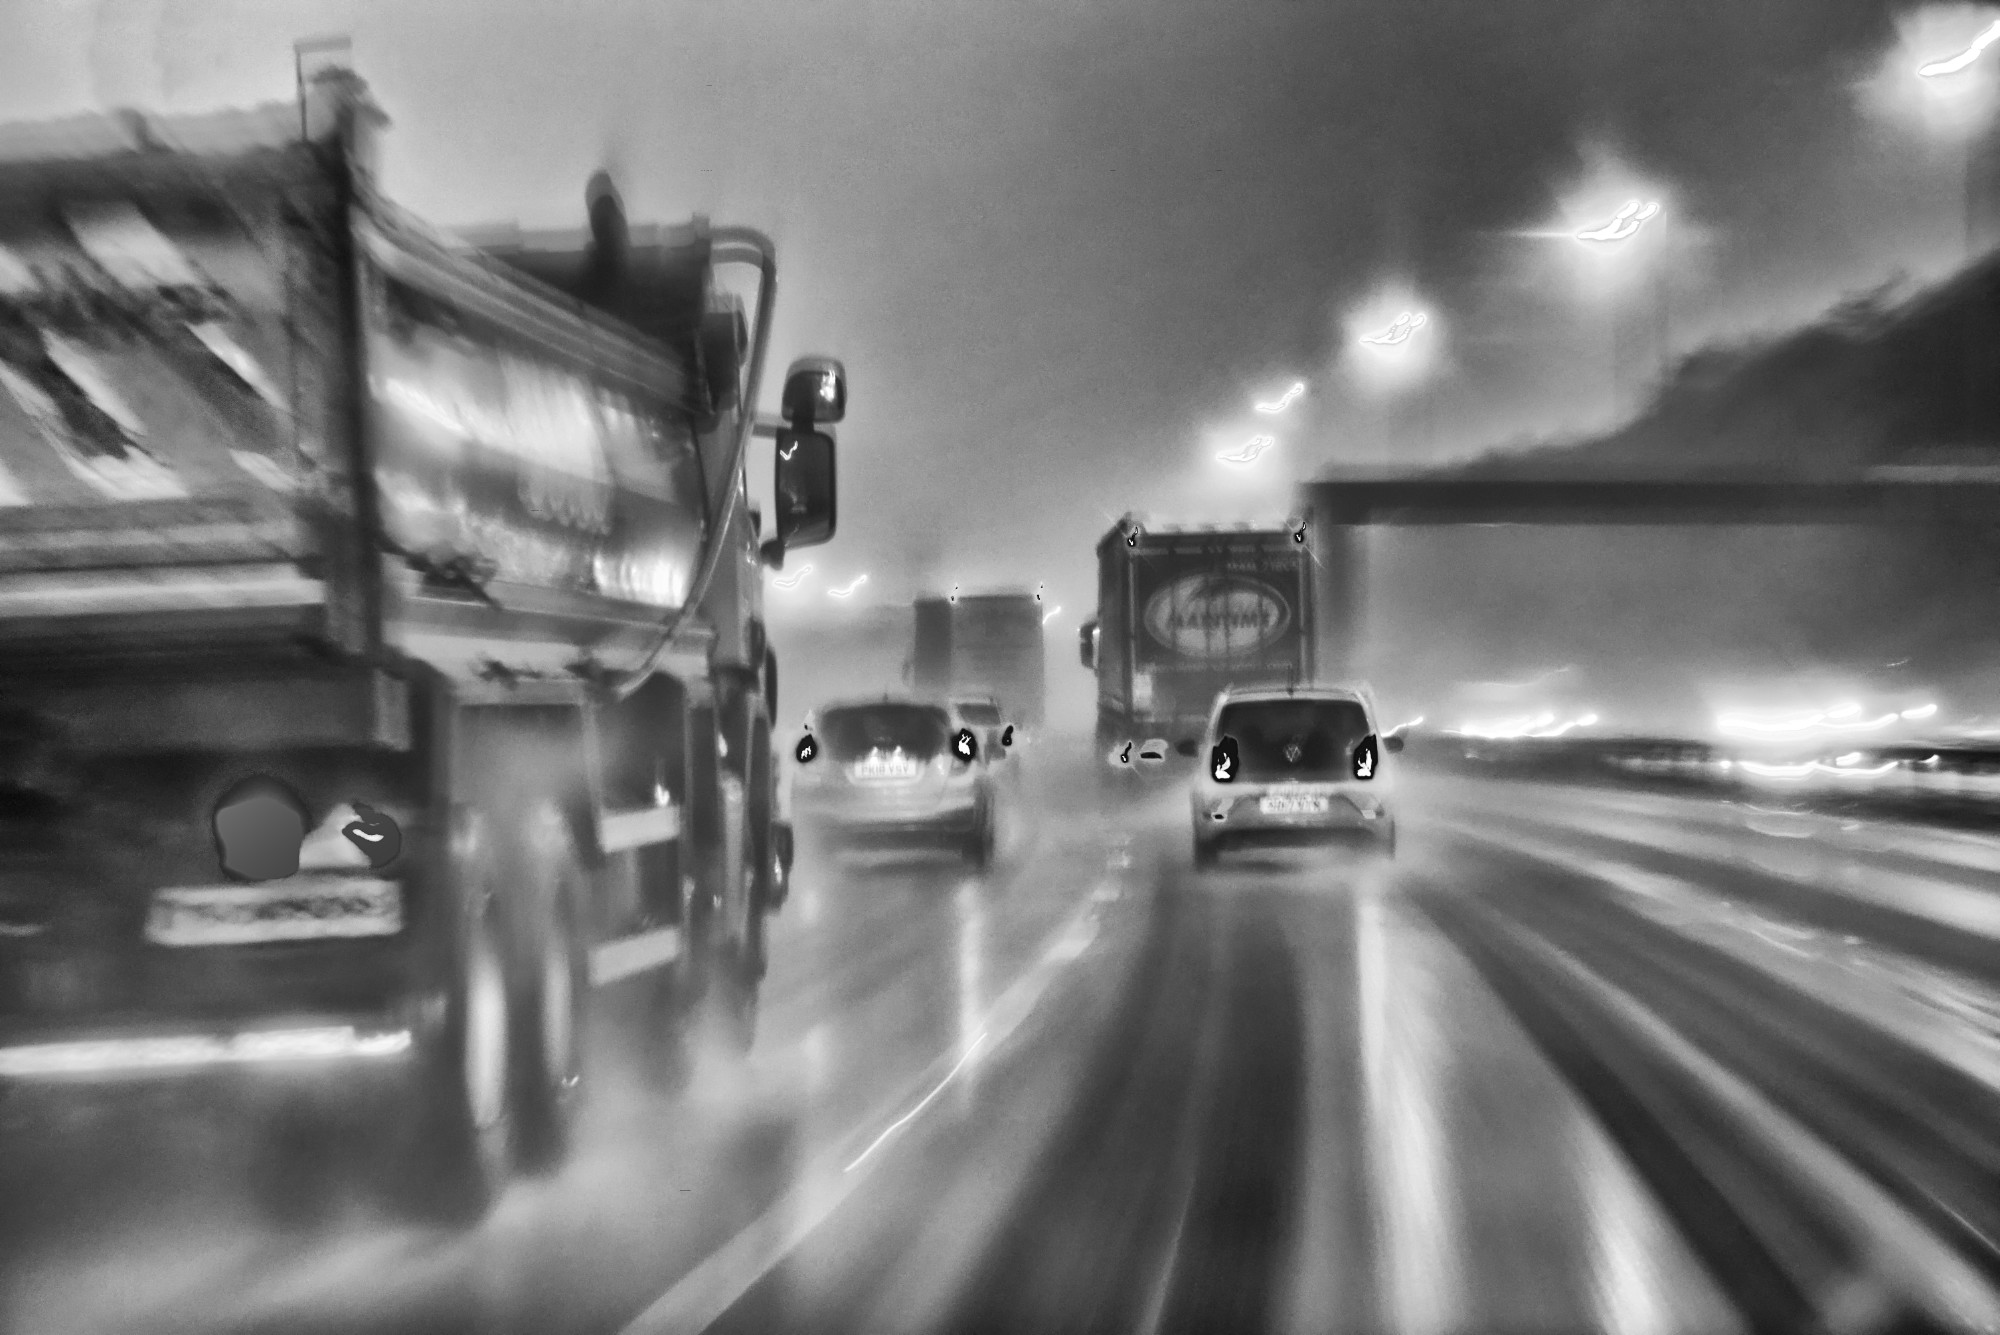
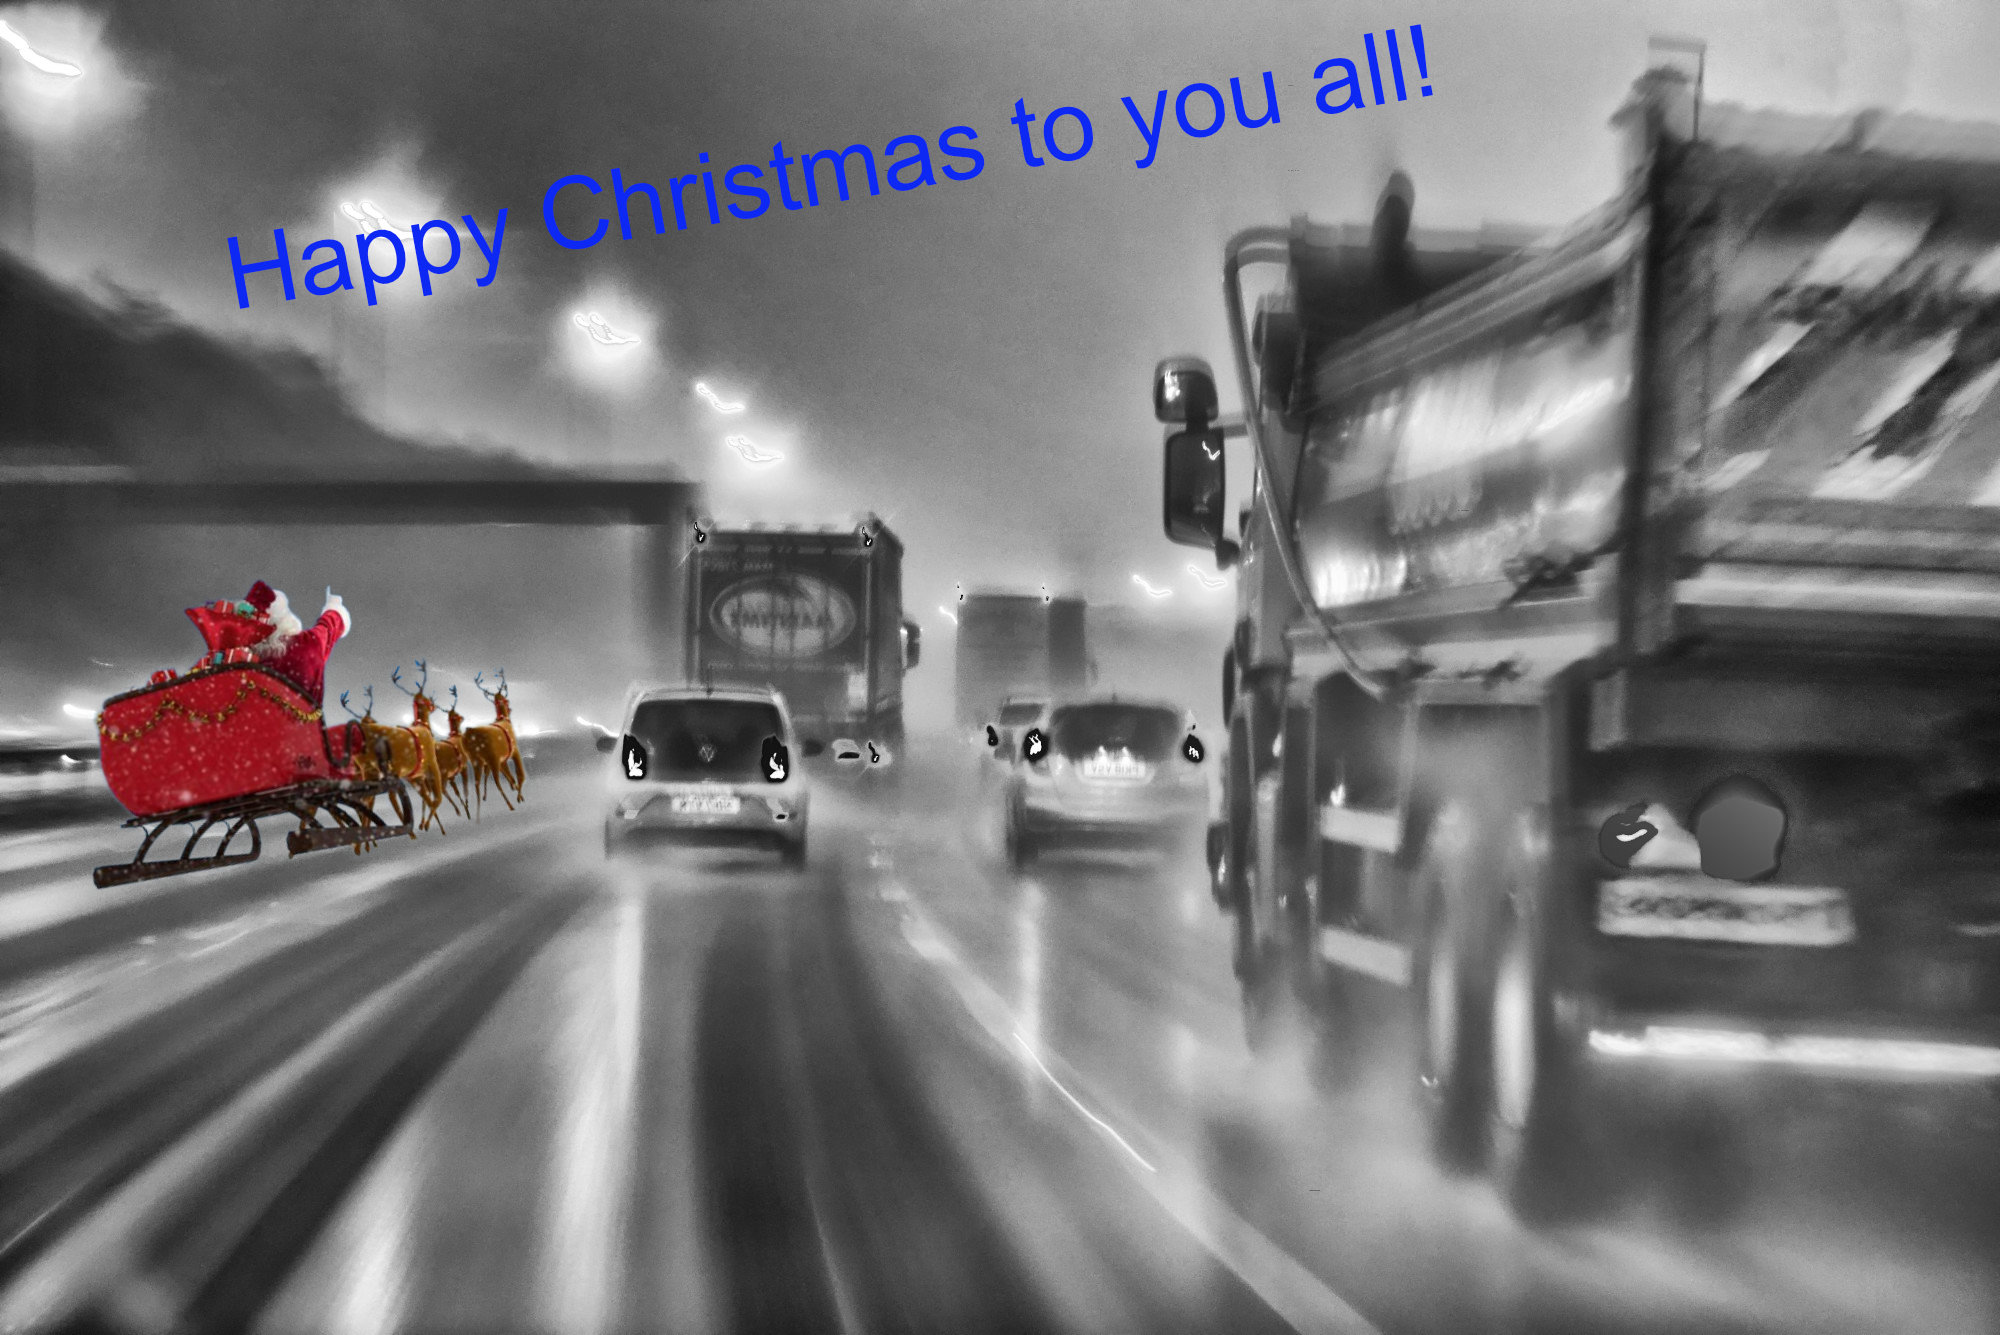
You might like the greeting now below as I've also flipped it for those on the "right" side of the road! Although, if you read this (https://www.theguardian.com/notesandqueries/query/0,5753,-19385,00.html), the left side is probably the right side ;-) |
Dec 19th |
| 64 |
Dec 21 |
Reply |
Thanks, Helen.
|
Dec 19th |
| 64 |
Dec 21 |
Reply |
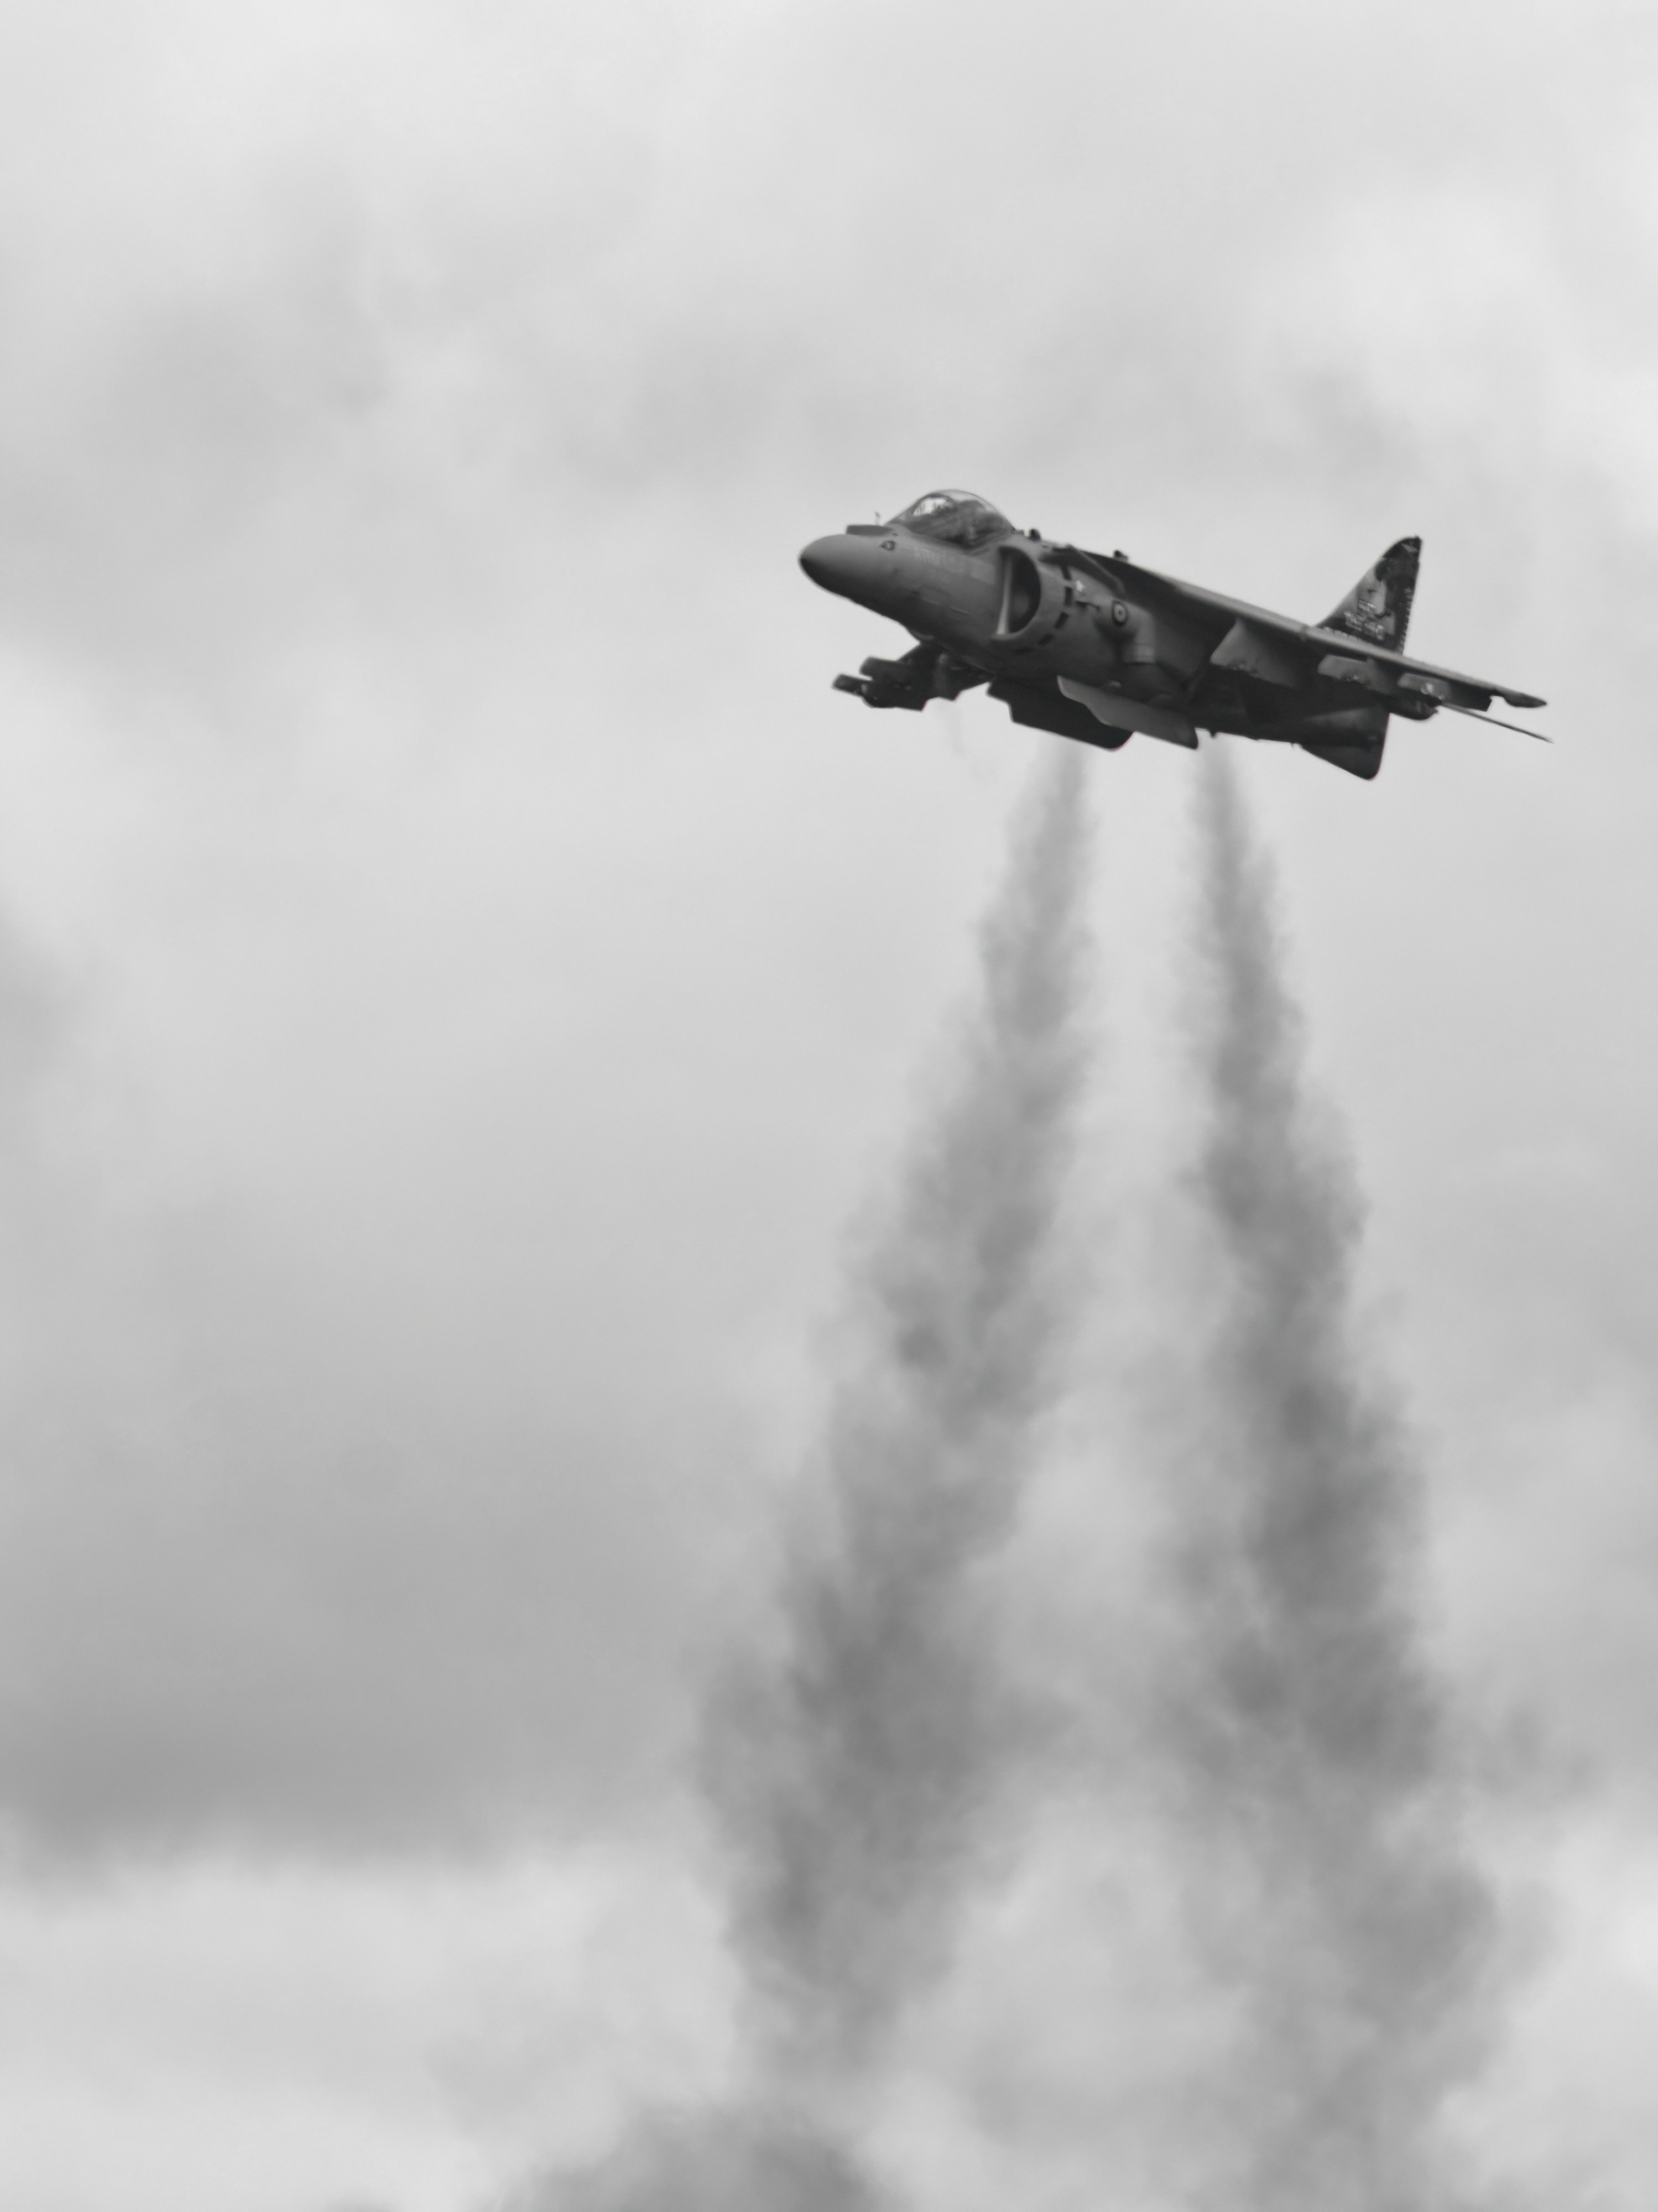
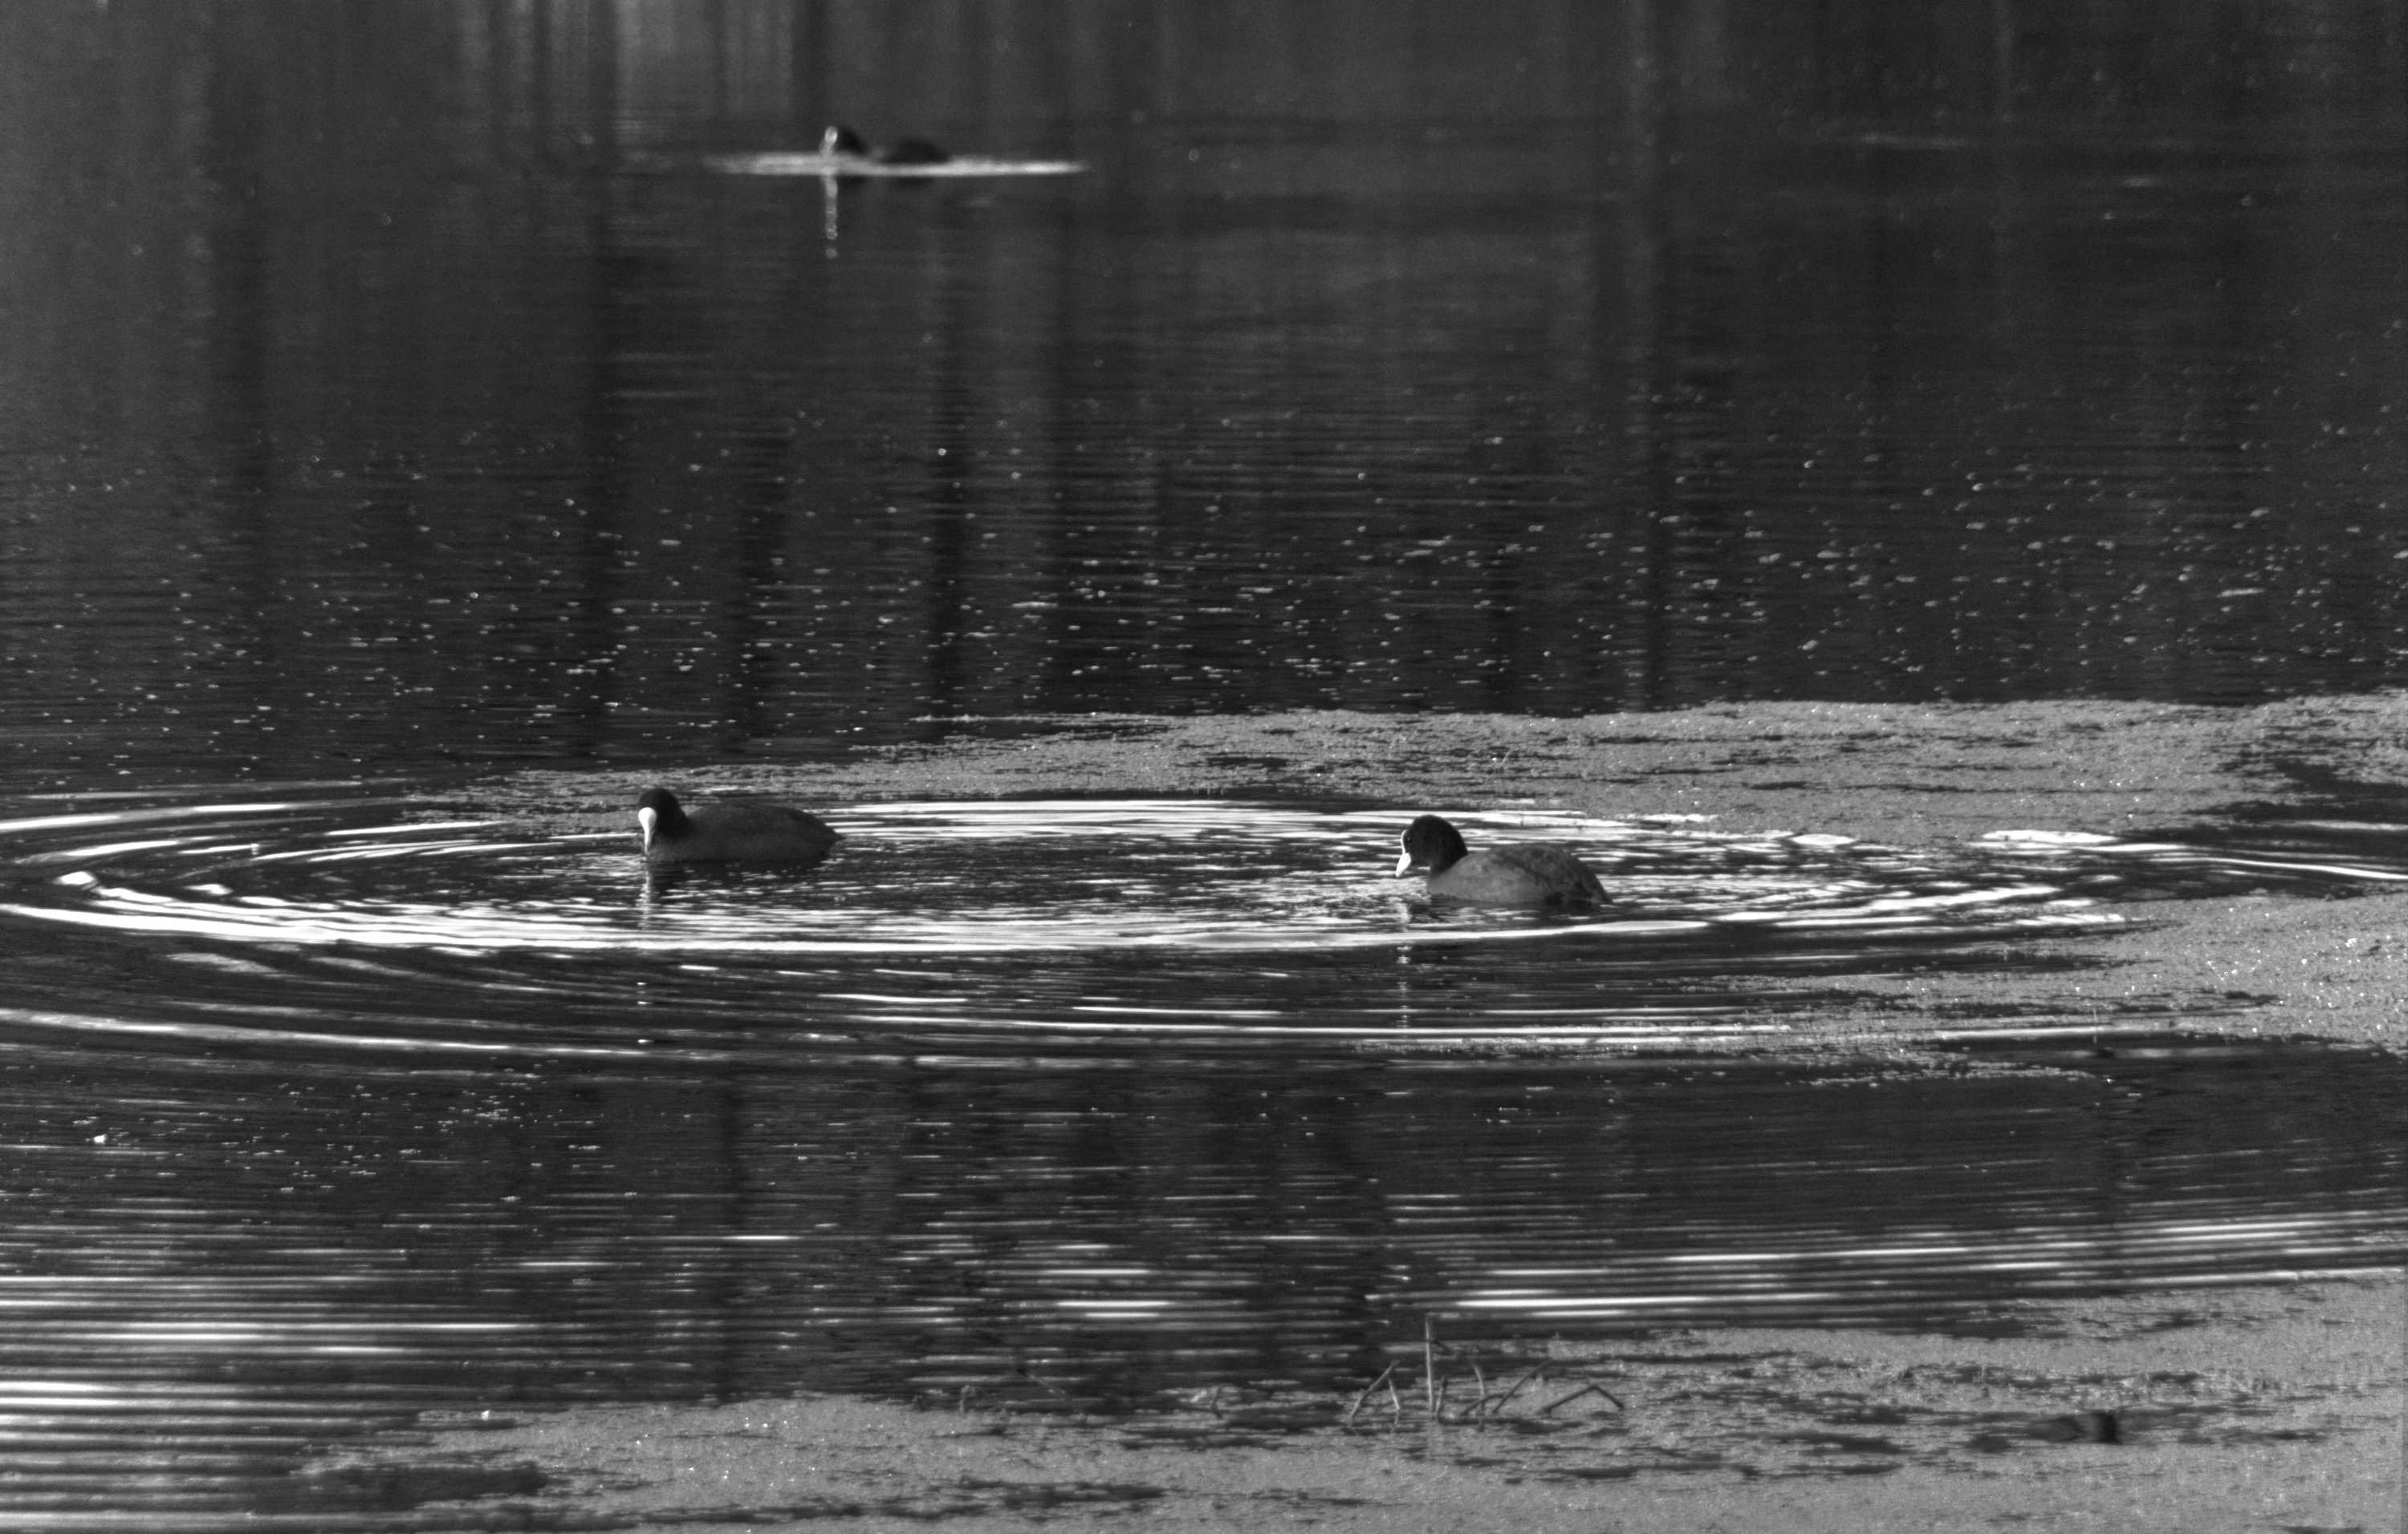
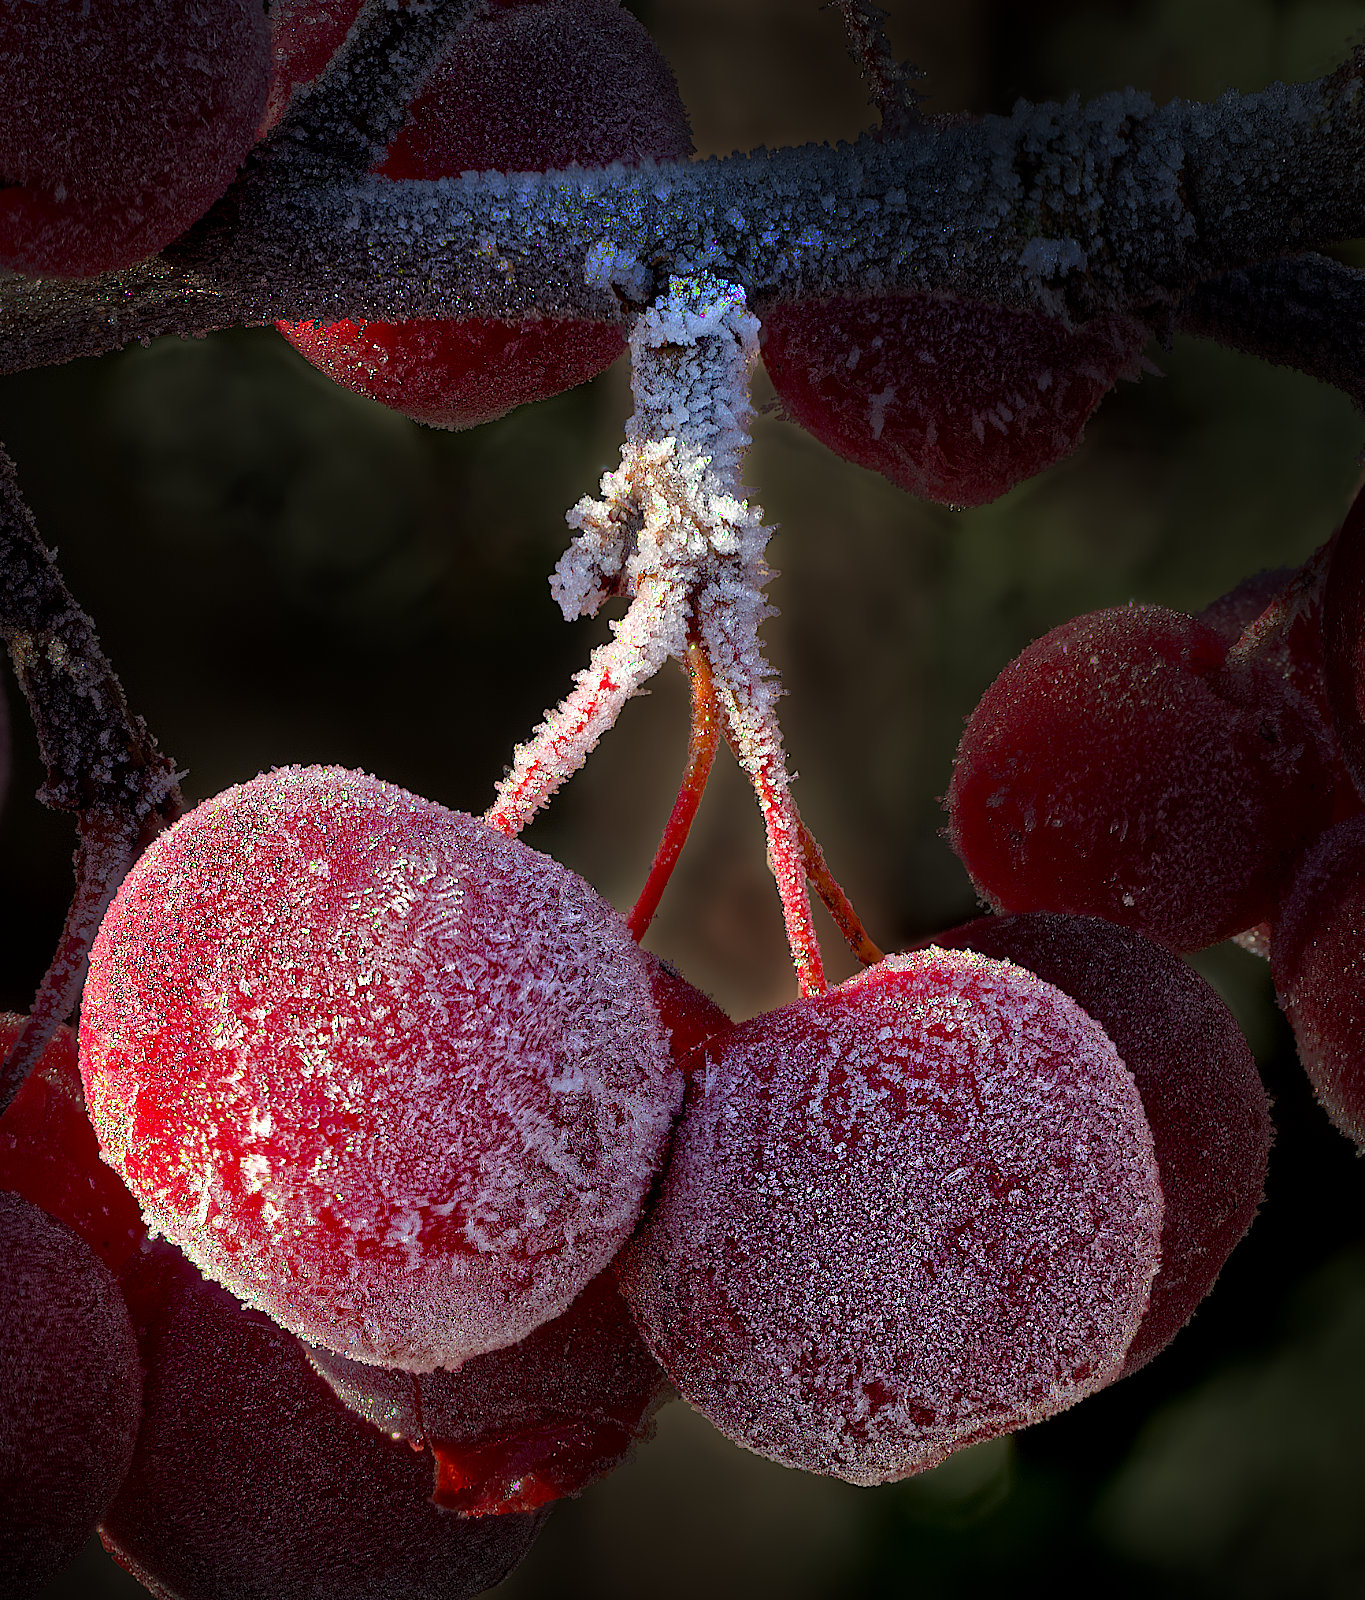
Just the windscreen wipers. It wasn't raining, just a wet road, so there was plenty of gap between the sweeps. I didn't have to edit any drops out. |
Dec 18th |
| 64 |
Dec 21 |
Comment |
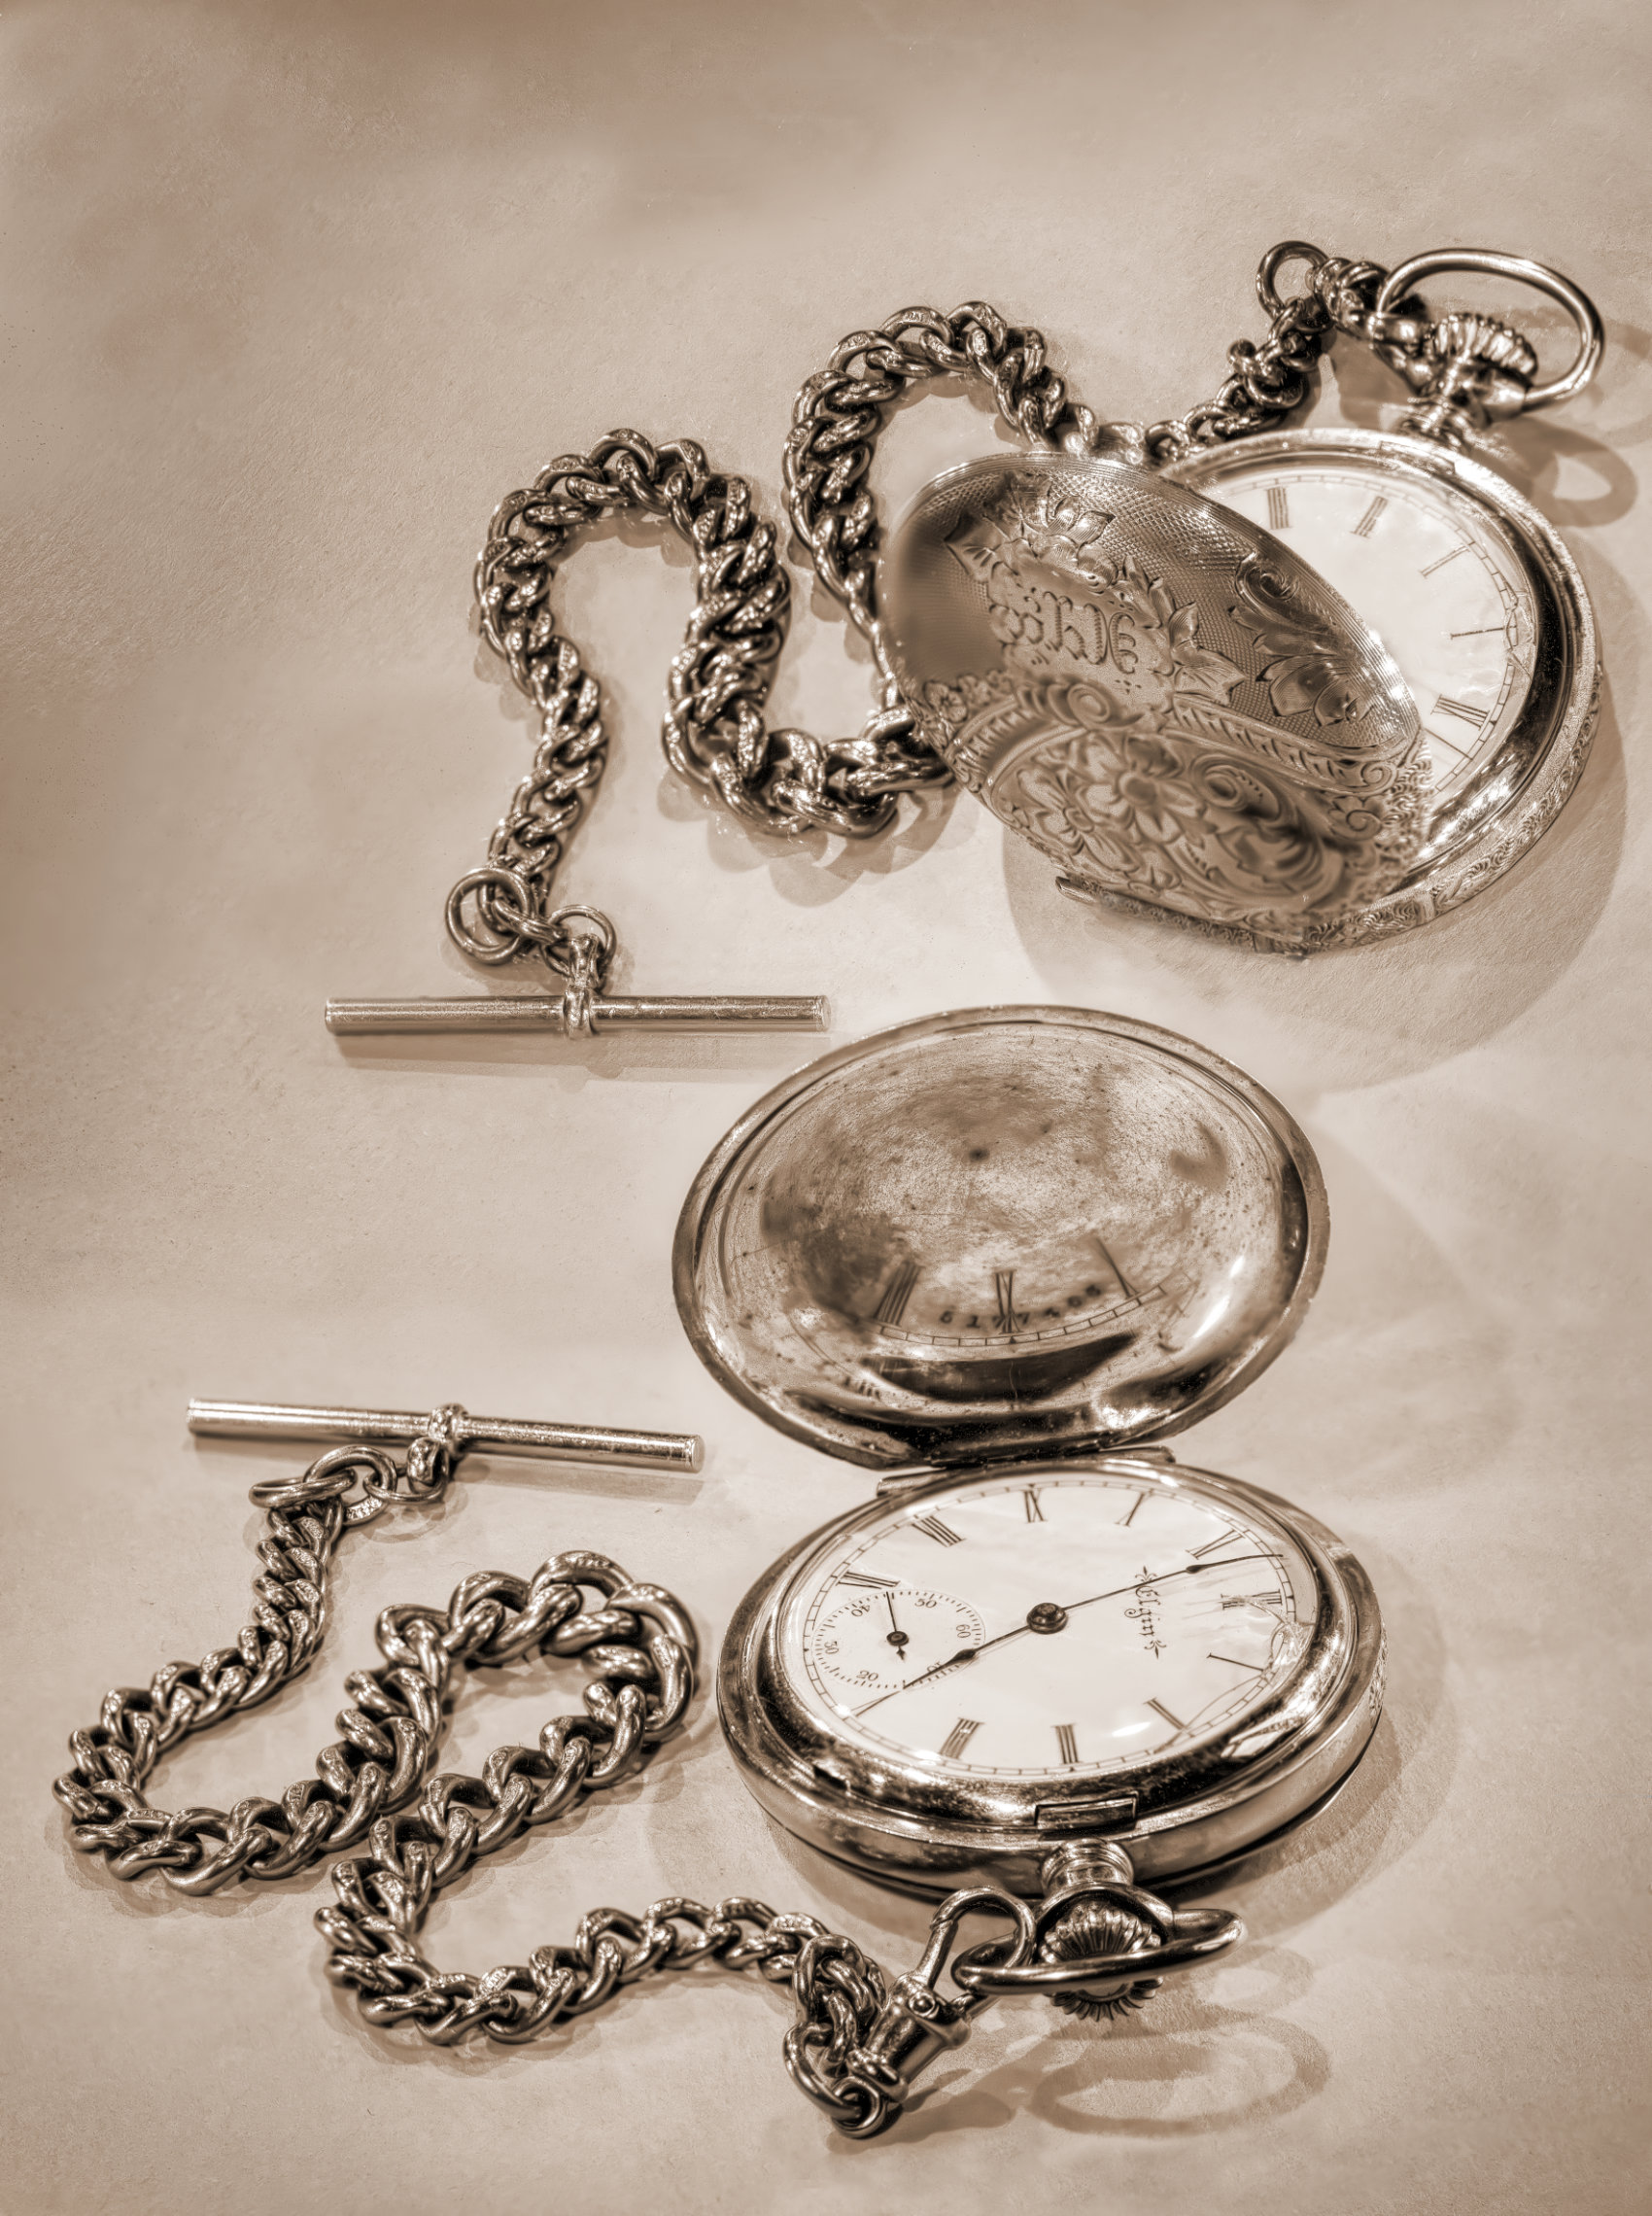
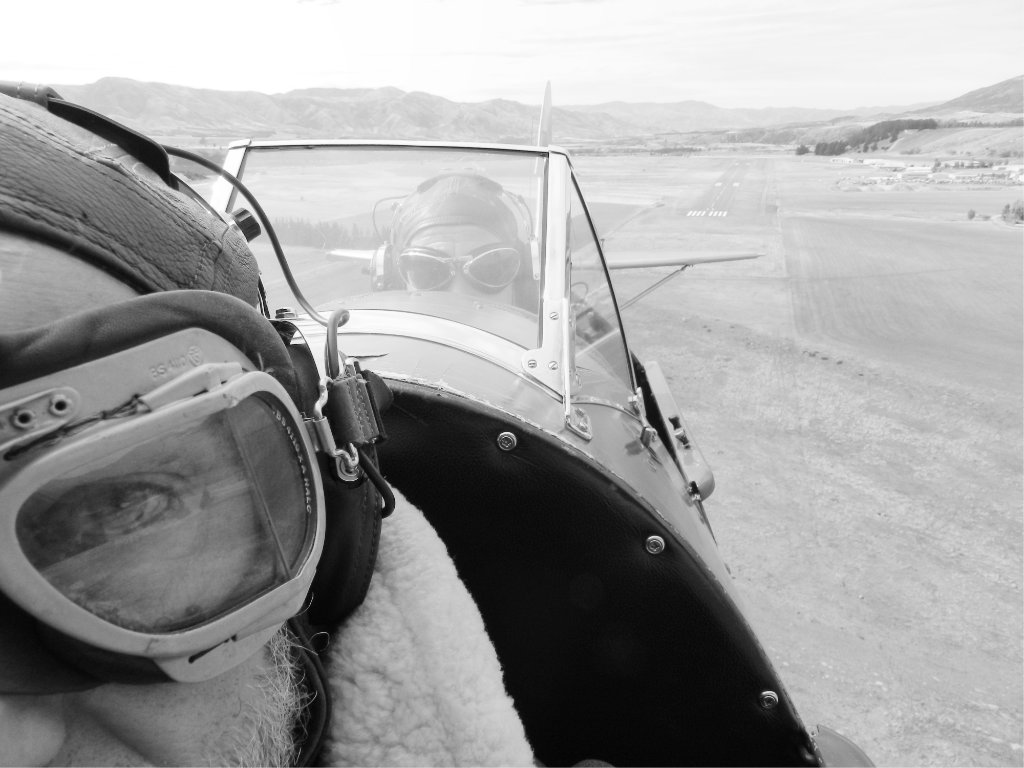
Well thanks, all. I can only say my response in a picture - |
Dec 17th |
 |
| 64 |
Dec 21 |
Reply |
I suppose I could have flipped it for my American friends! I didn't think of that. :-) |
Dec 12th |
| 64 |
Dec 21 |
Reply |
Thanks Jerry! I had a lot to choose between, most were rubbish. |
Dec 12th |
| 64 |
Dec 21 |
Reply |
Ah, very cunning. I like it. Not for every photo of course, and probably best with abstracts as you've done. |
Dec 11th |
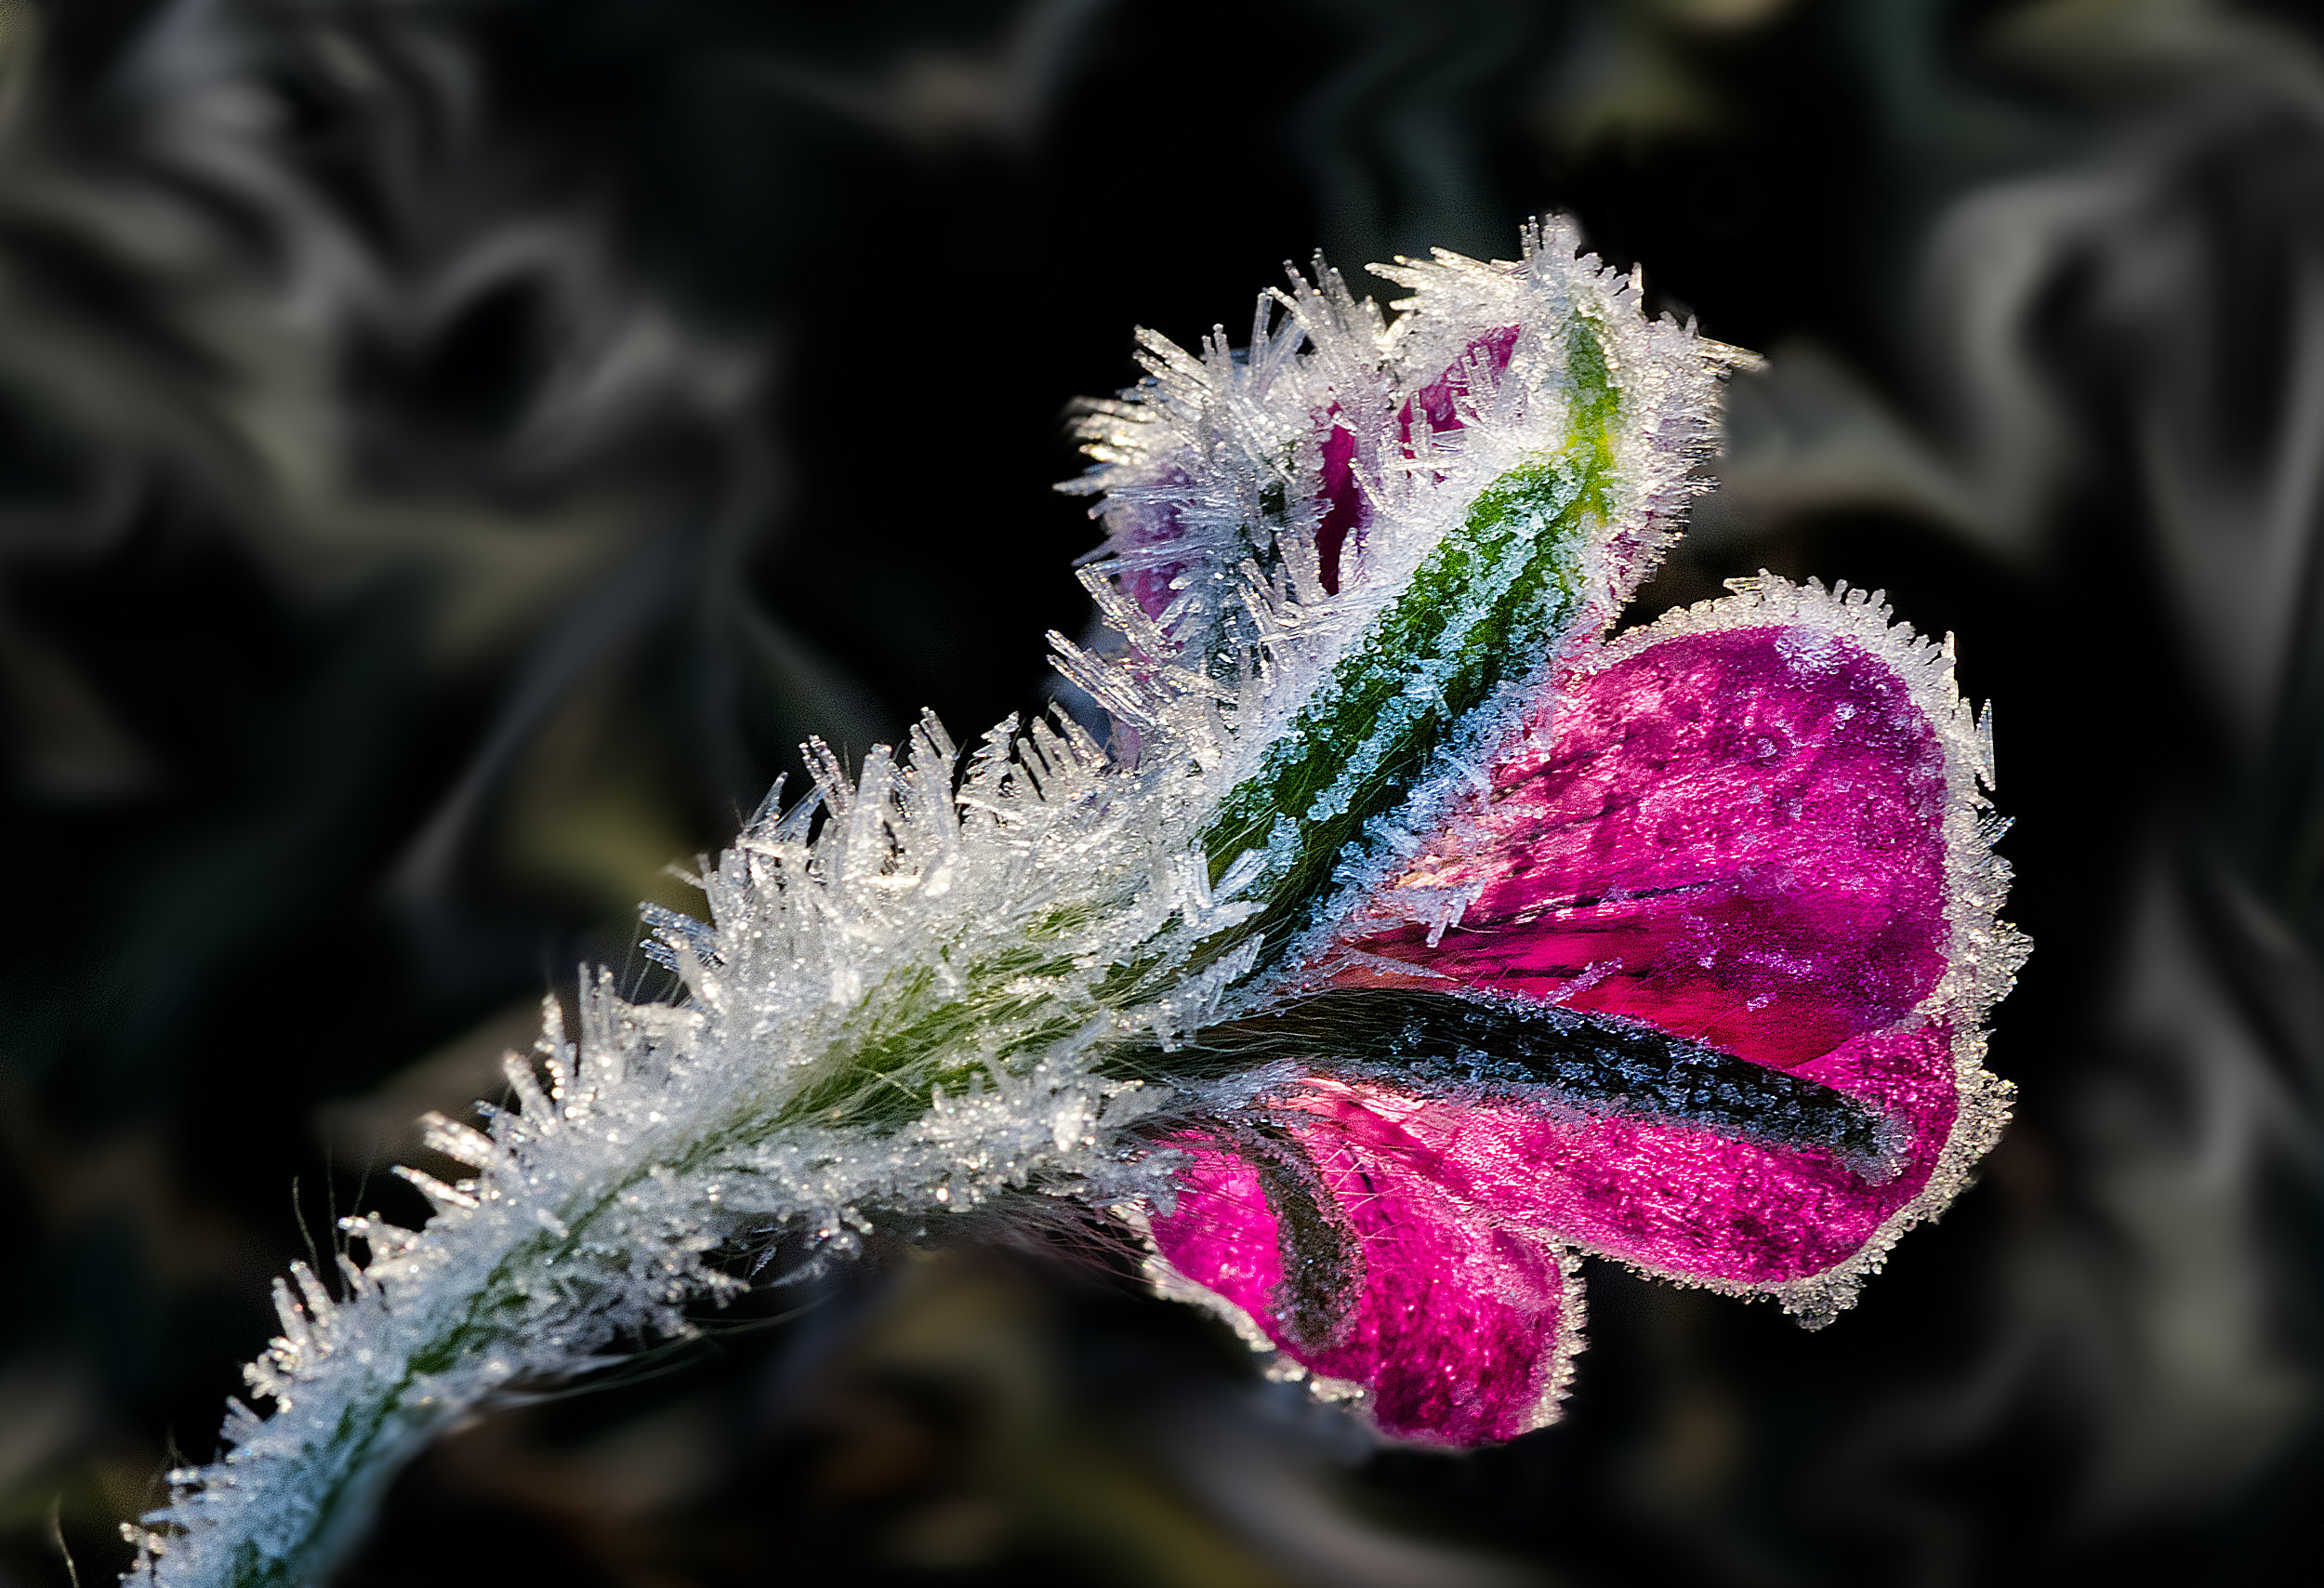
| 64 |
Dec 21 |
Comment |
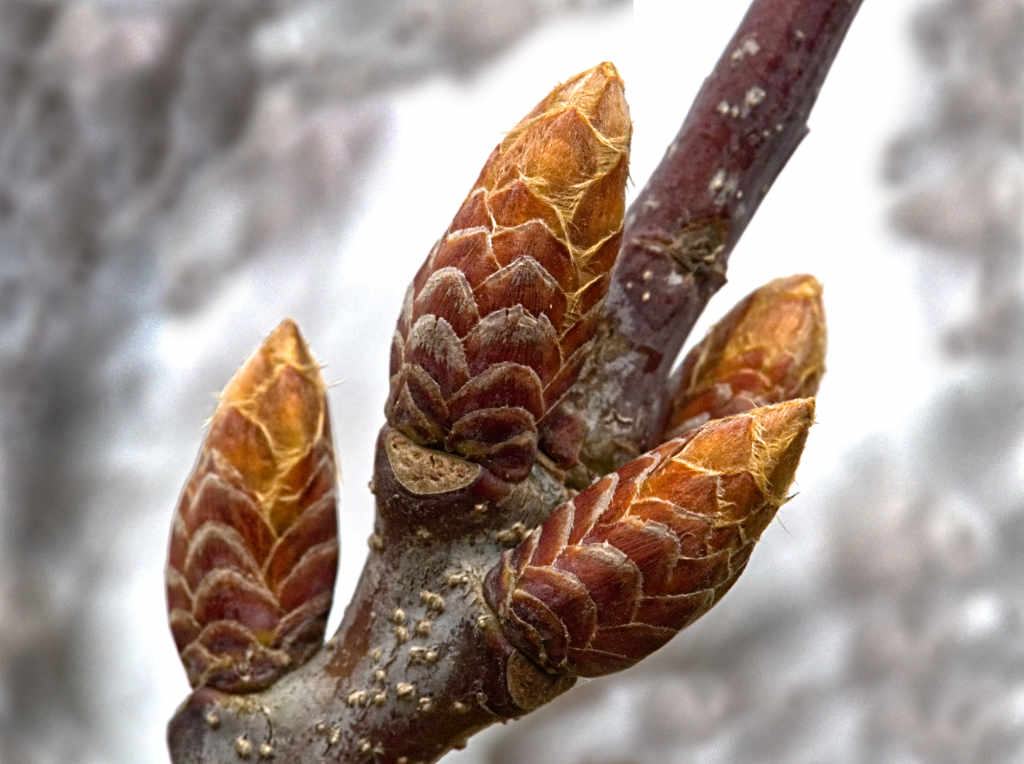
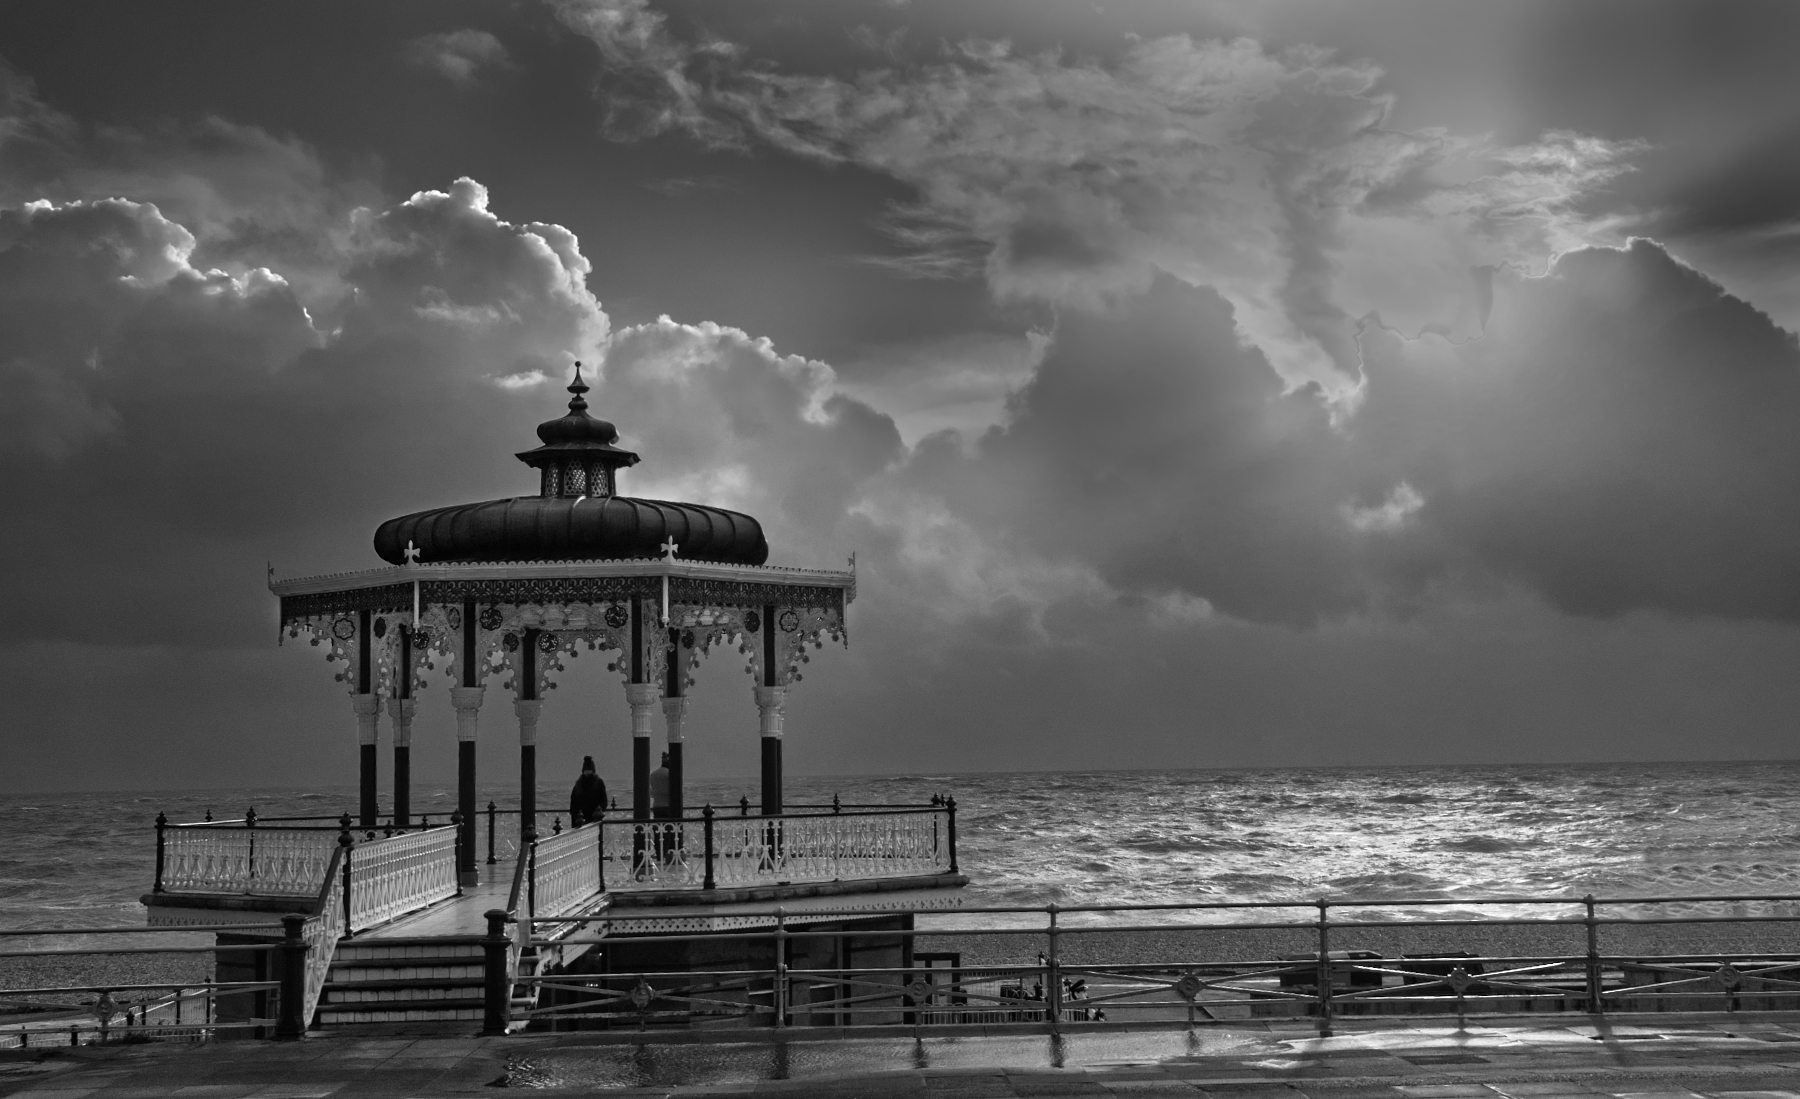
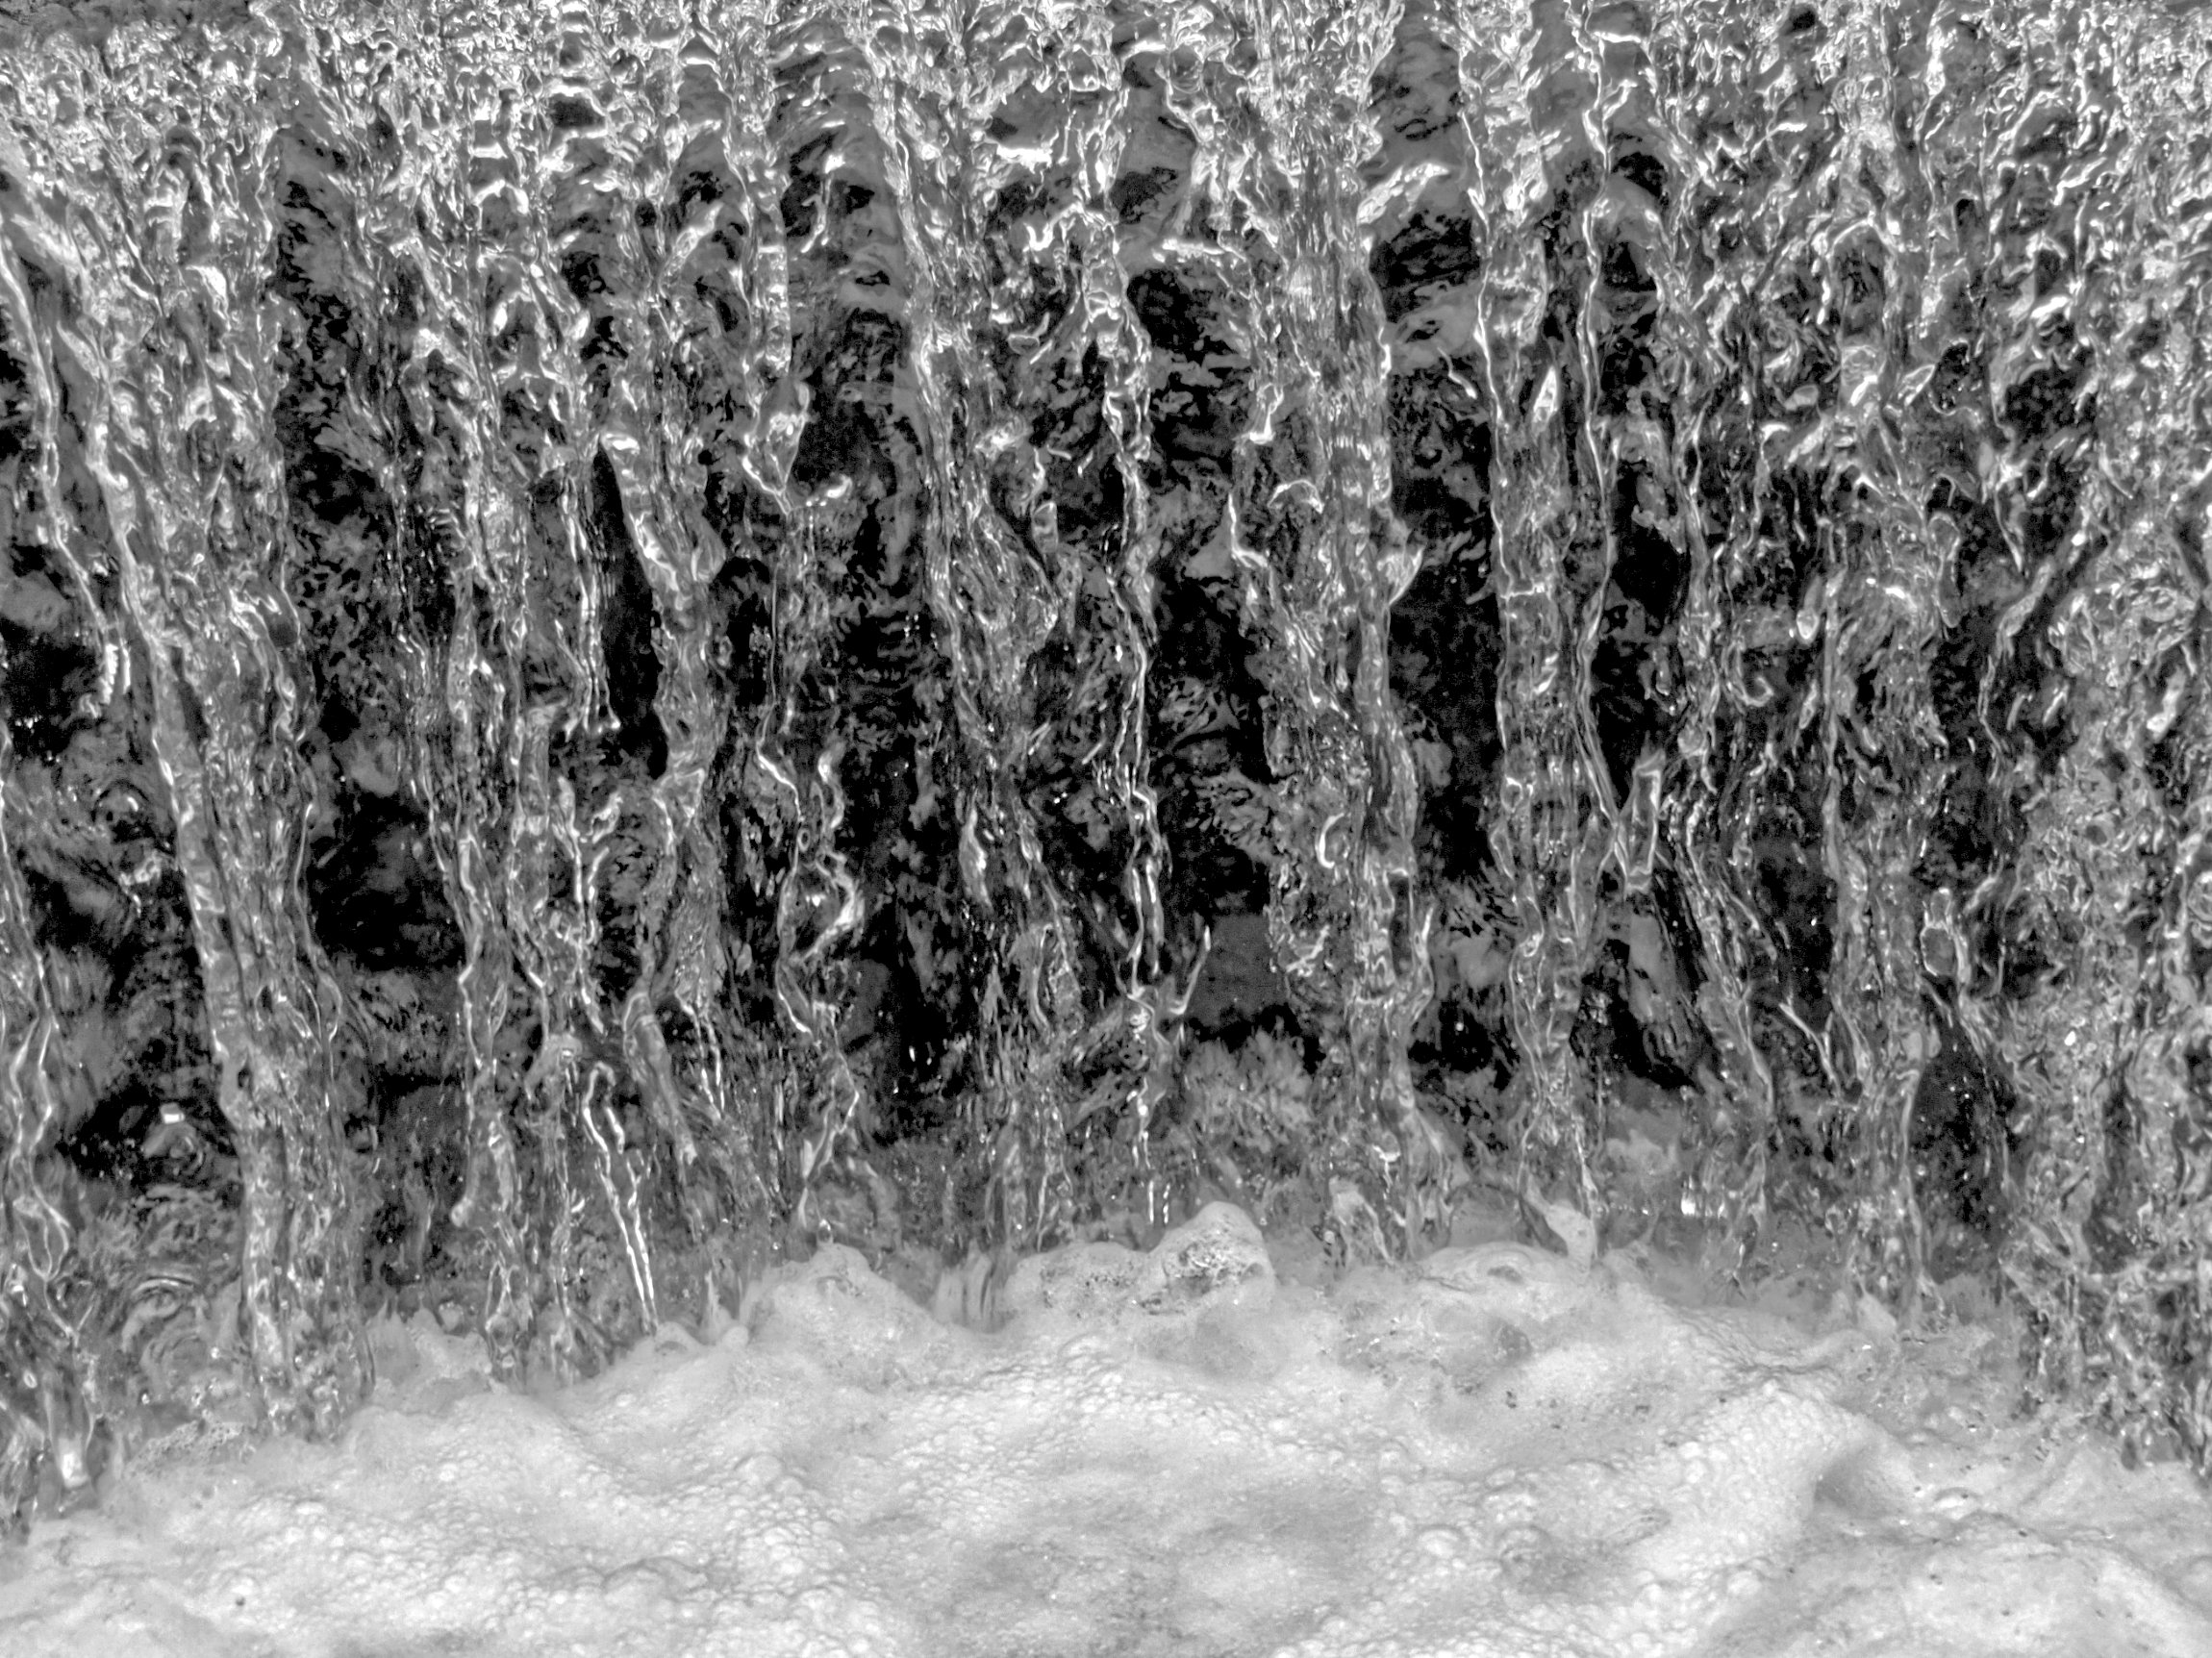
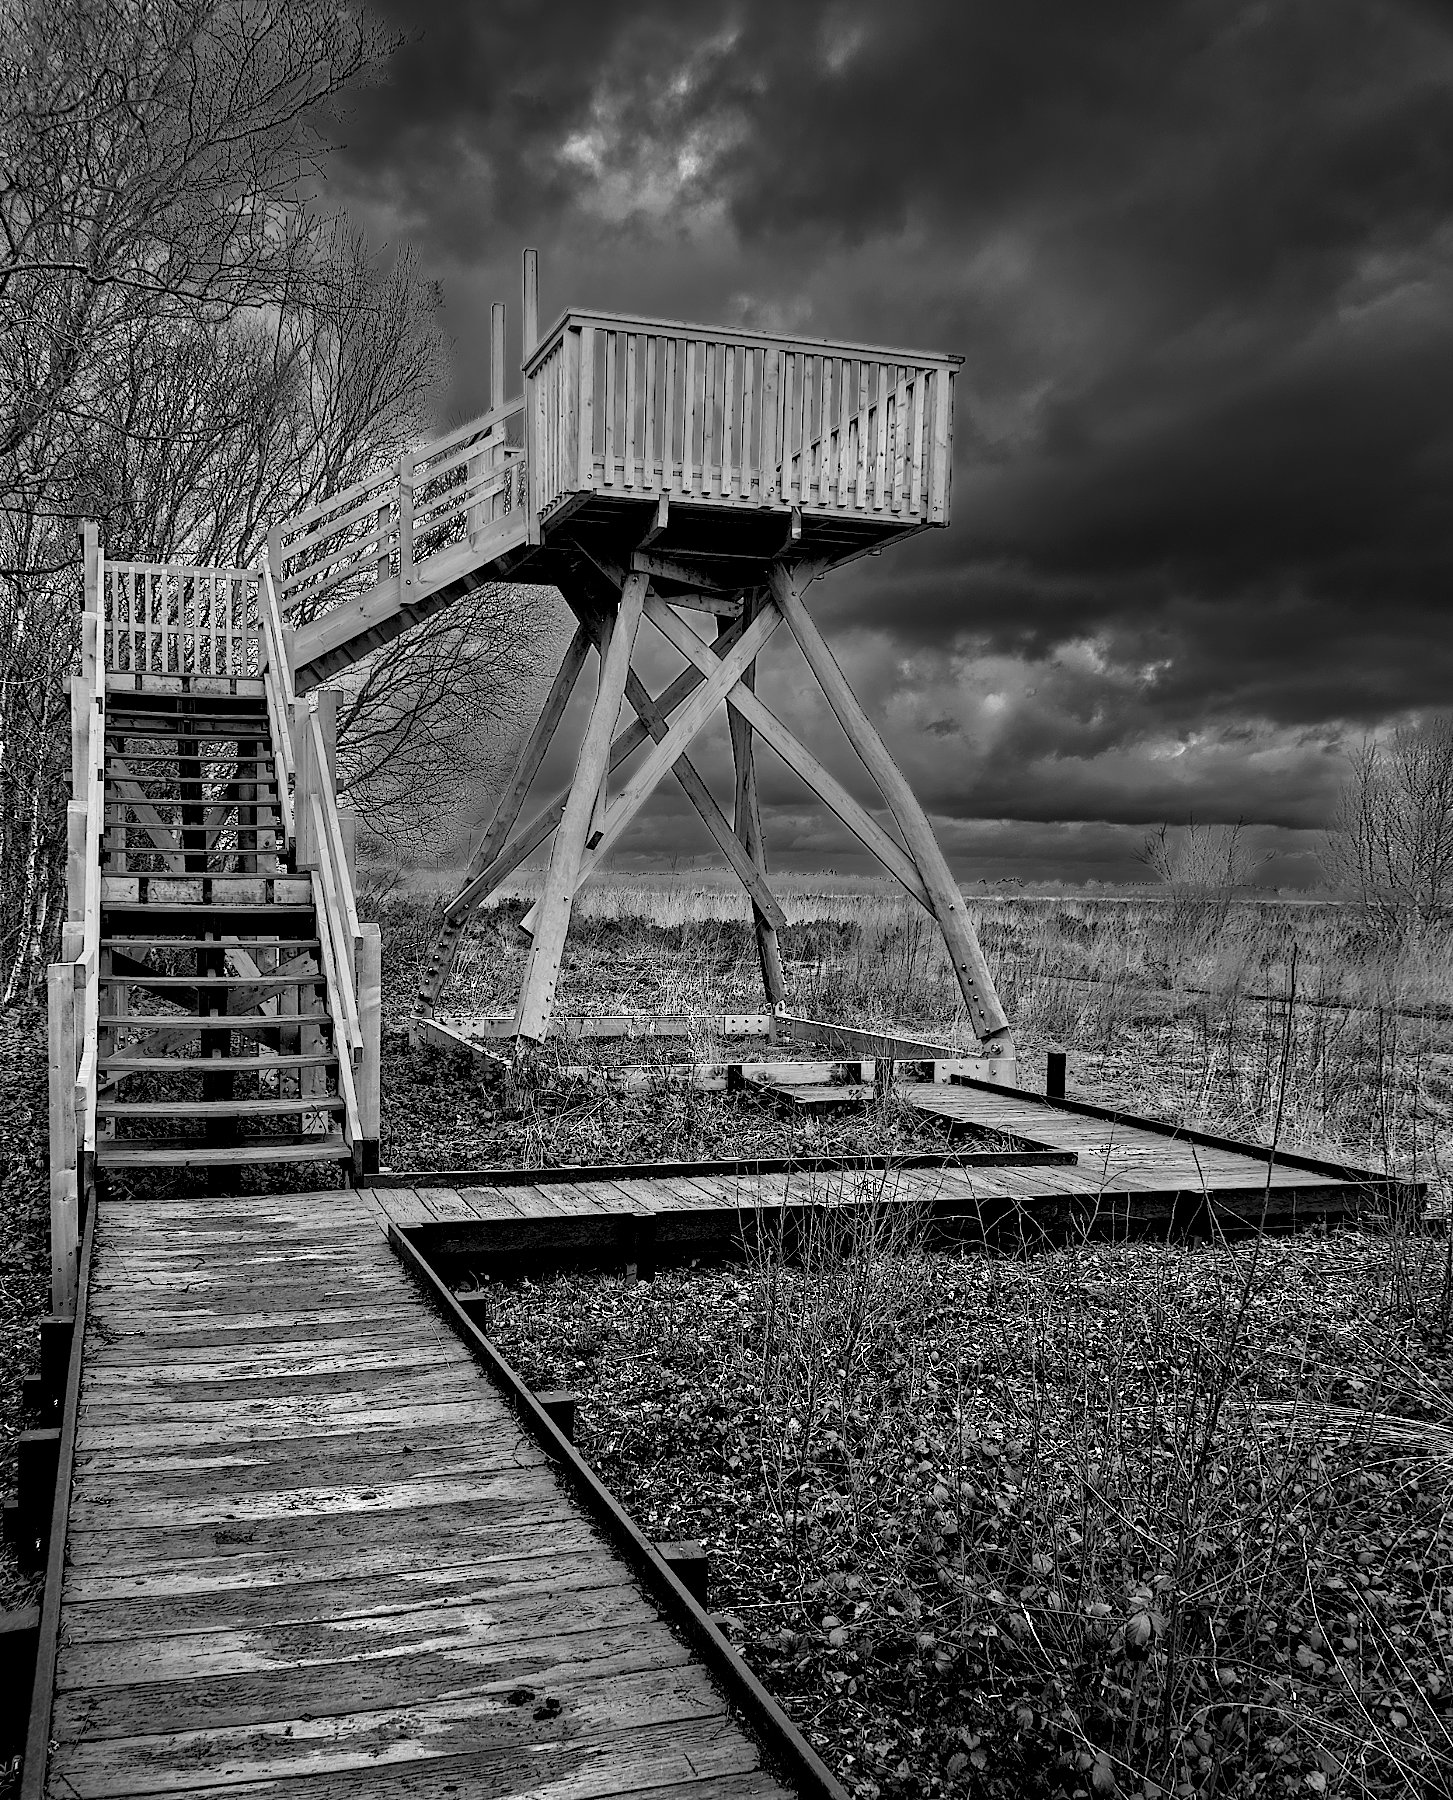
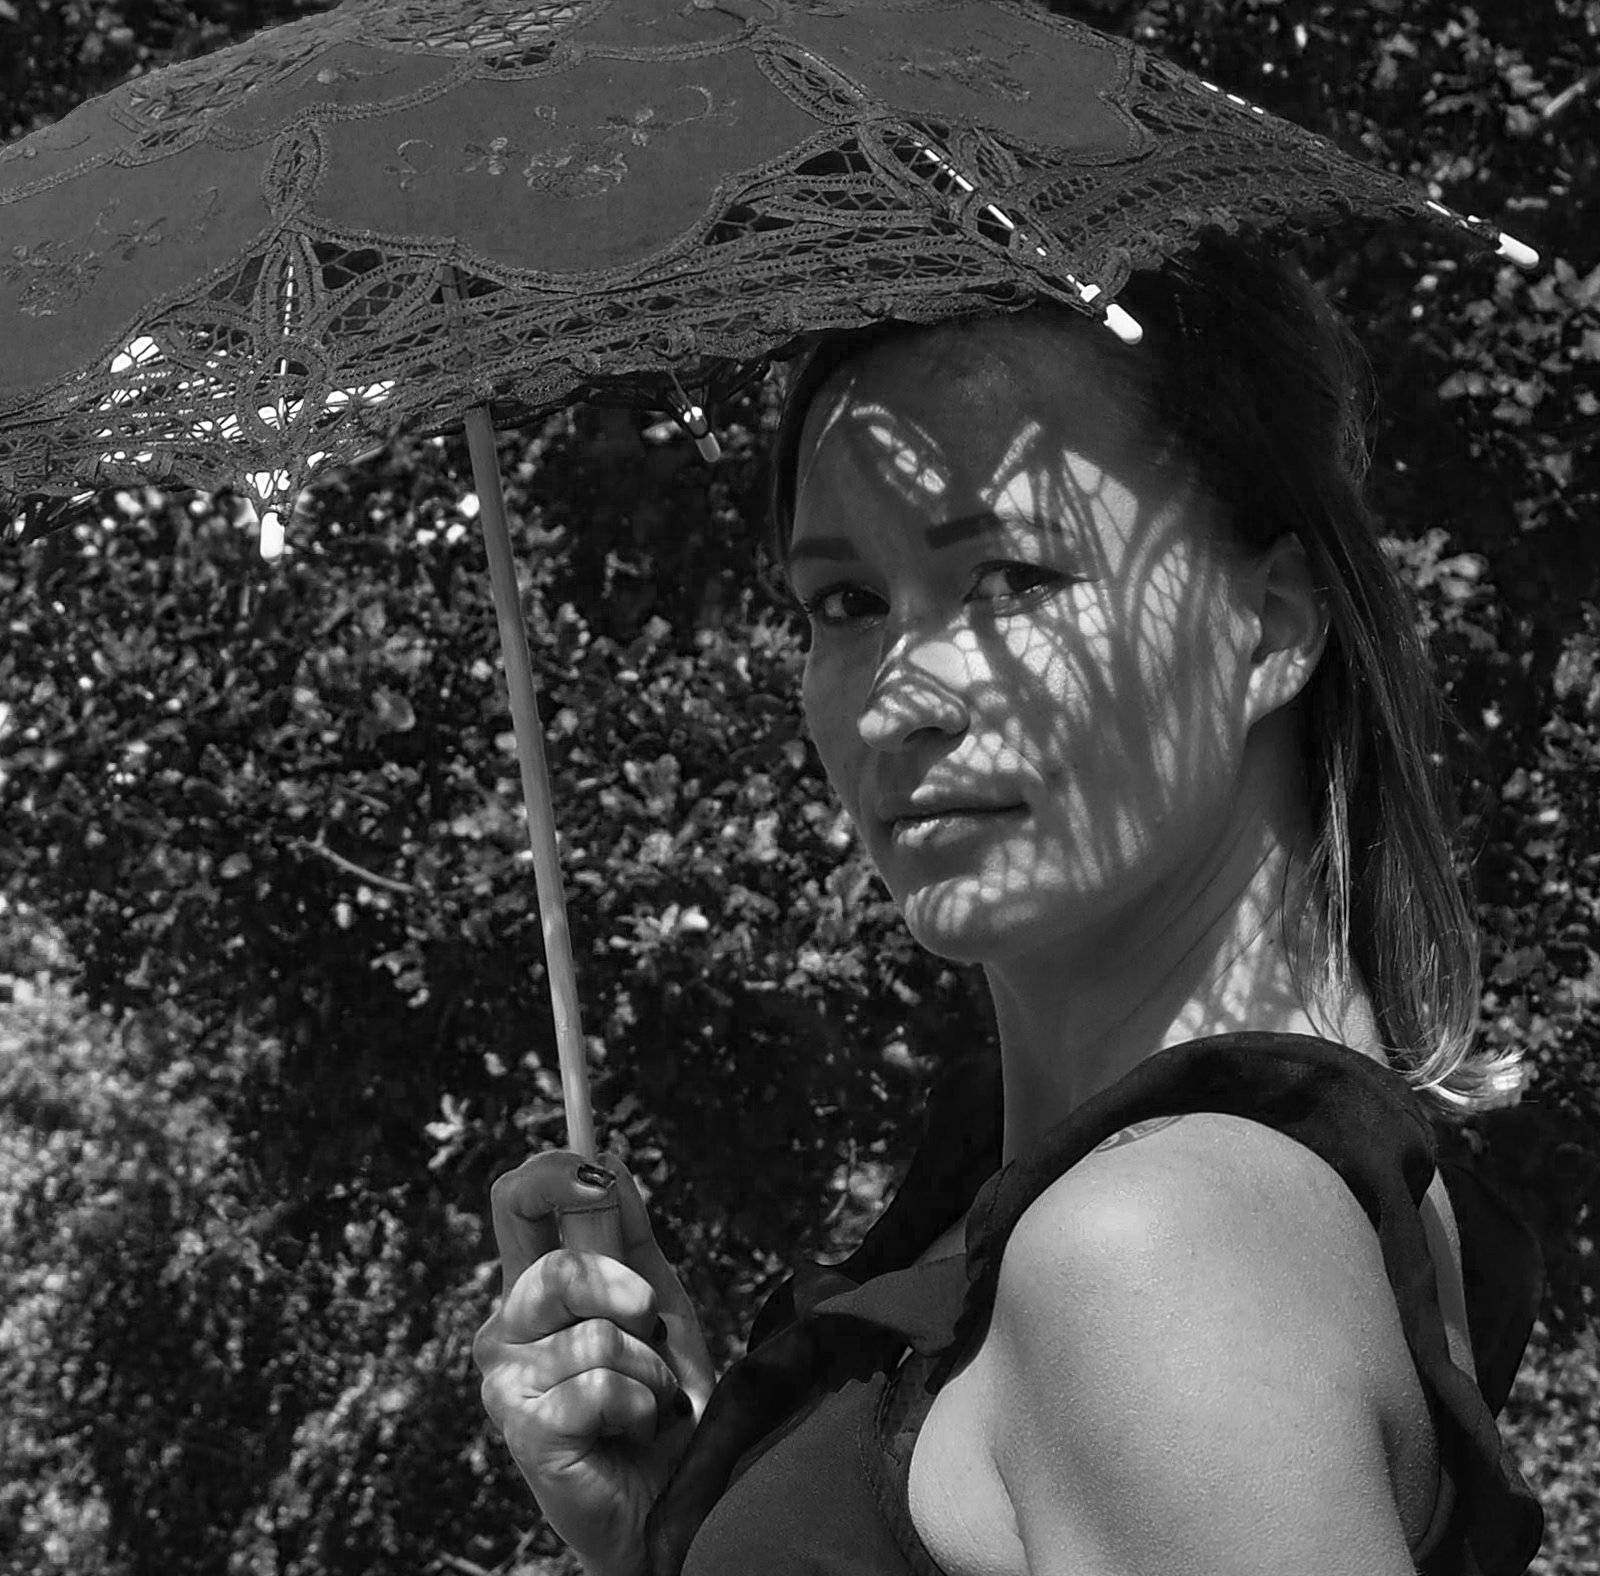
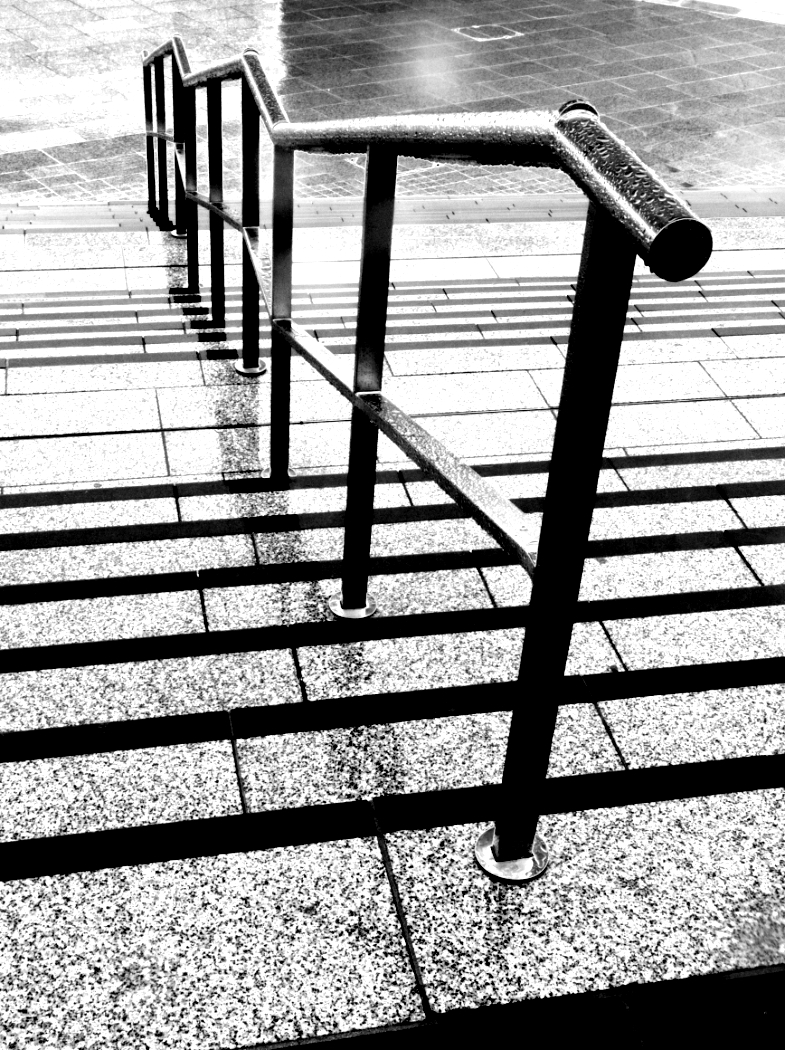
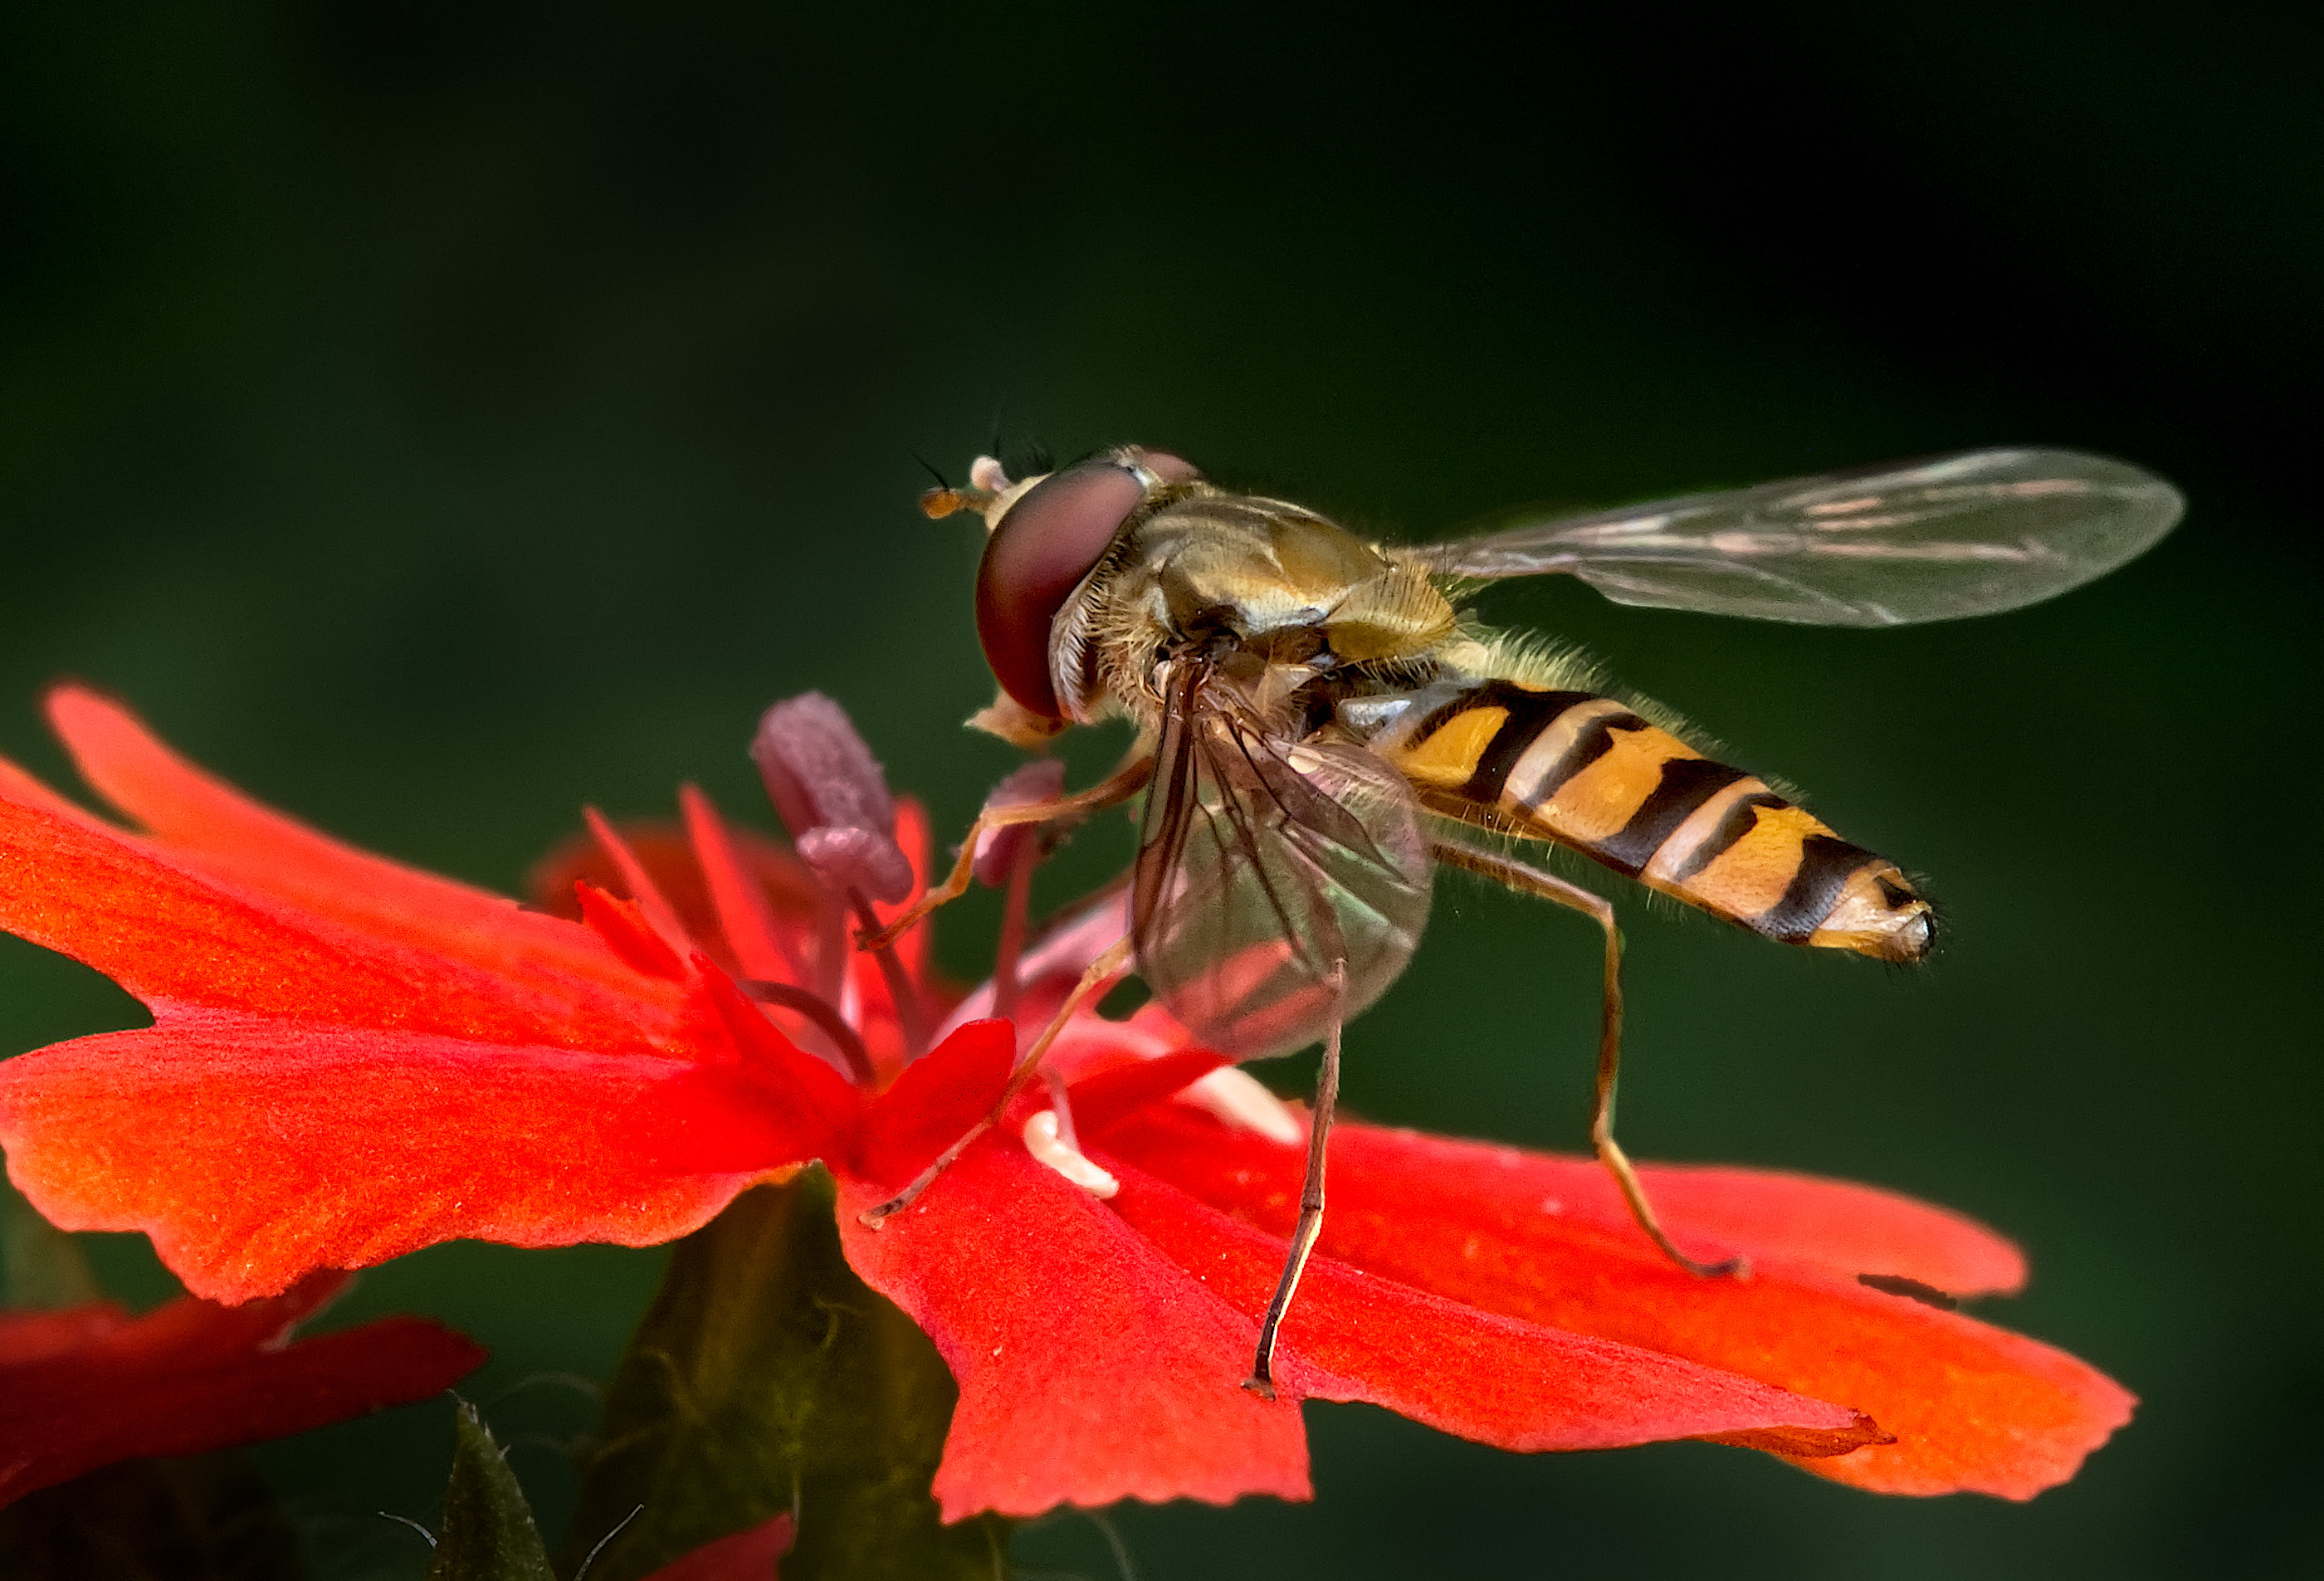
What fascinating texture and "colour". Beautifully seen and composed, I think.
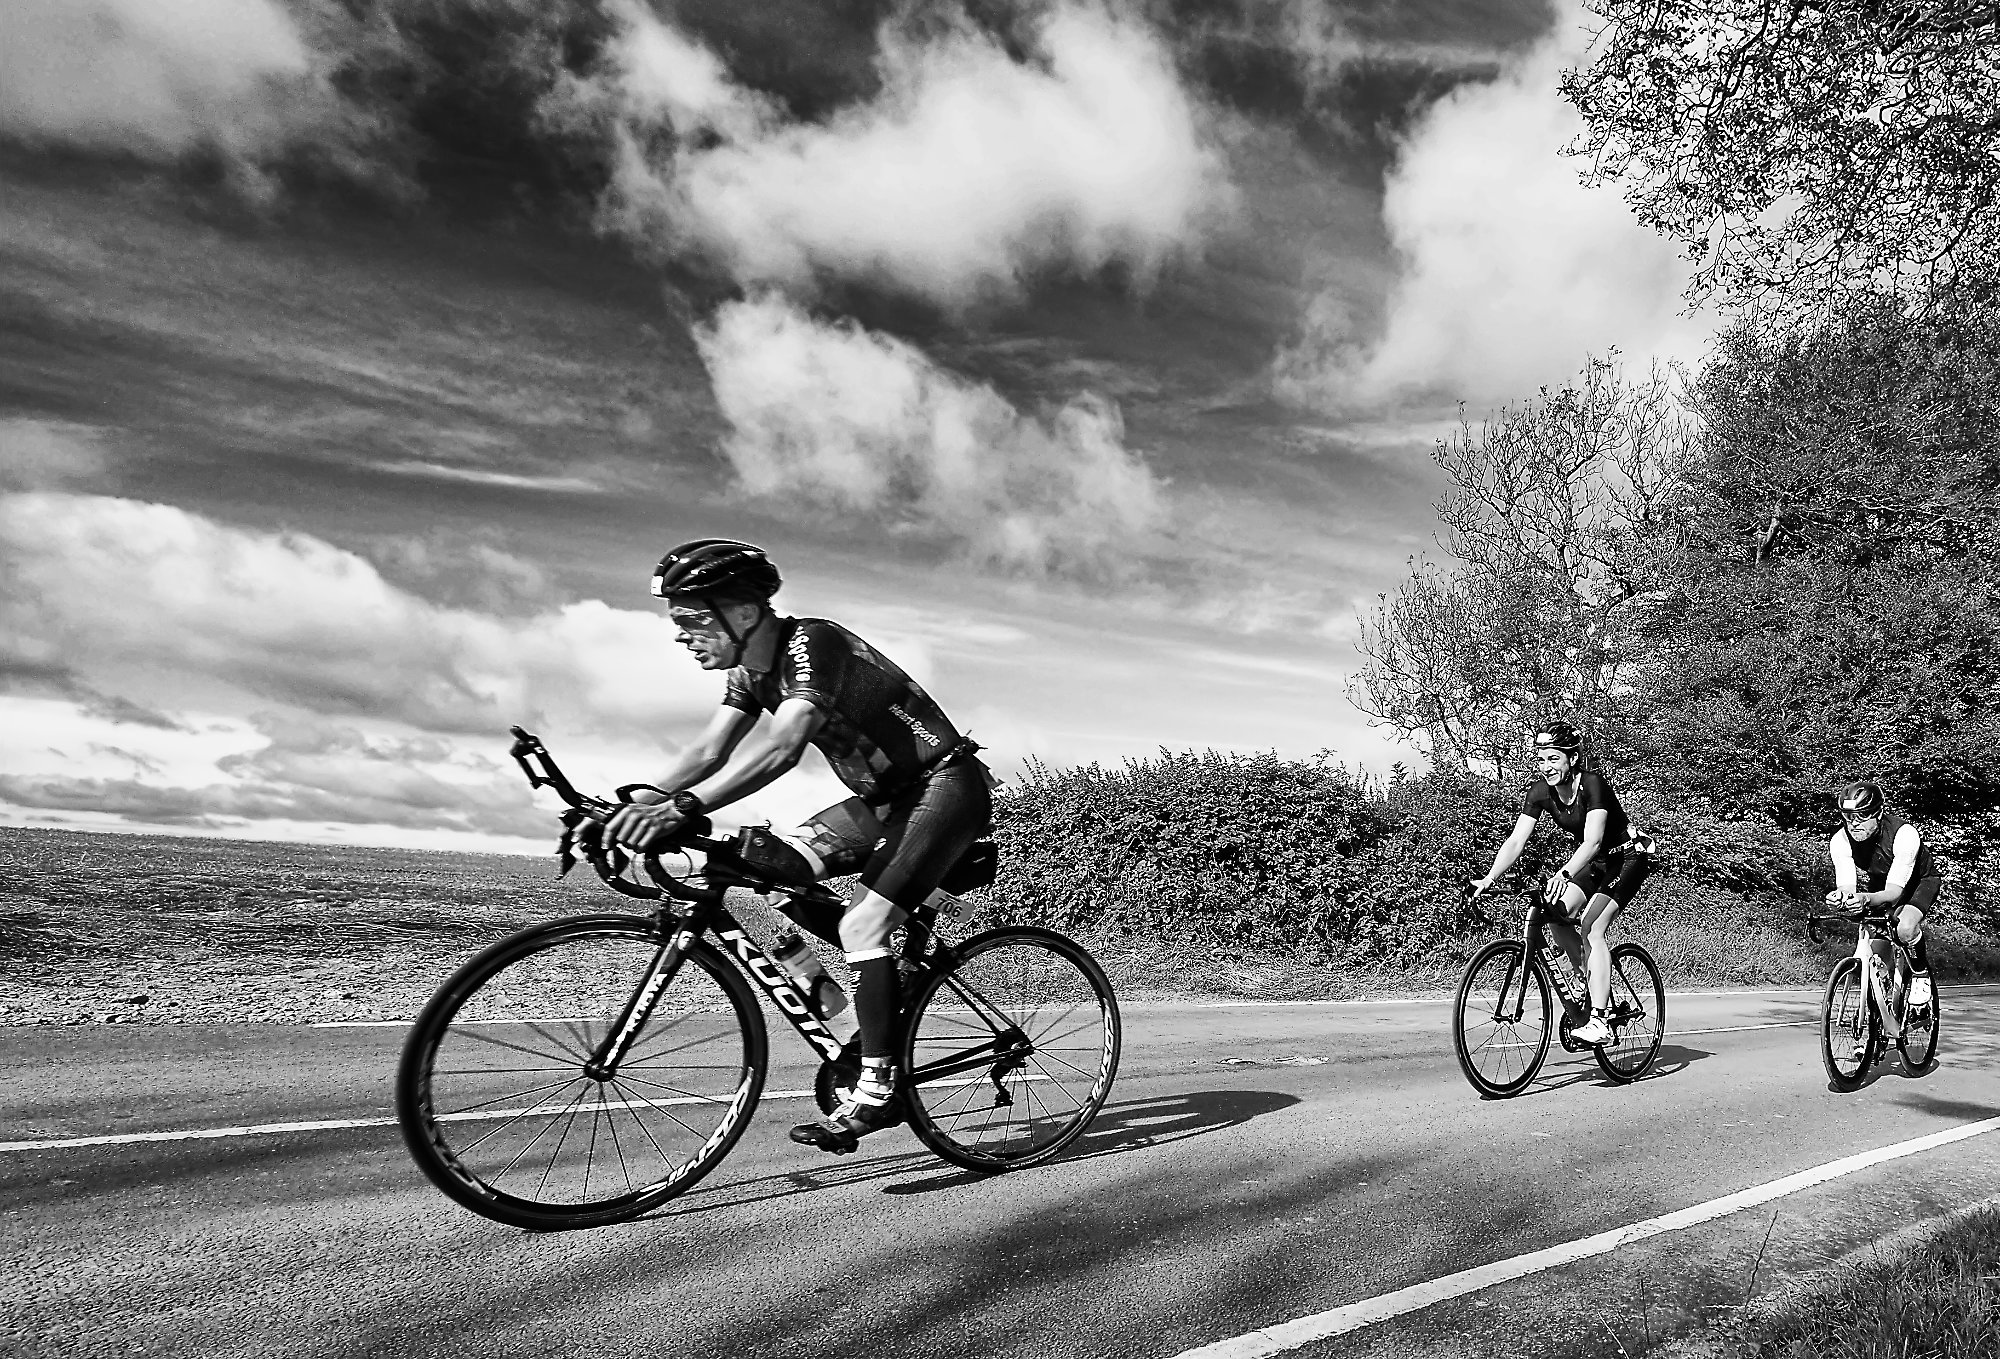
I suppose a knee-jerk reaction could be "too horizontal", as diagonals are usually seen as more compositionally pleasing than horizontals or verticals when there are options not to choose that. But I think this is an example of how to break the "rules" to great effect. I love it. |
Dec 10th |
| 64 |
Dec 21 |
Comment |
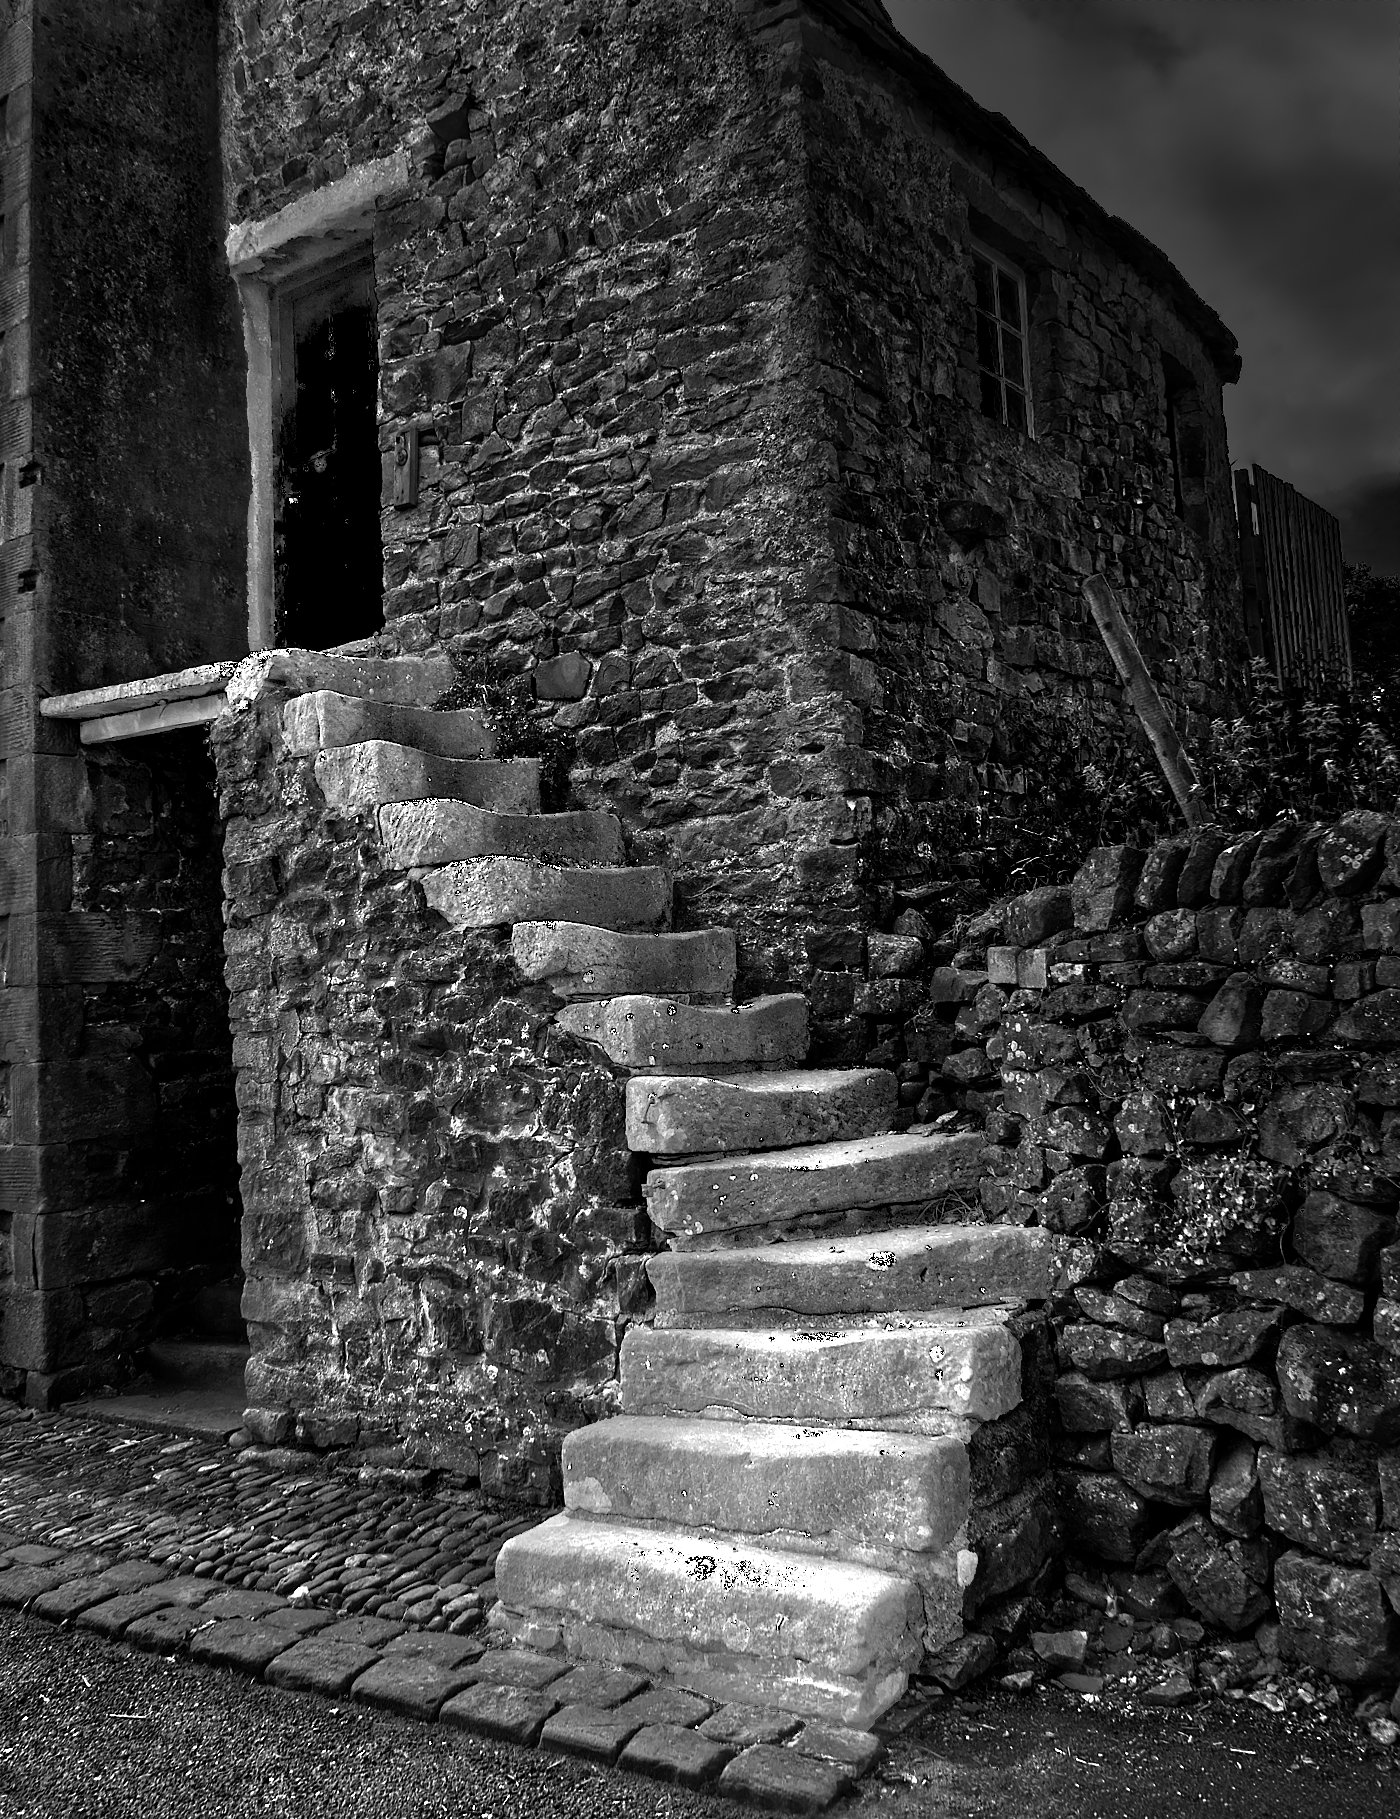
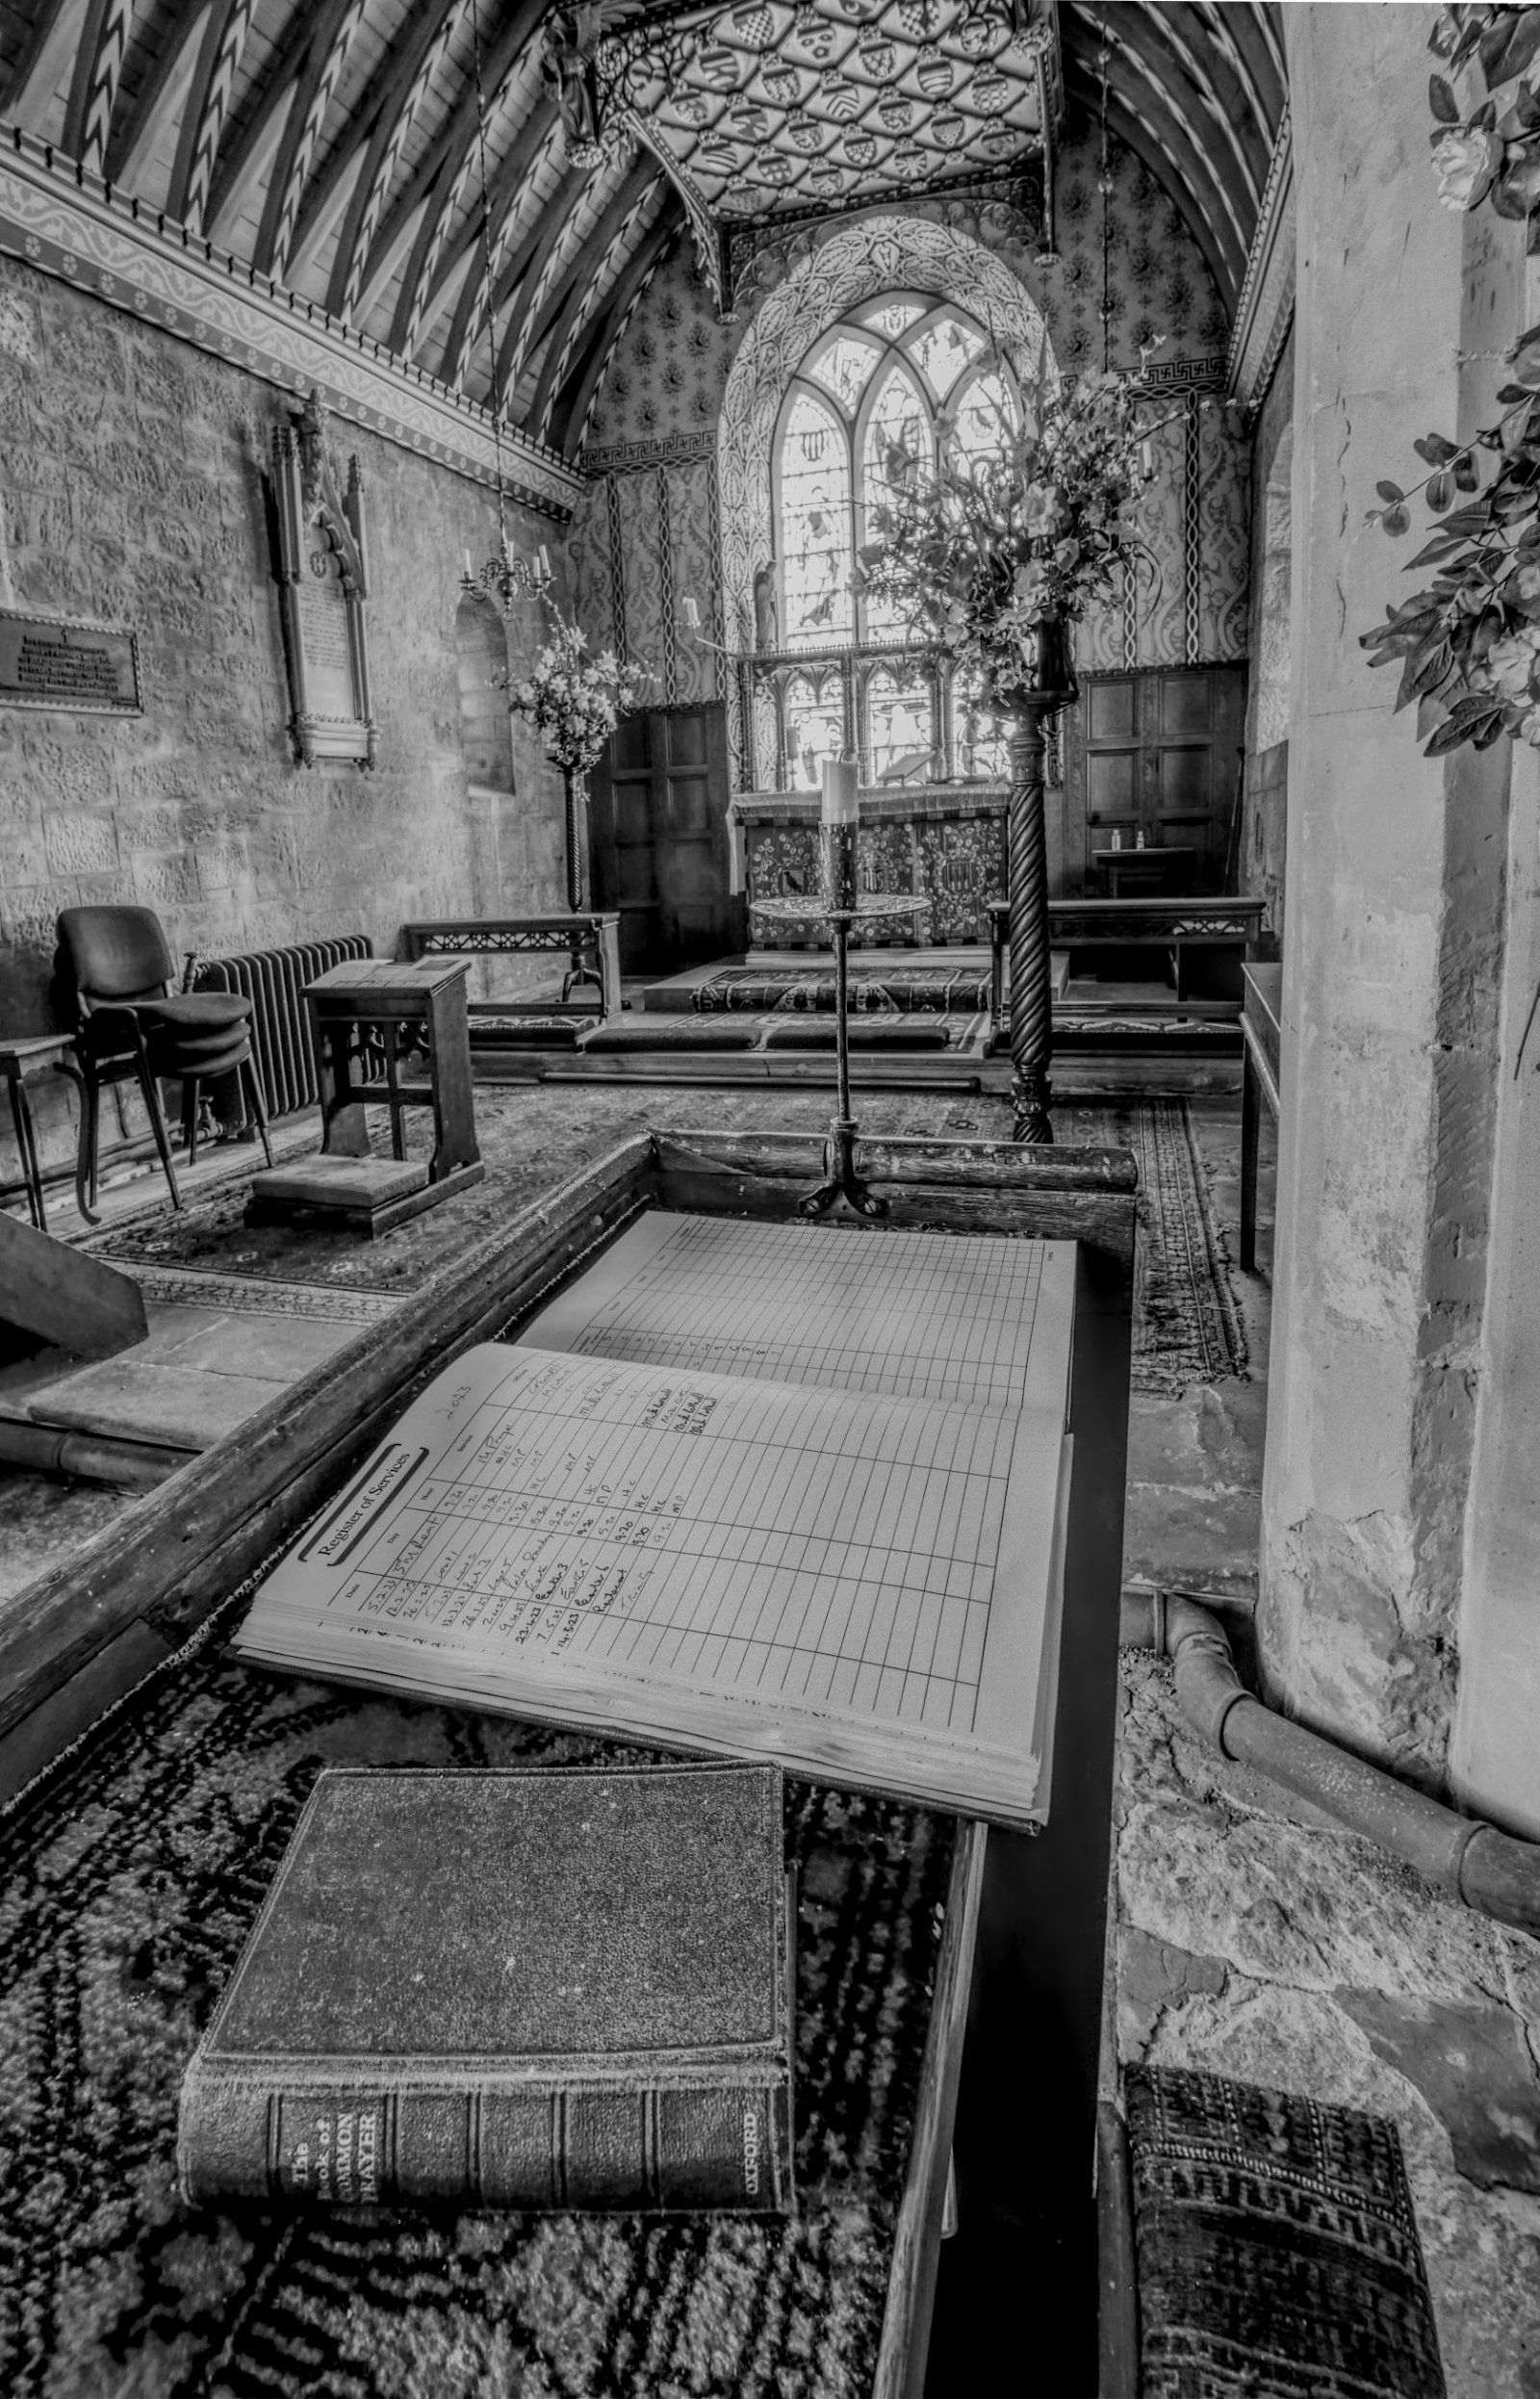
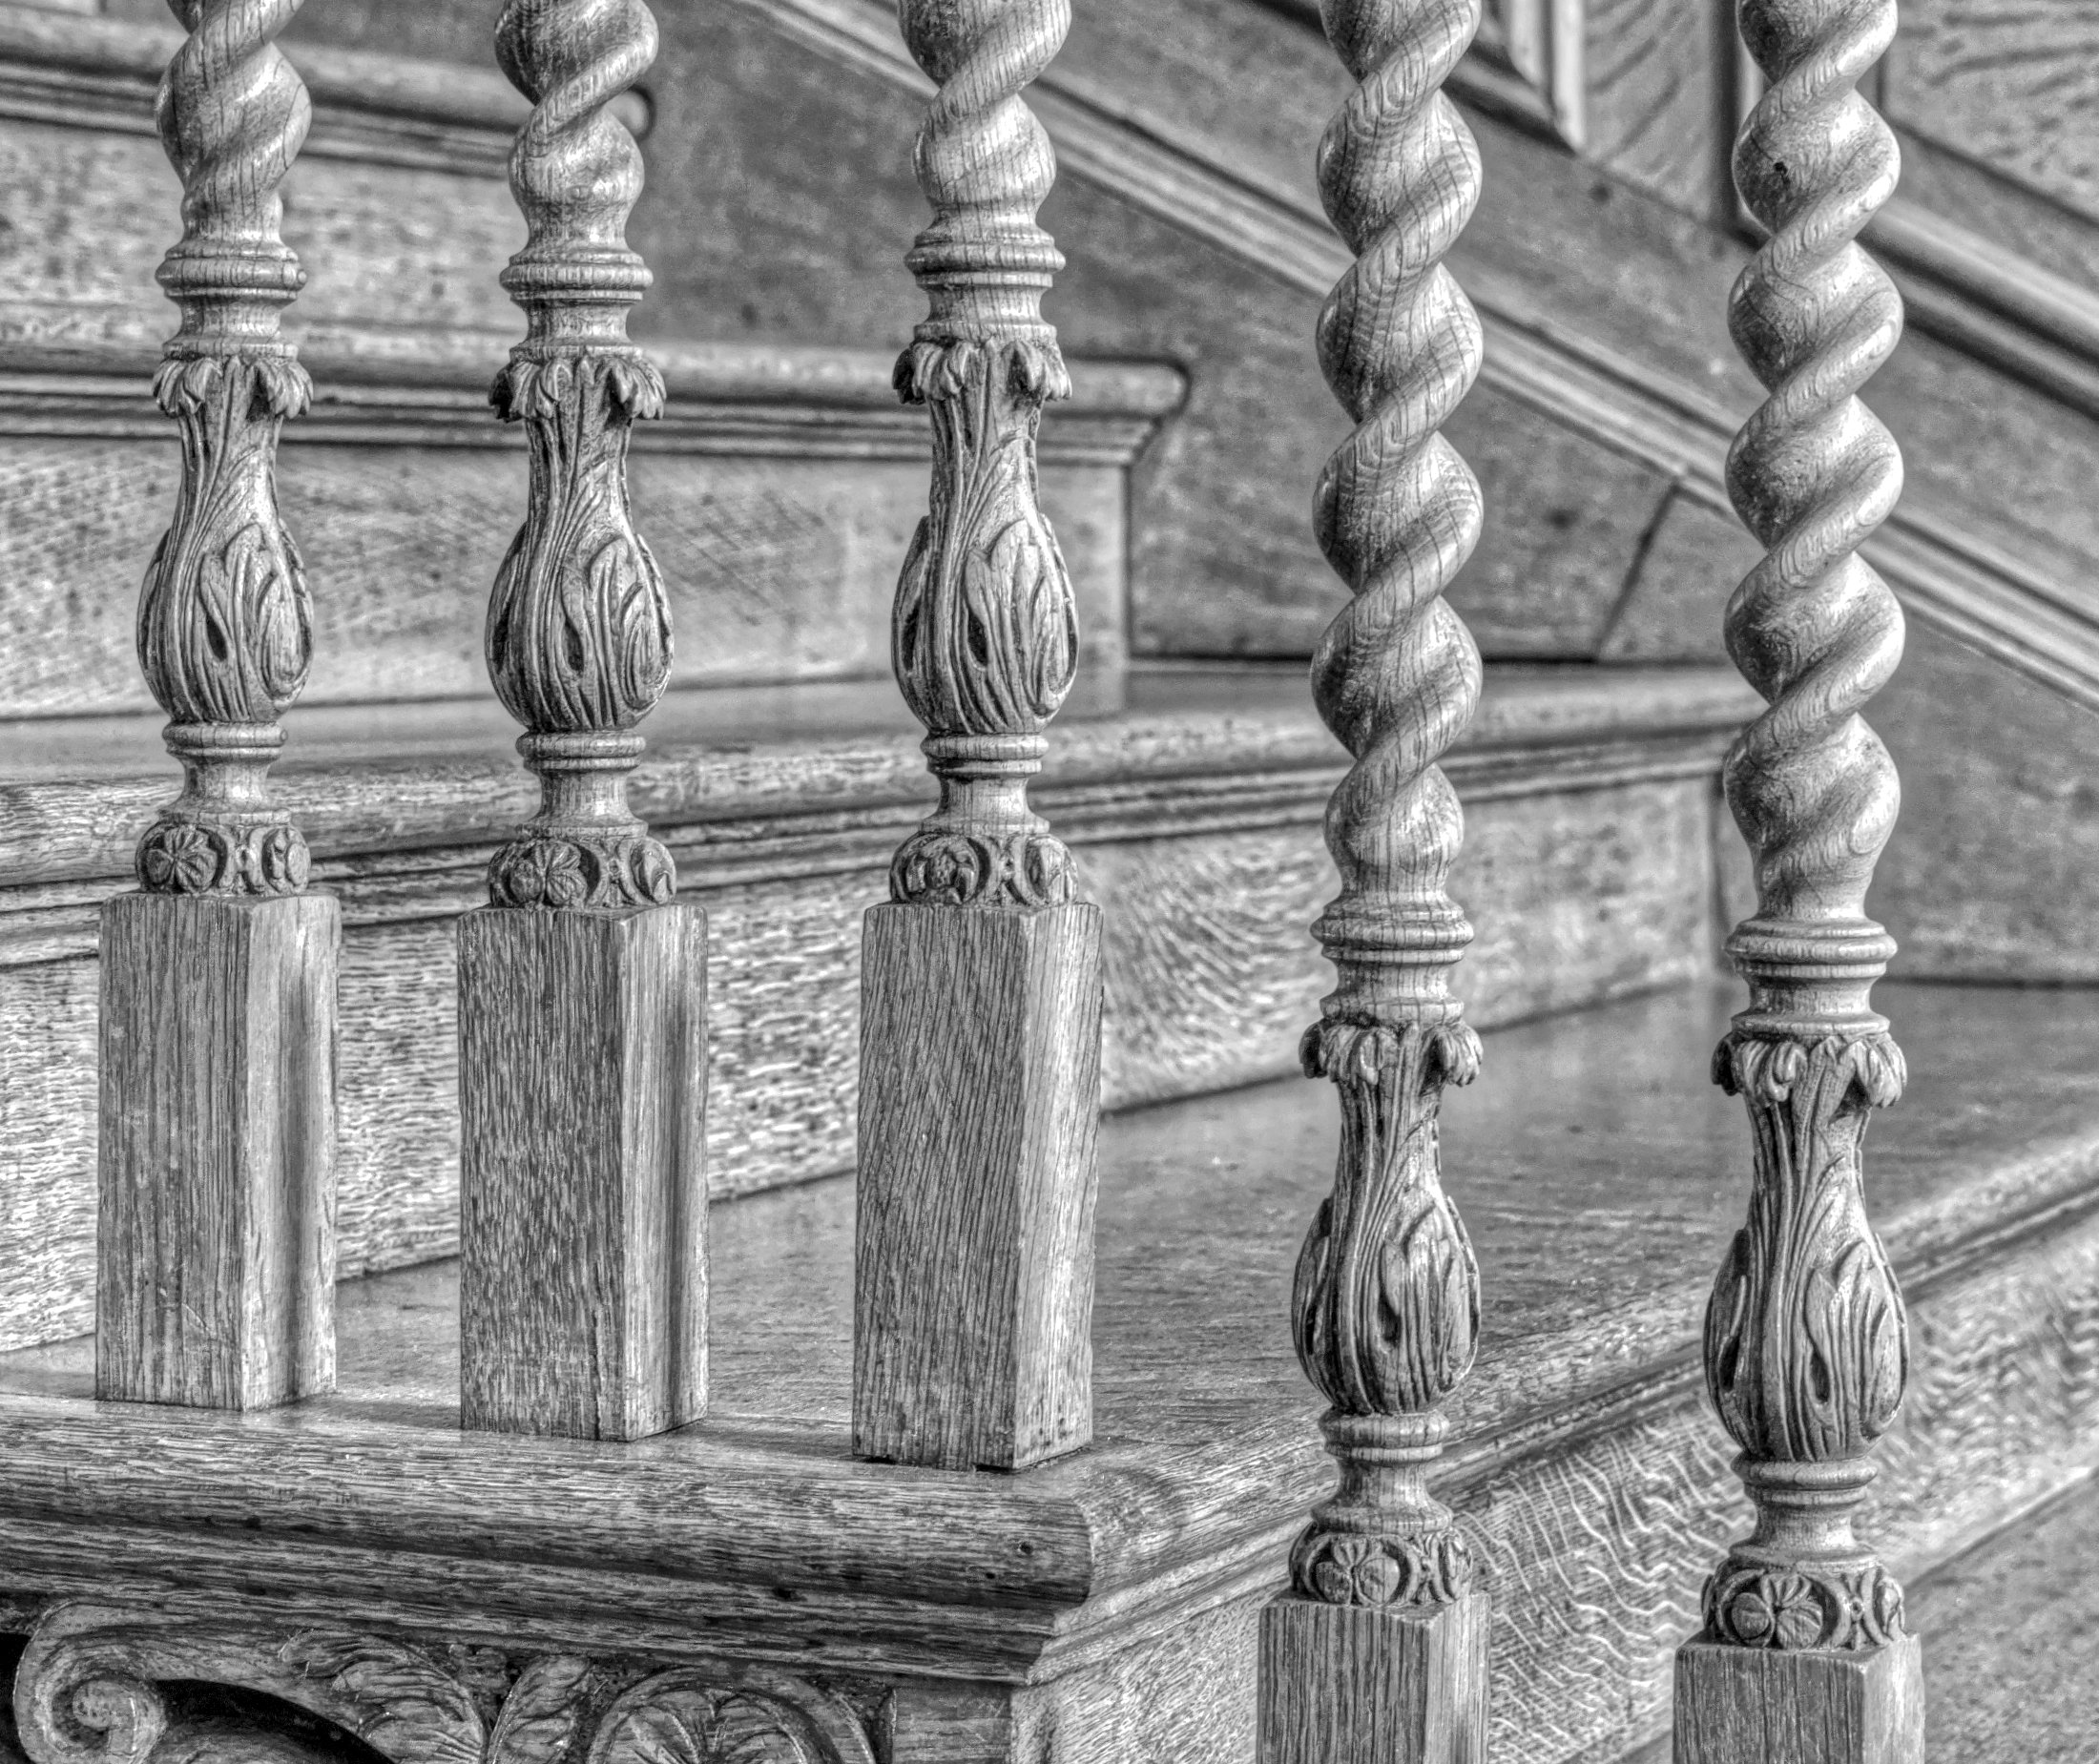
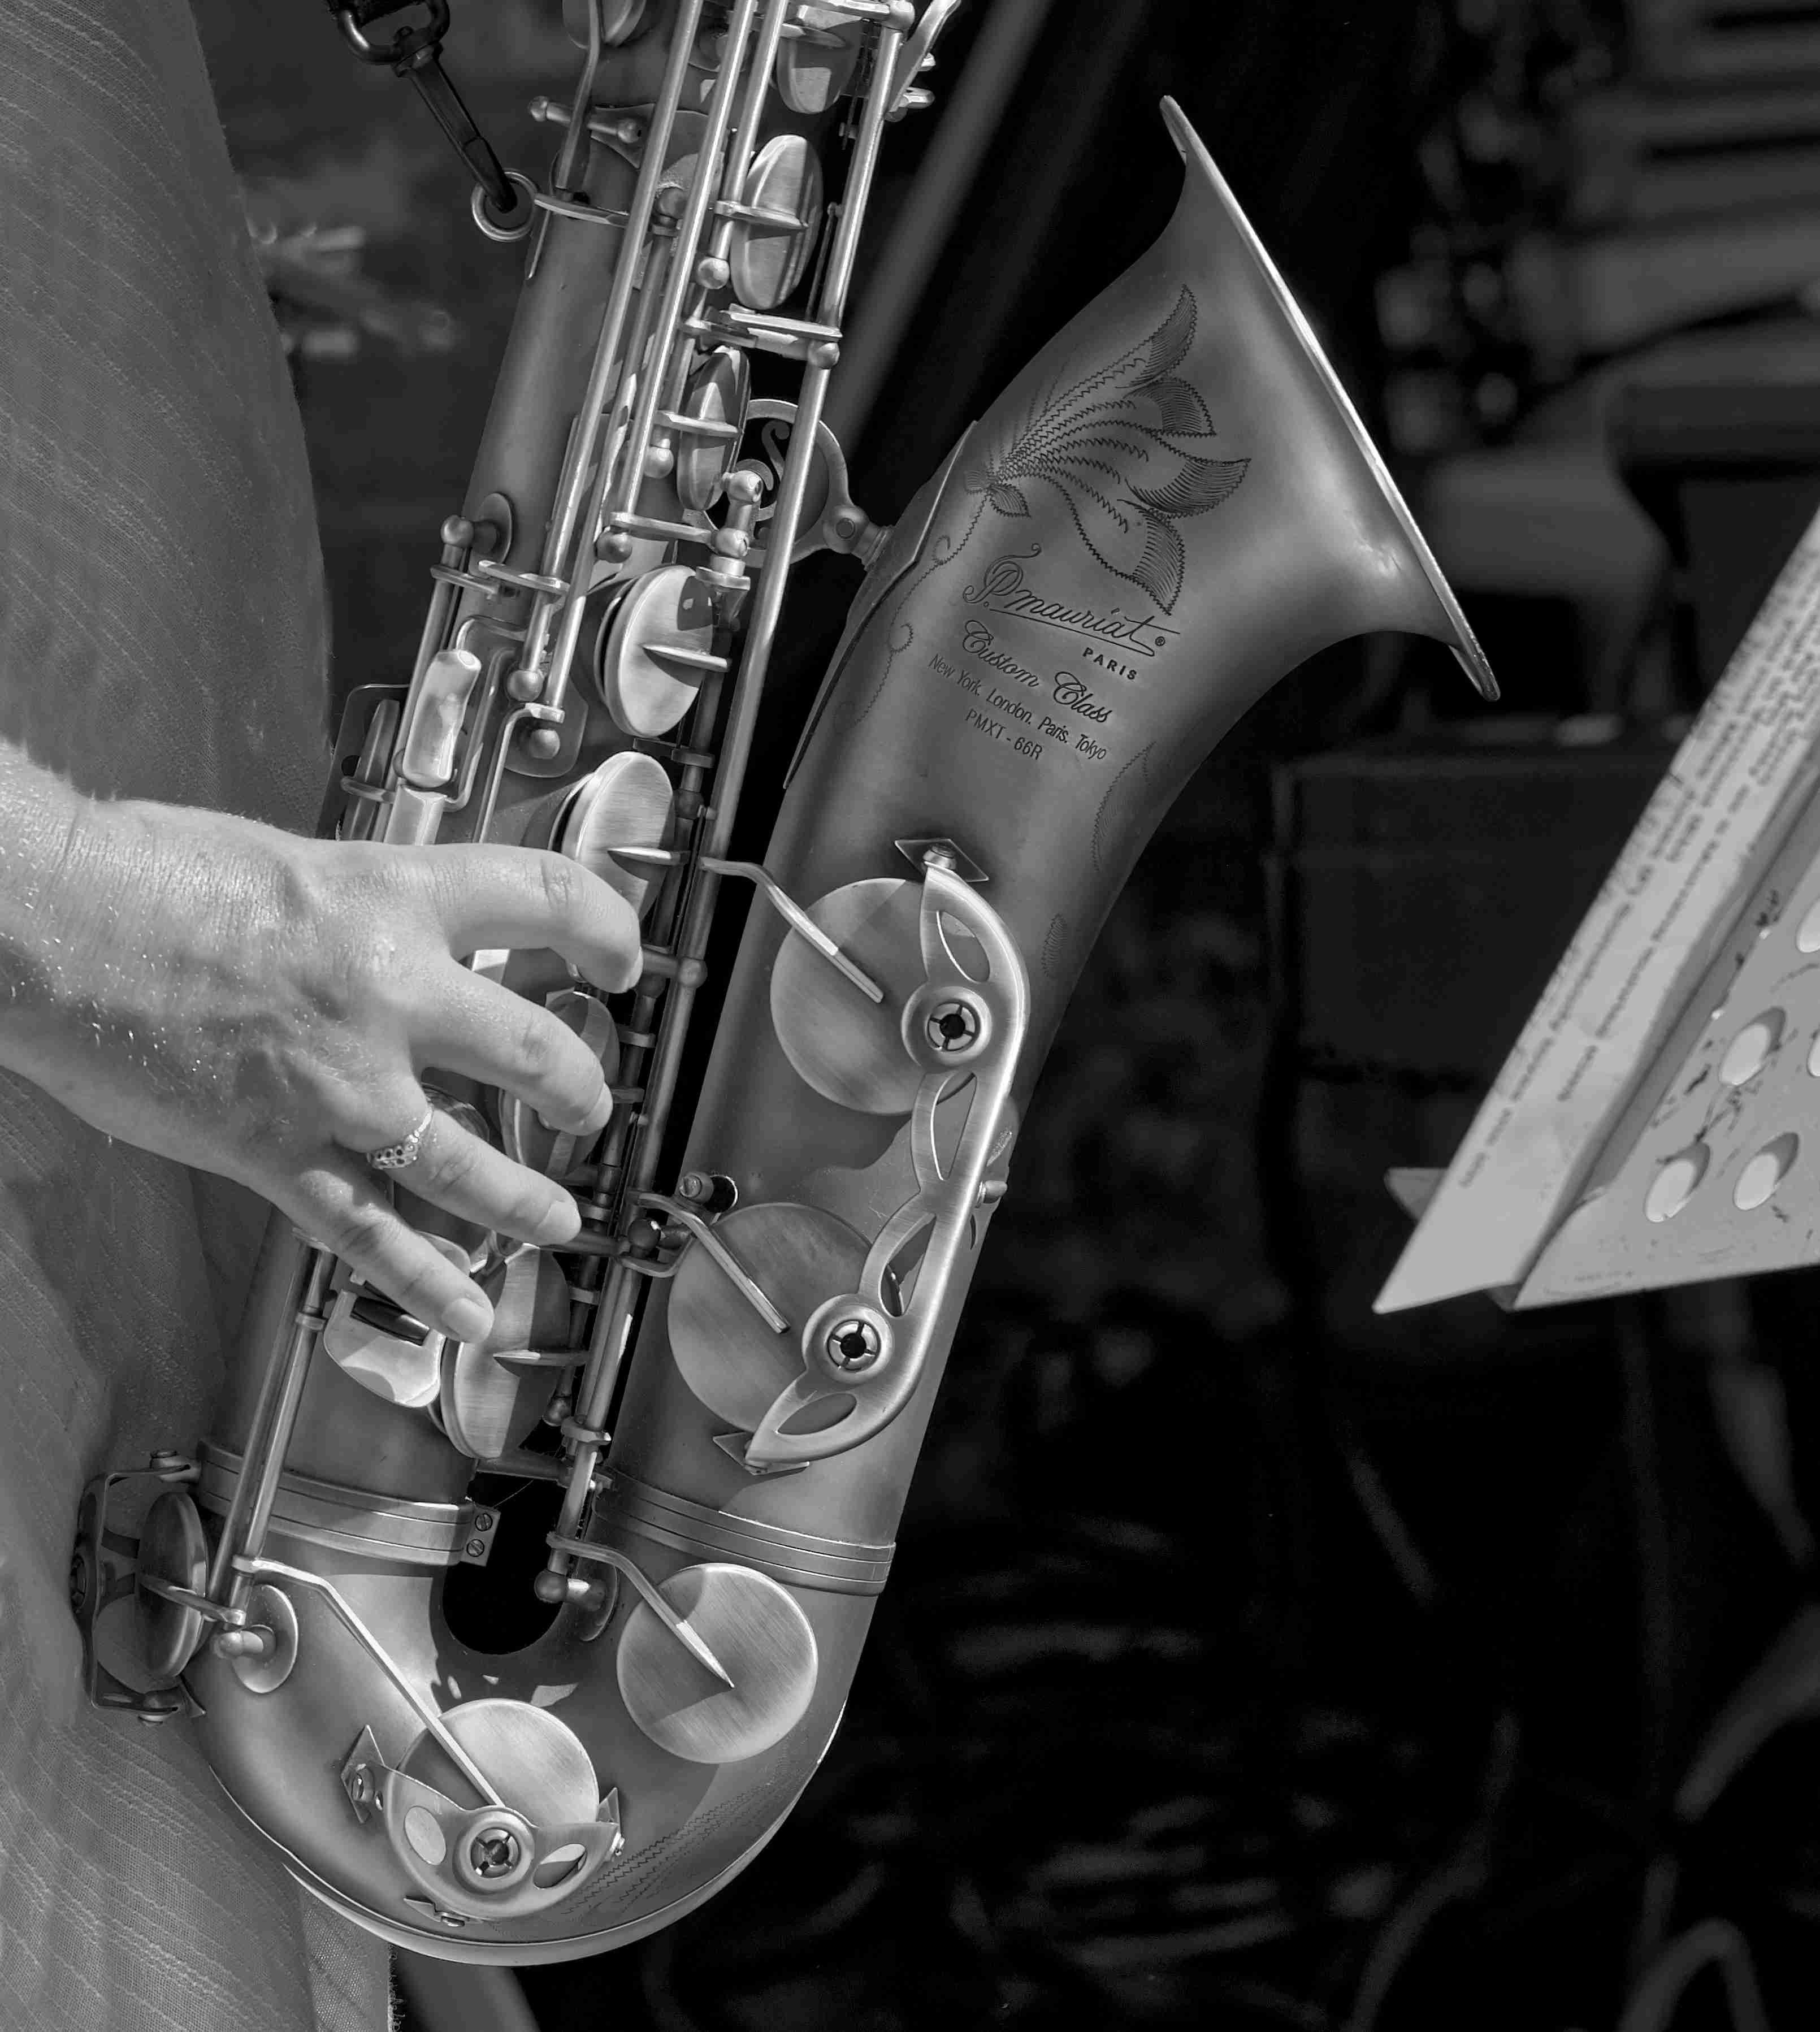
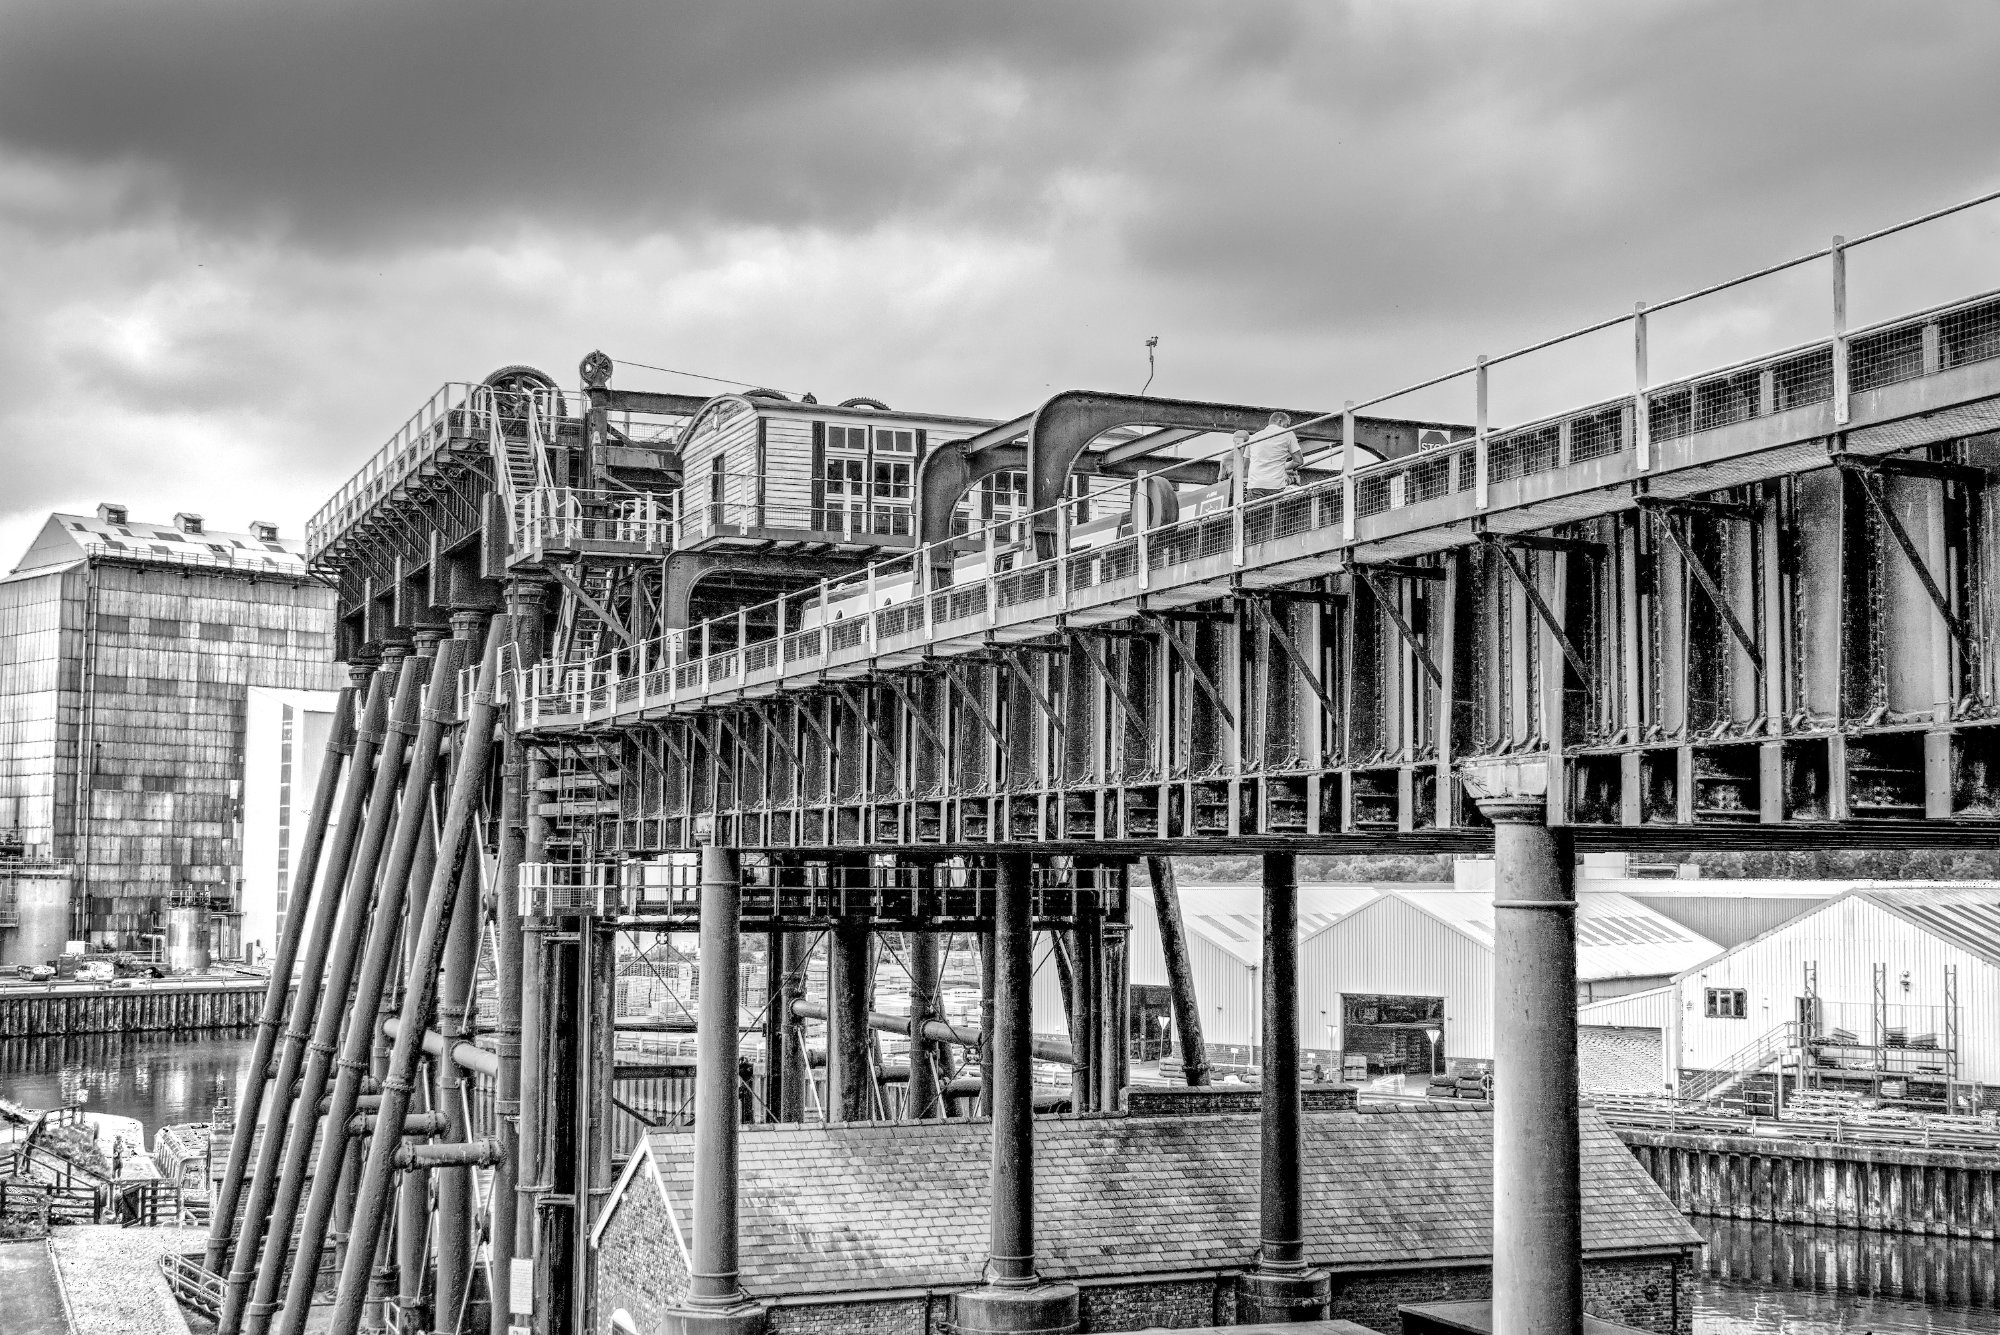
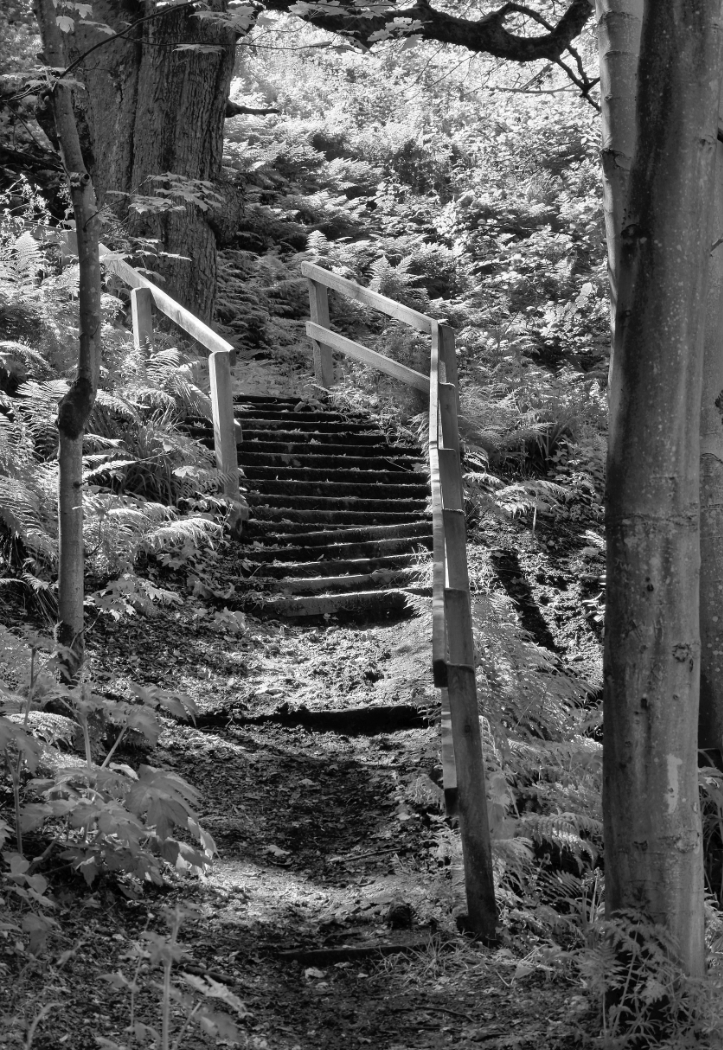
Yes, I think the attirbutes you like are there, loud and clear! The background behind the stairs isn't exactly a rivetting subject I think, but you couldn't do anything about that. The graphic makes up for that, and I think it's very attractive overall. The mid tones have converted well. I think I would clone out that notice under the stair, it's a trifle distracting for me. |
Dec 10th |
| 64 |
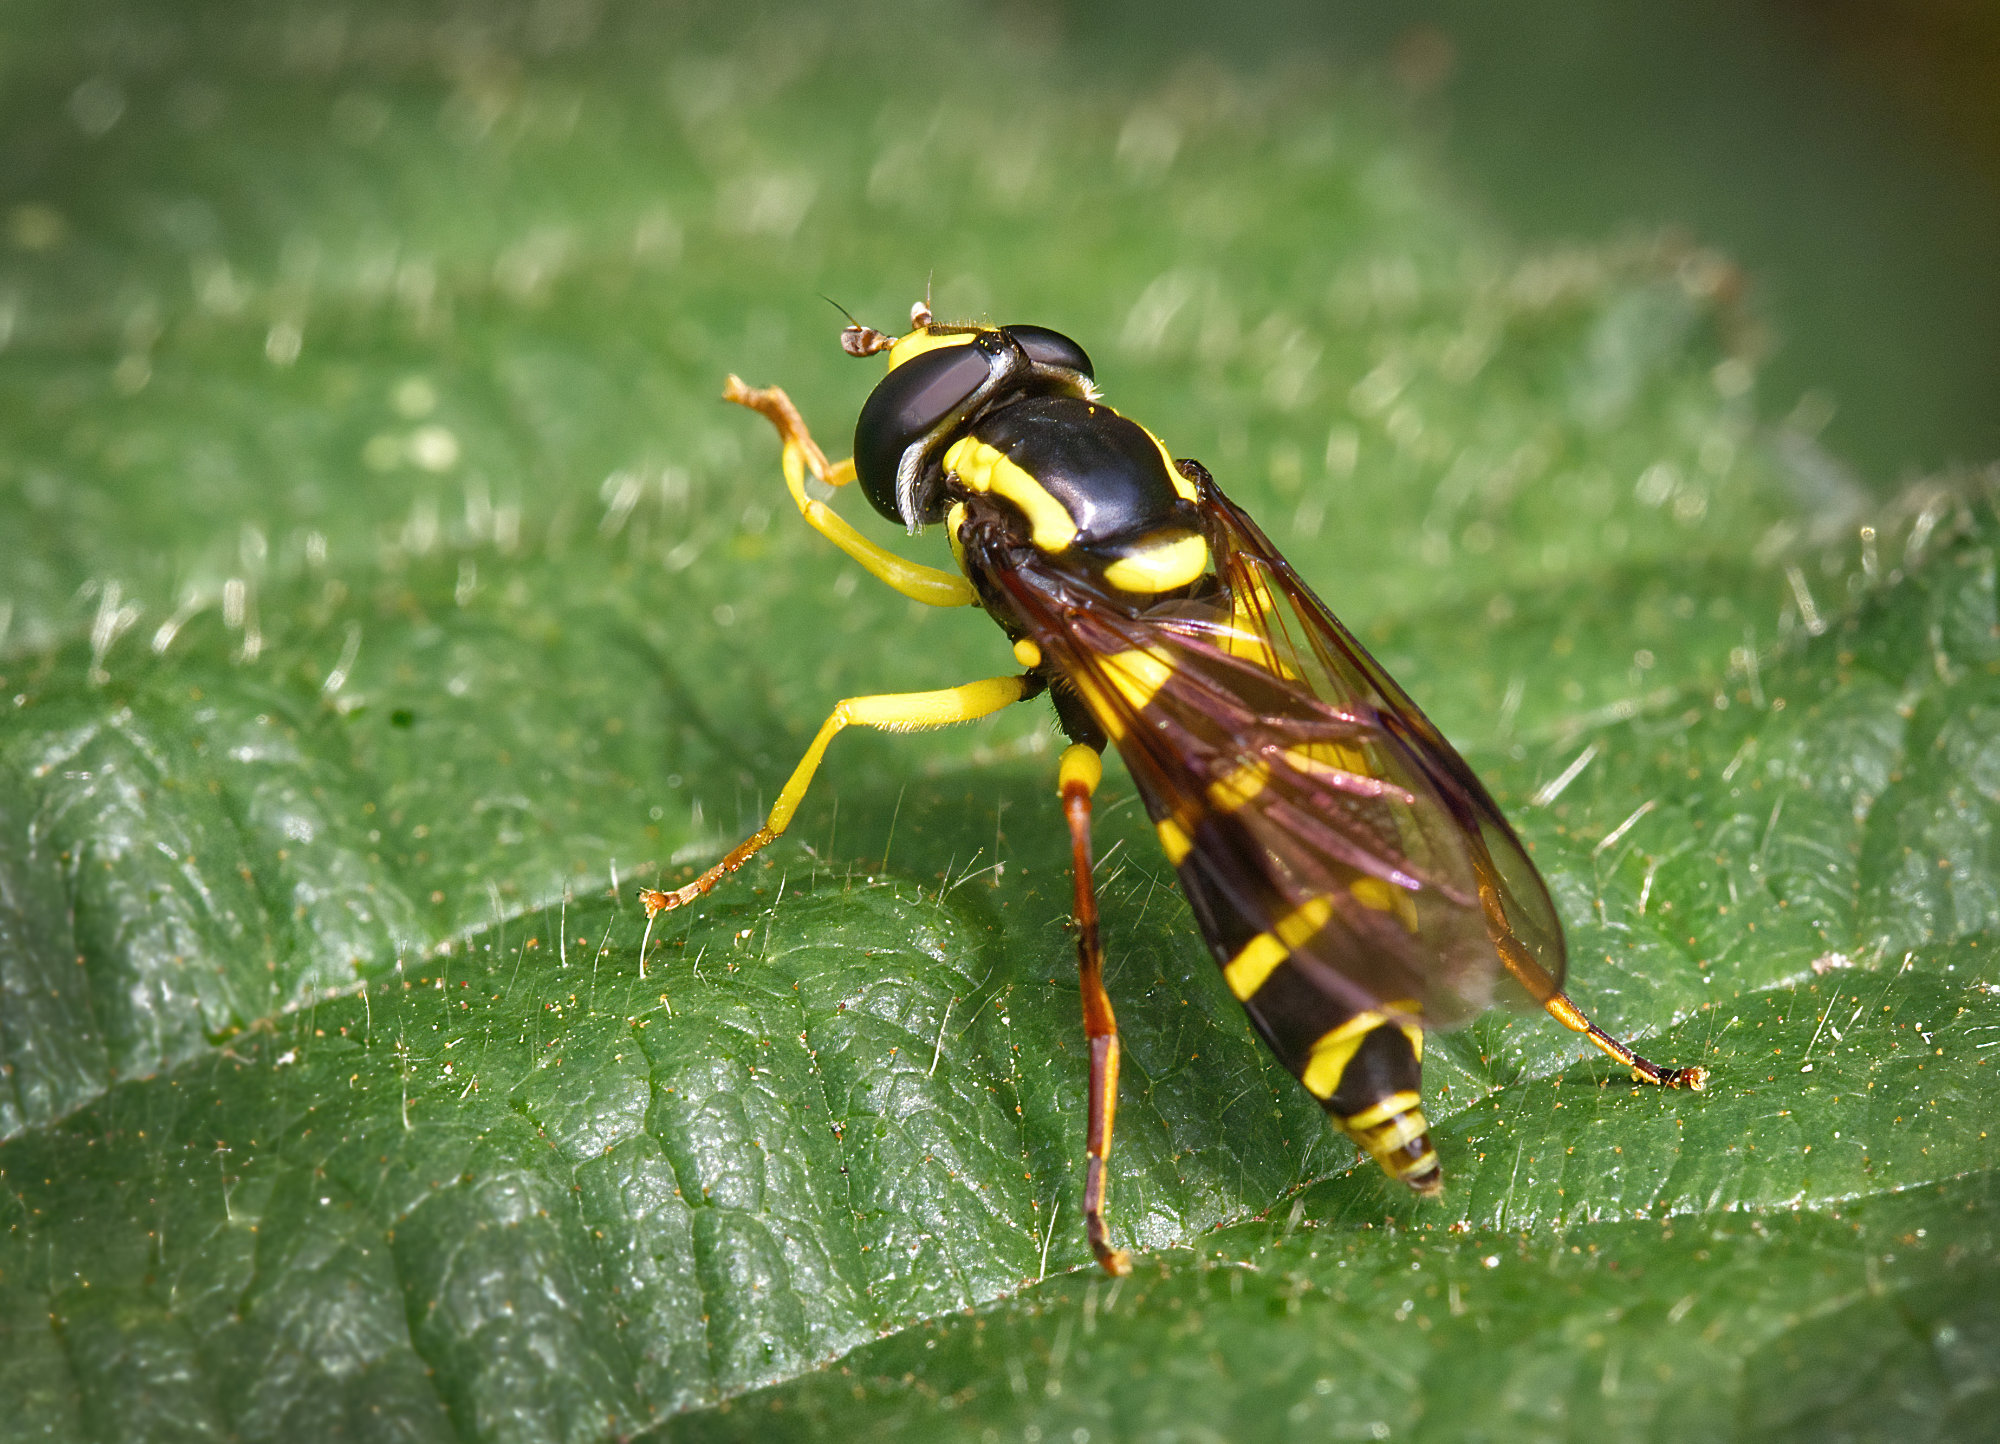
Dec 21 |
Comment |
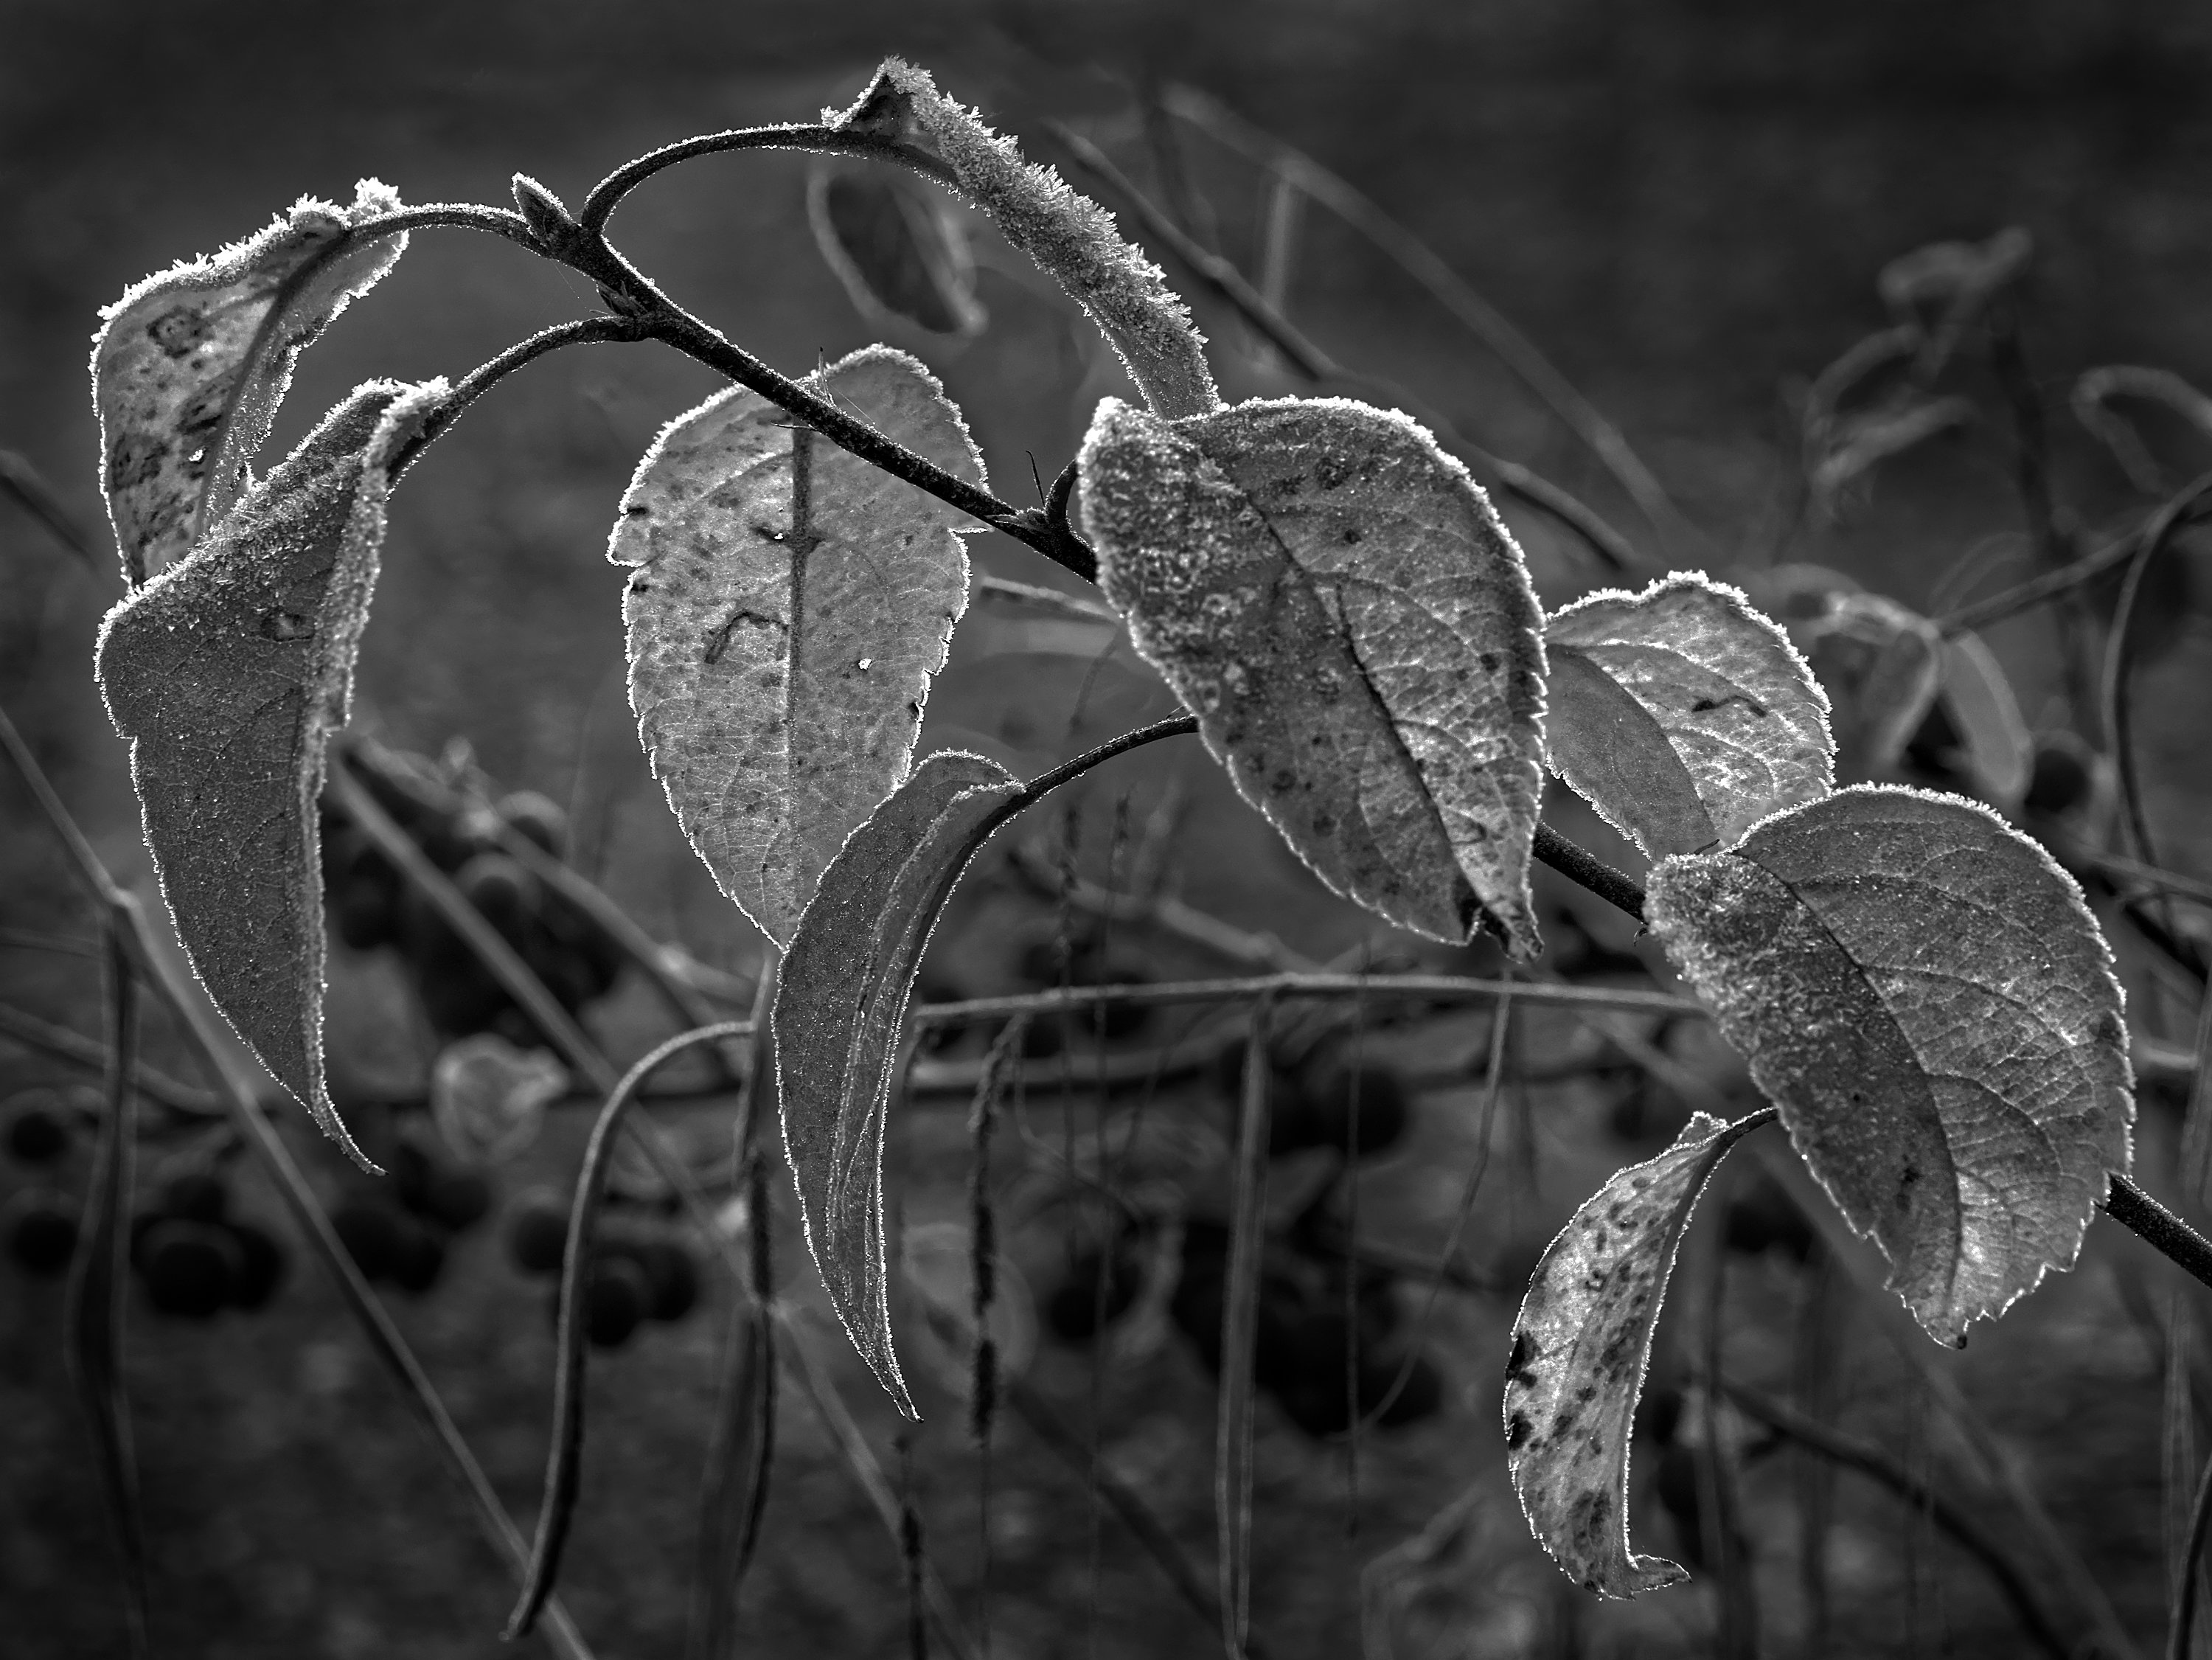
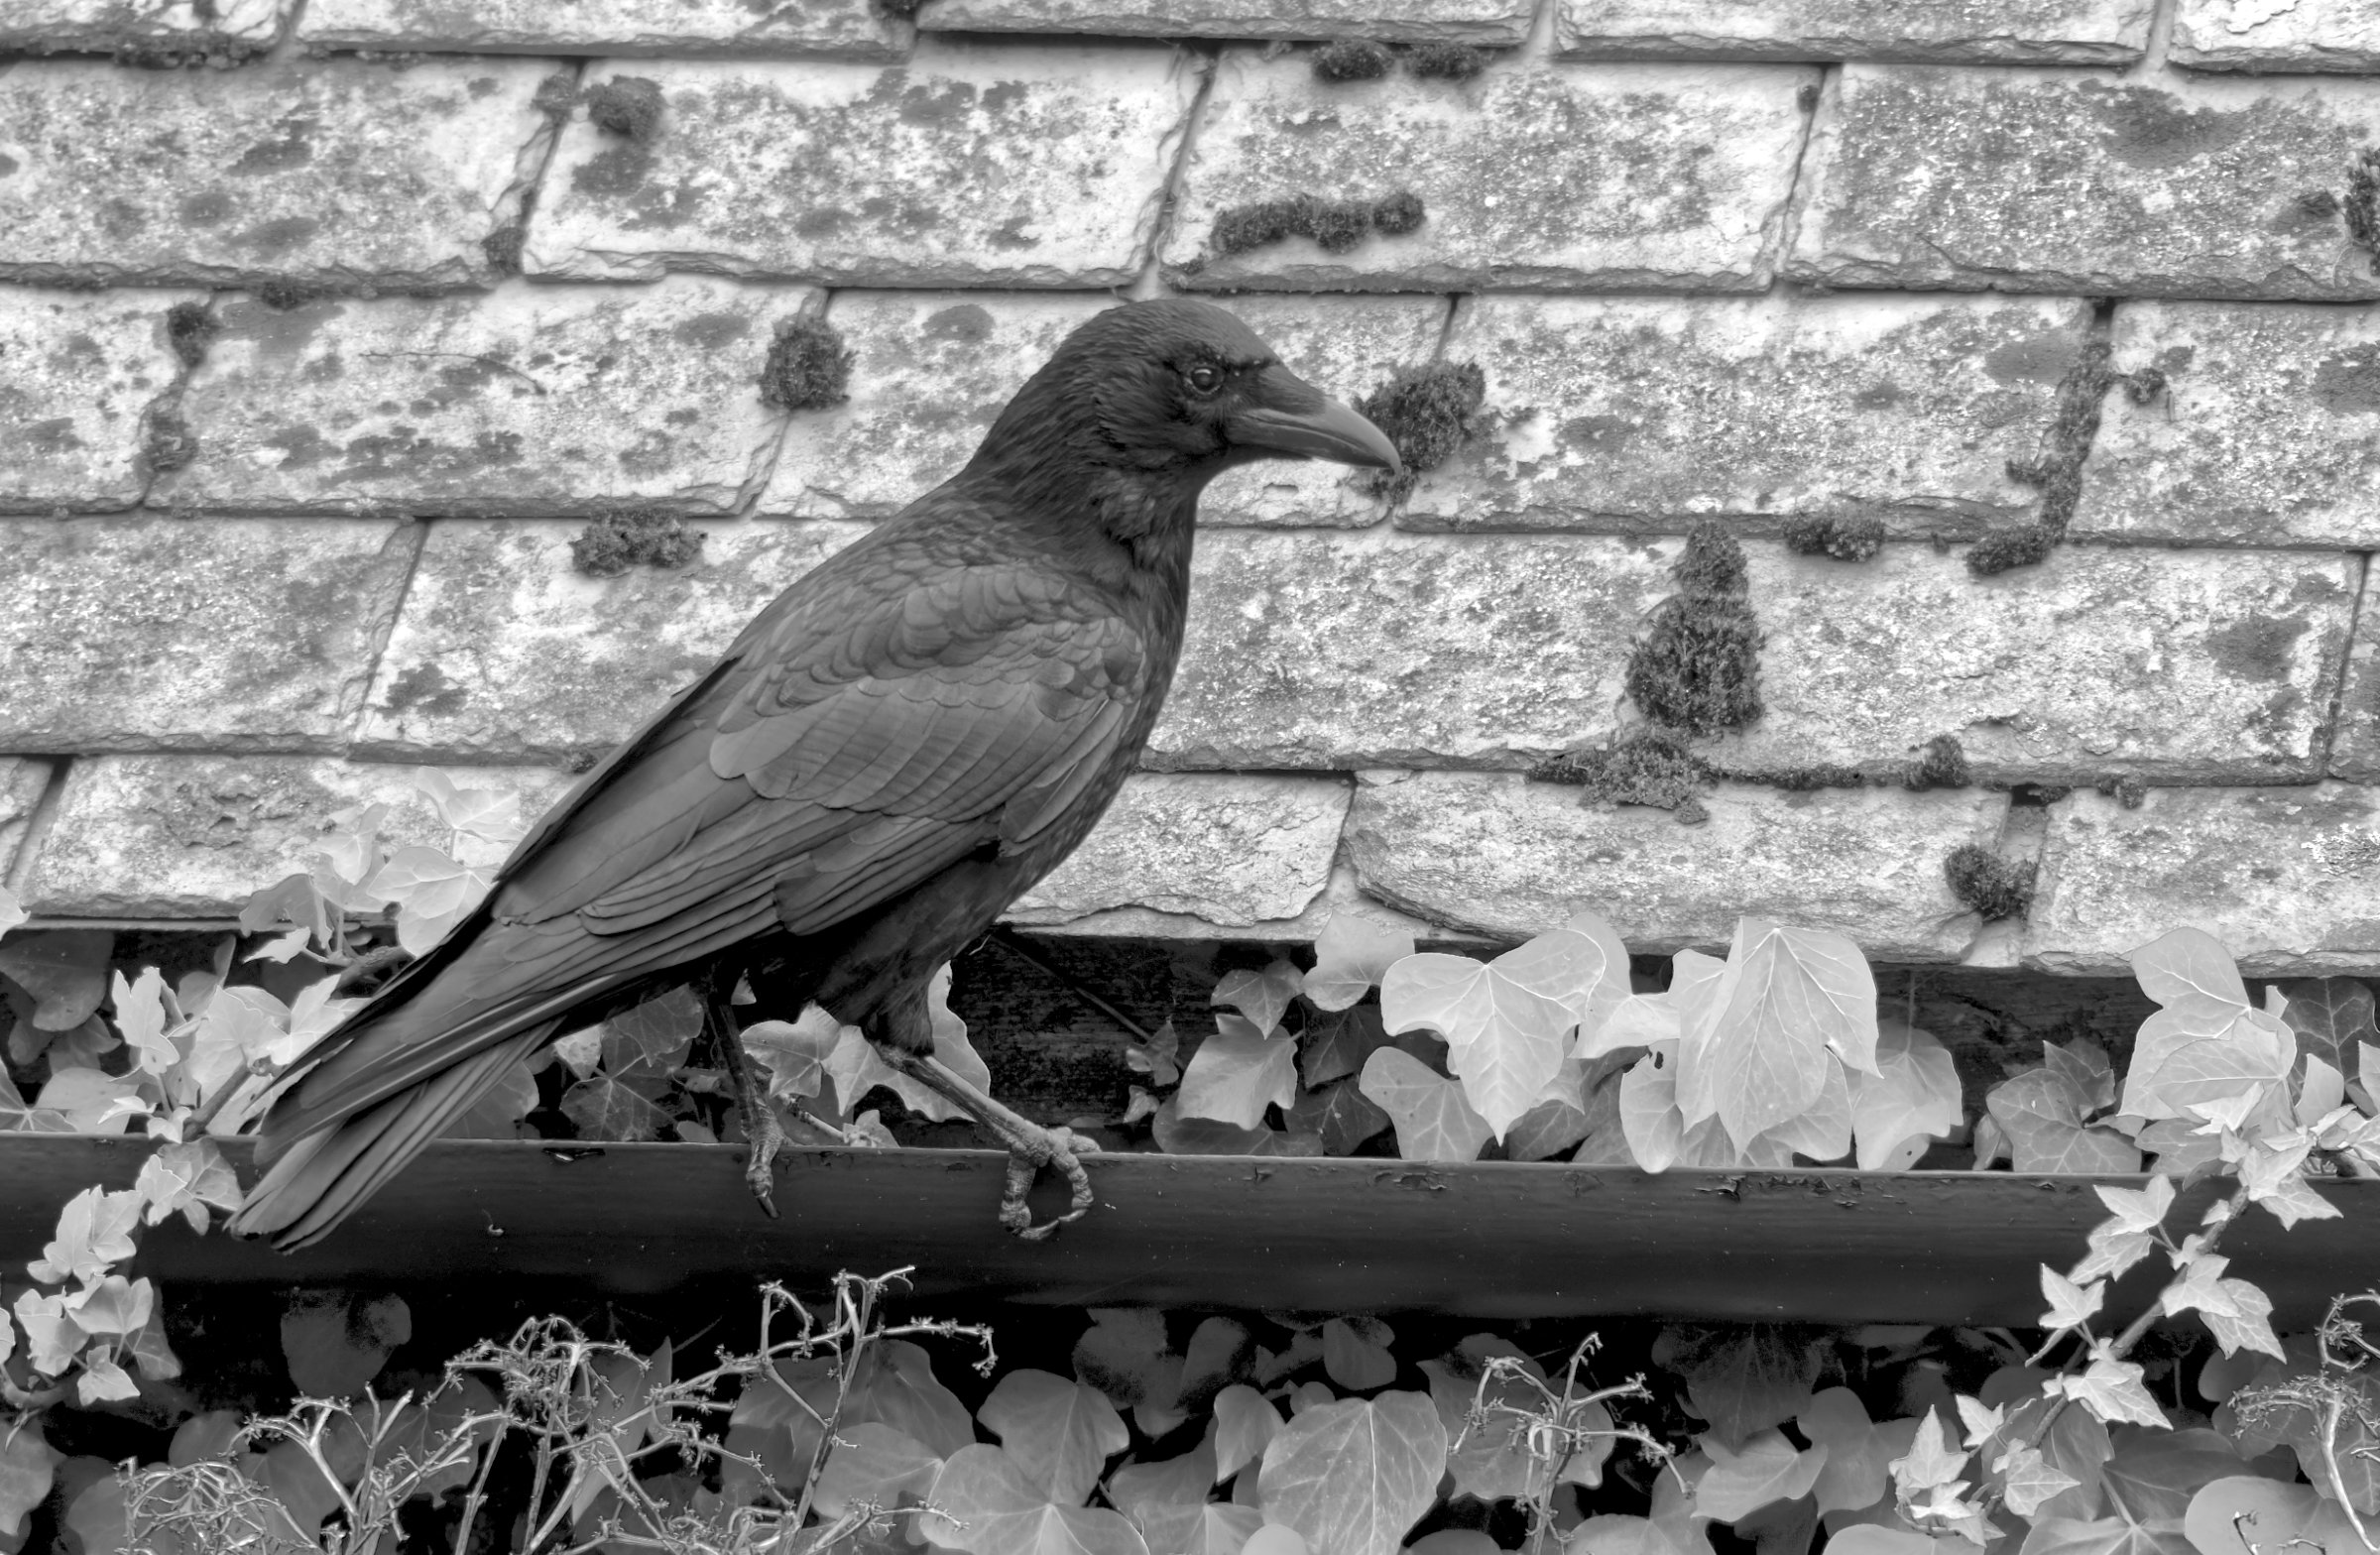
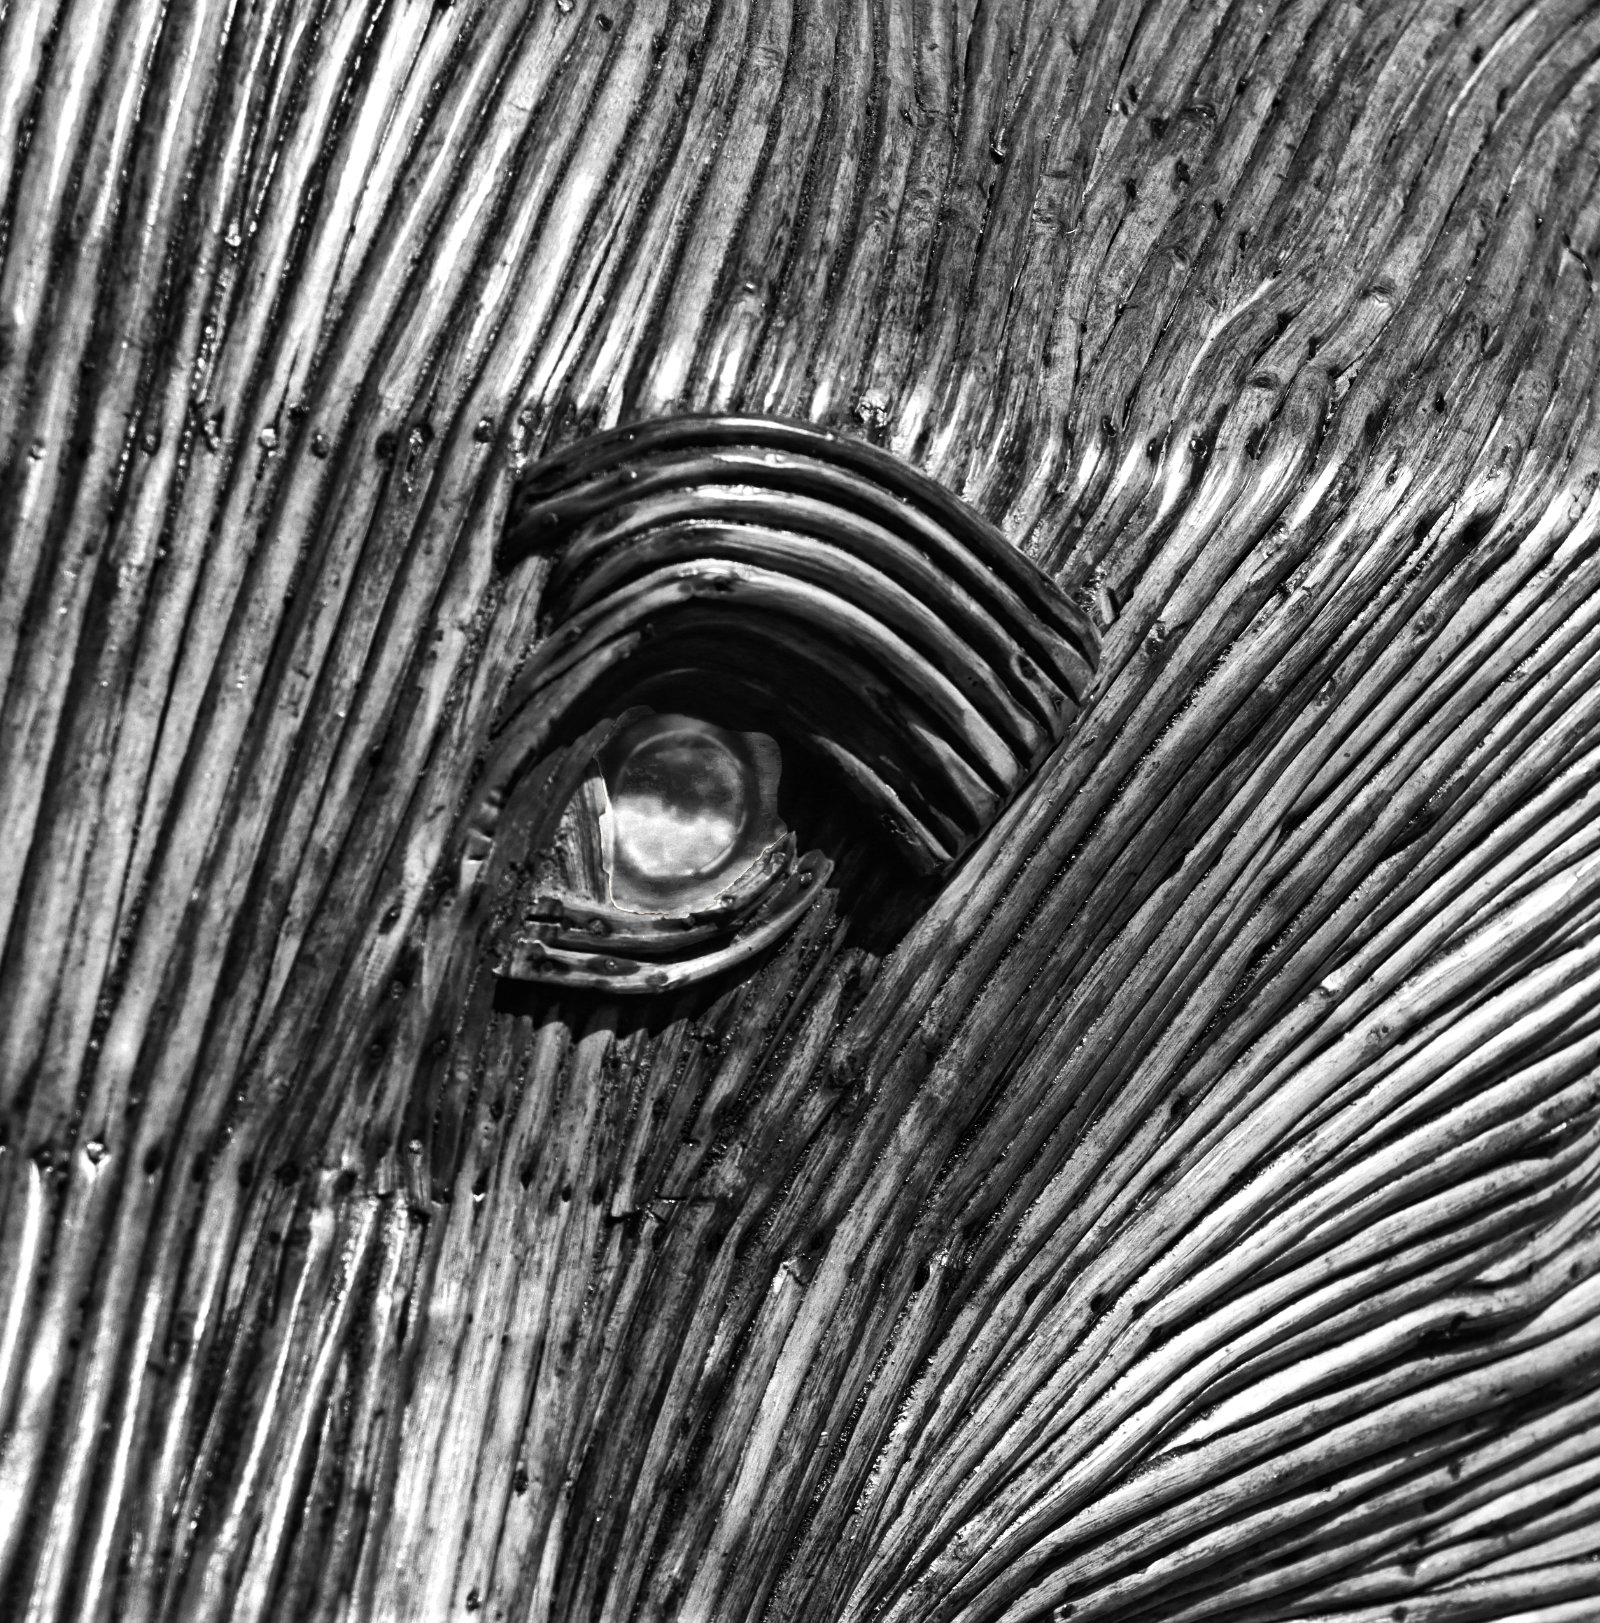
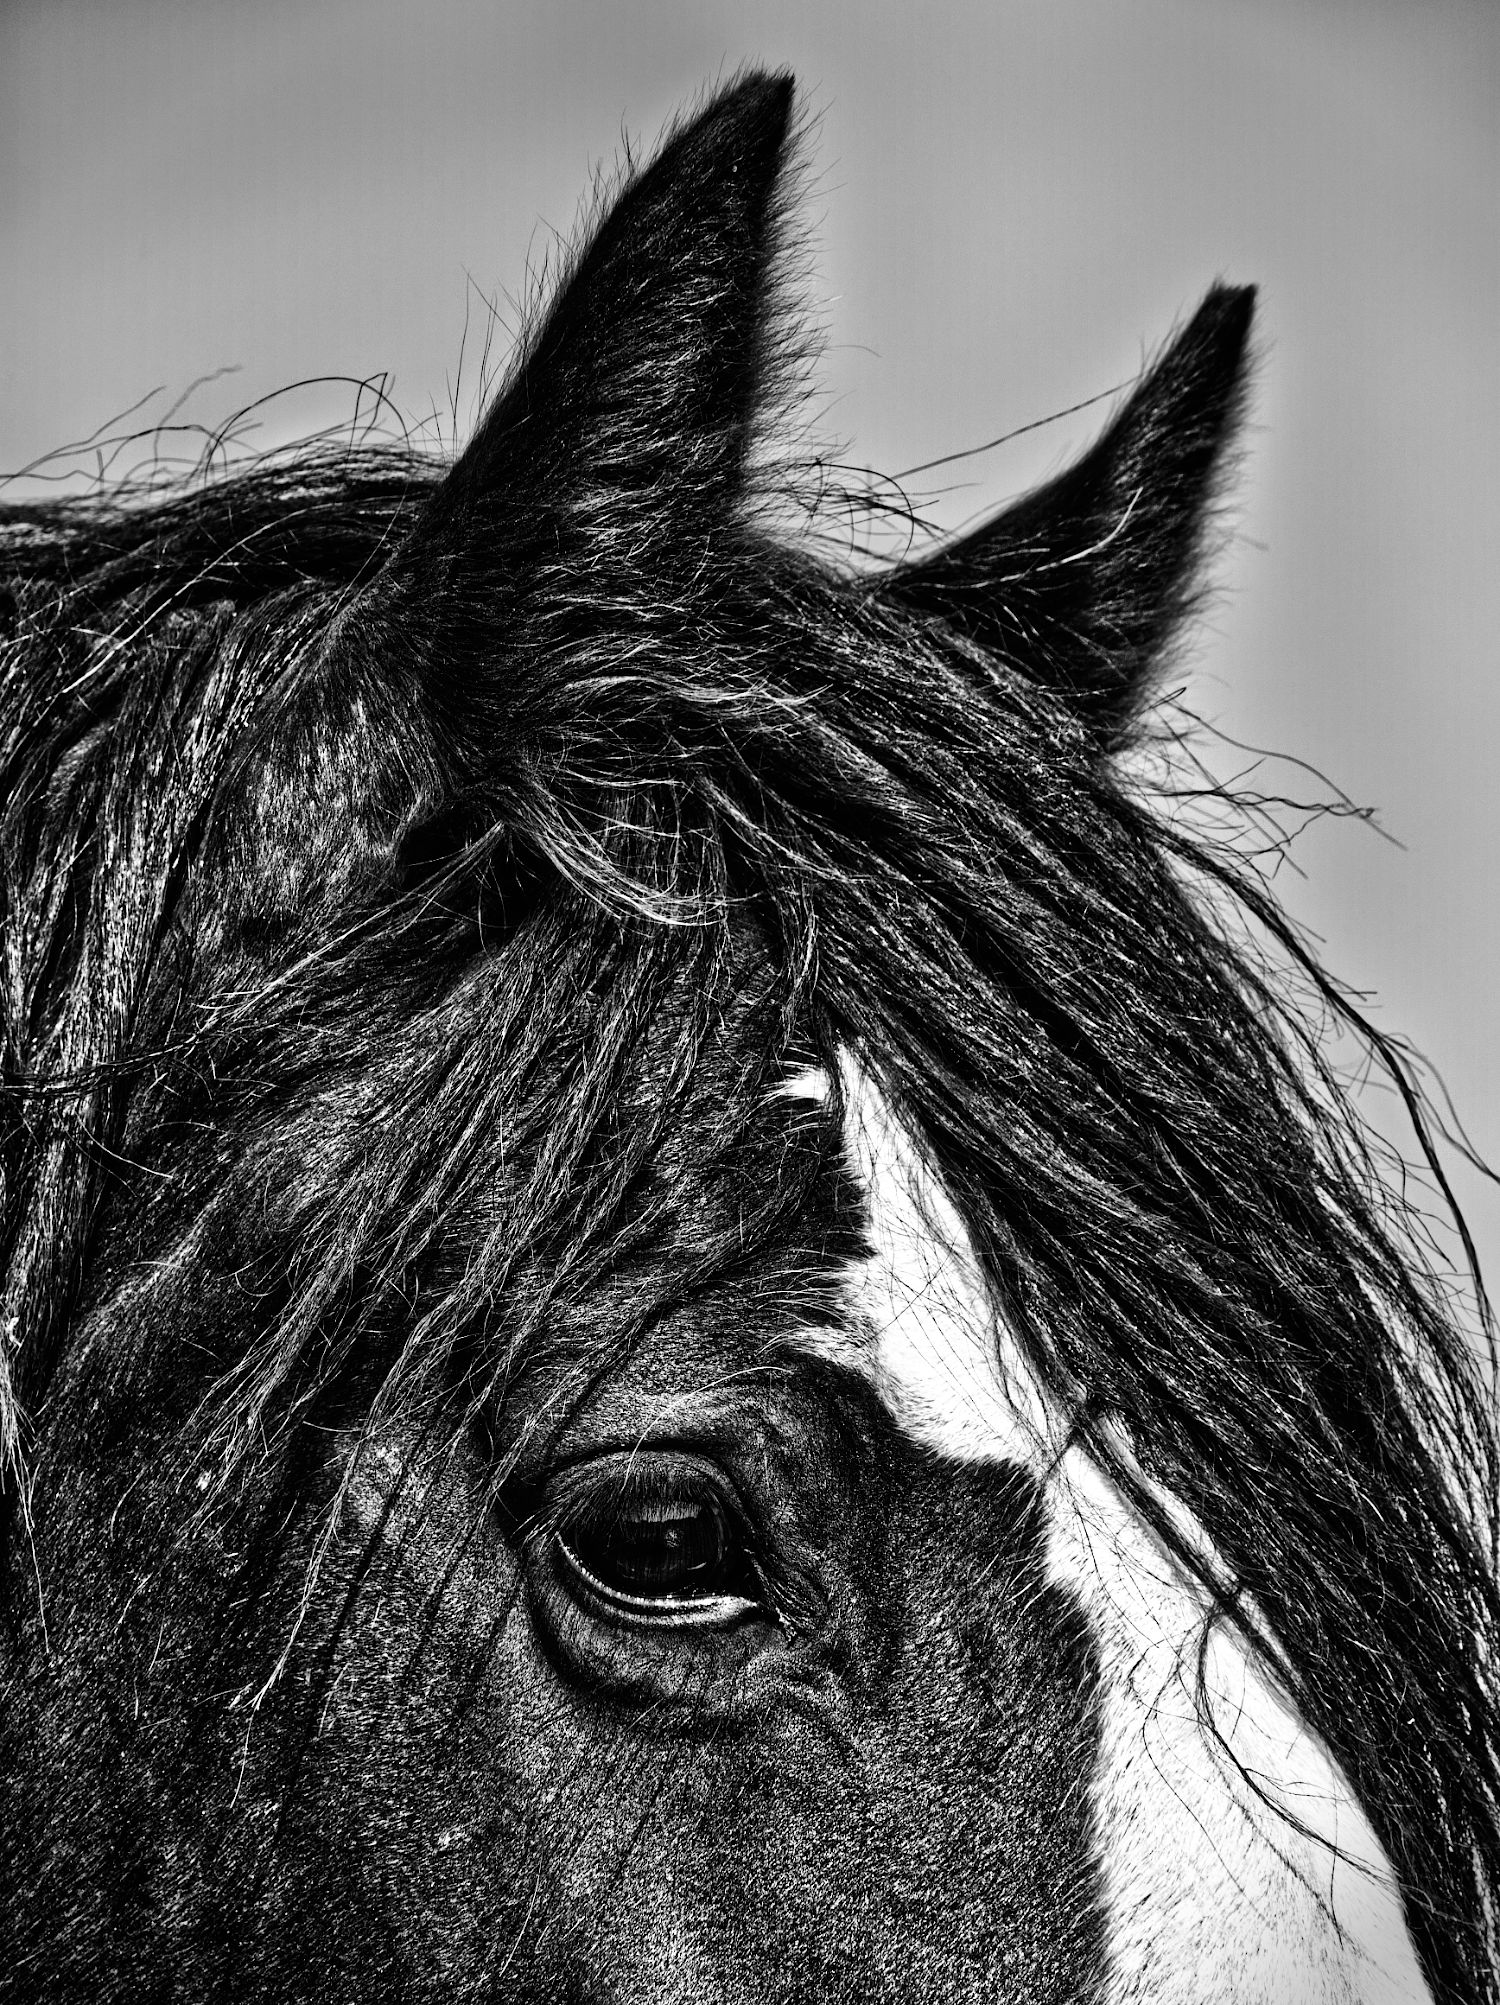
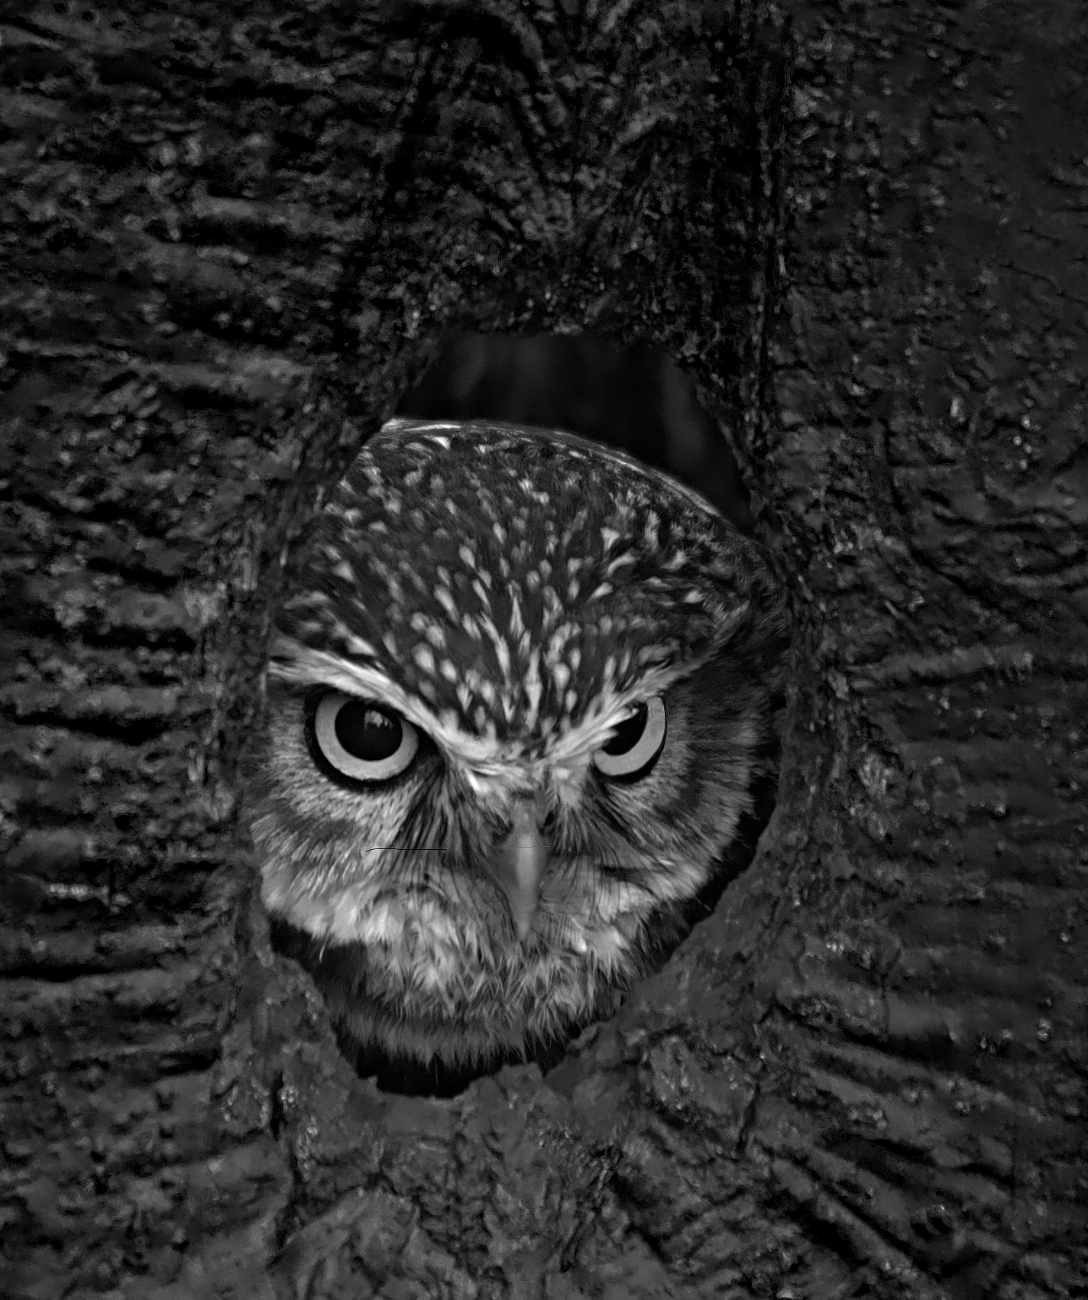
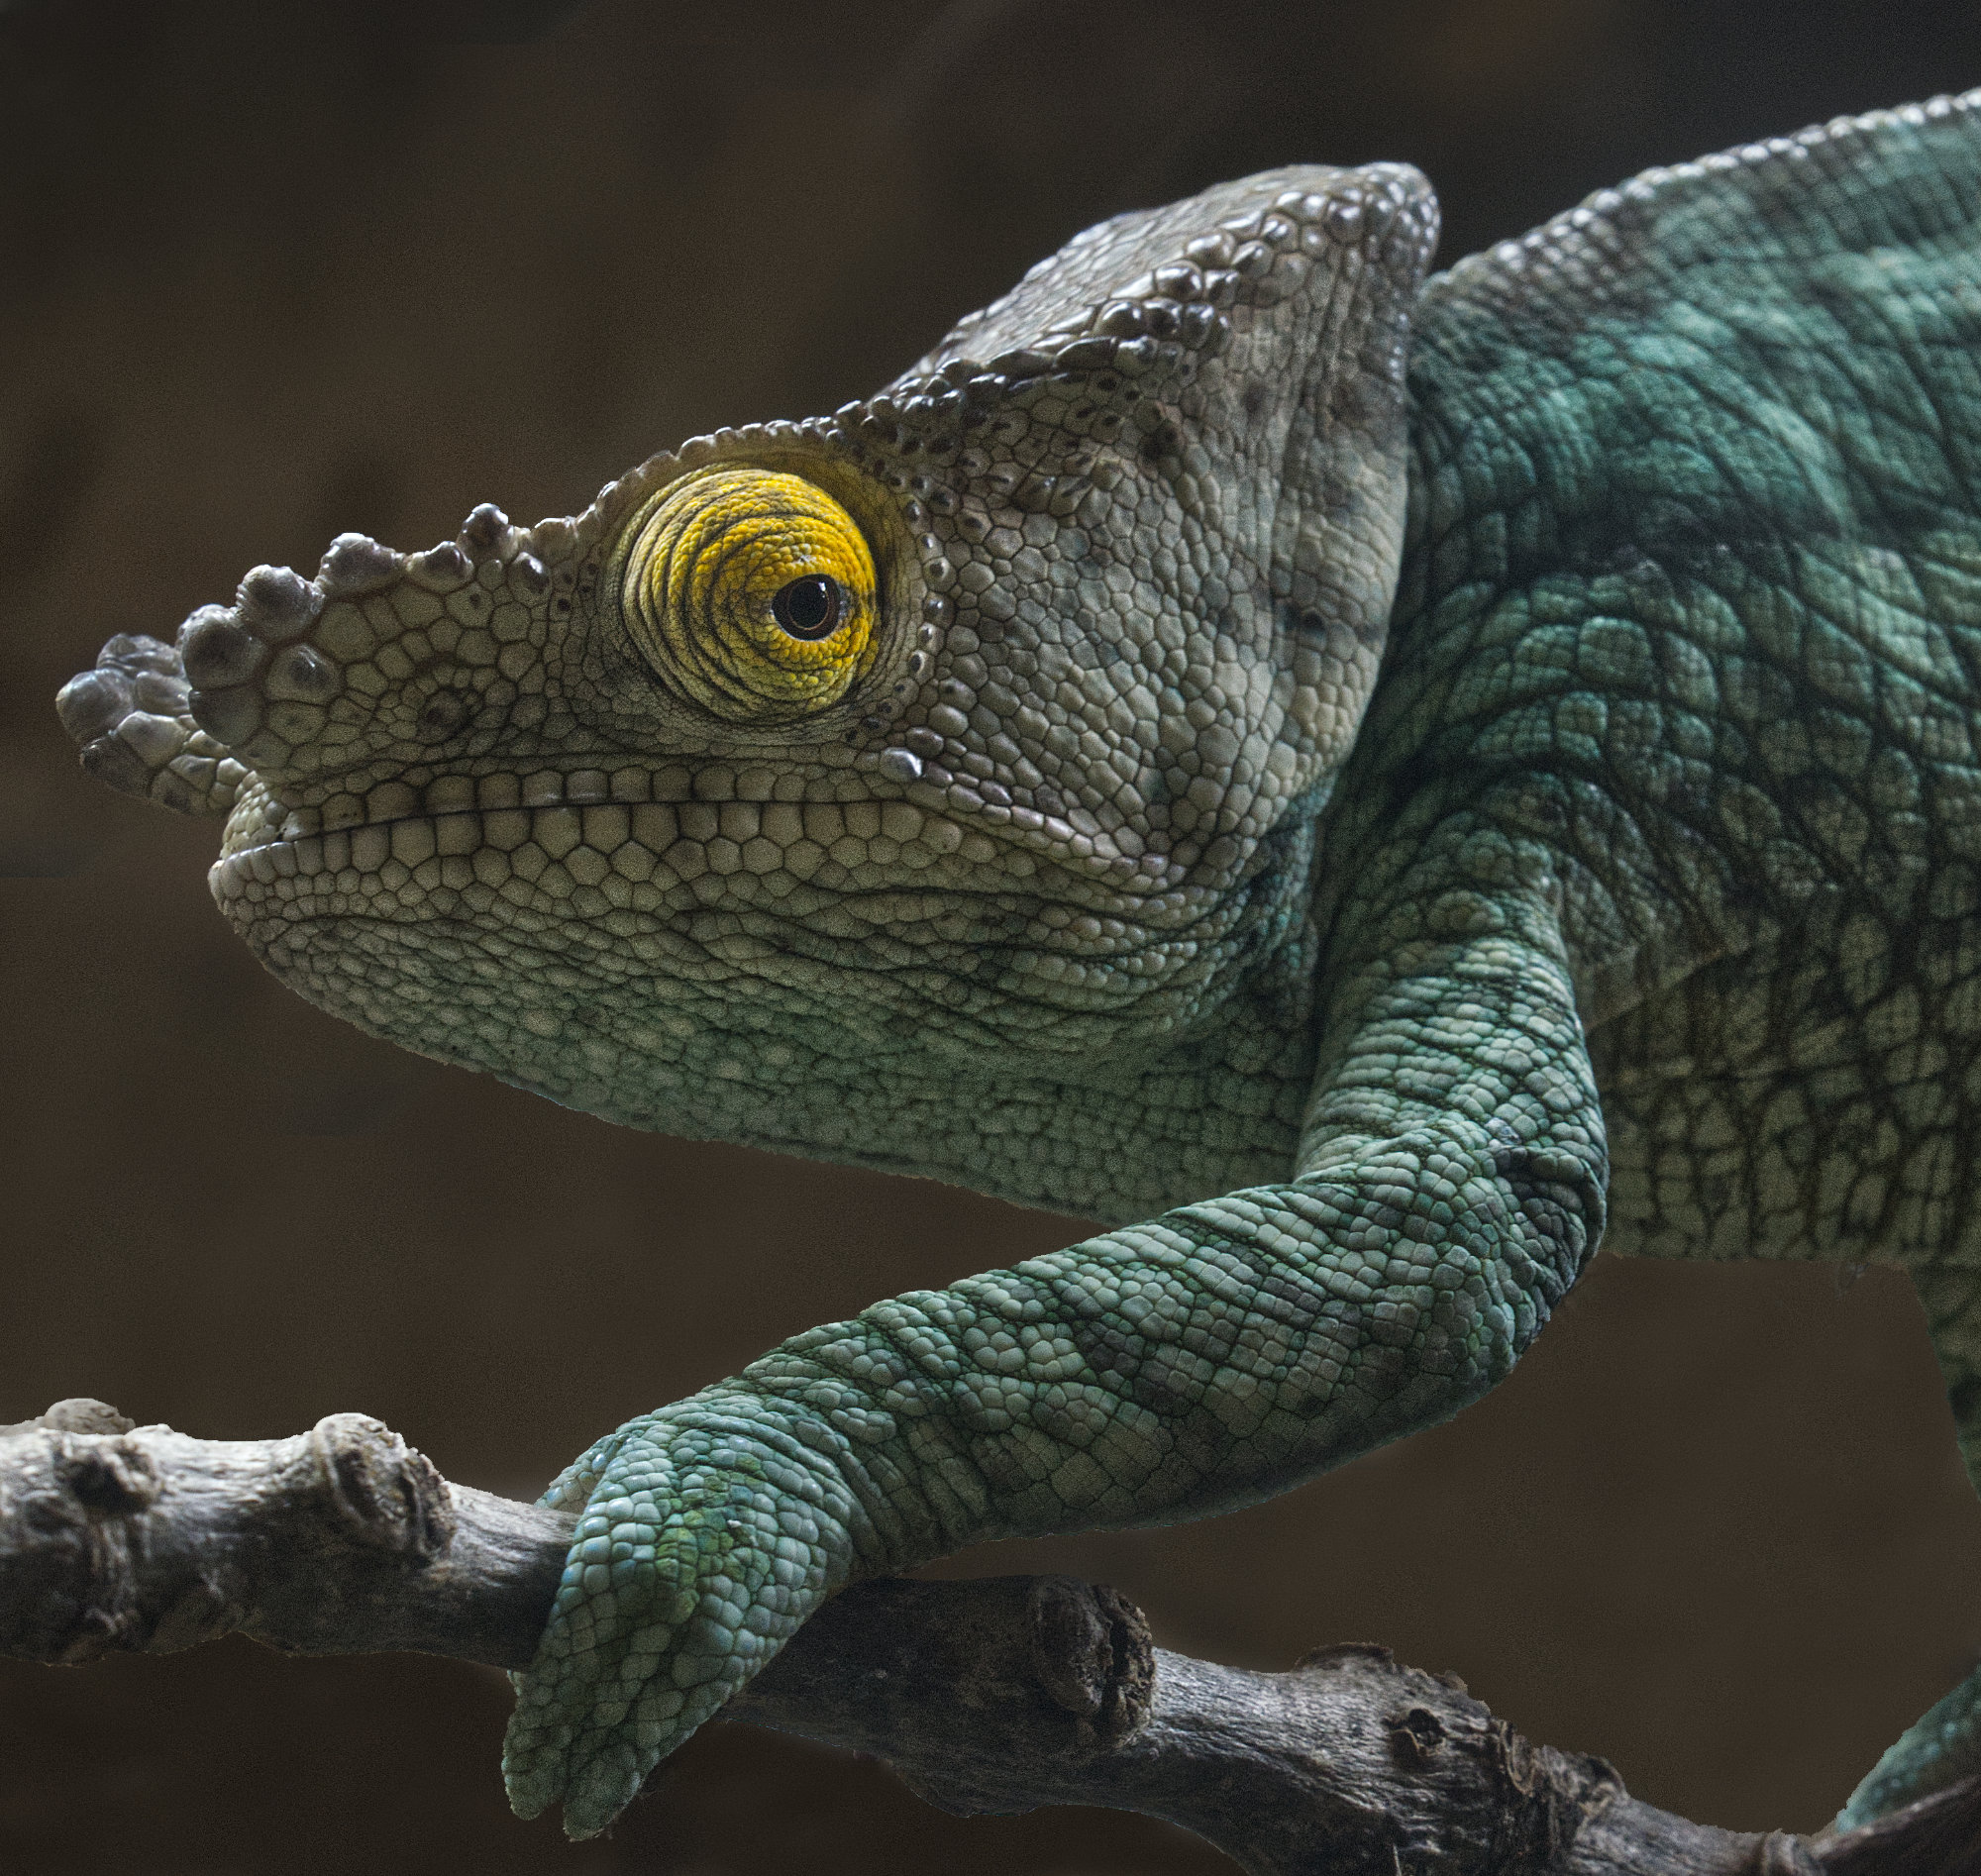
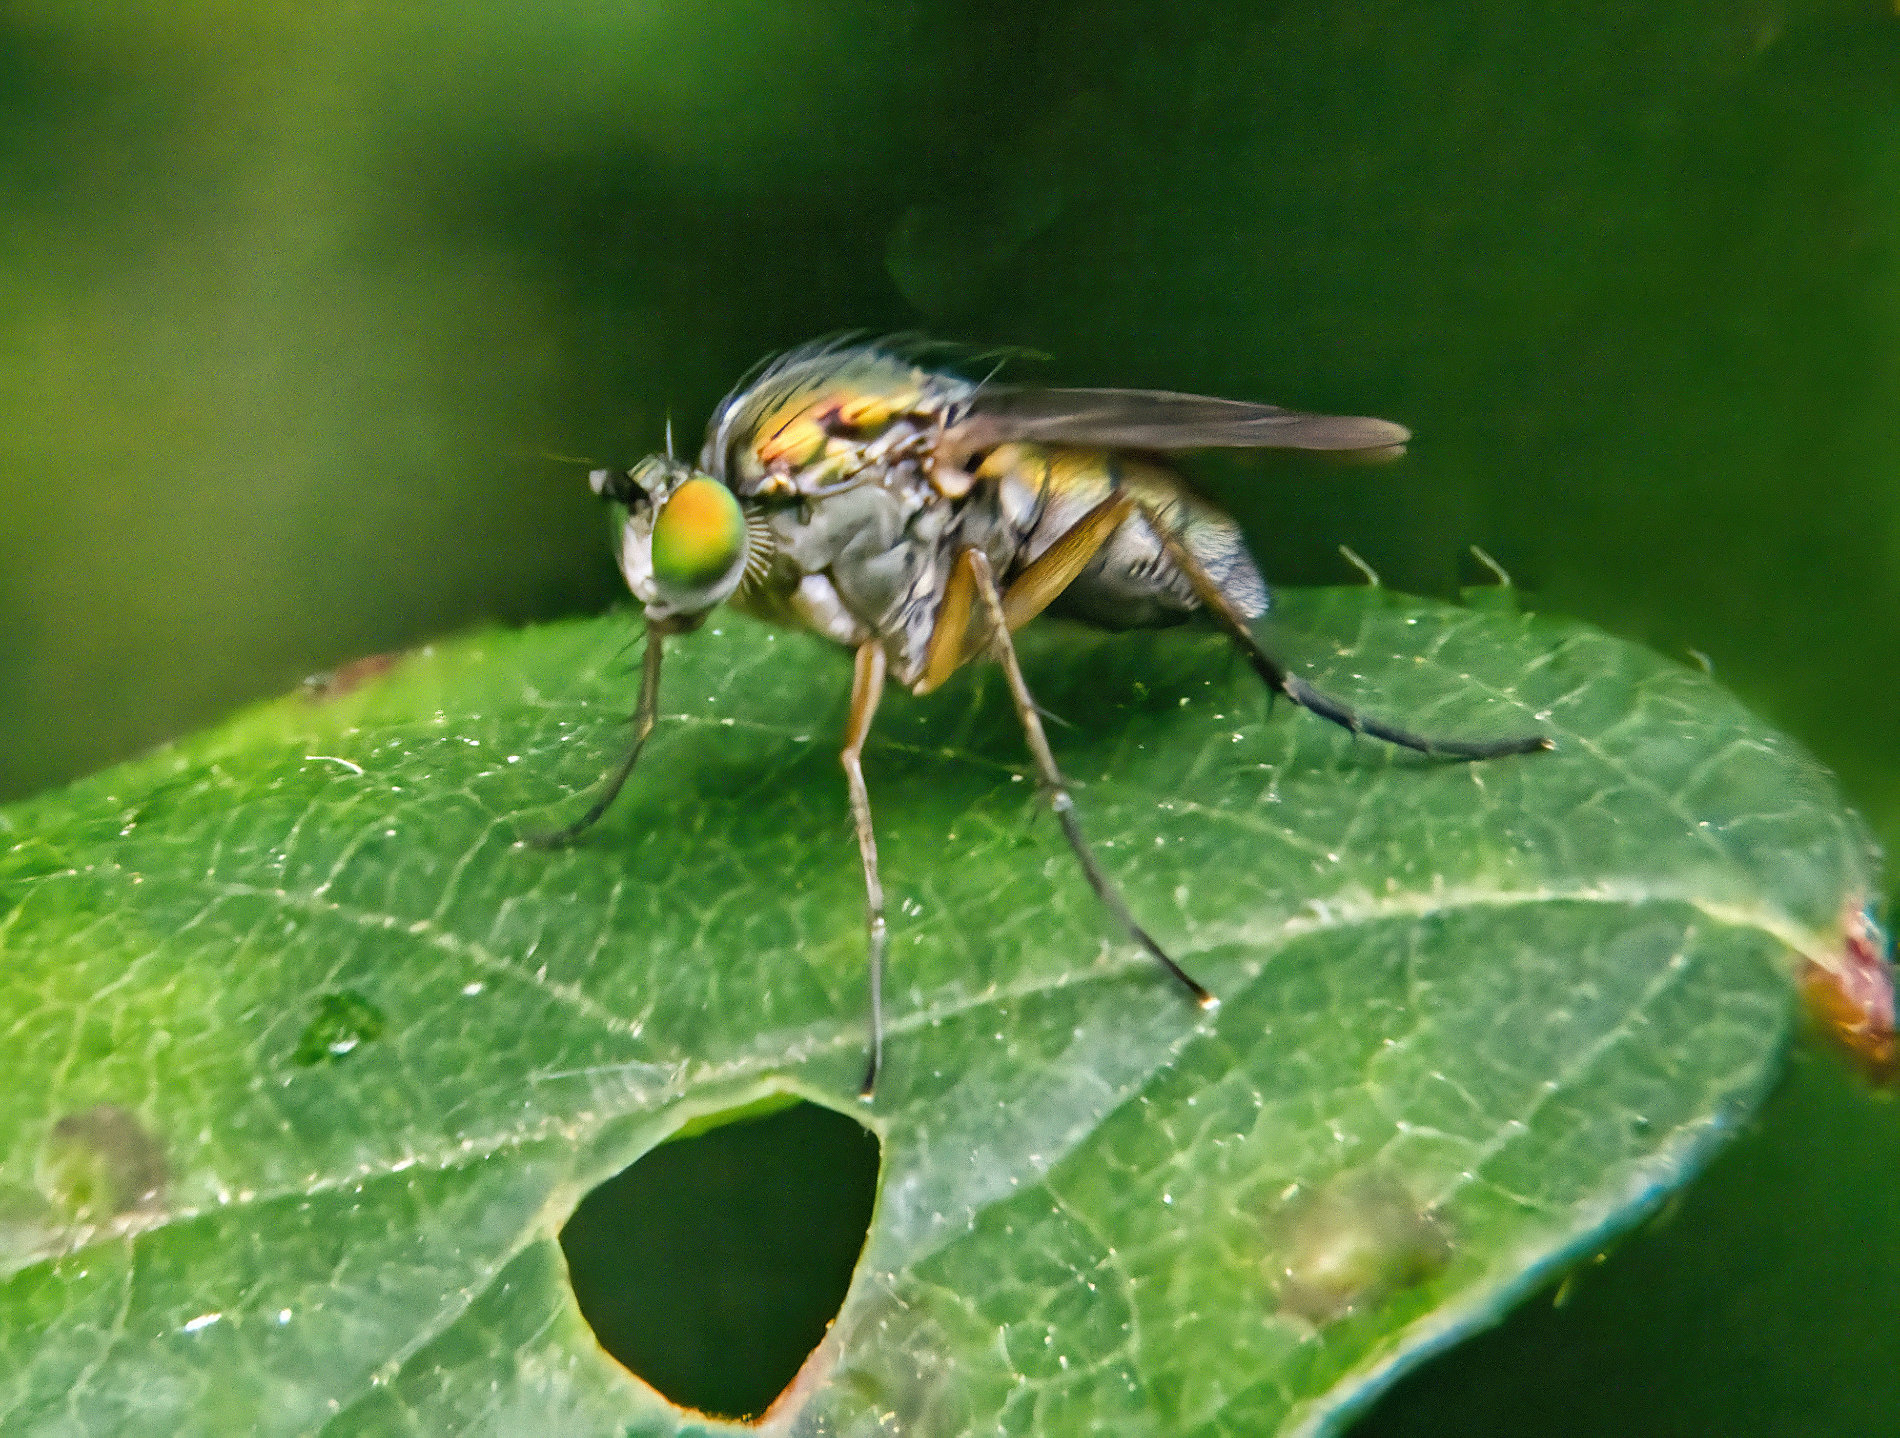
Another piercing eye! Great stuff.
I love the detail in the feathers and the nest. Some might say the sky is bland, but it's exactly what's needed to complement and contrast the bird and nest in my view. Super mono conversion.
|
Dec 10th |
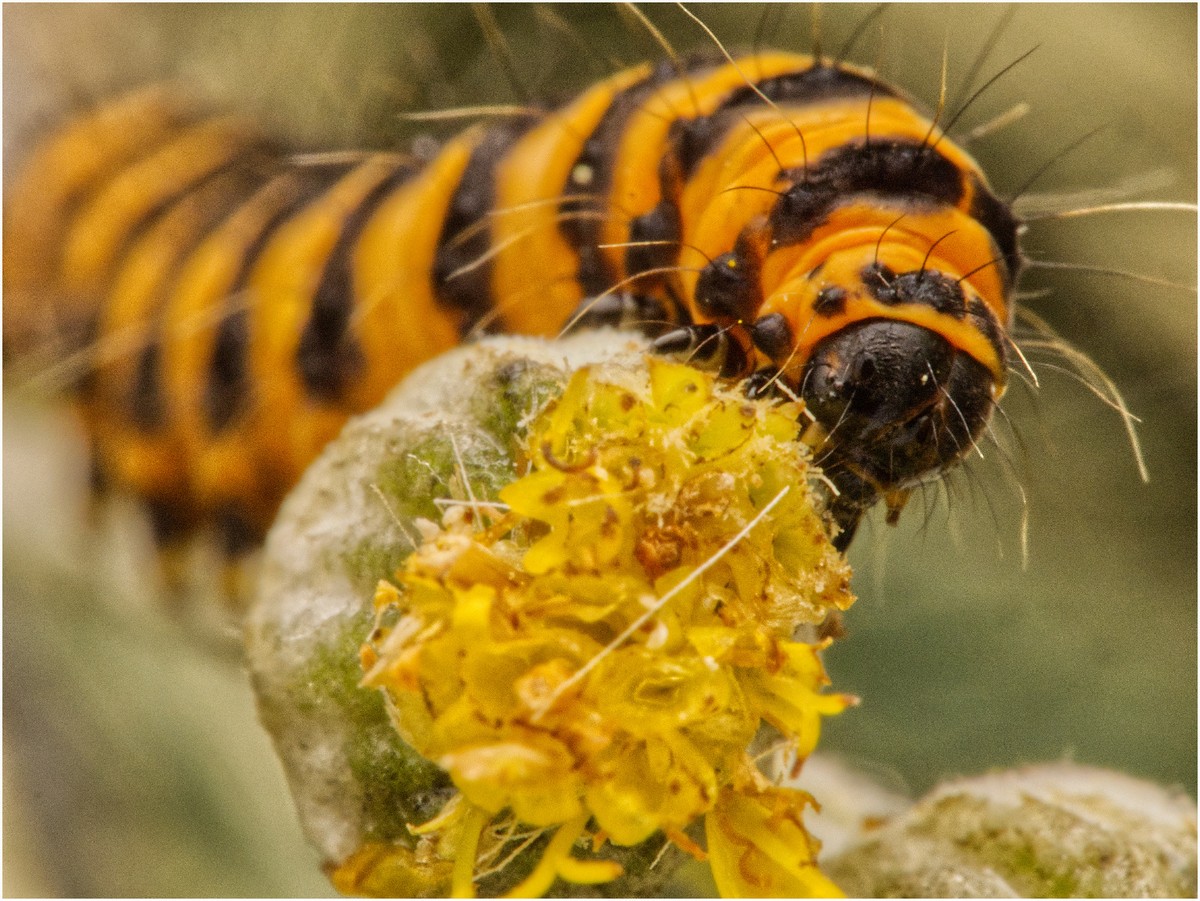
| 64 |
Dec 21 |
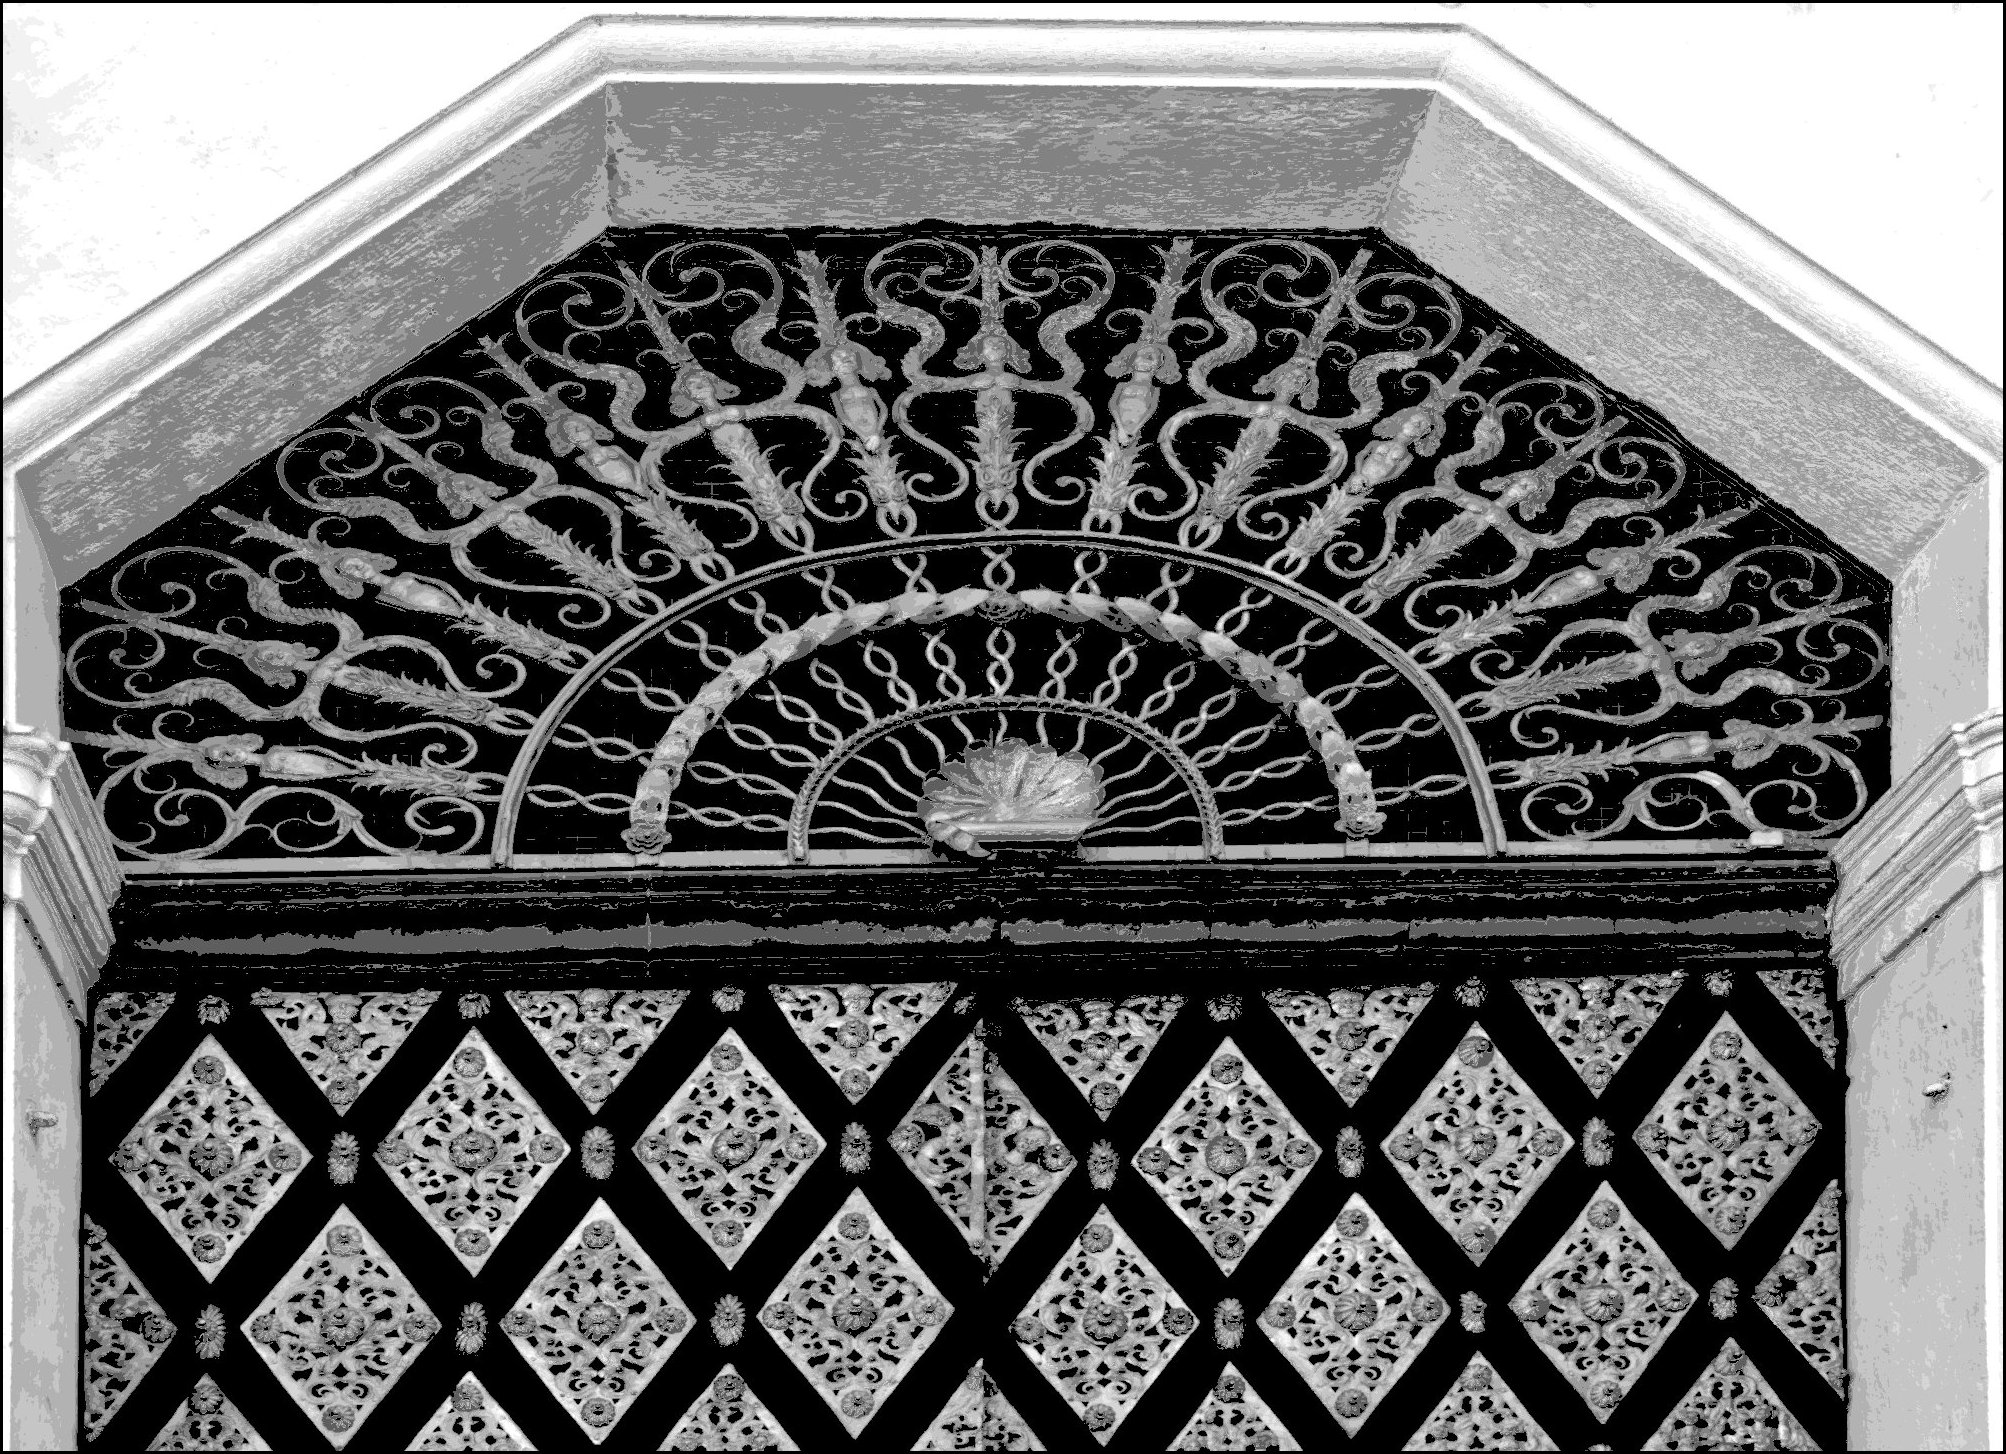
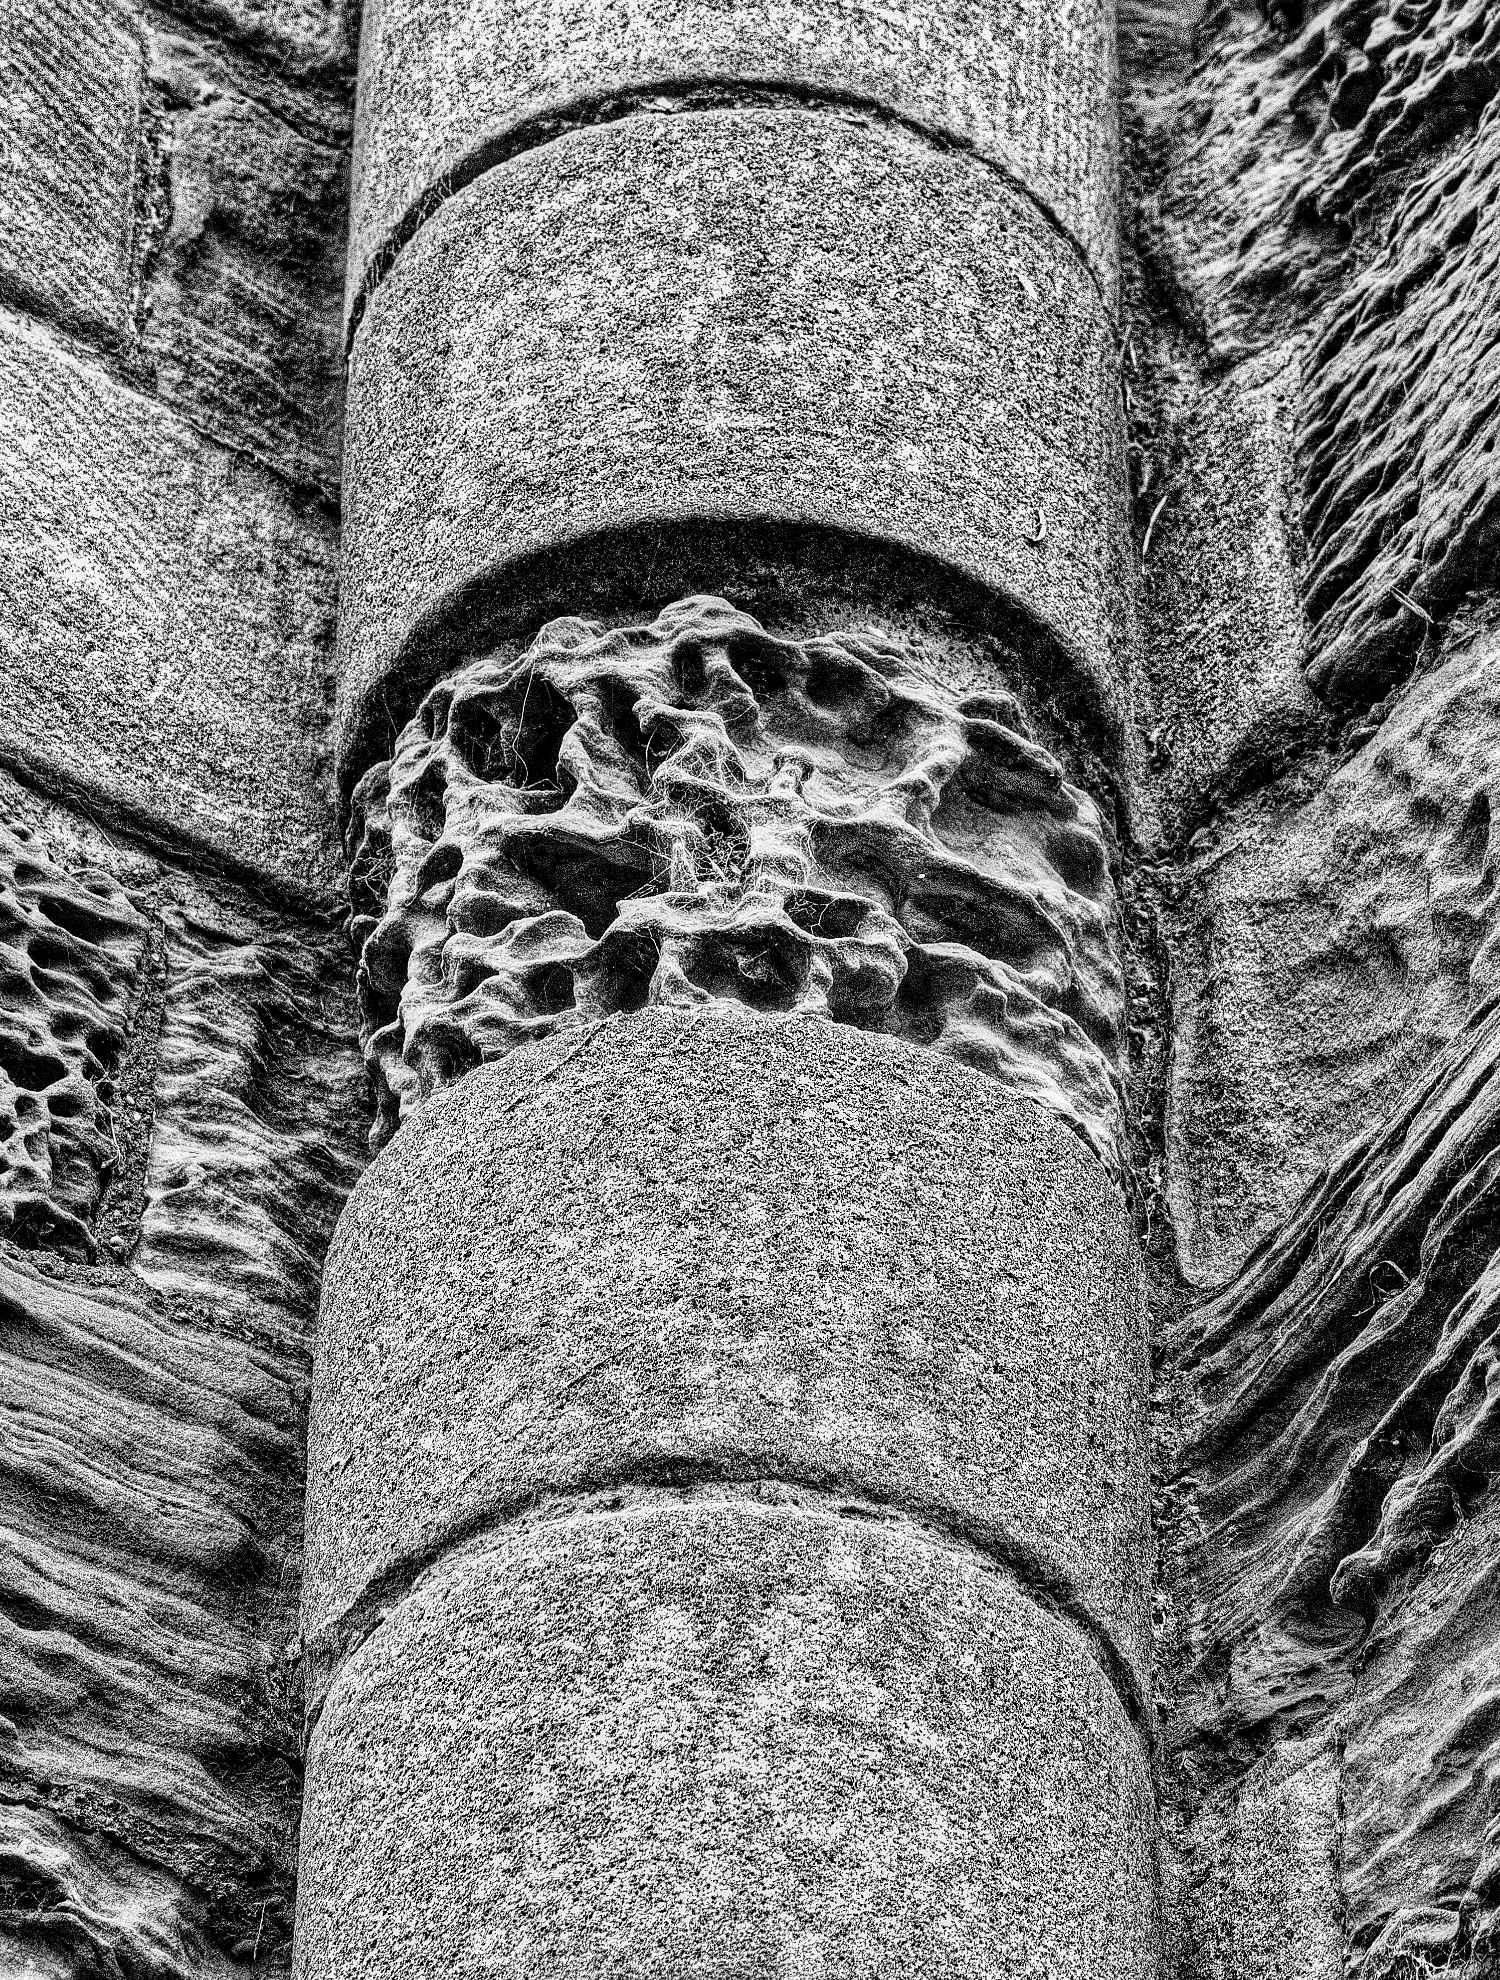
Comment |
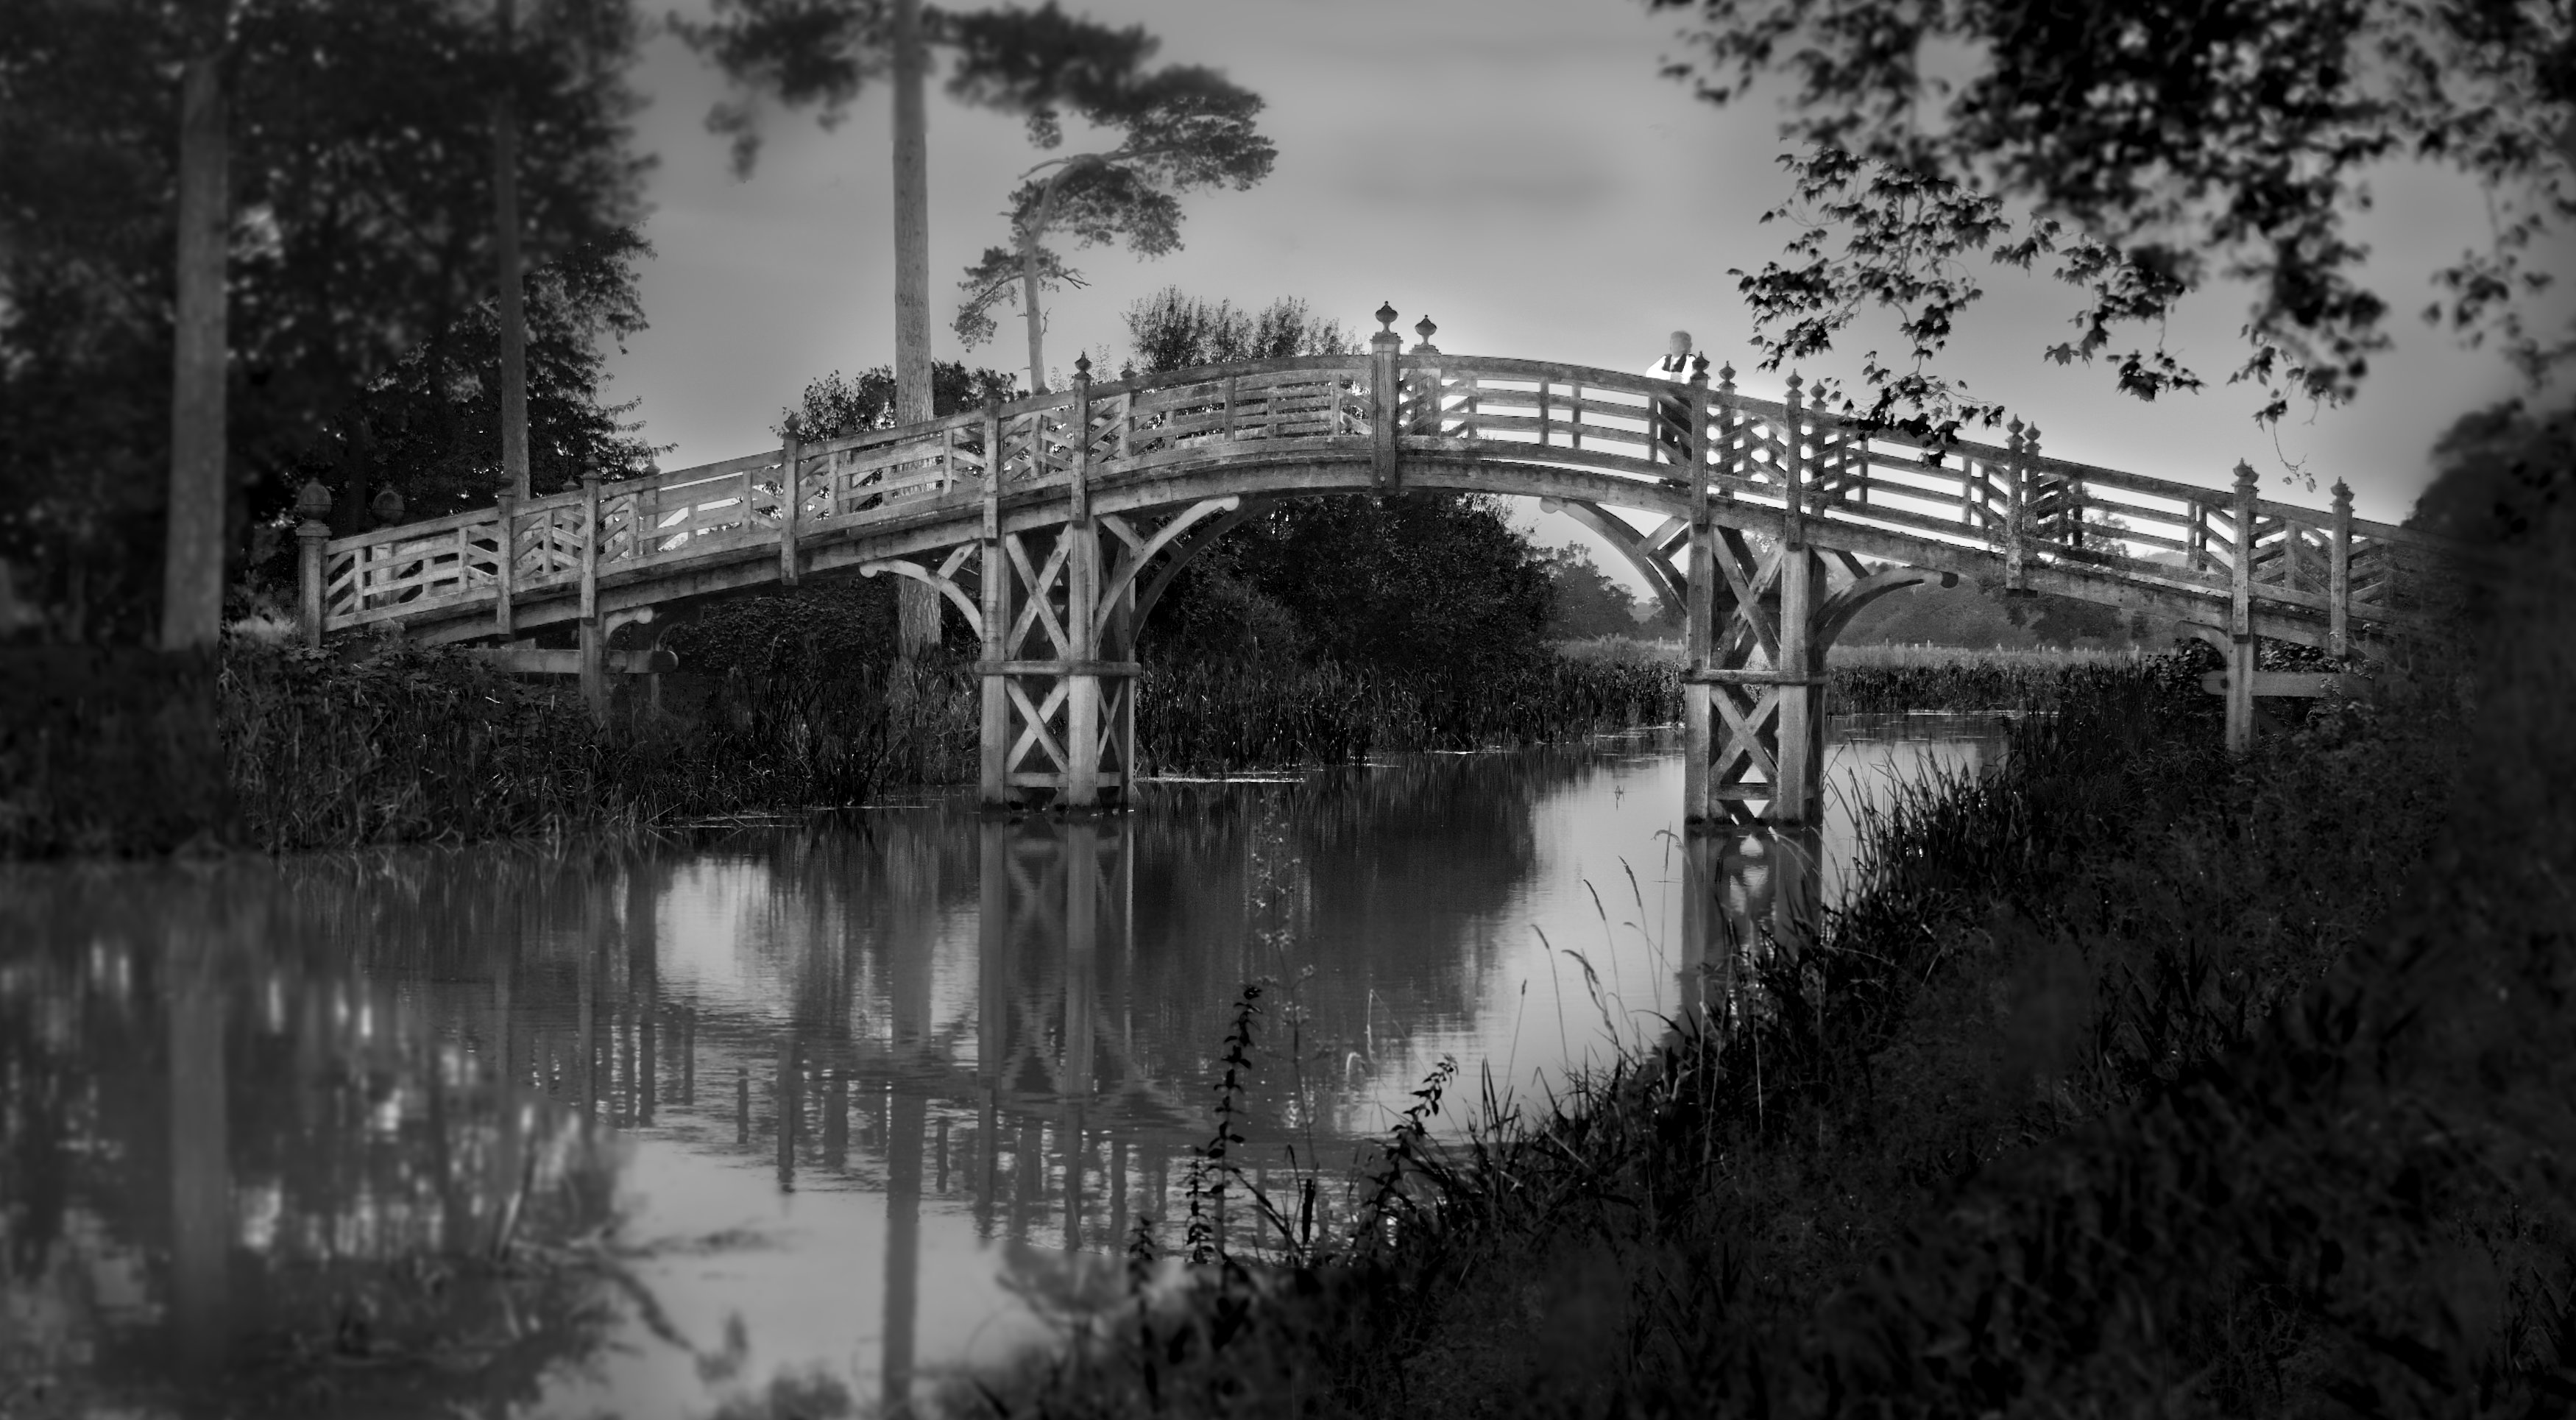
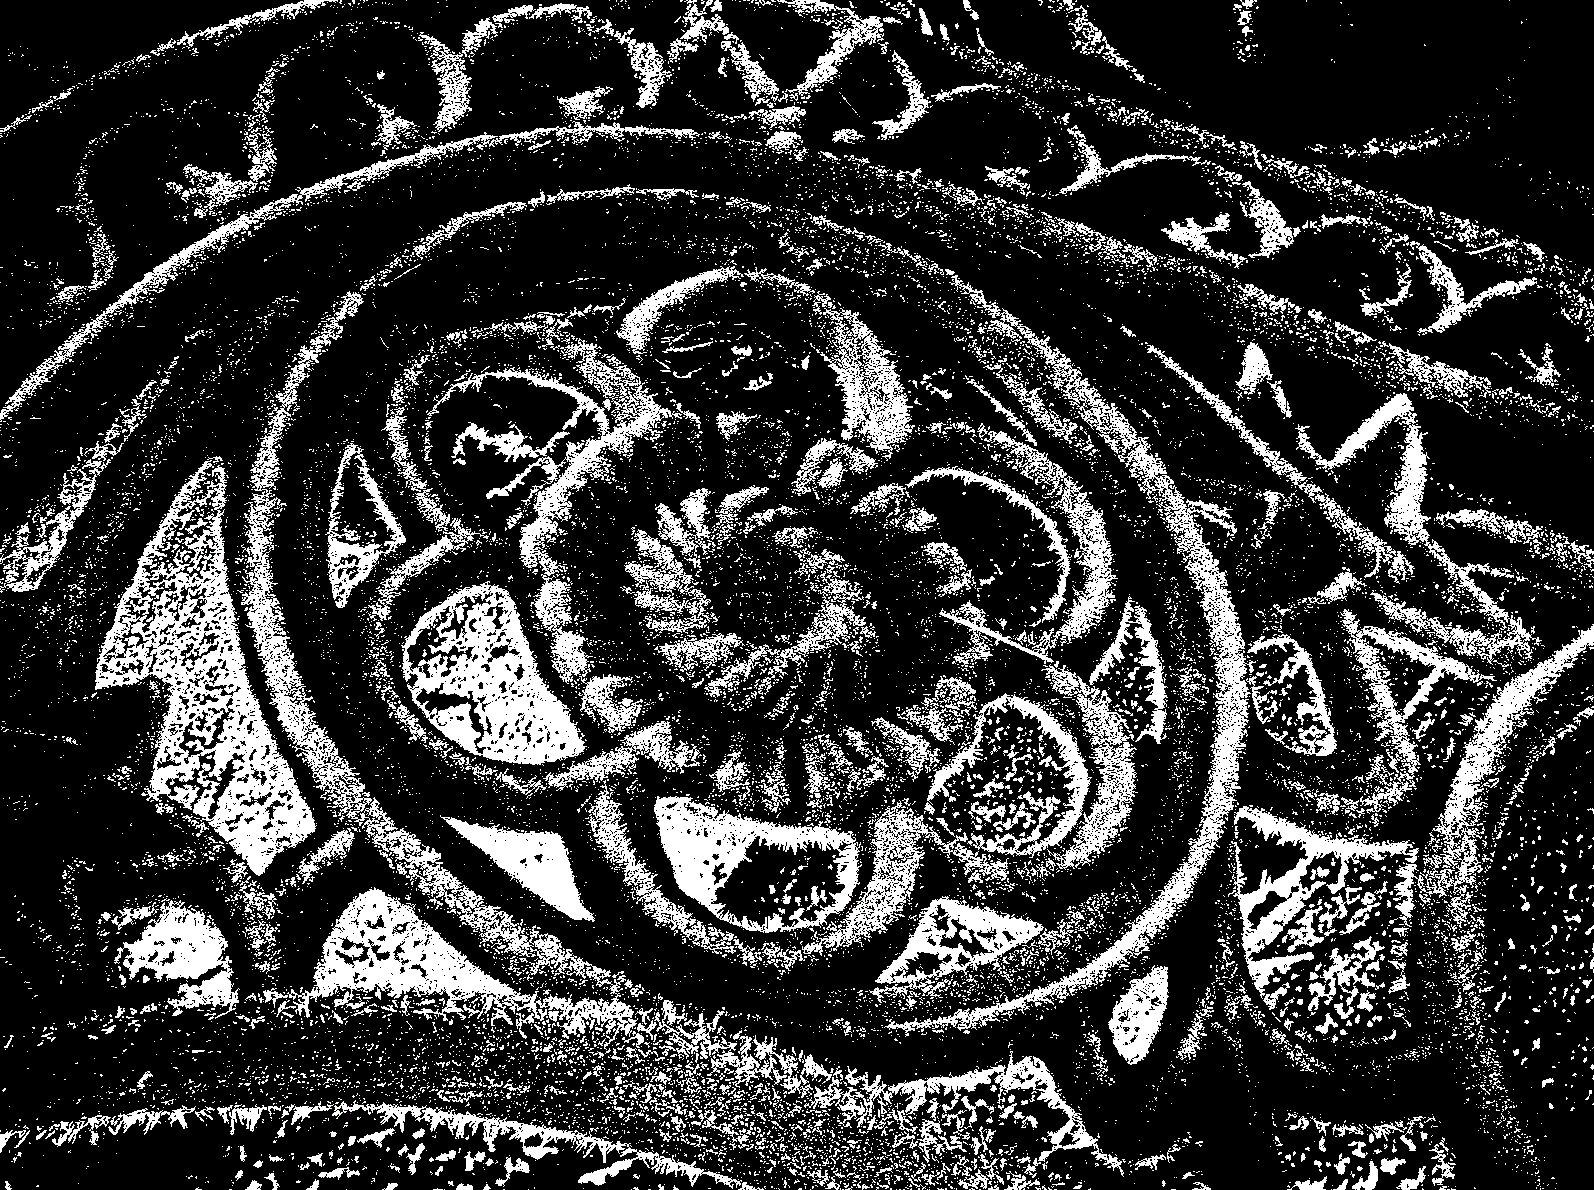
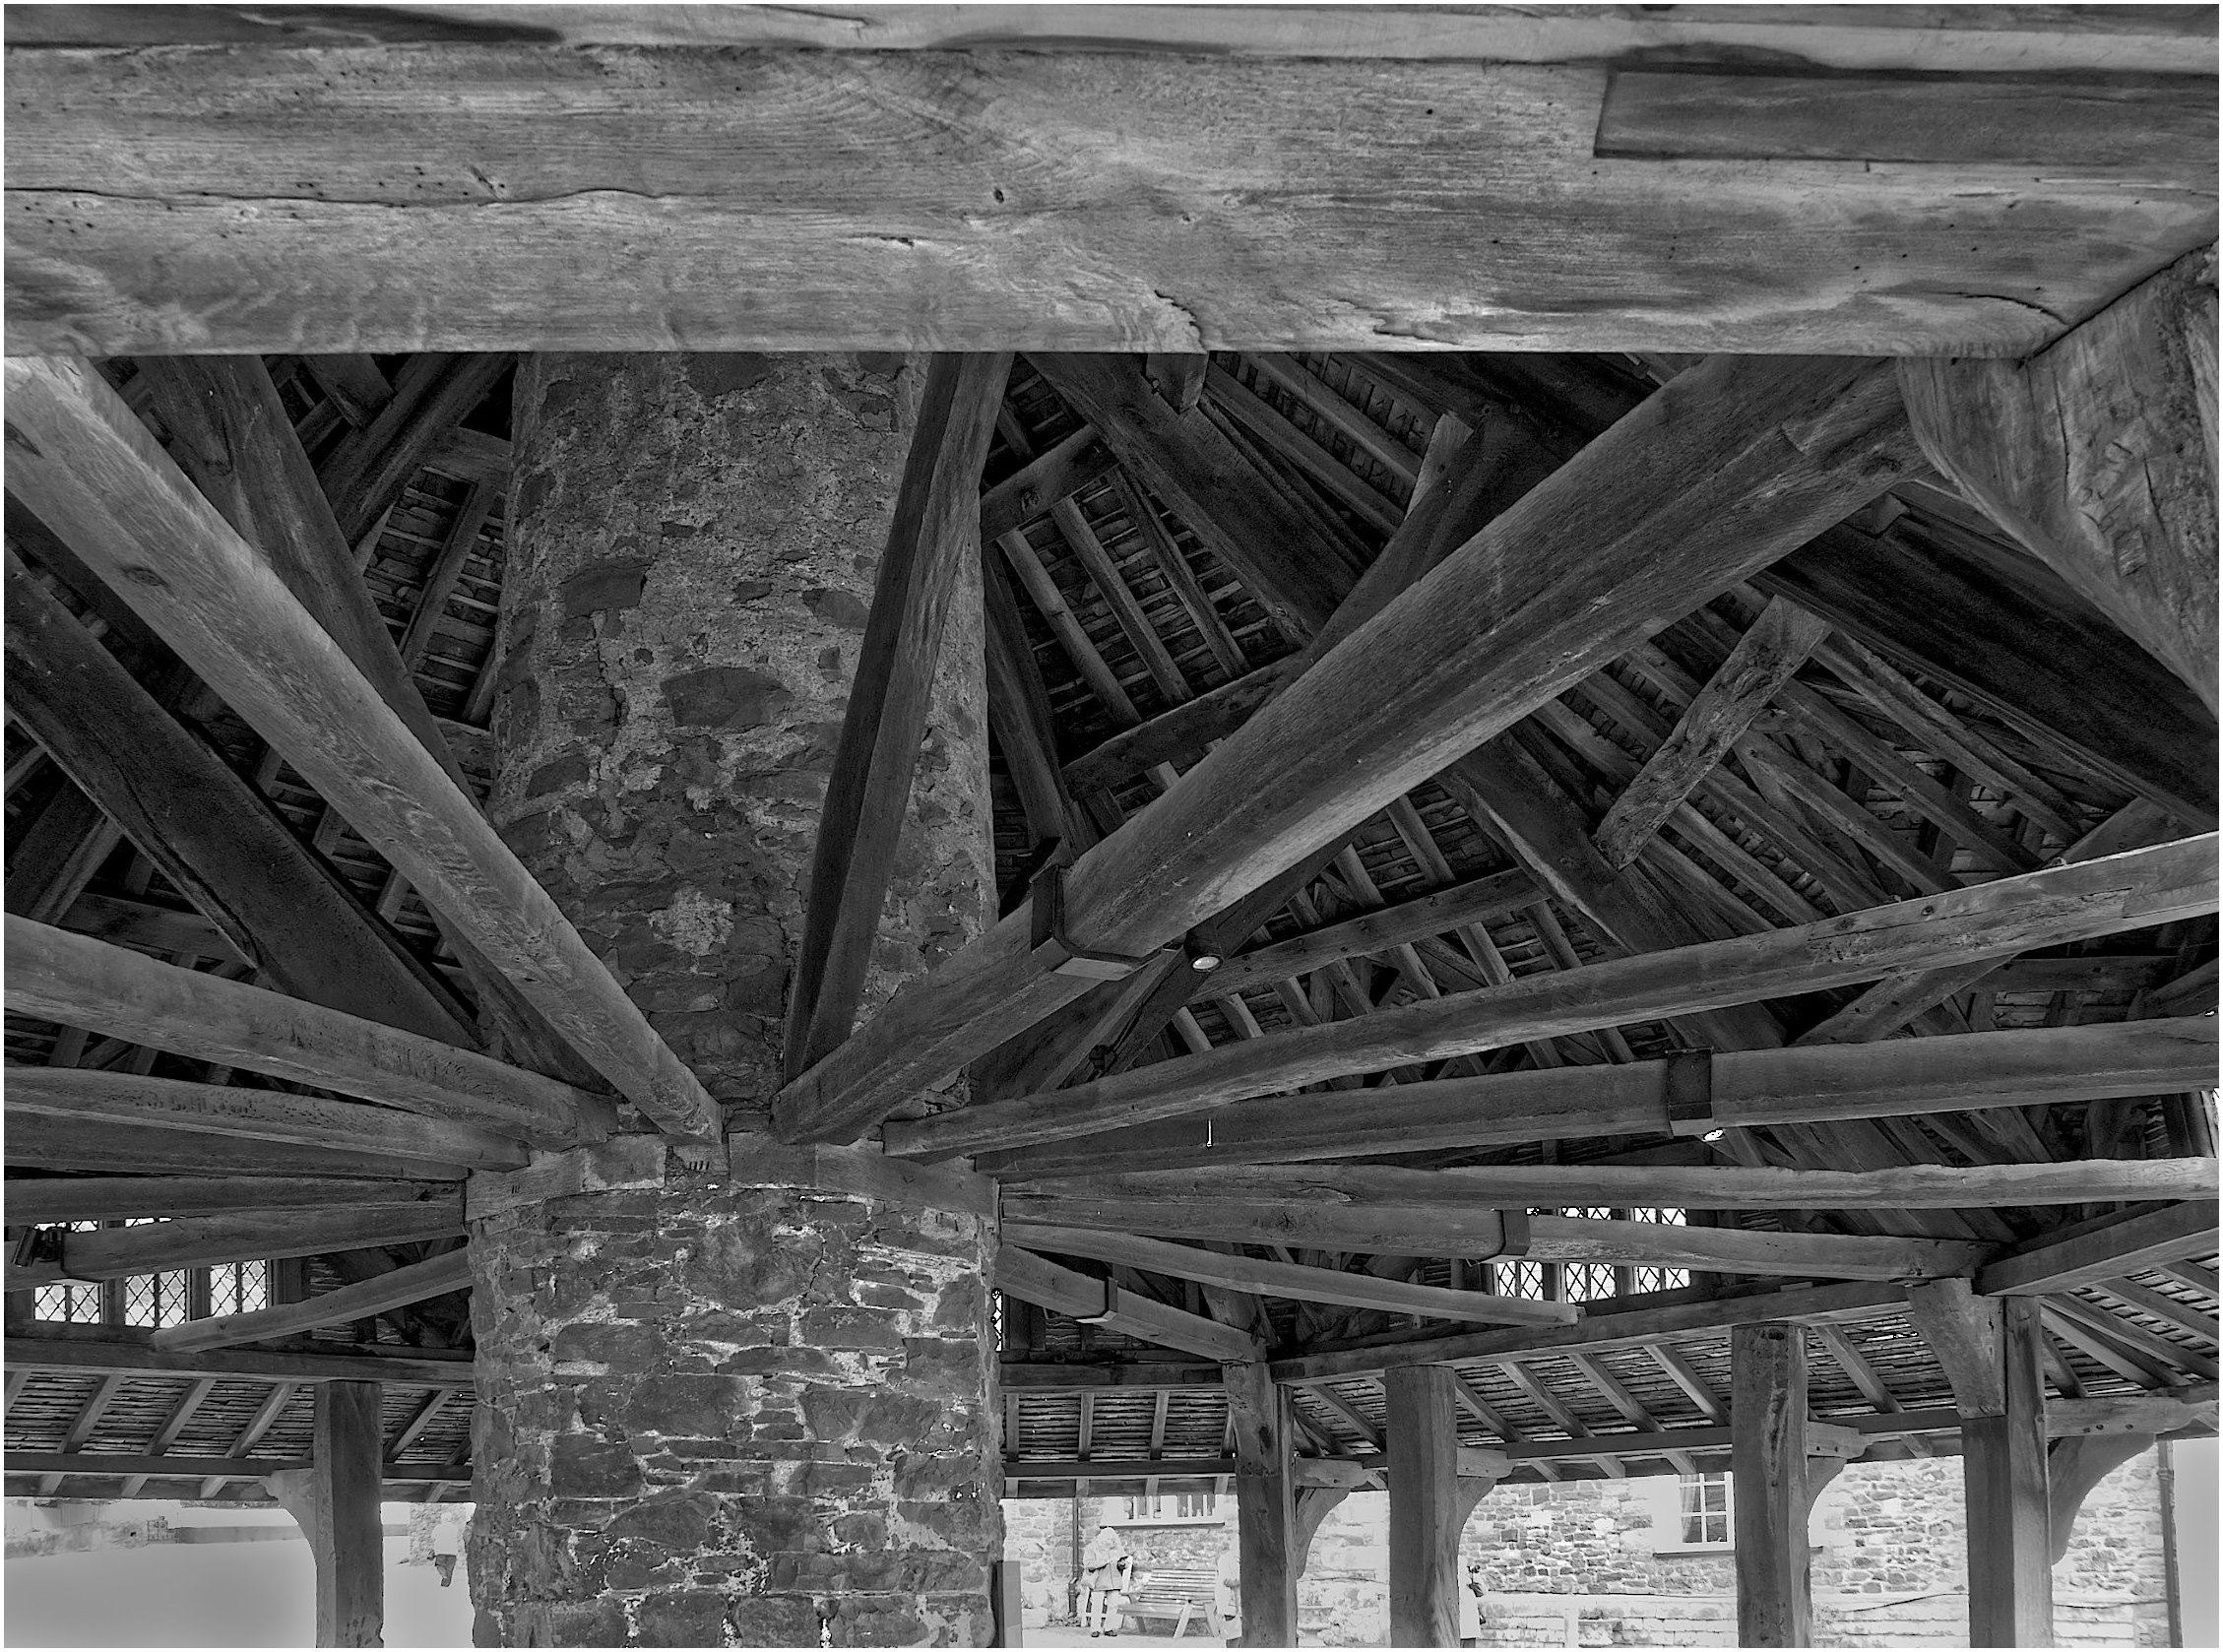
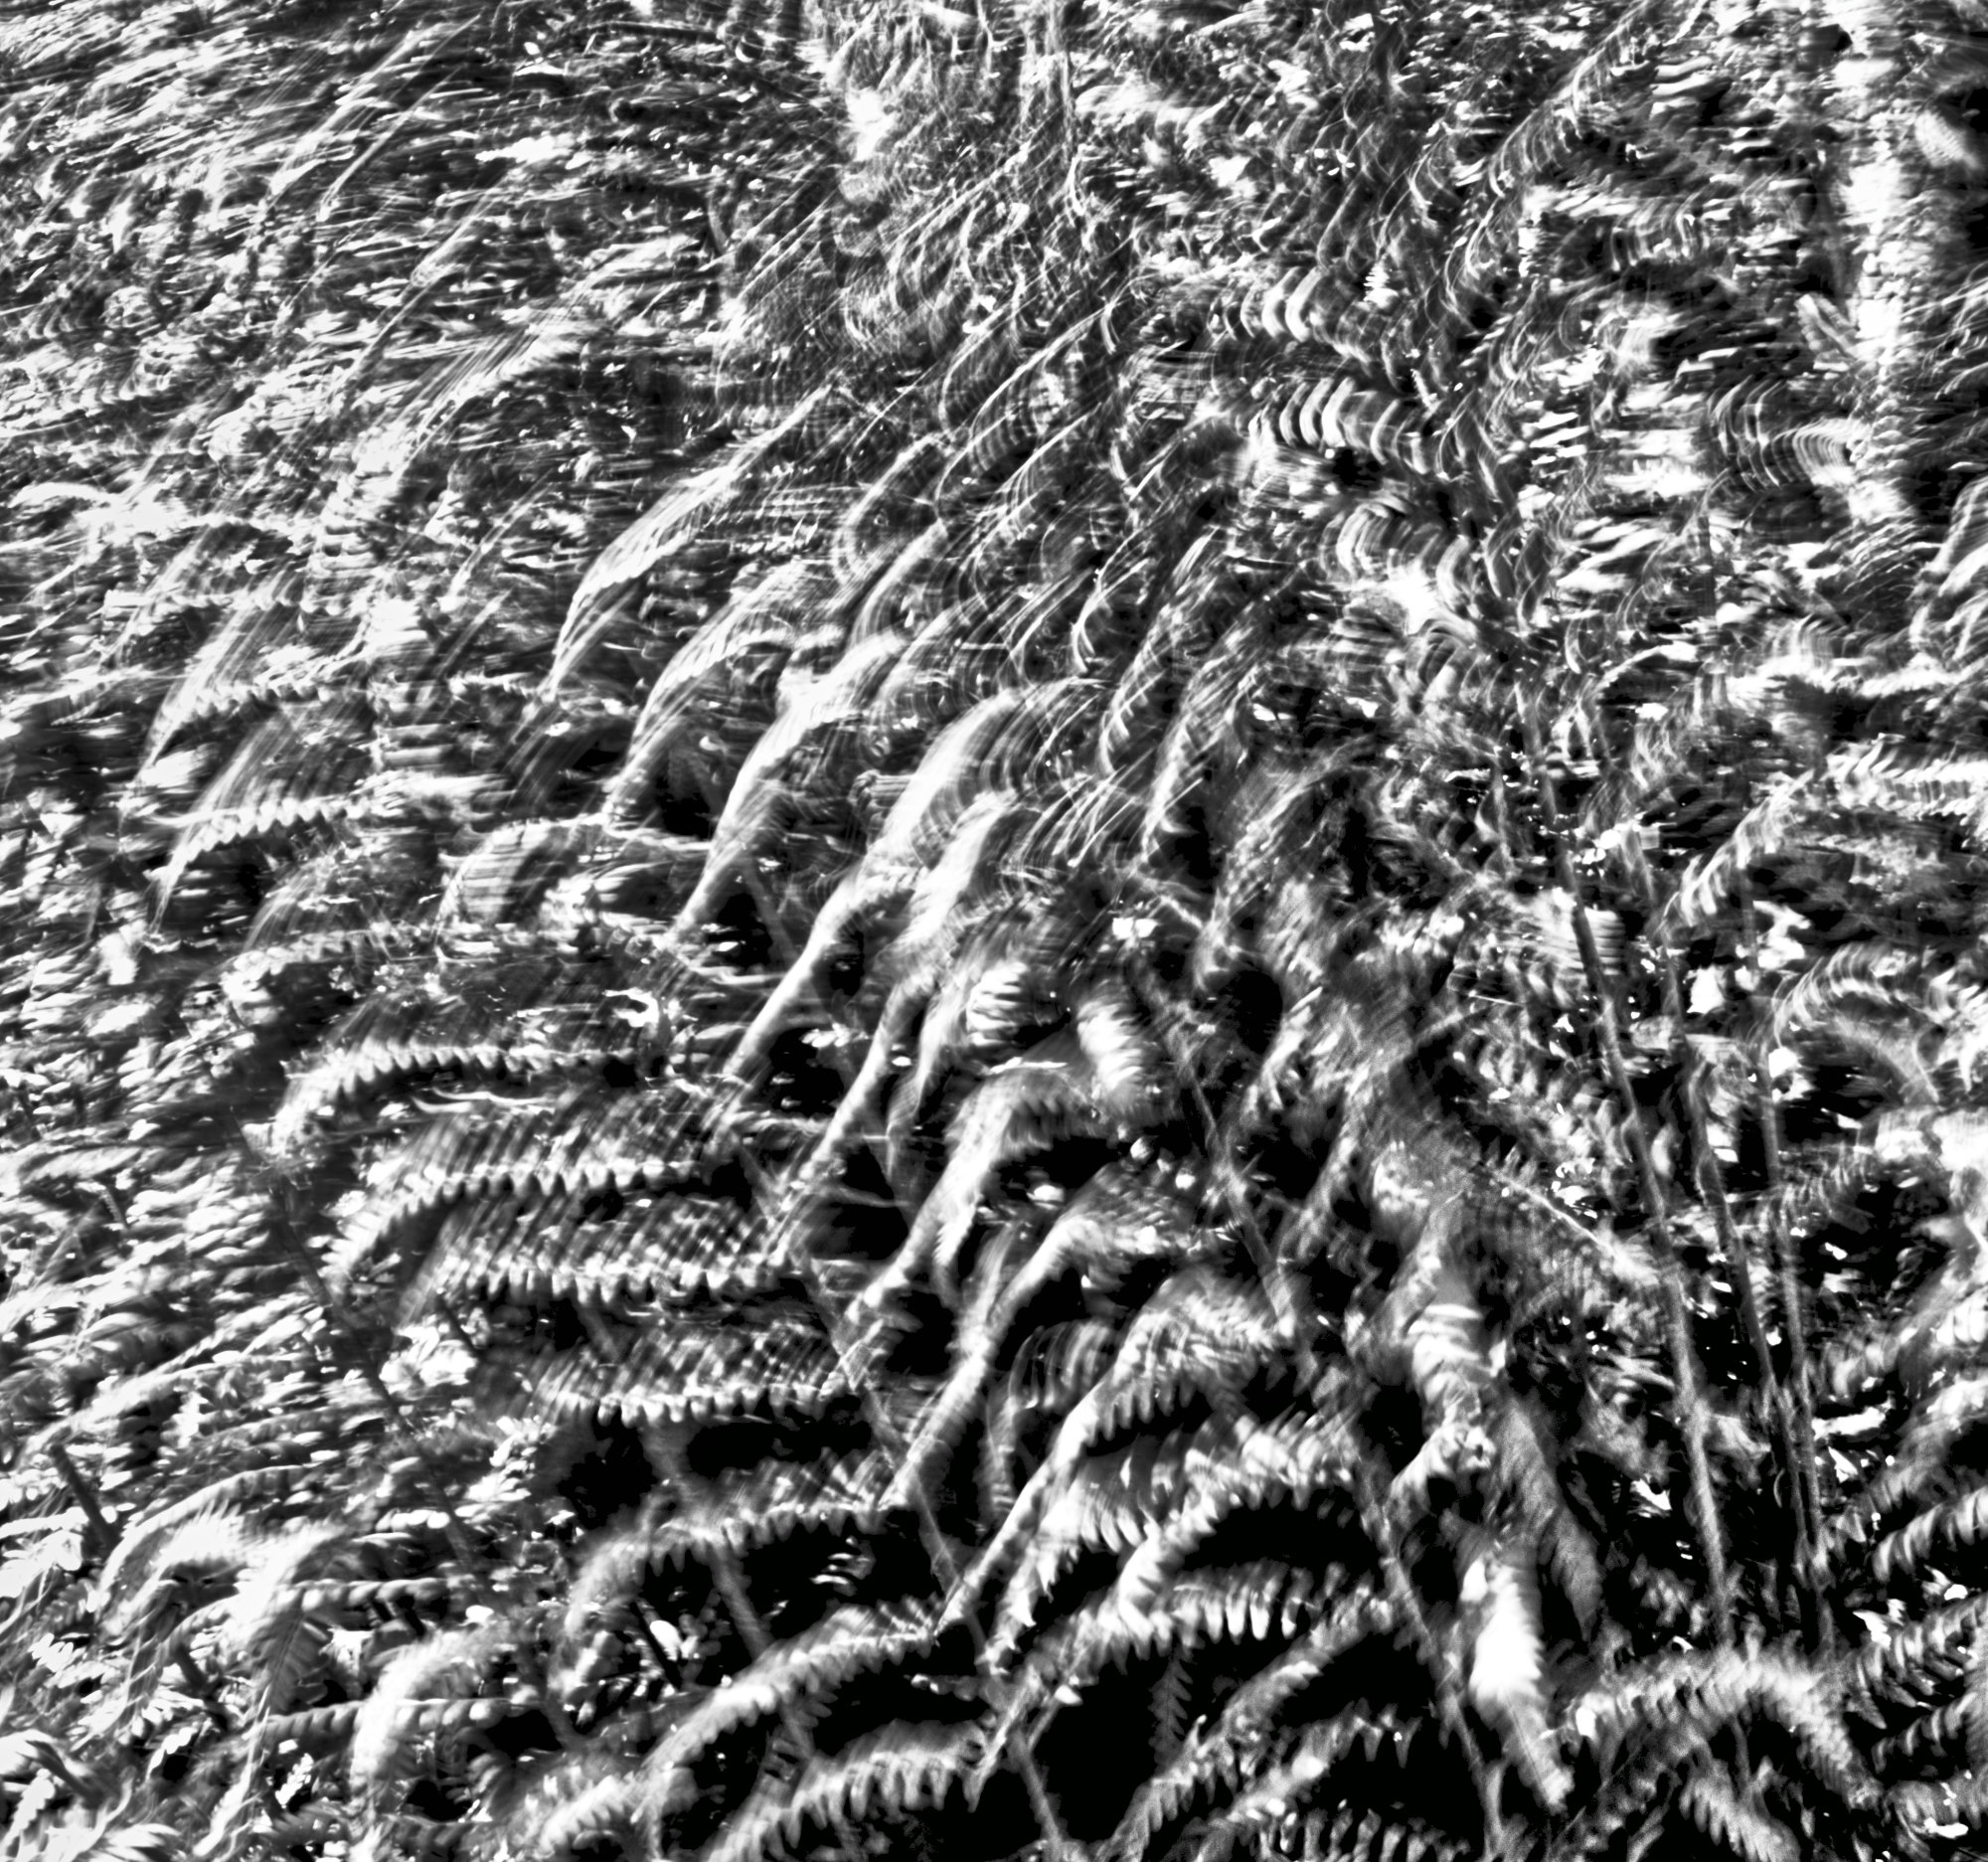
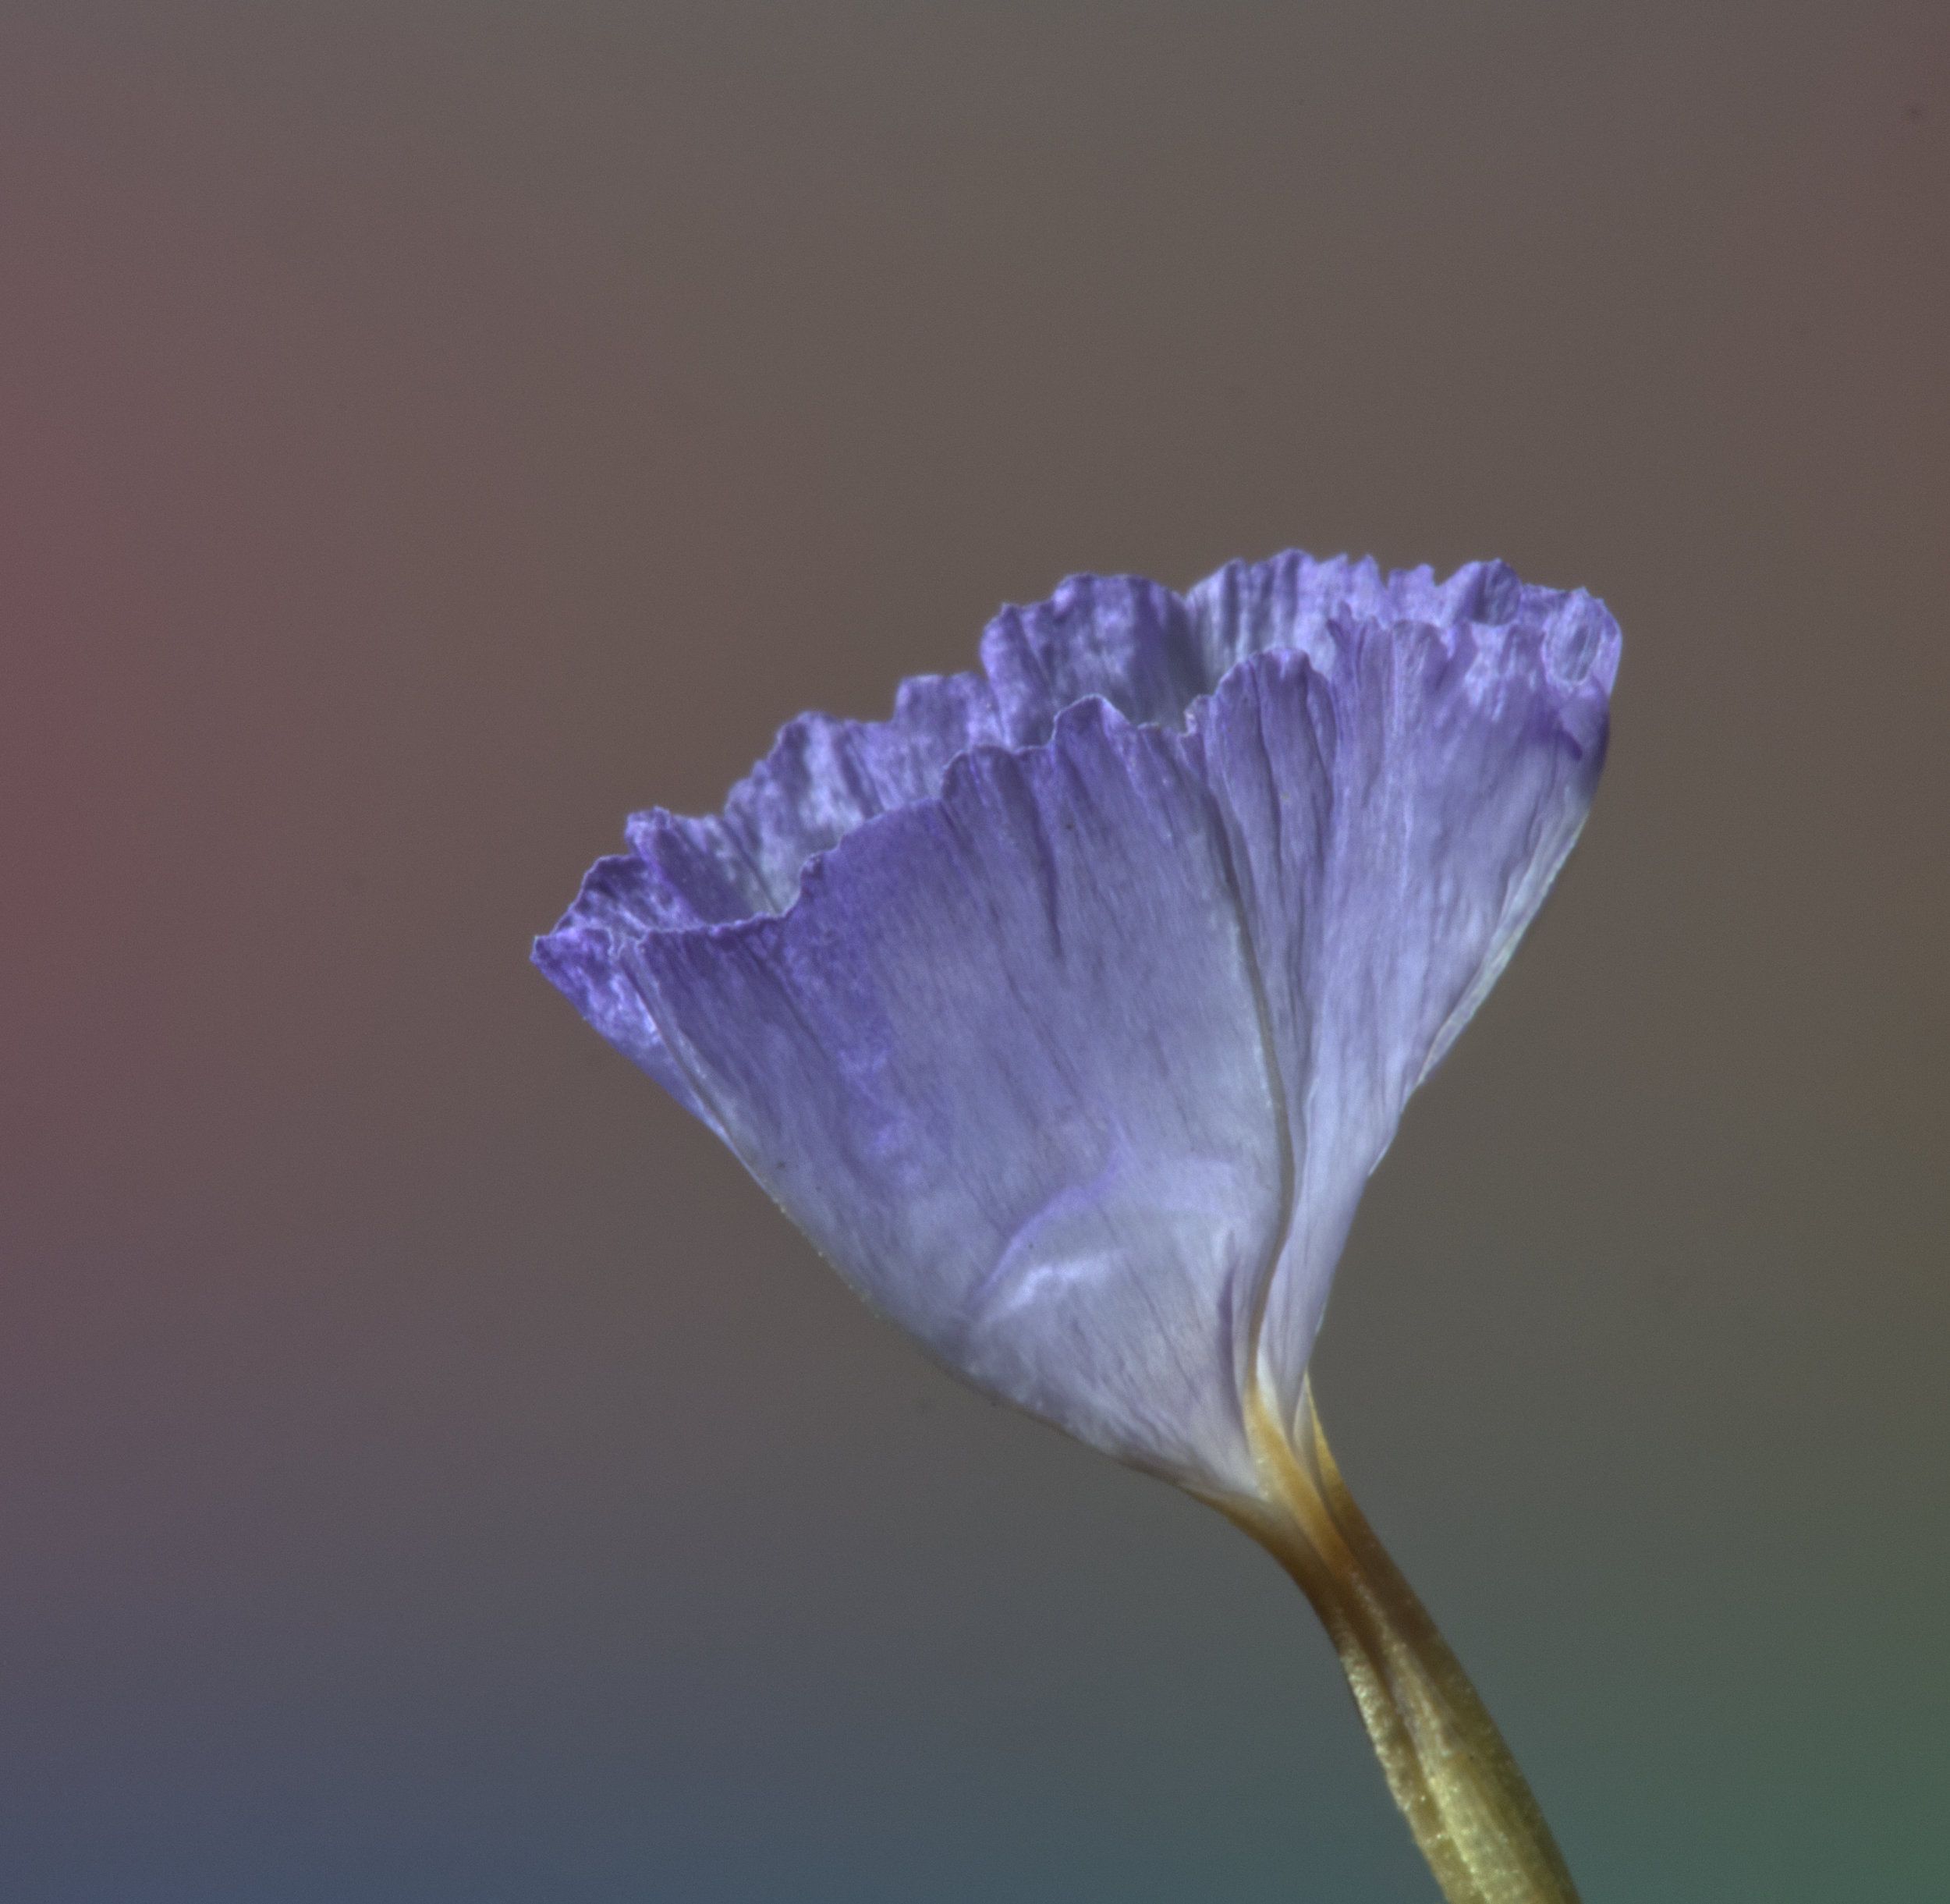
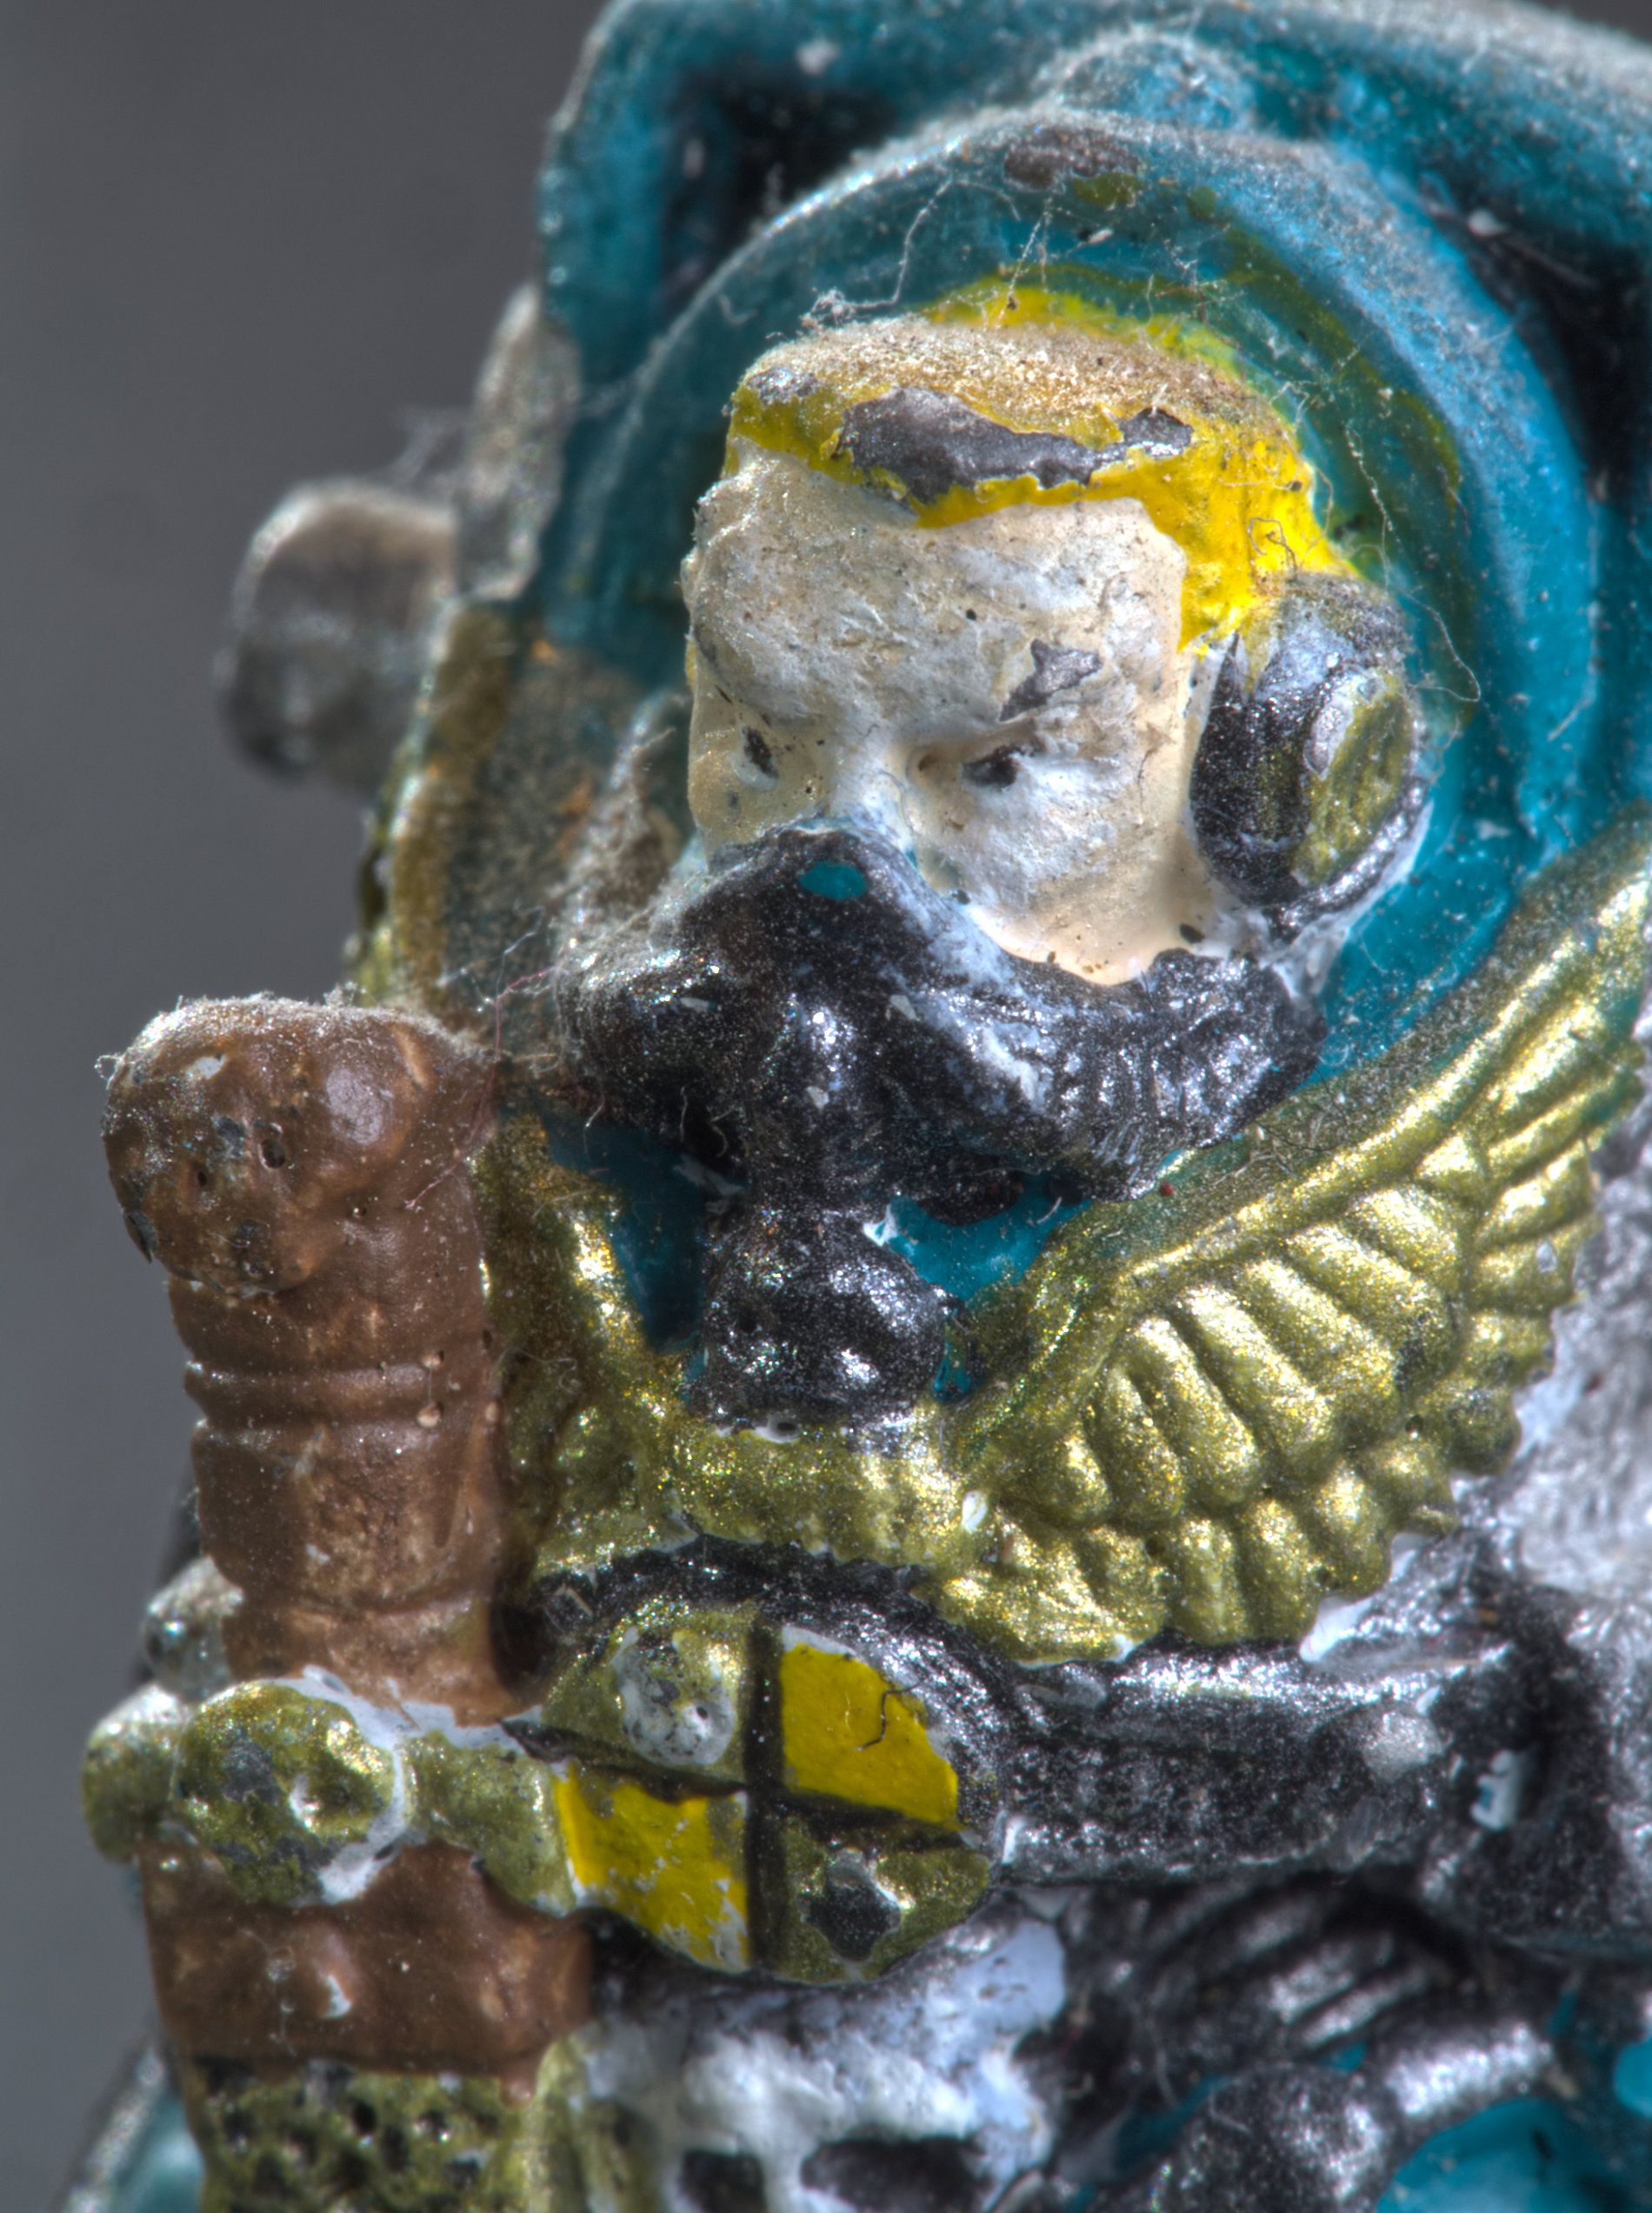
I think this is an interesting picture. Theree's no way I could have guessed what it is a picture of, which I think is essential for an abstract.
Whilst the mono conversion is interesting, I like original 1 better.
Unusual and interesting frame - how did you do that? |
Dec 10th |
| 64 |
Dec 21 |
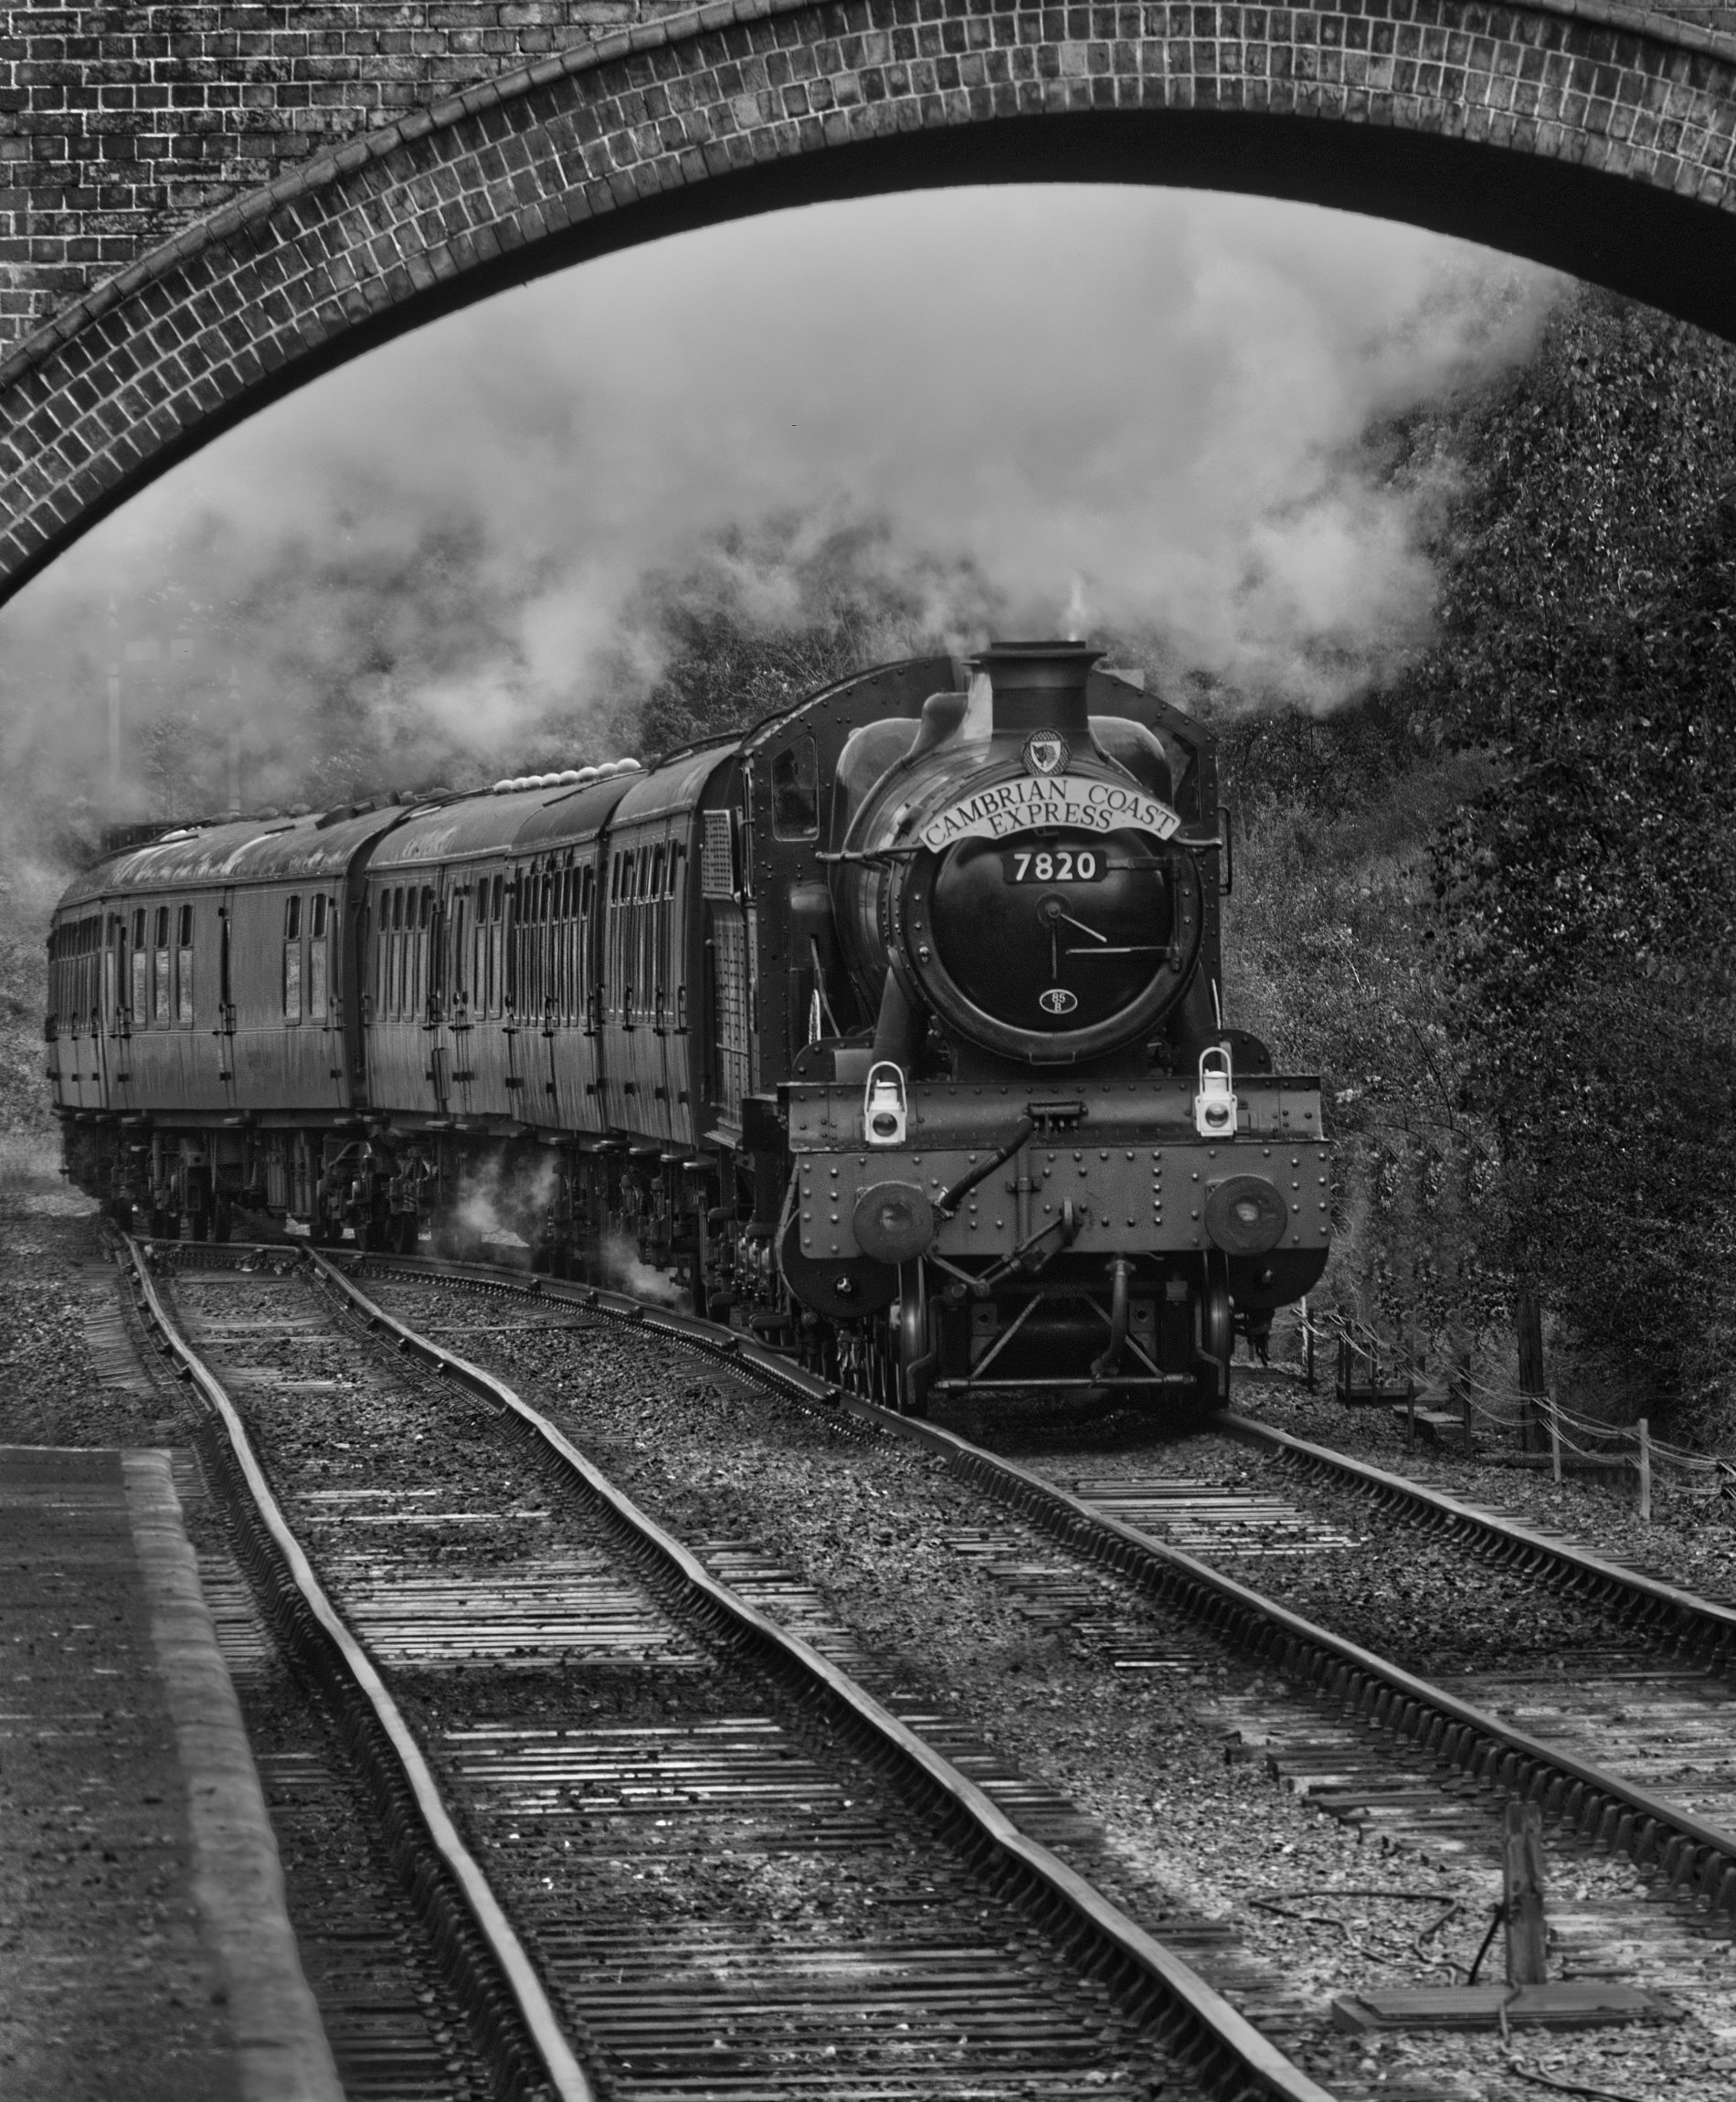
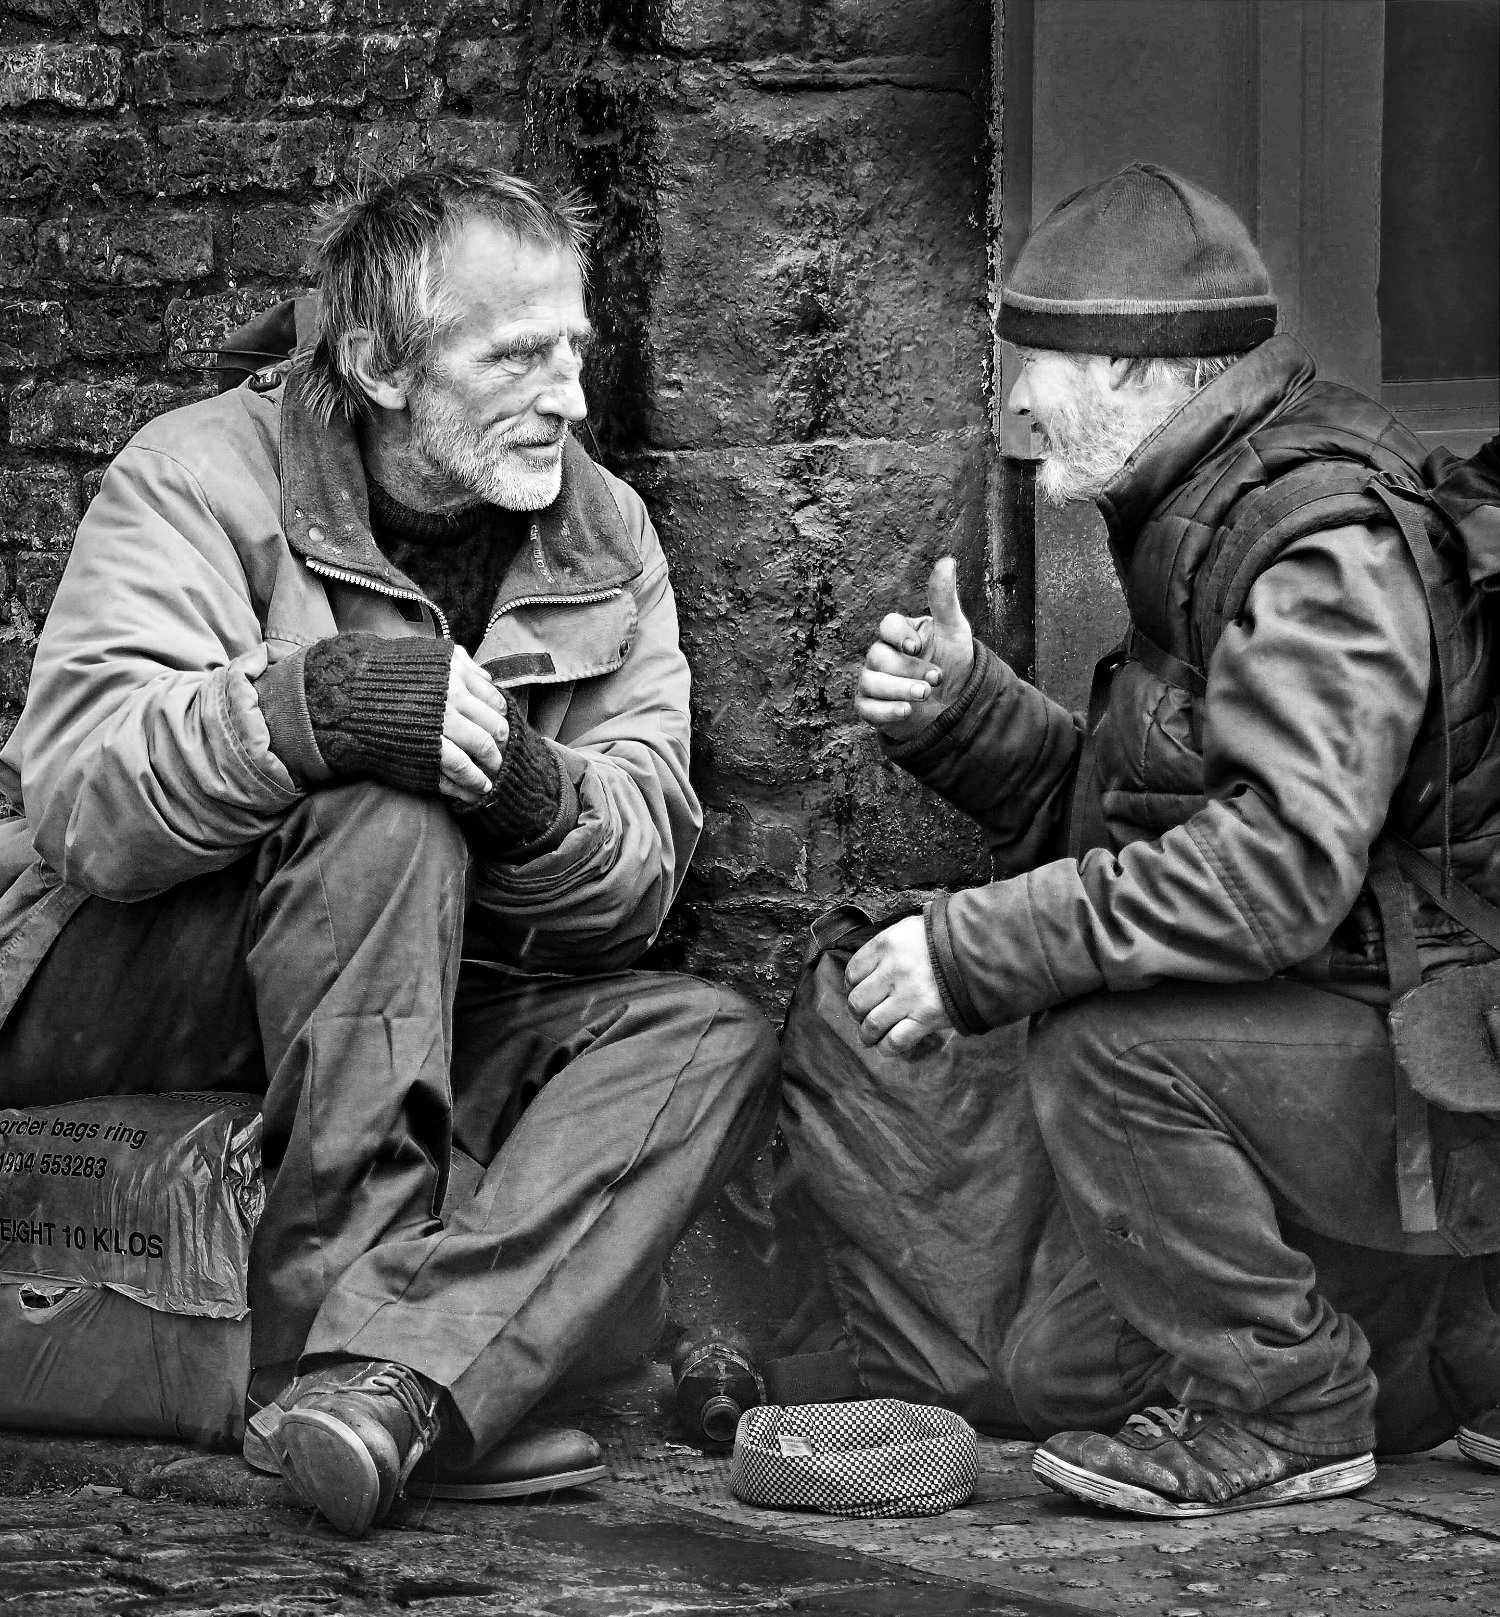
Comment |
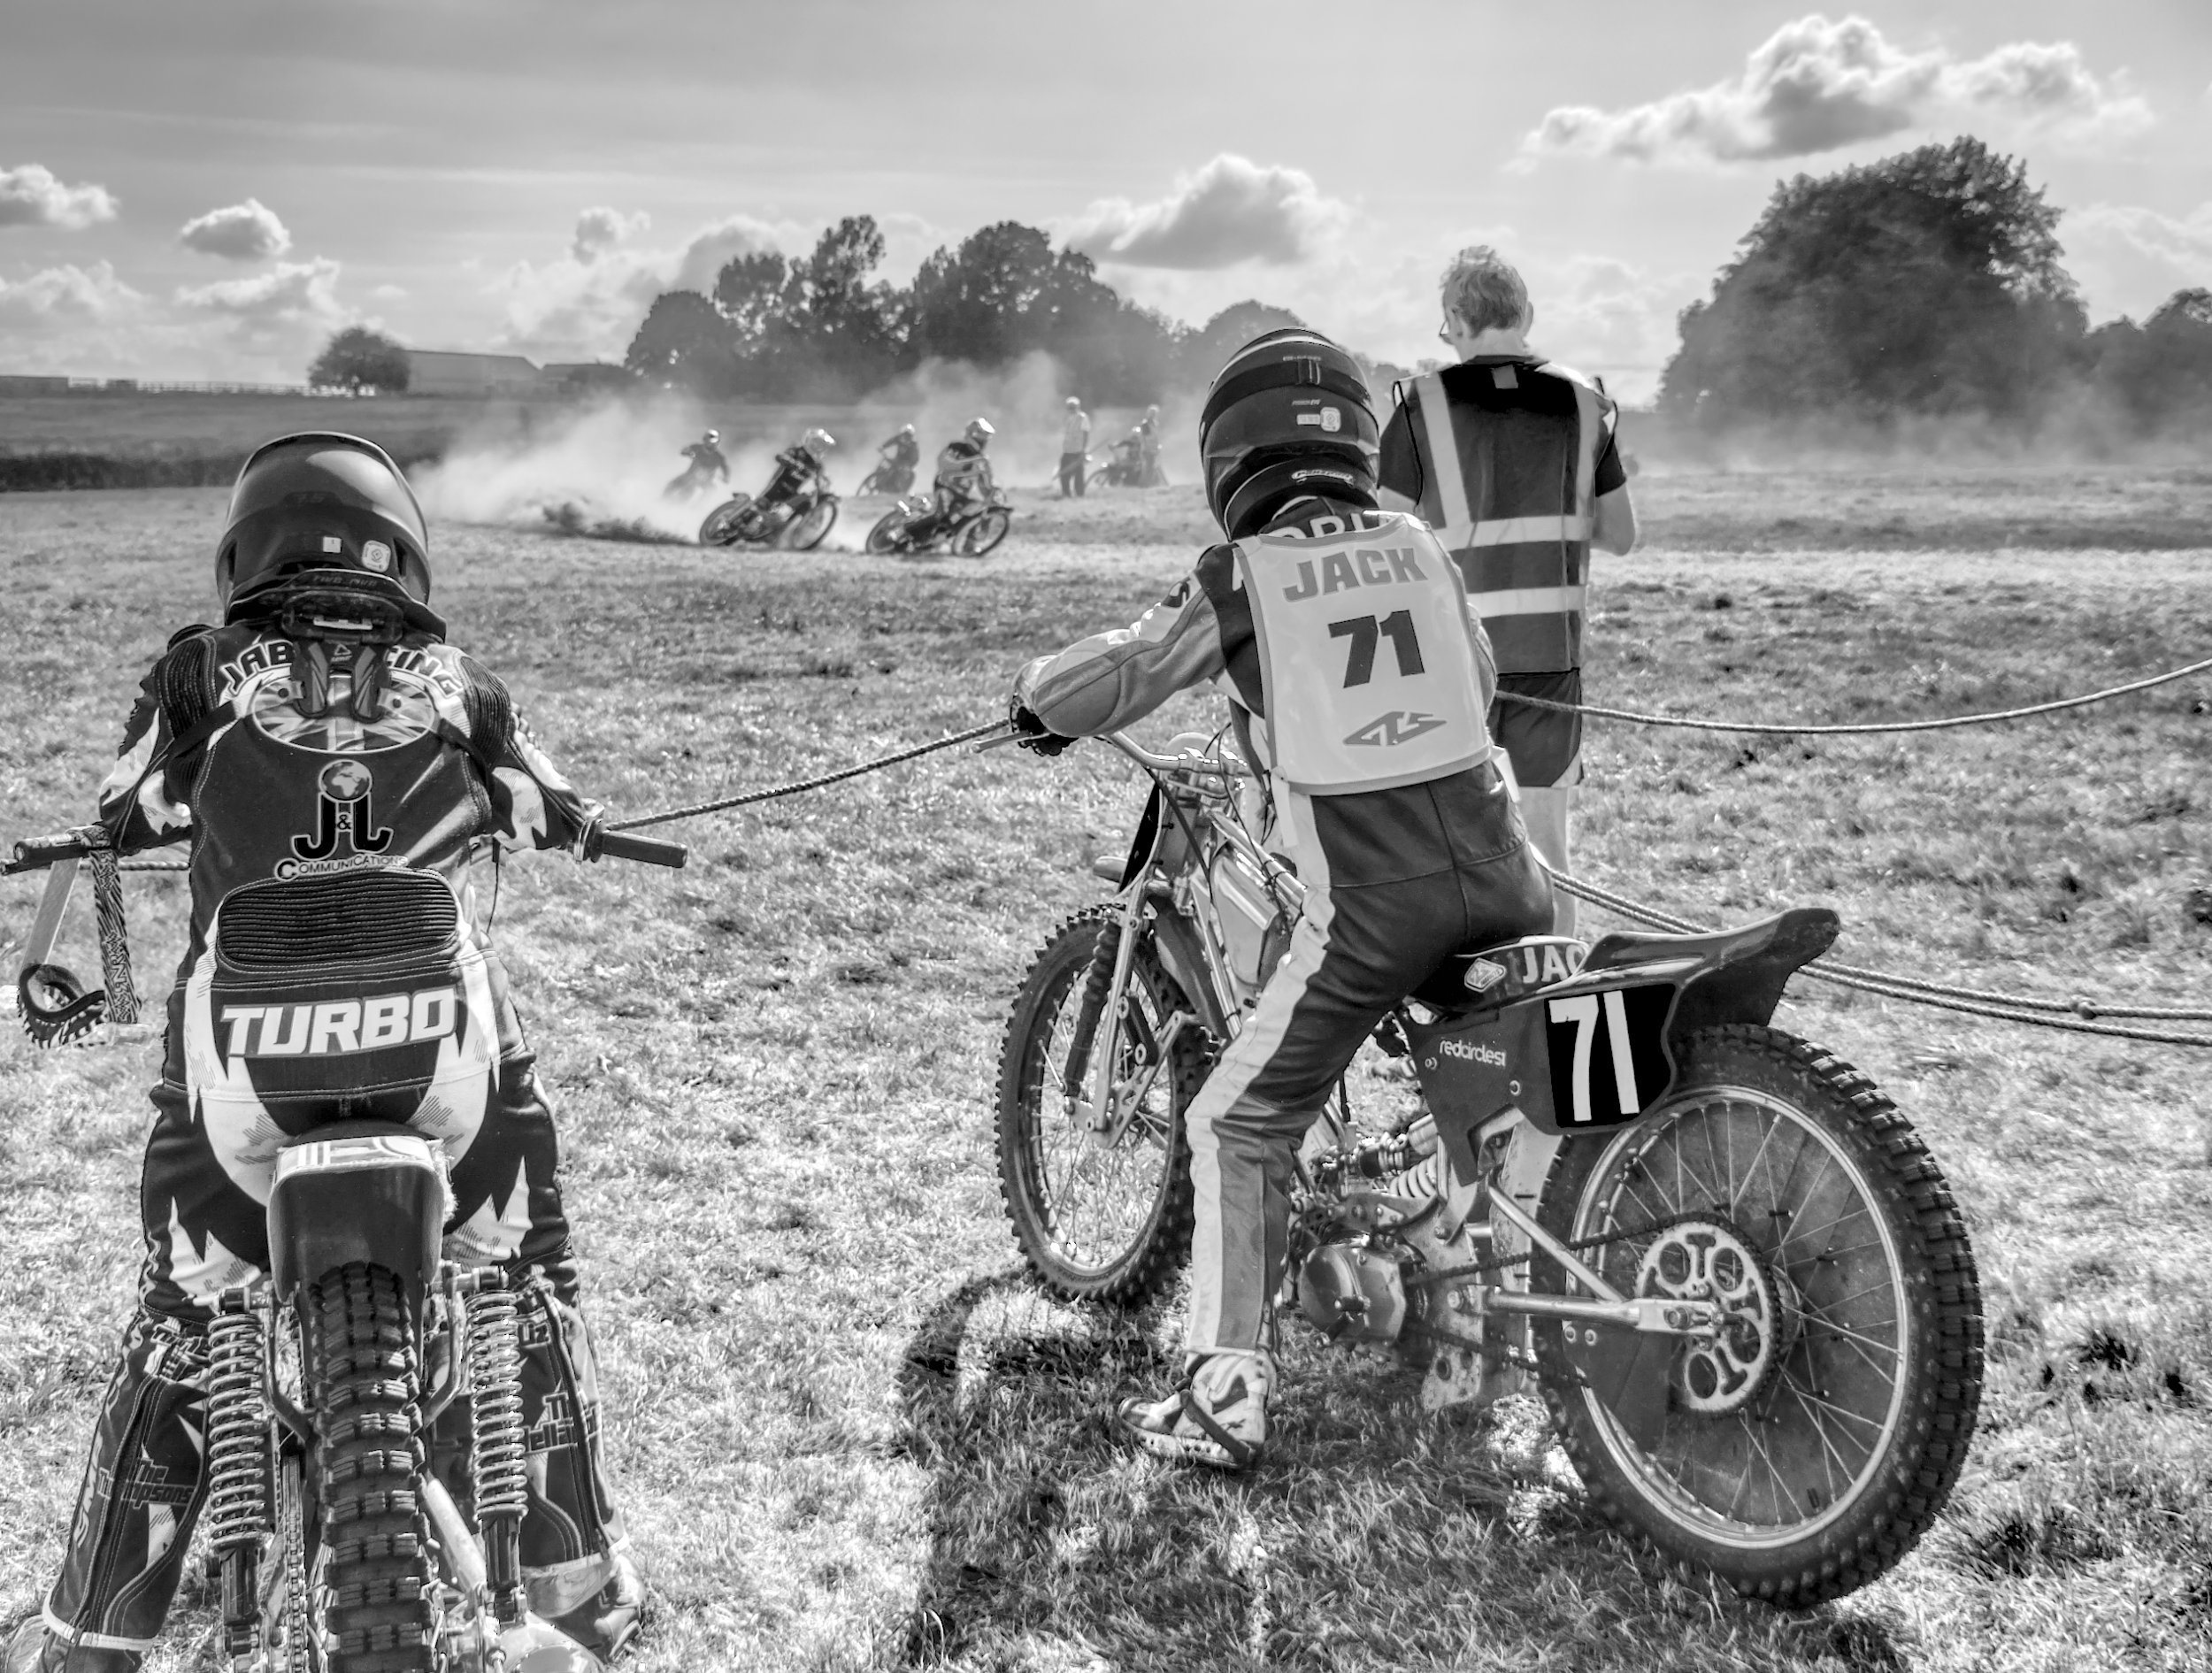
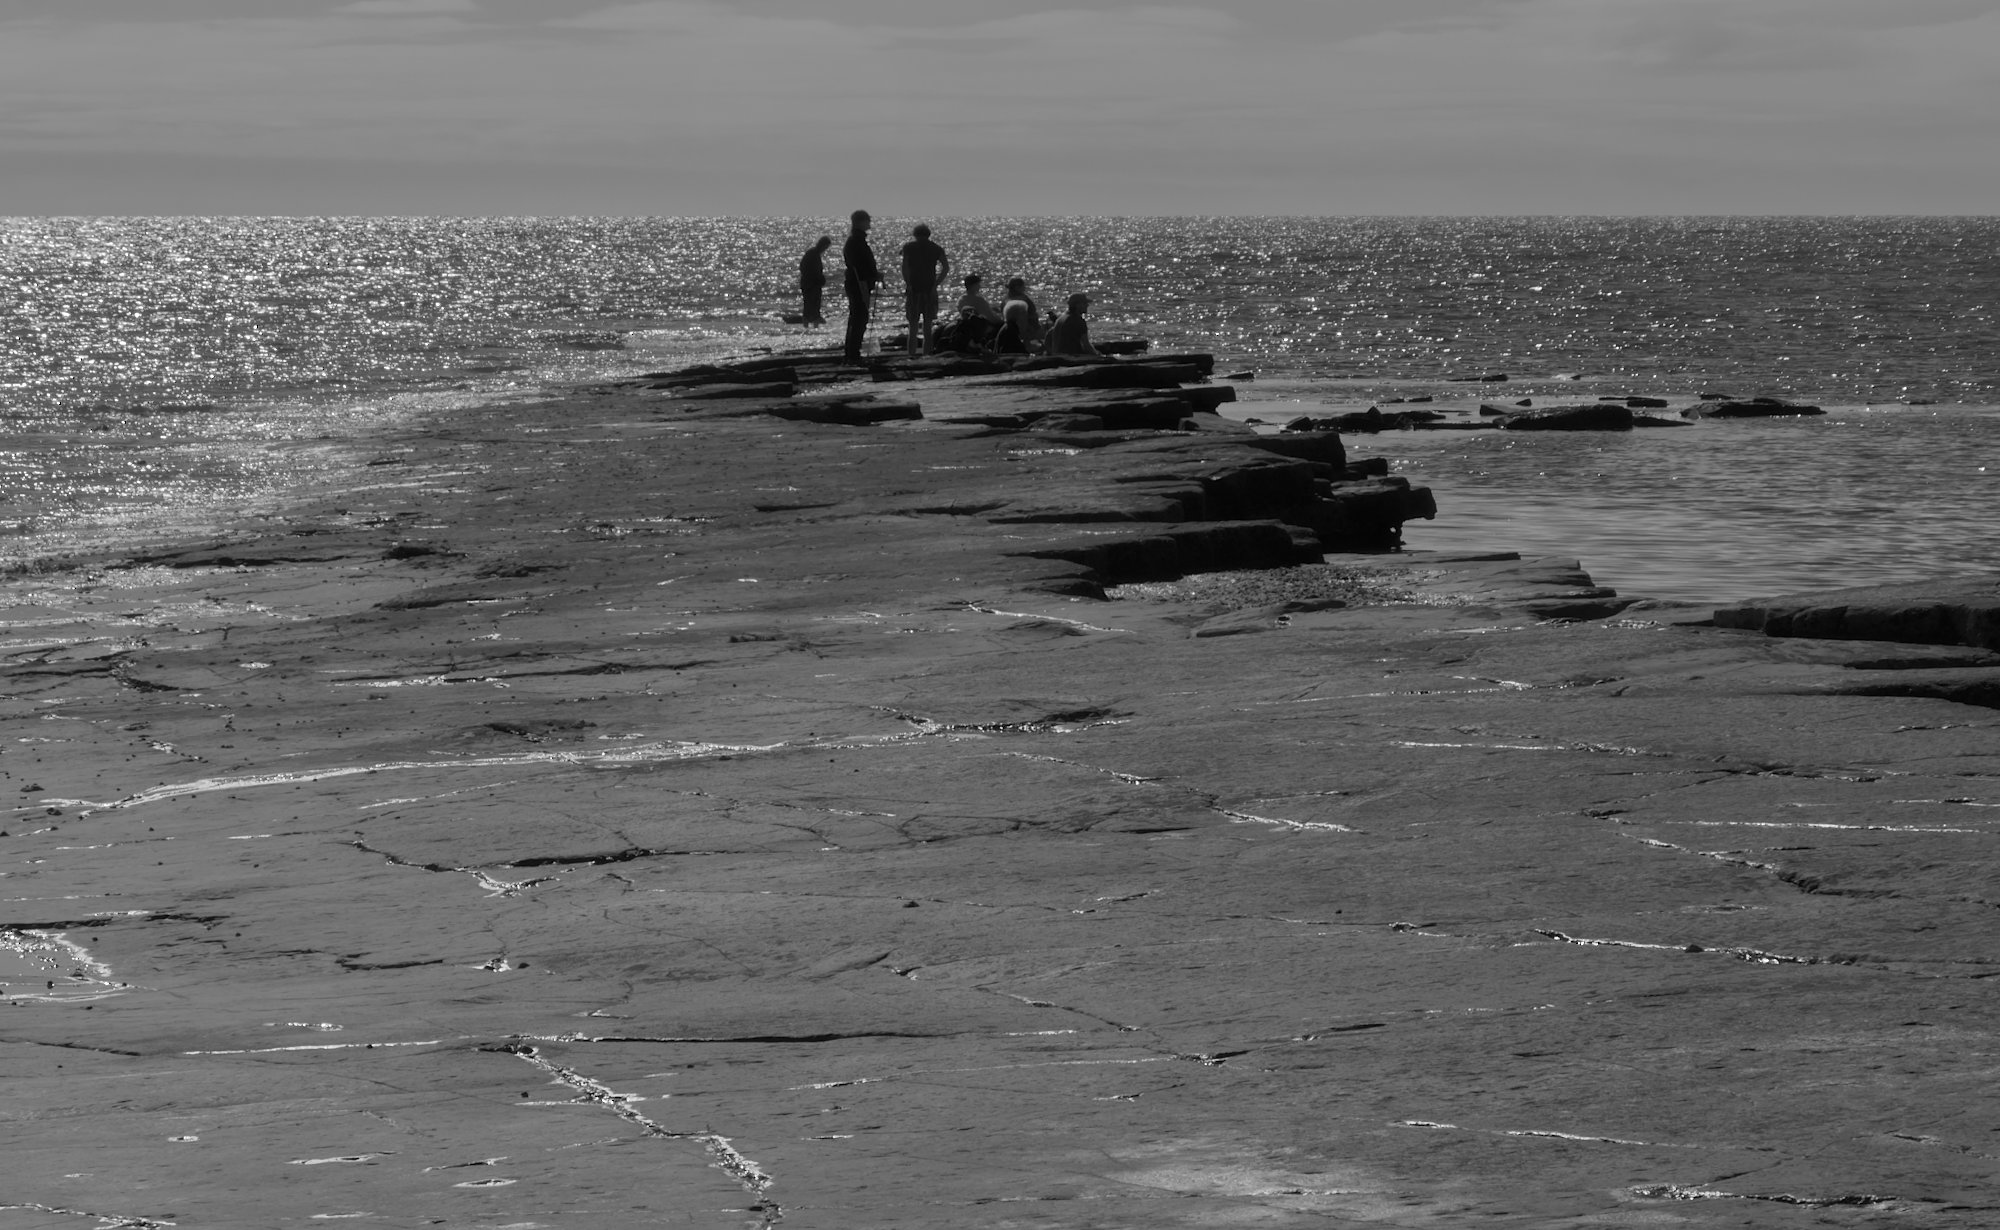
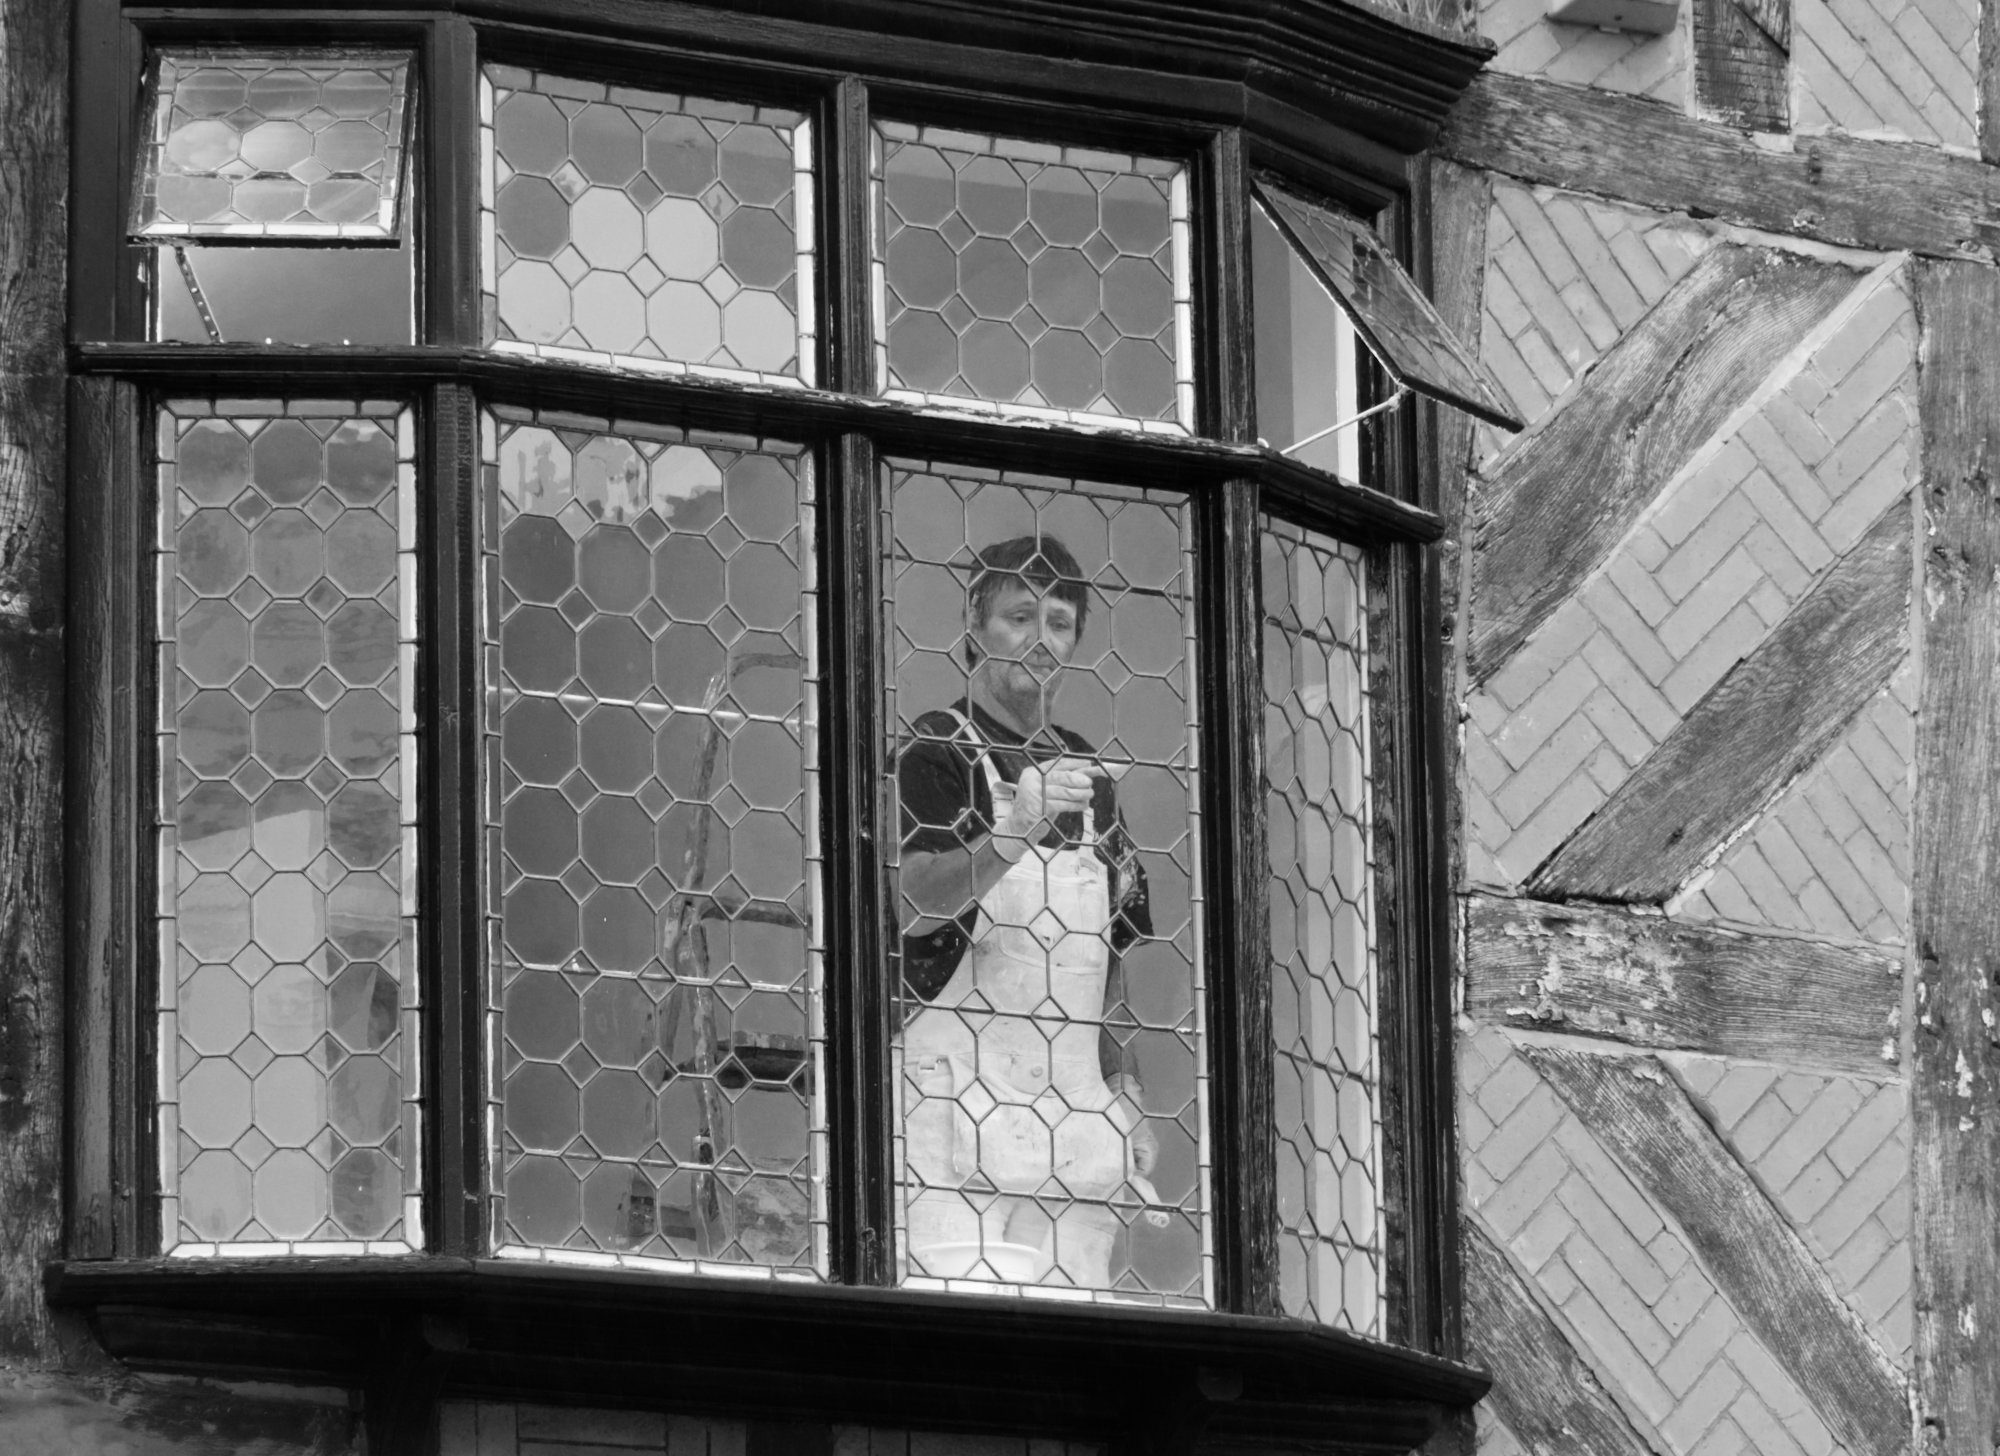
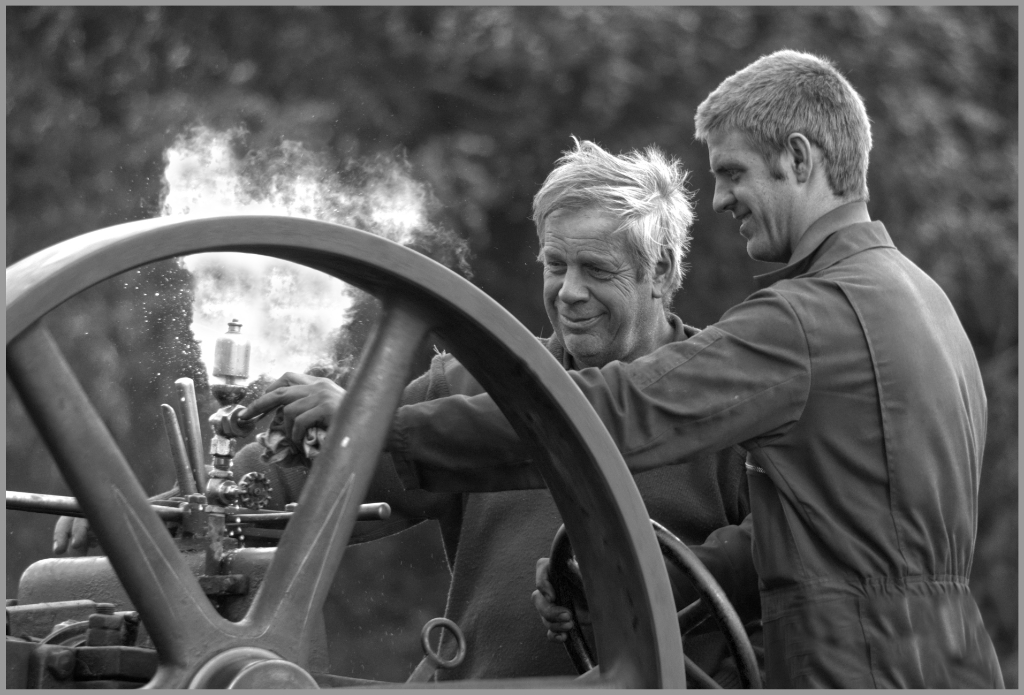
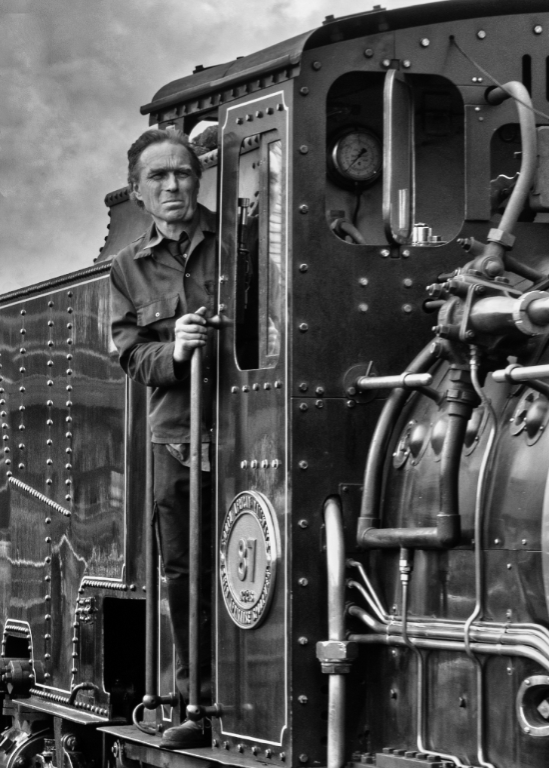
I wouldn't have realised what the man was doing without your narrative, Don. Pity there wasn't a good spray of water from a hose! Although now I look closer I think it's a rake or similar in his right hand, I'm not sure what his left hand is doing.
I suppose it's this uncertainty of what this picture depicts that makes me less enthusiatic than I'd have expected, as at first glance the scene is dramatic and appears exciting.
The scene converted well to mono, although I'd have darkened down the path a little.
|
Dec 10th |
| 64 |
Dec 21 |
Comment |
Oh, I love that eye! So piercing. He seems to have been a self-confident bird.
Keeping details in the feathers of birds like this is paramount, and this photo has done that well I think. The out of focus waves complement the sharp lines of the bird well.
Nice photo! |
Dec 10th |
7 comments - 6 replies for Group 64
|
| 95 |
Dec 21 |
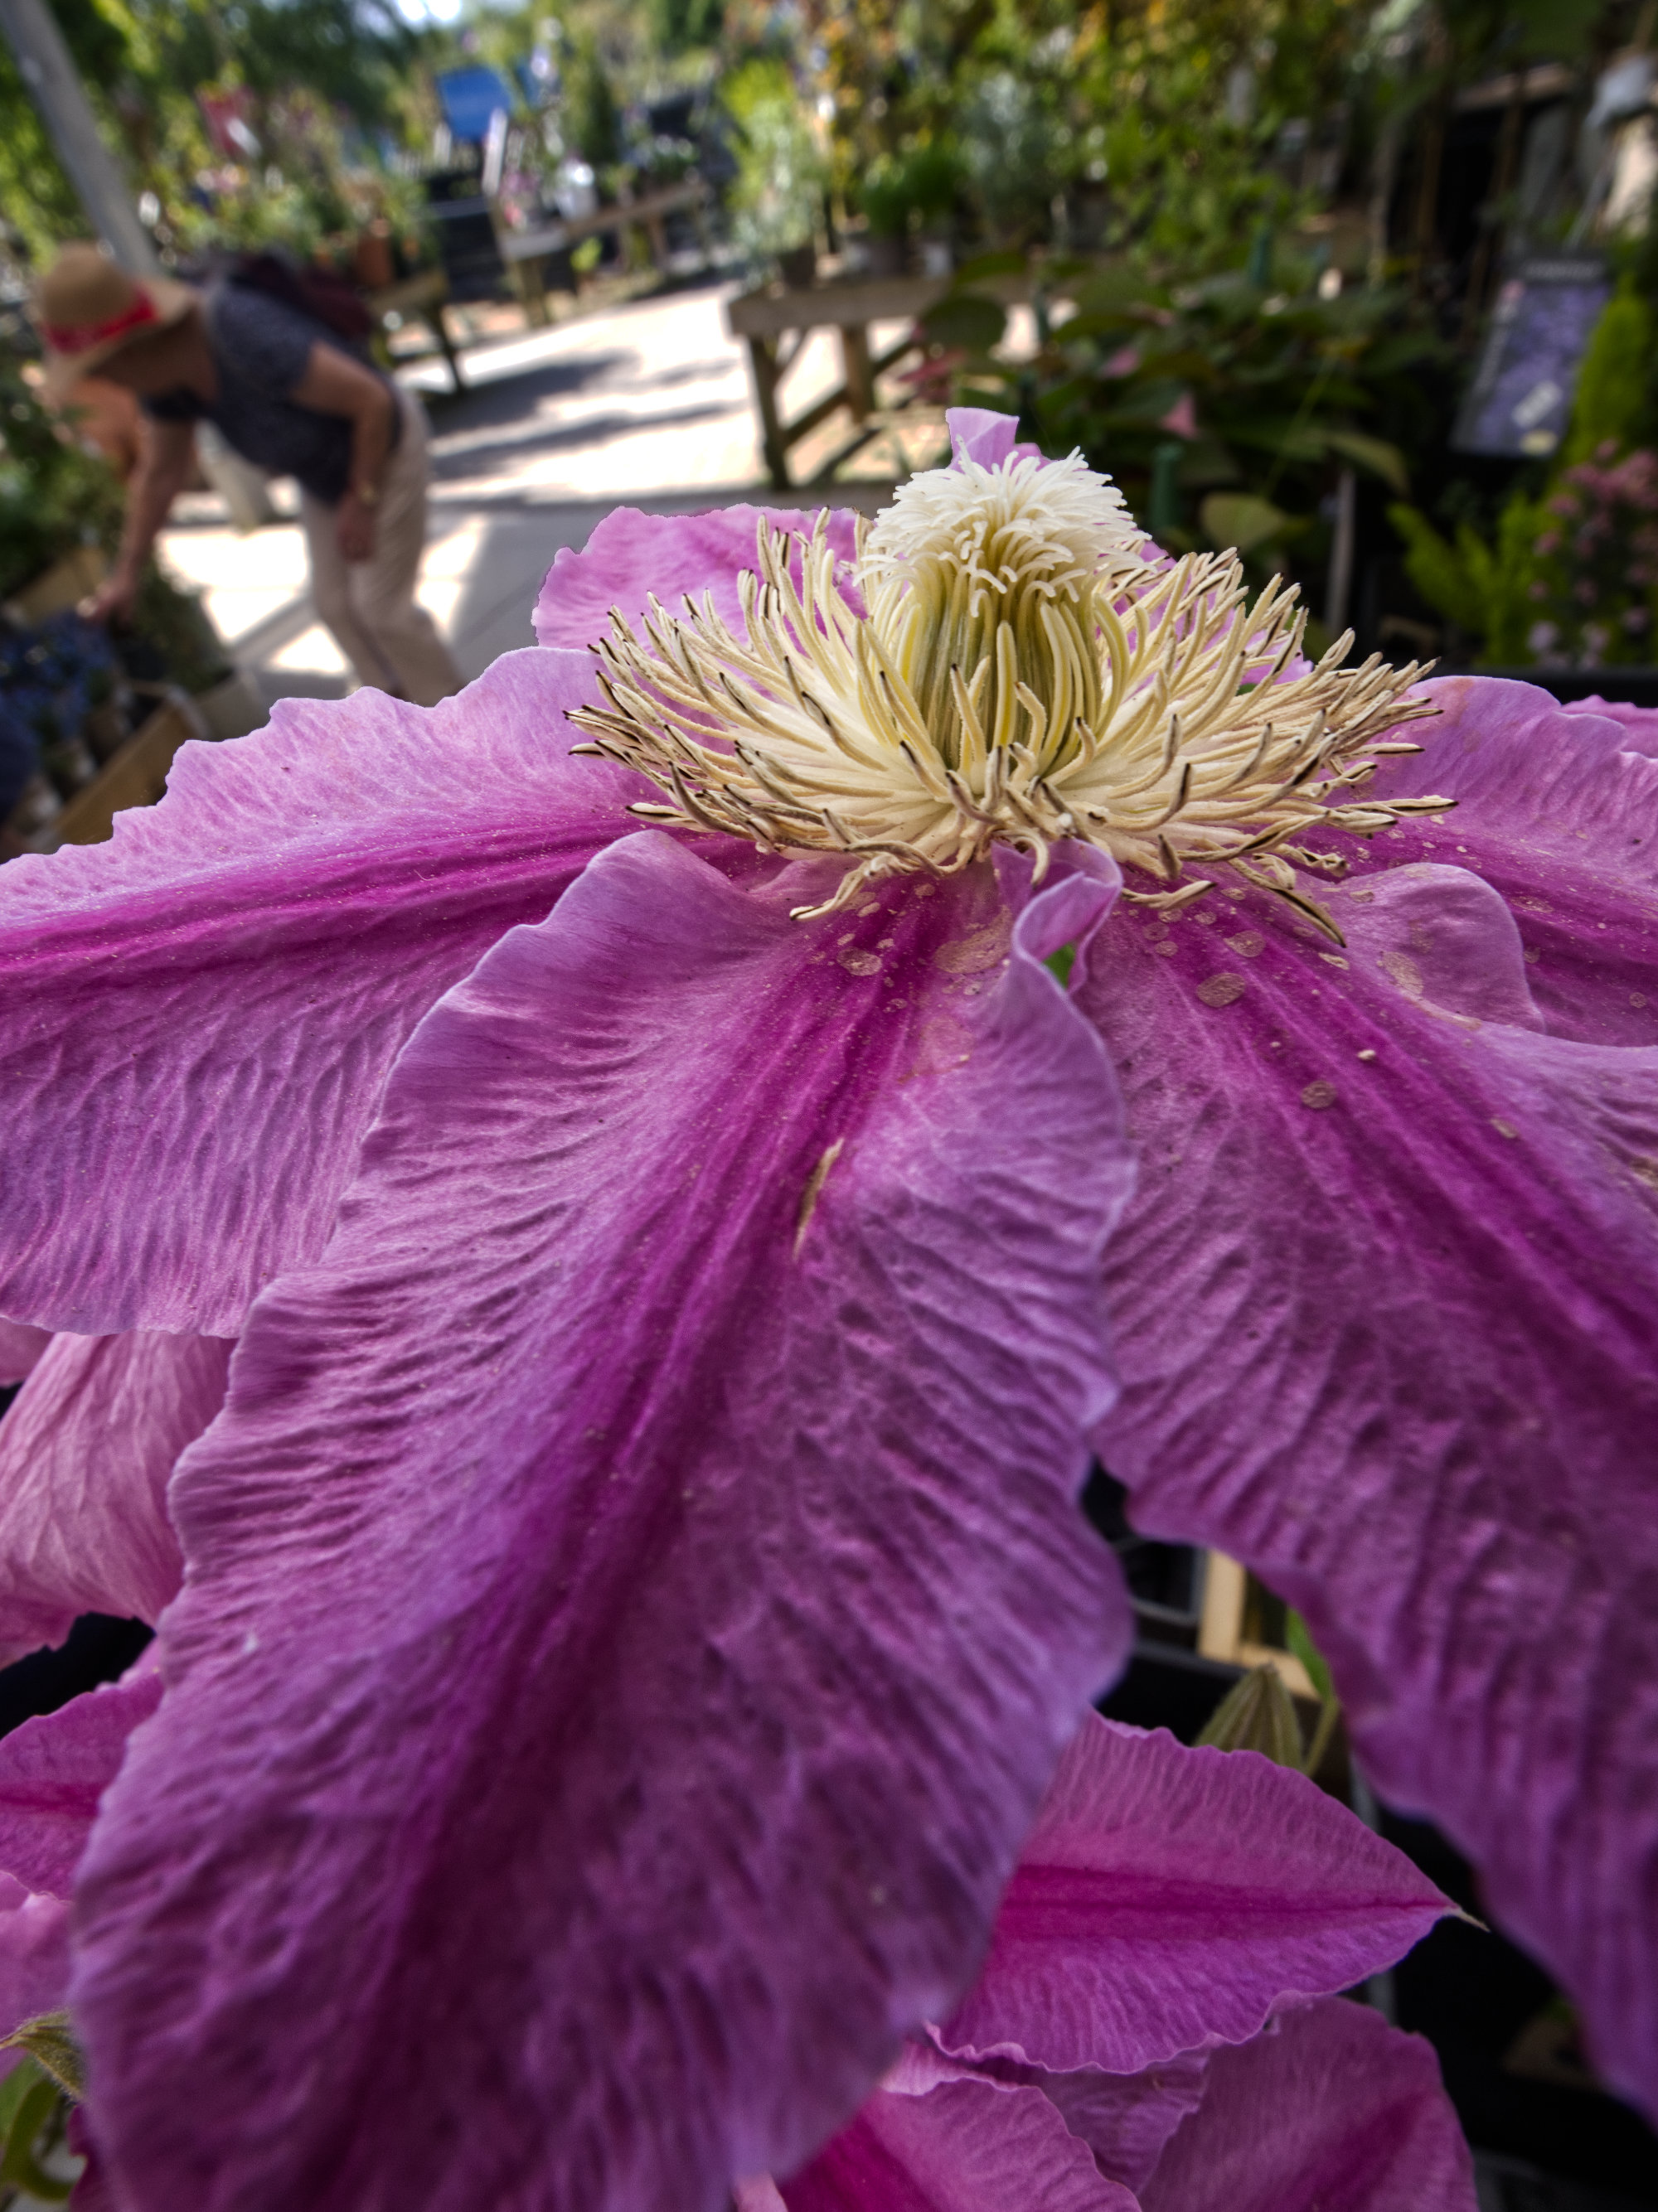
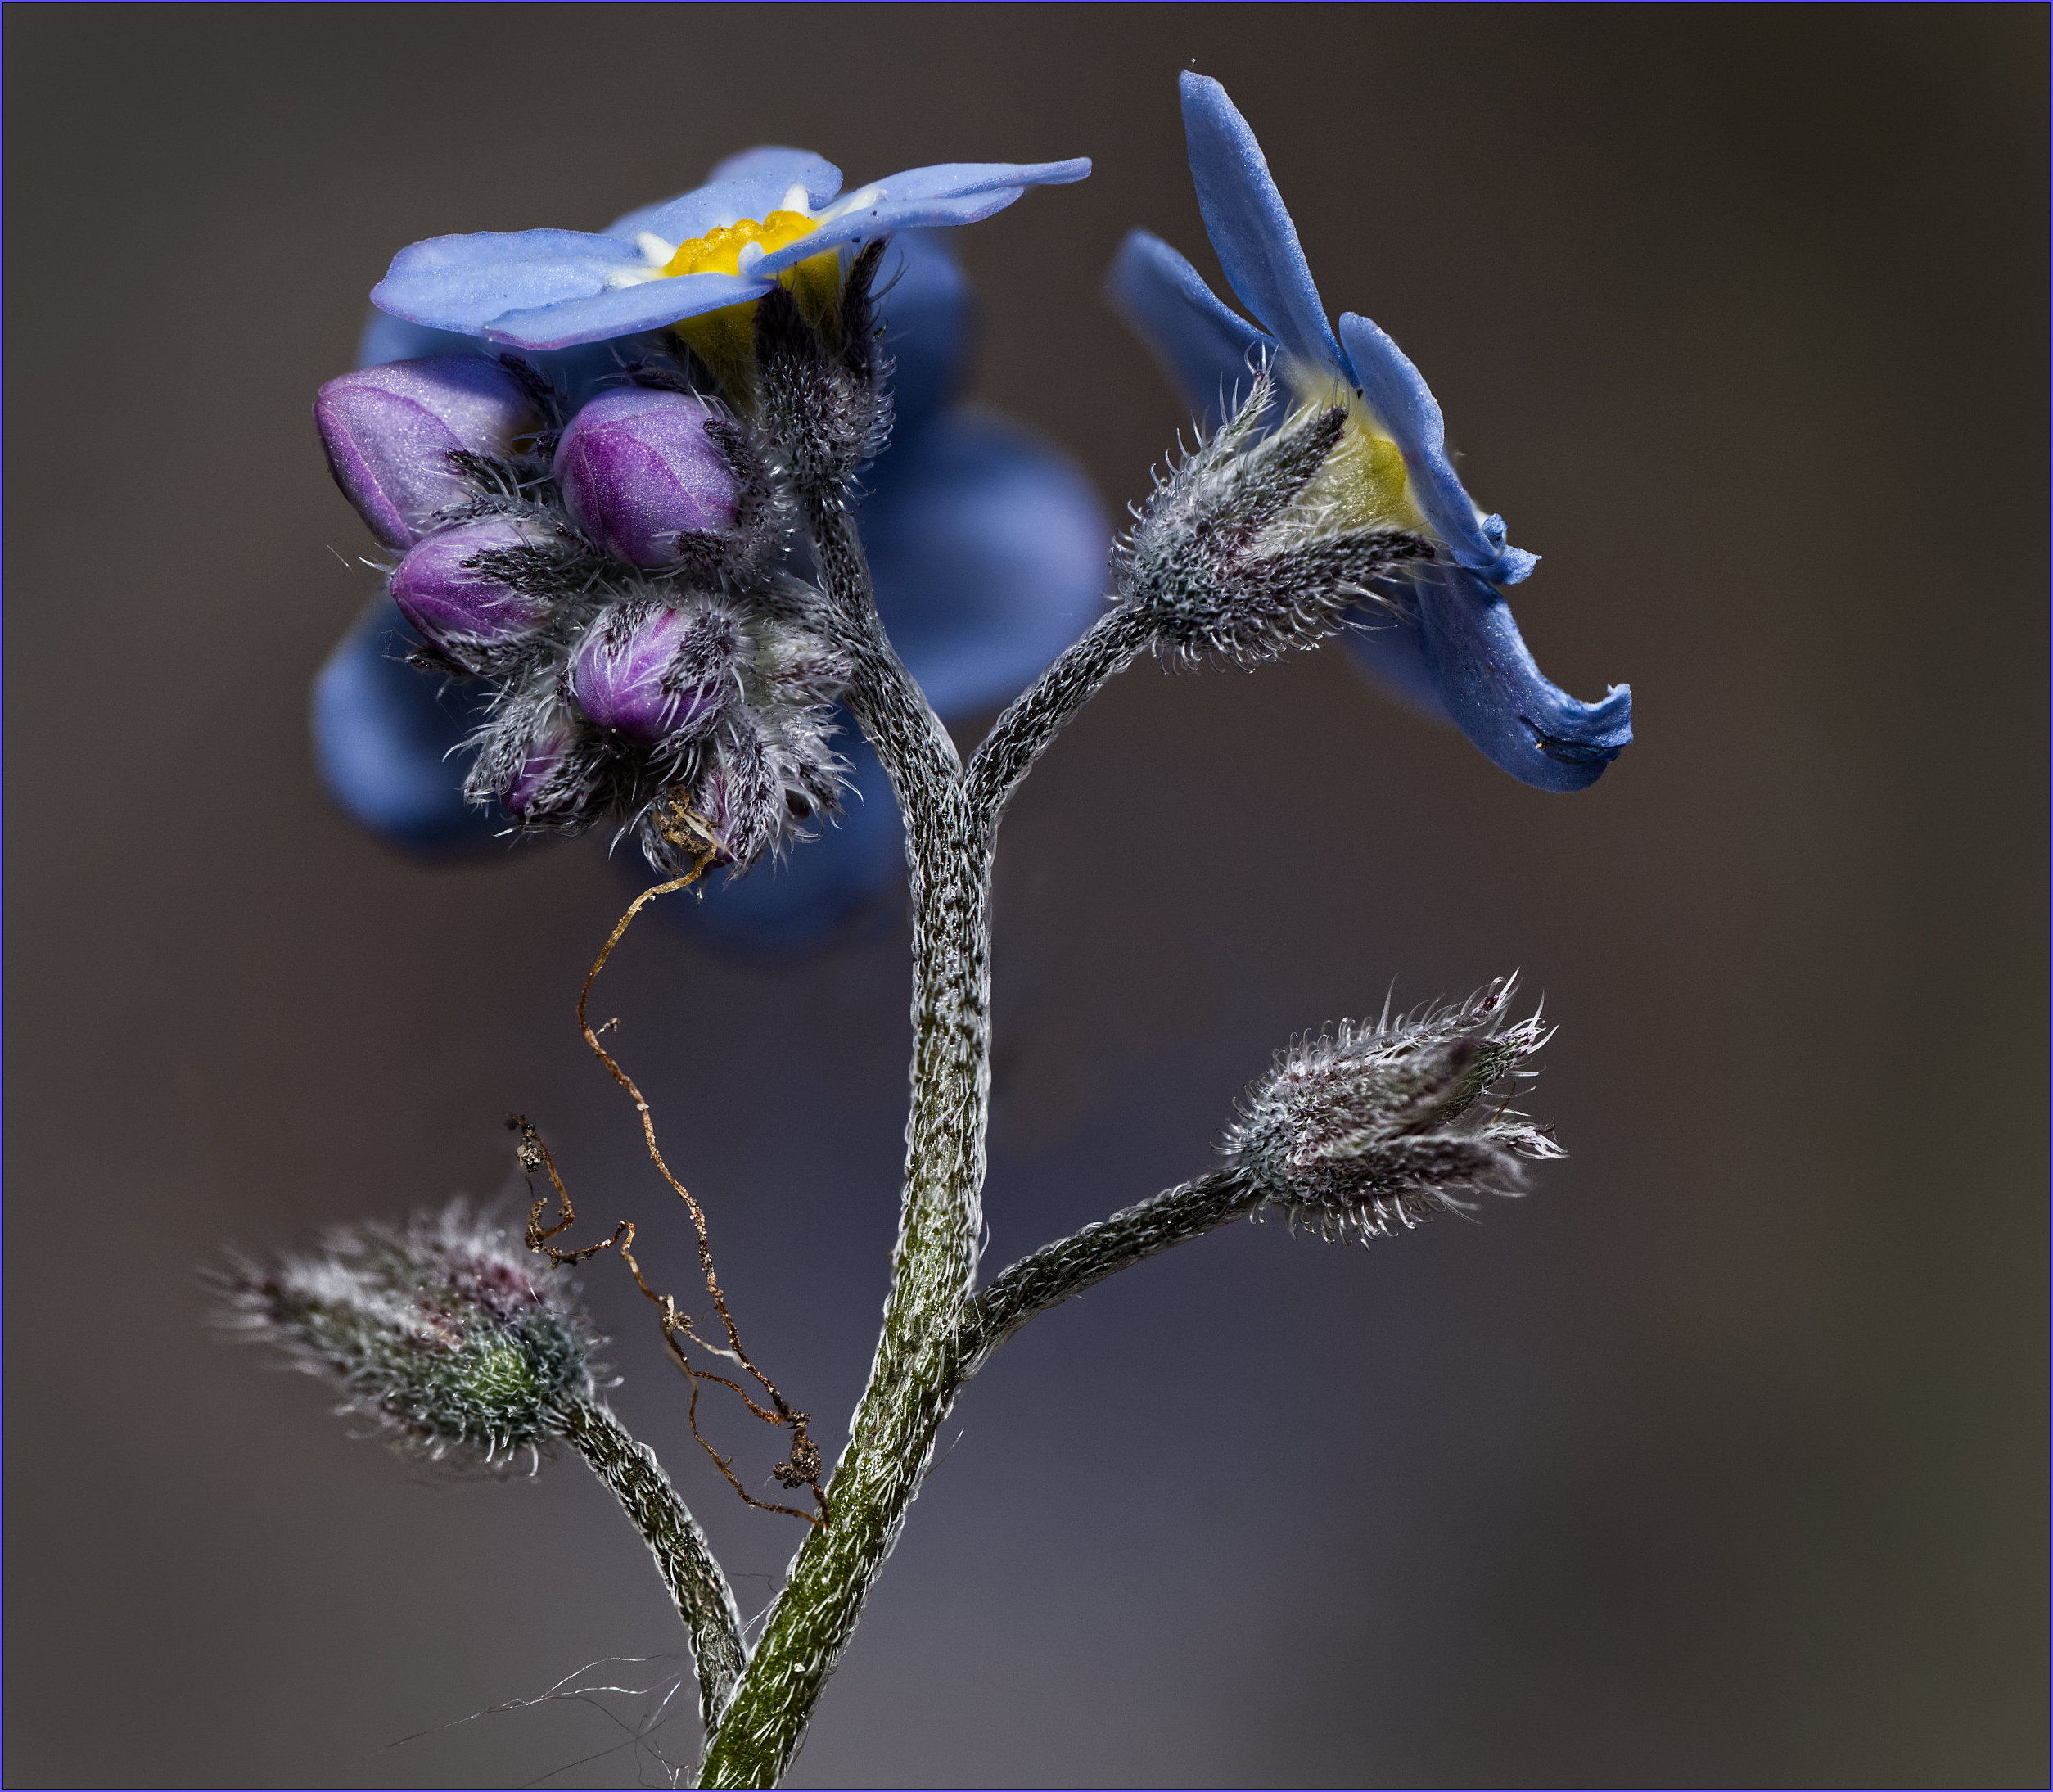
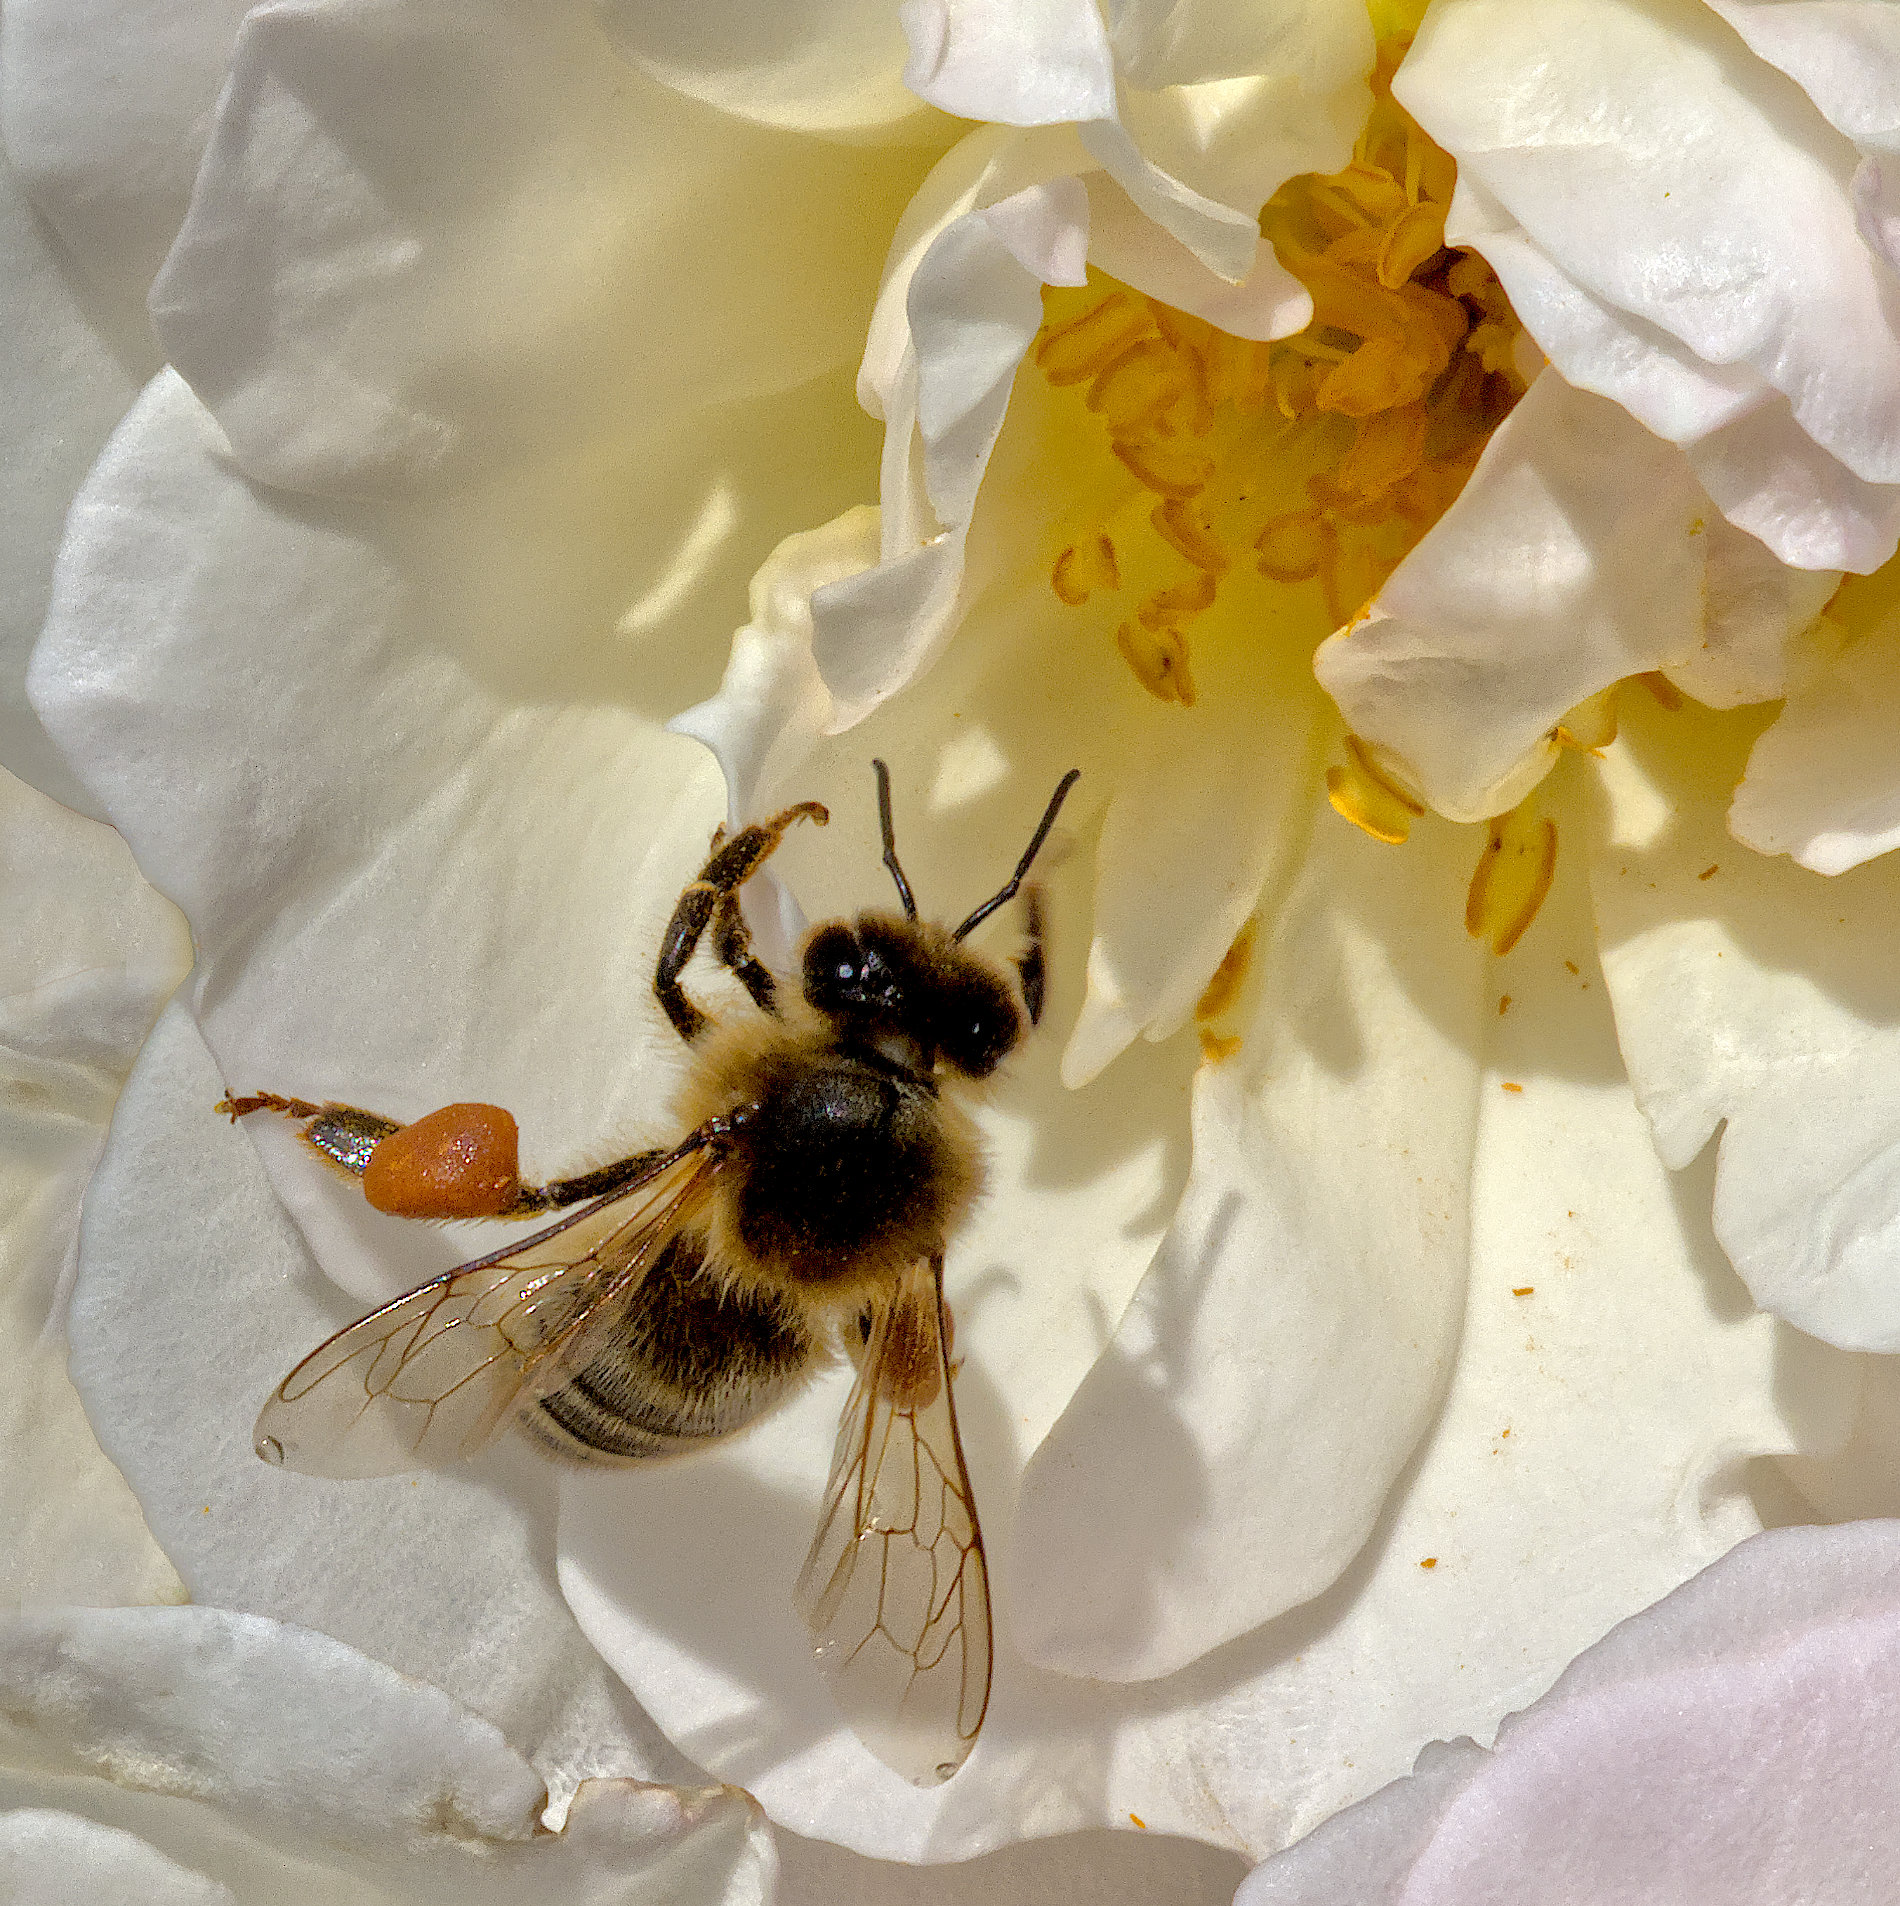
Comment |
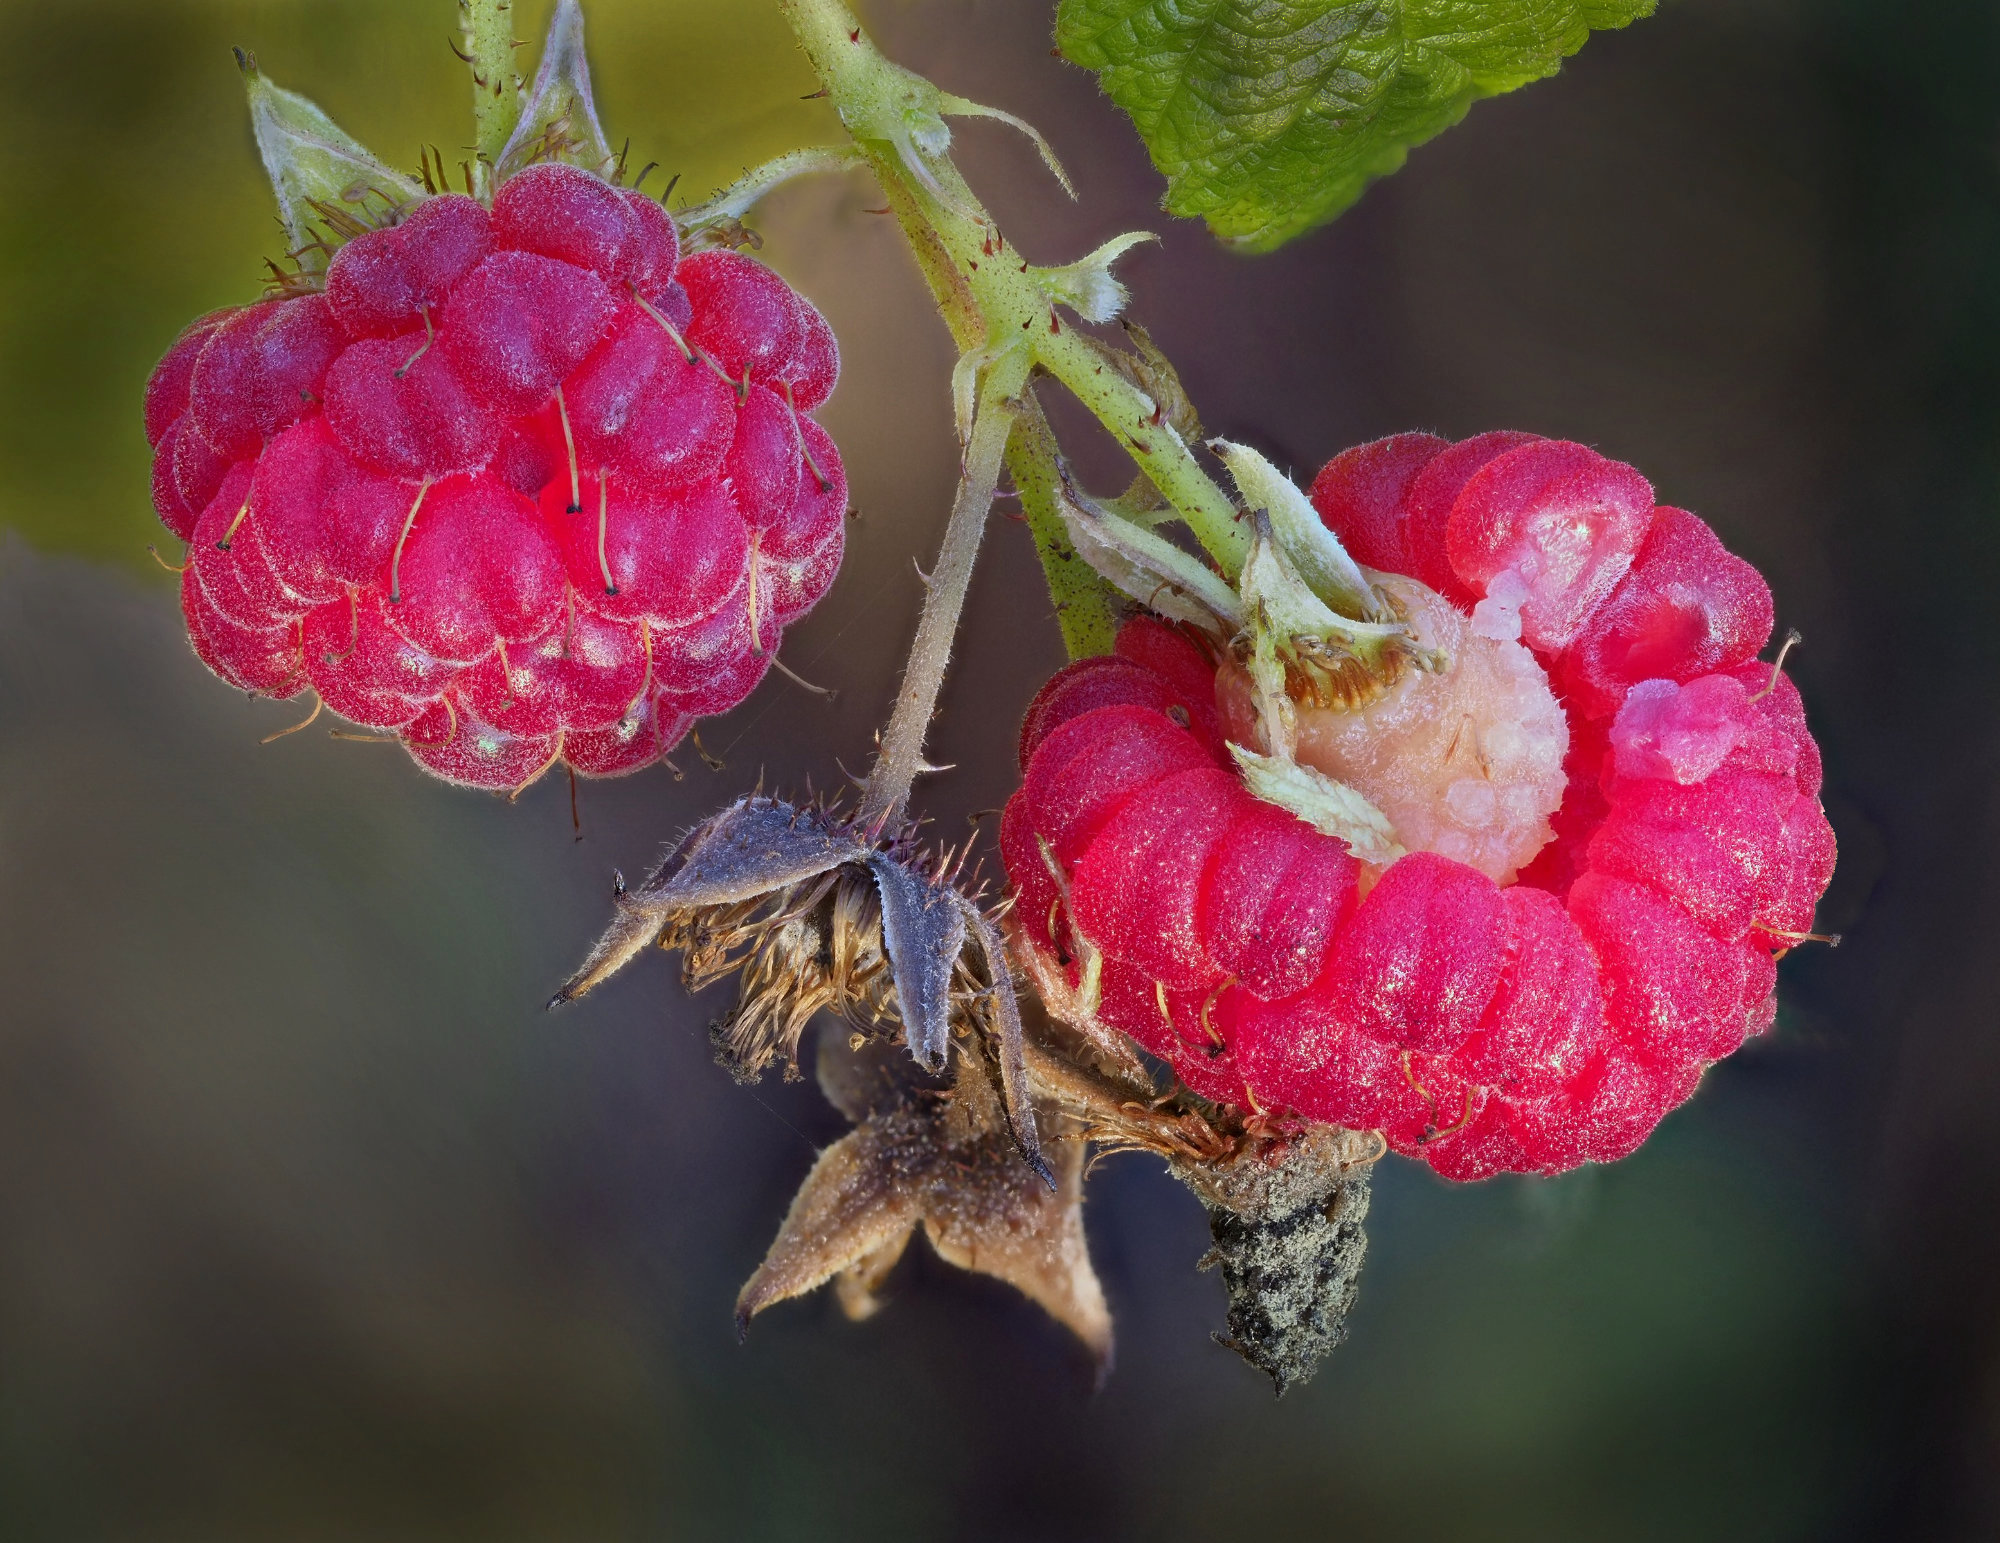
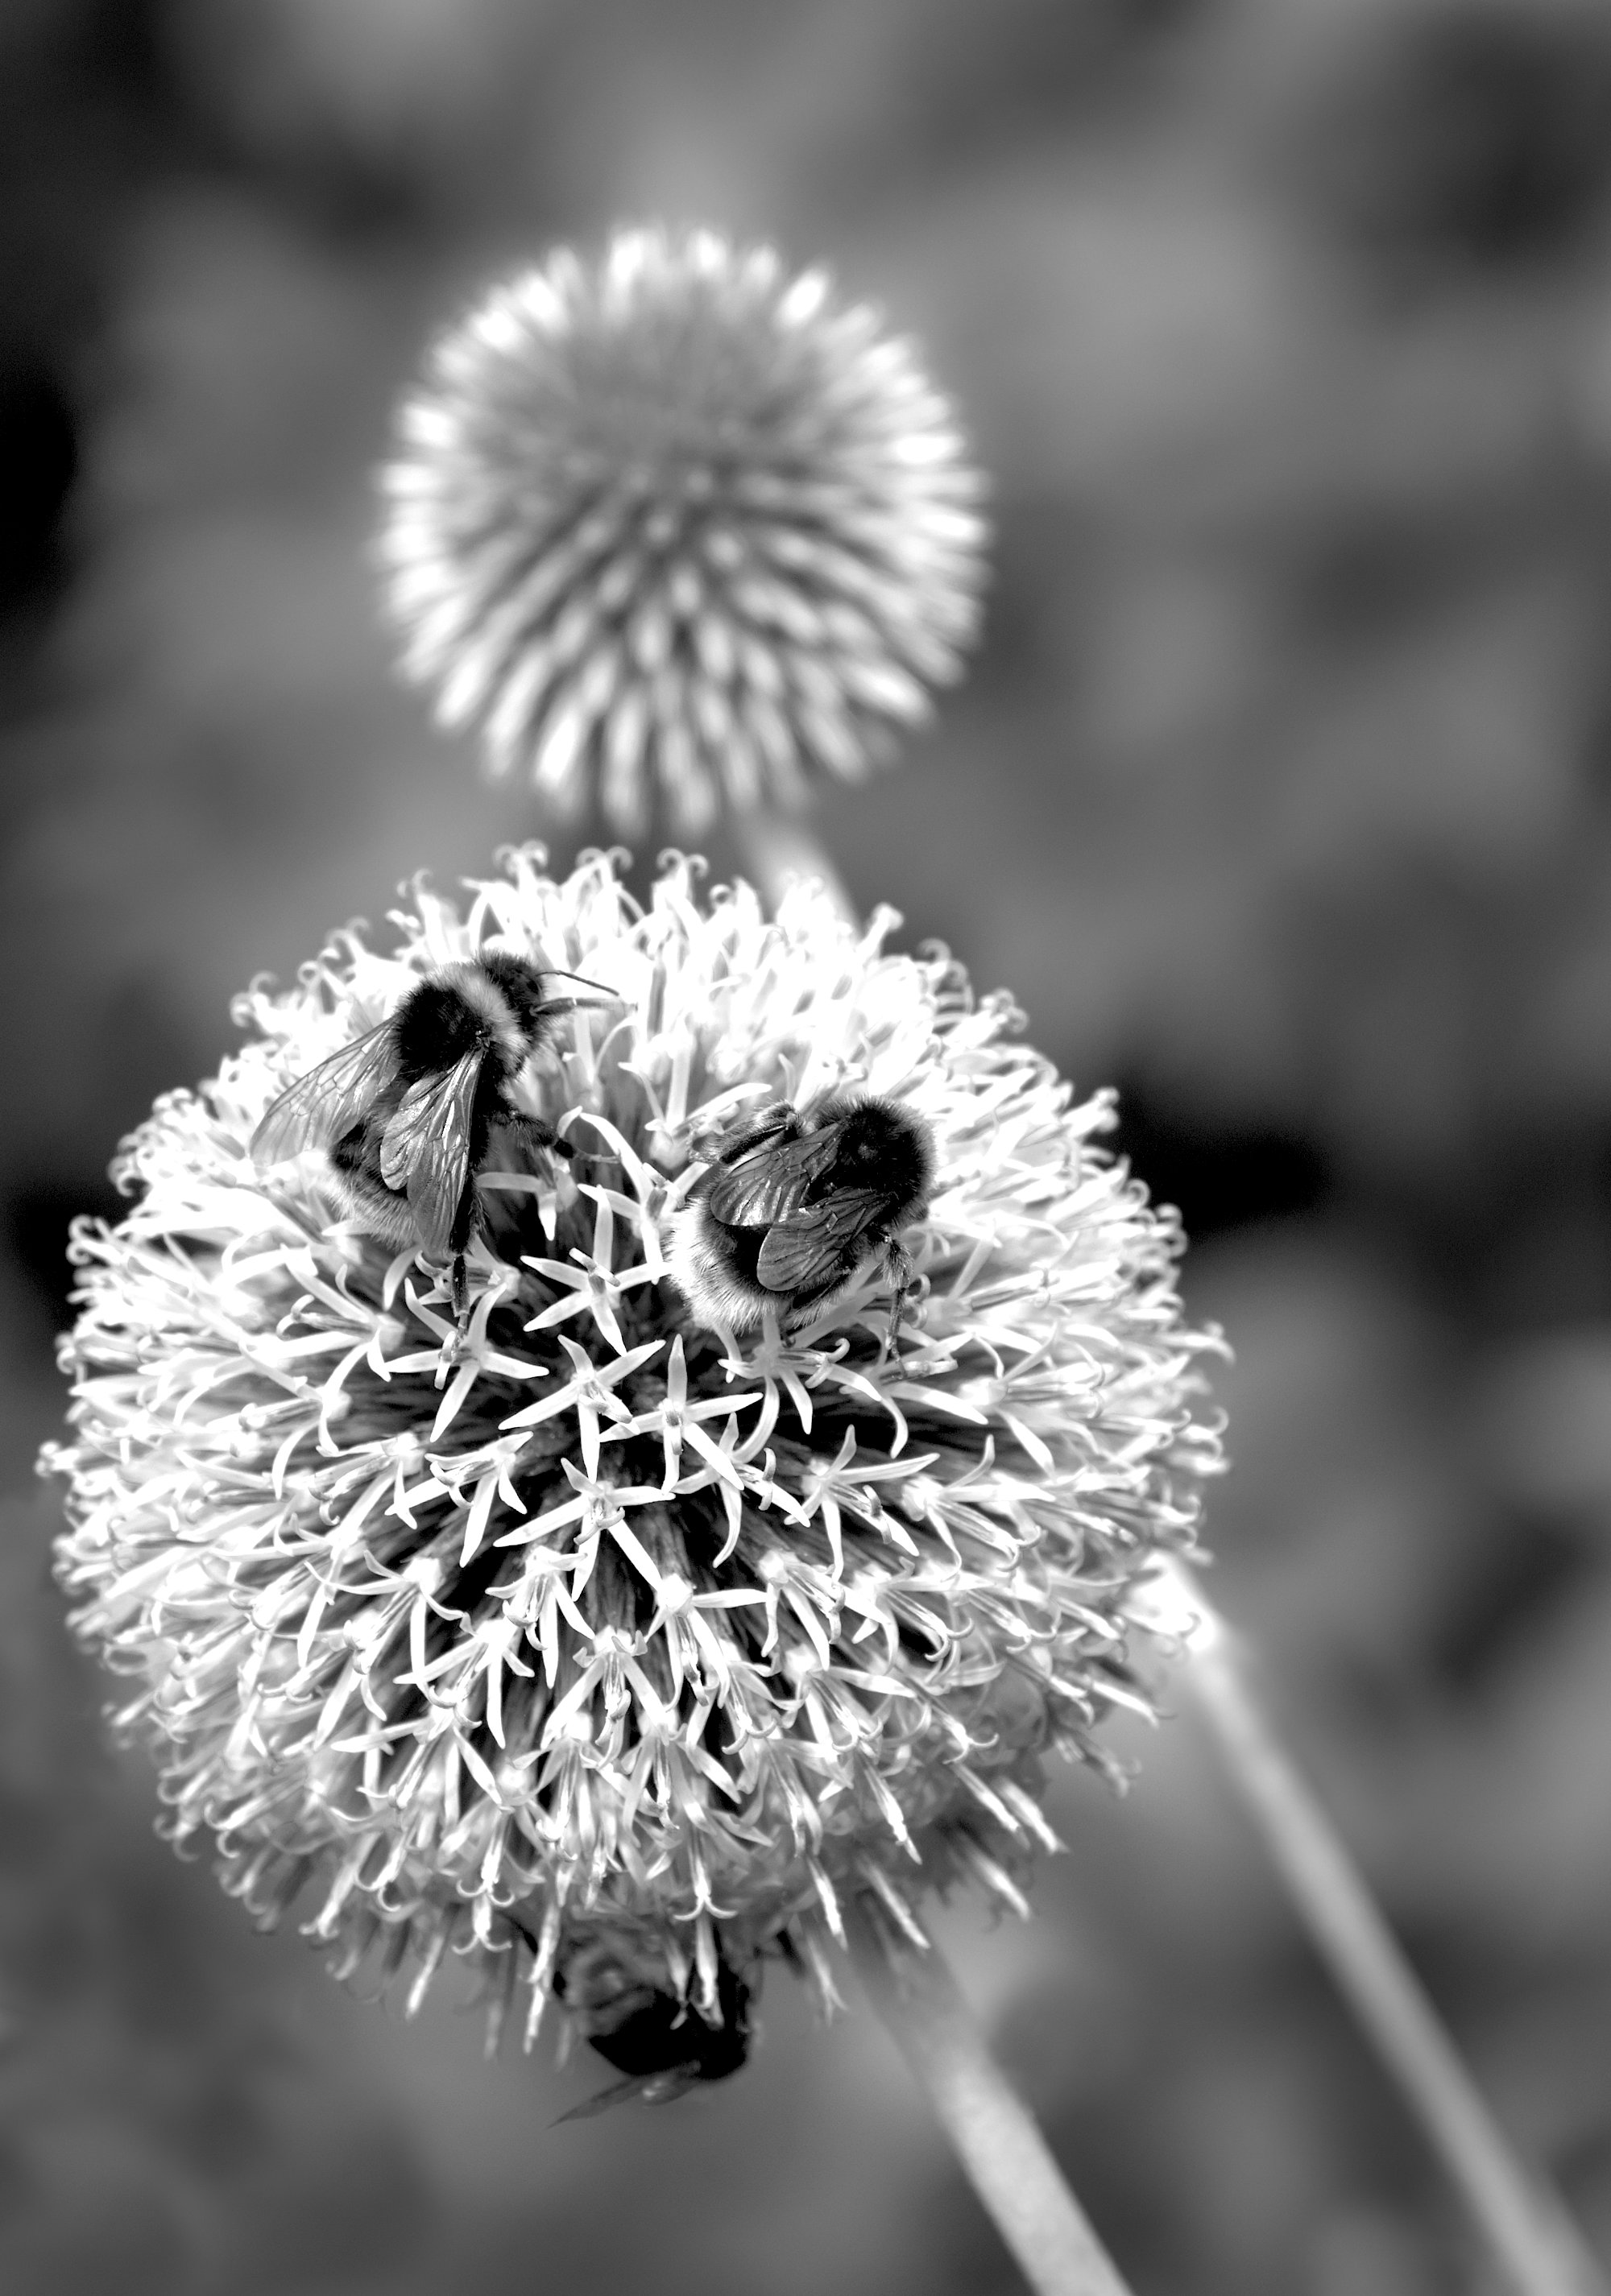
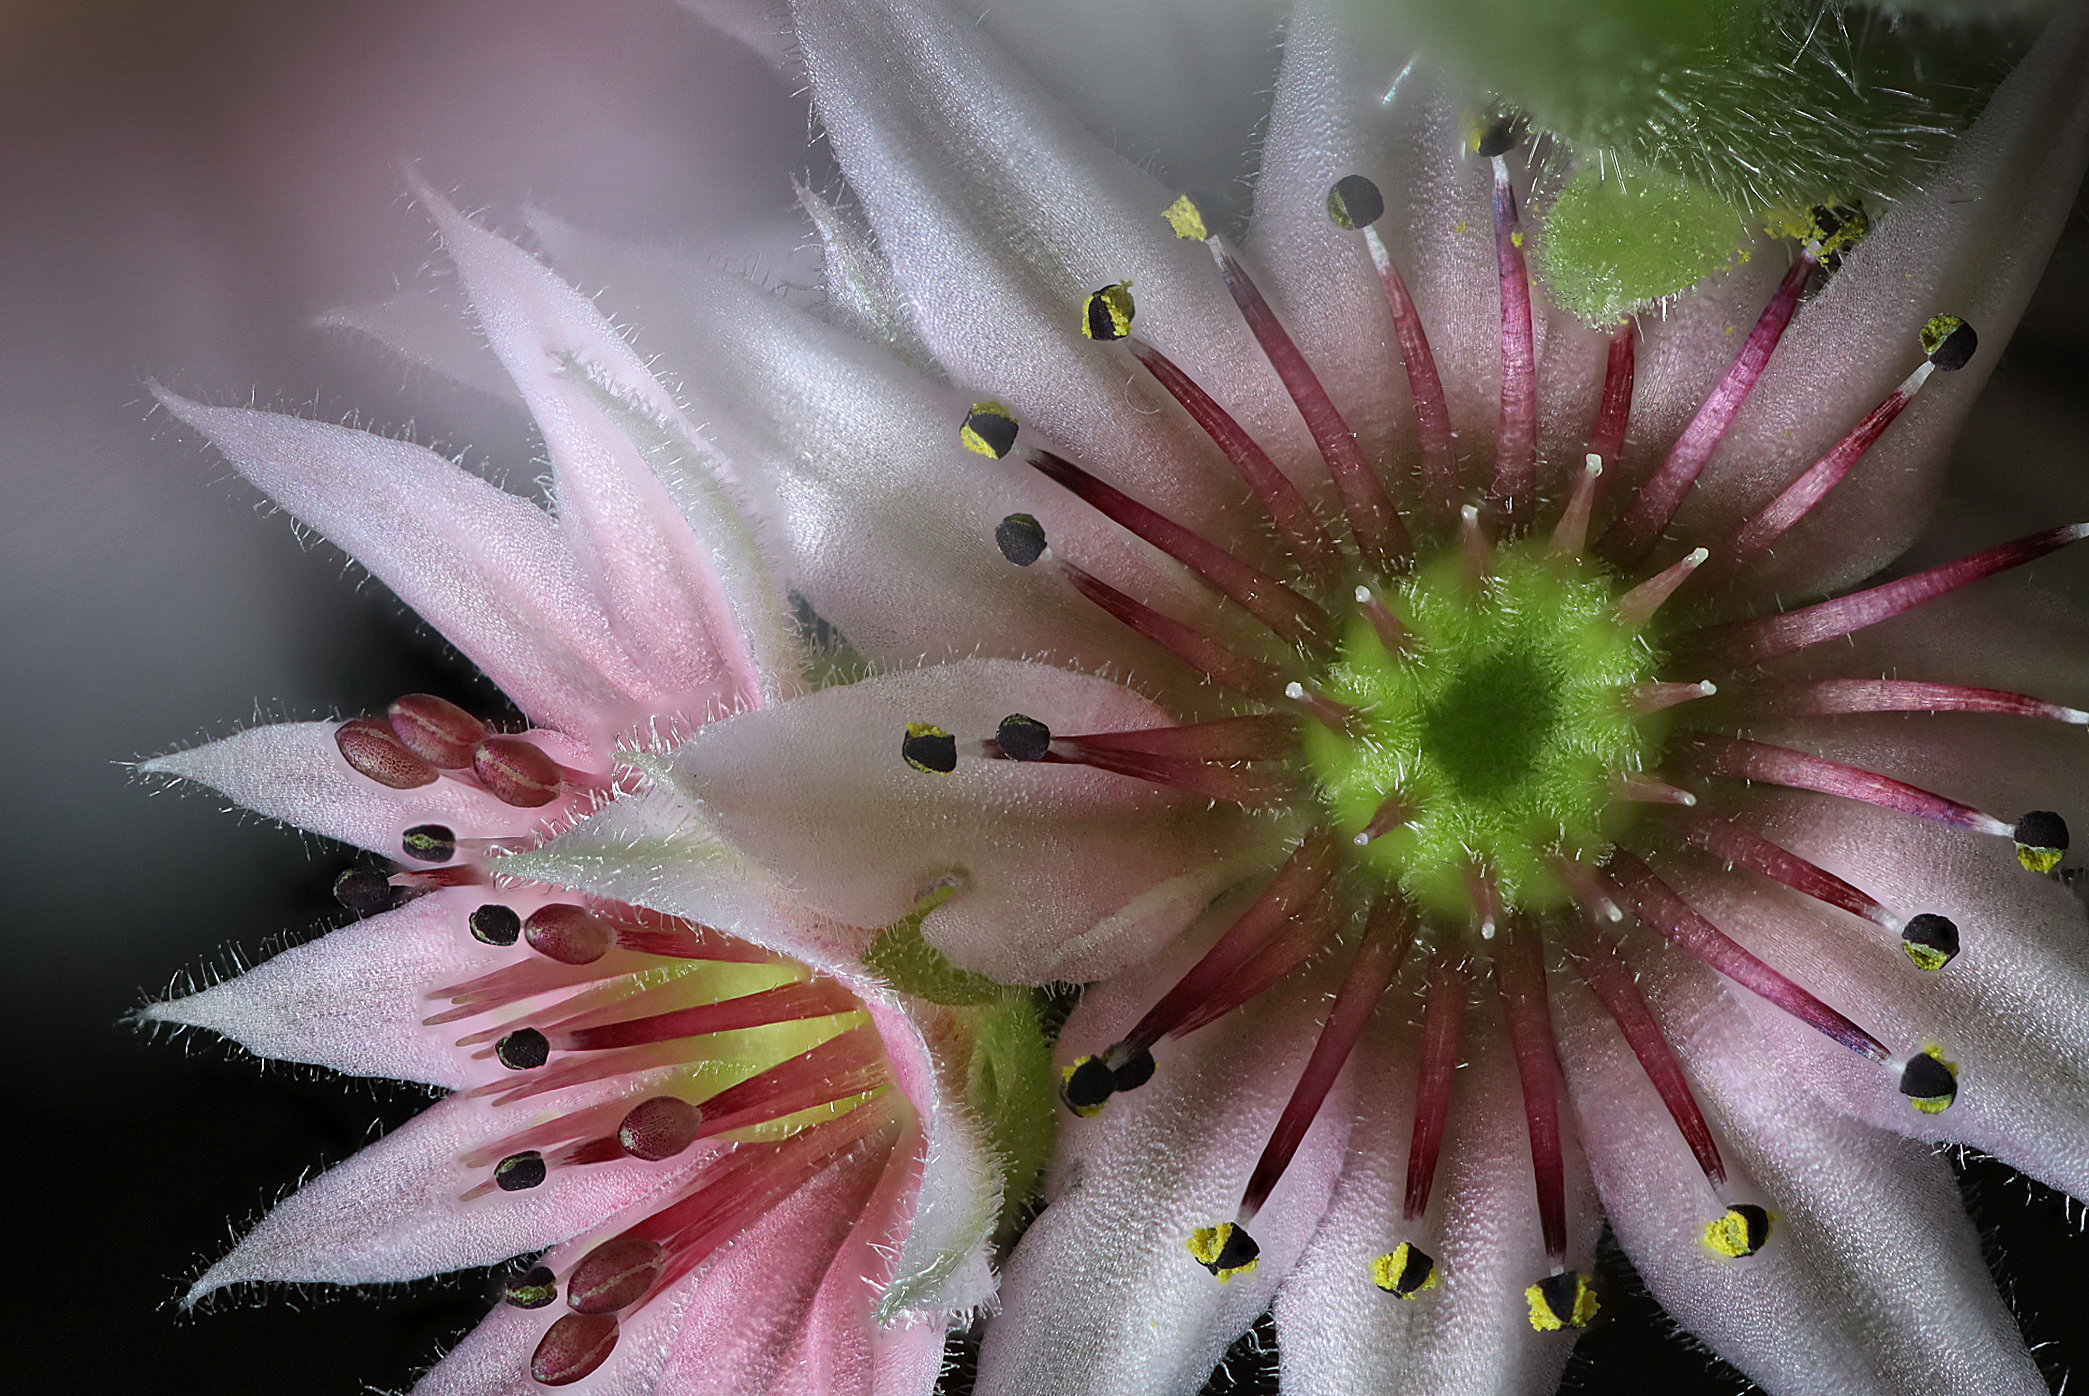
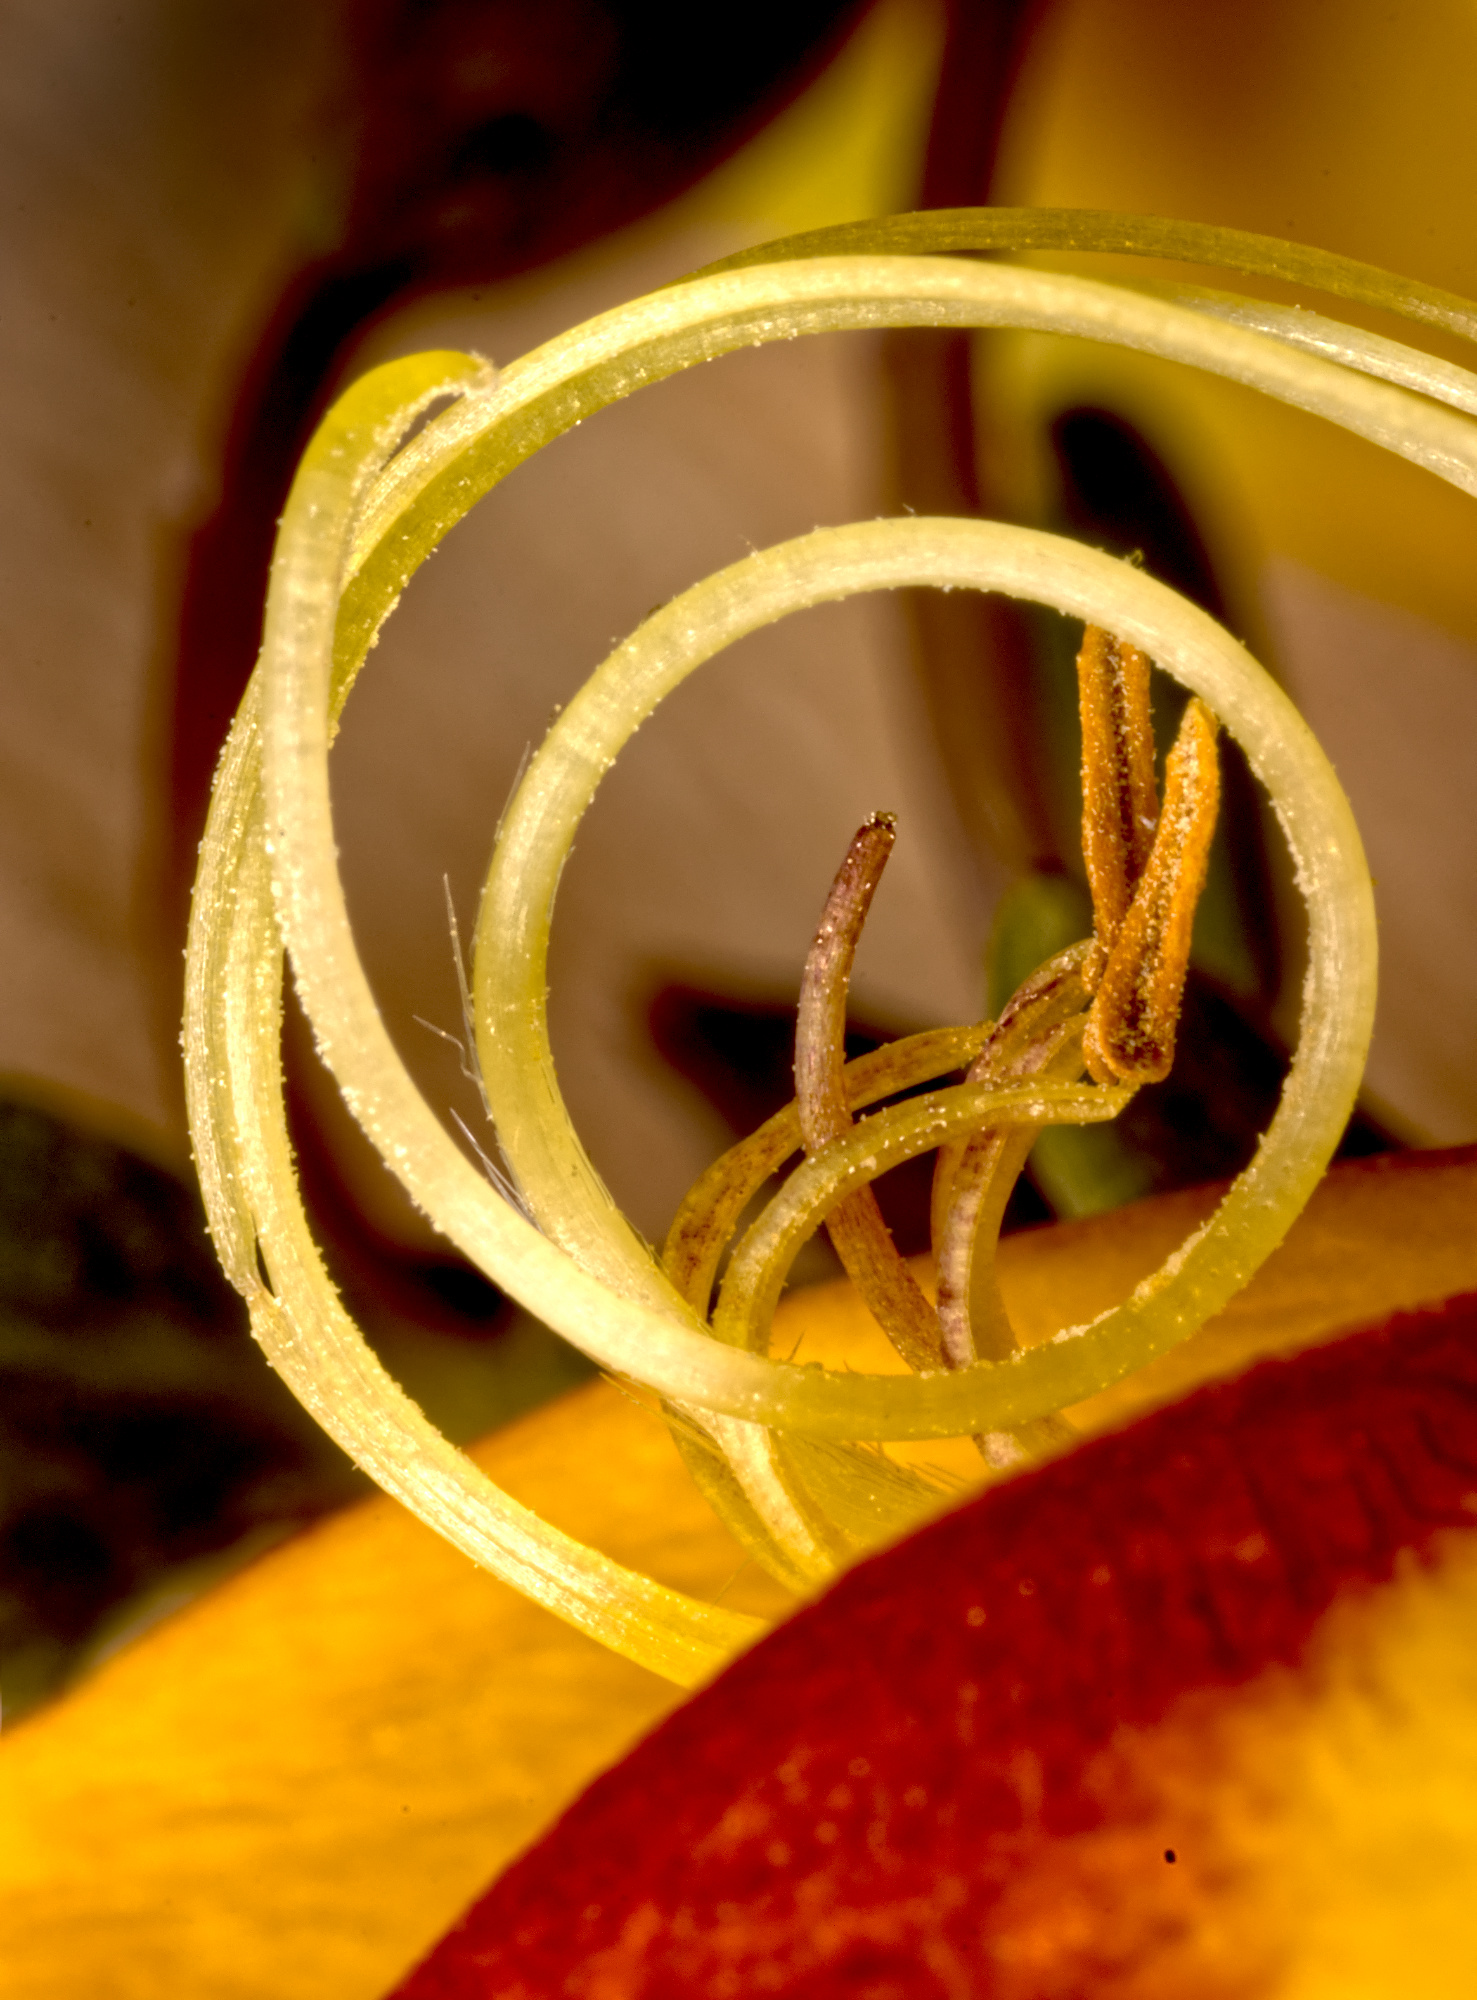
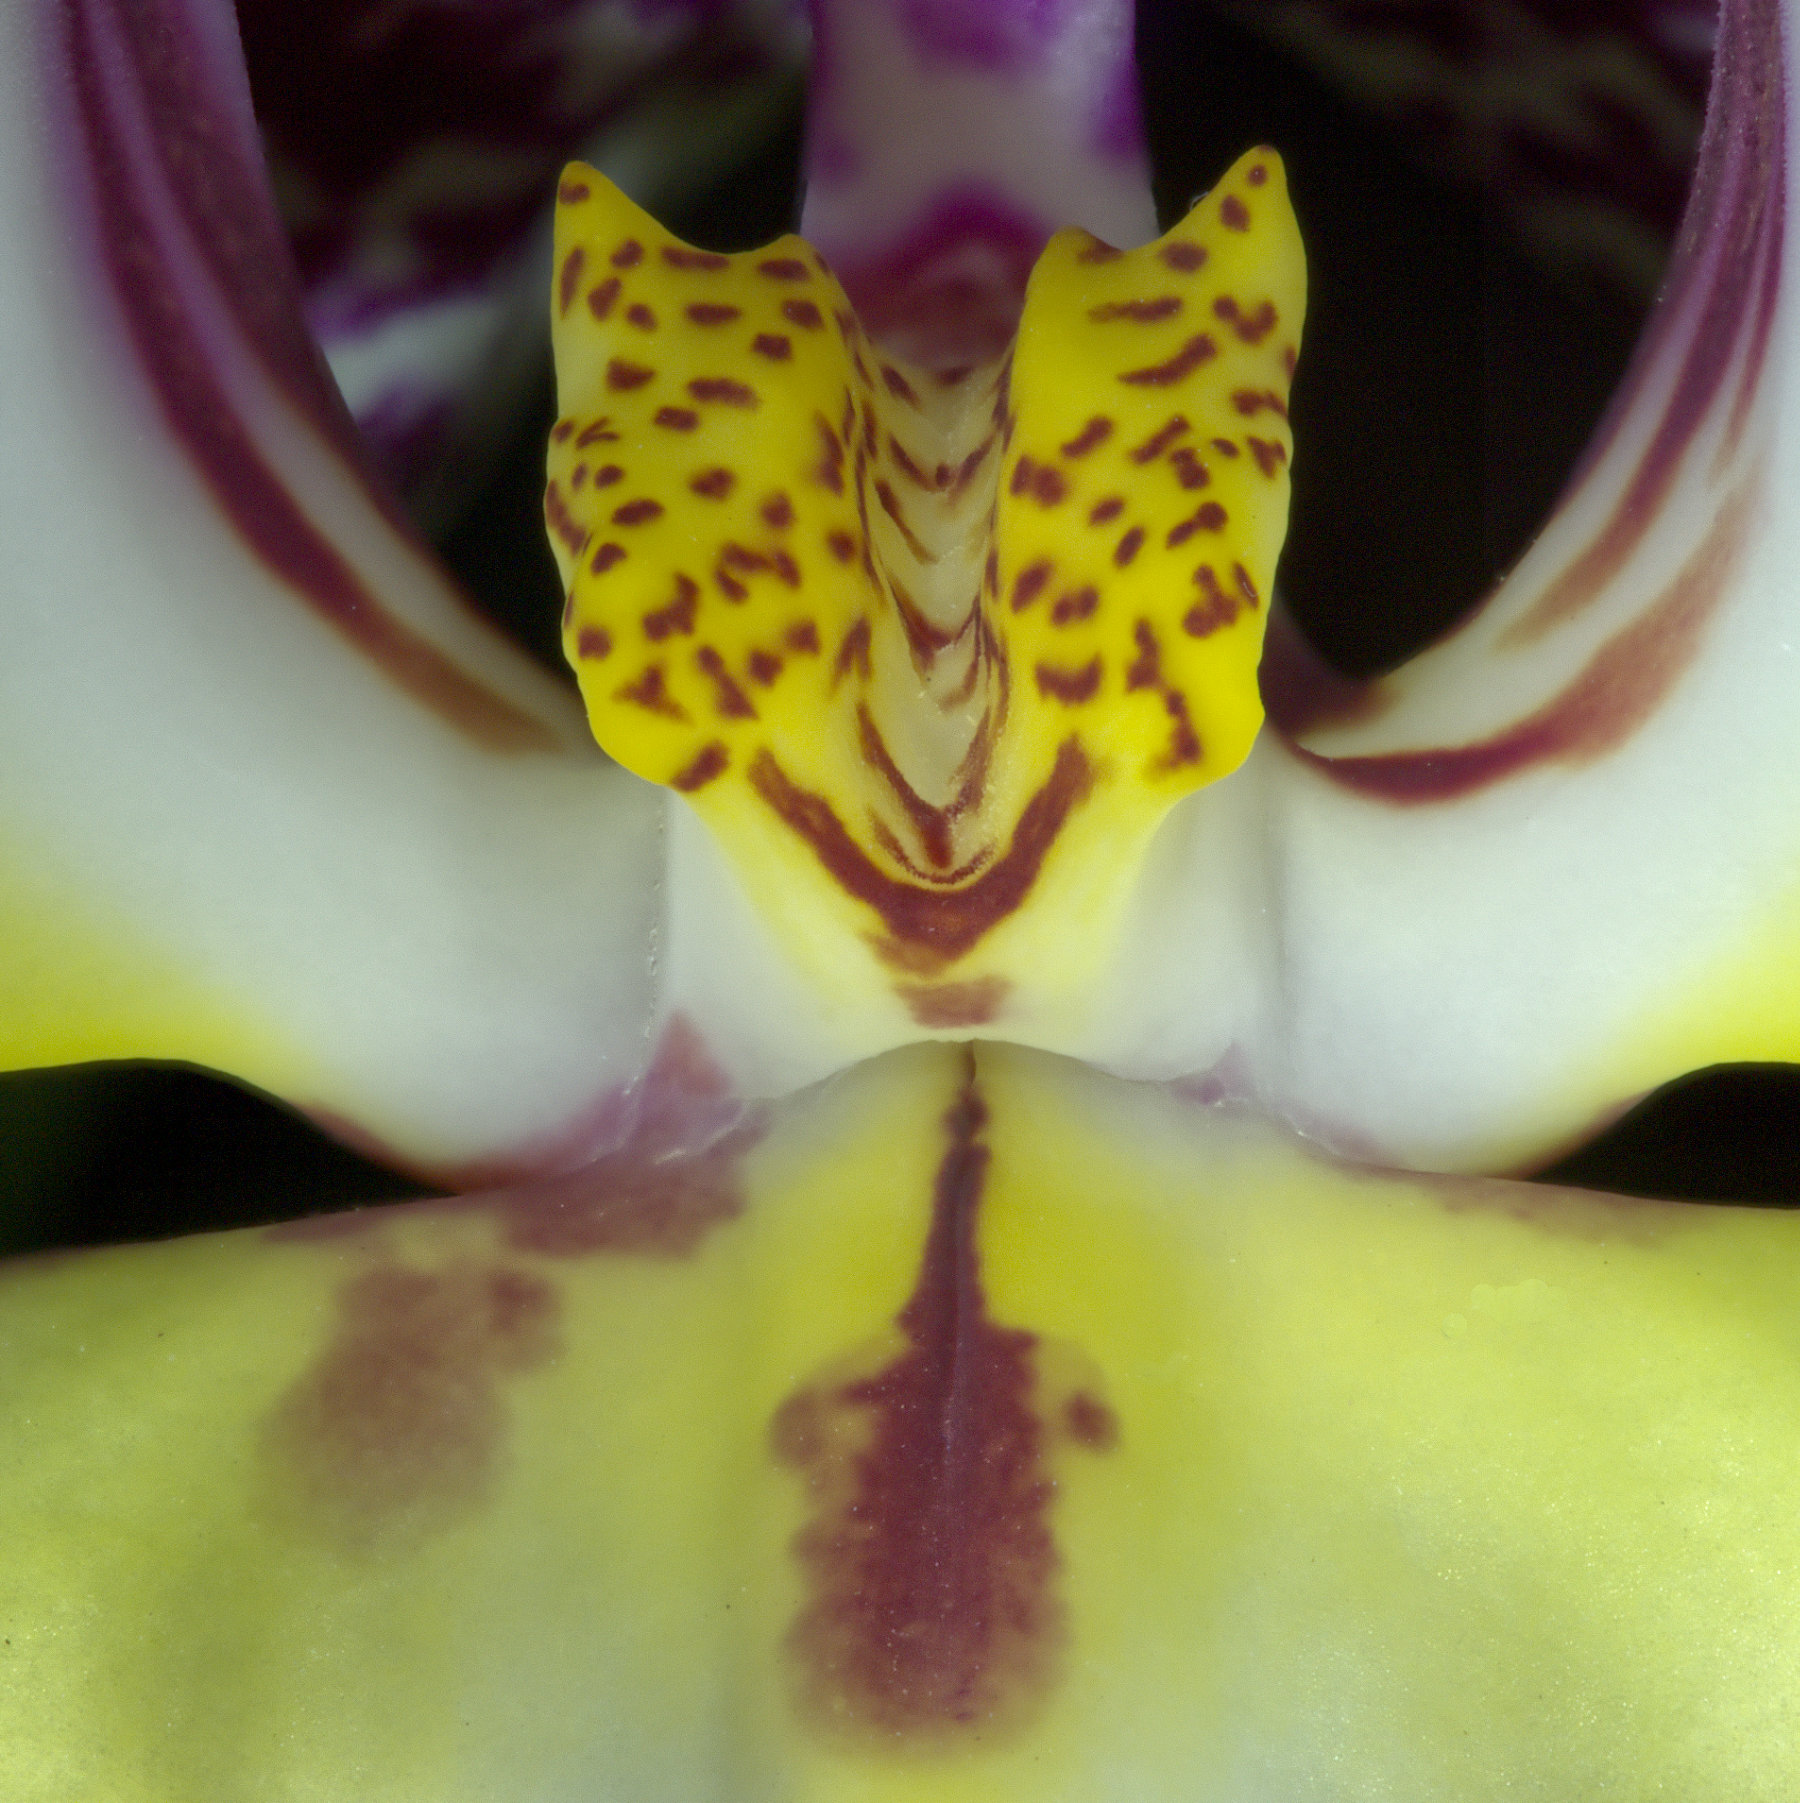
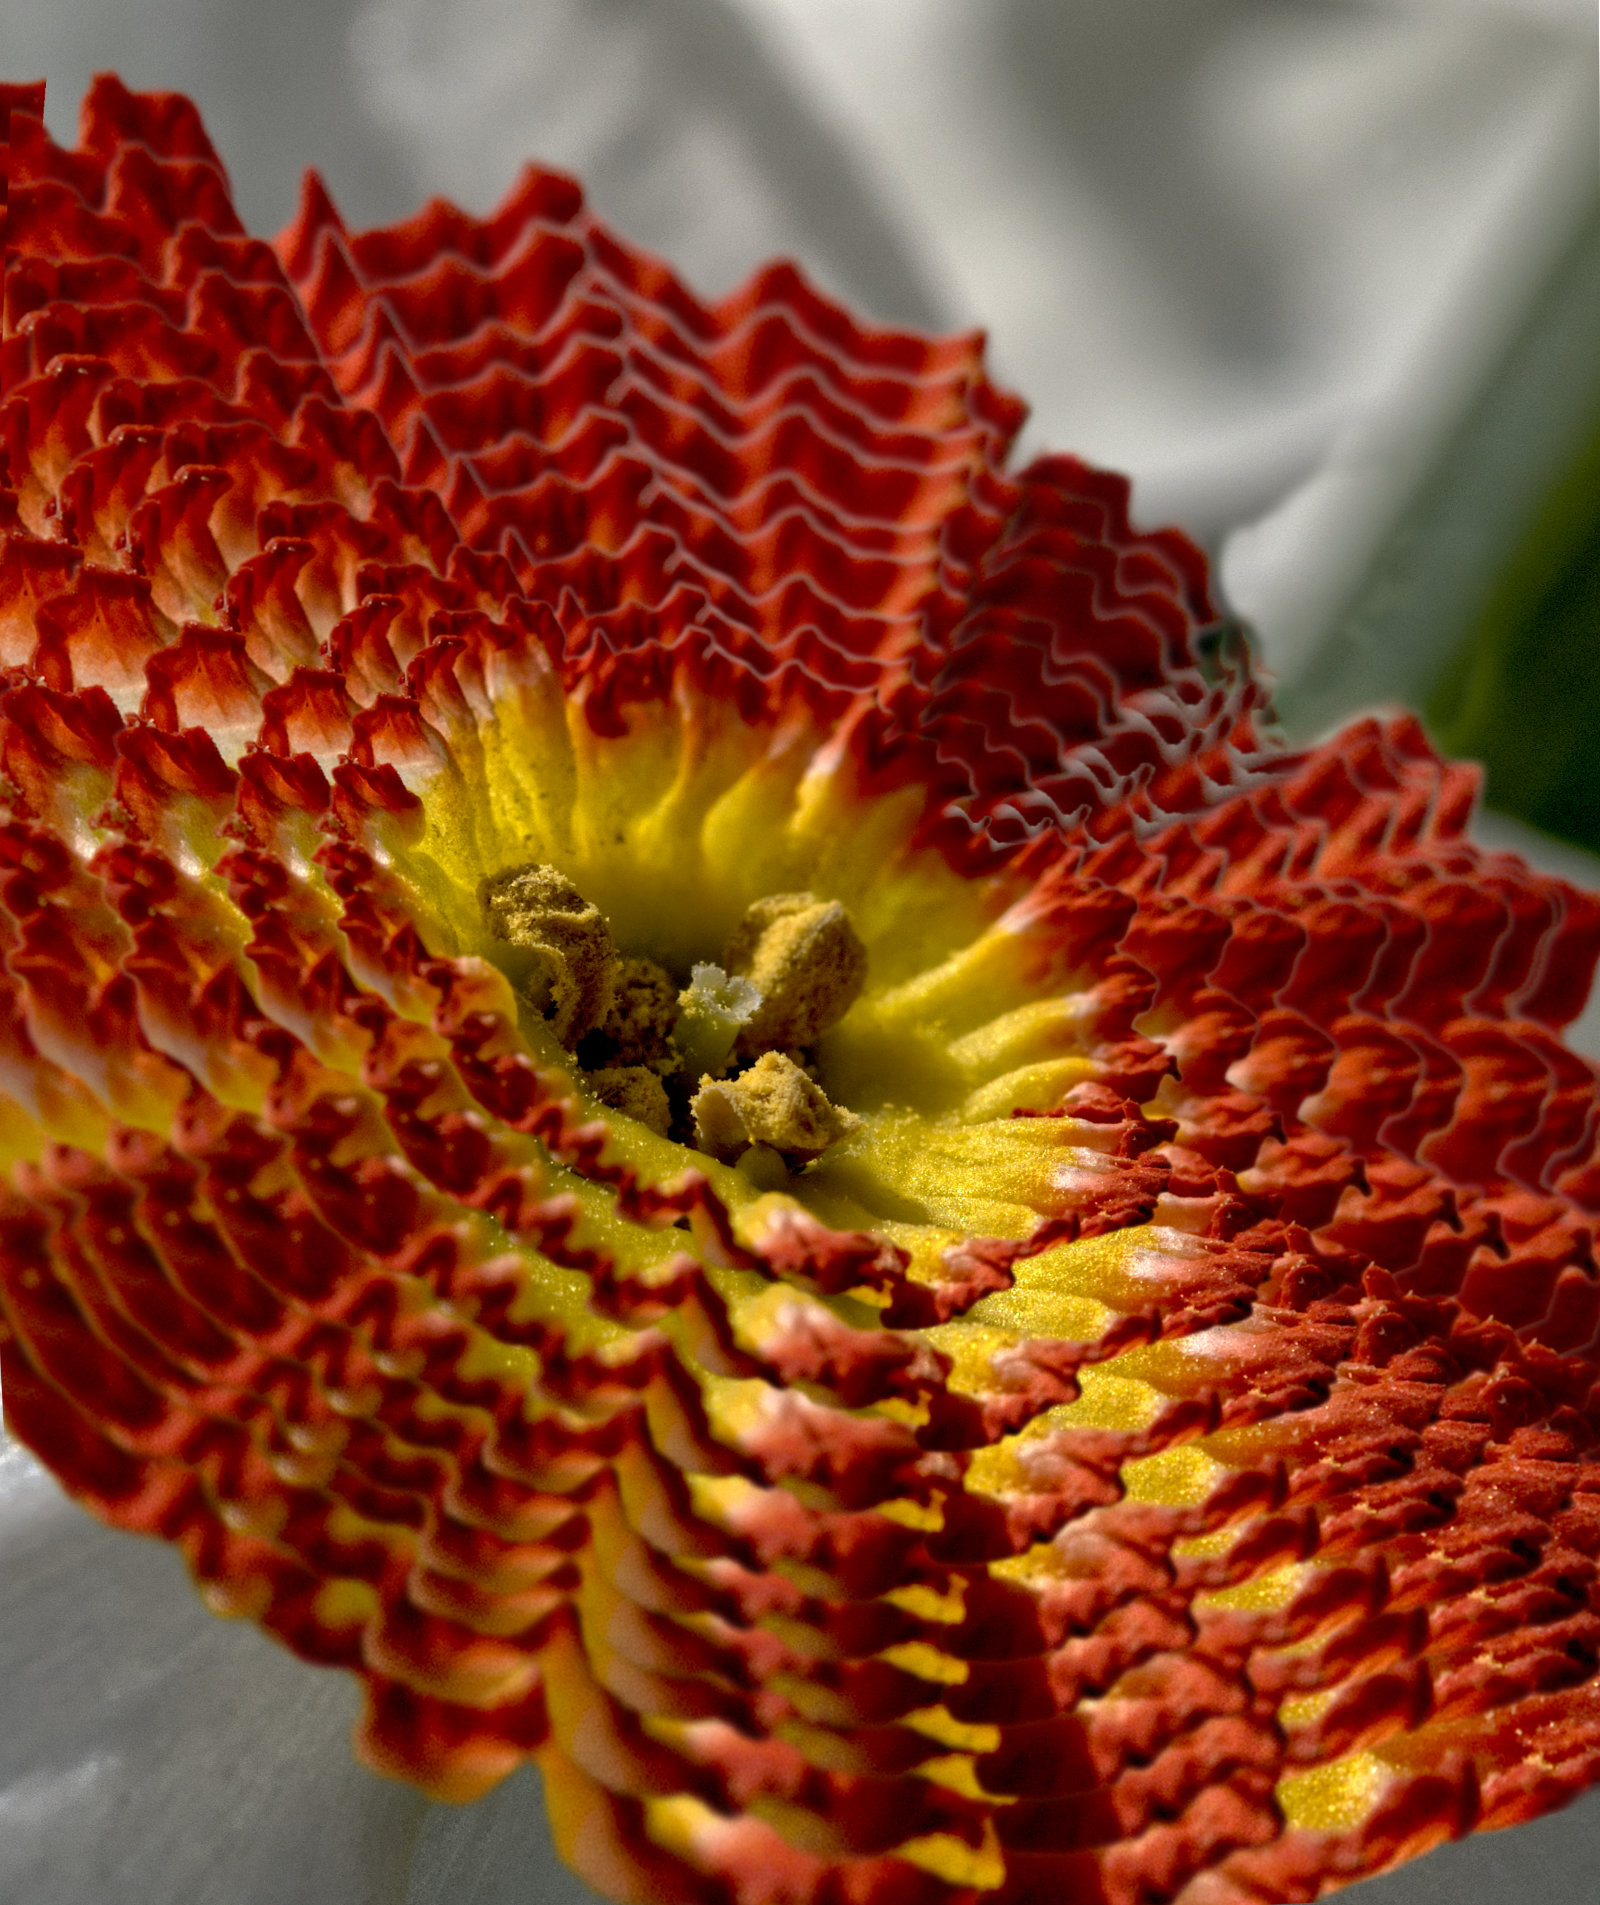
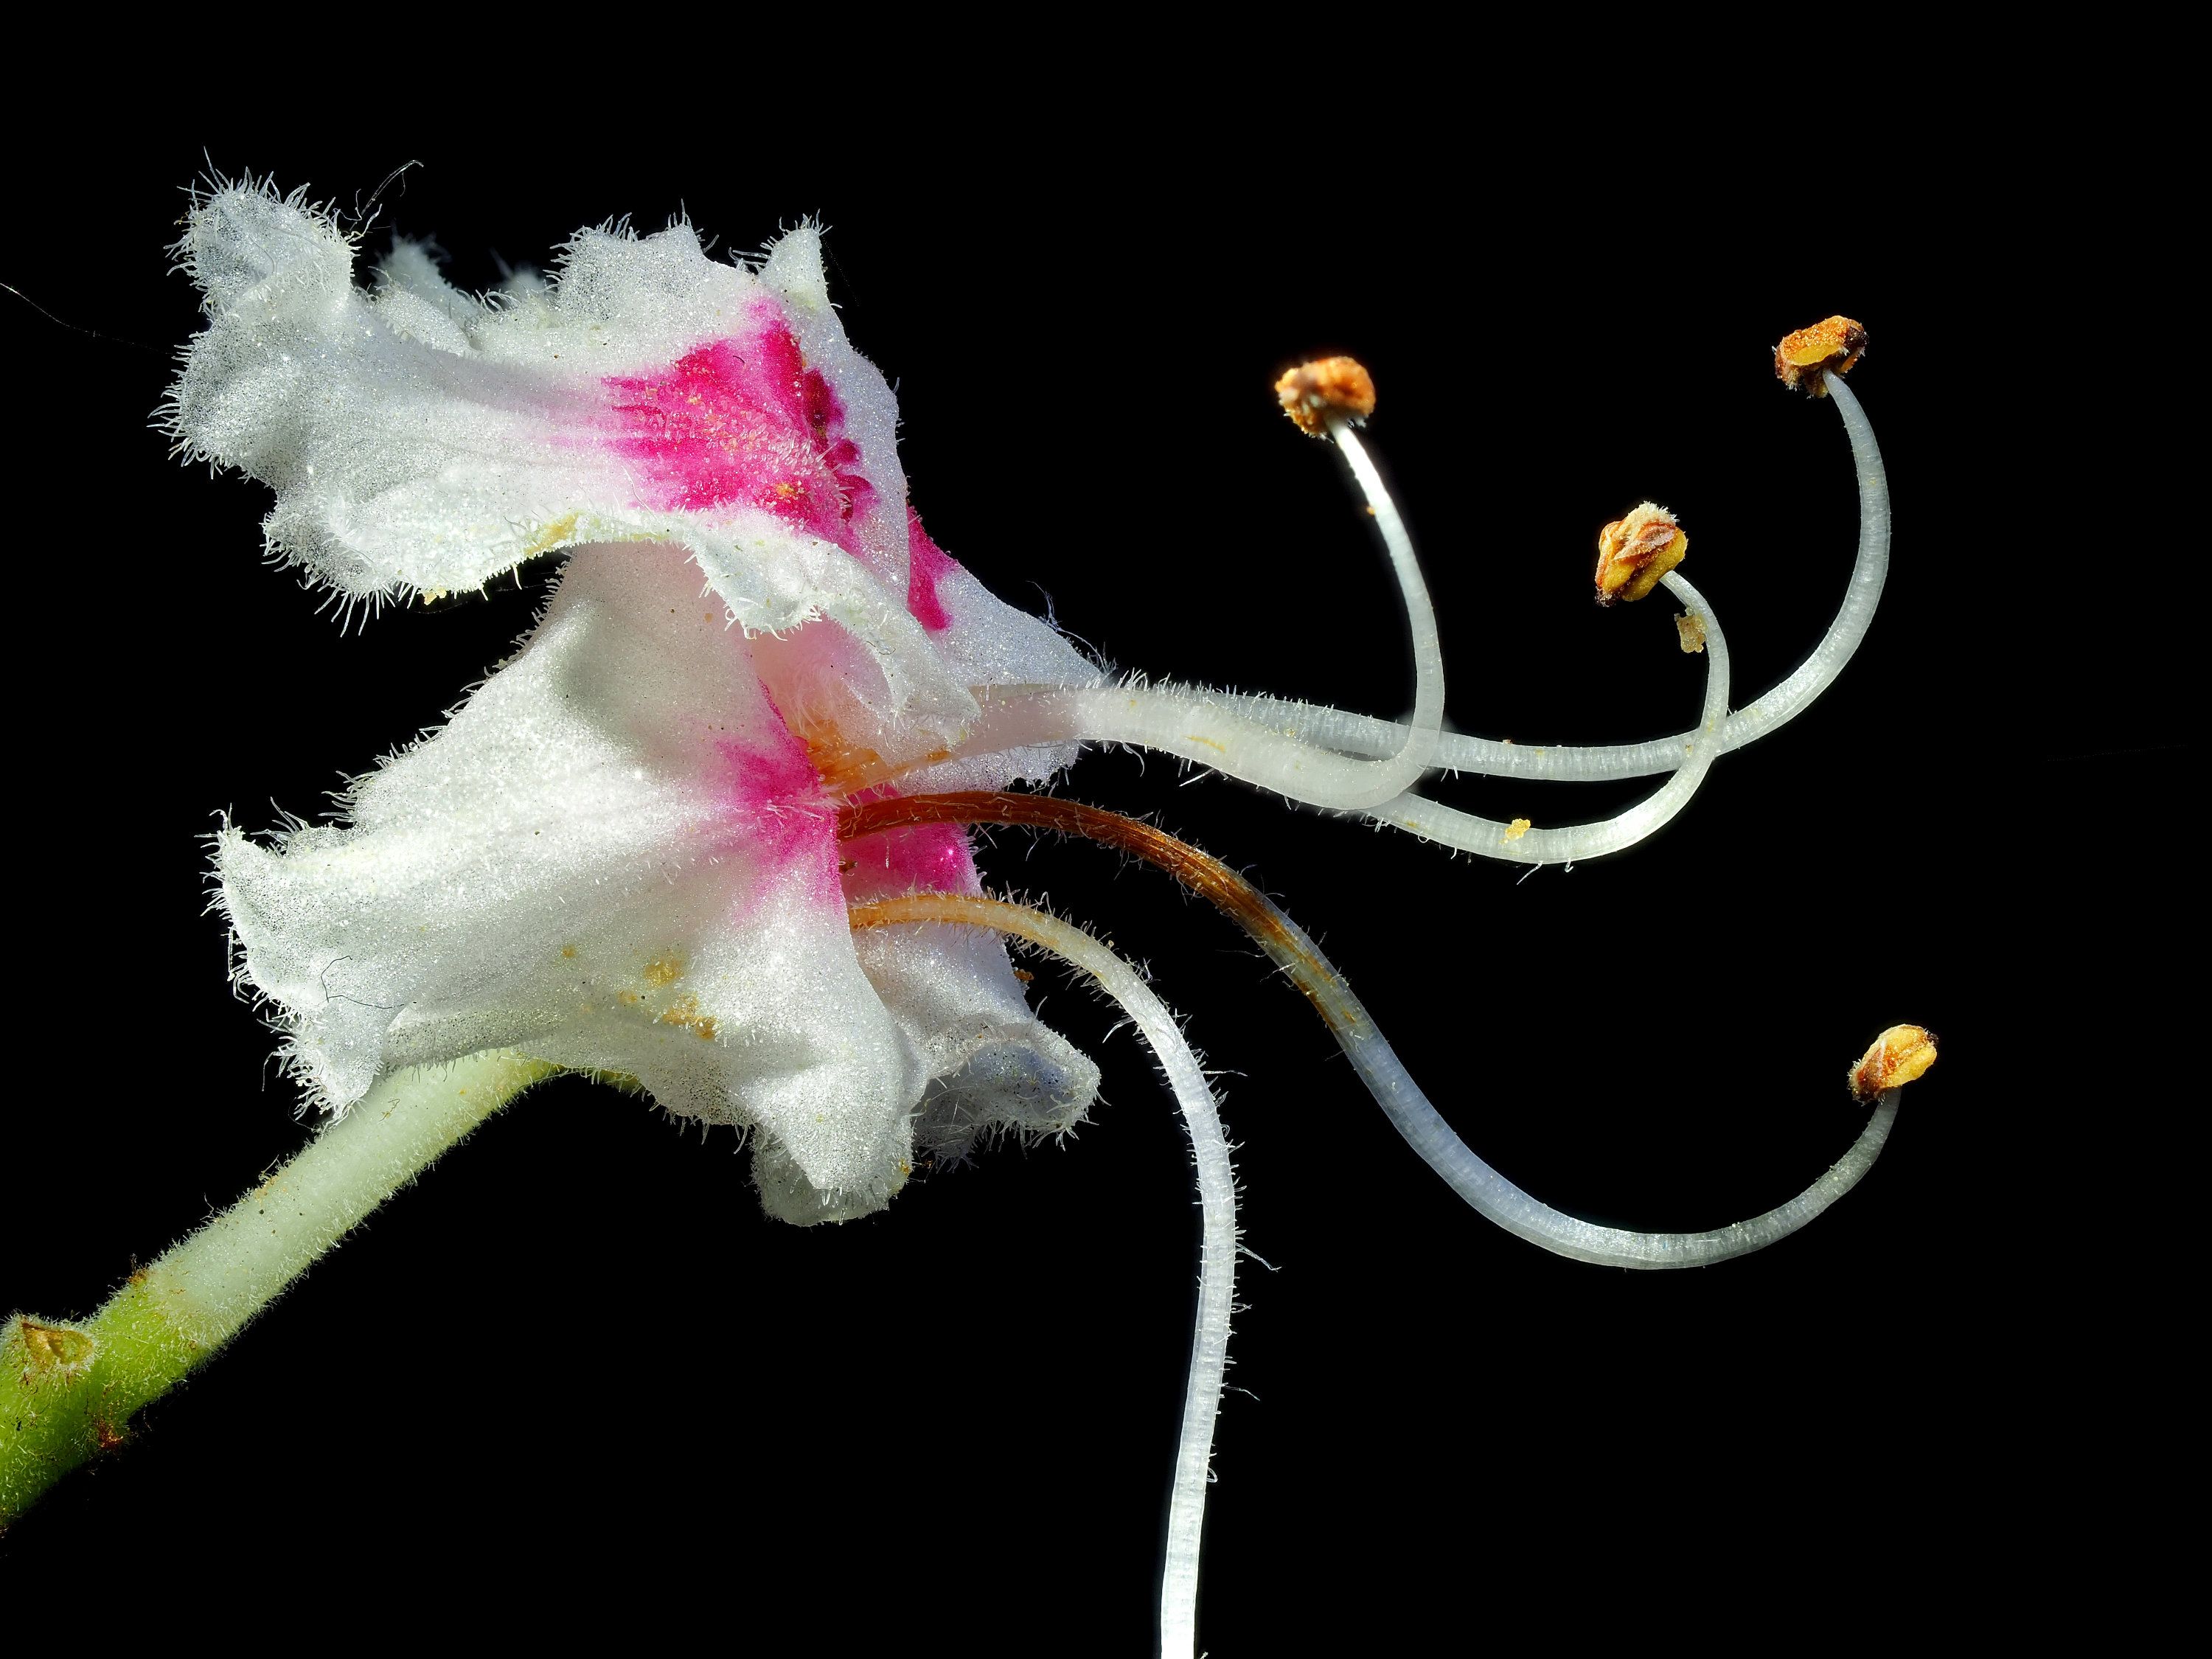
It is indeed an interesting and enjoyable photograph.You've got the closest parts in sharp focus and the petals nicely blurred to make the stigma and stamens stand out, giving this almost 3D effect.
The part that spoils it for me is the bright area where the petals join. Judicious use of the burn brush in your software would darken it down and make it less distracting. I'd suggest you'd have got more mellow tones as well had you underexposed a bit rather than overexposed.
As you say, cropping is no route to macro really, but it's a great way to test ideas and to see if the results makes you want to get the same and closer but with uncropped quality. |
Dec 17th |
| 95 |
Dec 21 |
Comment |
I'd love to know what magic you used to get from the originals to the final image! ;-)
I'm like Carol, I'm not obsessed with sharpness everywhere, and I don't mind some in macro photos if appropriate. This is a very challenging subject for a single shot, and f6.3 on 100mm and this distance doesn't exactly give a big depth of field. You've got the focus where it matters most, but more DoF wouldn't have gone amiss. Personally I'd have sacrificed the low ISO and traded it for a couple of stops smaller aperture. If you are concerned about noise, I would suggest you investigate how noise varies on your camera by taking a series of test shots. I'm quite happy going to ISO800 with my Olympus and Canon as the noise is never a problem with this in my view.
Anyway, back to the picture, and I do like it! |
Dec 17th |
| 95 |
Dec 21 |
Reply |
I'm not a fan of Adobe so I use none of their products. Affinity has these tools though. There's a very large number of combinations of these adjustments. To paraphrase an old saying, if you put 100 monkeys in a room etc they'd find a great combination every so many years! This monkey doesn't have that much time unfortunately, so any suggested combinations are welcome! |
Dec 14th |
| 95 |
Dec 21 |
Reply |
Doesn't need much room for a macro rig, even less for a micro one. ;-) |
Dec 14th |
| 95 |
Dec 21 |
Reply |
Fair enough. I hope your move goes well. It's a traumatic job I find, not just doing it, but adjusting the new place to suit you when you get there. At least a bit of macro can be a nice diversion when you get the time. |
Dec 12th |
| 95 |
Dec 21 |
Reply |
I probably agree, but it's good fun to seek something different I think.
Sharpening is a trying subject for me. In my current (digital) camera phase, I plumped for m4/3 on weight grounds. Few of my new camera club colleagues used it, and I soon found myself defending "unsharp" pictures. I now know that over-reliance on a steady hand and/or on in-camera stabilisation was more the culprit, m4/3 is capable of perfectly sharp images when taken correctly. Indeed an ASP-C sensor isn't much larger anyway, and my friend with a Sony bridge takes amazing pictures with a 1" sensor. As do many phones, even. Anyway, it has left me the habit of cranking up sharpening to the highest level I can, and I suspect I often over-do it. At least I haven't been accused of soft focus recently! |
Dec 12th |
| 95 |
Dec 21 |
Reply |
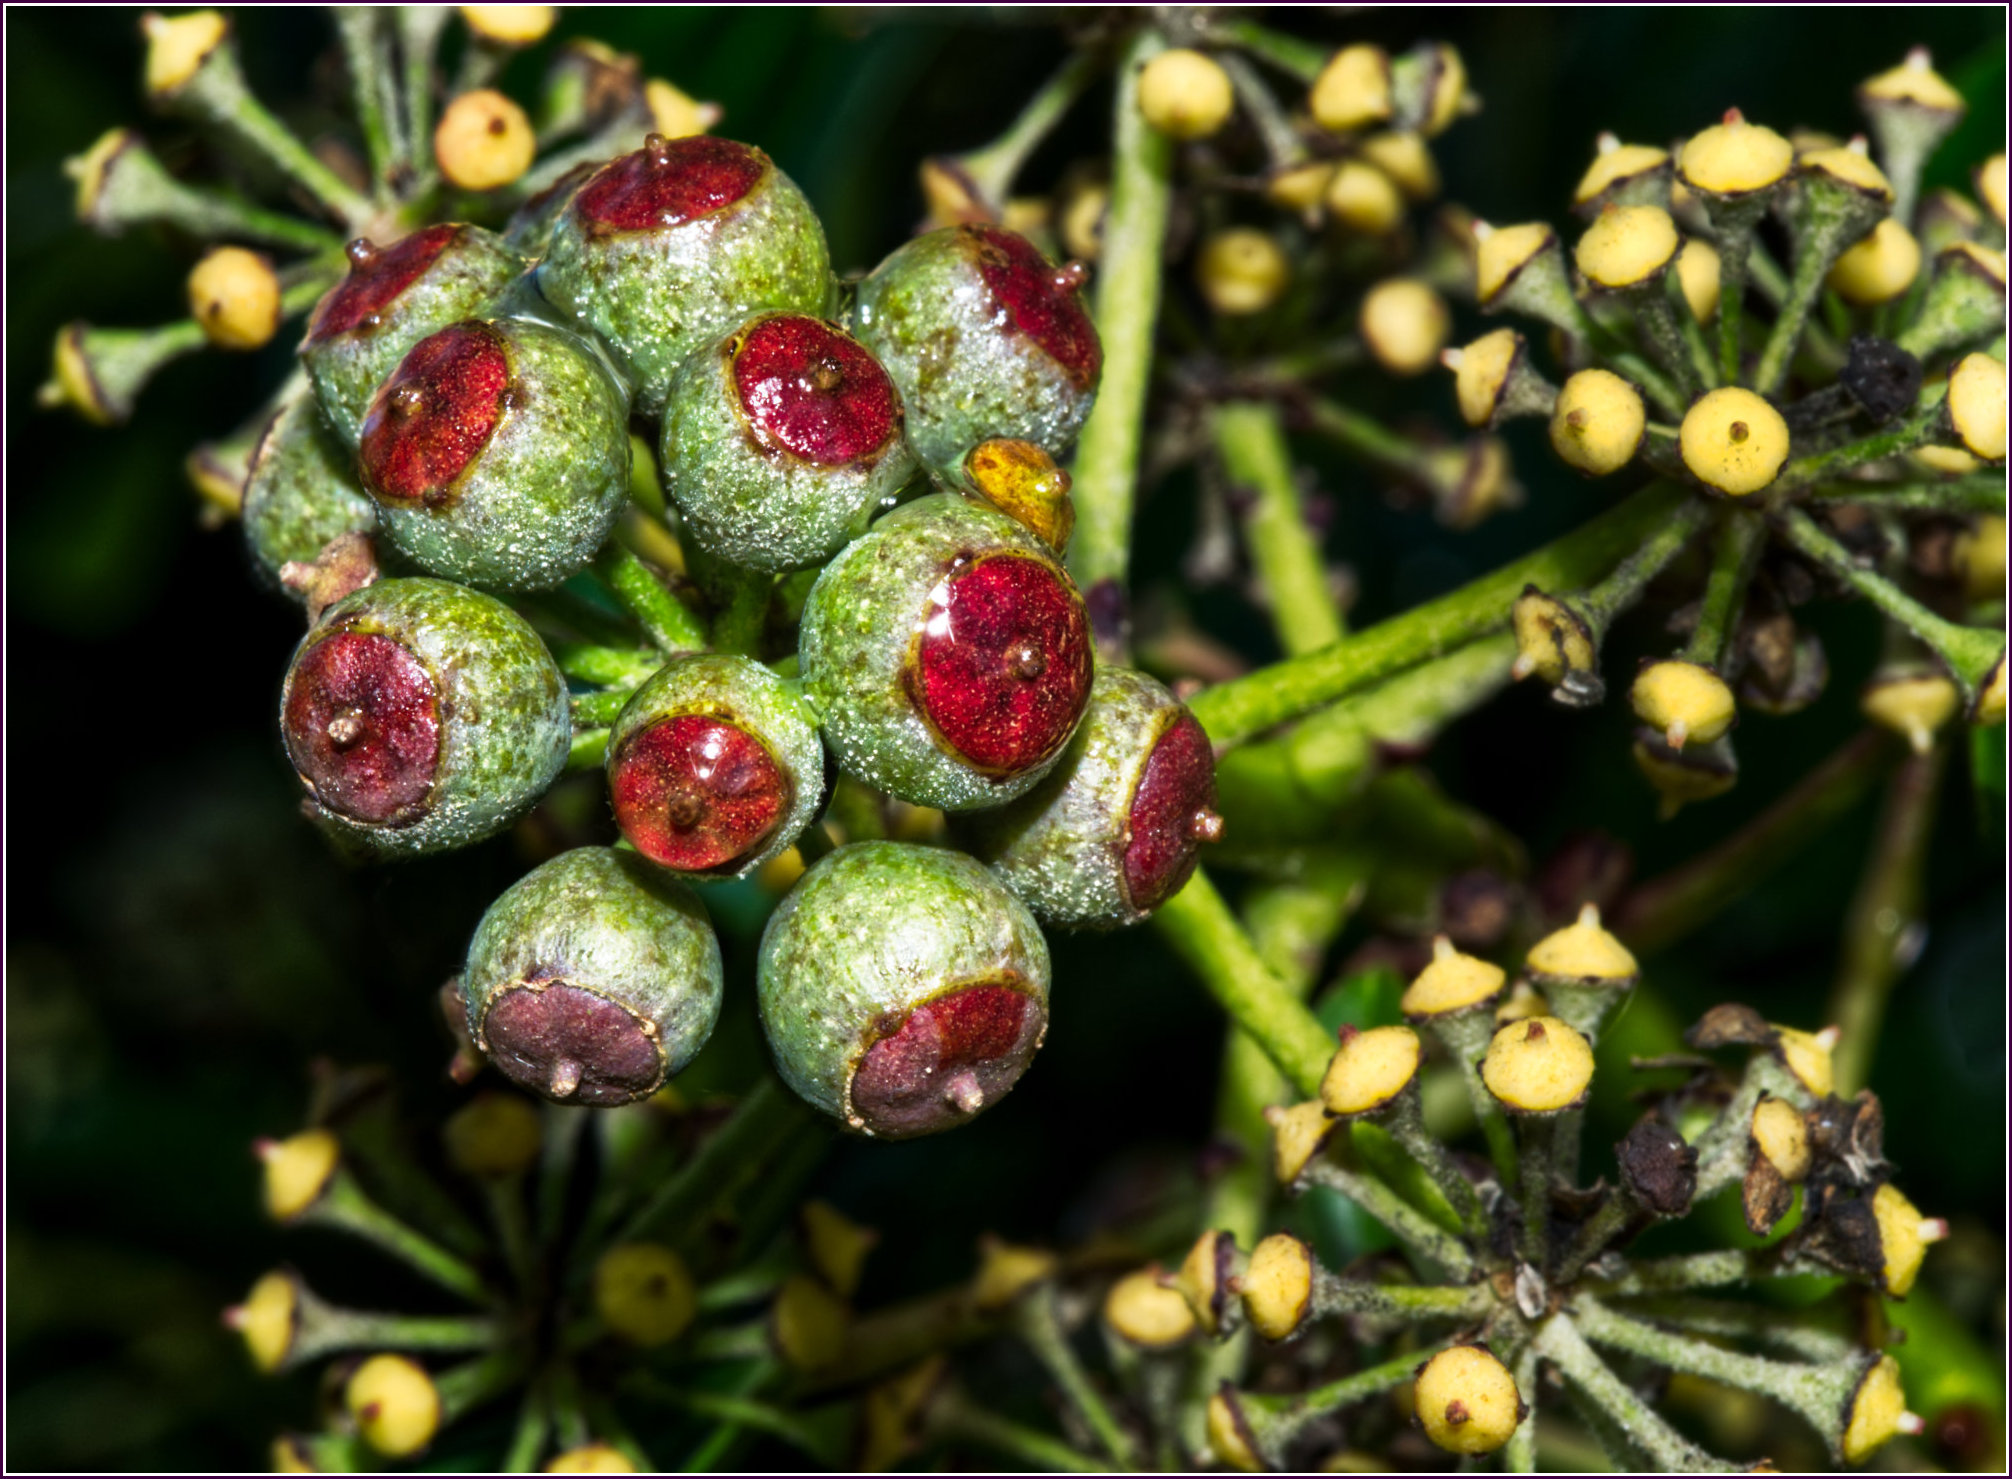
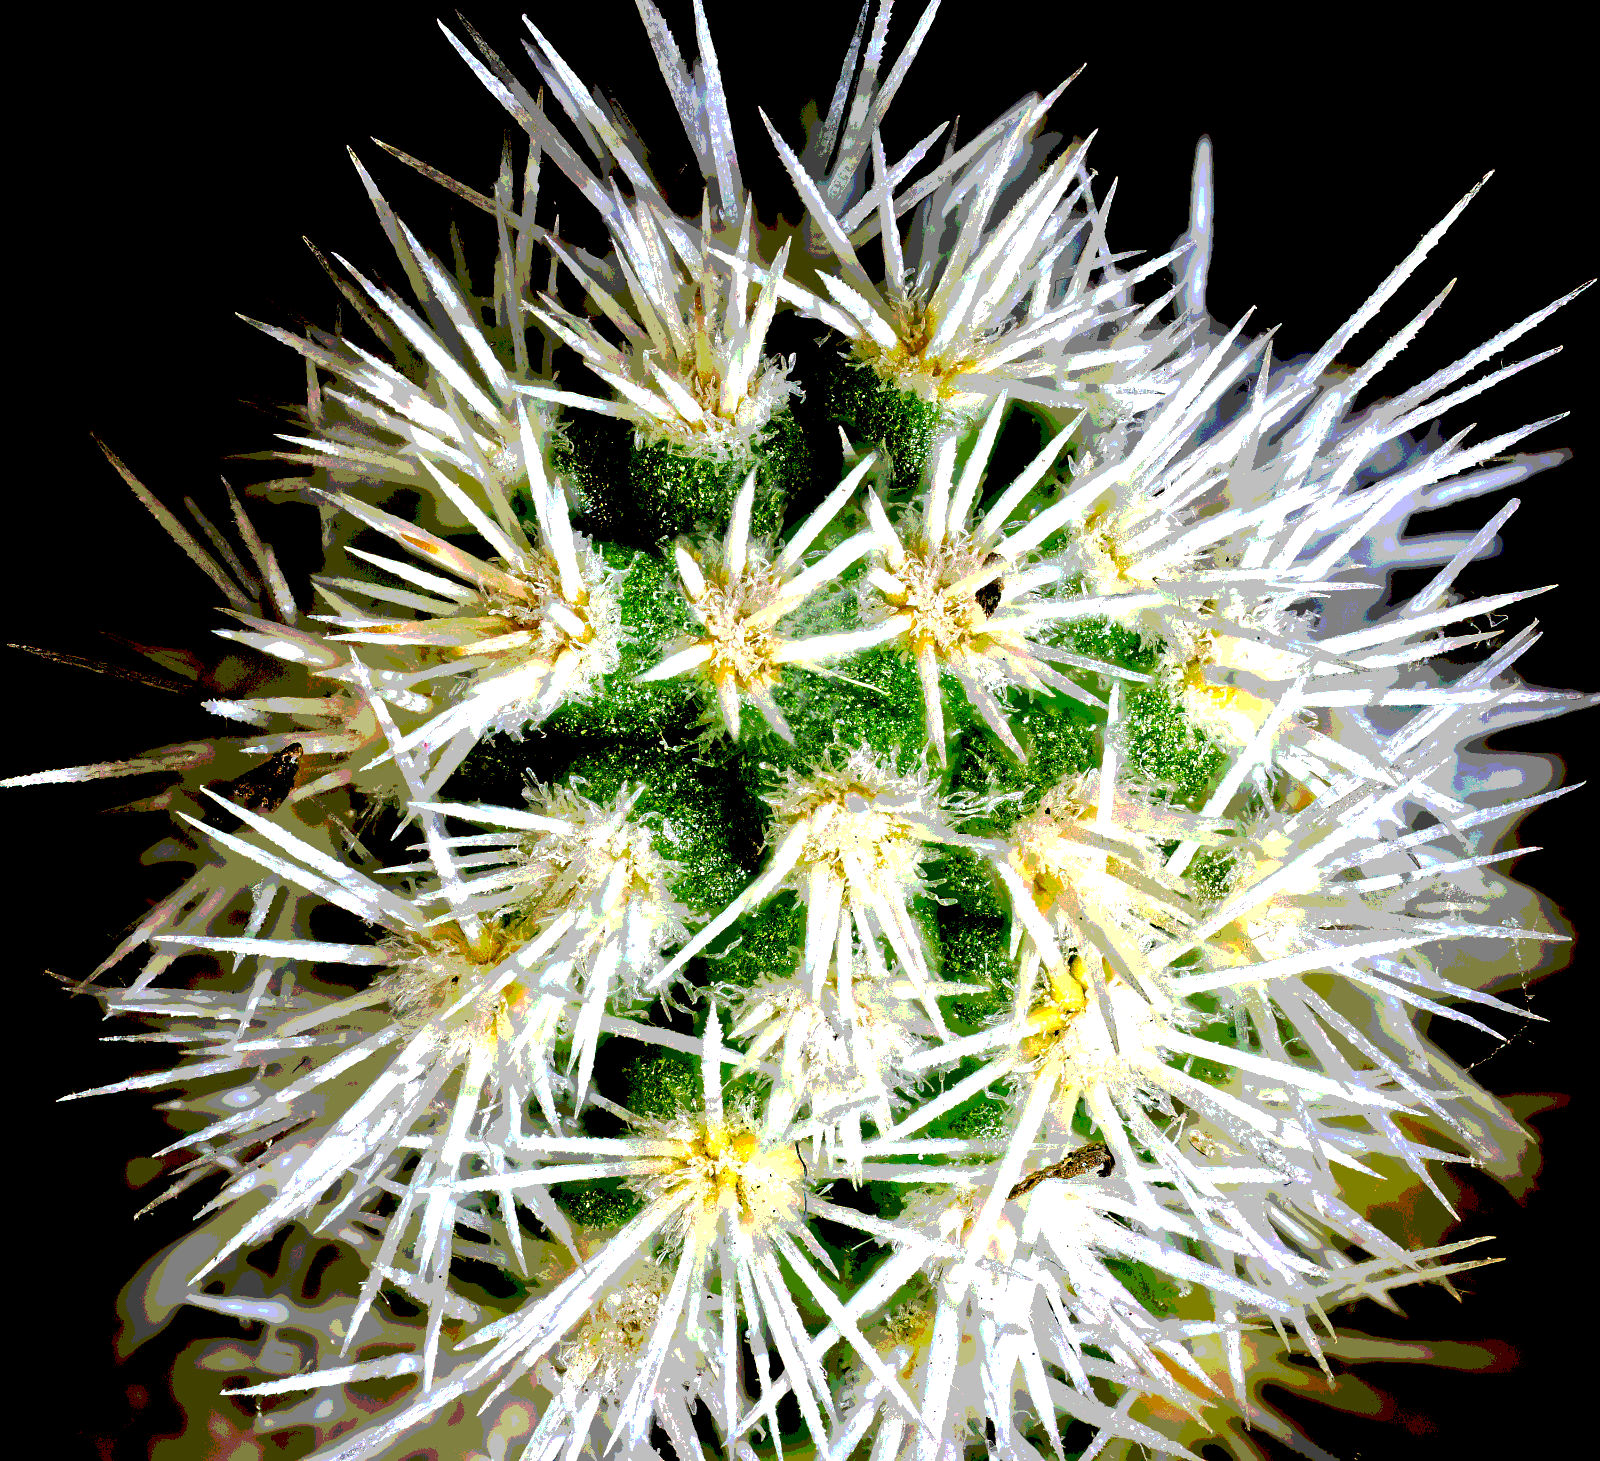
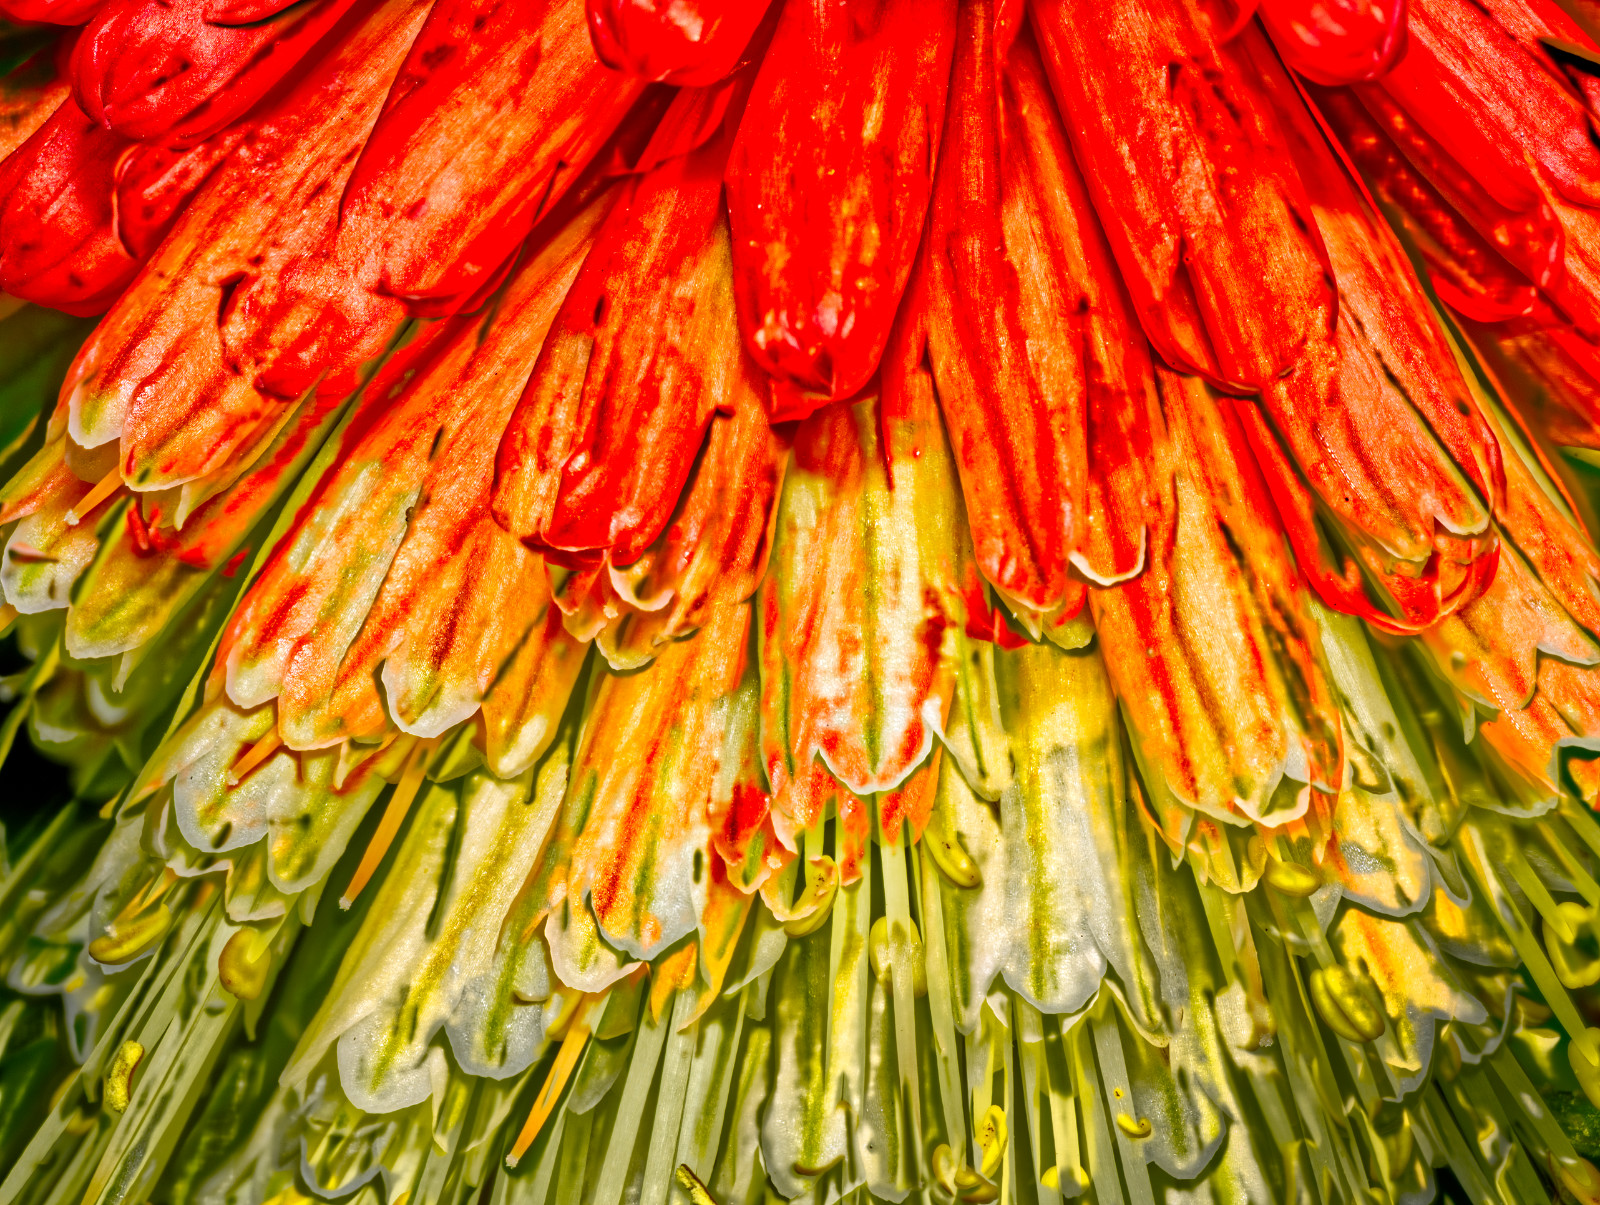
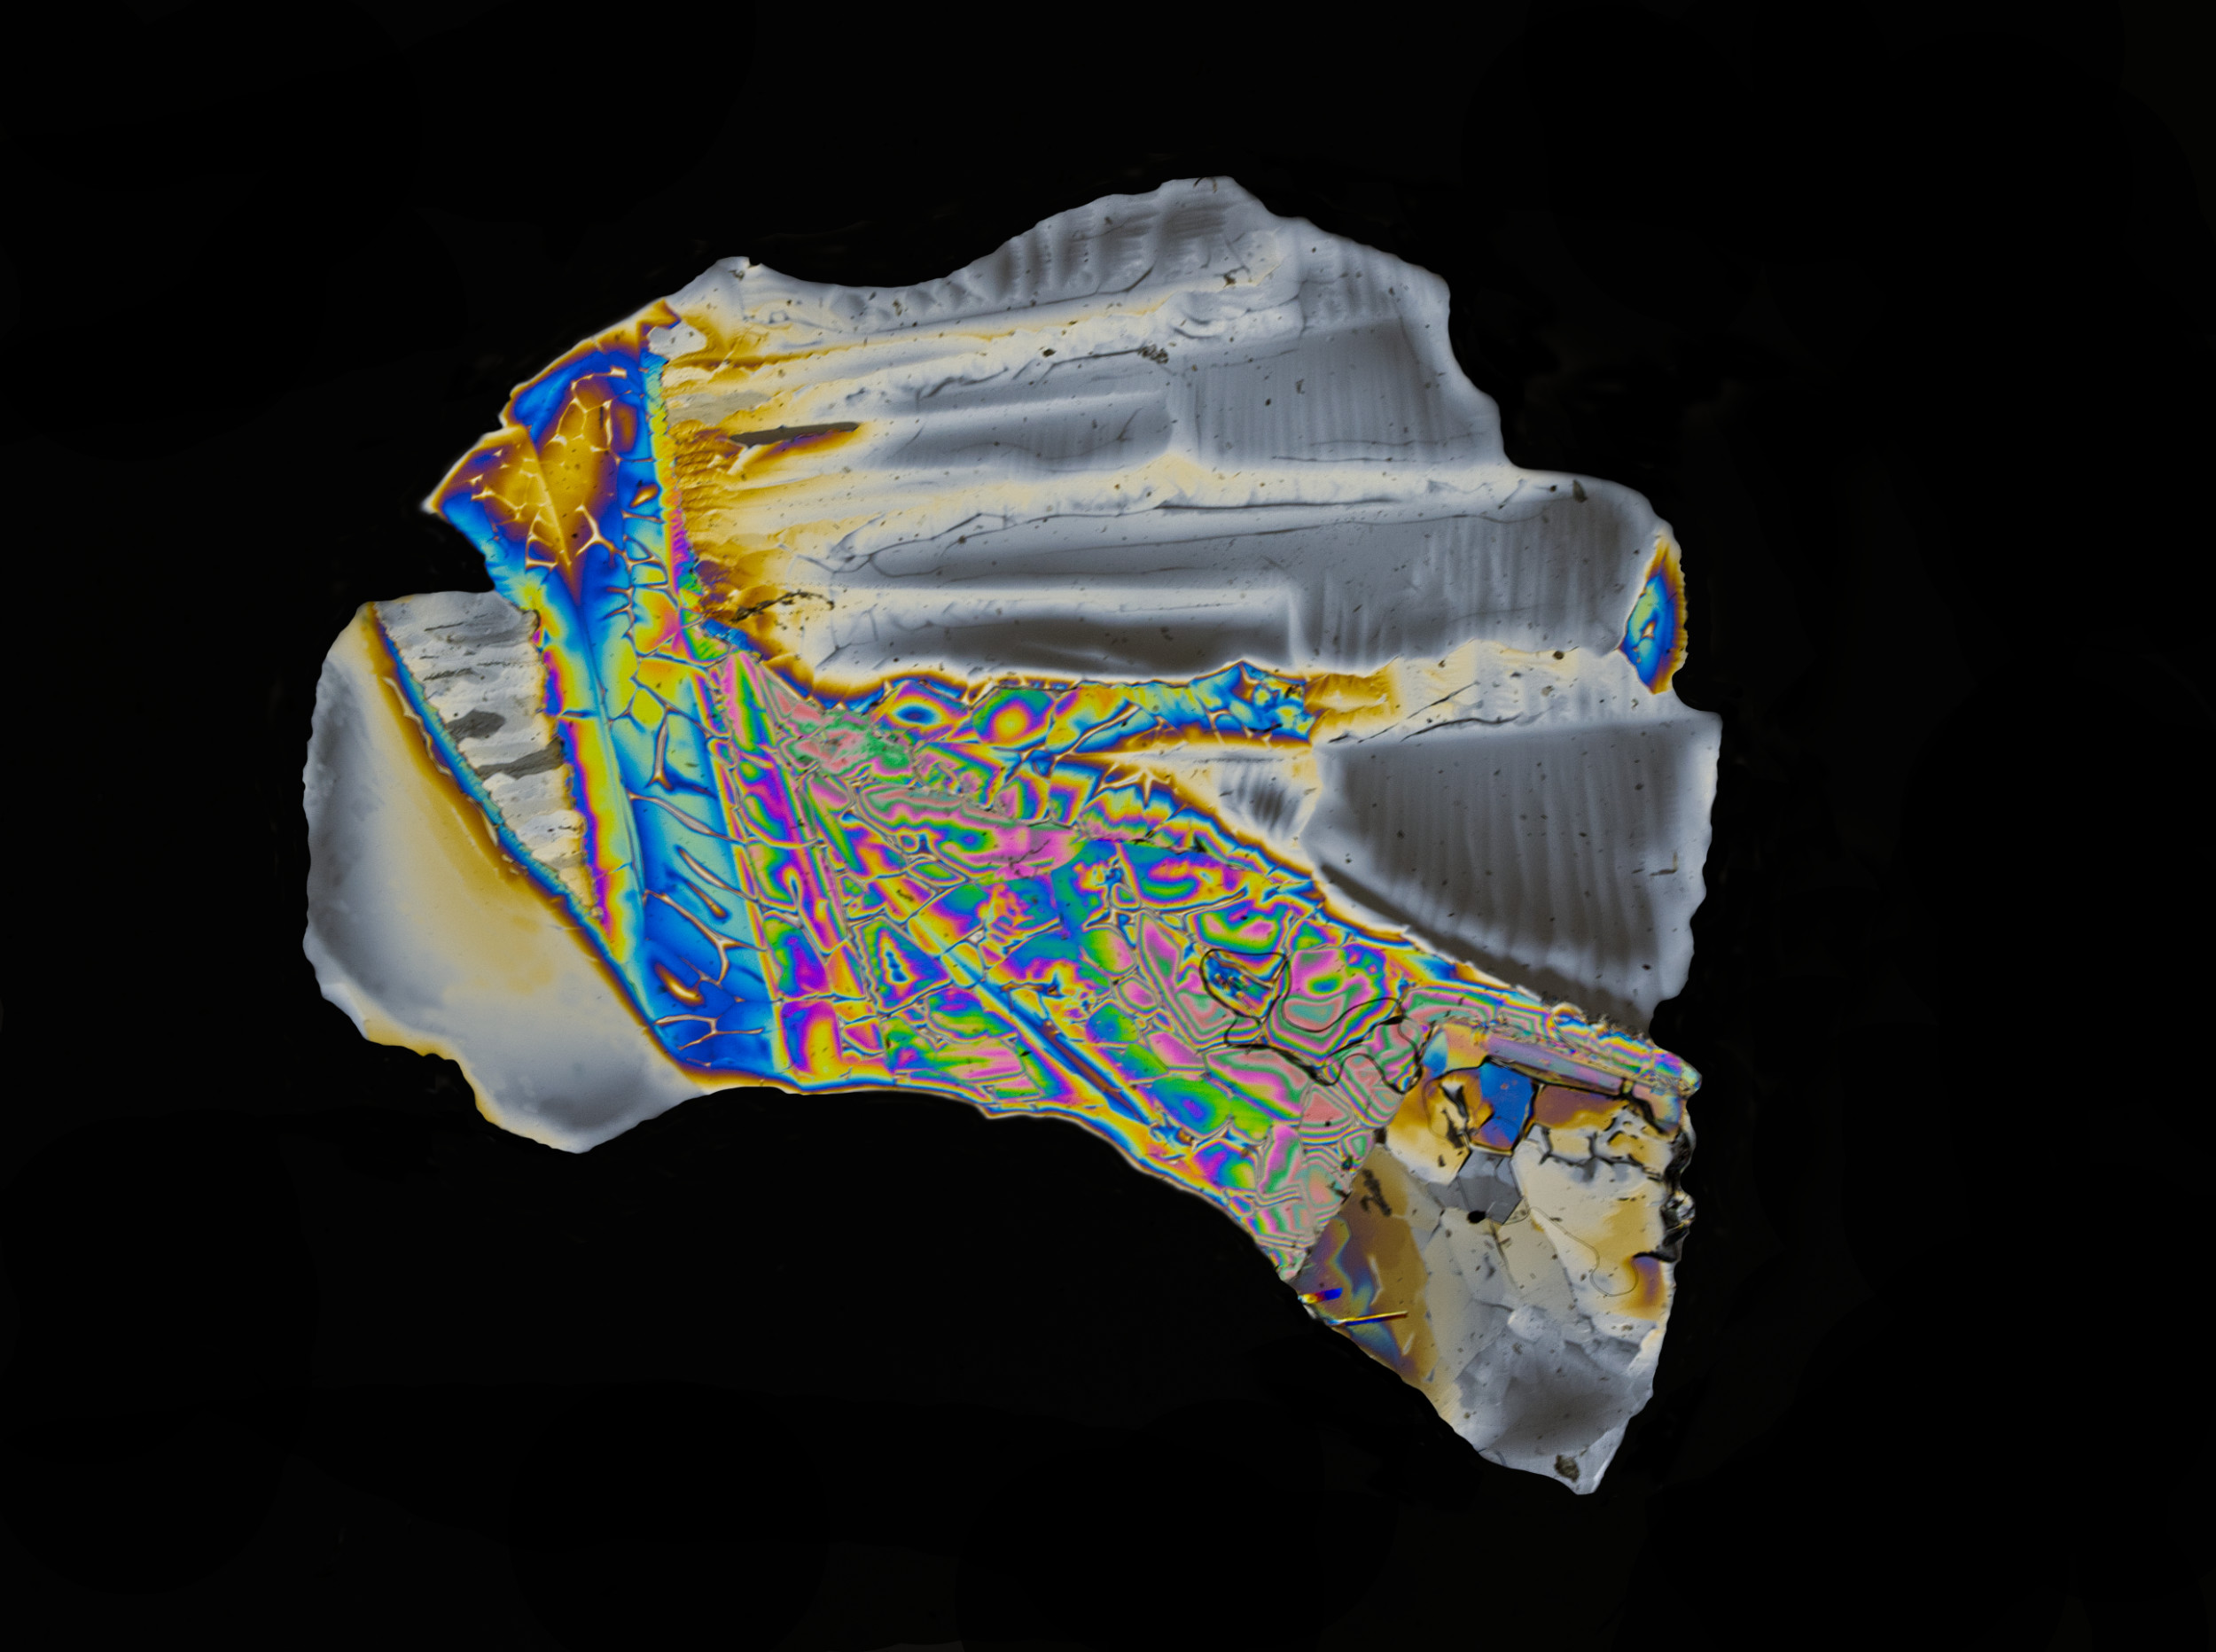
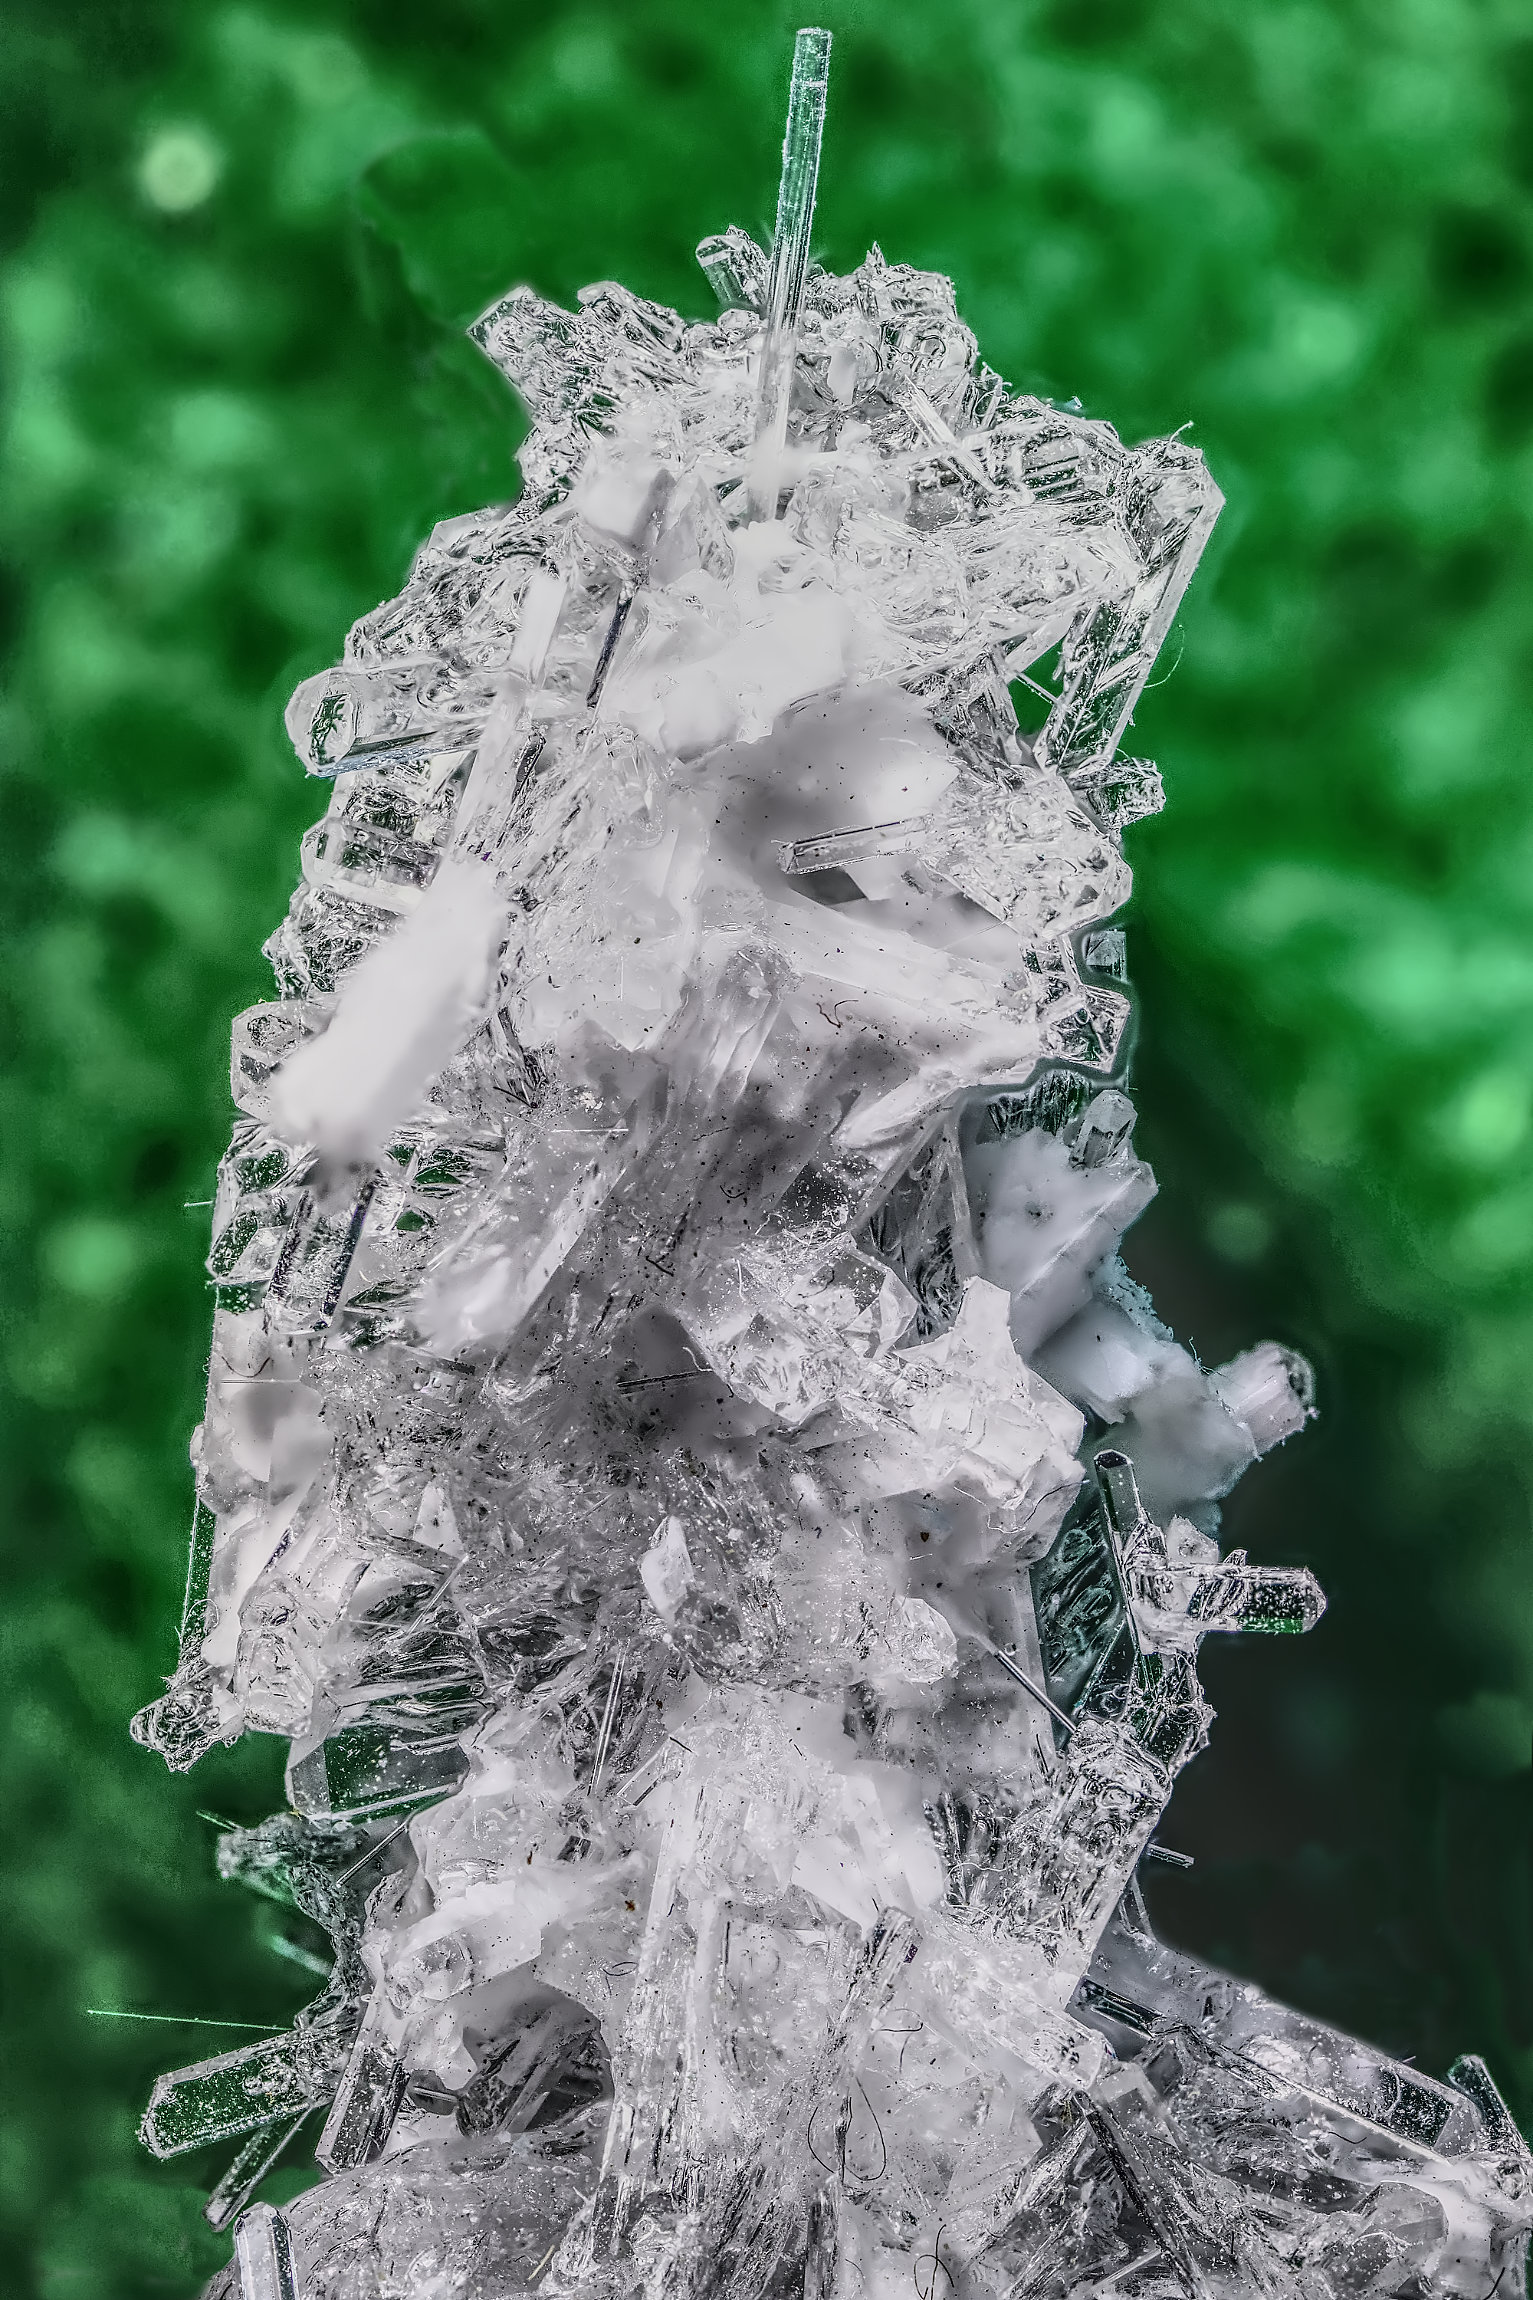
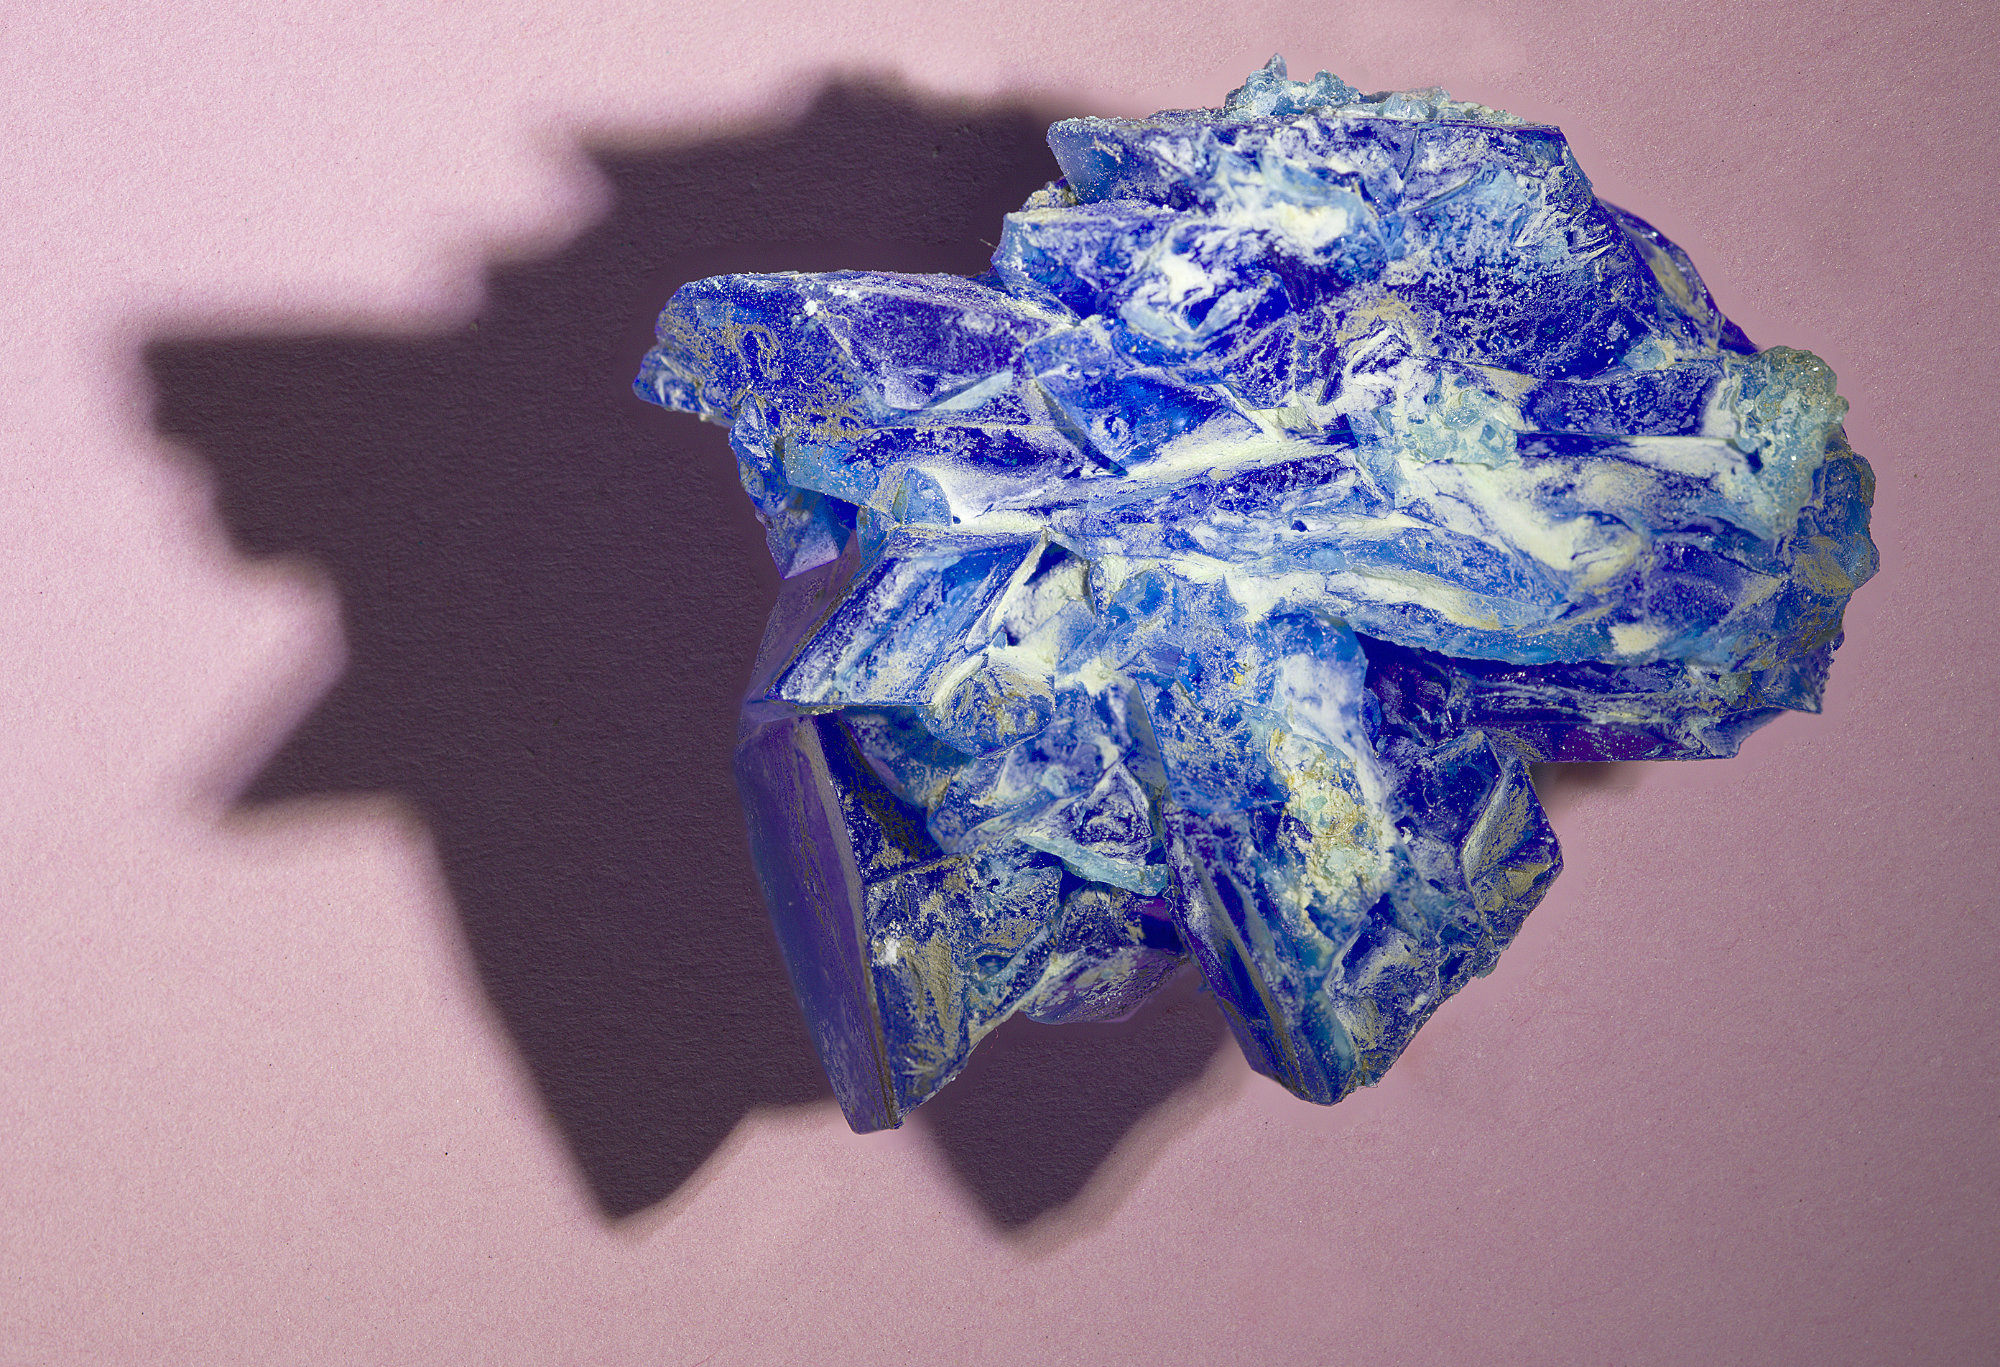
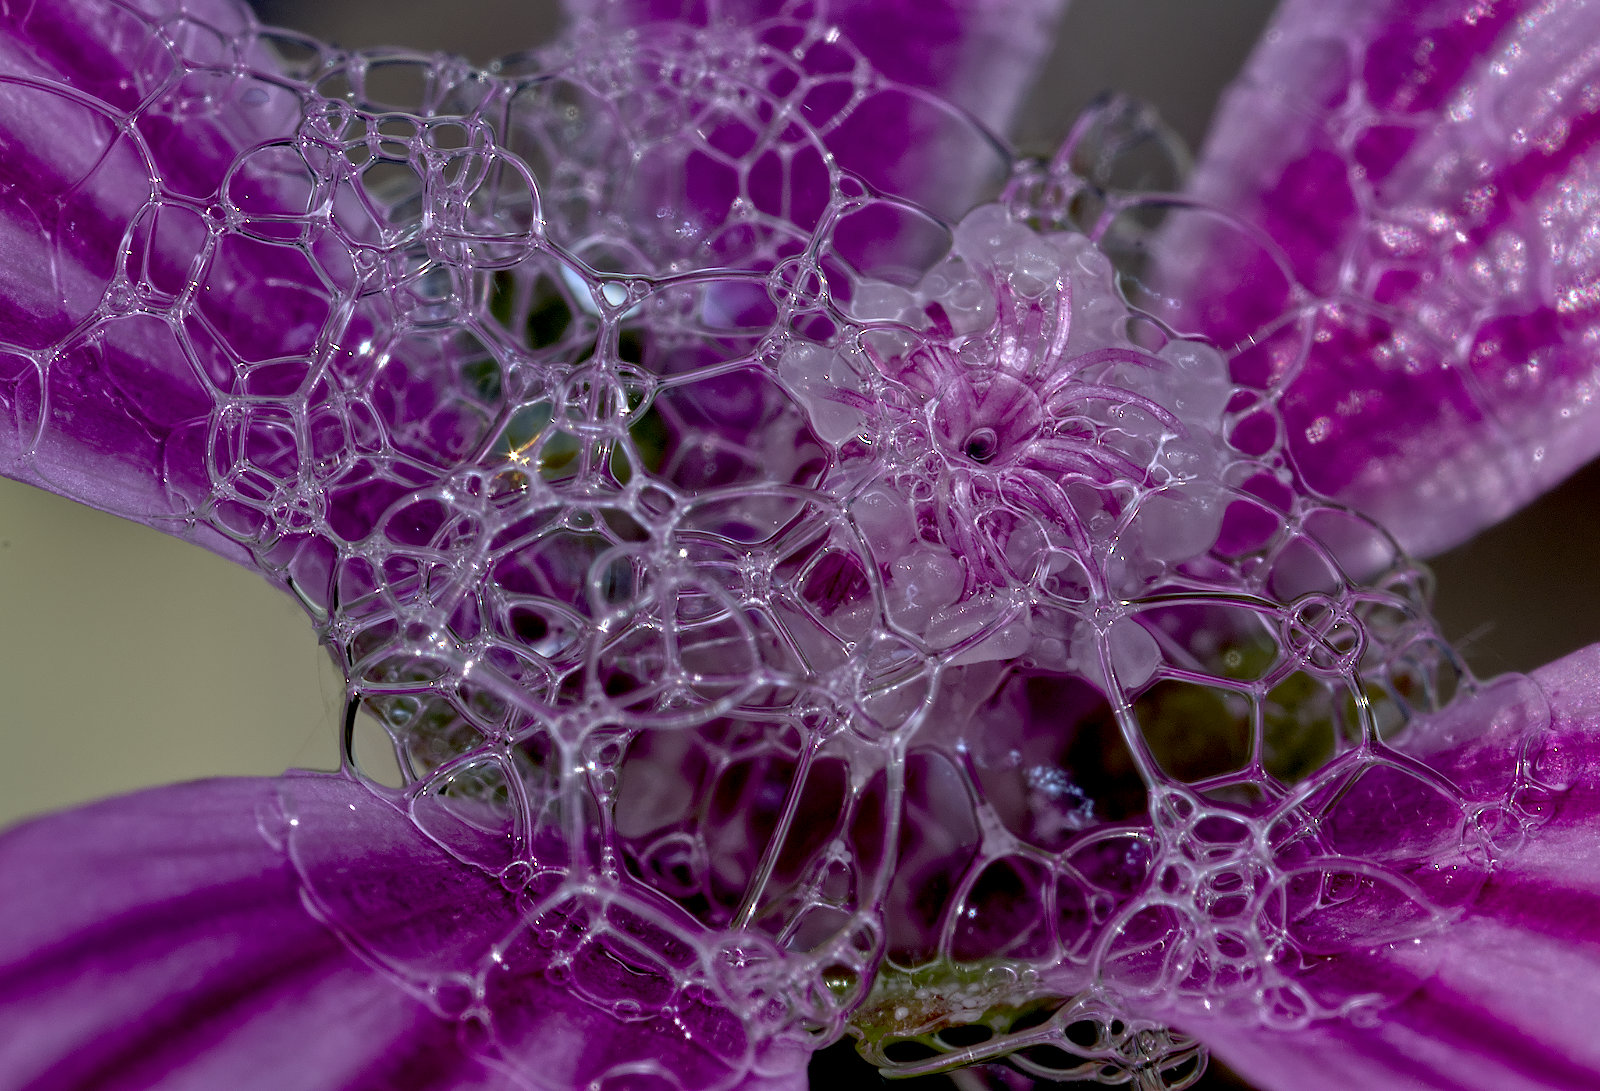
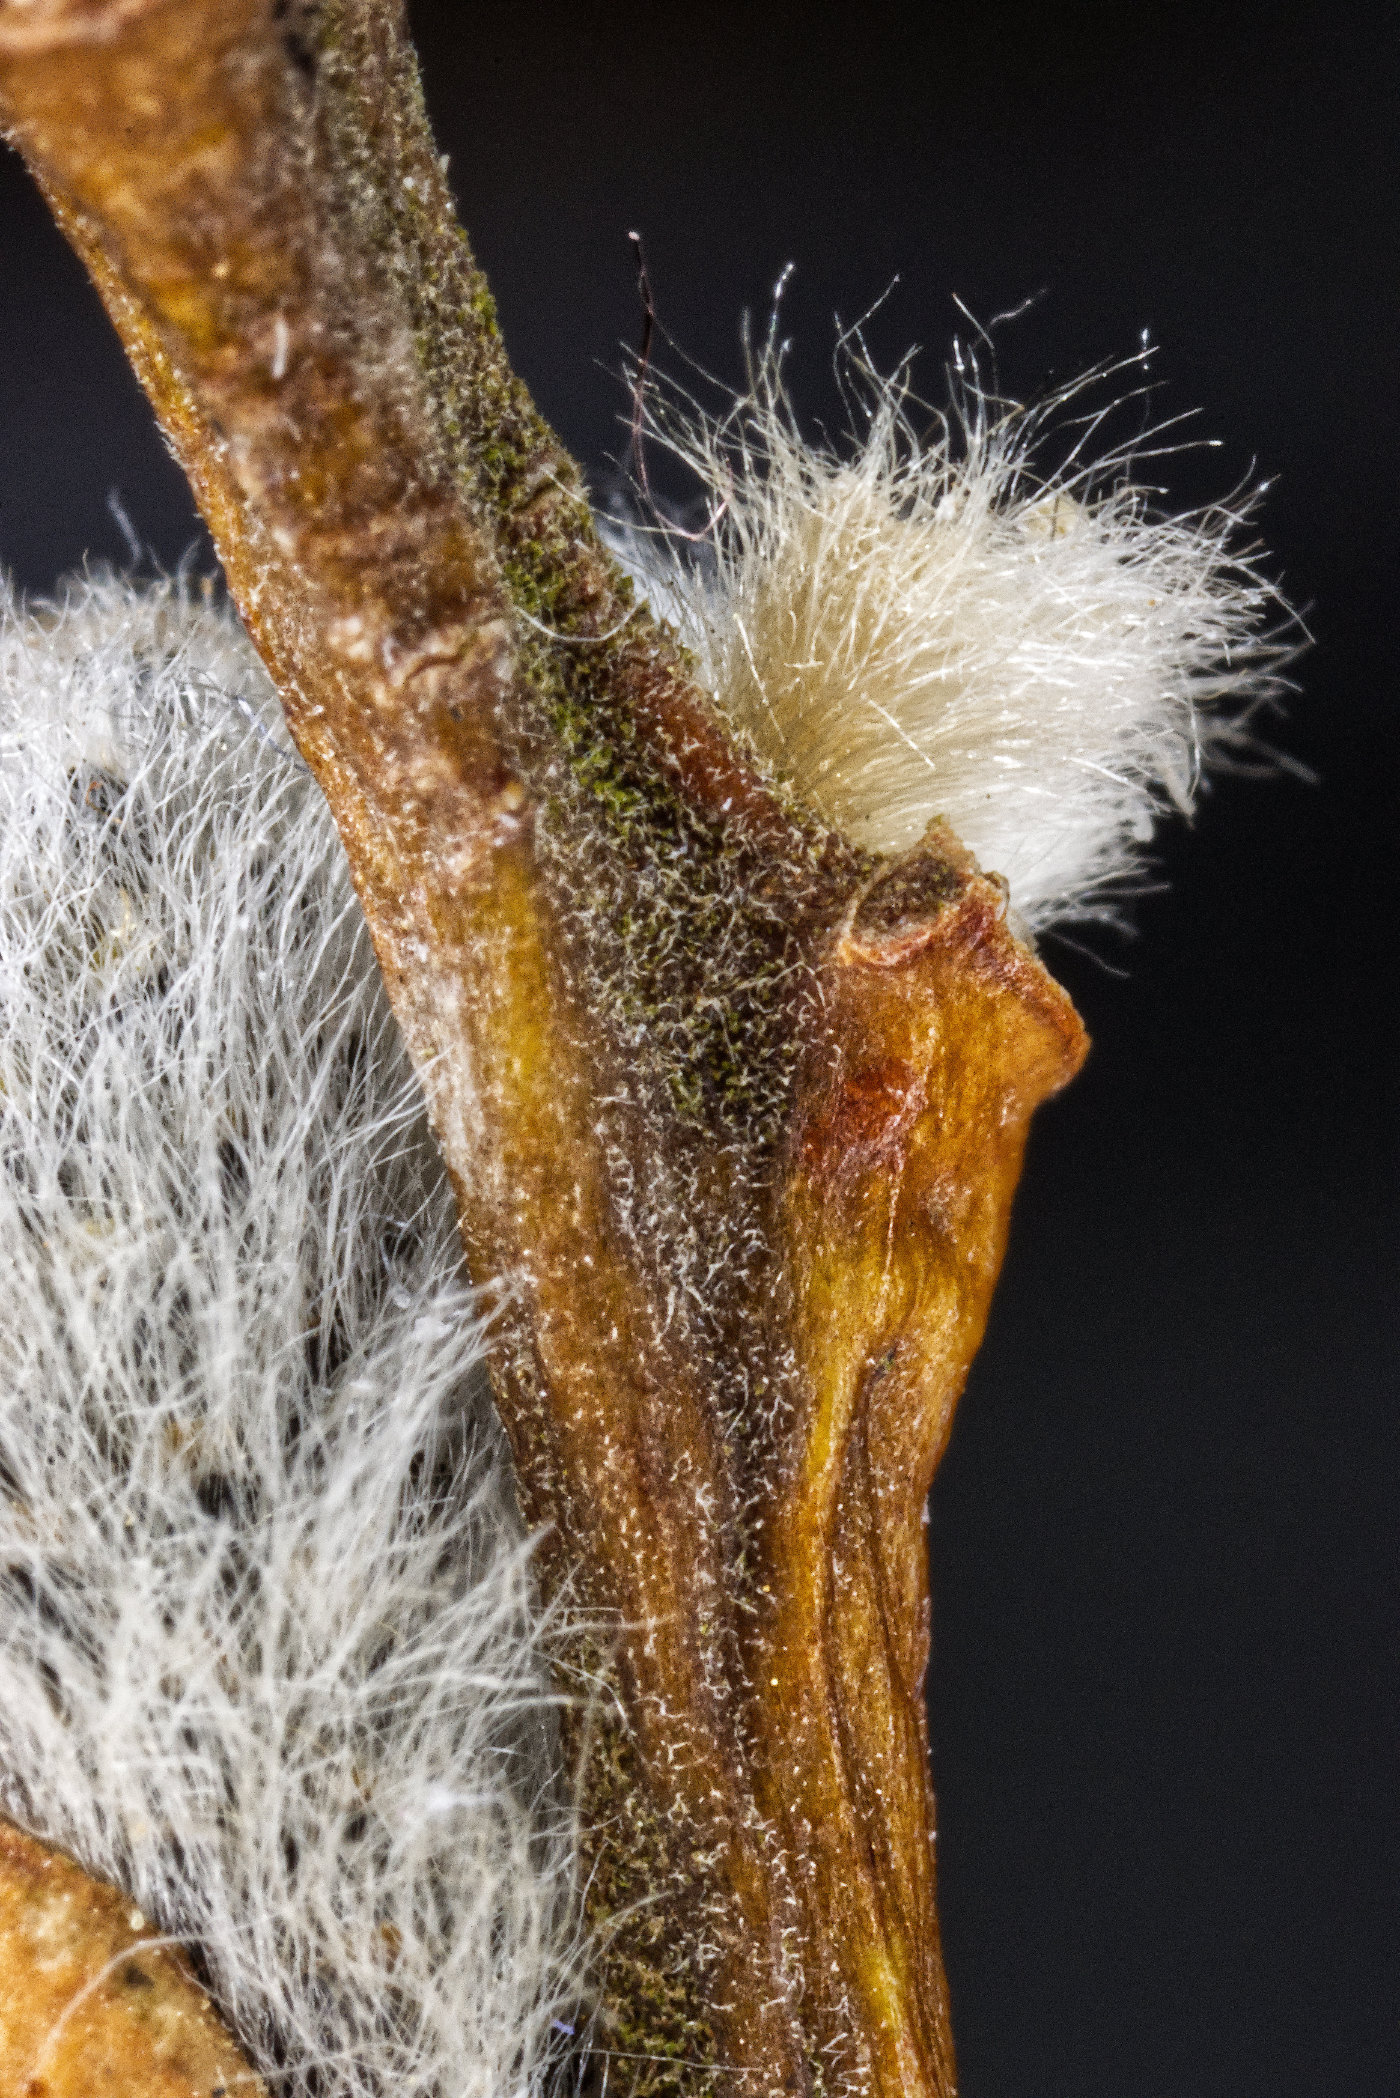
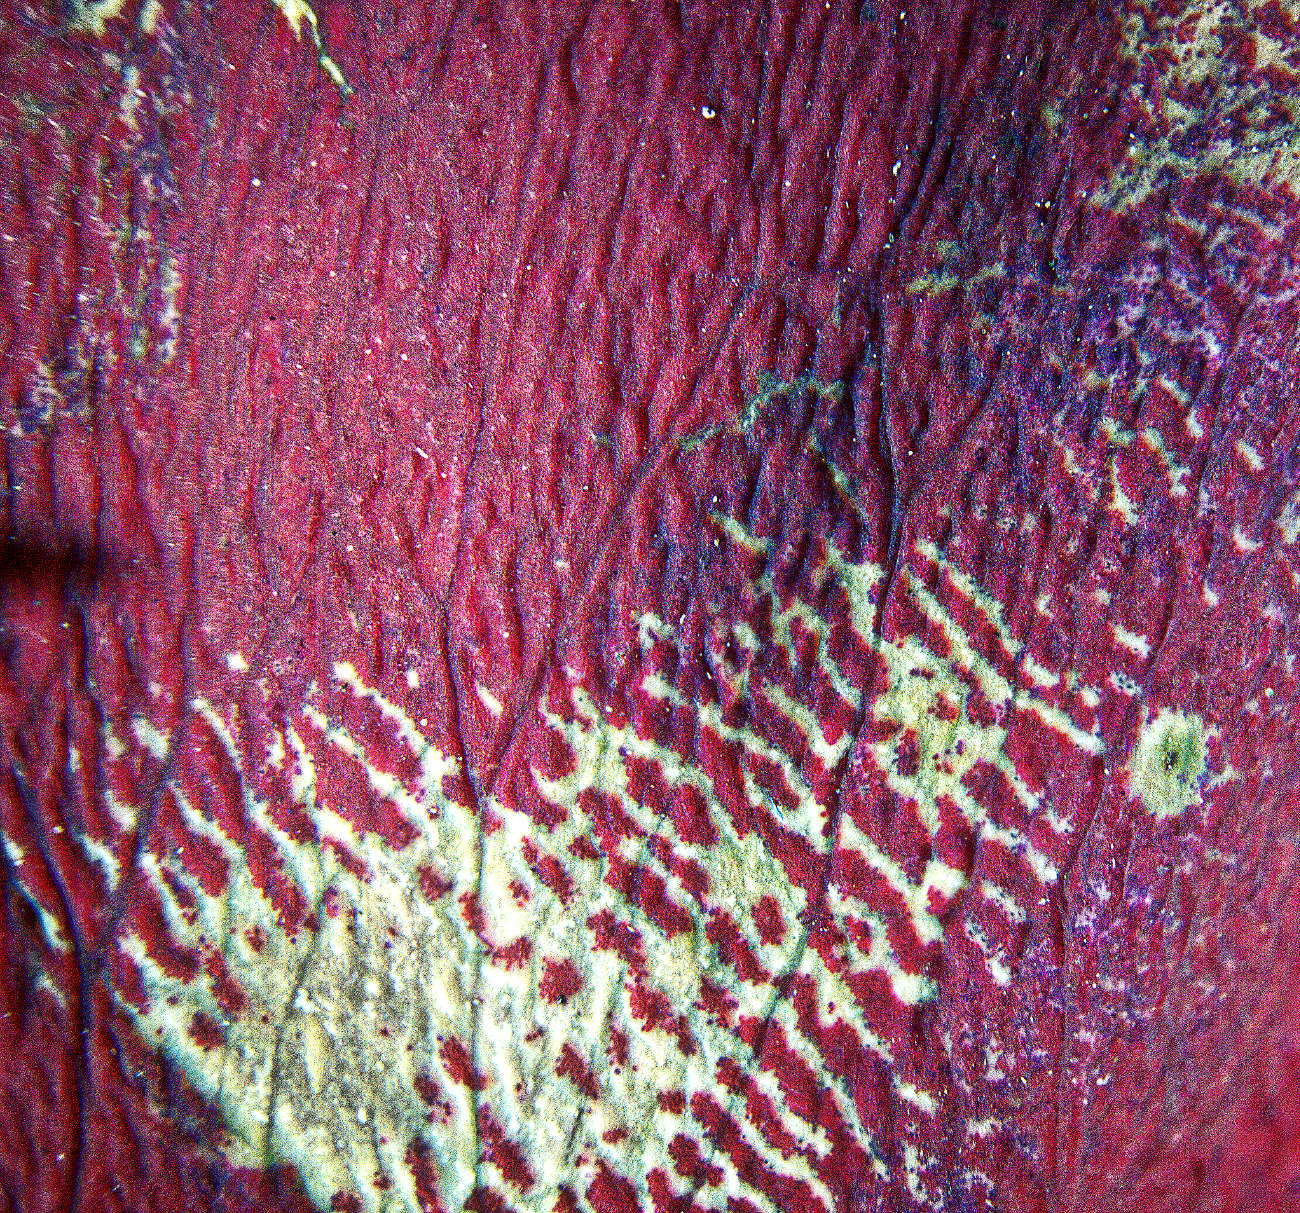
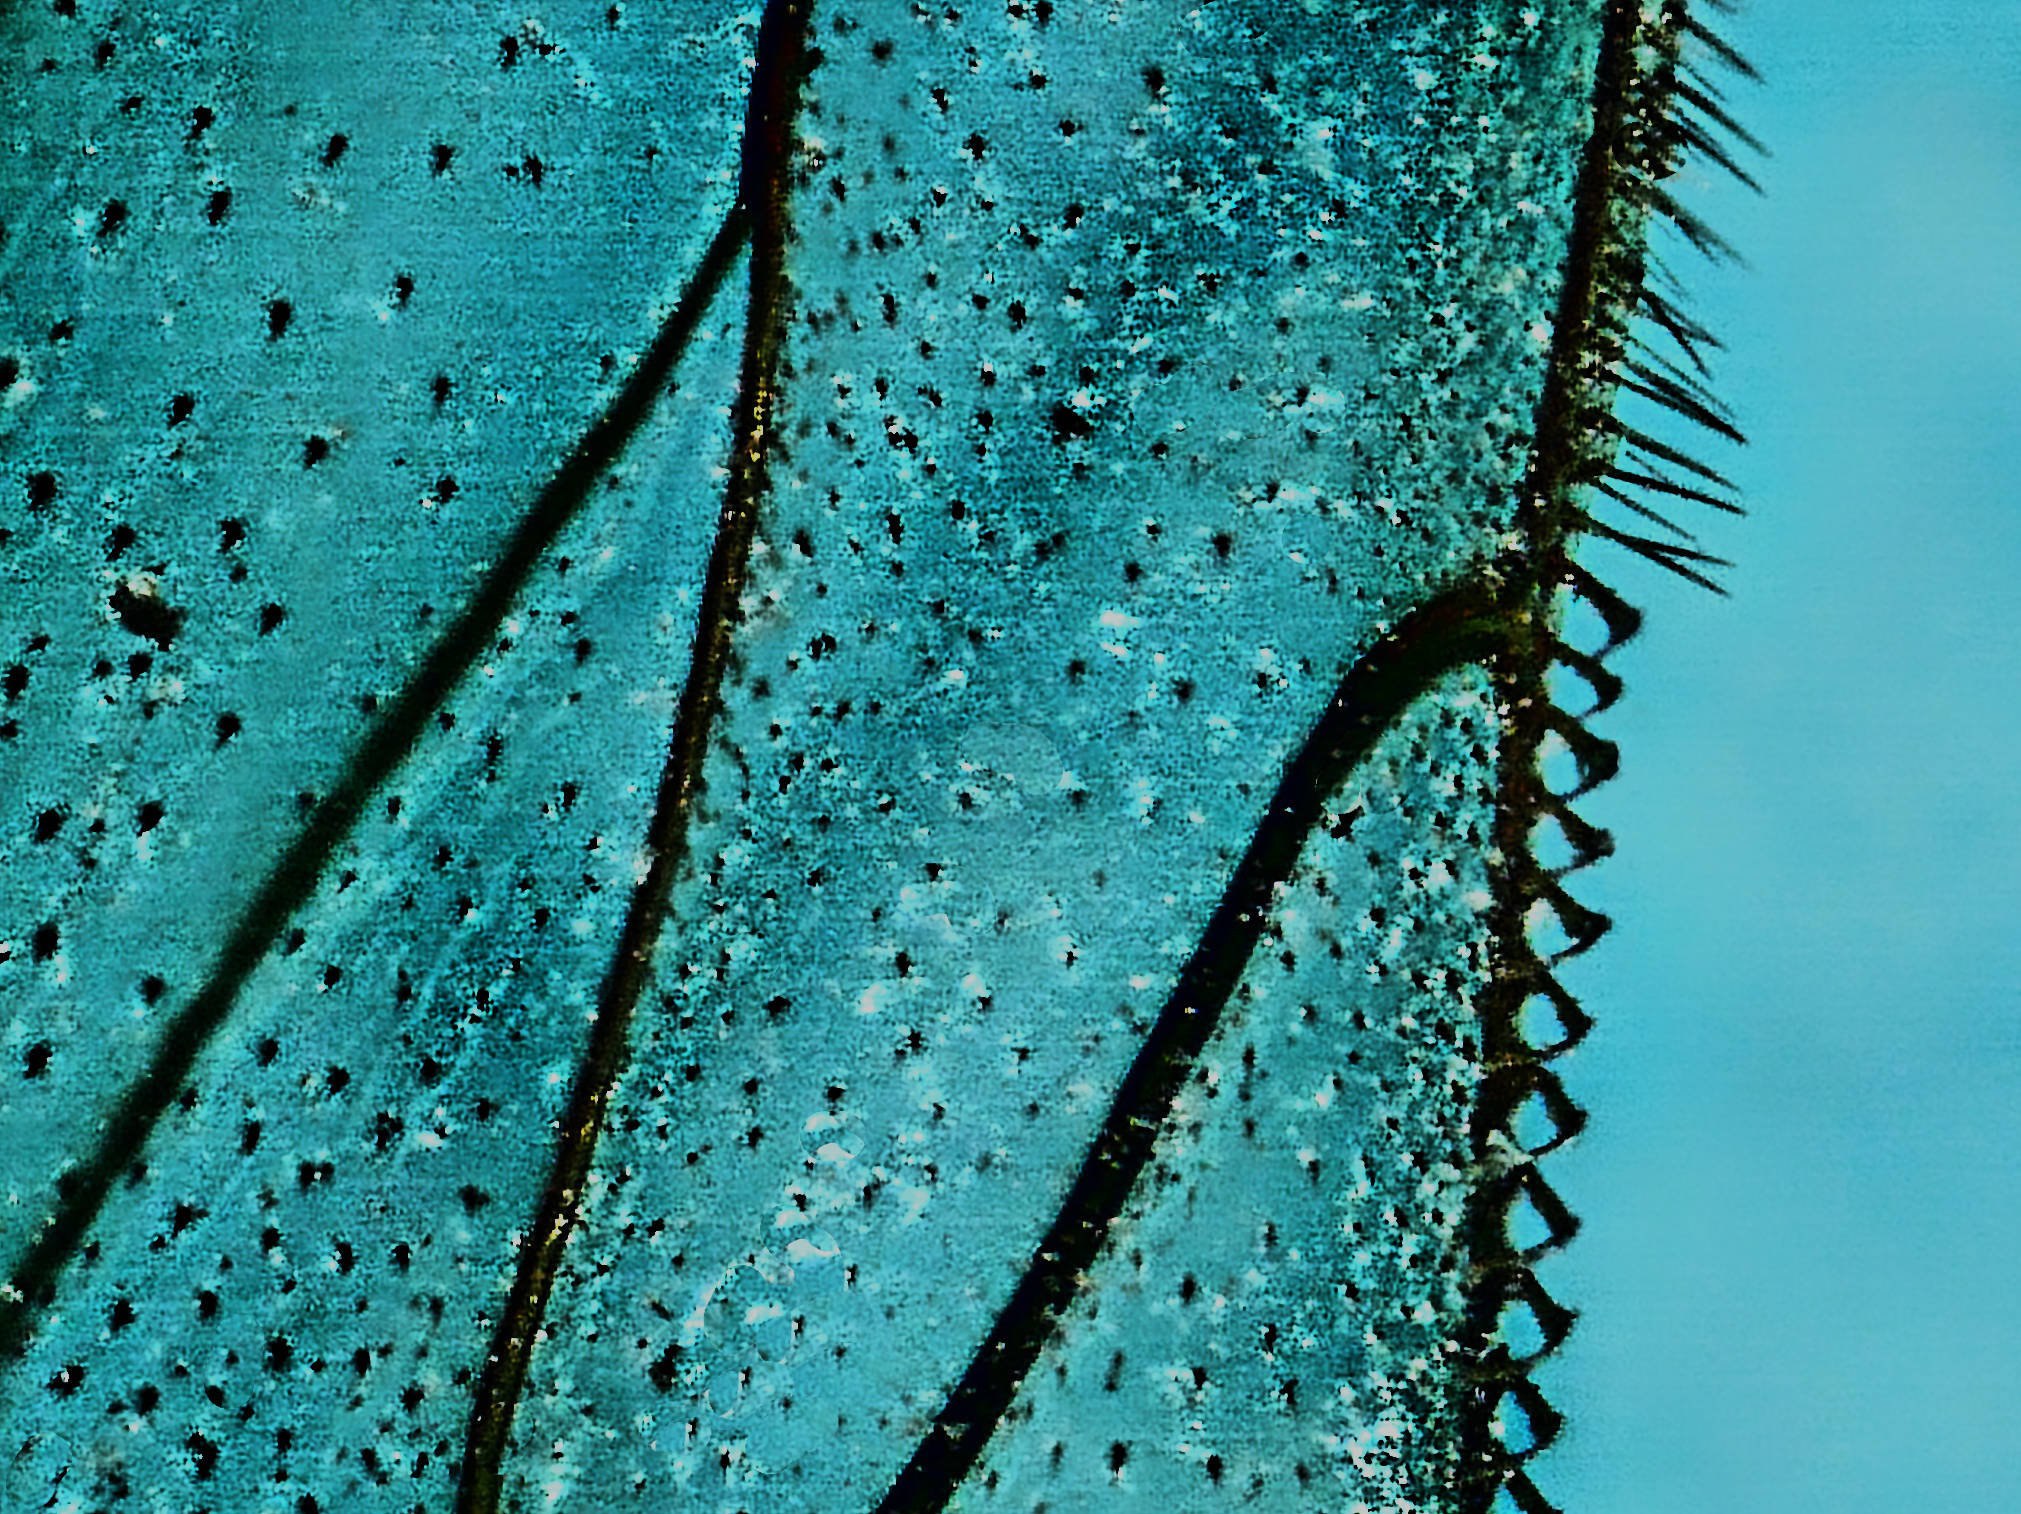
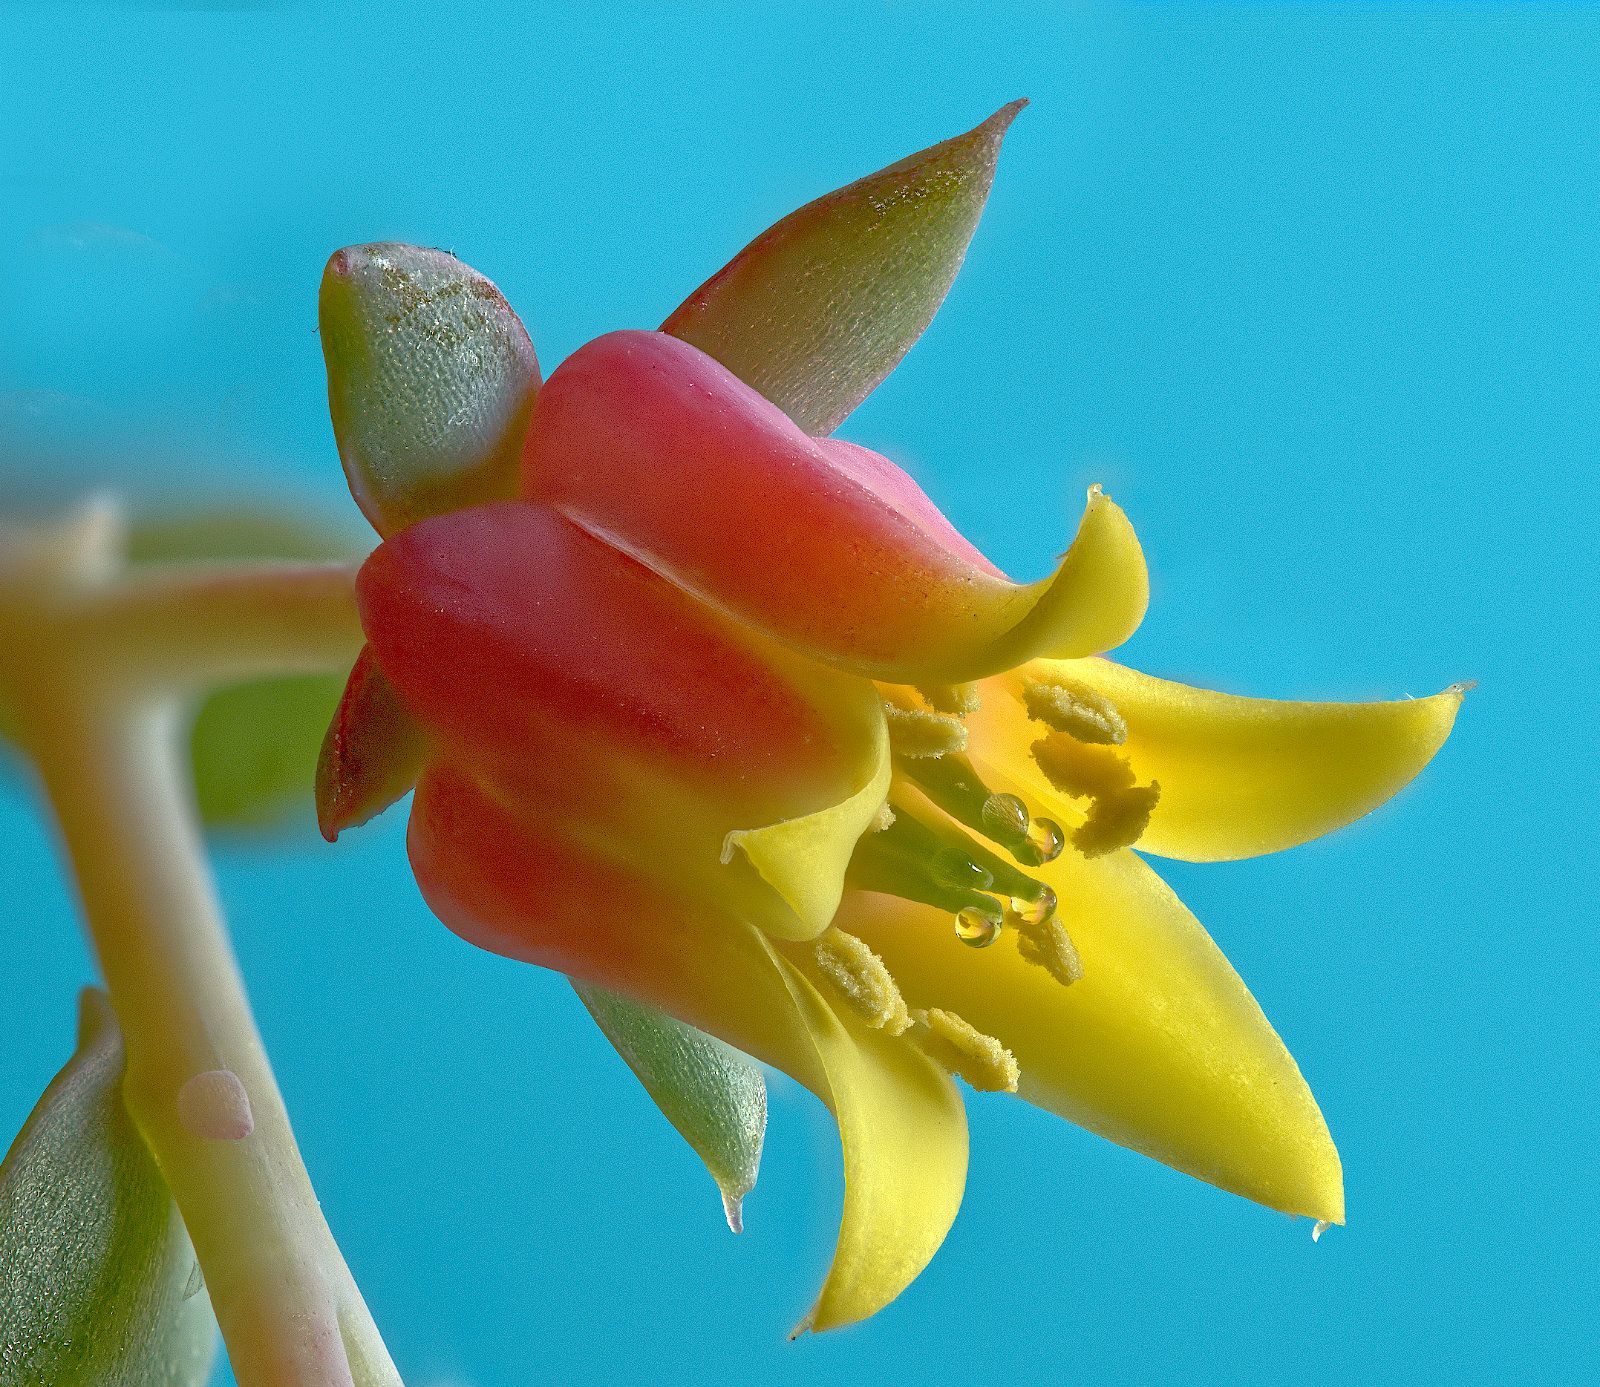
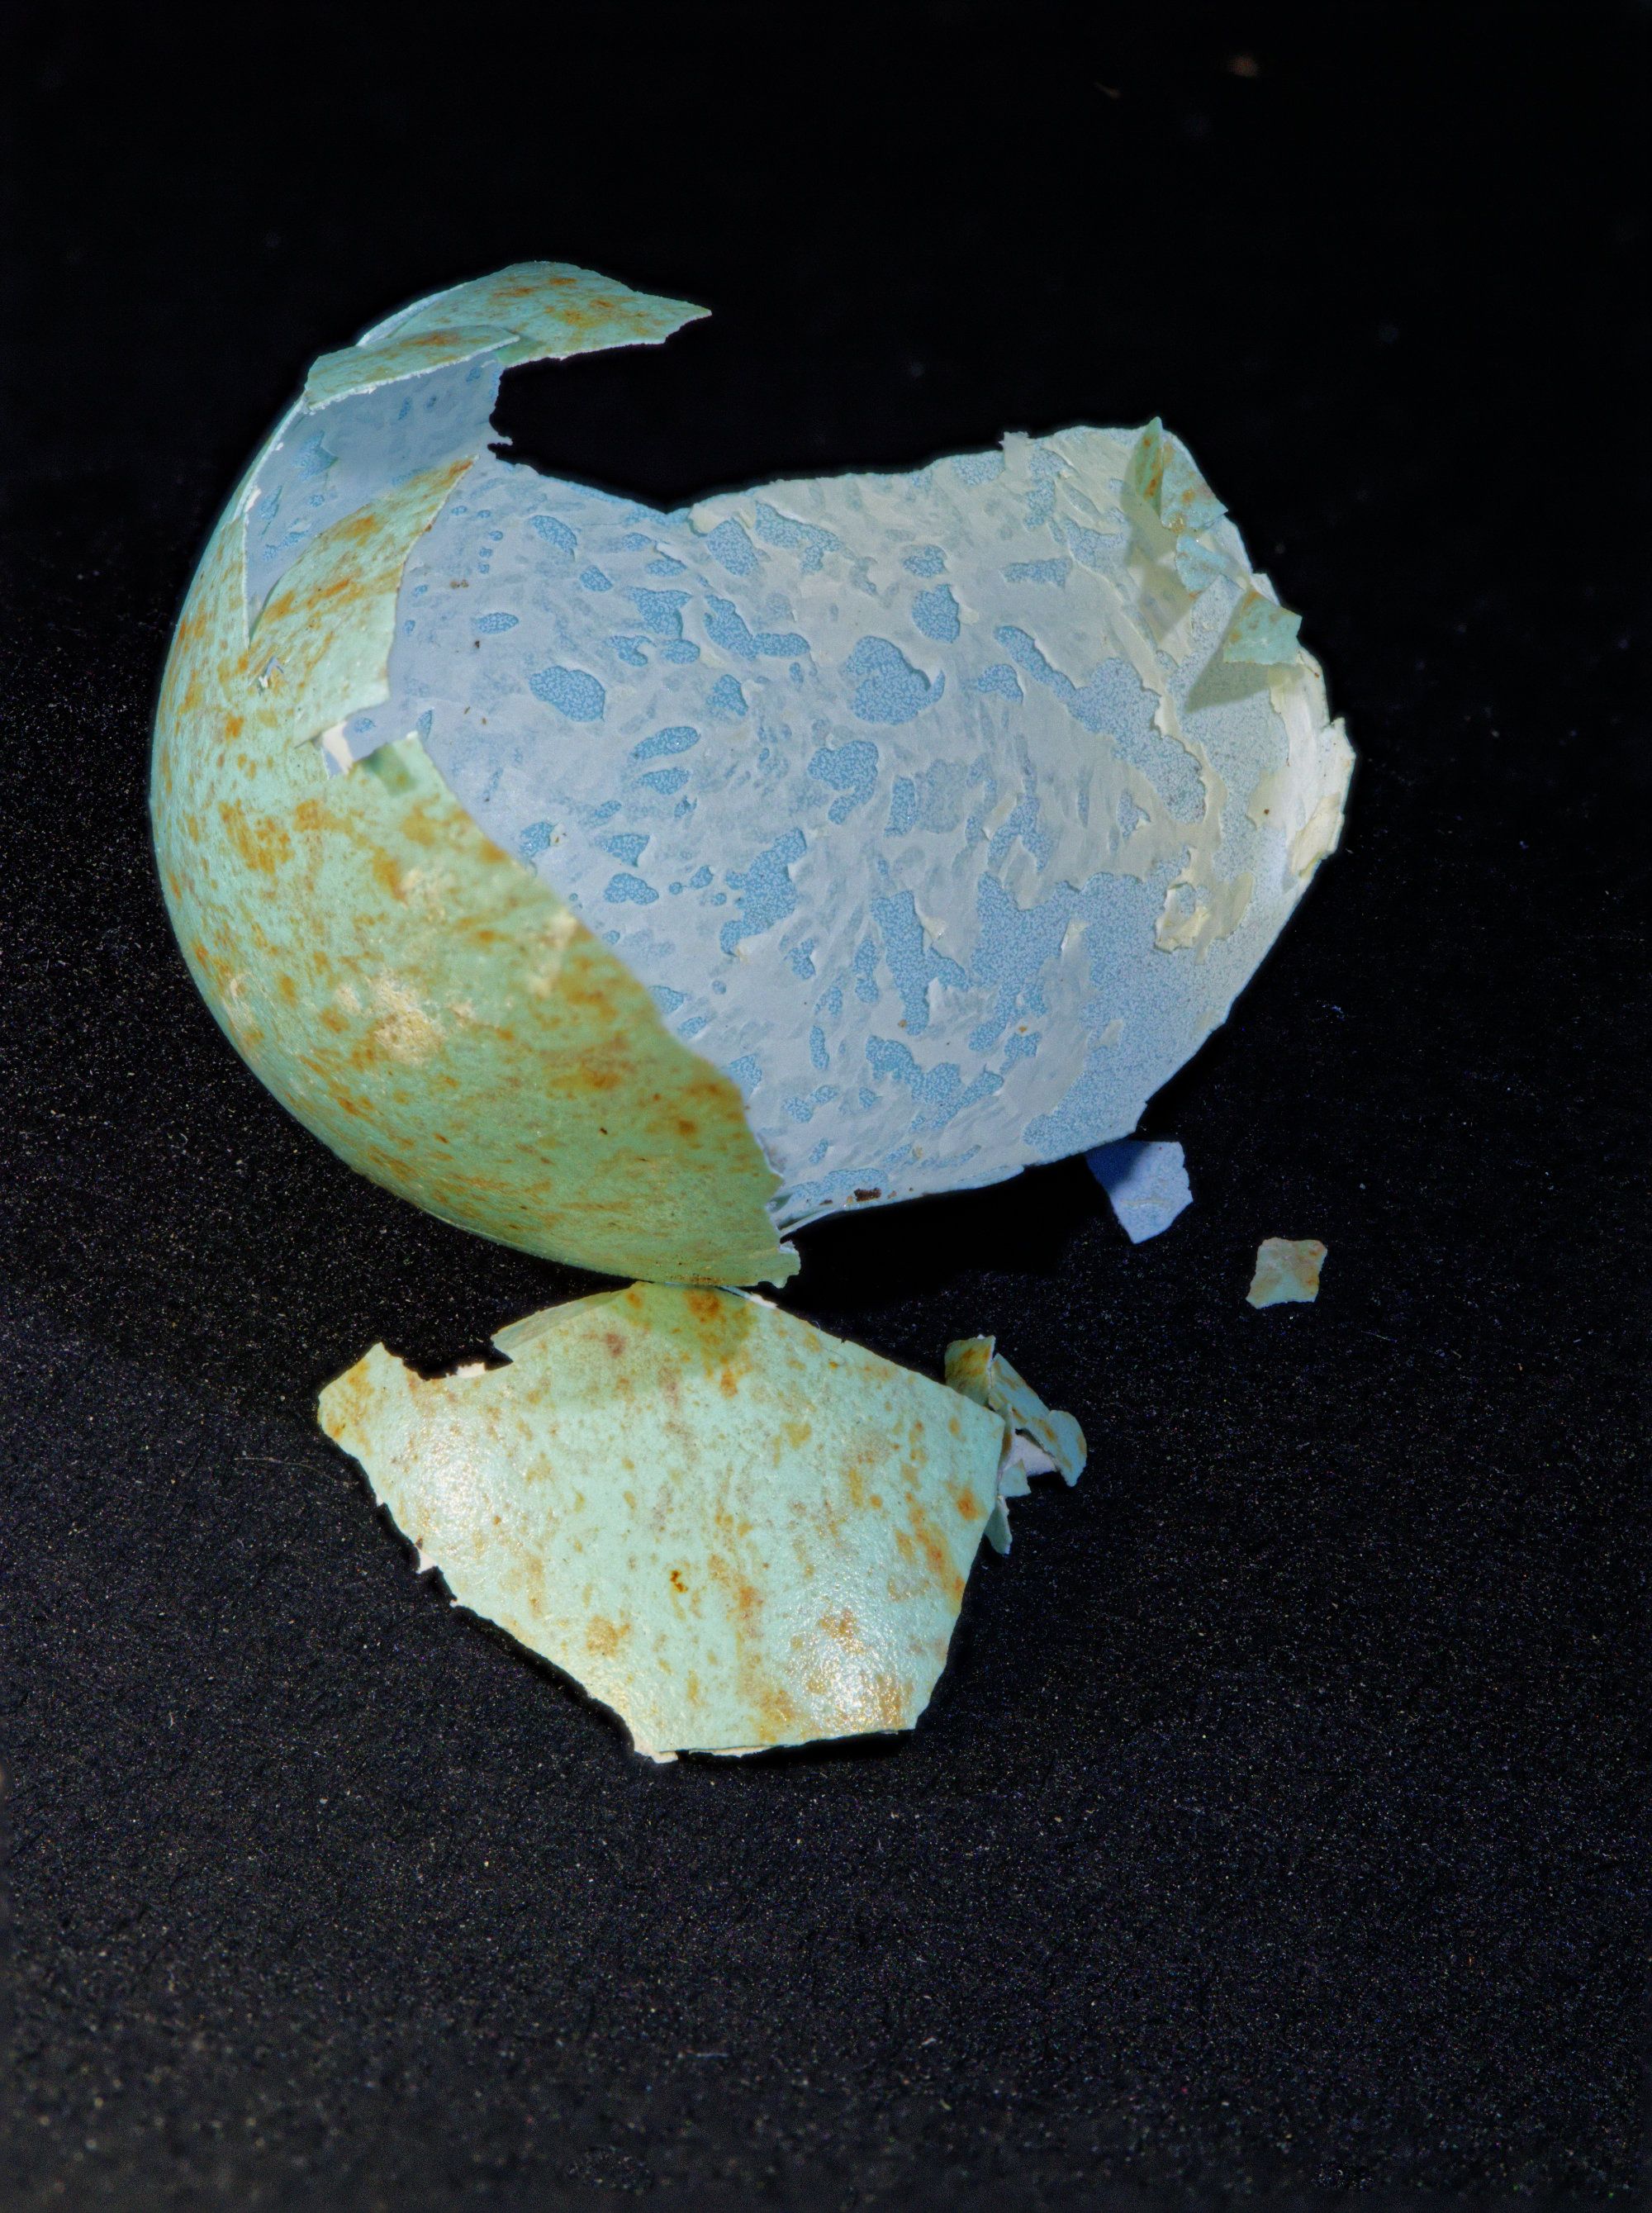
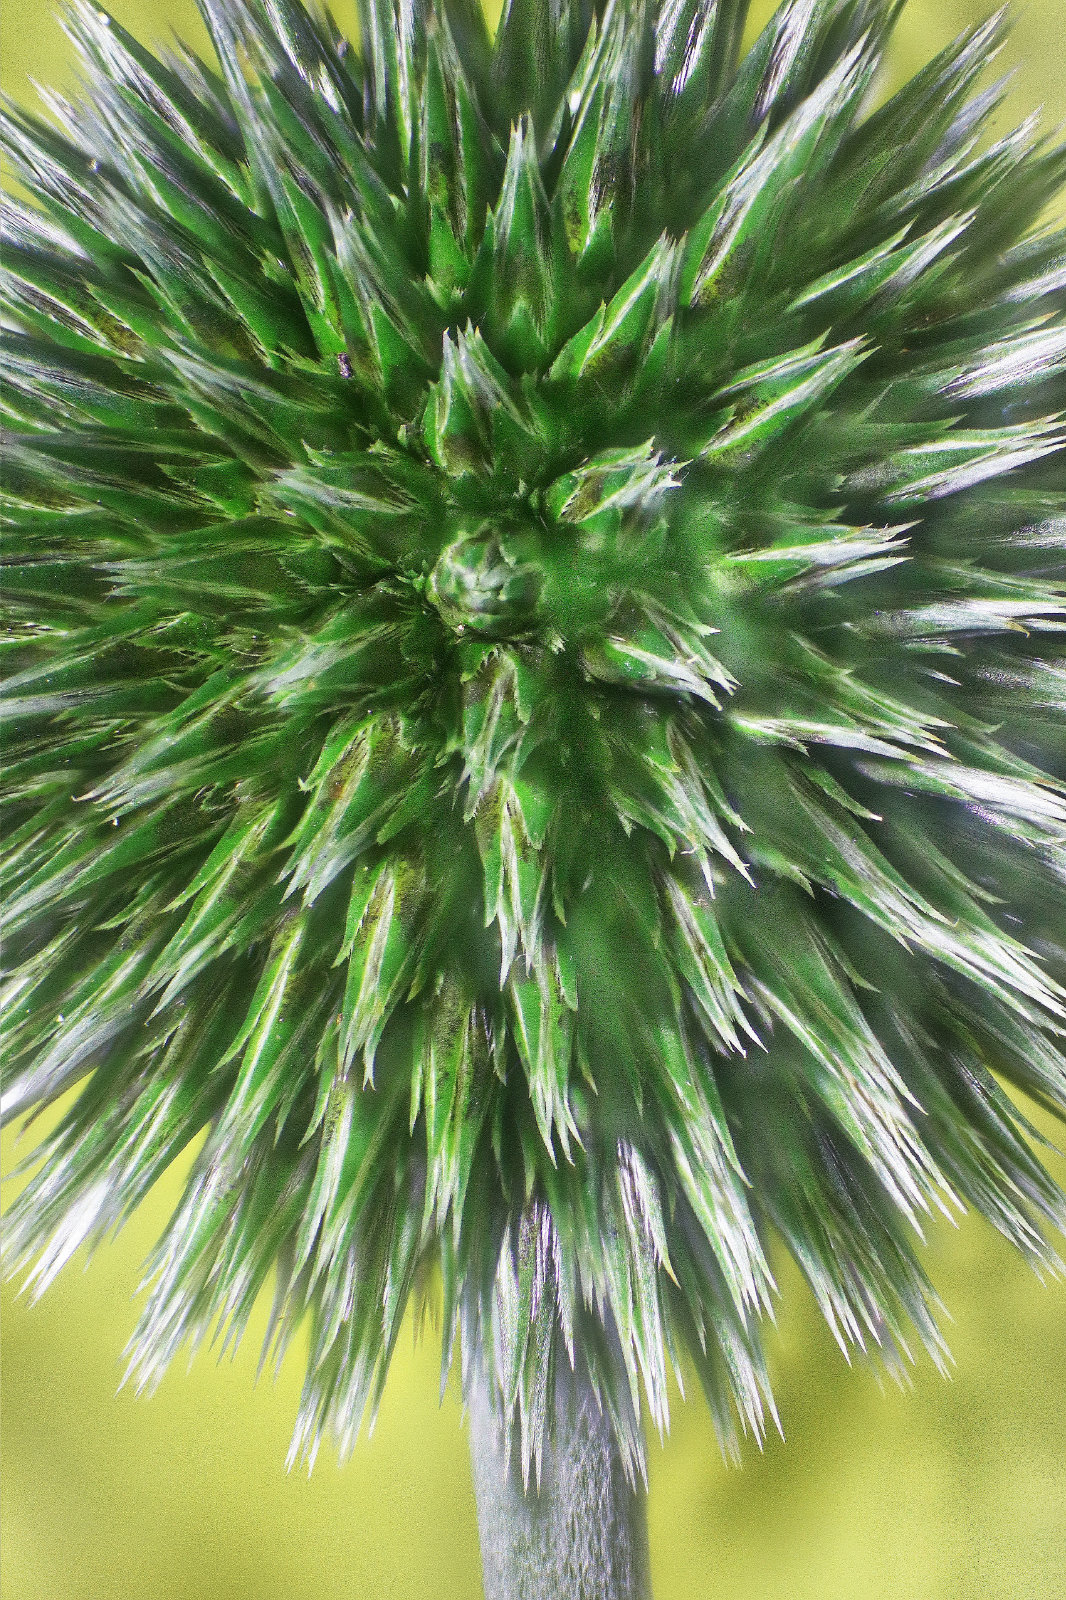
No, the colour change was a separate step. Stacking just combines lots of images focussed at different points (such as images 3 and 4 above) into a single image where all the sharp bits have been extracted and merged together (such as image 2 above). It's more or less the same as the originals (27 were used here) except all is now in focus (if the bracket was done correctly). Usually you lose a bit round the edges as the field of view changes as you refocus or move the camera (notice the difference between images 3 and 4), and the software crops to the size of the least field of view. I then took this final image and played with it in Affinity, and the colour inversion just struck me as interesting. Not necessarily better, as Carol points out!
There are lots of ways of creating those initial images, different ones can work better in different situations. Some move the focus point with the camera fixed, some move the camera with the focus distance fixed. The aim is always the same - a series of photos, the first focussed on the closest point where you want sharp focus, and the last on the furthest such point. Just how to make them all and what steps to move the camera or focus point is a big topic! Simple in principle - the movement between successive images must be less than the depth of field, so that depends on your lens aperture, focal length, and magnification ratio. So it might look difficult at first, but it's not really.
Moving the camera can be done by hand, manually on a focus rail, or automatically using a computer-controlled motorised focus rail.
Moving the focus can be done by hand (focus highlighting helps with this), by the camera (many bodies have a focus bracket setting and some have an internal focus stack setting as well, such as my Olympus OM-D E-M1ii), or other software can be used for this as well, eg Helicon Remote.
Once you have your bracket of images, there is lots of software available to stack them. Affinity will do a good job of it, maybe Photoshop too (I don't use it), but dedicated programs have the edge, eg Franzis Focus Projects, Zerene Stacker or (my favourite) Helicon Focus.
There is a lot of material on the net about focus stacking. Here's a good guide on this excellent macro website - http://extreme-macro.co.uk/focus-stacking/ |
Dec 12th |
| 95 |
Dec 21 |
Comment |
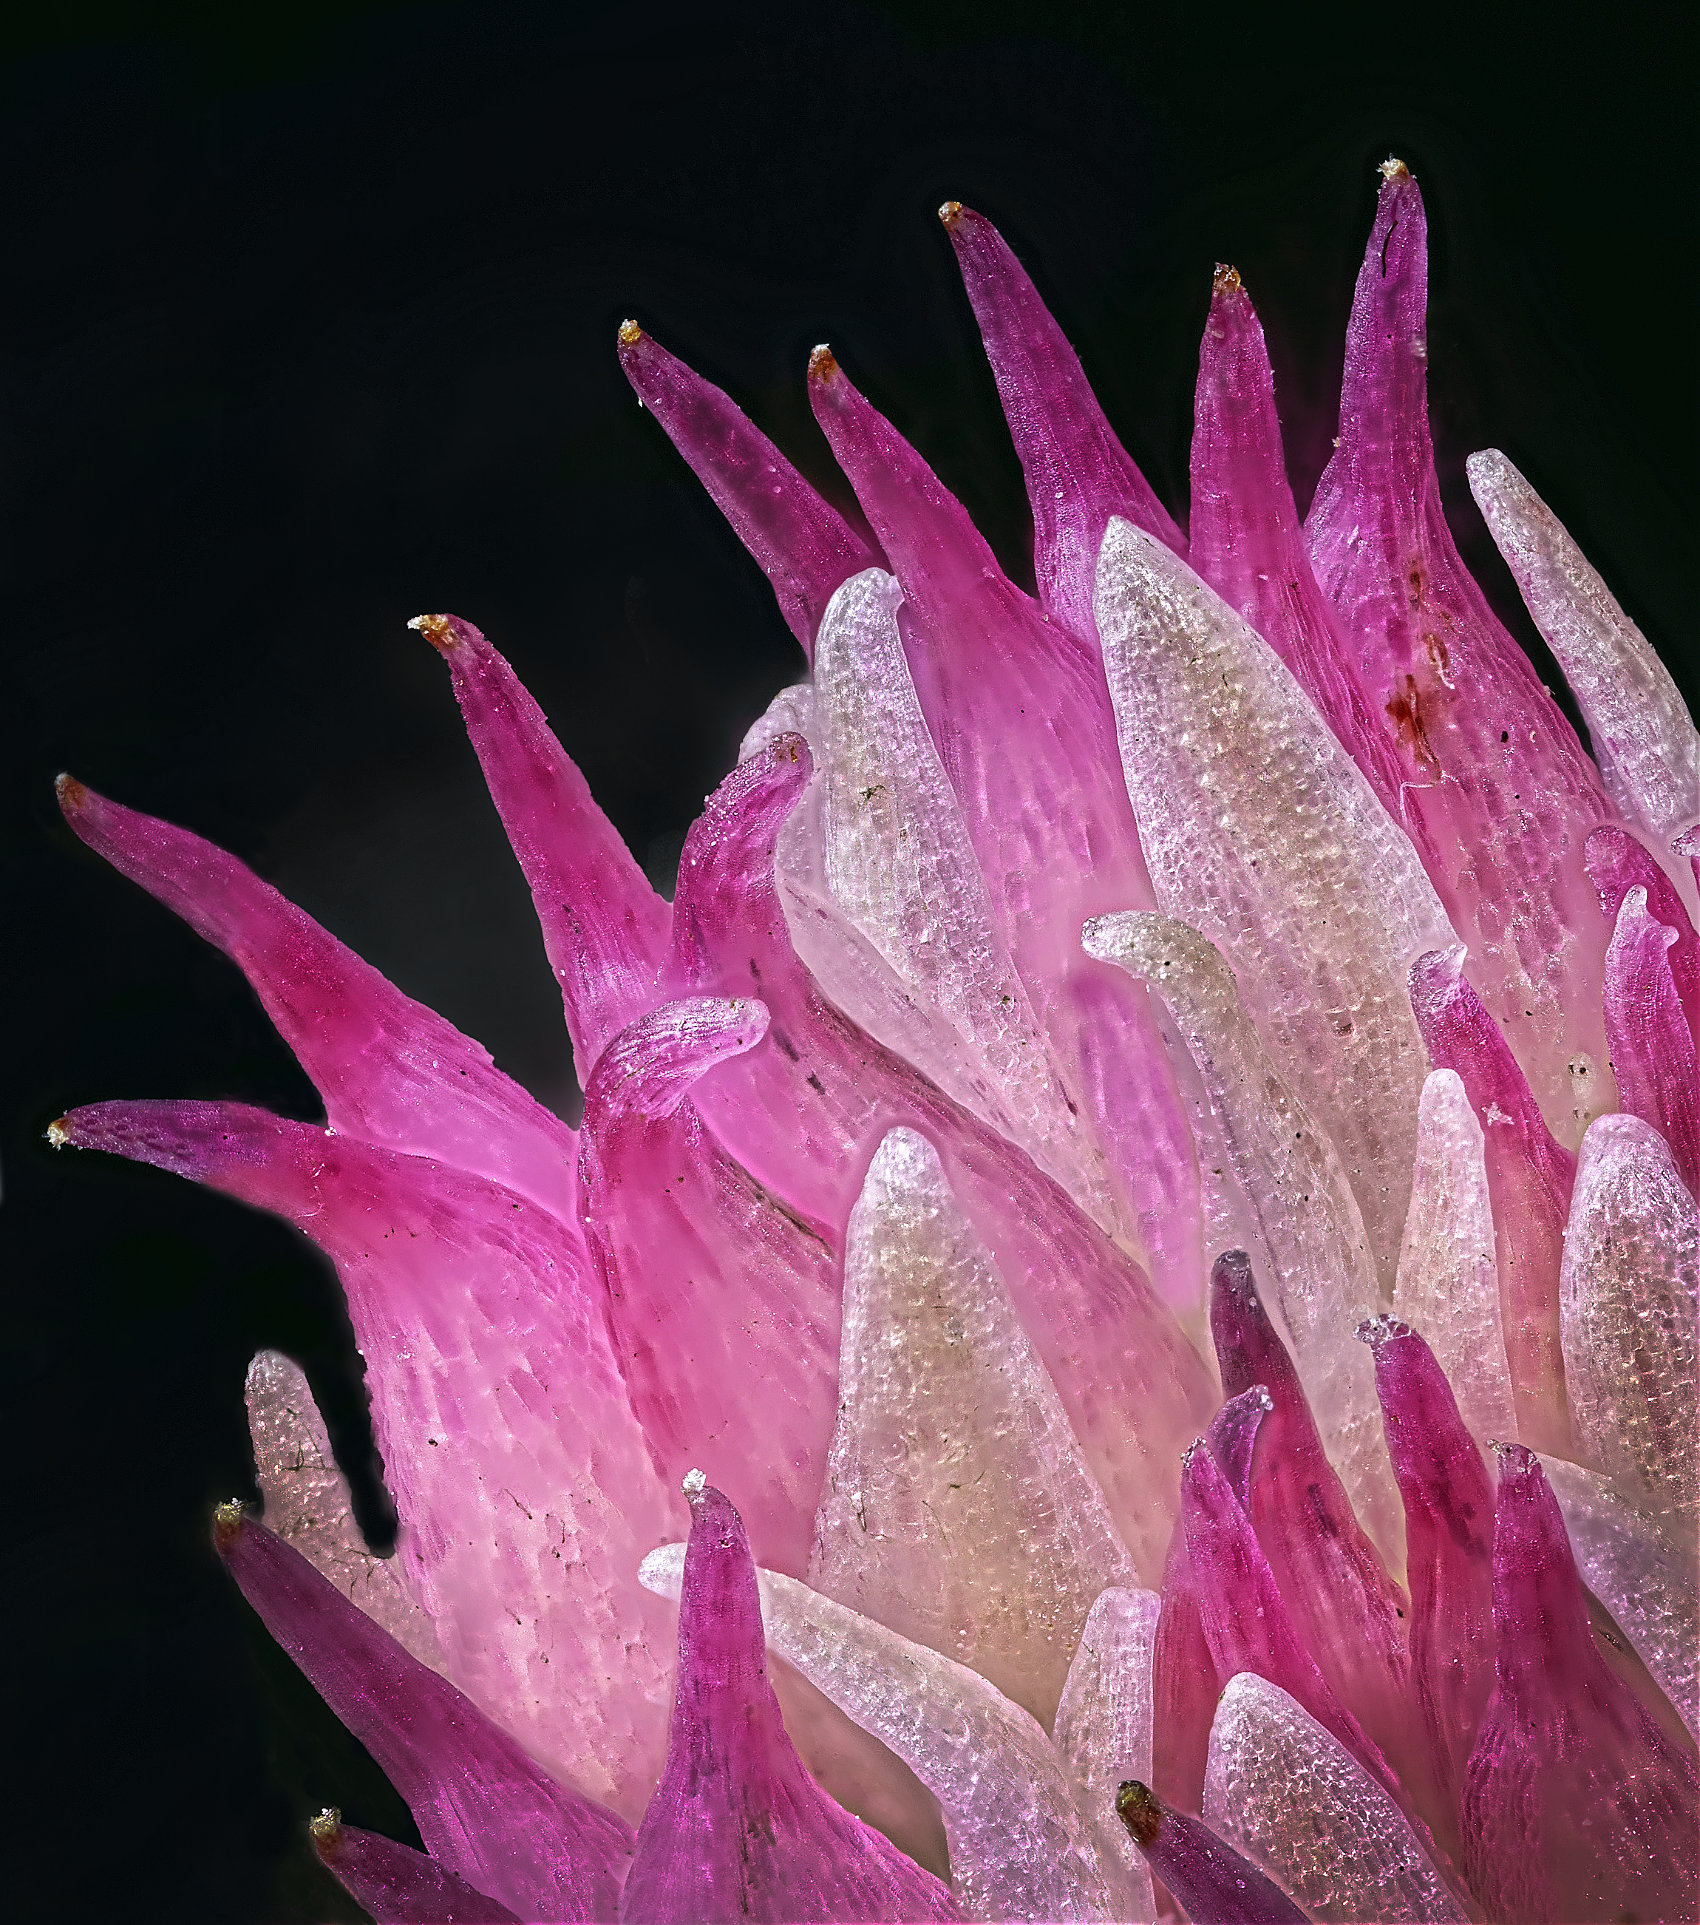
I've no problem with selective focus, Carol- indeed I've said it's one of the macro photographer's tools, to decide what to make in focus and what not.
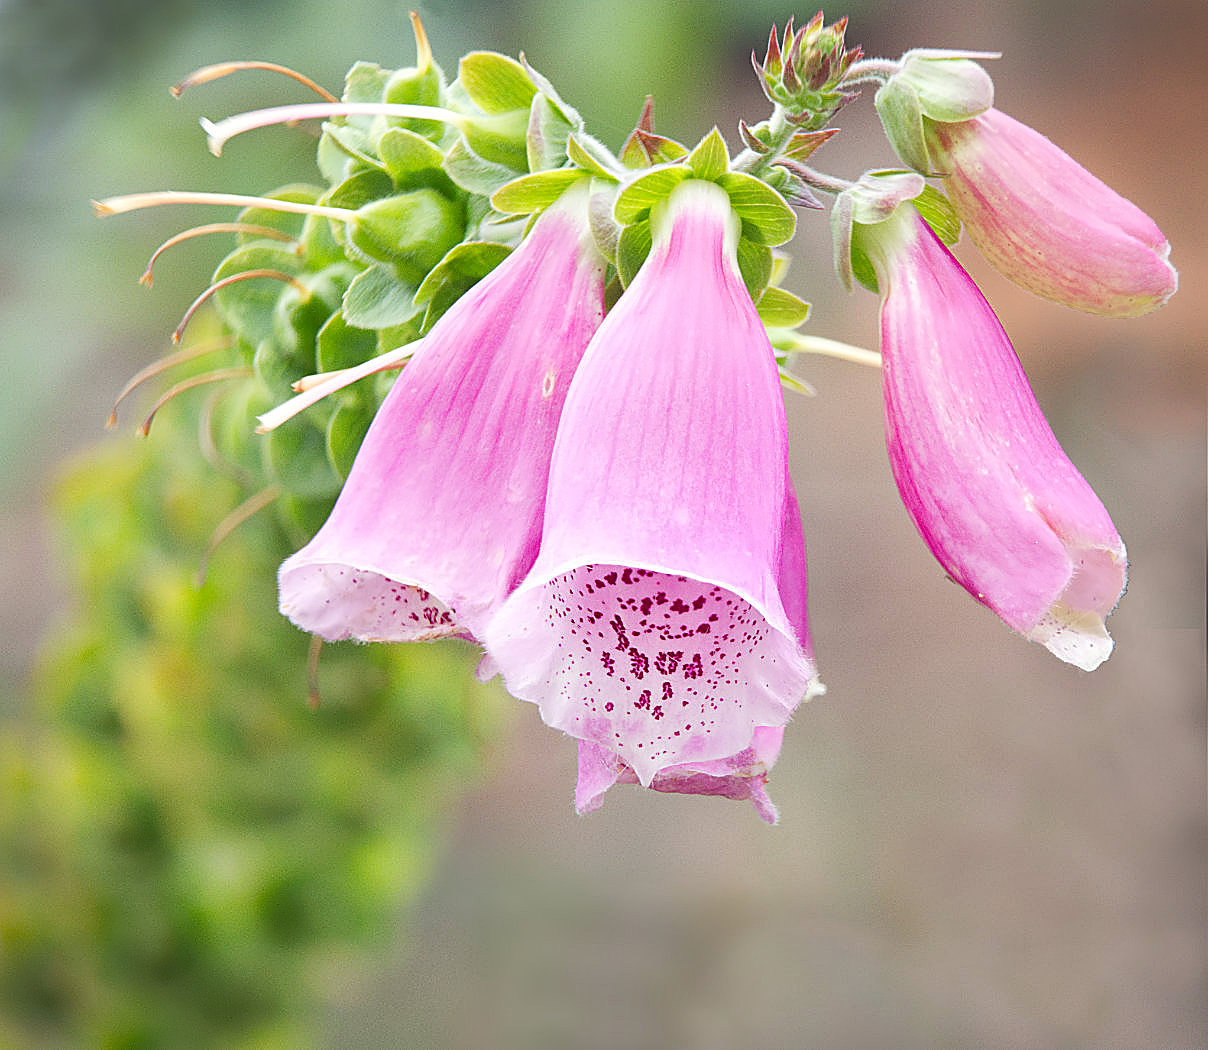
I would quite like this, as I can see a suggestion of diagonal lines, and the frog's pose is interesting. However I think it is much over-exposed on the whole. The strong sunlight makes for very high contrast which is a real problem. You have some shadow detail which is nice, but the cost at the other end of the histogram is punitive. Olly's aren't at the top of the pile for sensor latitude, but they can give 12 stops which should give a chance if you use RAW. If you took a RAW, open it in Affinity then investigate the shadows and highlights sliders in the RAW processor, plus contrast and exposure of course.There are some non-obvious tricks that can help. James Ritson did a great video on tone compression which can help, see https://www.youtube.com/watch?v=y86rUhitQGE
Of course you can always do real HDR, and our Ollys can do this hand-held with their super fast high speed shutter. Even a frog can't beat it!
Sorry if I'm saying something you know! |
Dec 10th |
| 95 |
Dec 21 |
Comment |
Not sure what to say here, Tom, you don't seem to have challenged us as much as you usually do! The texture of the cloth is nicely caught. The swirls and pattern are clear and interesting.
Suggestions - combing it? Being bold in Affinity? Using it as a texture for other photos? |
Dec 10th |
| 95 |
Dec 21 |
Comment |
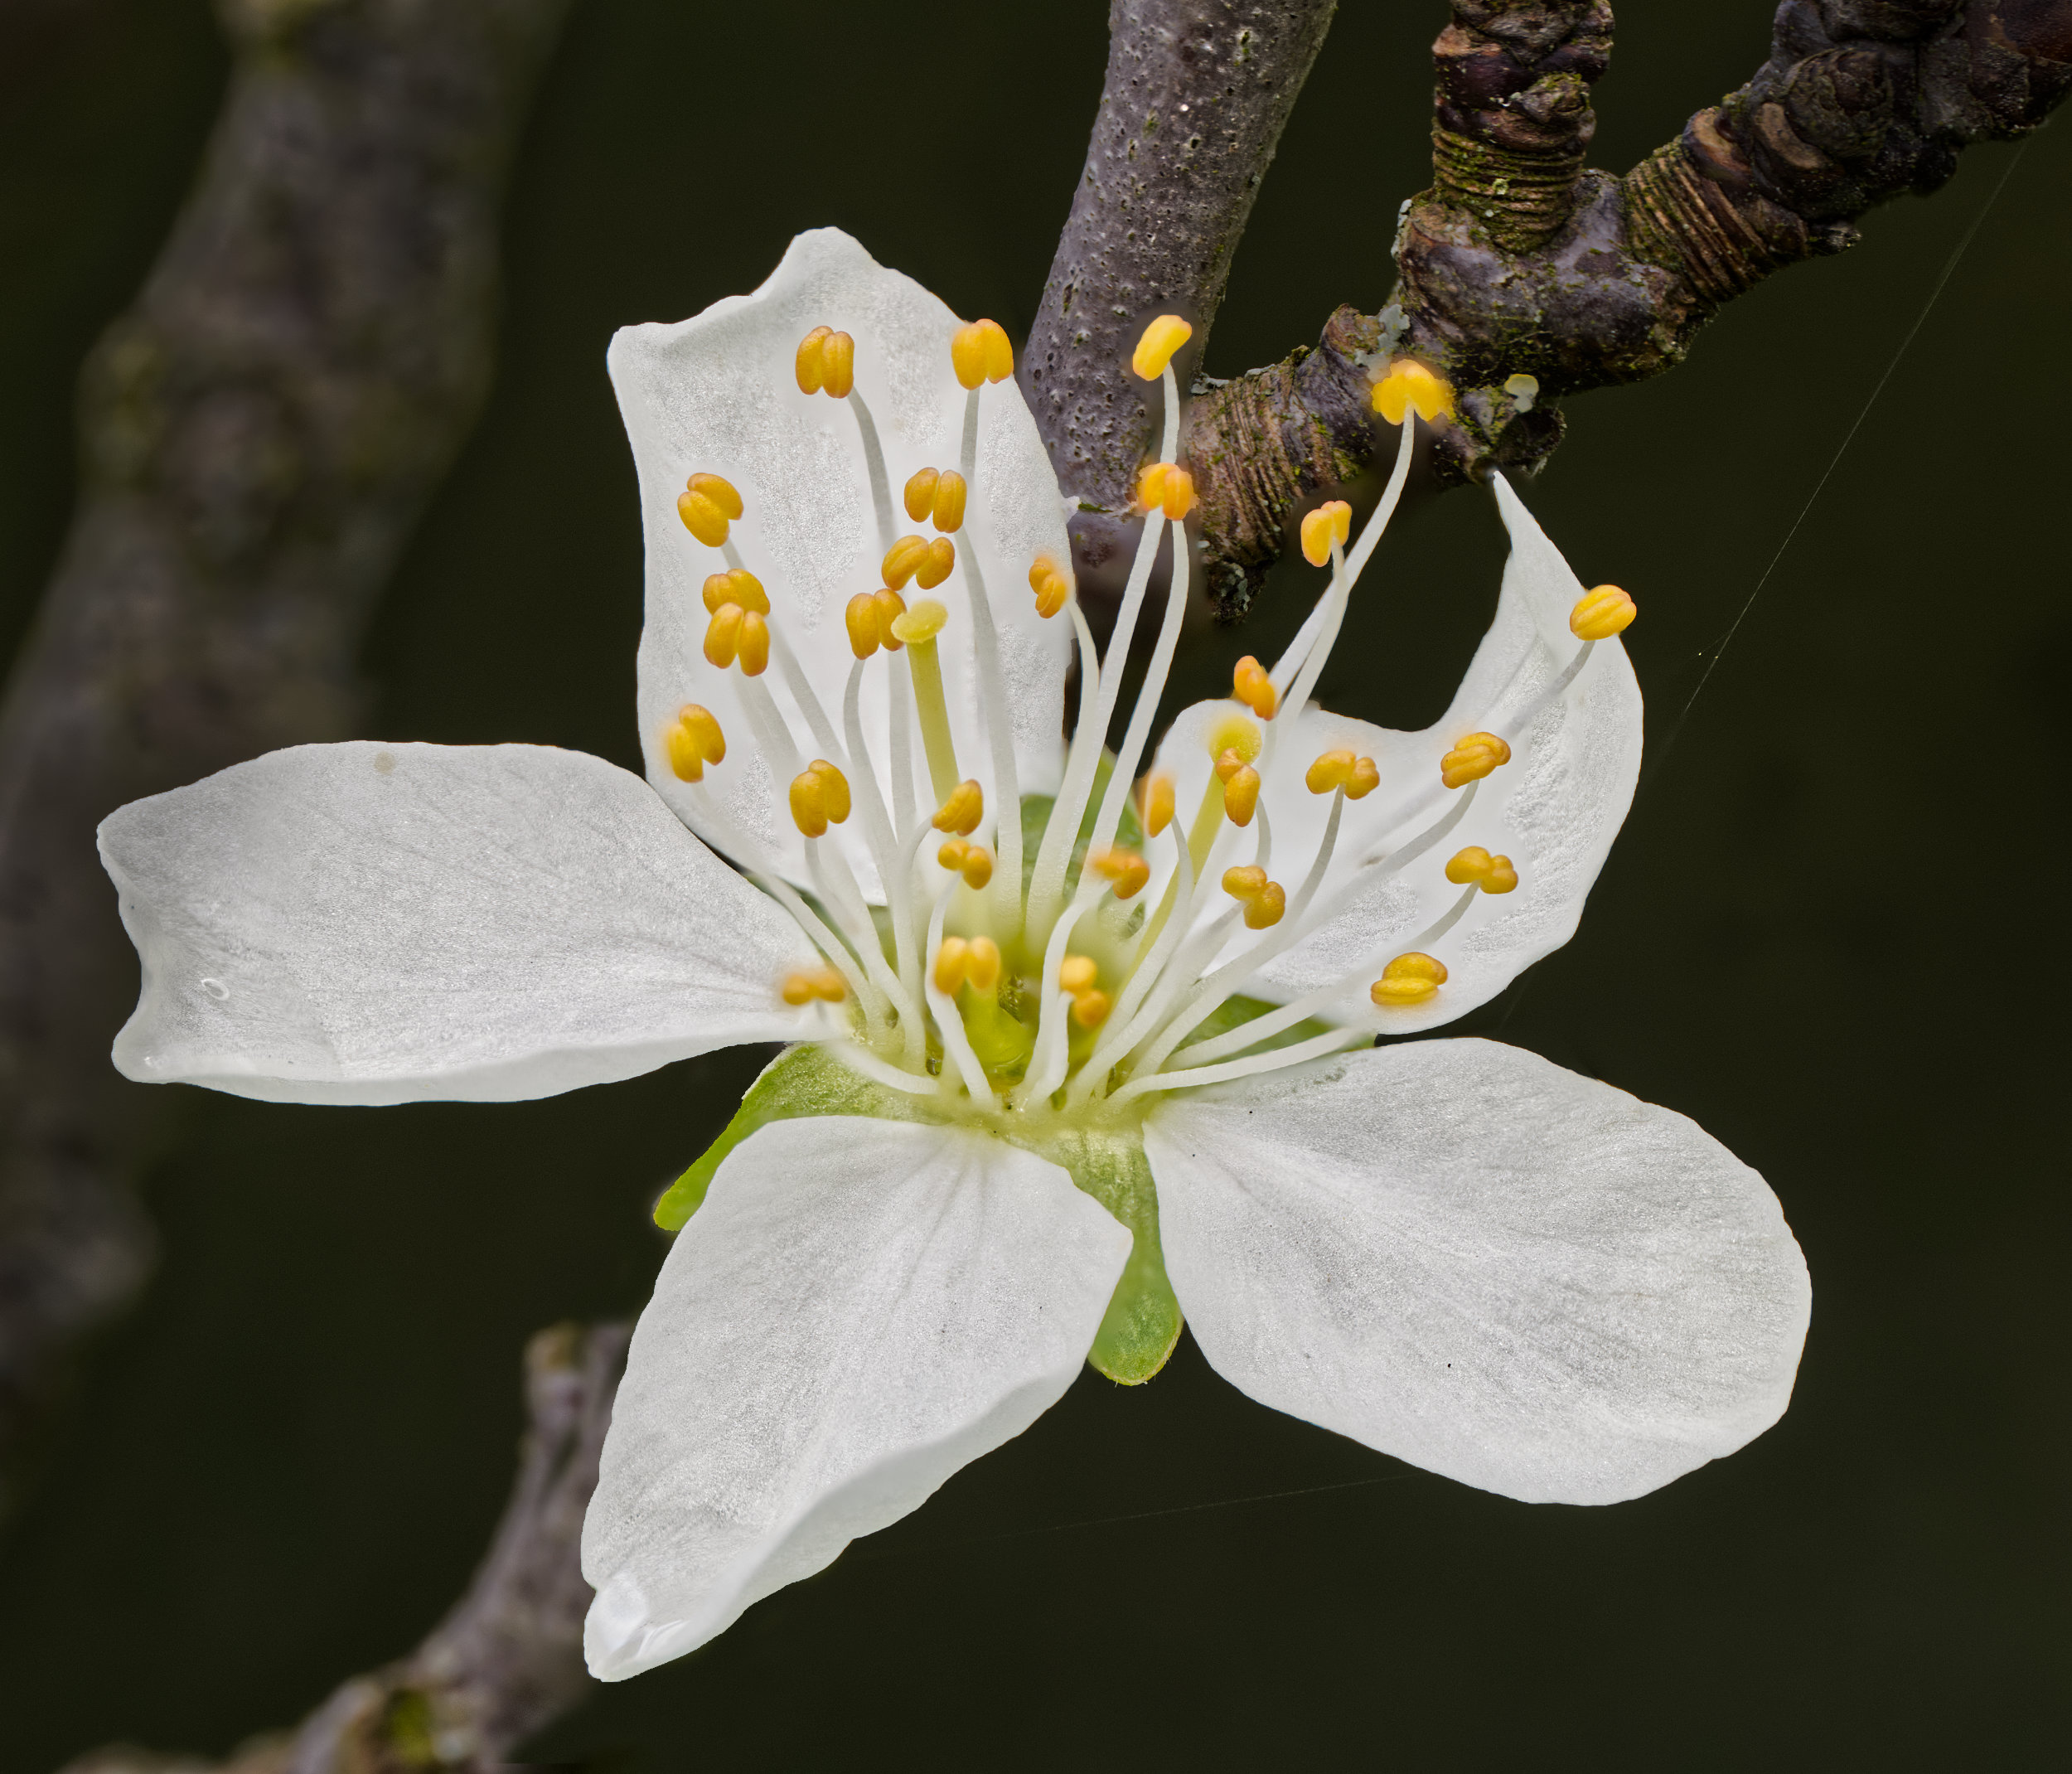
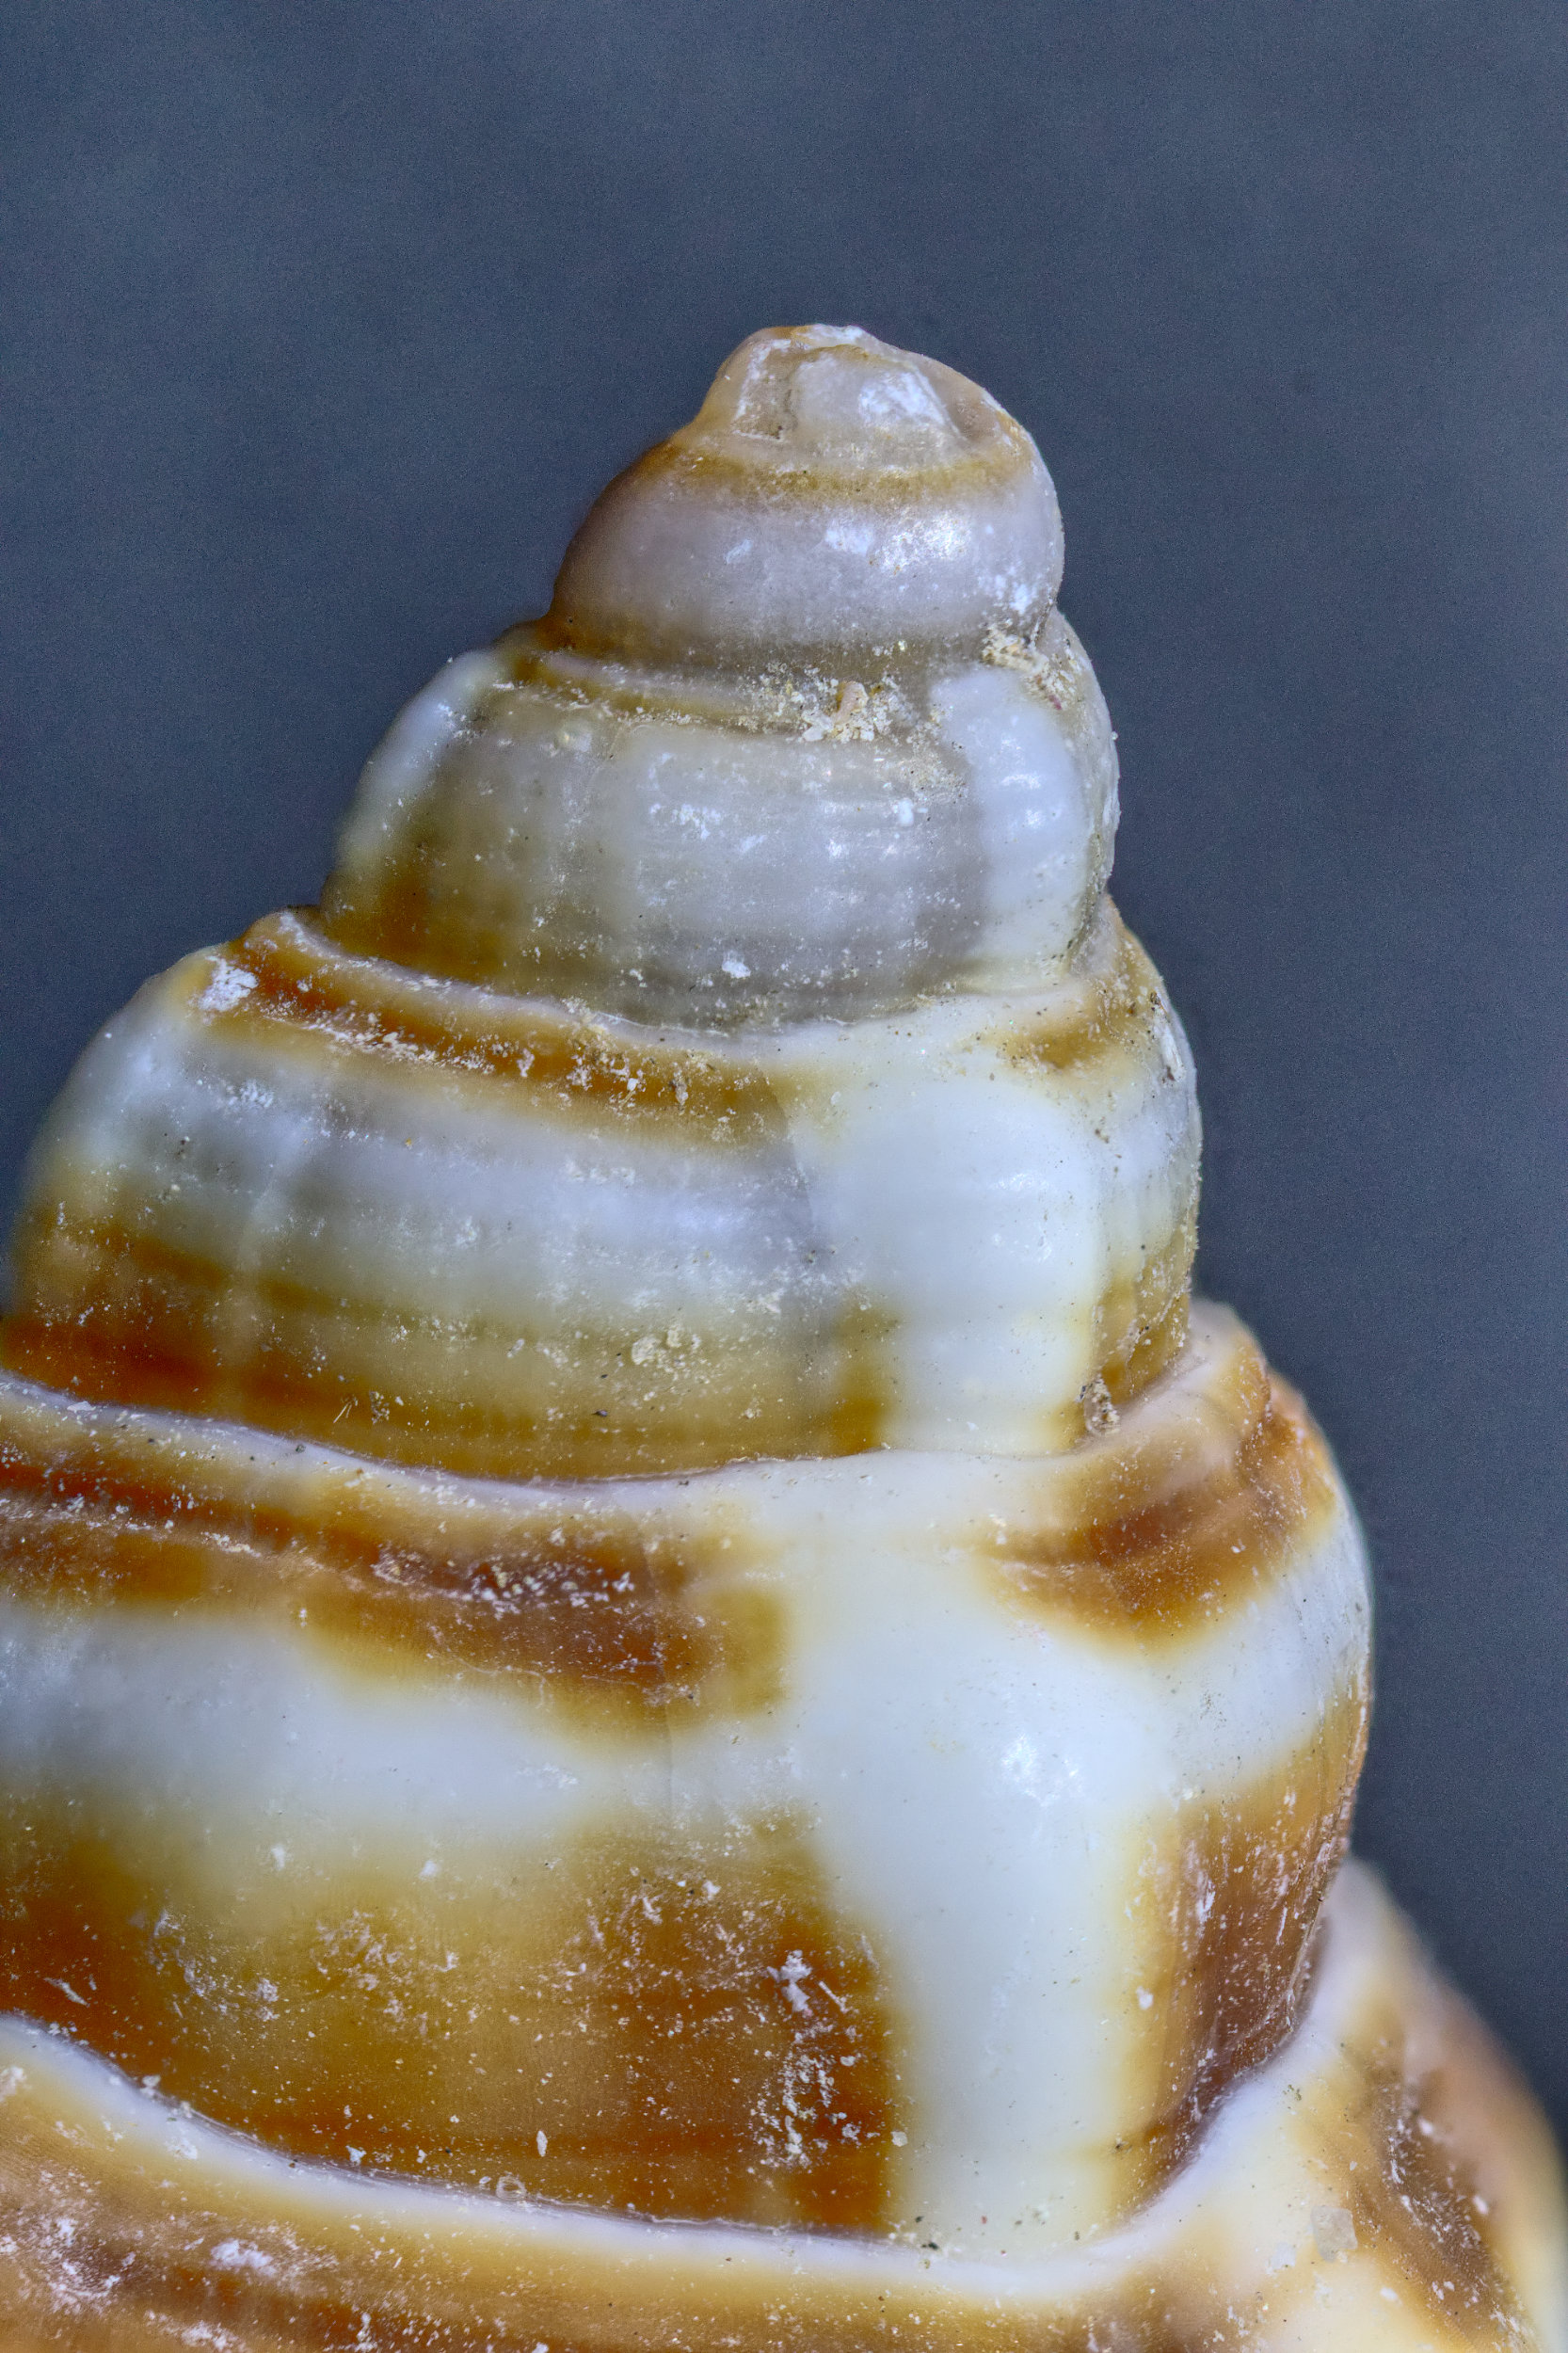
Hi Pat,
First of all, your picture. Nice and colourful, well exposed, and the sharp bits are nice and sharp. So far, so good. However the depth of field isn't suited to the picture I think - but you knew that already.
Several questions, I'll give you my views, maybe others will too.
First, that old humbug "1:1". We've discussed this before in this group, and I'll say again that many people have different views of the "definition of macro".
1:1, ie image size on the sensor = same size as the subject is a decent yardstick, but no more than that. I believe it came from many years ago when nearly all amateur photographs were on 35mm film, the images being the same size as "full frame" sensors today. So, for macro, they aimed at an image 36mm wide x 24mm high. So in landscape format, you can take a picture of something 24mm high filling the frame height.
We are taking this definition without thinking about the implication to cropped sensors. My view is that for cropped sensor cameras such as my Olympus, this definition means the biggest subject I can have is only 12mm high, which is more difficult! What's wrong with me taking a photo of something 24mm high? My magnification ratio then is only 0.5:1, so is it no longer macro? I don't think so.
So I regard 1:1 as being a guide only.
I think macro does mean "closer than close-up". That is, macro is something that "normal" camera lenses can't do, you need special lenses or additional kit such as extension tubes, supplementary lenses etc on top of a "normal" lens to do macro.
Having said that, there are plenty of lenses on the market sold with "macro" in their names which can't get close to 1:1, and so I think they are fakes, or marketing hype really - not actually macro lenses.
Real macro lenses do go to 1:1. Oddly, very few go to a higher magnification. So if we stick with the 1:1 definition, they only work at one setting! So again, we should use 1:1 as a guide only. Don't be worried that your autofocus can pull the lens off 1:1, provided you are within the spirit of the definition, then it's OK to call it macro in my view. True, you can set it on 1:1 and put the camera on manual focus so it won't change, and then move the camera to achieve focus, and I often do this with my kit. But if I find myself too close for a pictorial image, I don't hesitate to move back a bit and put it on auto focus.
Outdoor macro is more difficult than indoor. Auto focus and a relaxed view over 1:1 makes it easier. Good light is essential - you need to use fast enough shutter speed (say 1/100sec minimum), smallis aperture (say f8 or lower), reasonable ISO (say maximum 800), and a steady hand, for good results. Using a flash can make this easier. Normal flashes on the camera won't work as the lens shades the subject, but home-made reflectors do work, and macro flashes such as ring flash or double macro flash work well.
Using a tripod can be difficult as it's physically awkward to use in a confined space, even if equipped with a slider rail and the like. So go on, use 1:1 and manual focus to get familiar with the setup and how such images look, but then go onto auto focus and just try to get close like that. ! won't castigate anyone if I think the magnification is less than 1:1! The key thing to achieve is a nice picture at the end.
Yes, you are using your lens properly! But a macro lens does not make macro easy. But do persist, it's not that difficult.
It's a bit of a cheat to take a close-up, crop it heavily and then say it's macro because the subject is then "bigger". There's nothing wrong with cropping a little as in non-macro photography to get the picture you want, but that is starting with a proper macro image in the first place only.
Uncropped photos are fine provided they are "macro", as discussed here.
Metadata doesn't seem to record magnification in most cases as far as I can find. I can only talk with certainty for the equipment I own, so I can say -
Olympus M1ii plus Olympus 60mm macro lens - exif tool, jpg or RAW file - no magnification information found. However it does tell me the focus distance, and from that you can work out the magnification ratio approximately. I didn't find any useful information using Olynpus Workspace software either.
Canon M50ii and 35-80mm lens converted to macro - no macro information.
Canon M50ii and 65mm MP-E lens - the exif does has a line for "Macro magnification". Hurrah!
Canon M50ii and Canon 100mm macro - the exif shows the focus distance (far and near, and hence by subtraction the depth of field) but not the magnification ratio.
So it seems to me that camera and lens manufacturers do not do us macro photographers a good service! When the lens has autofocus, it knows what distance it's focussed on, but they don't report it in the exif. The only exception I've seen is my Canon MP-E lens, and that doesn't even have auto focus, it's manual focus only!!!
So if your exif gives you nothing, just note the focus distance if you can, and for your 105mm lens, we can work it out - sort of. It's an easy calculation for a simple lens, (ie like a magnifying glass), but more difficult for a compound lens with many separate lenses inside it such as our camera lenses. So, taking a bit of a guess here, if the distance from the front of the lens to the subject is 100mm, then you are getting close to 1:1. If it's 200mm, 0.5:1, 400mm, 0.25:1, and so on. |
Dec 10th |
| 95 |
Dec 21 |
Reply |
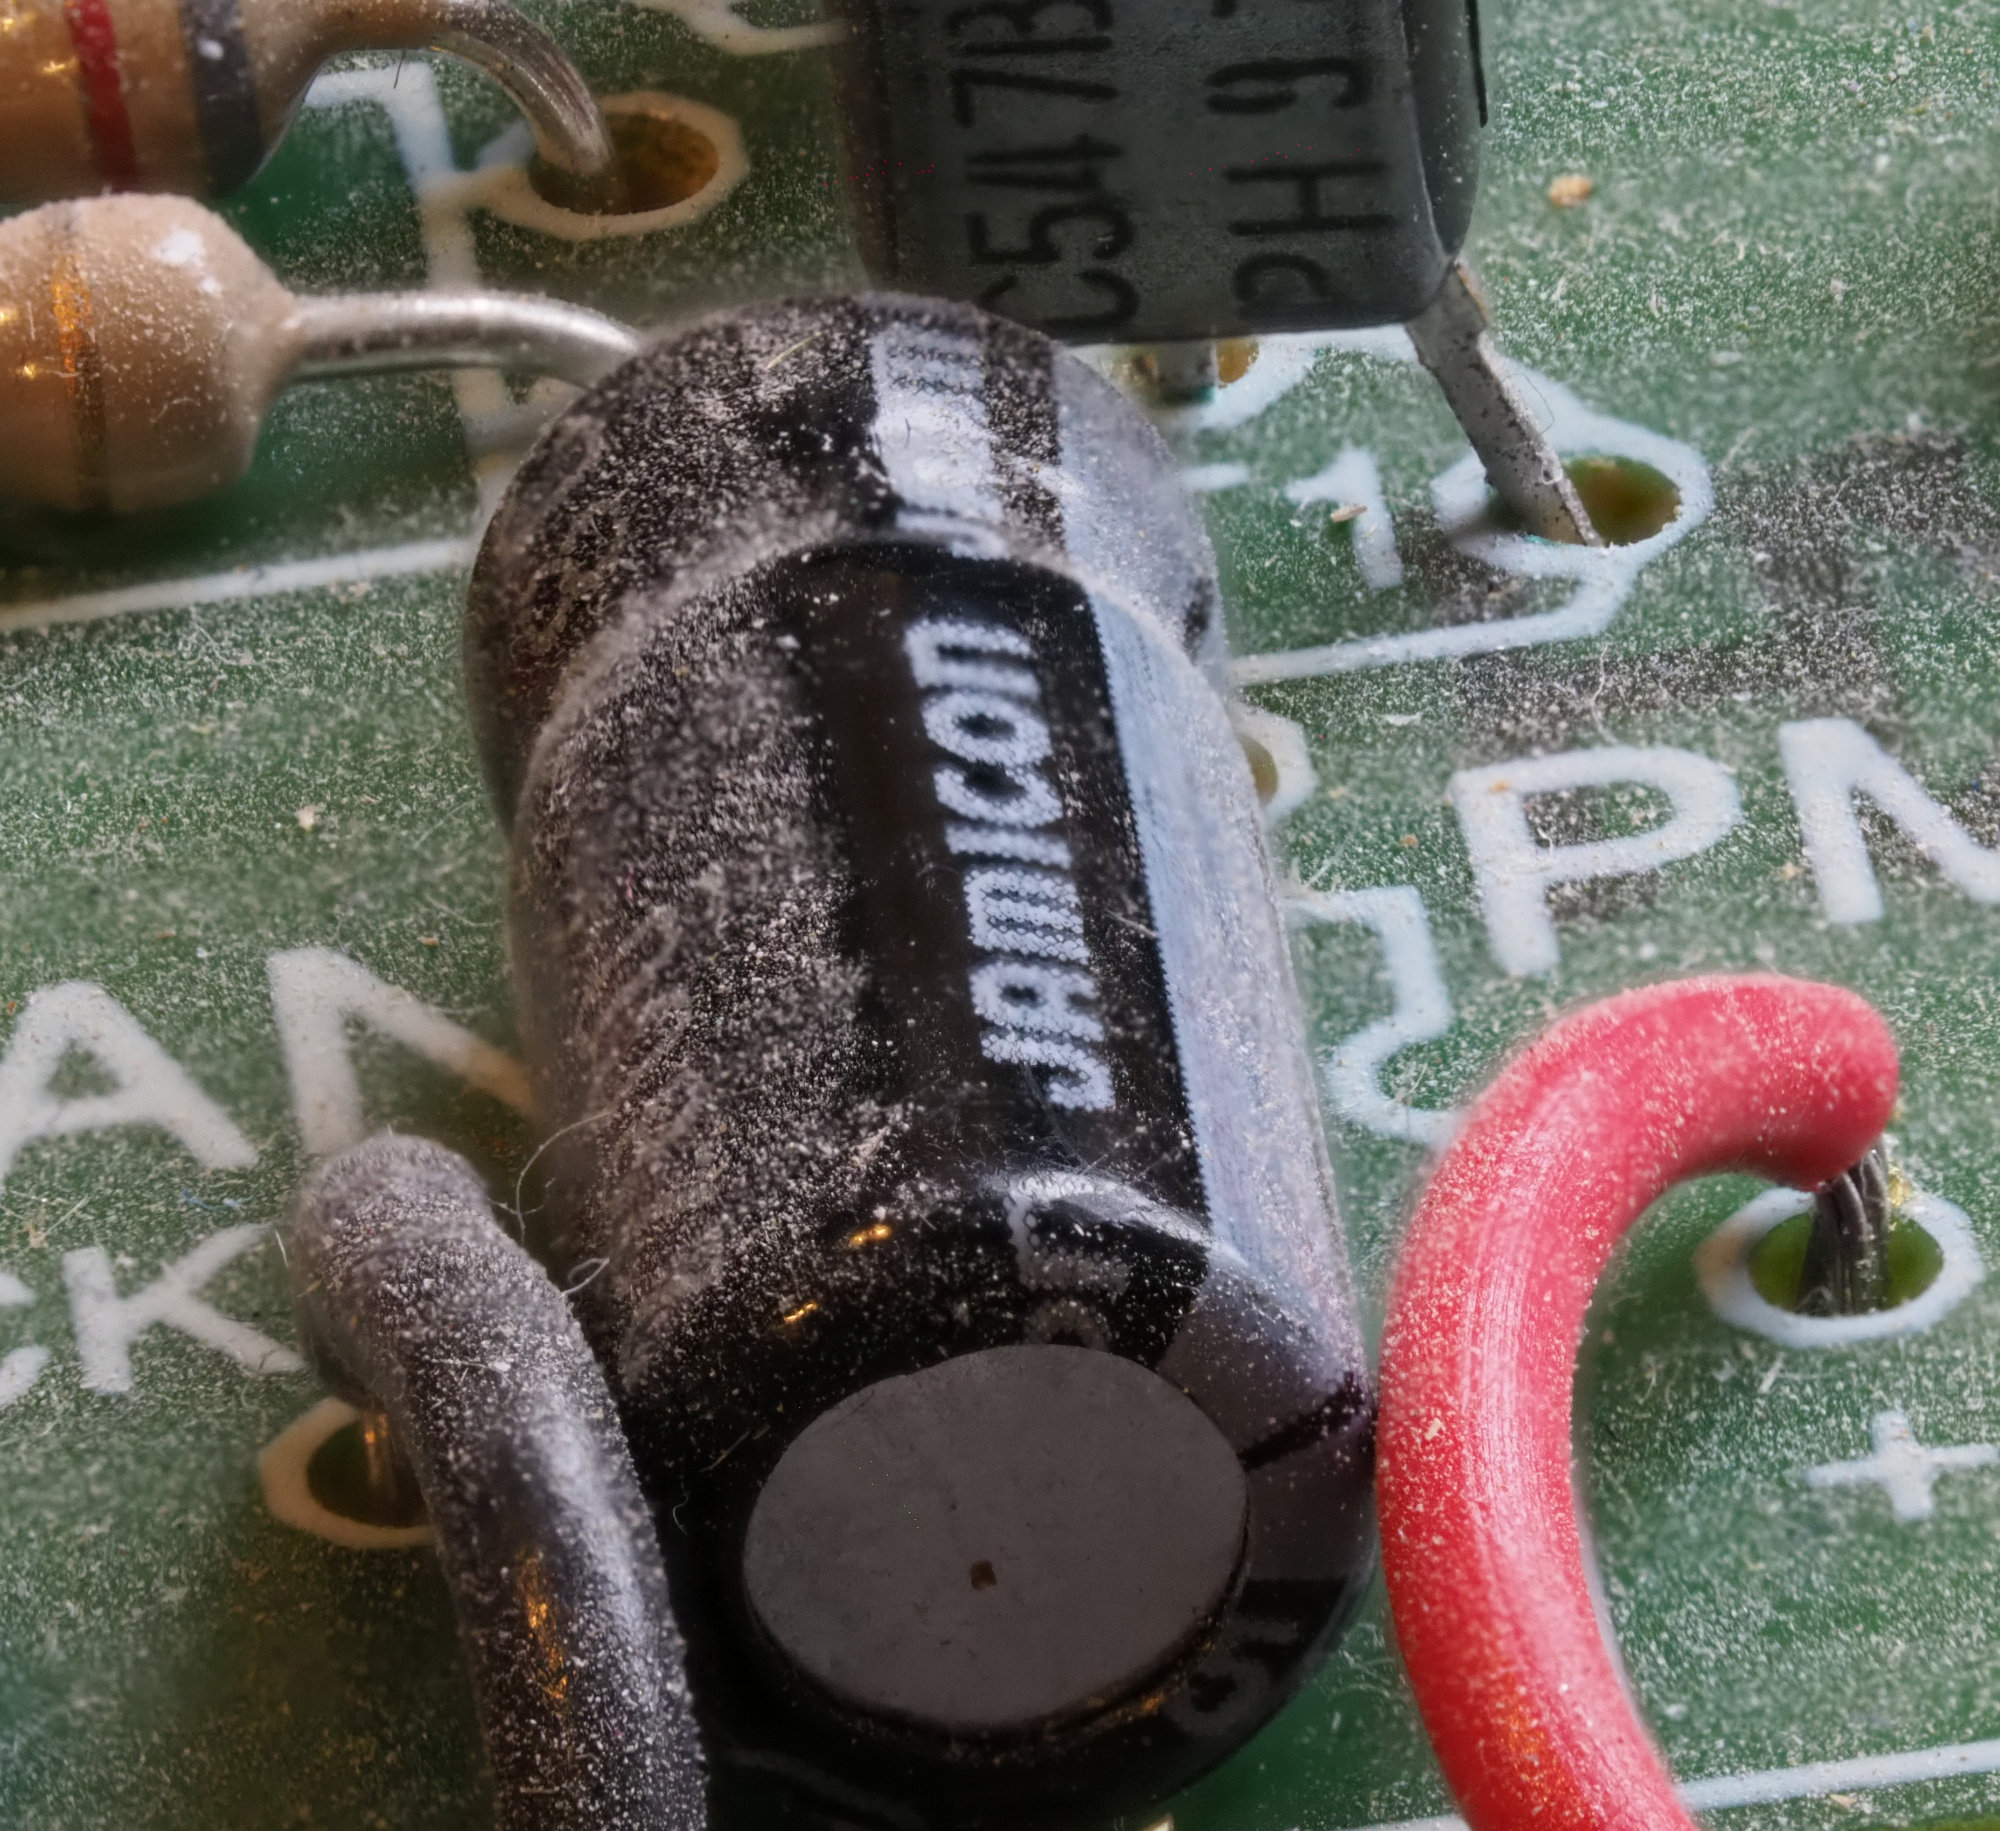
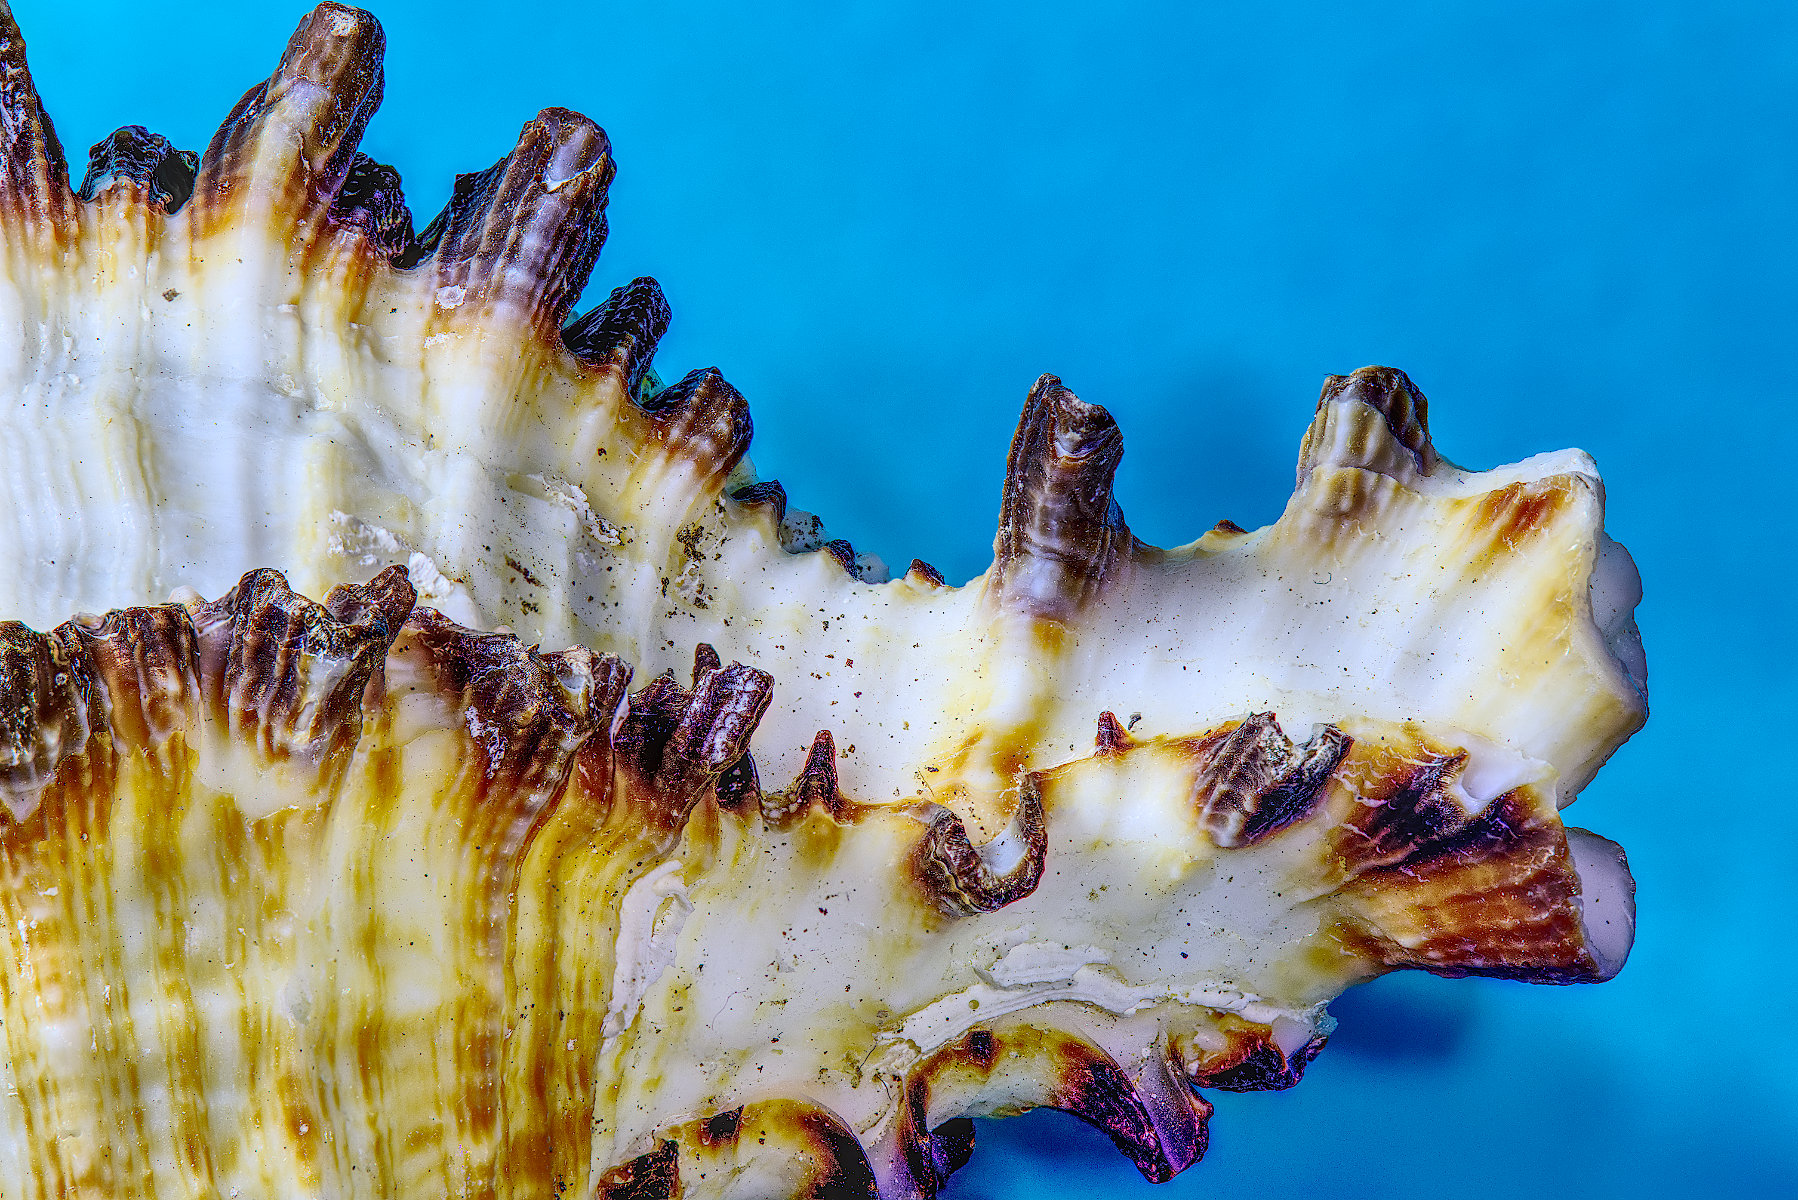
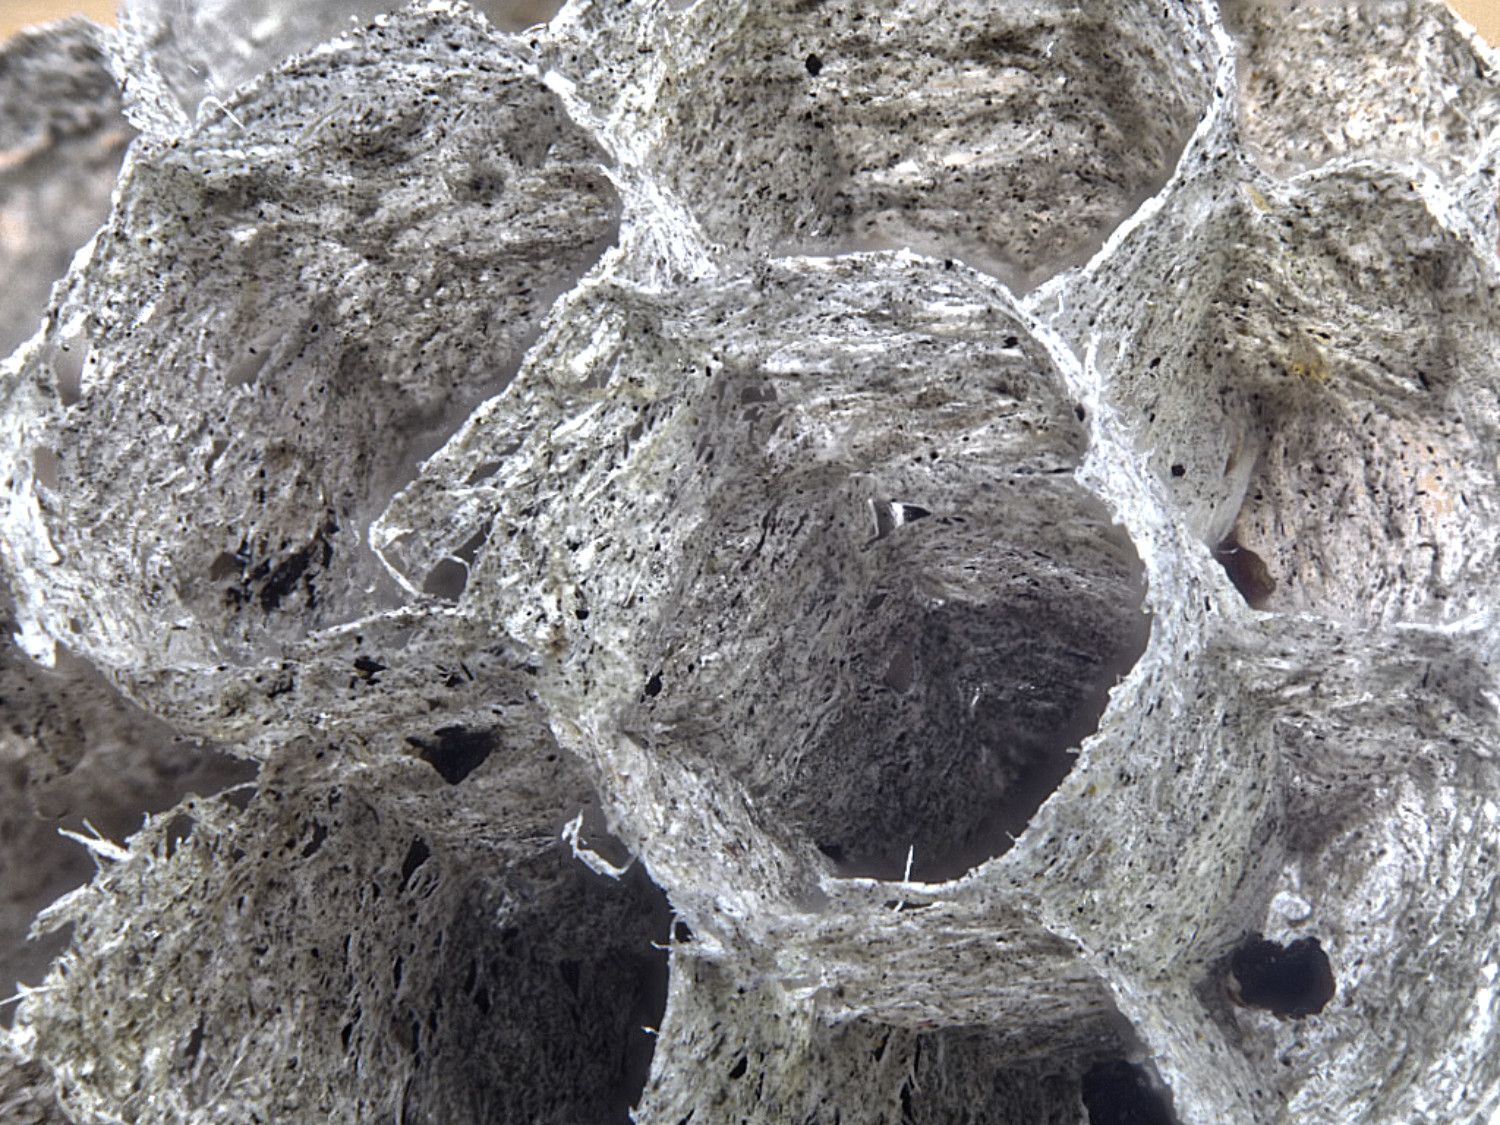
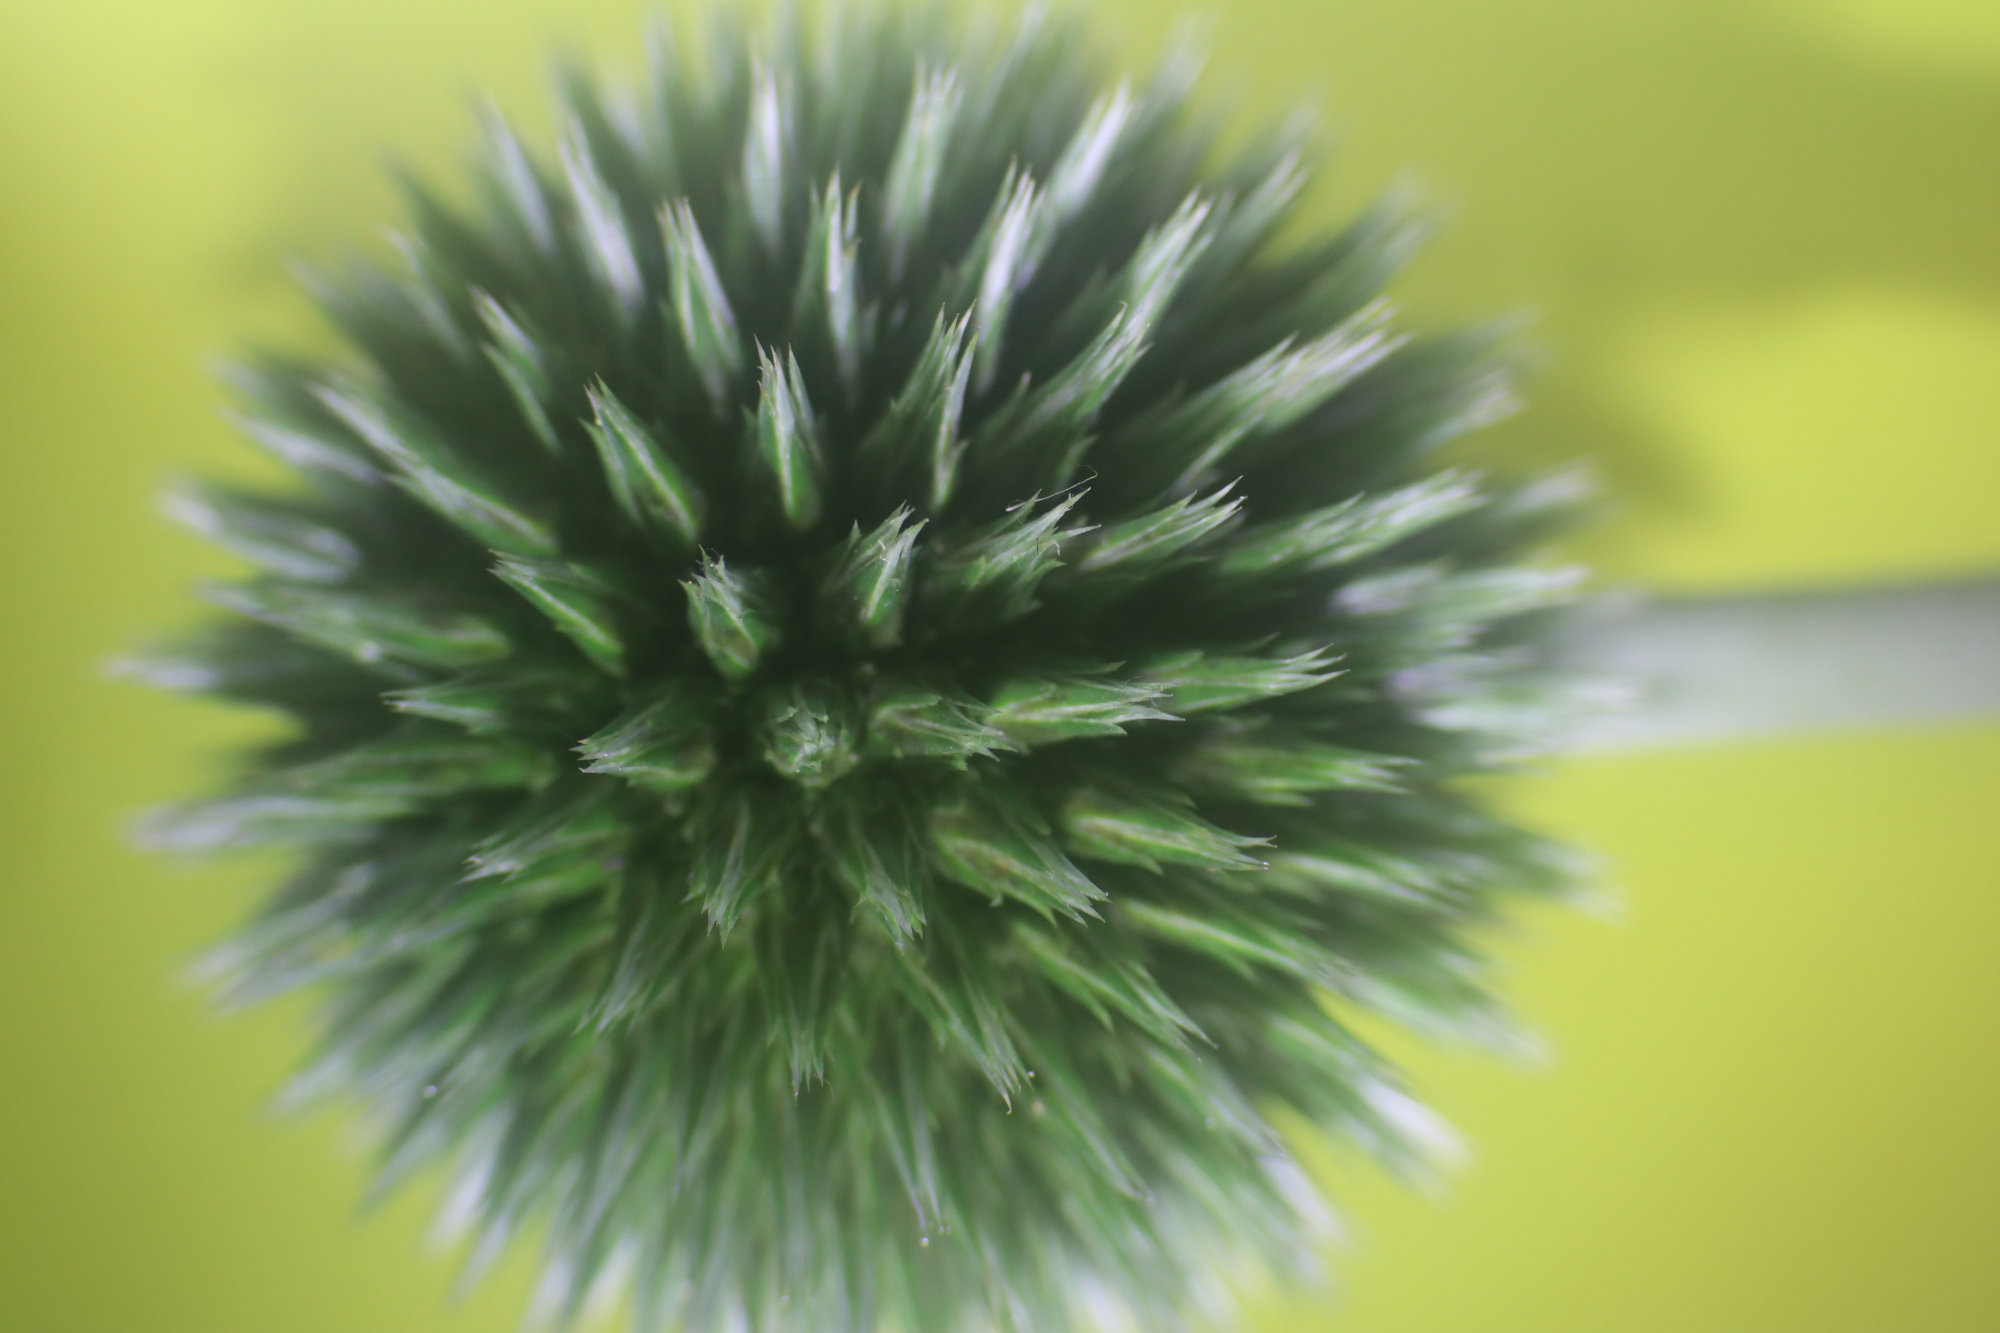
And the last one, focussed on the stem. You can see that by bringing the camera closer, the field of view decreased. But the software took care of that when it merged the stack. |
Dec 7th |
 |
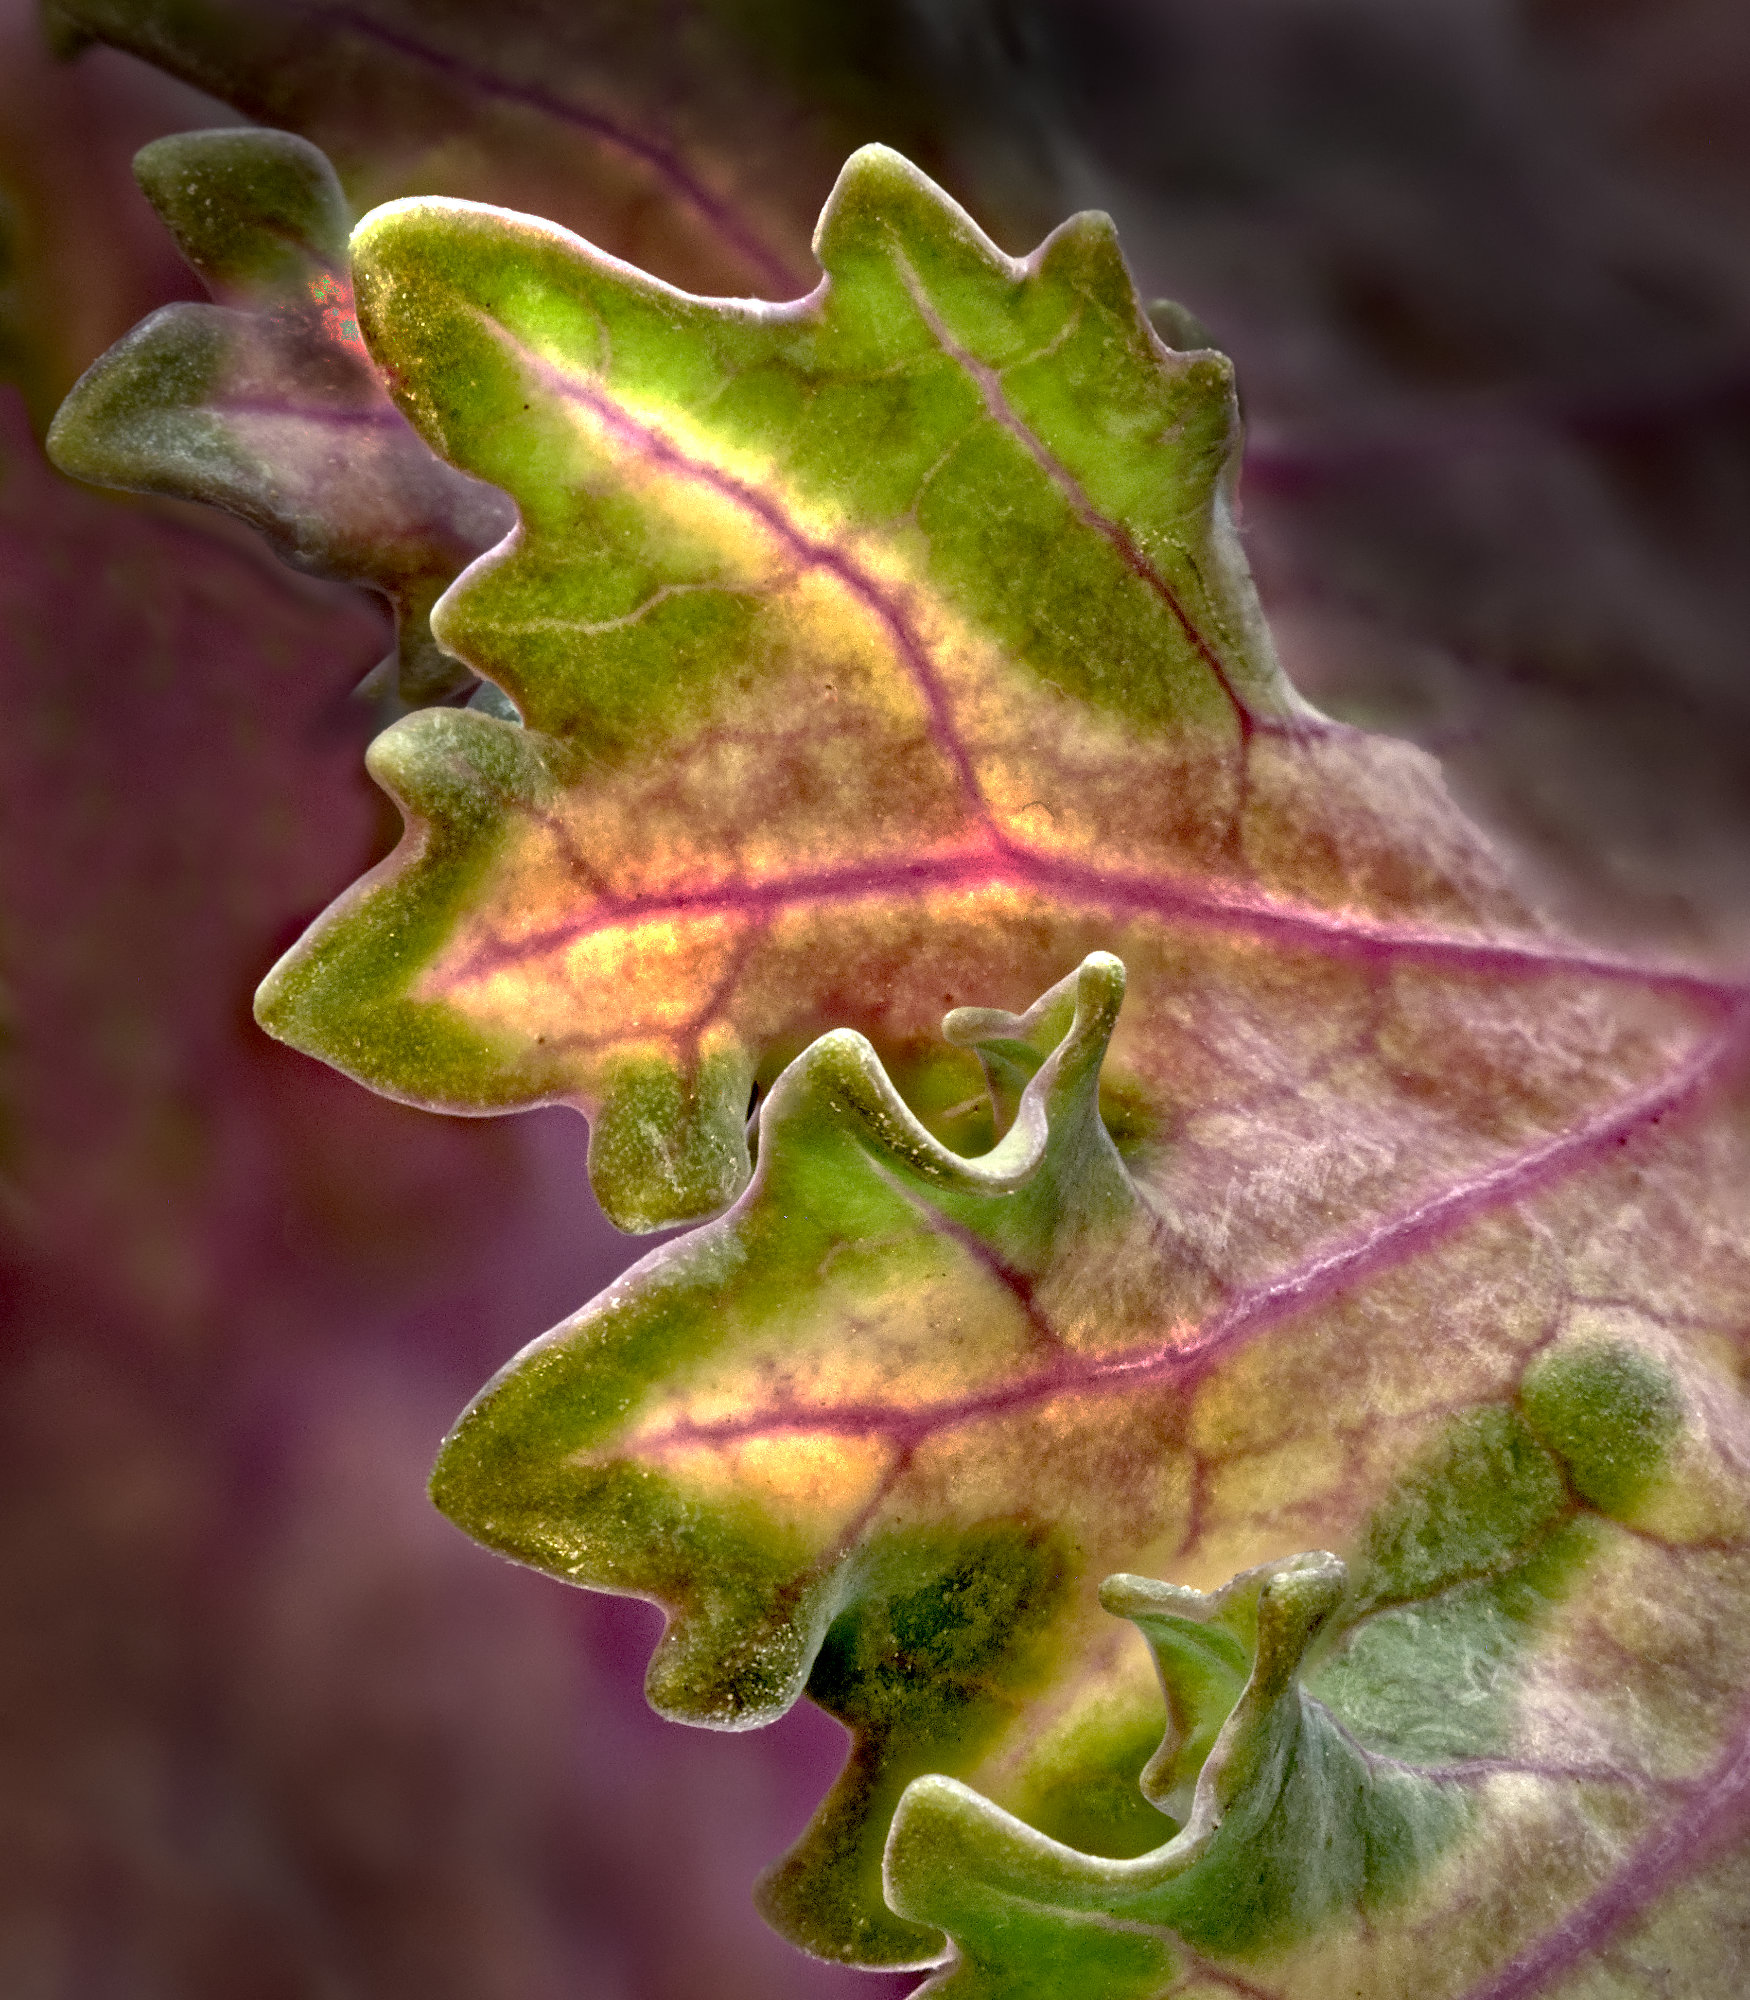
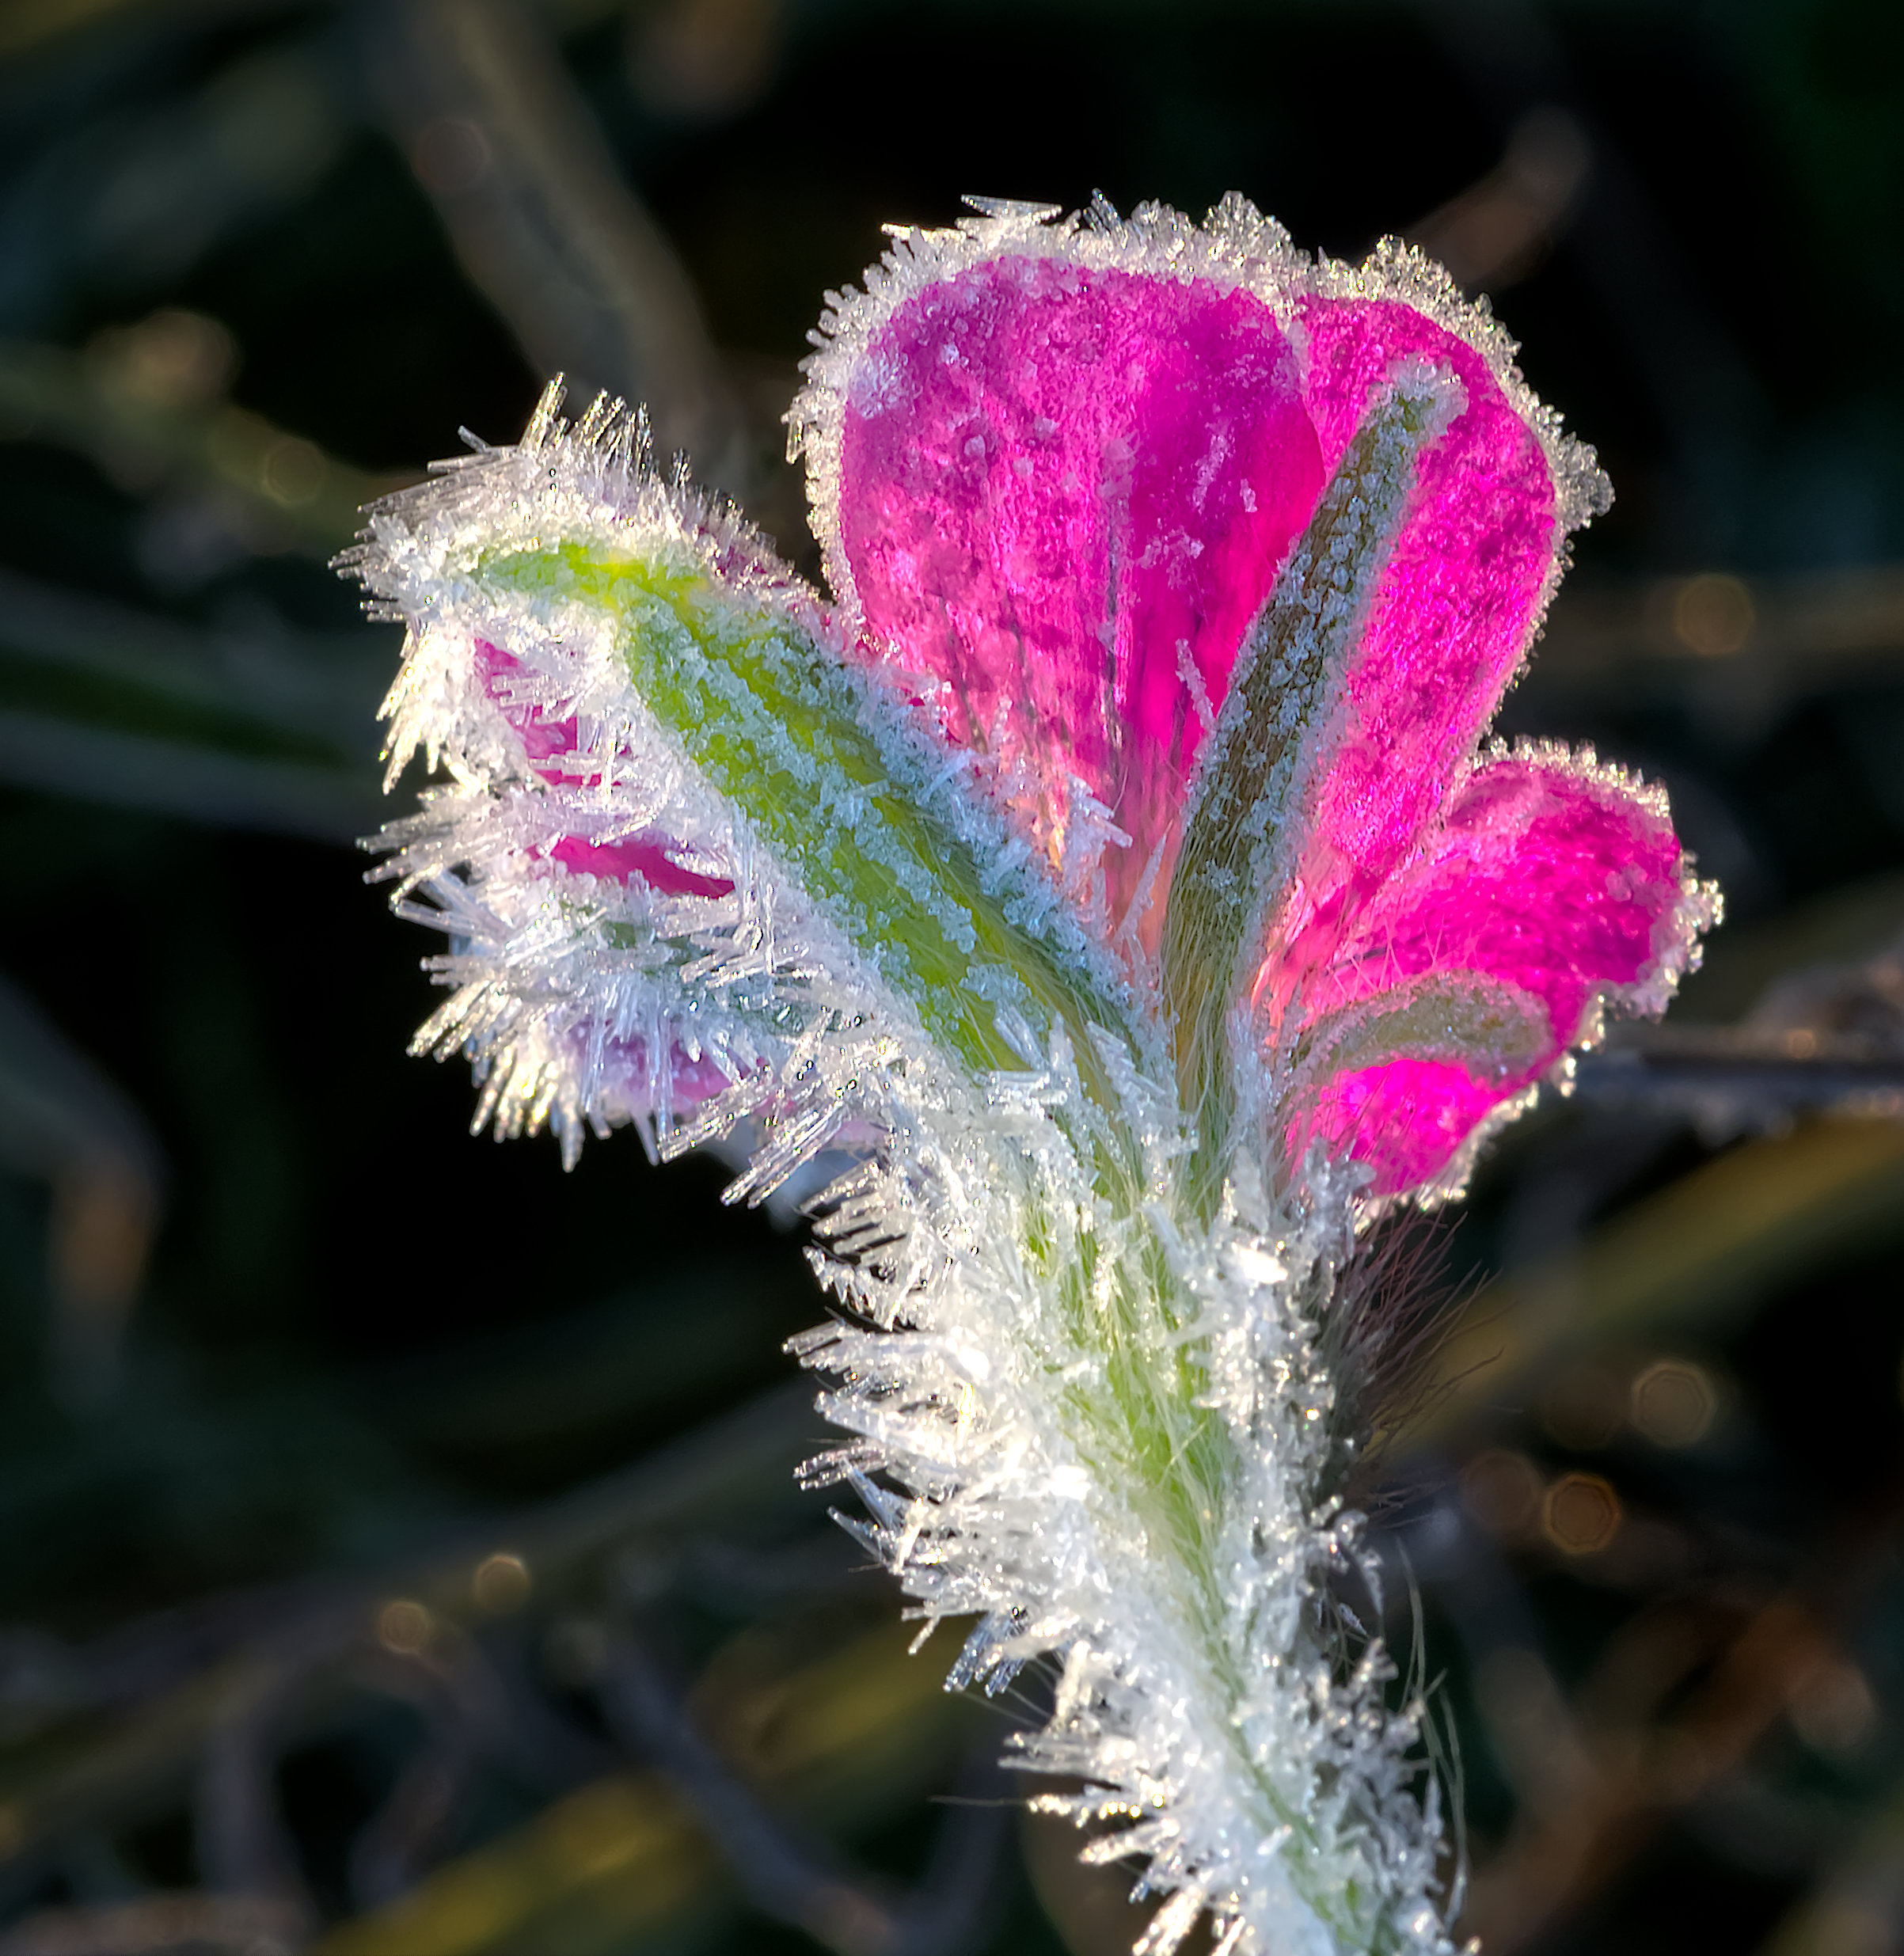
| 95 |
Dec 21 |
Reply |
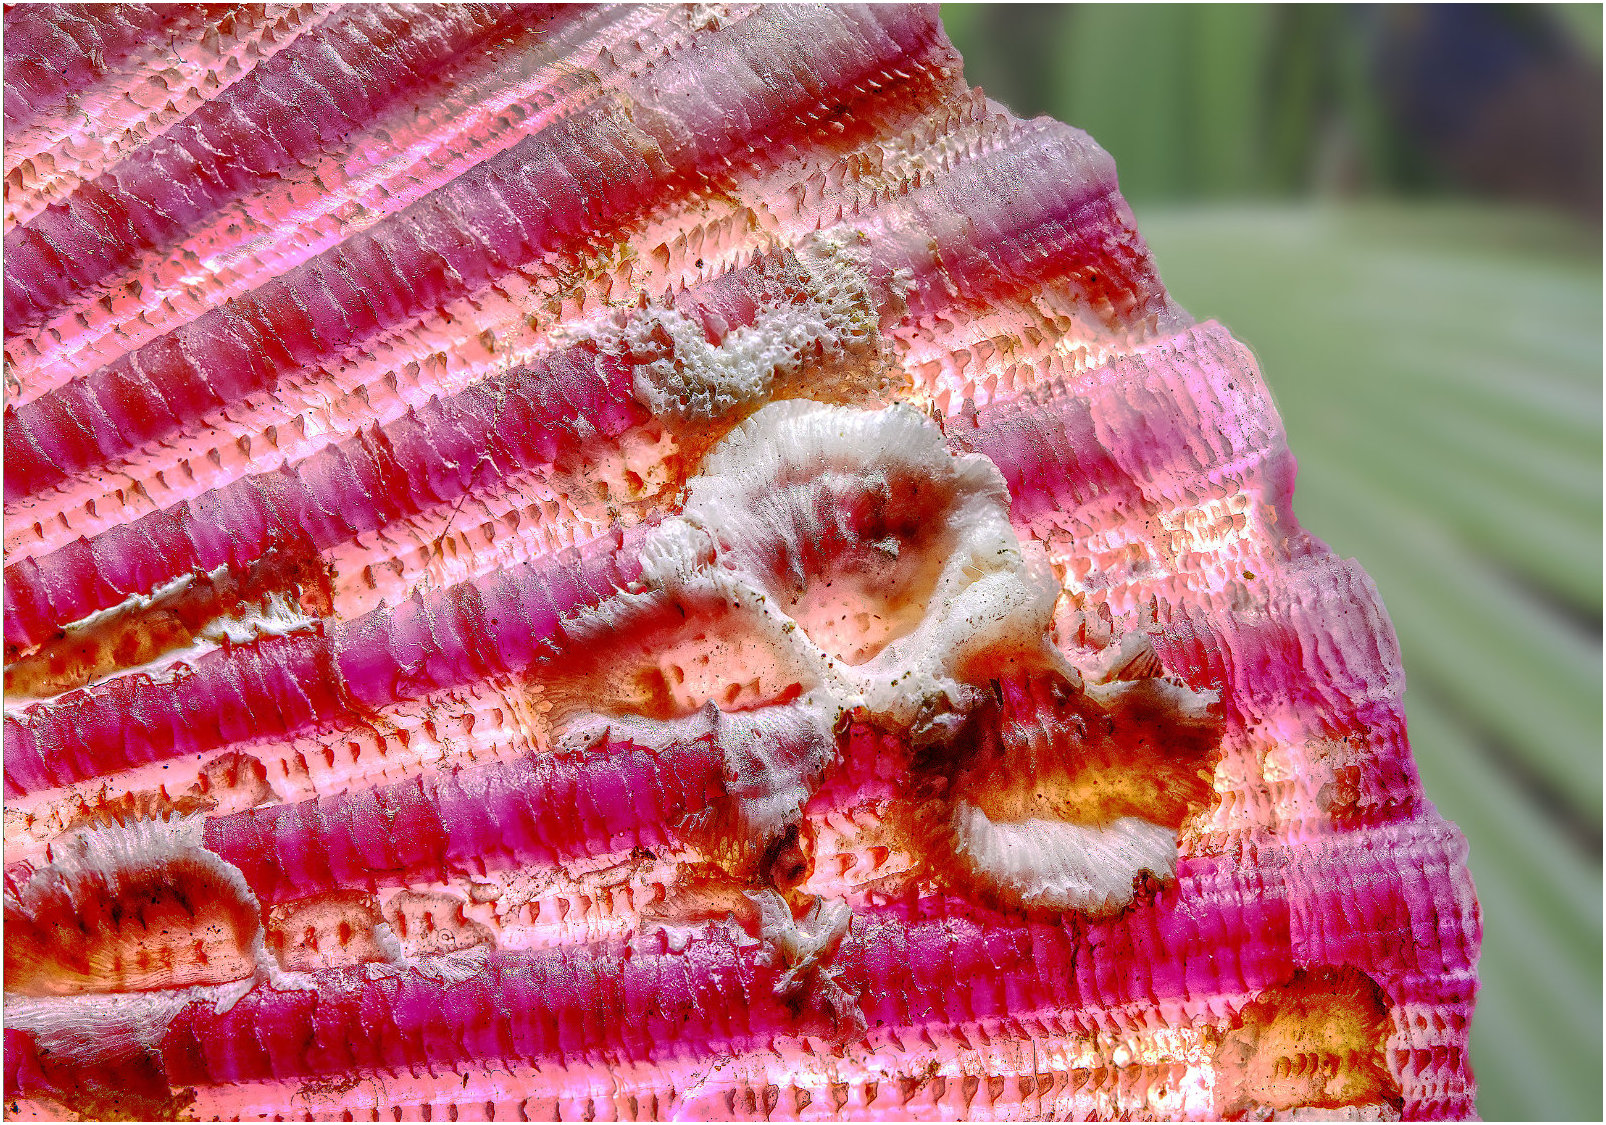
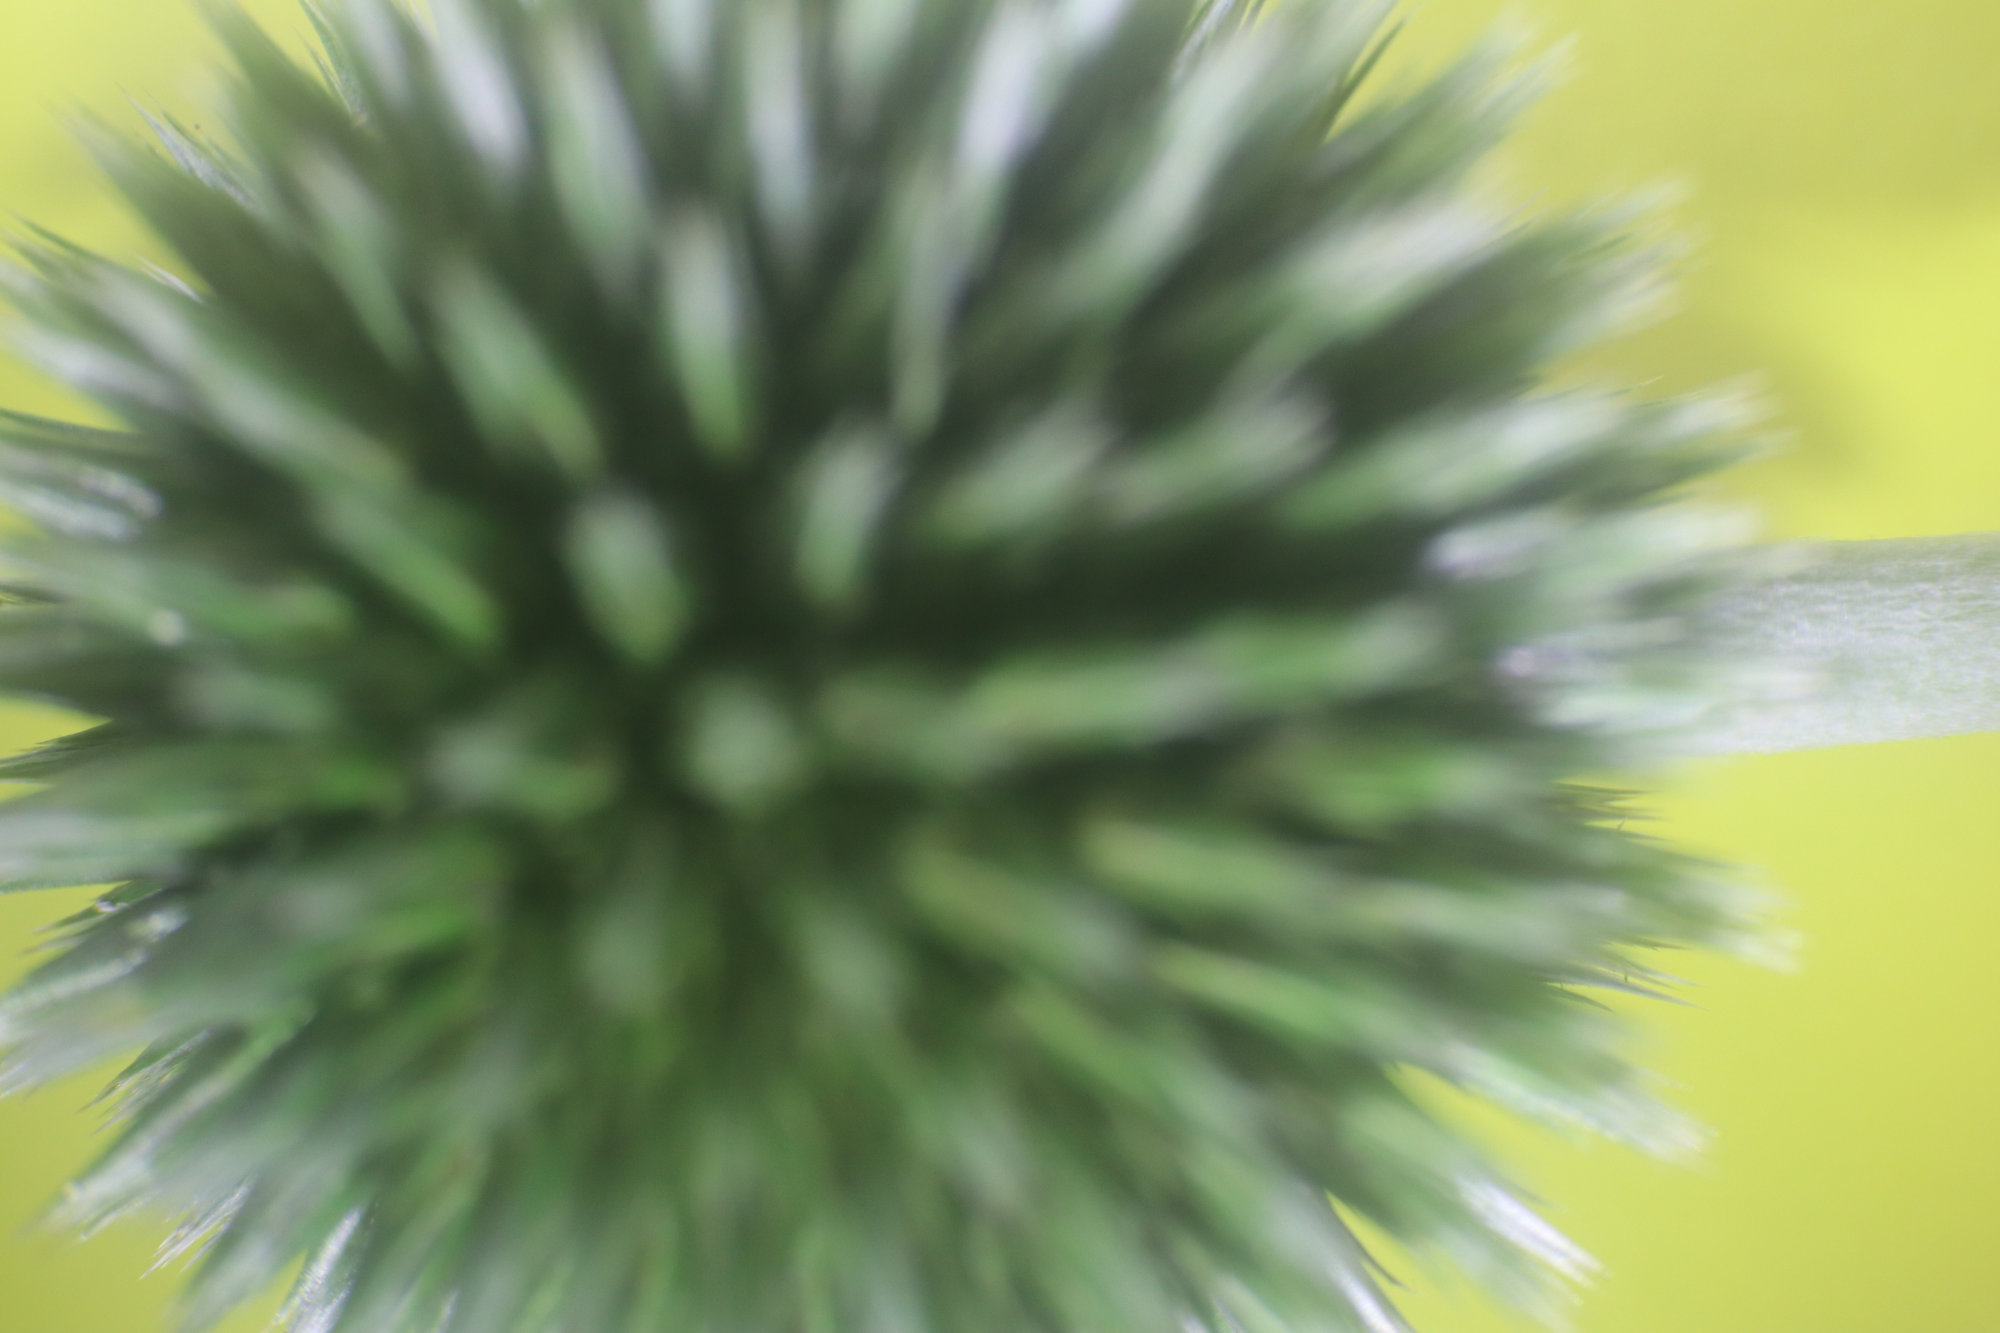
And one of the images going into the stack. This is the first one, focussed at the nearest point. |
Dec 7th |
 |
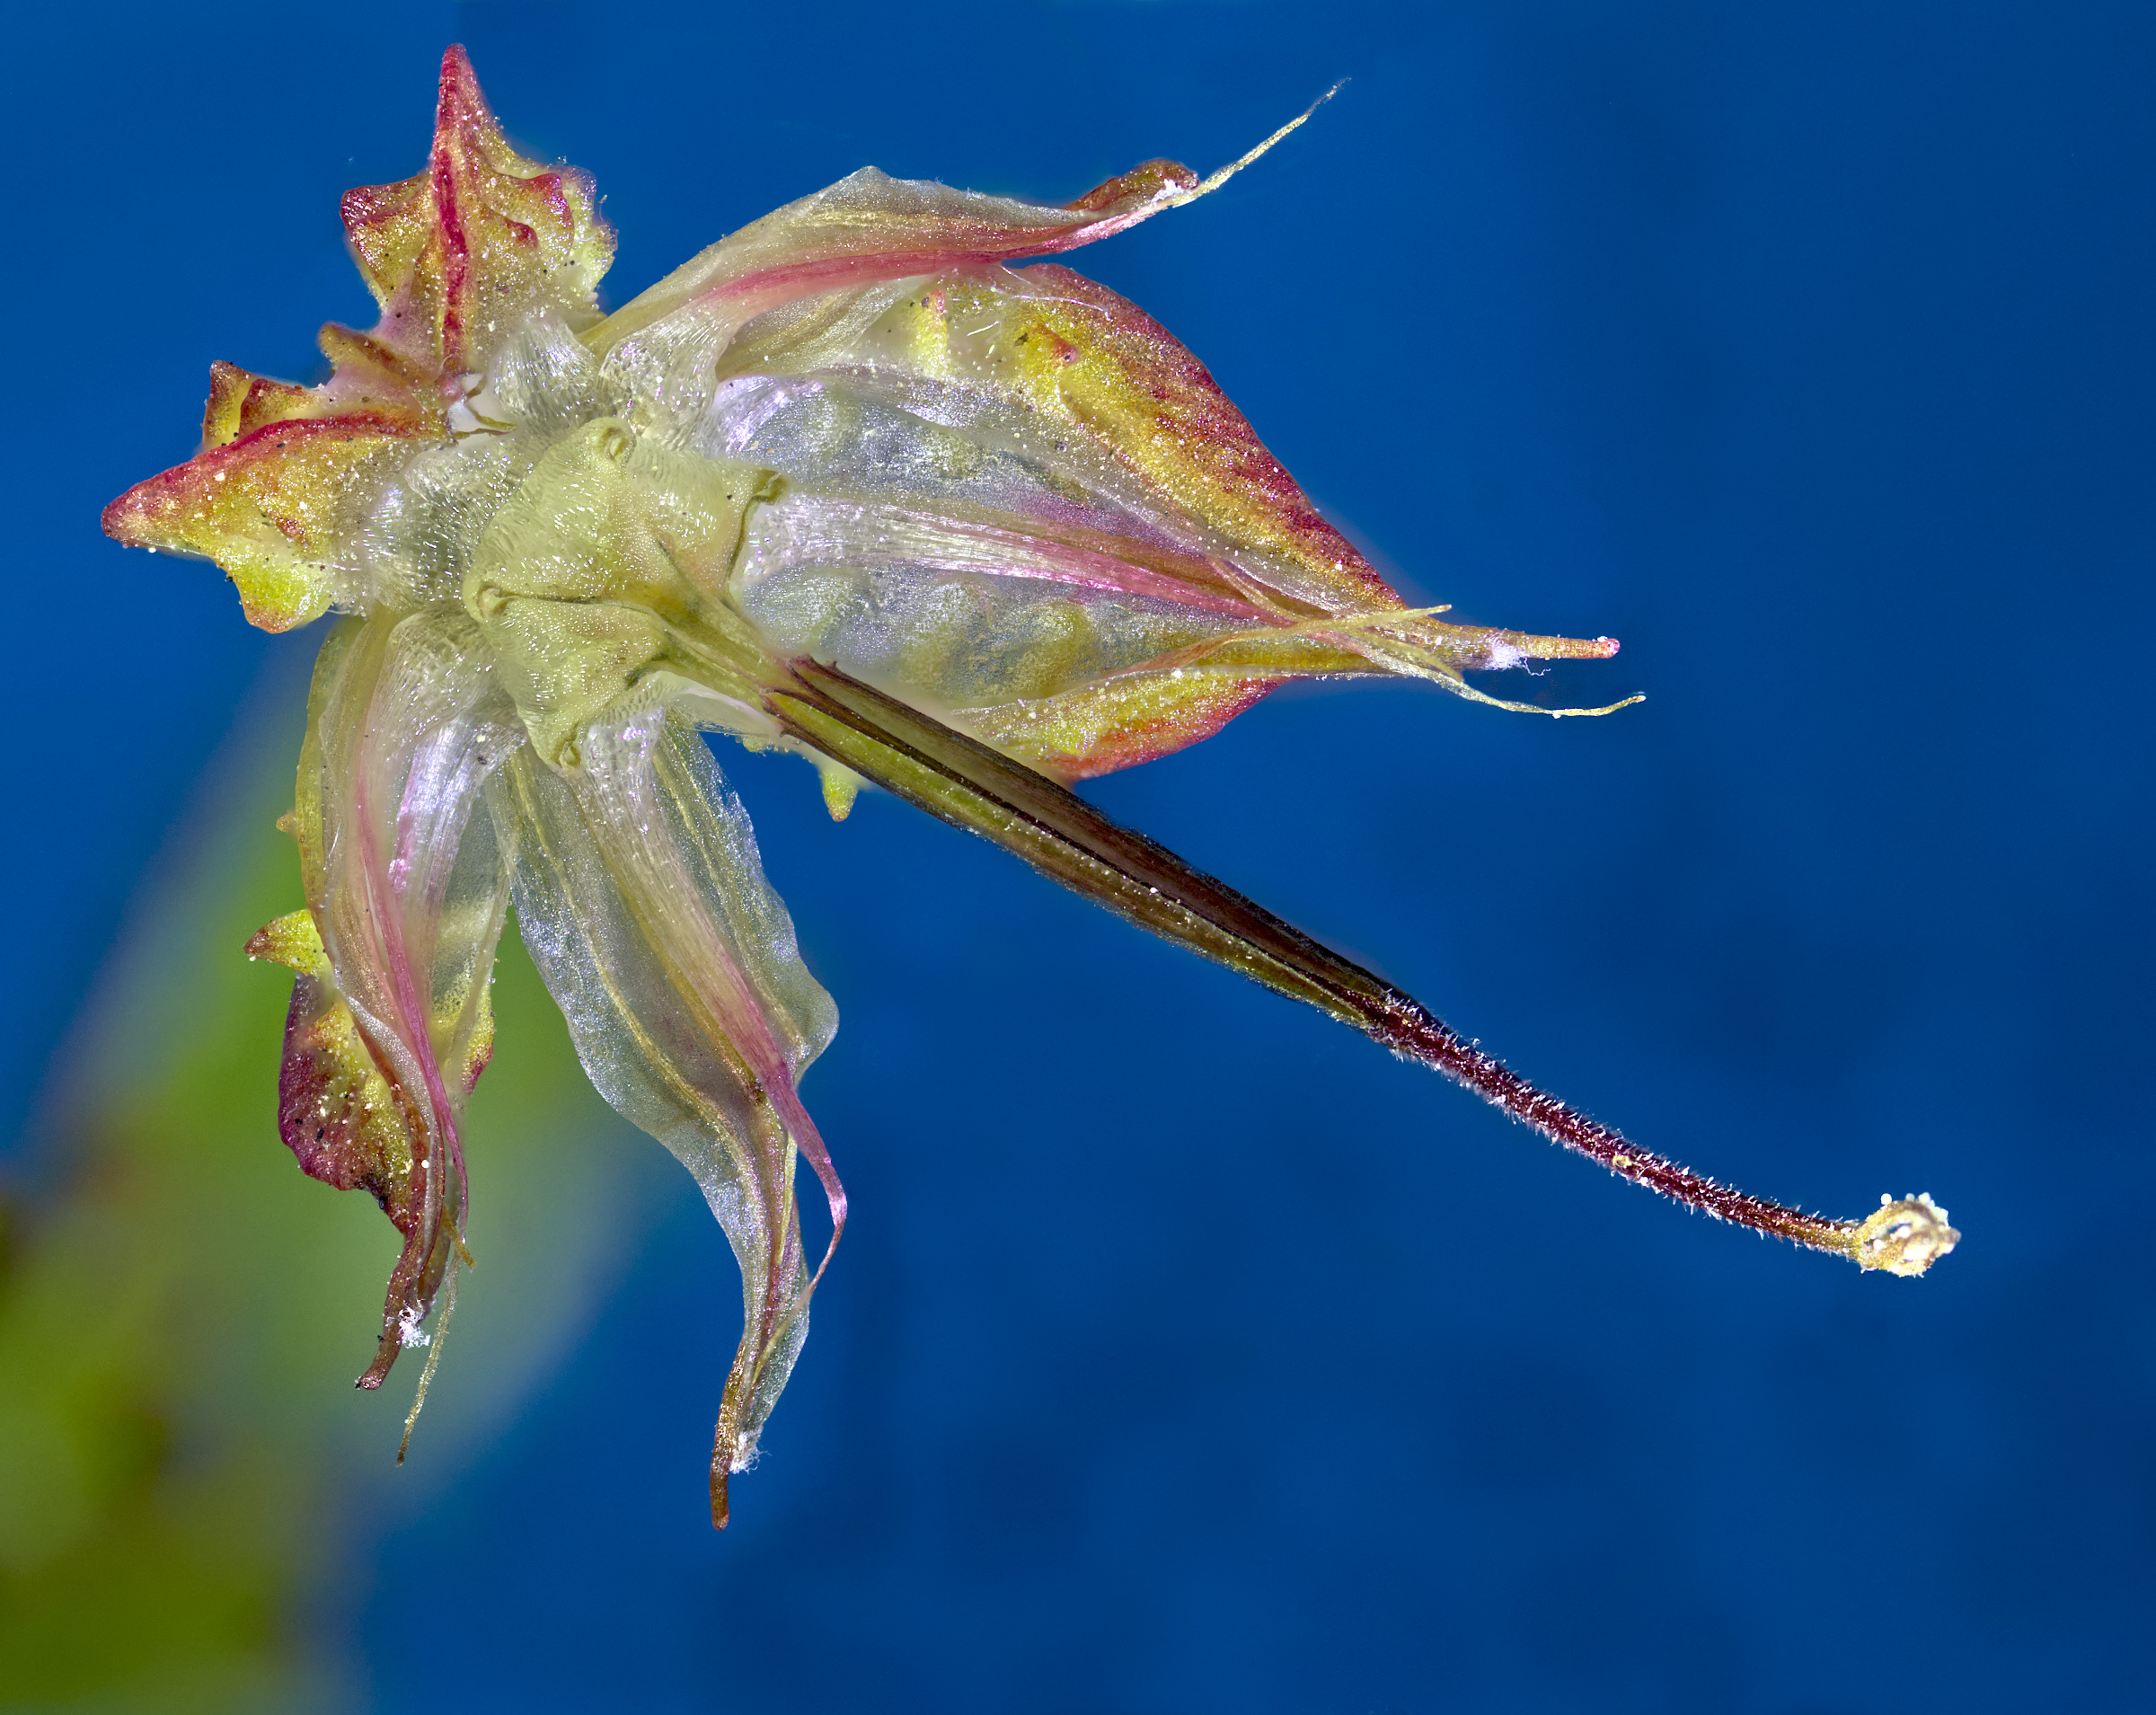
| 95 |
Dec 21 |
Reply |
The focus depth comes from focus stacking.
Here's the non-inverted version - |
Dec 7th |
 |
5 comments - 8 replies for Group 95
|
12 comments - 14 replies Total
|