|
| Group |
Round |
C/R |
Comment |
Date |
Image |
| 11 |
May 20 |
Comment |
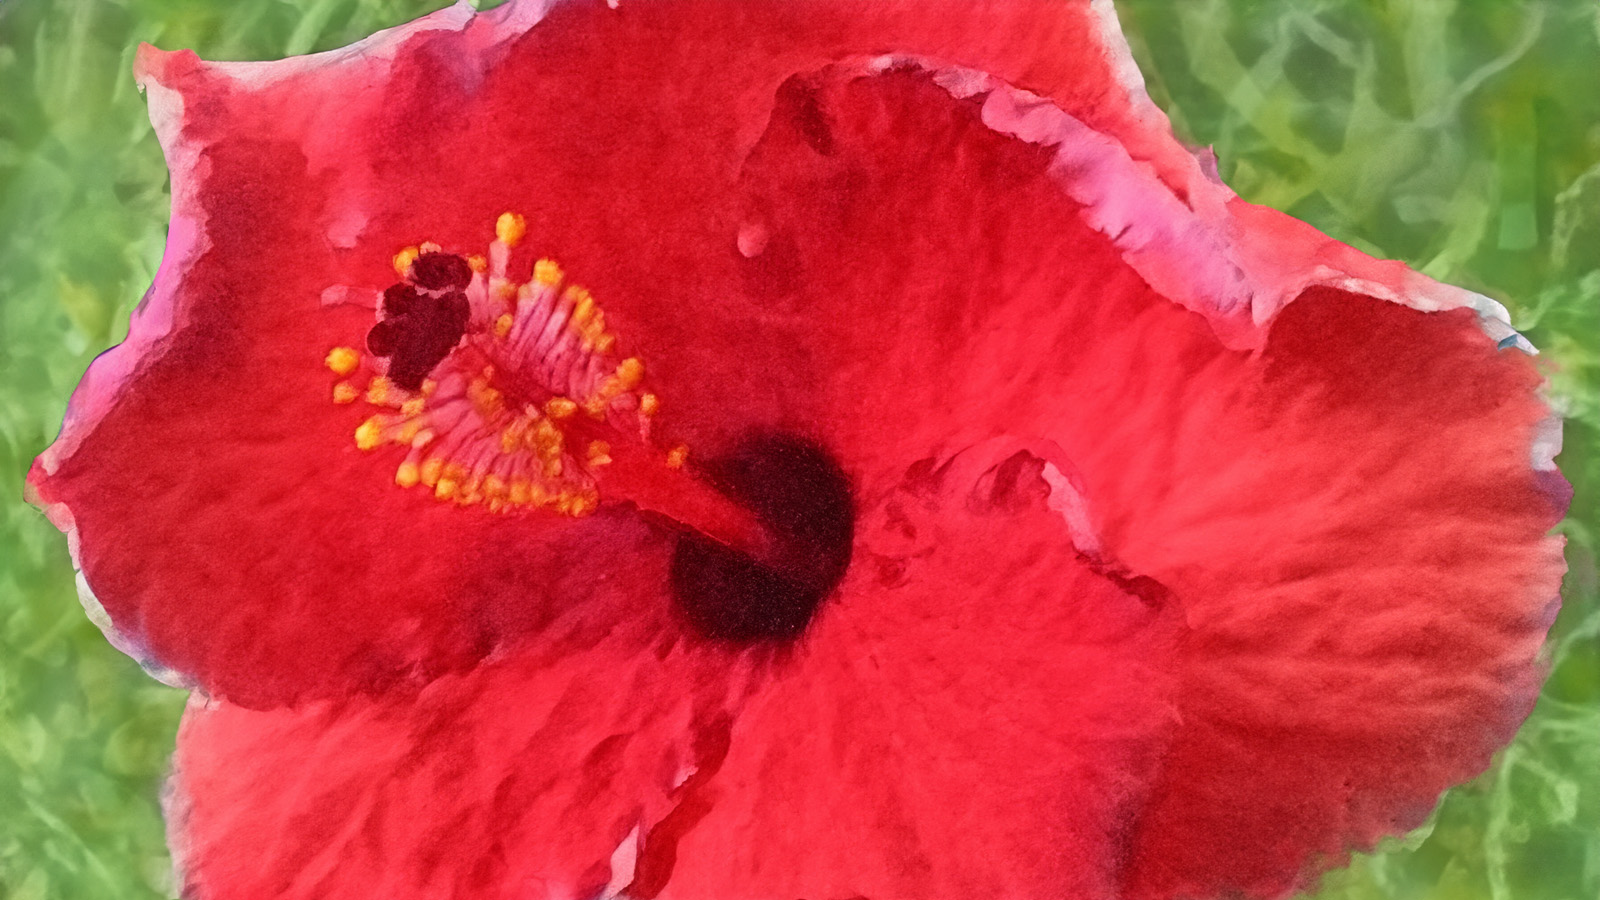
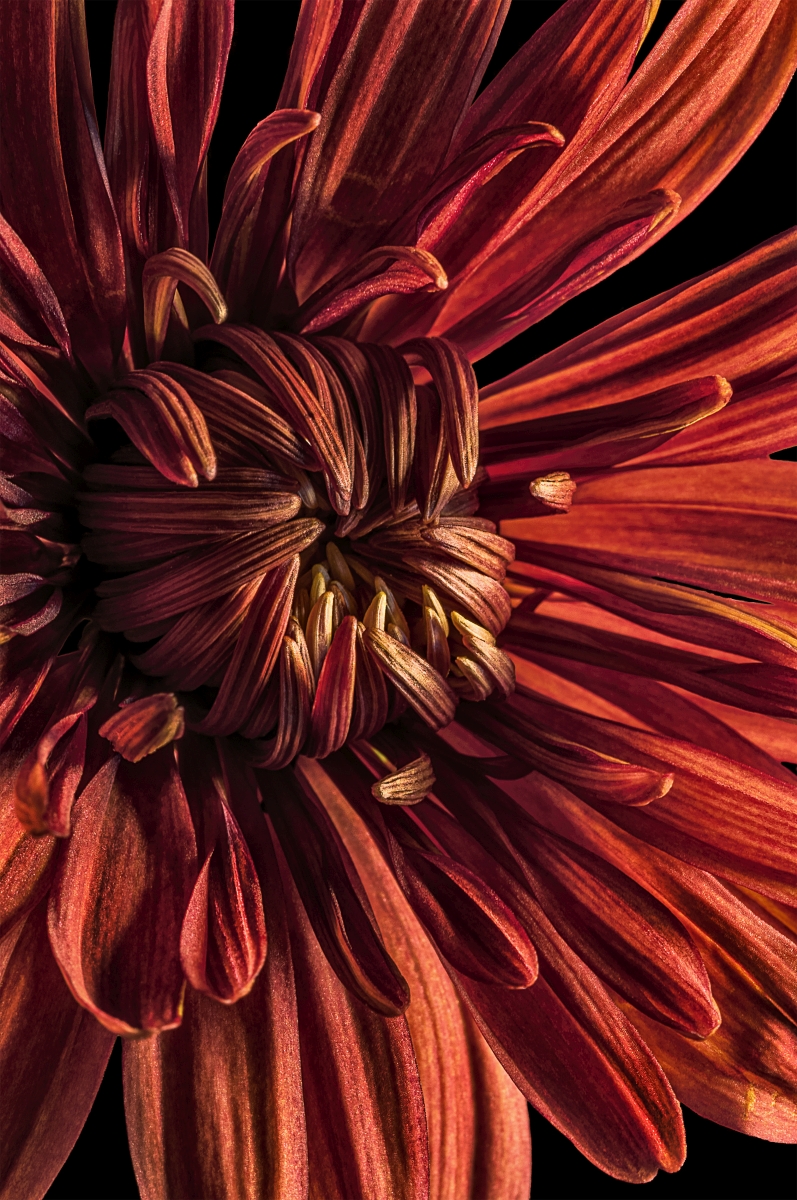
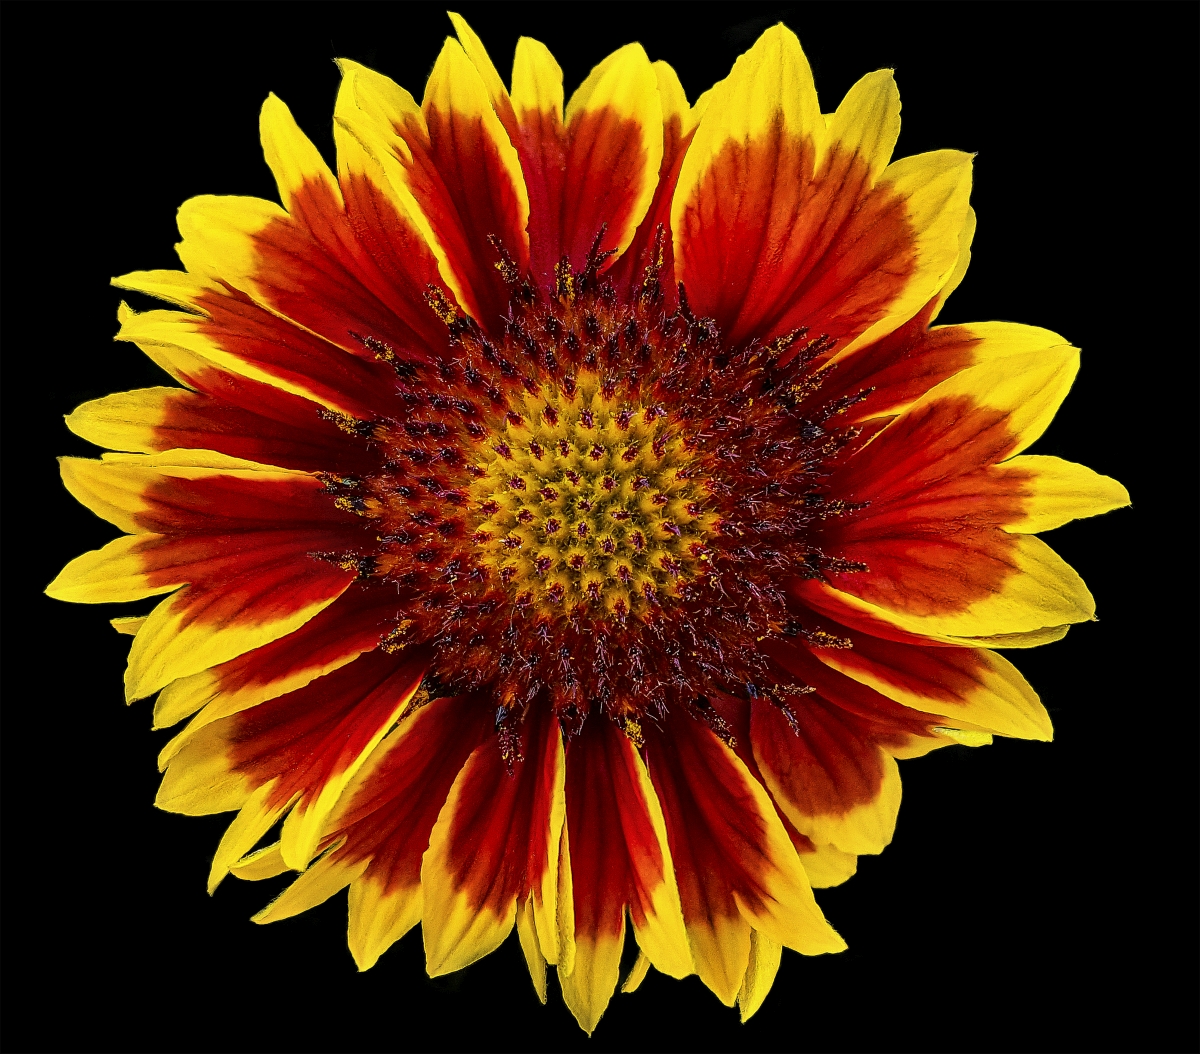
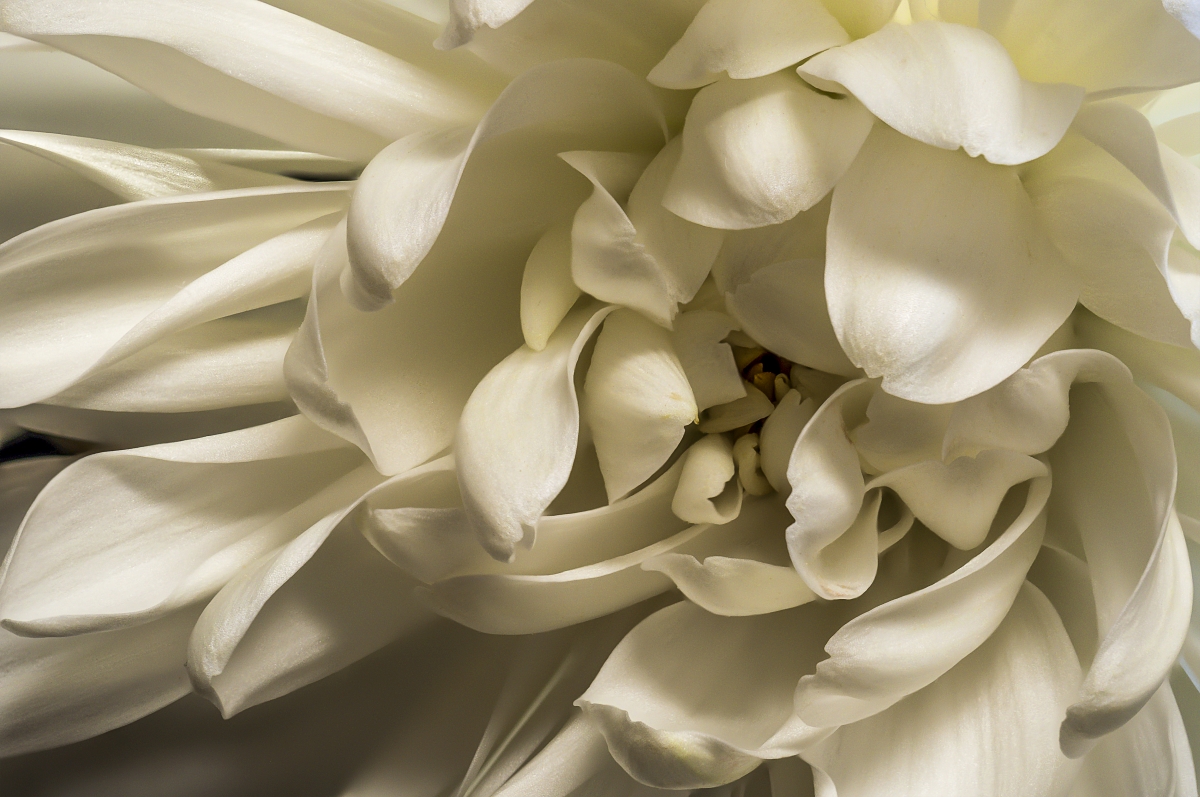
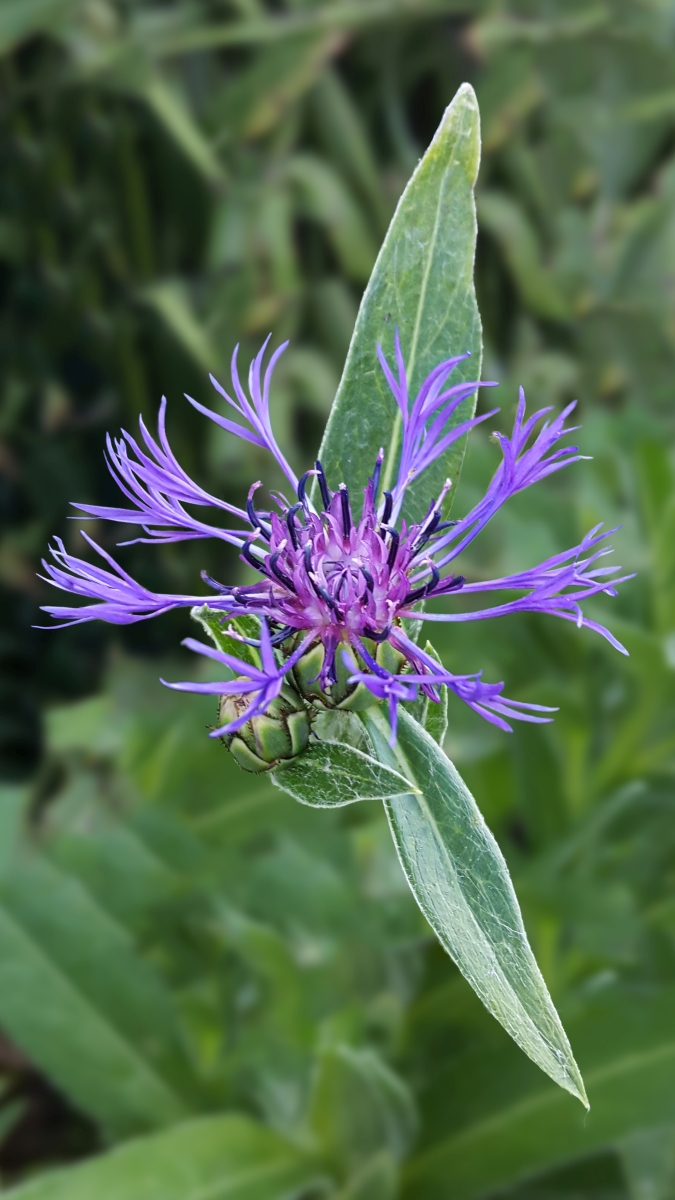
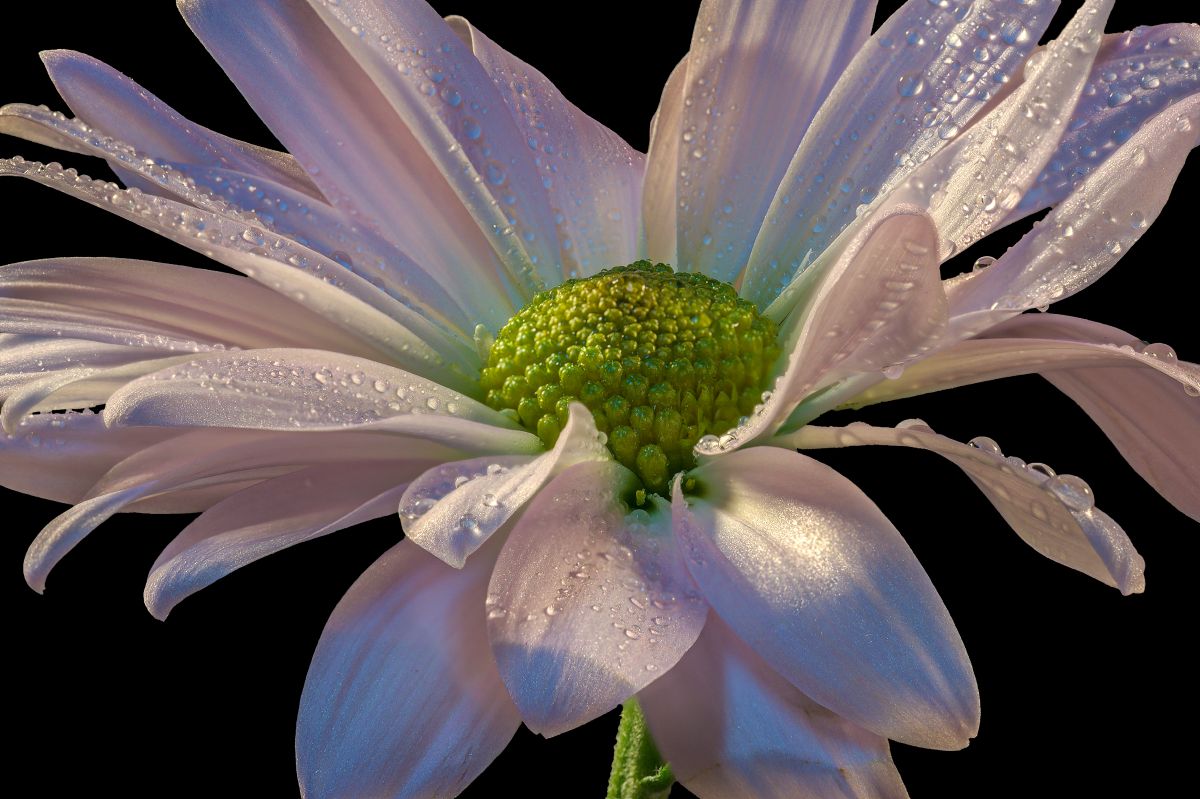
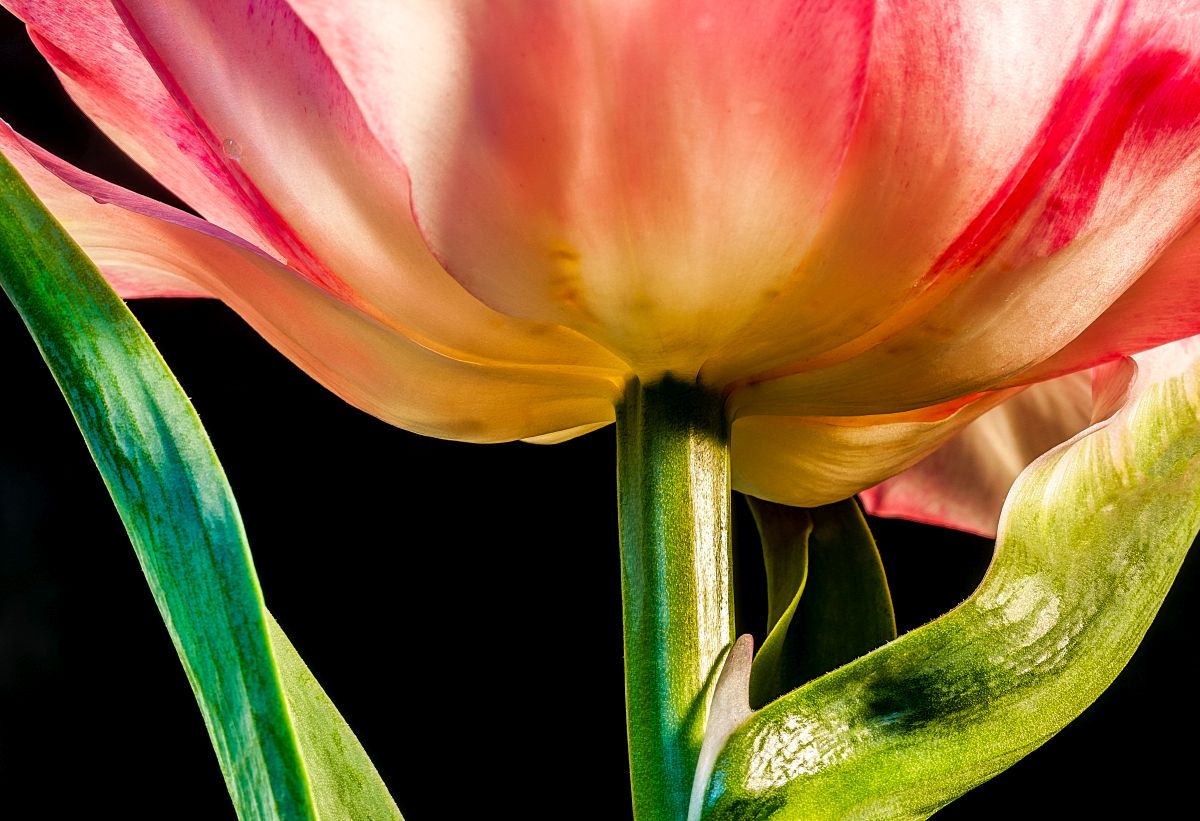
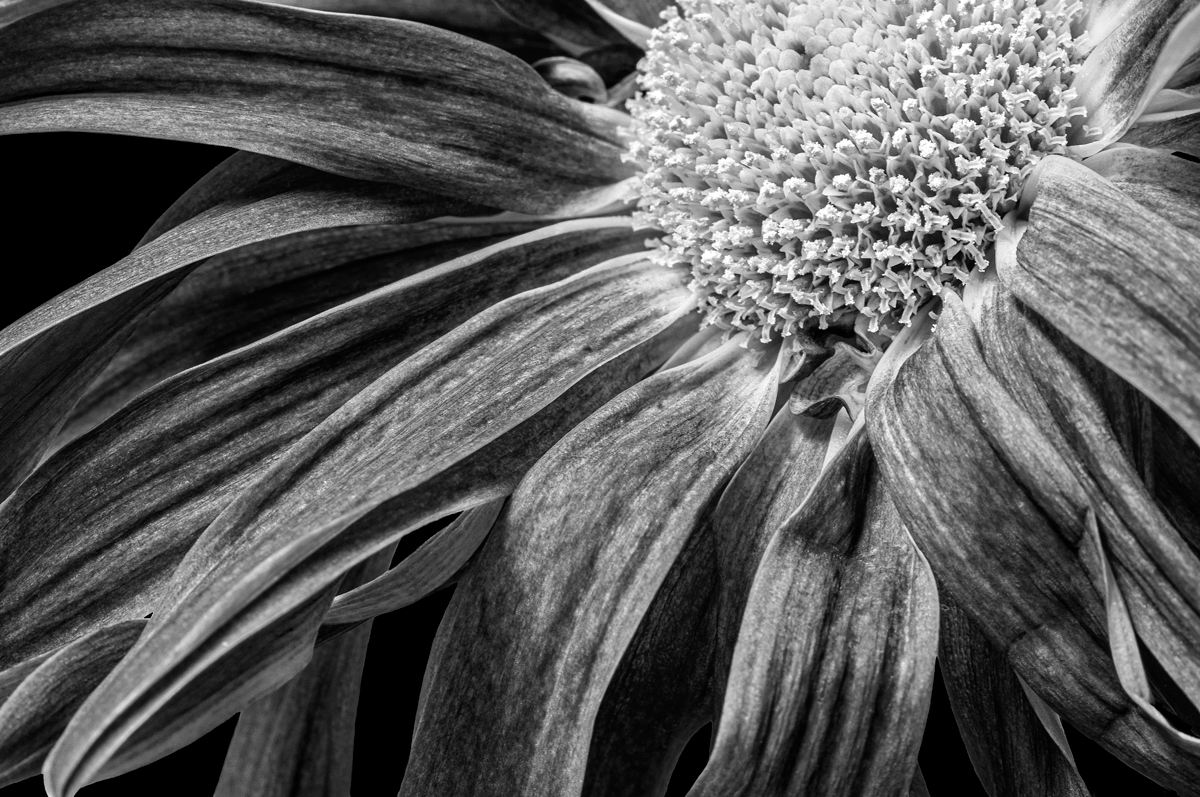
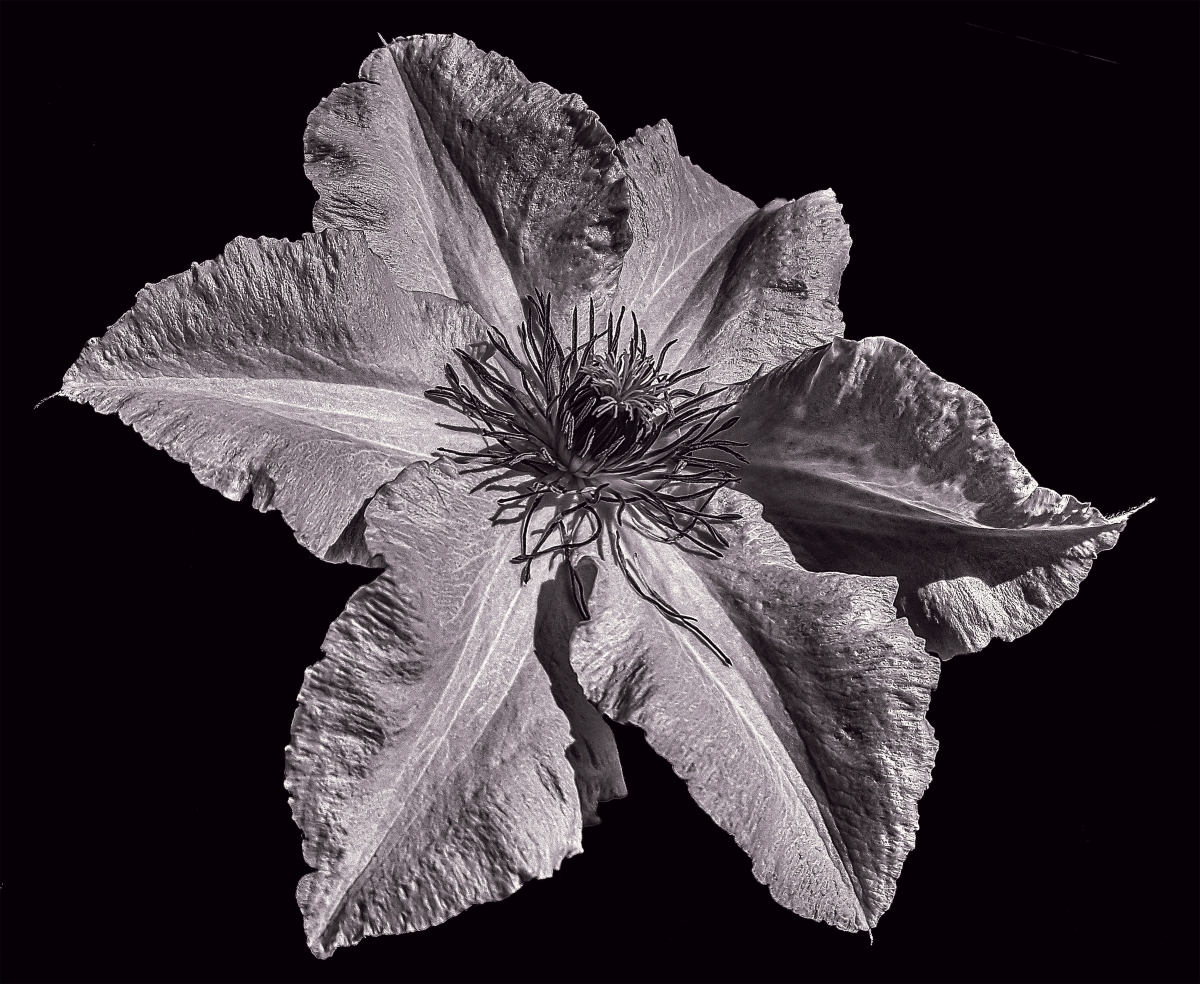
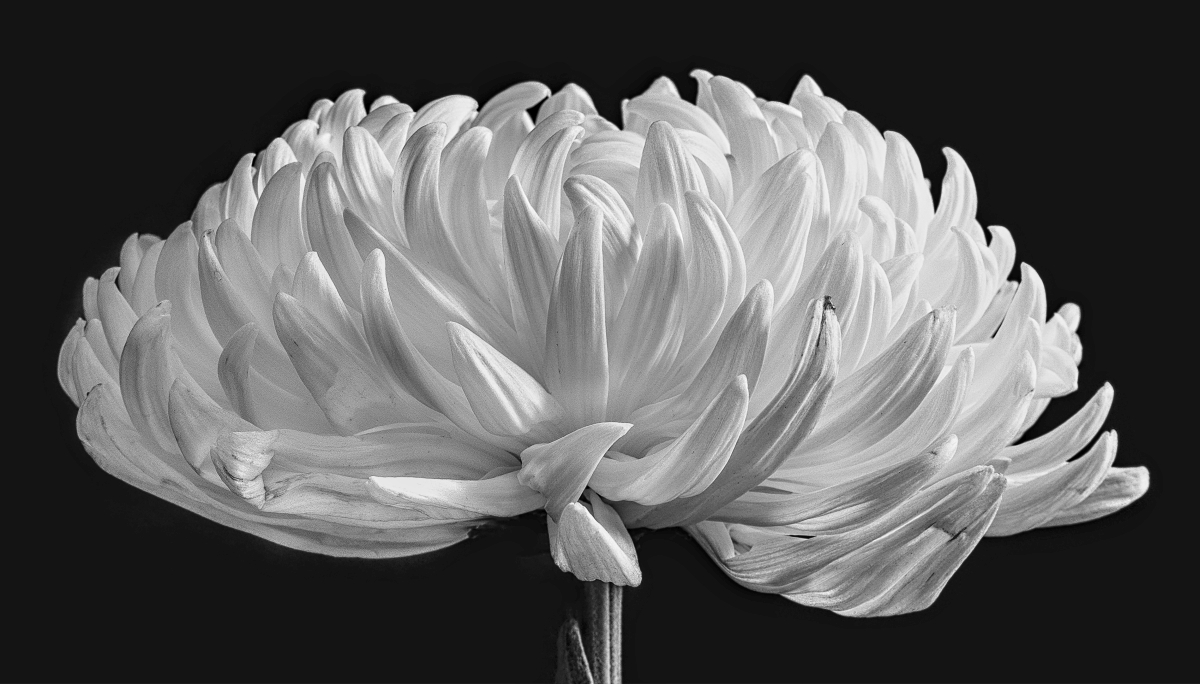
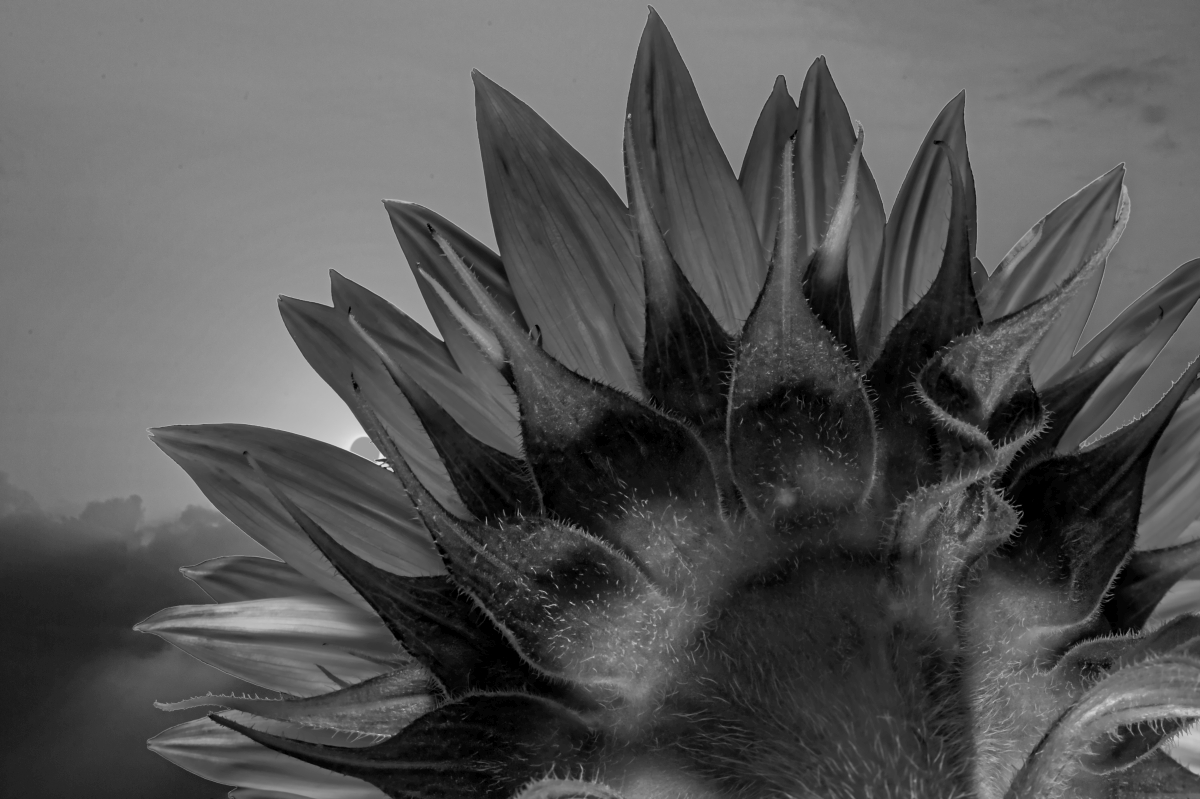
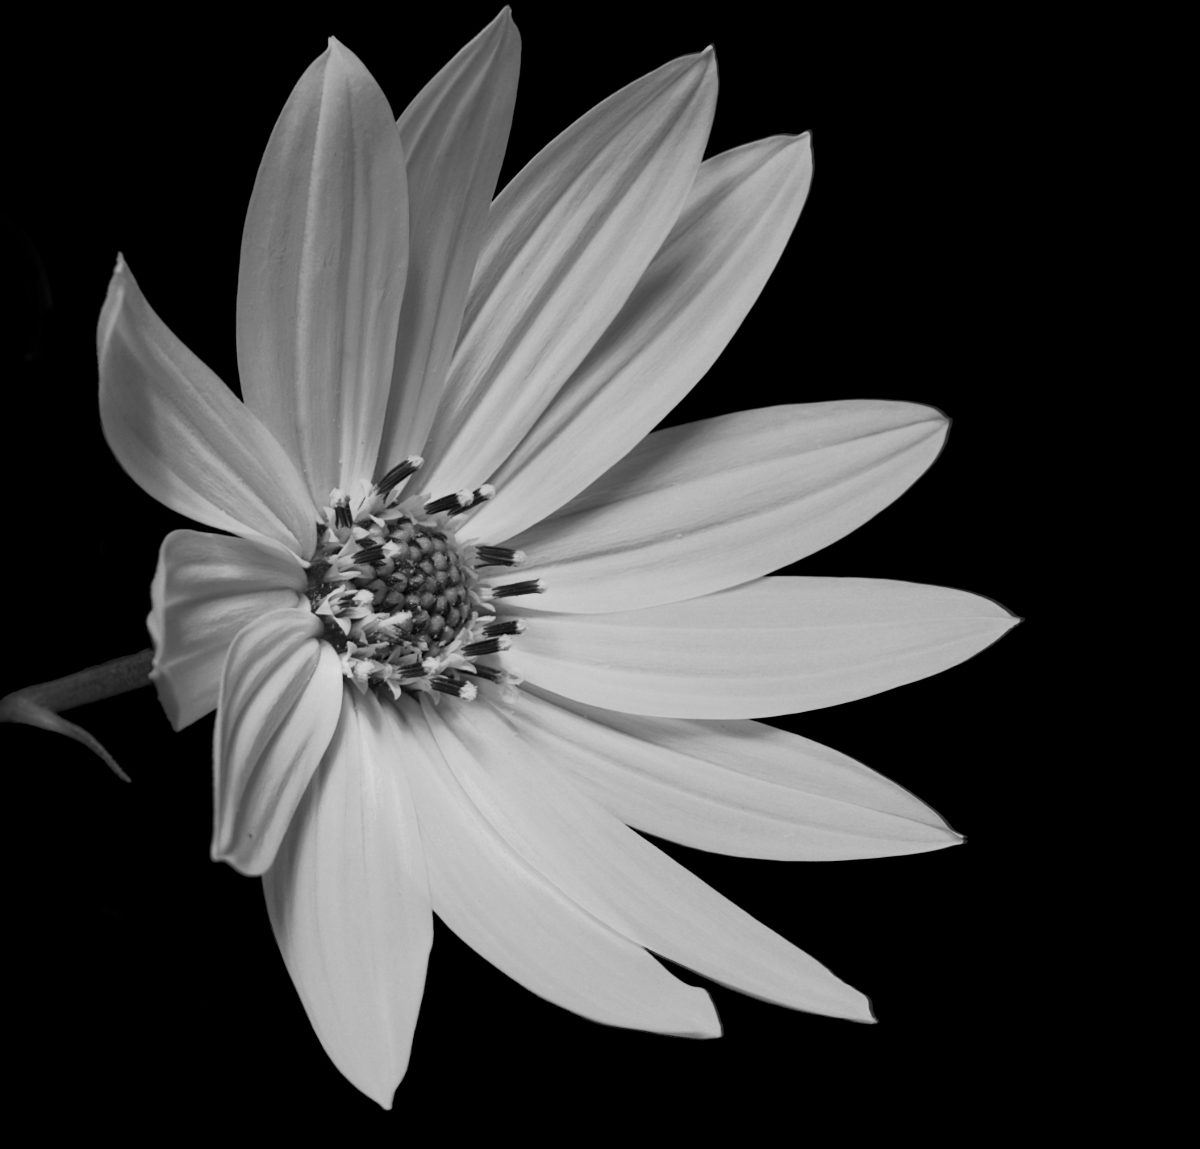
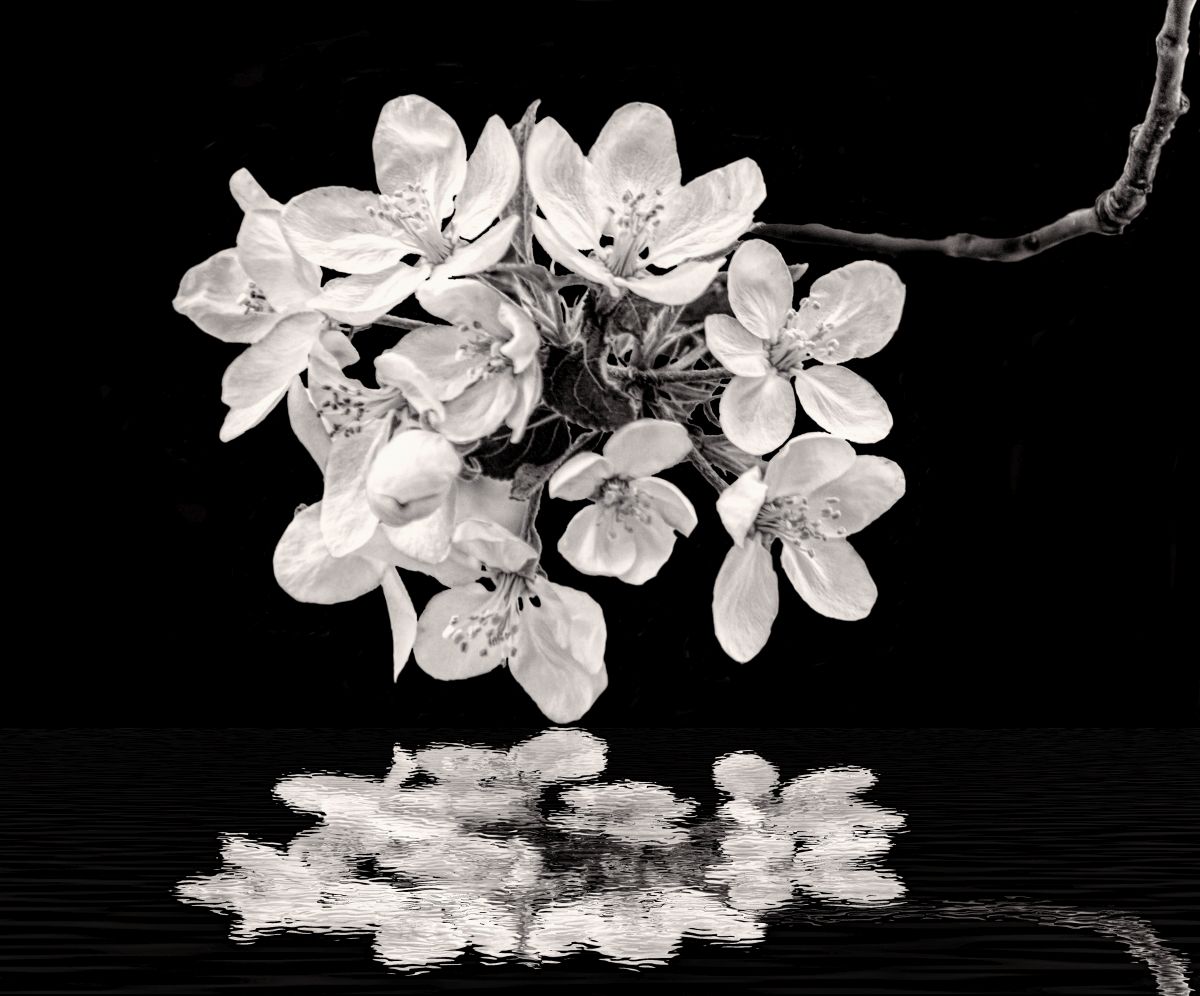
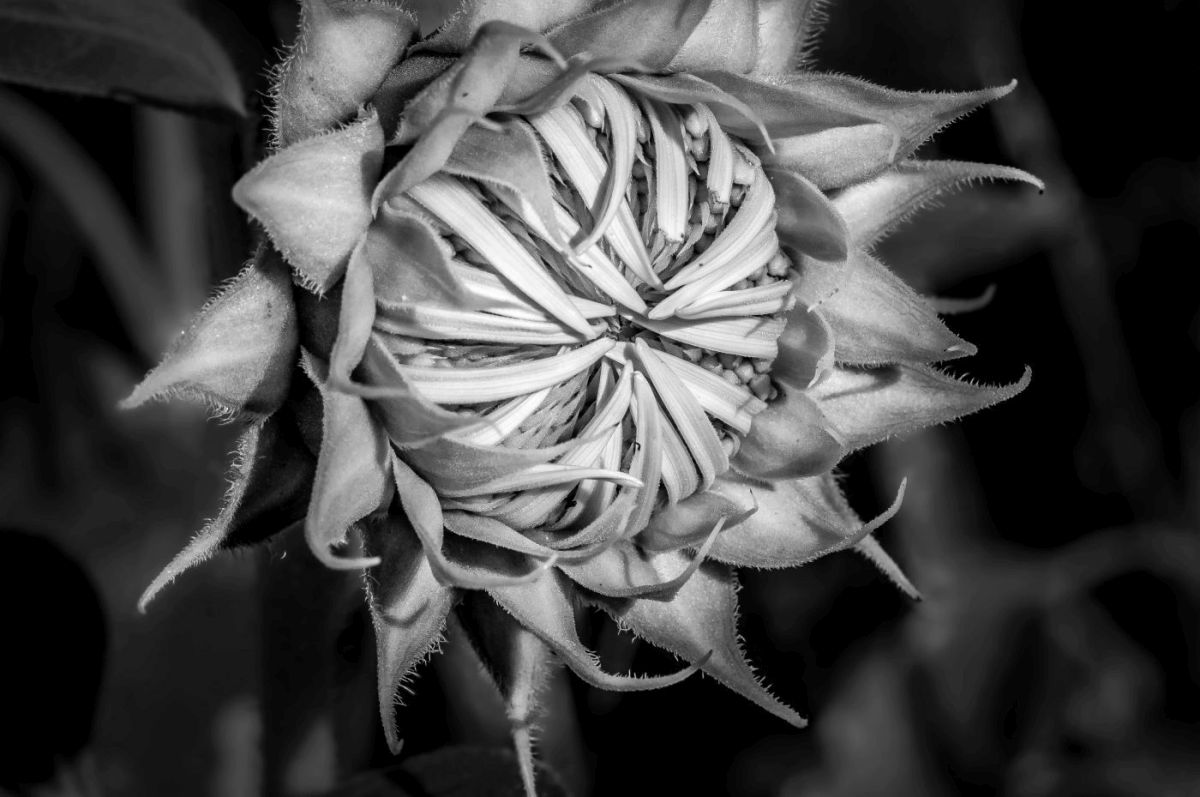
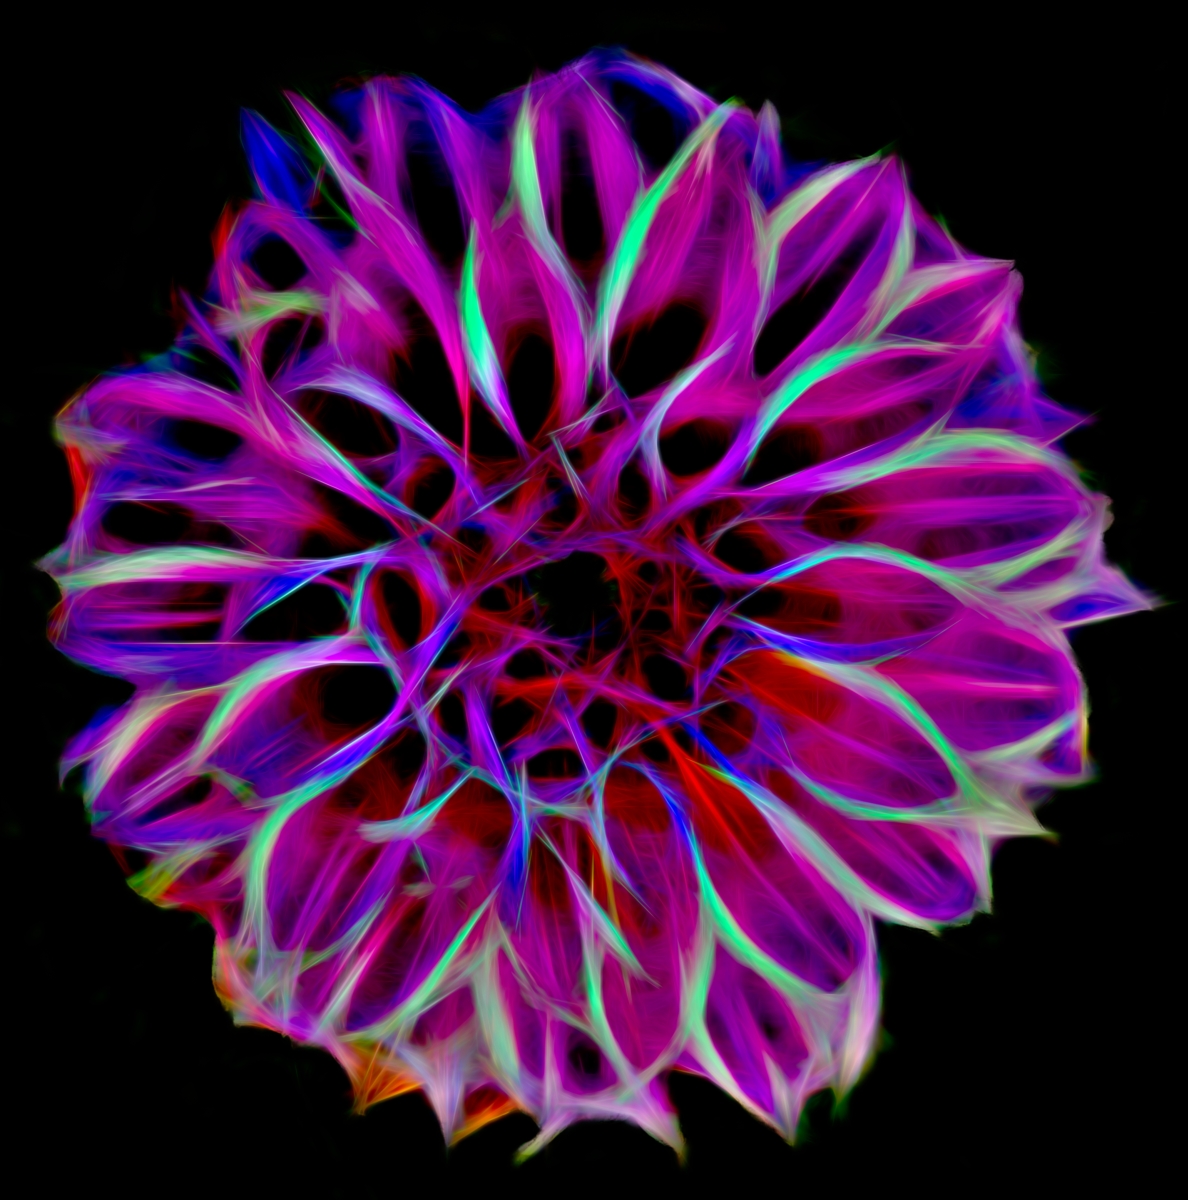
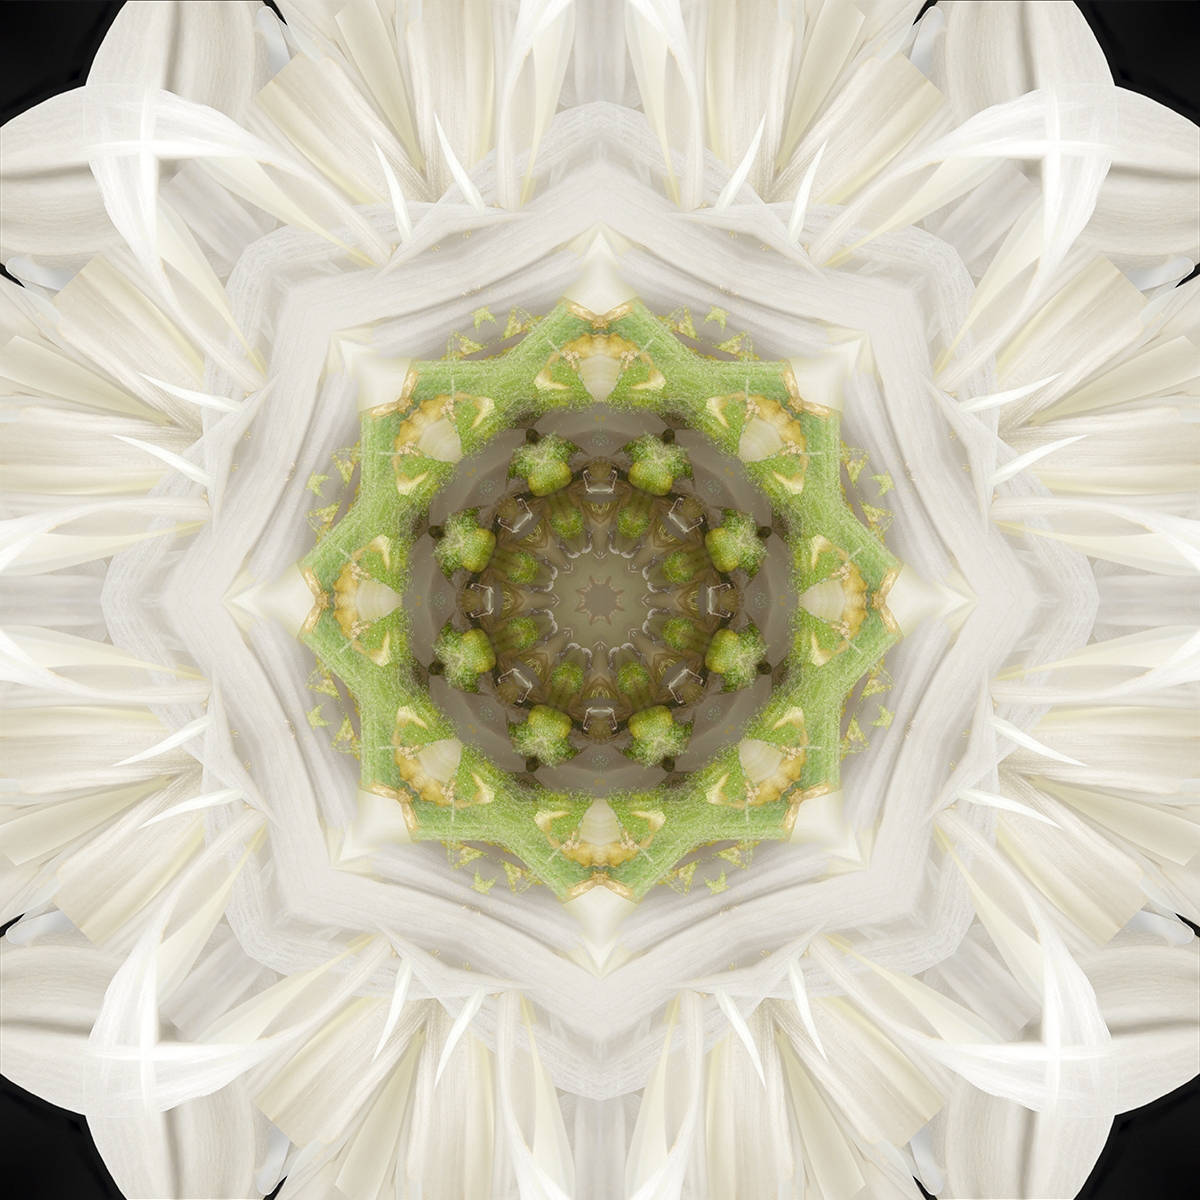
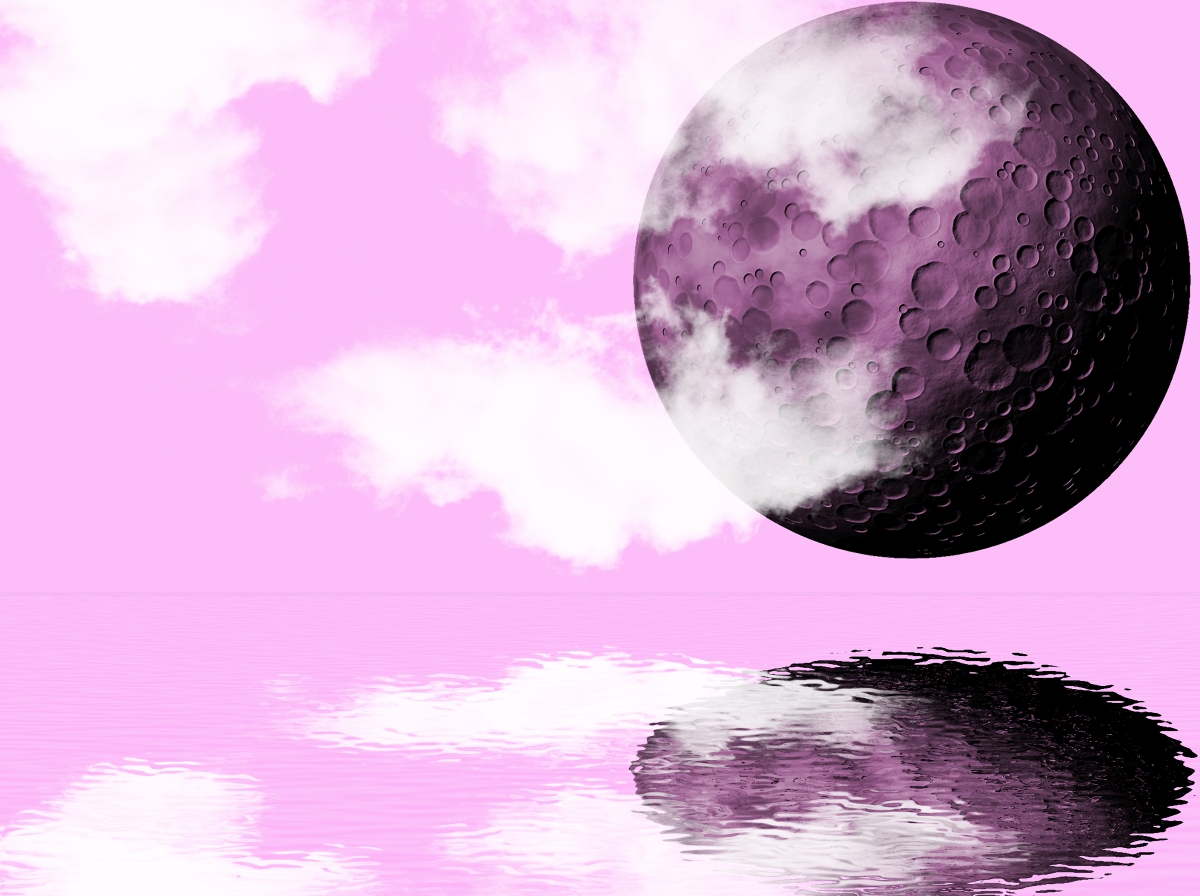
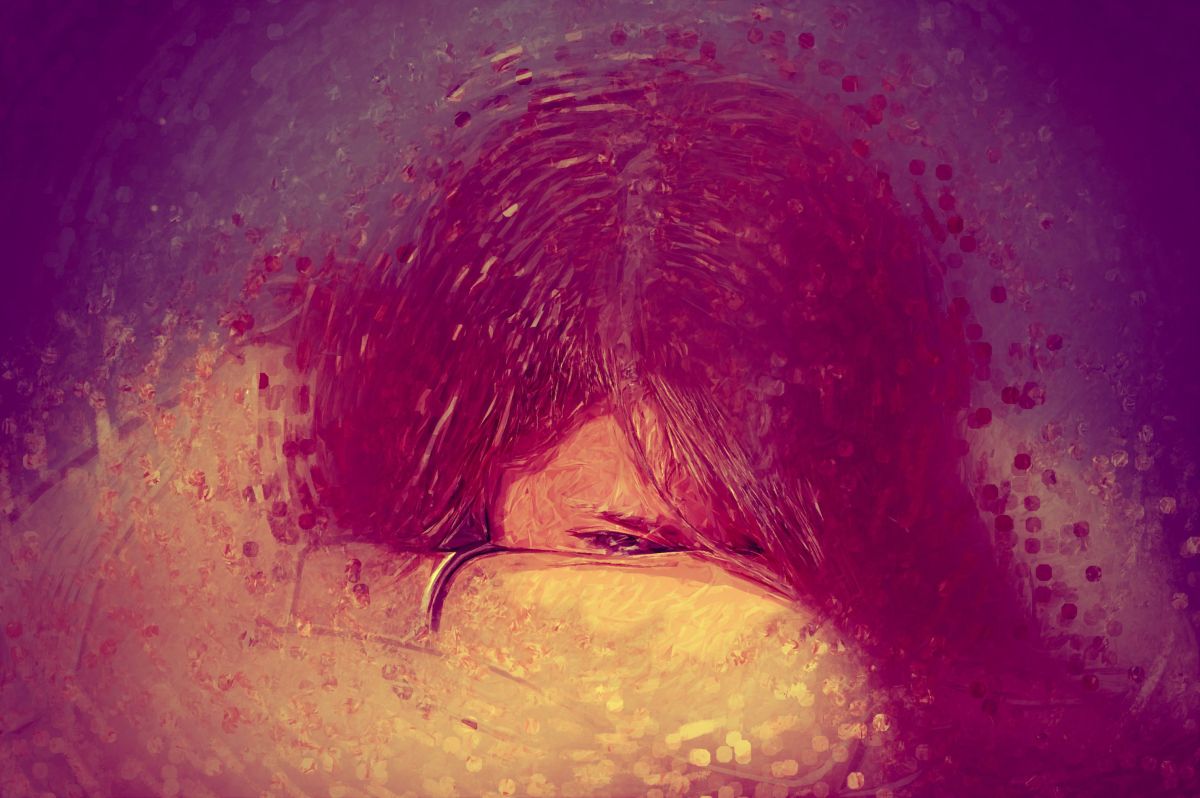
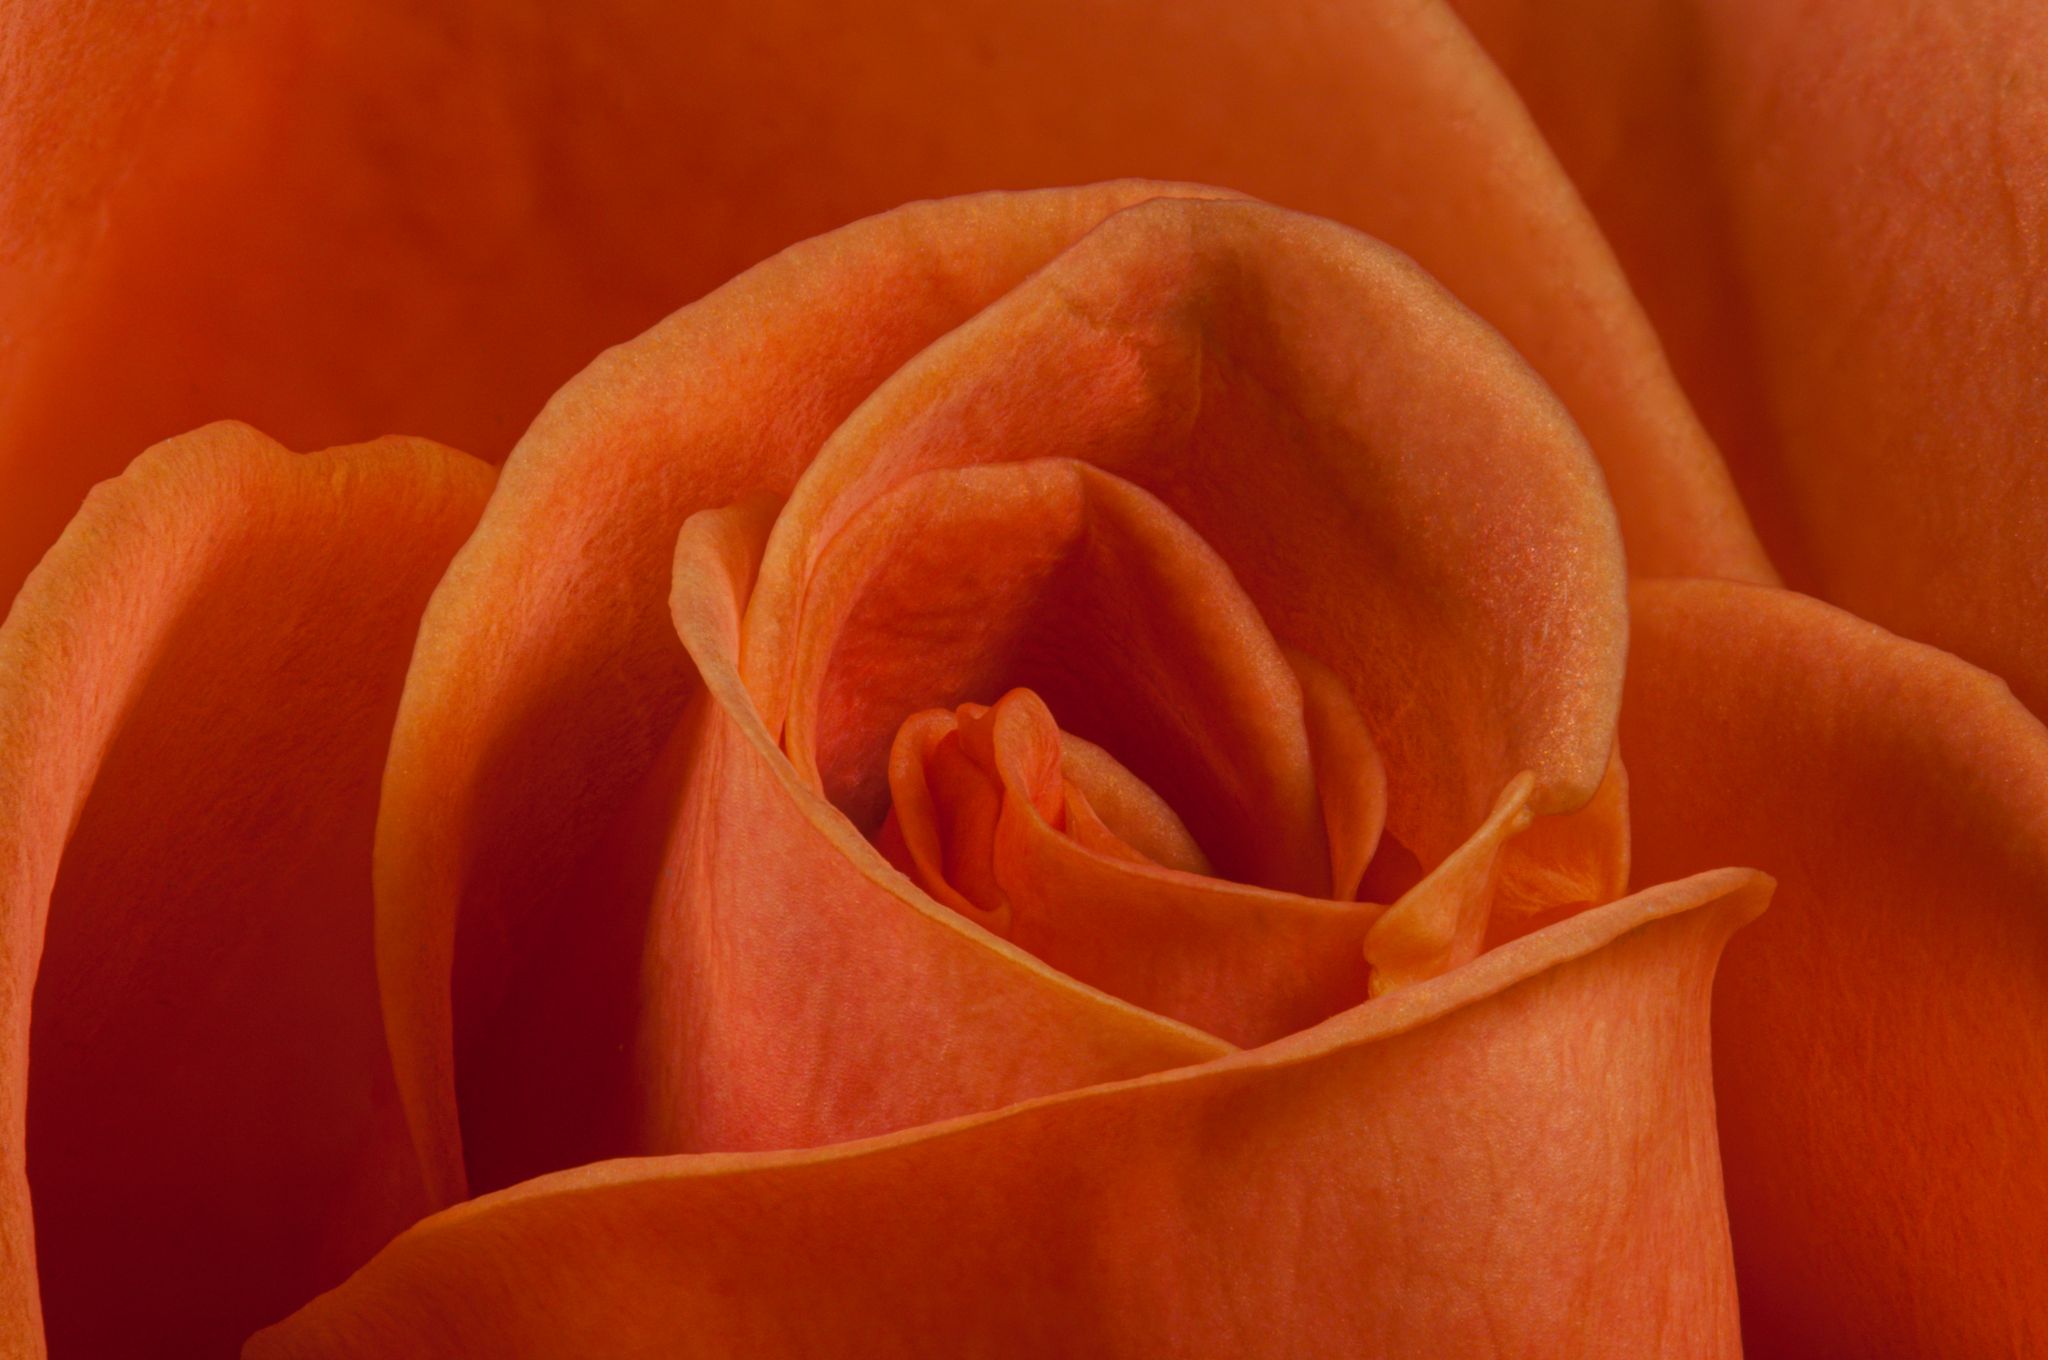
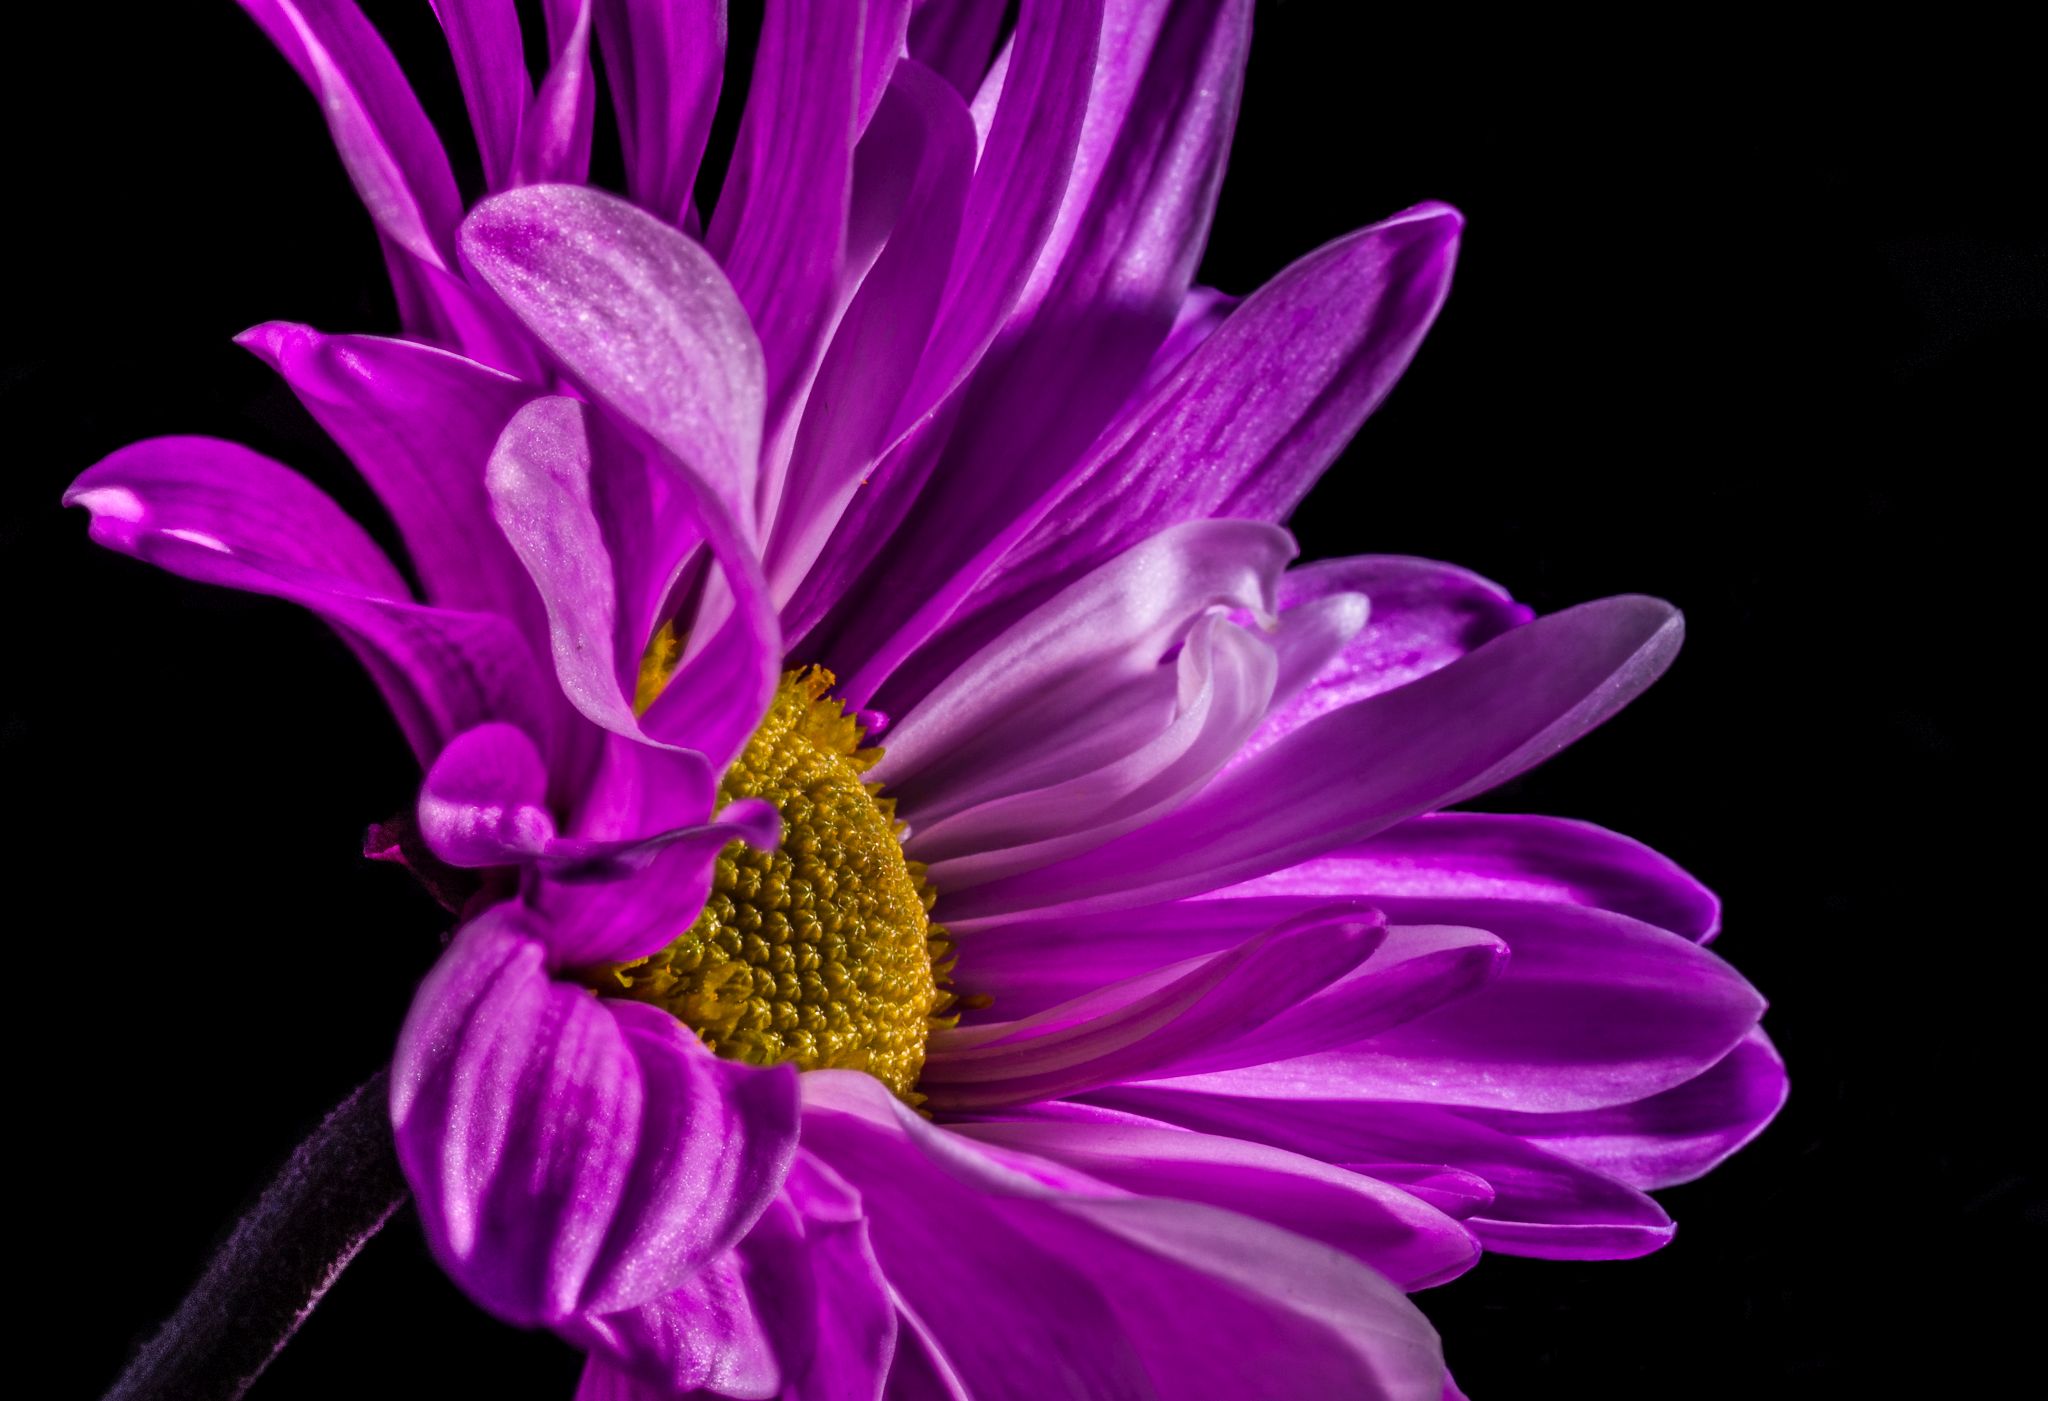
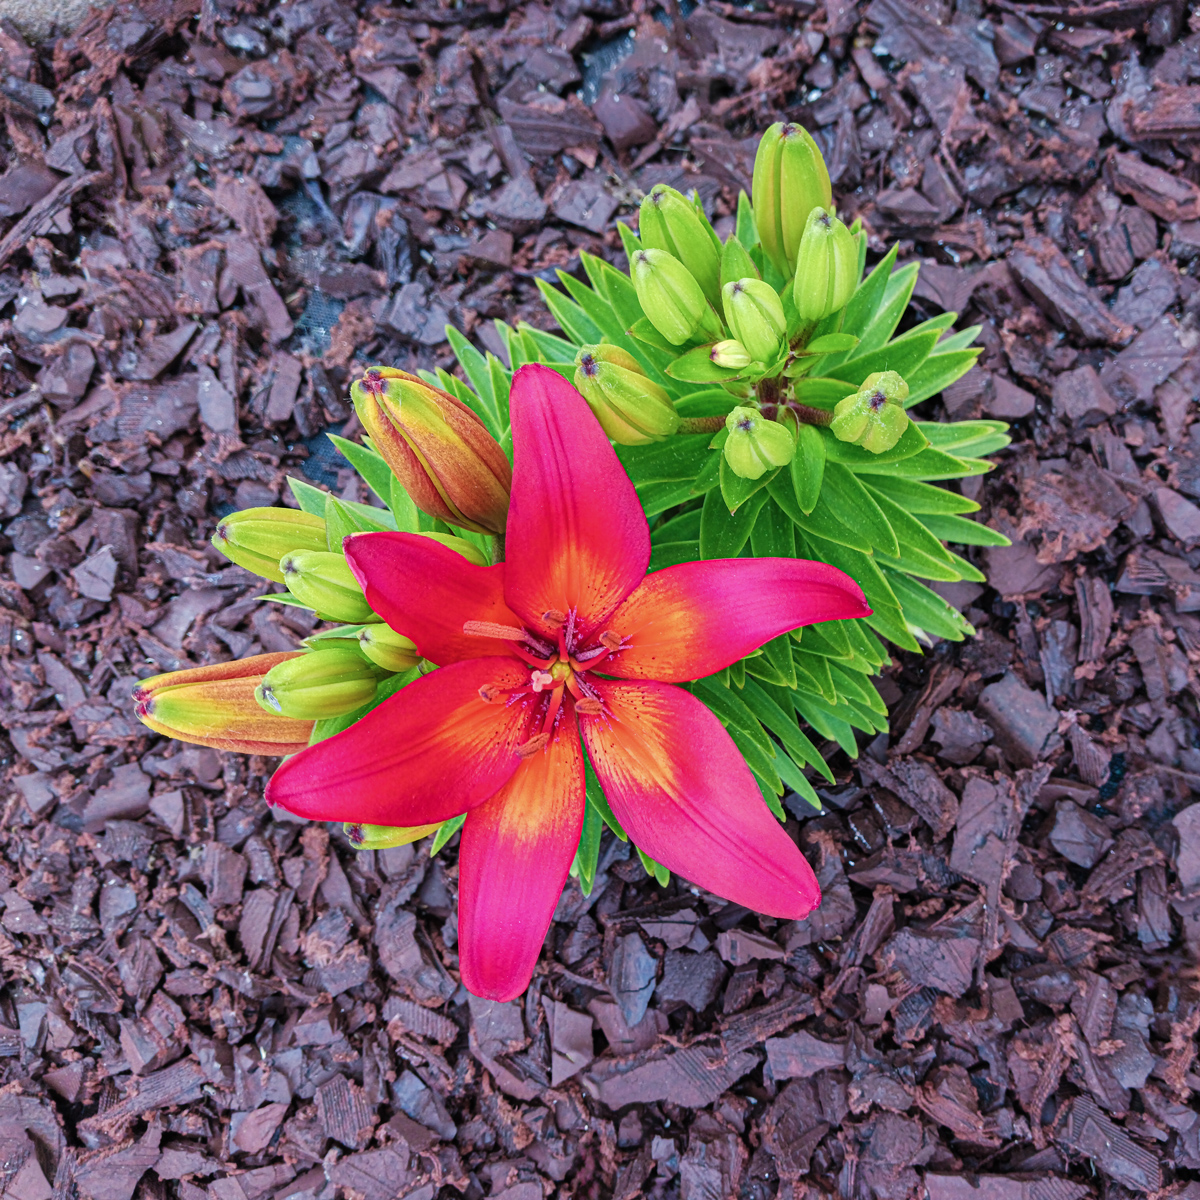
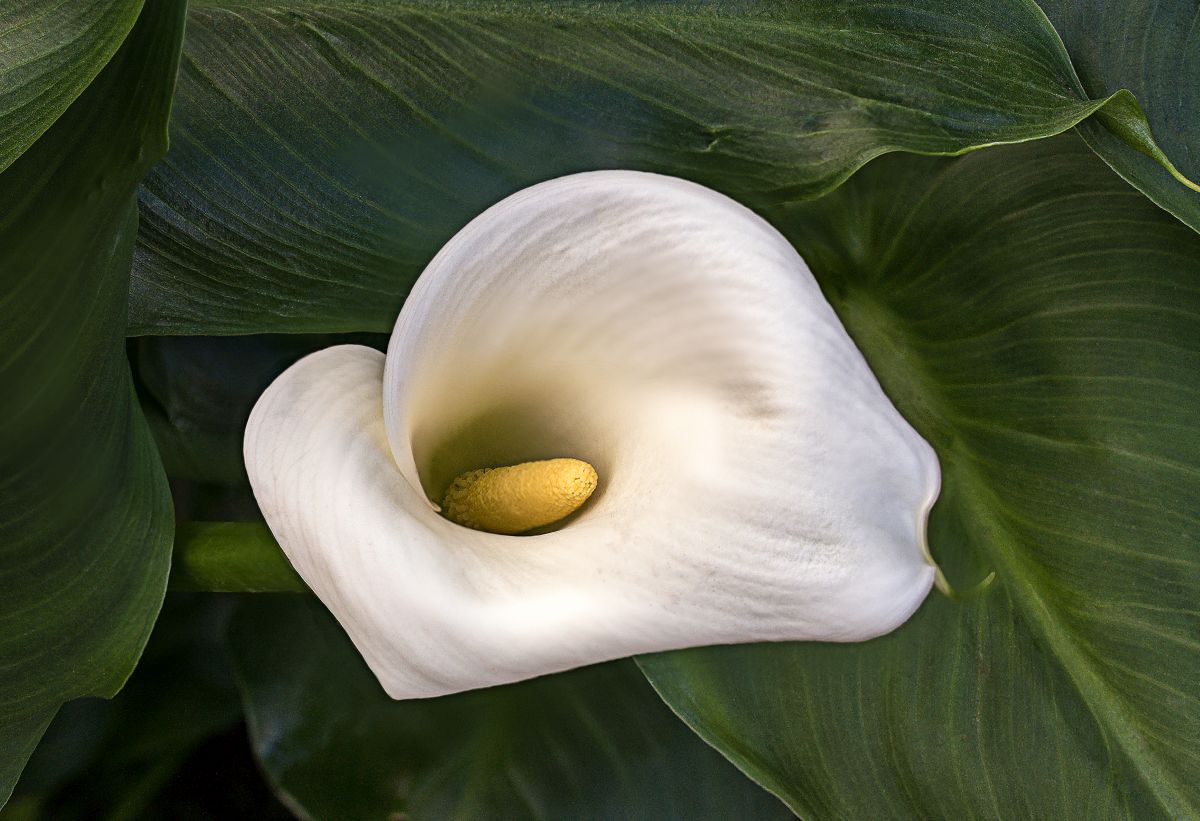
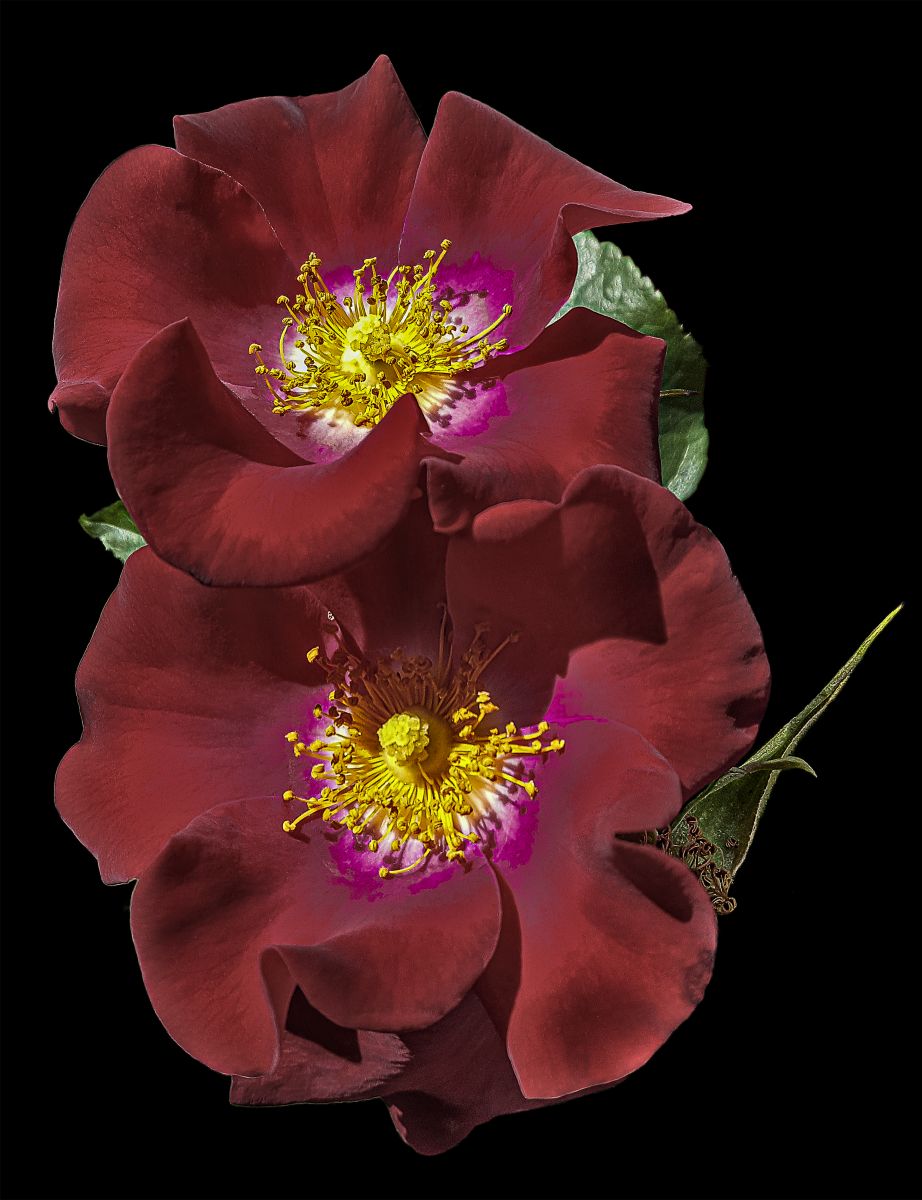
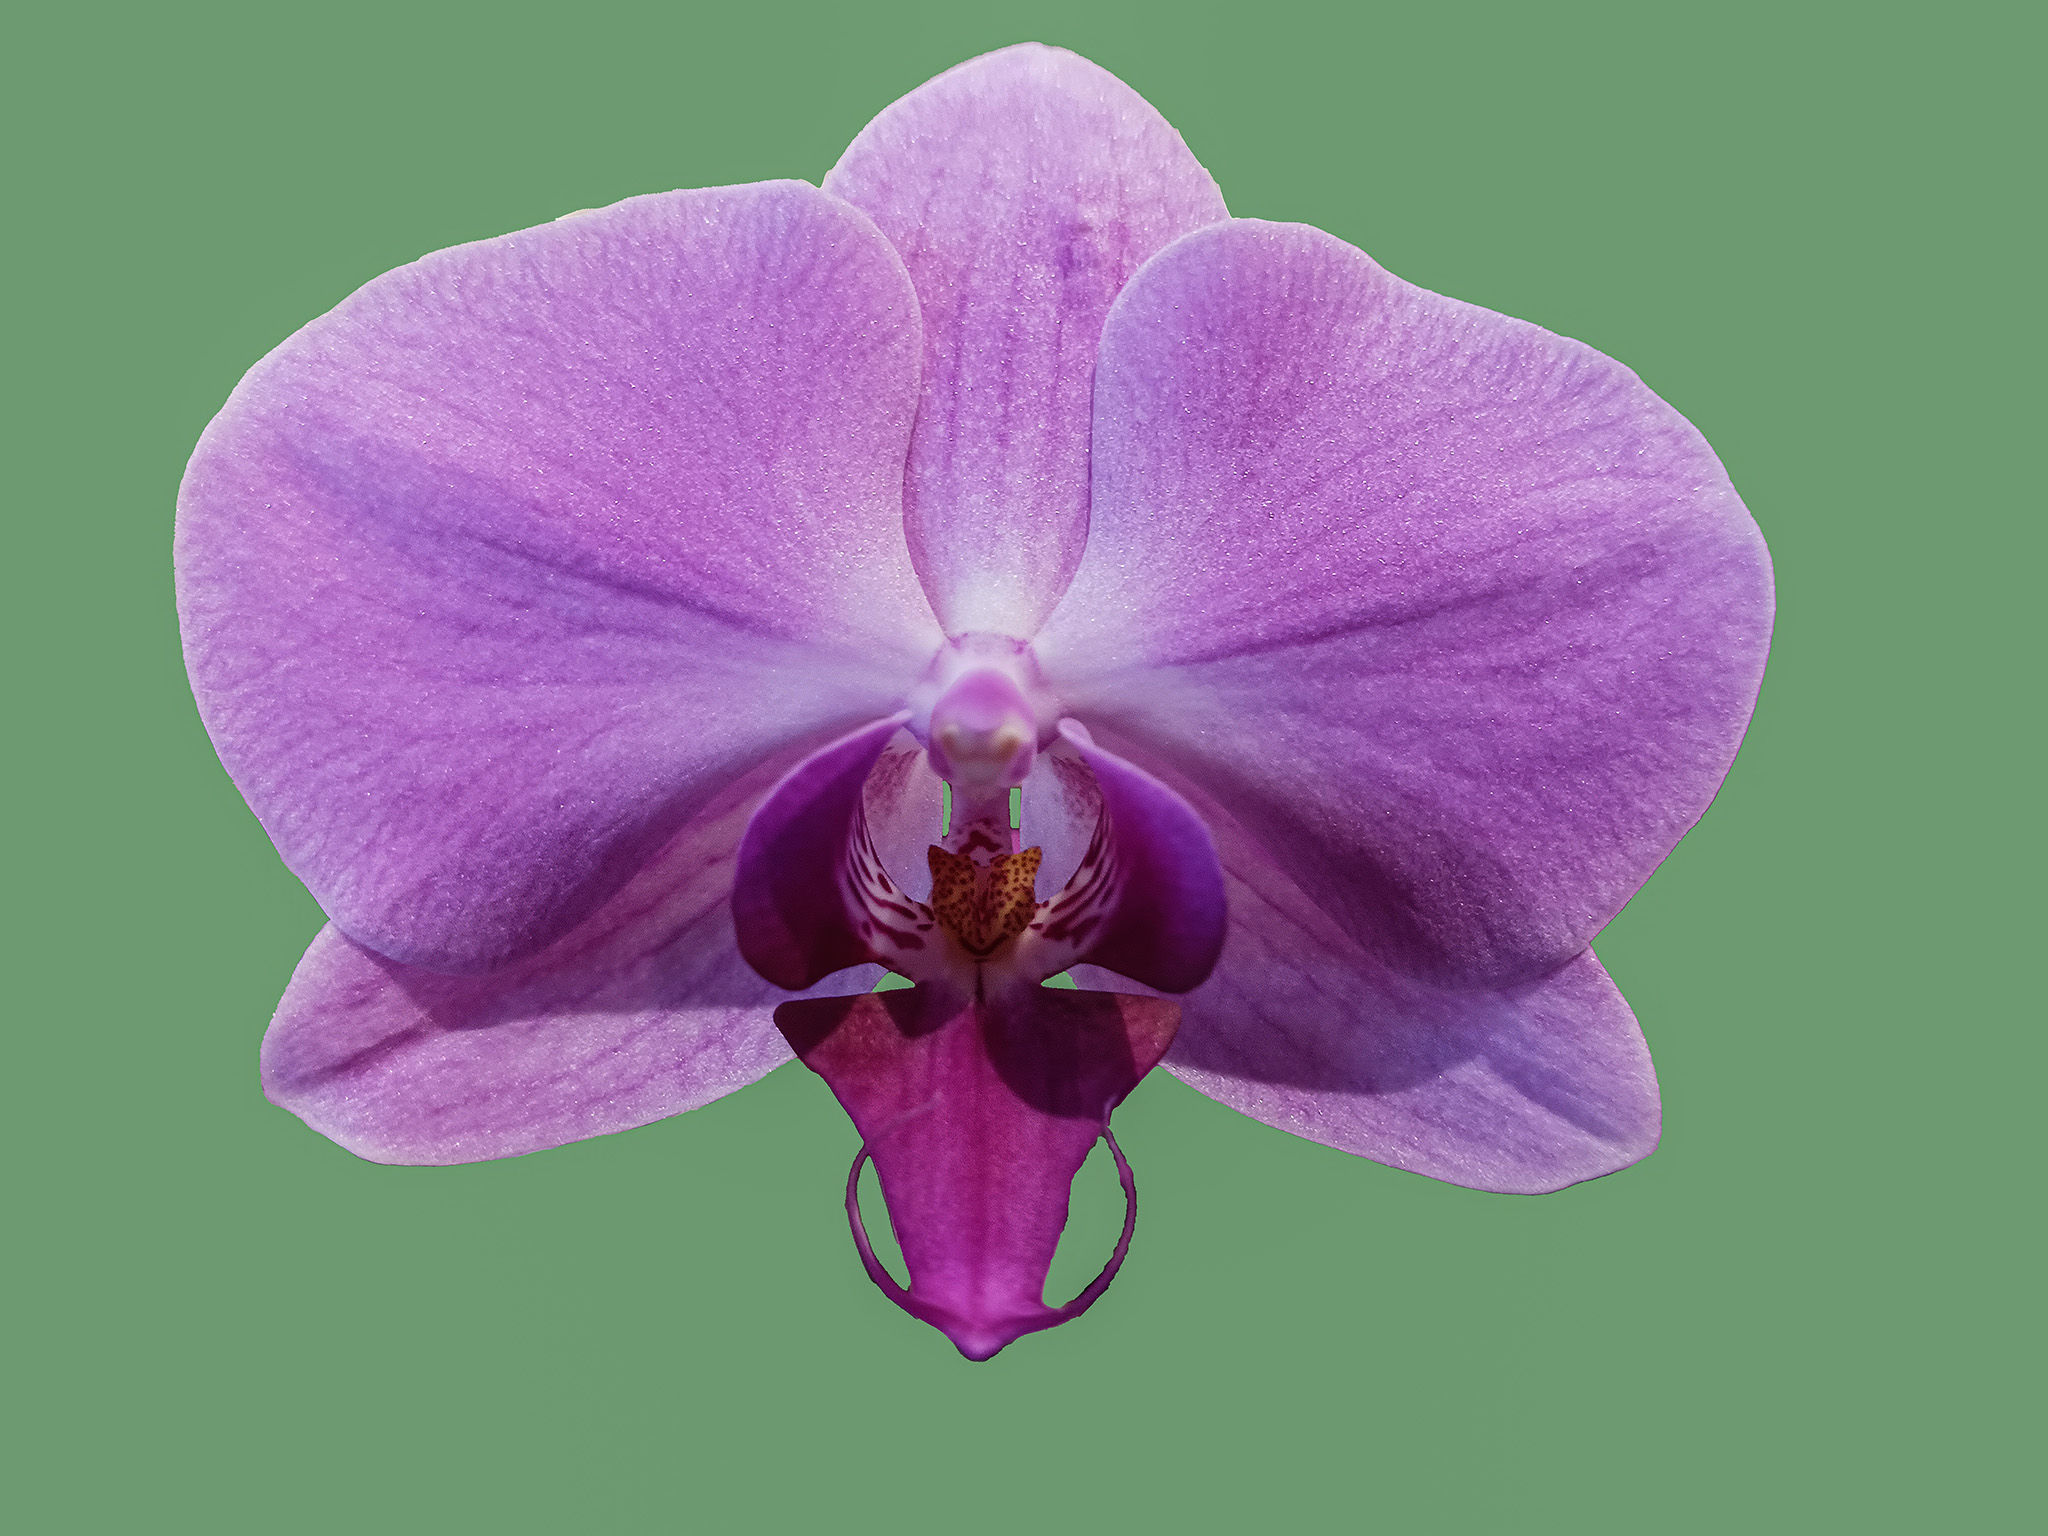
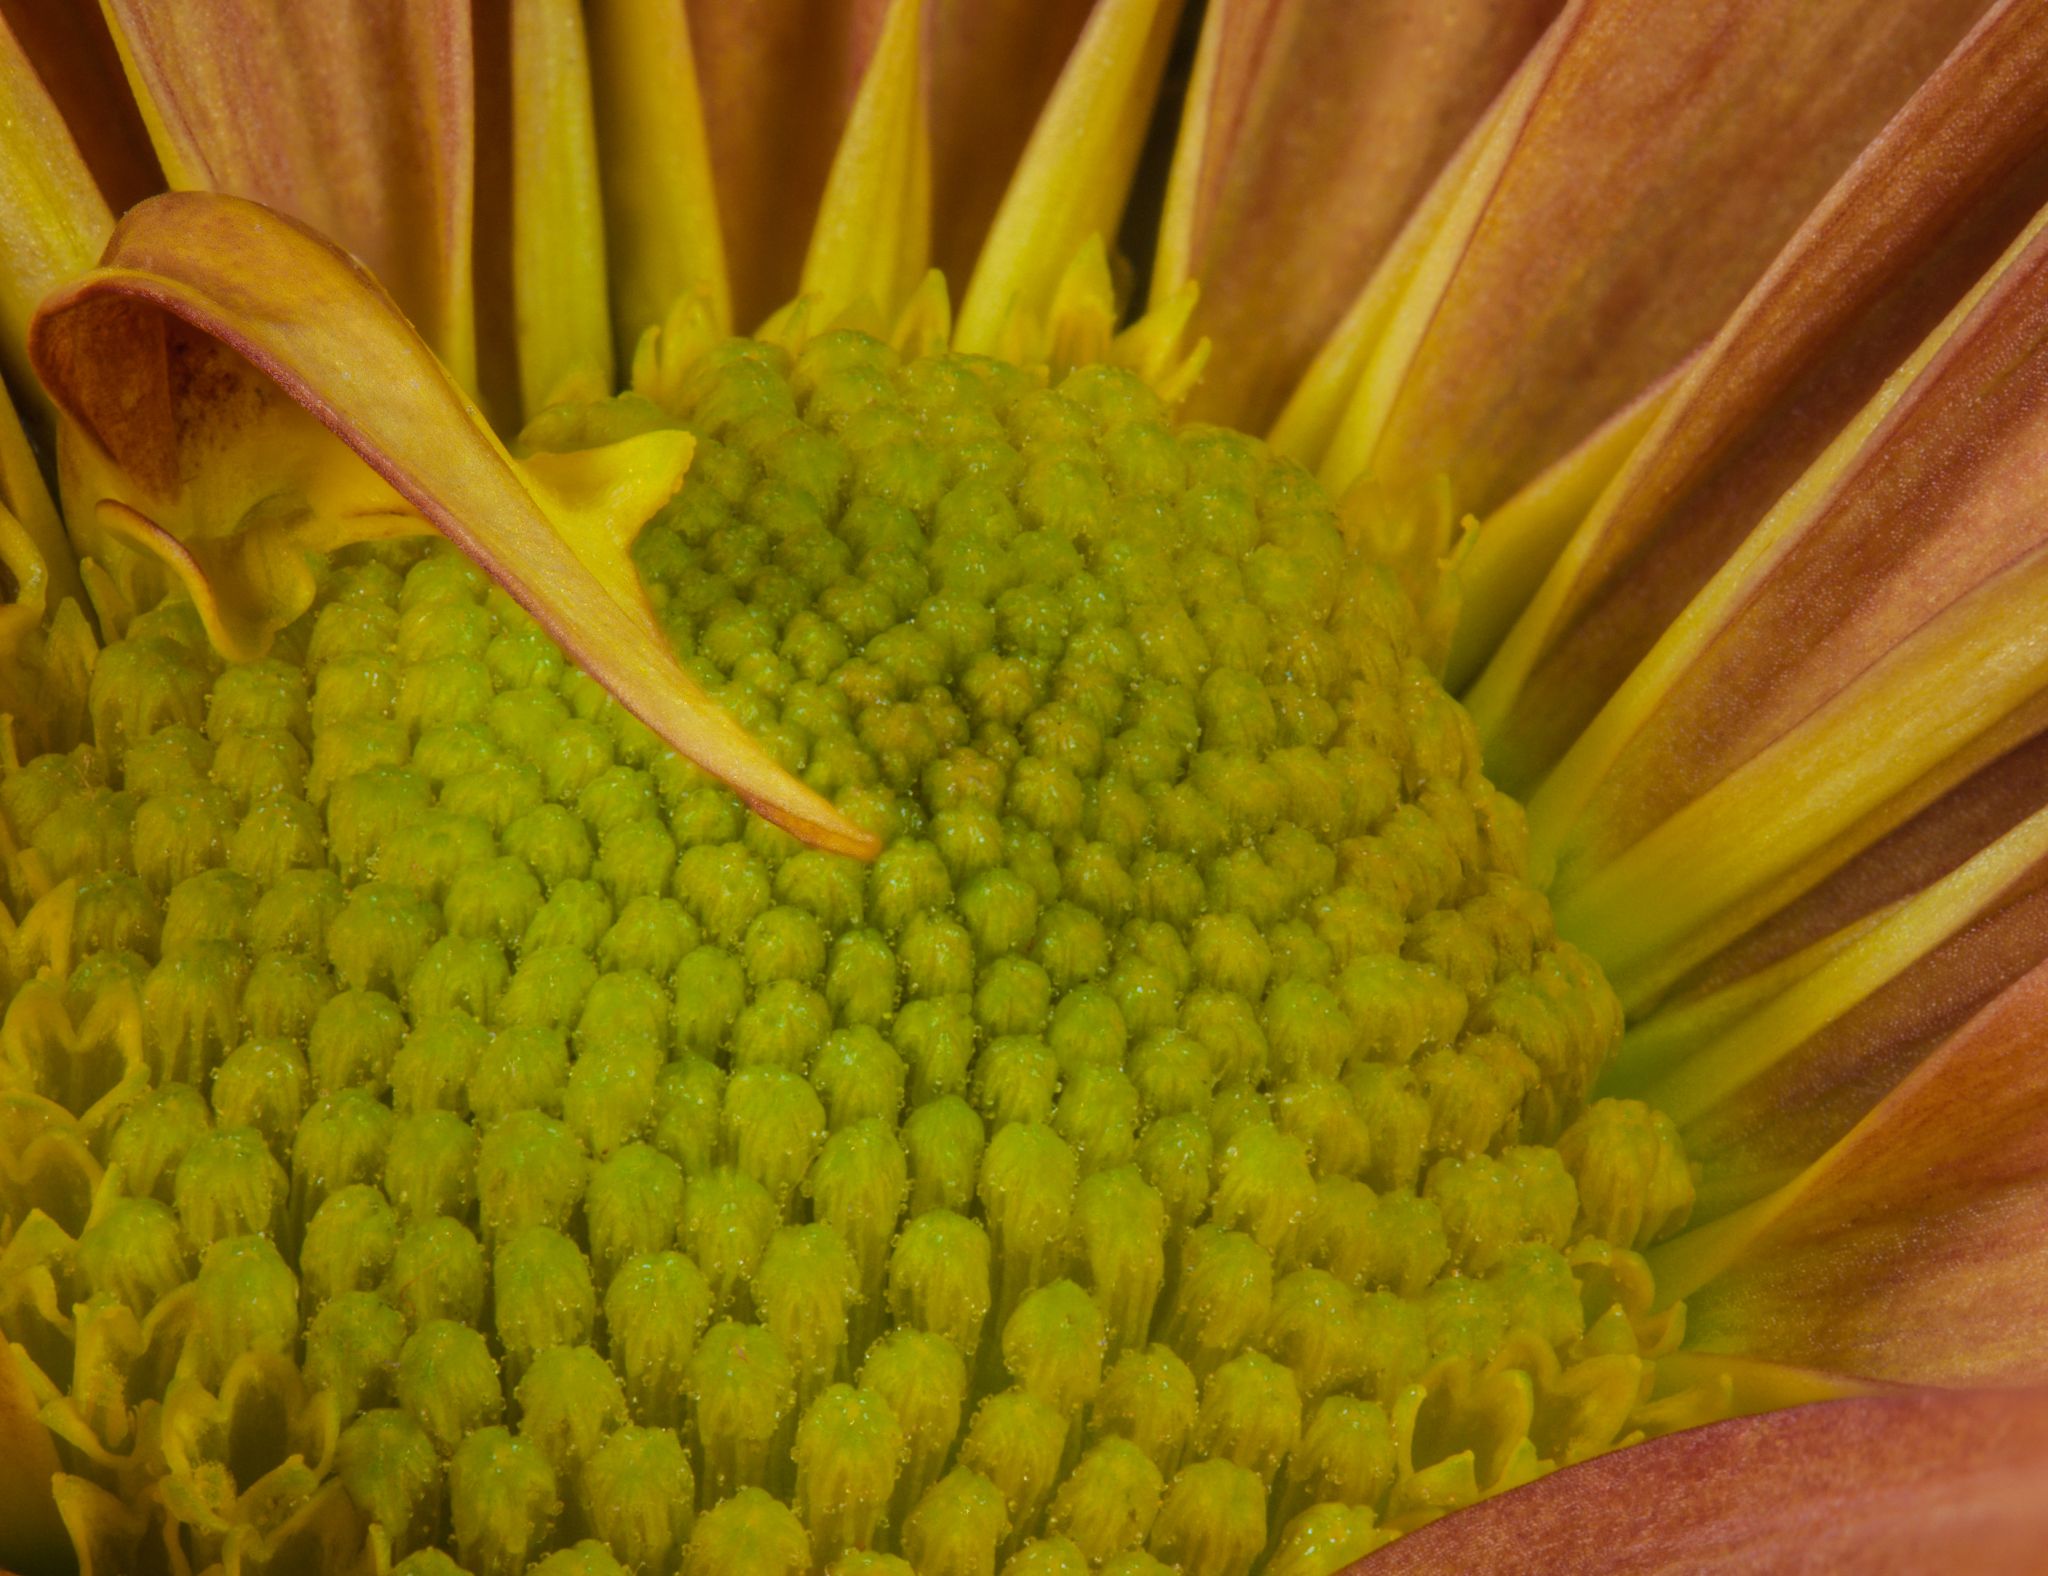
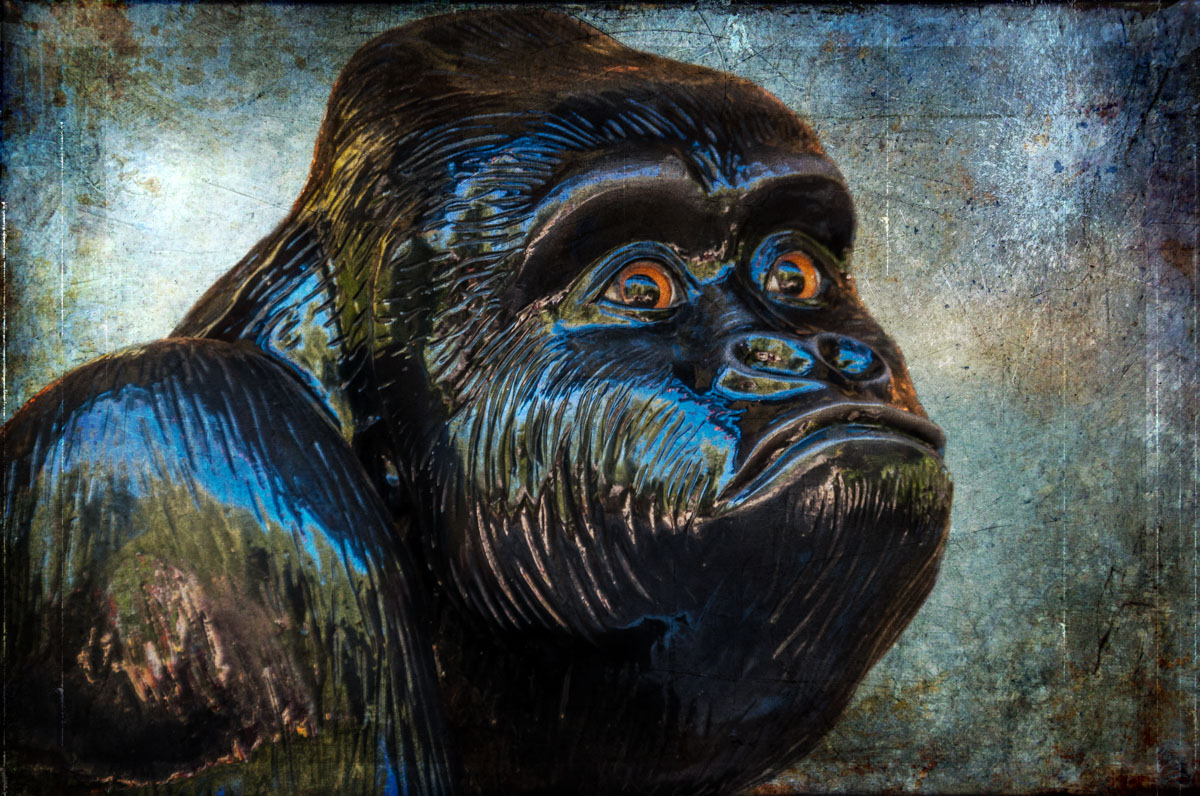
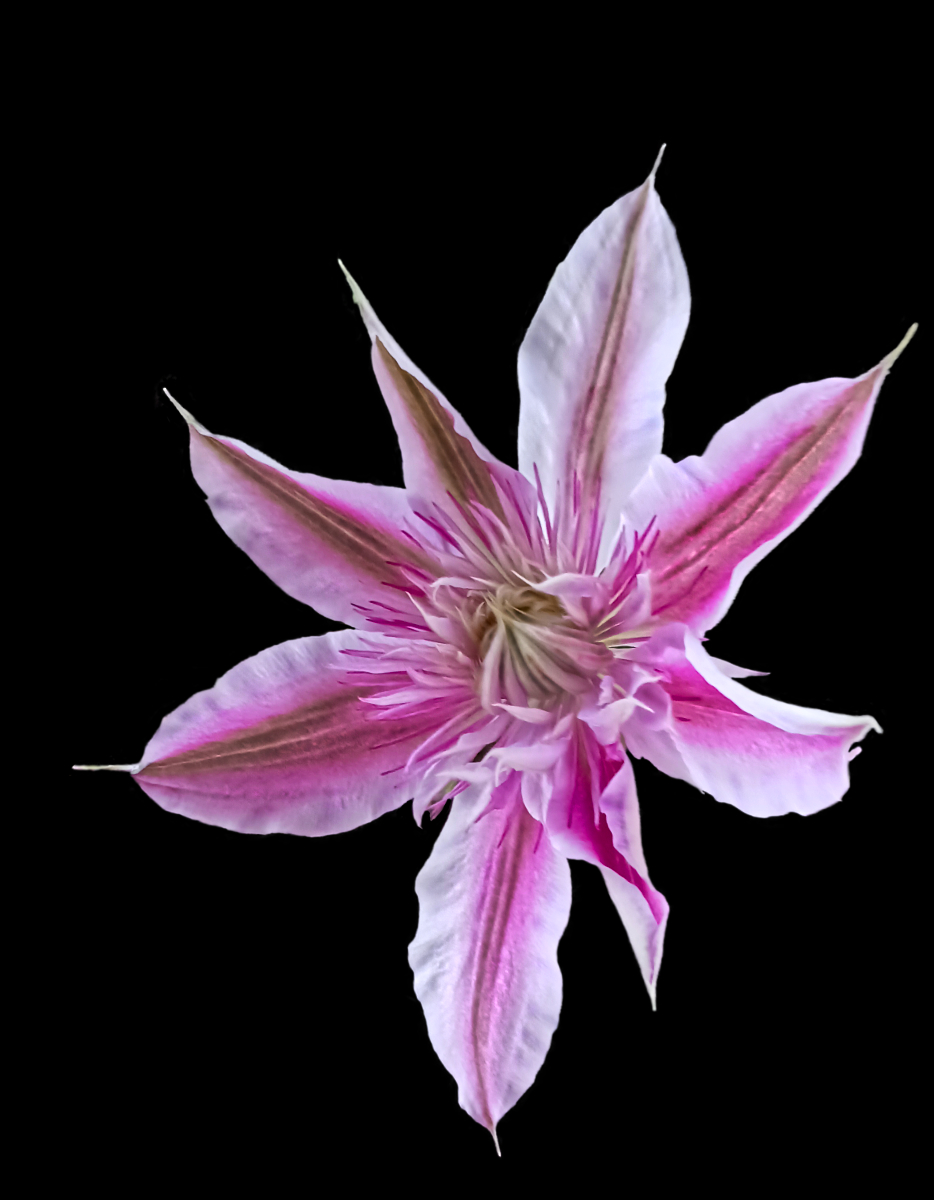
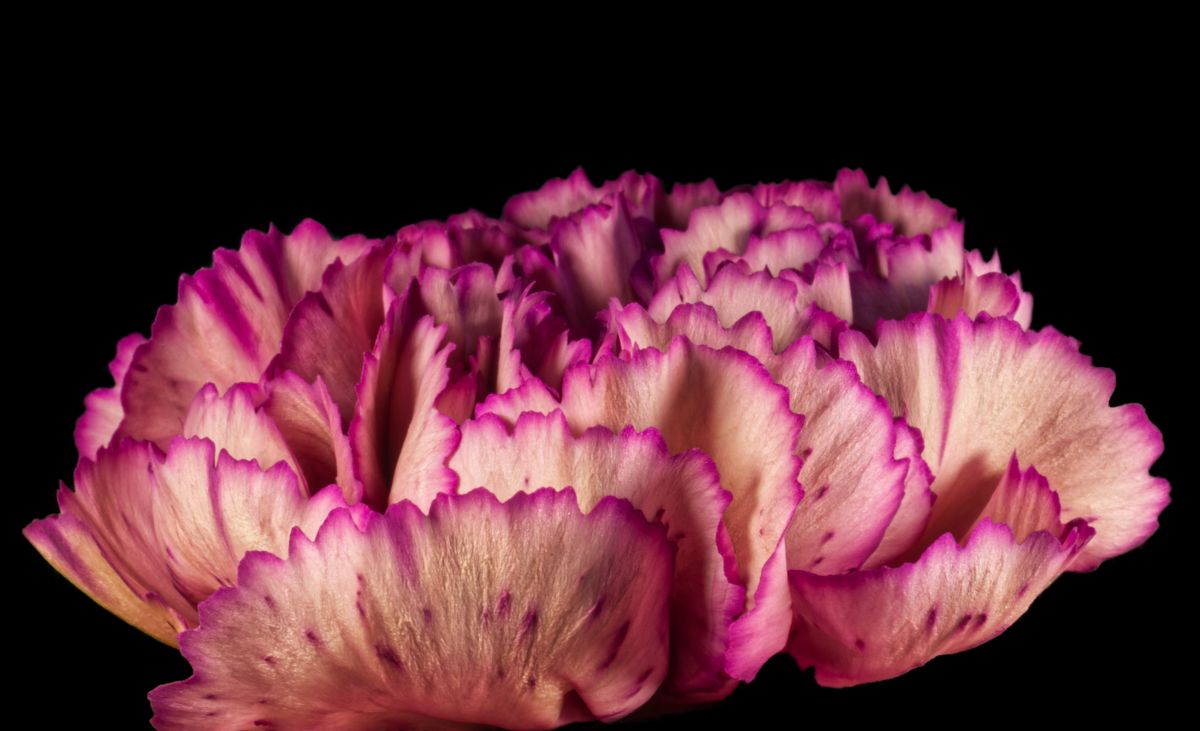
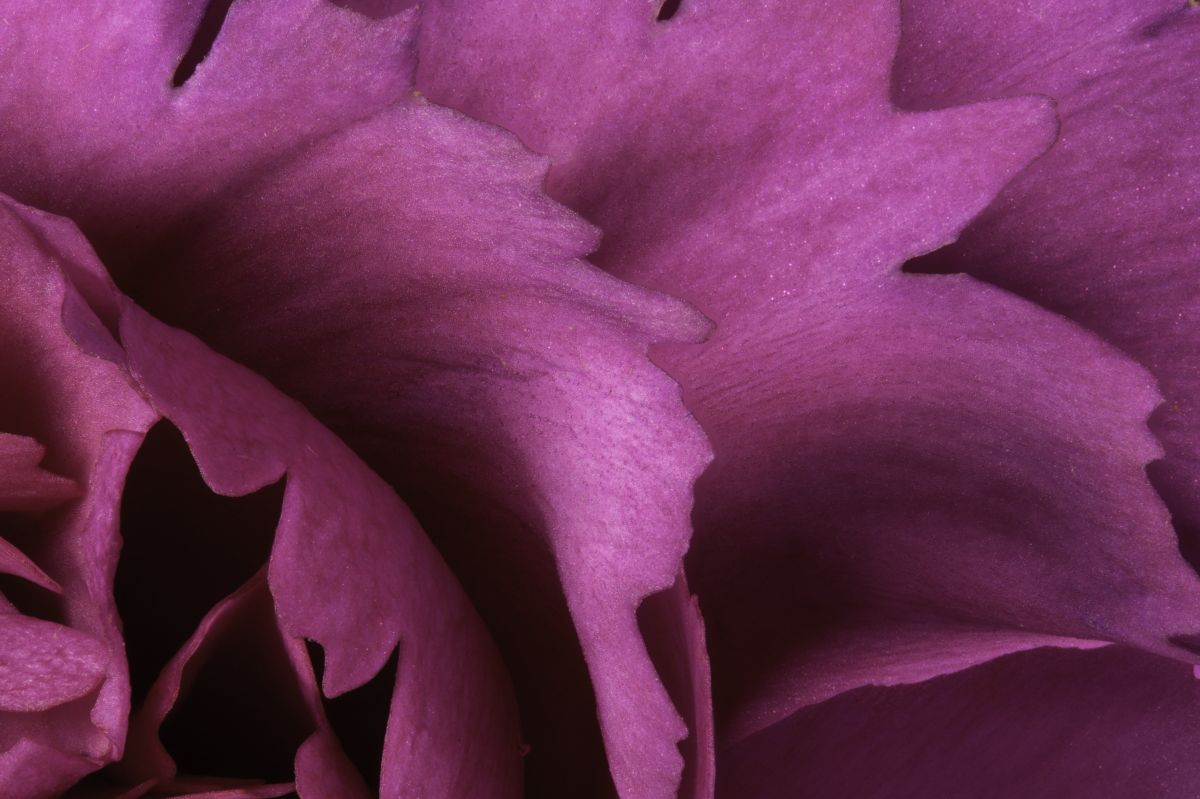
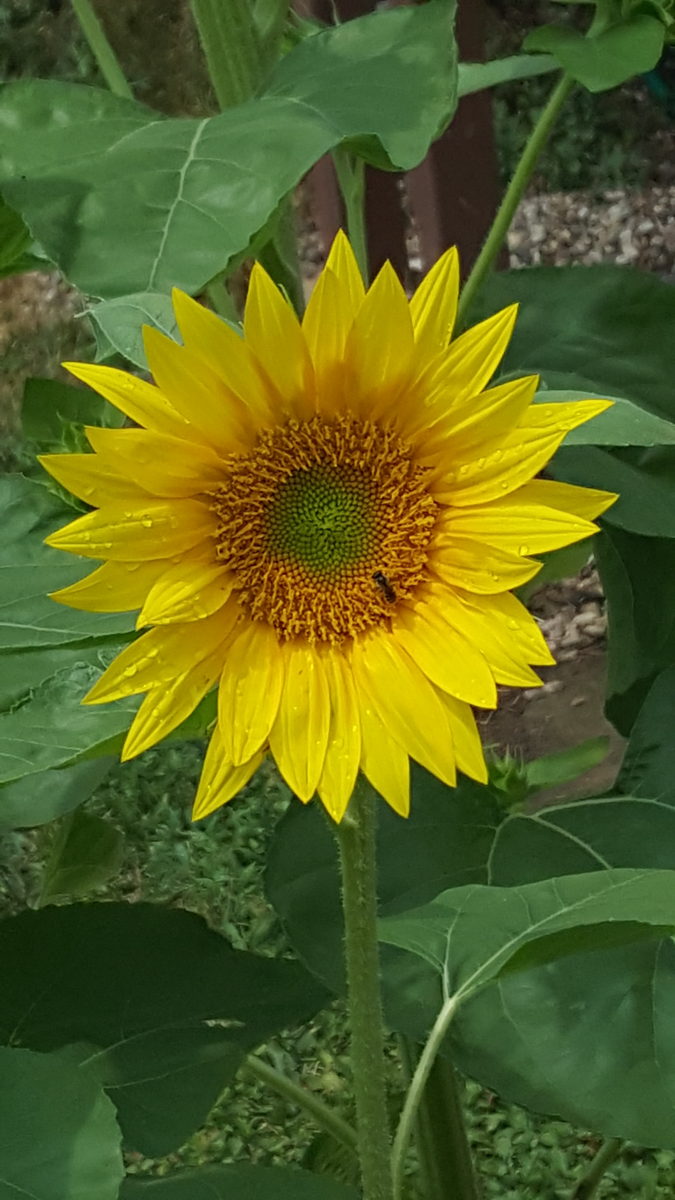
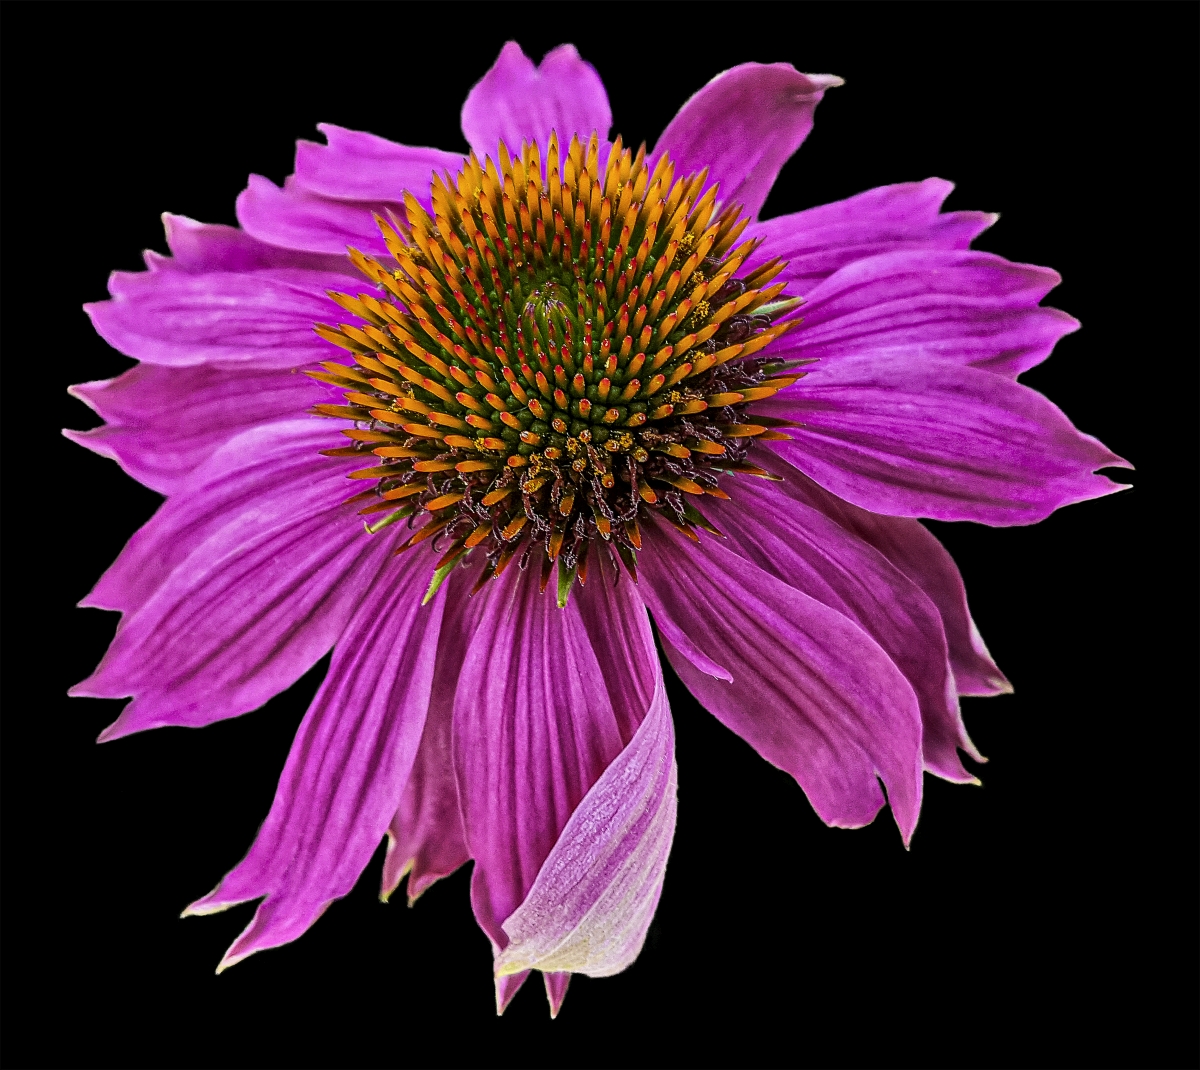
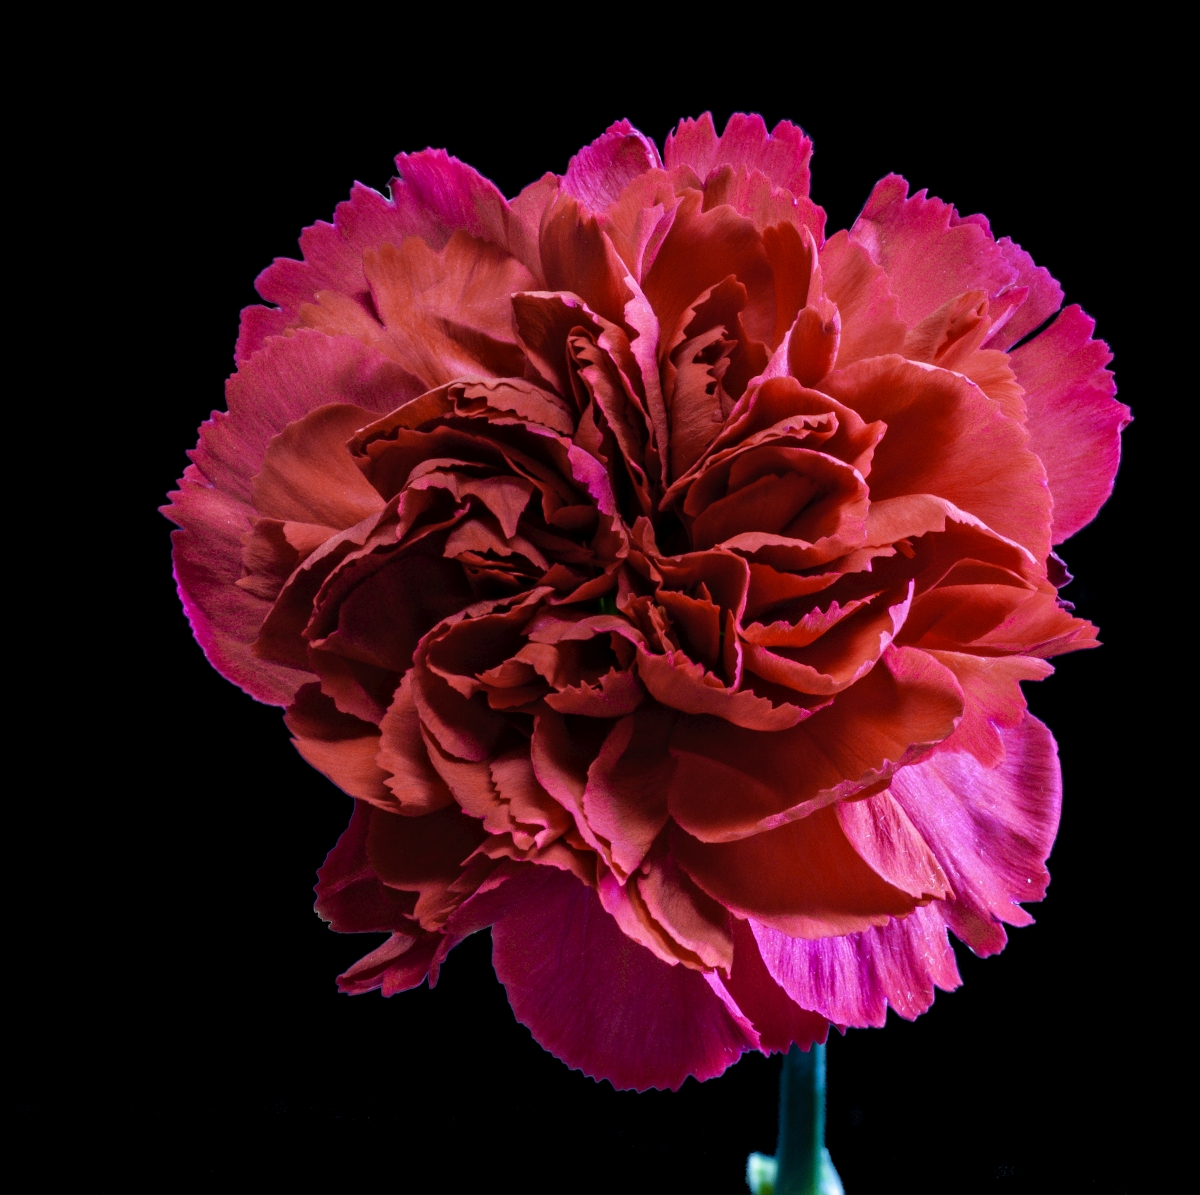
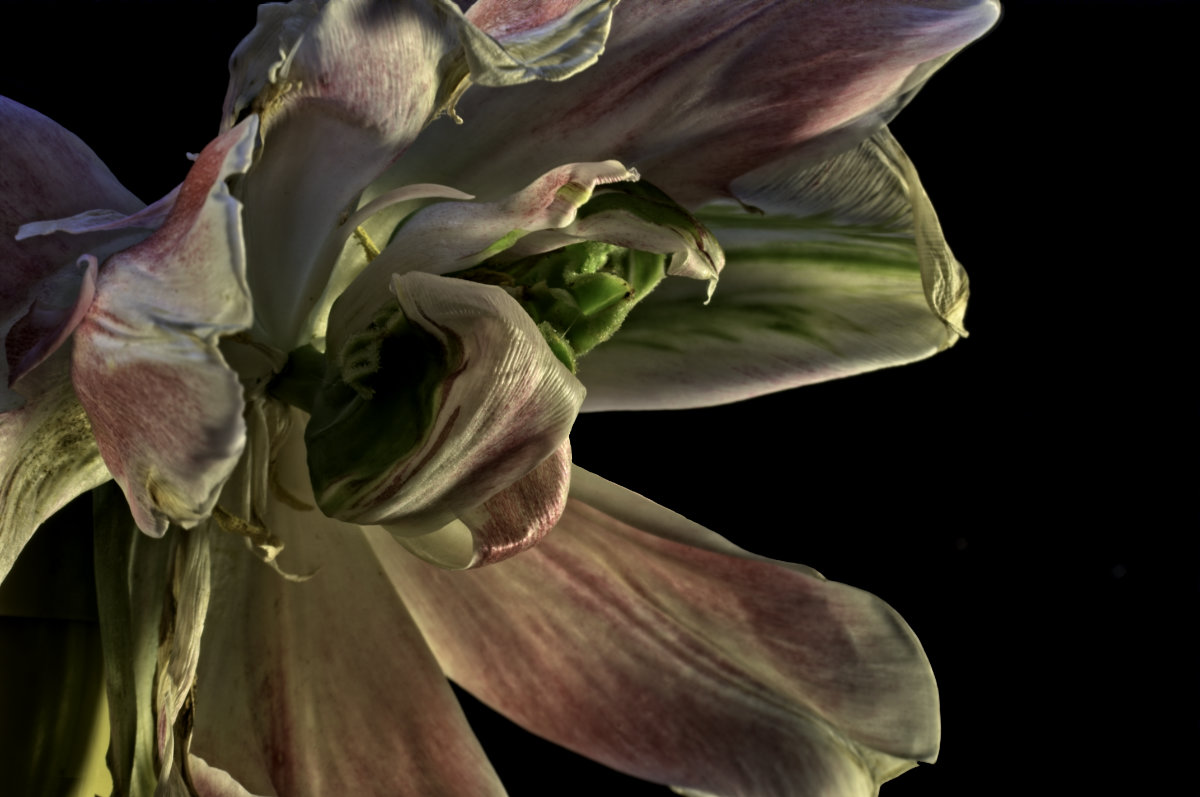
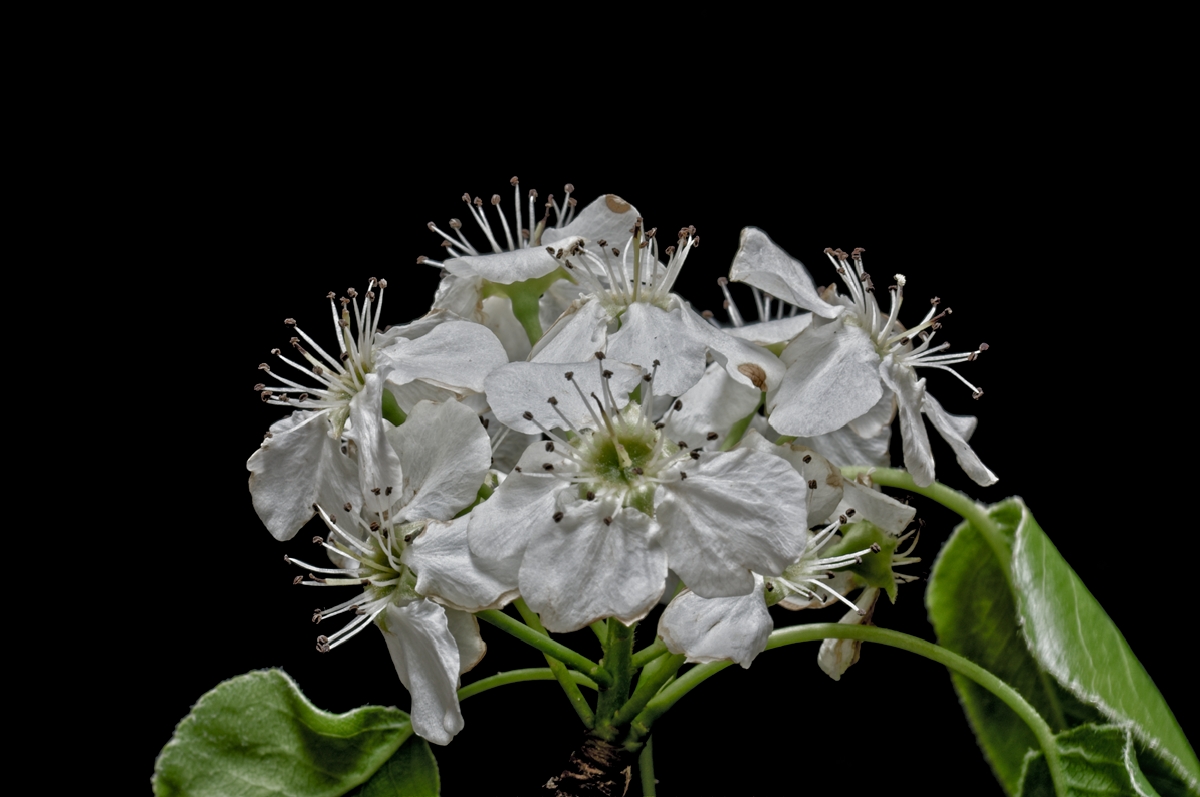
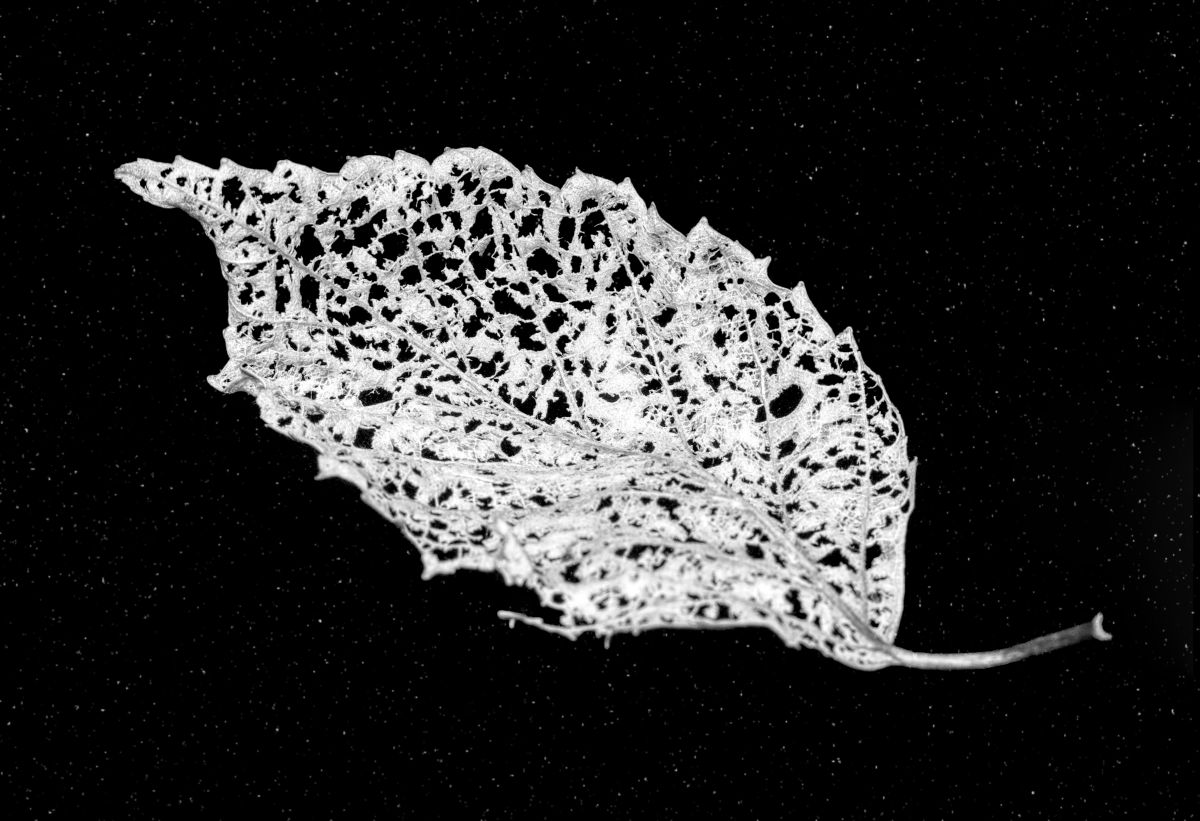
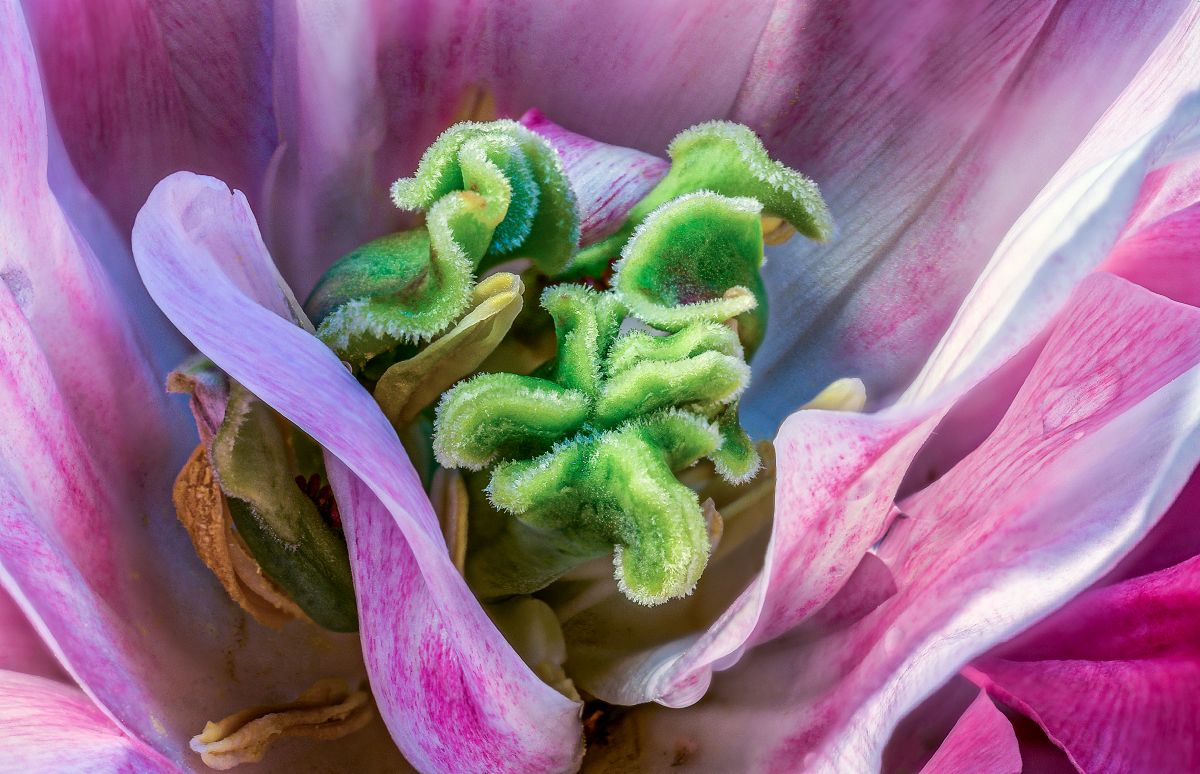
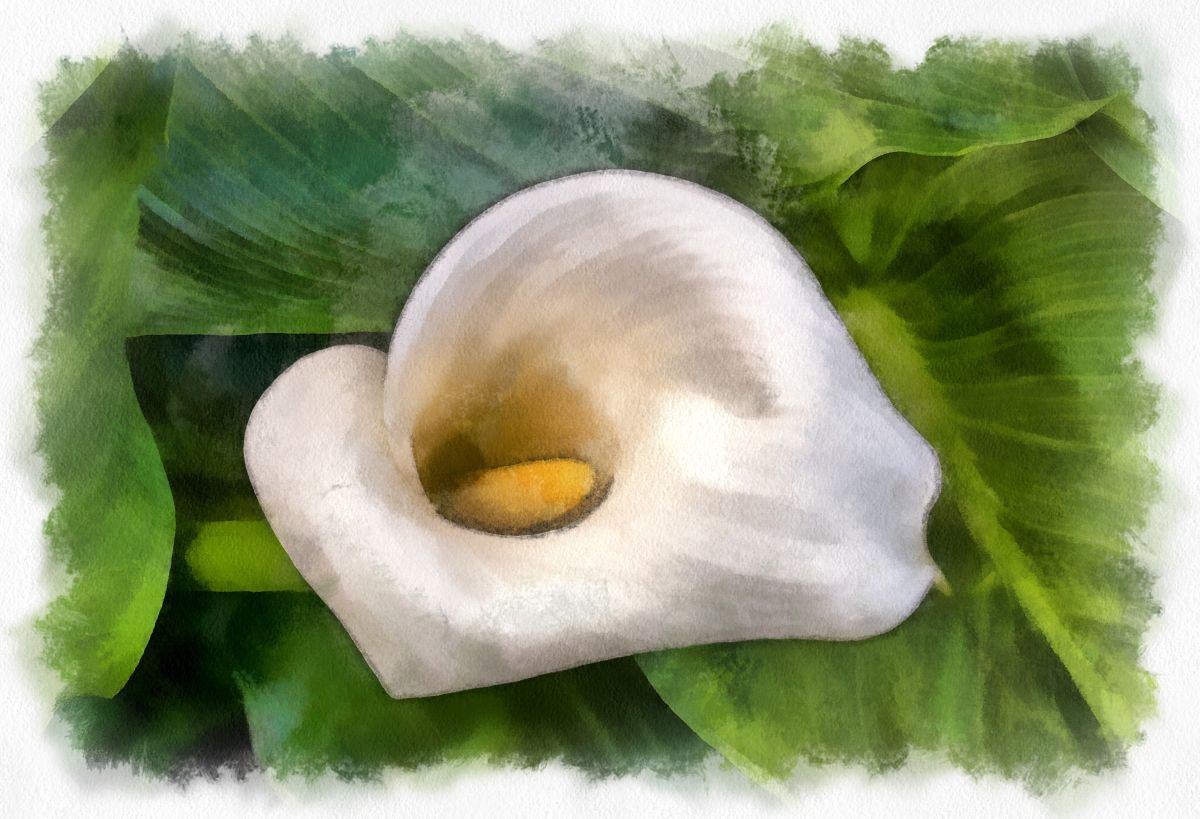
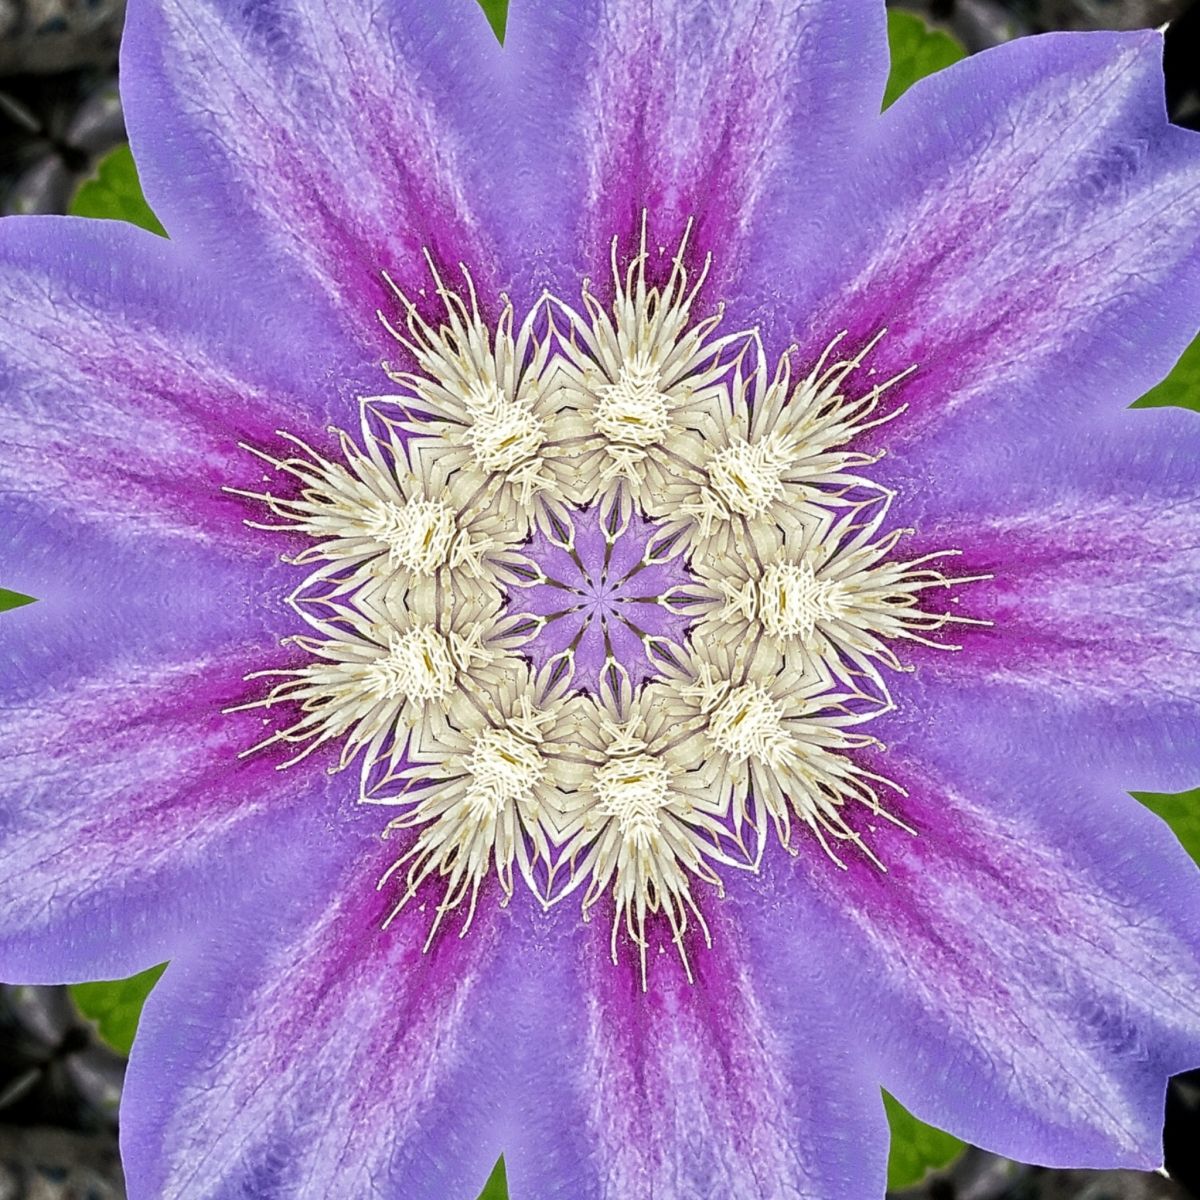
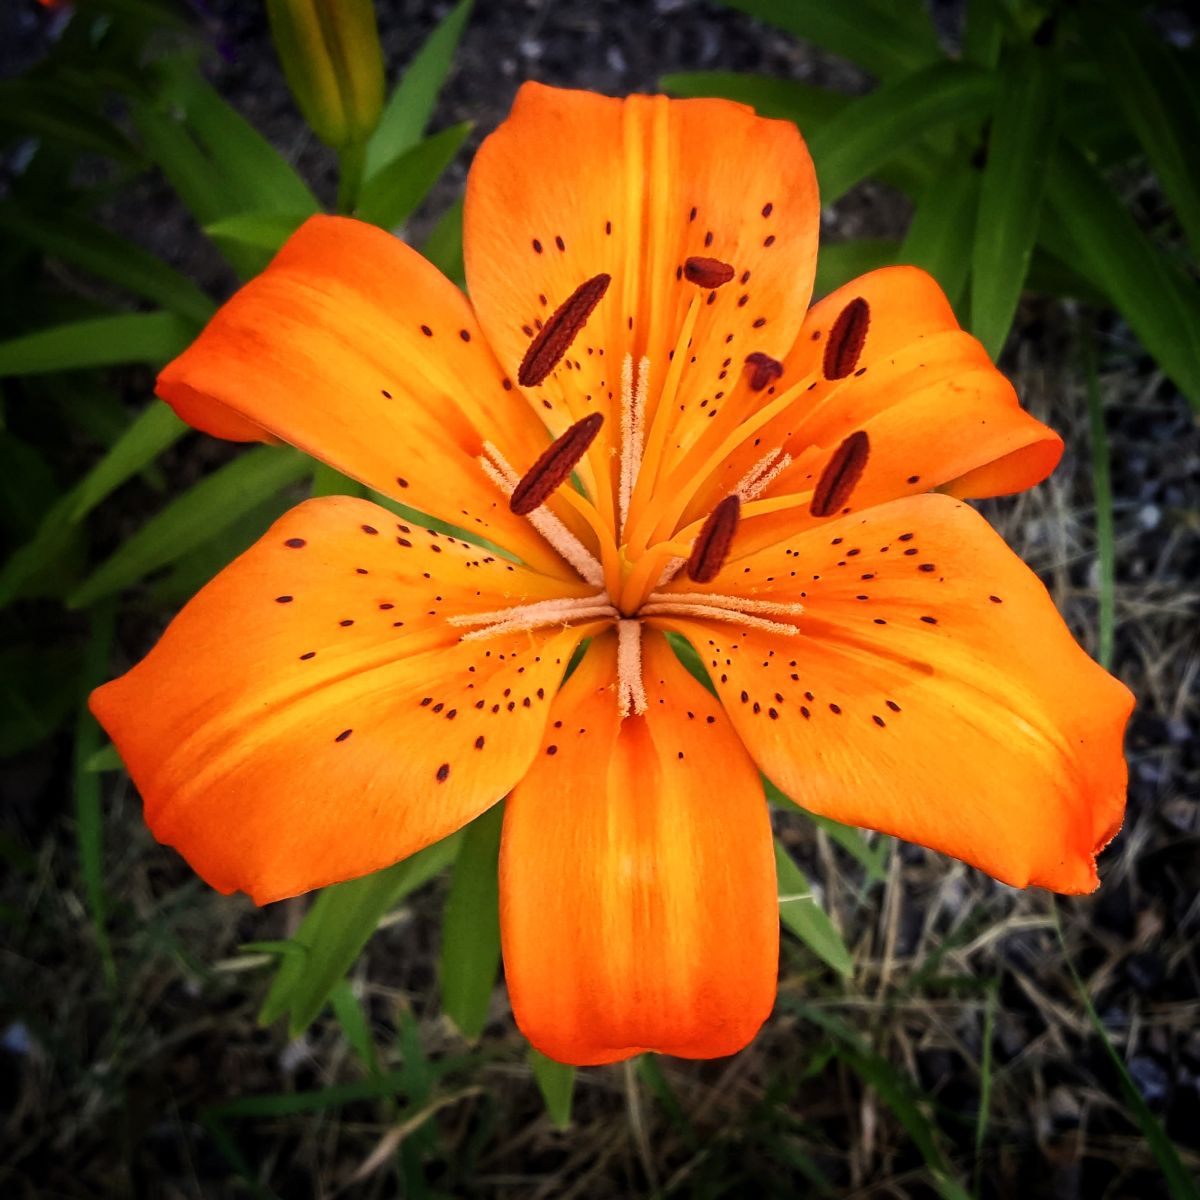
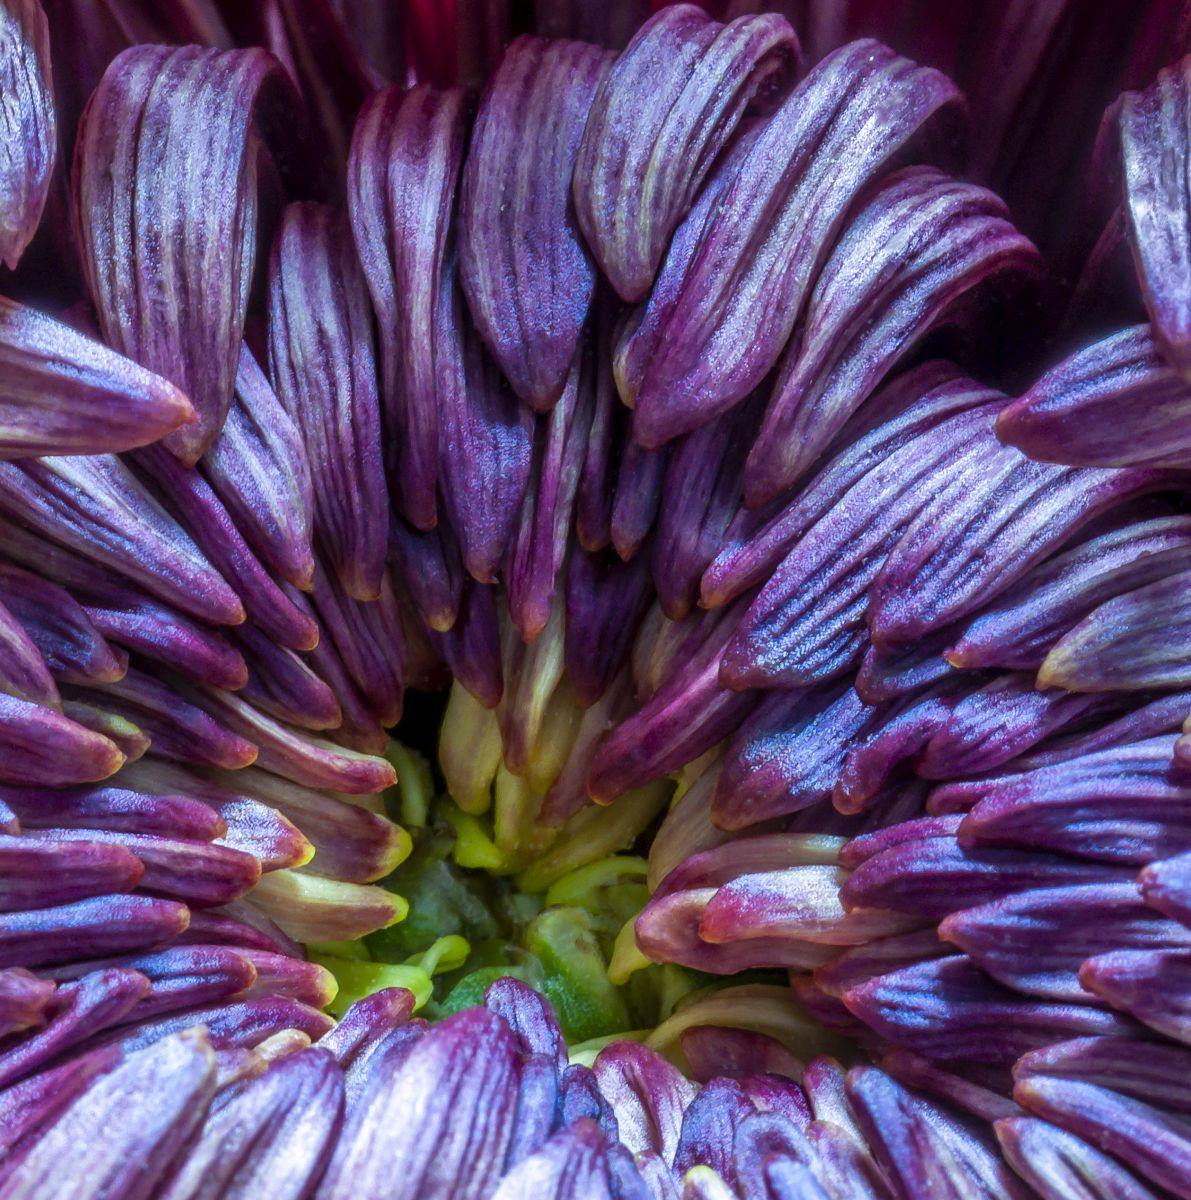
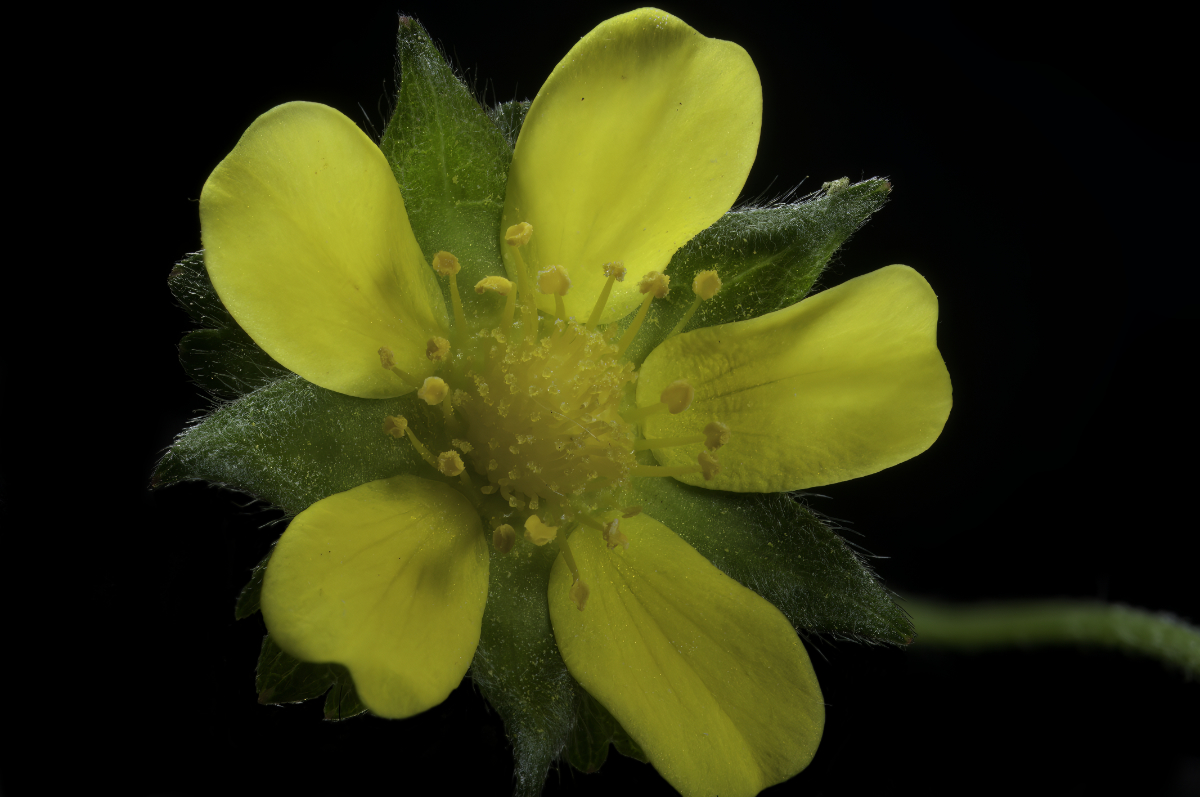
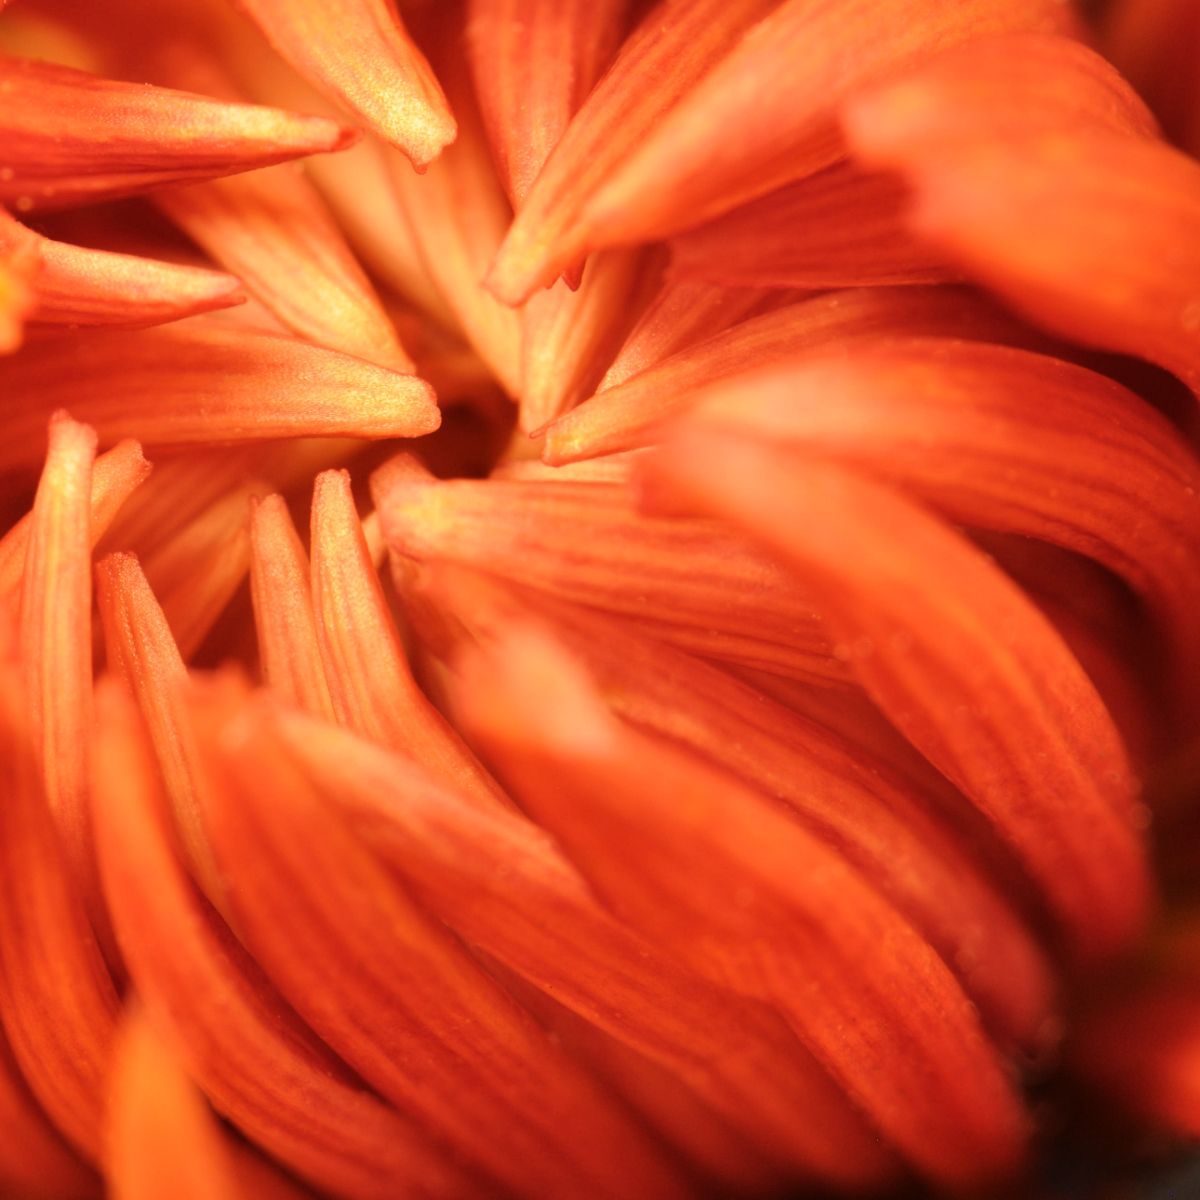
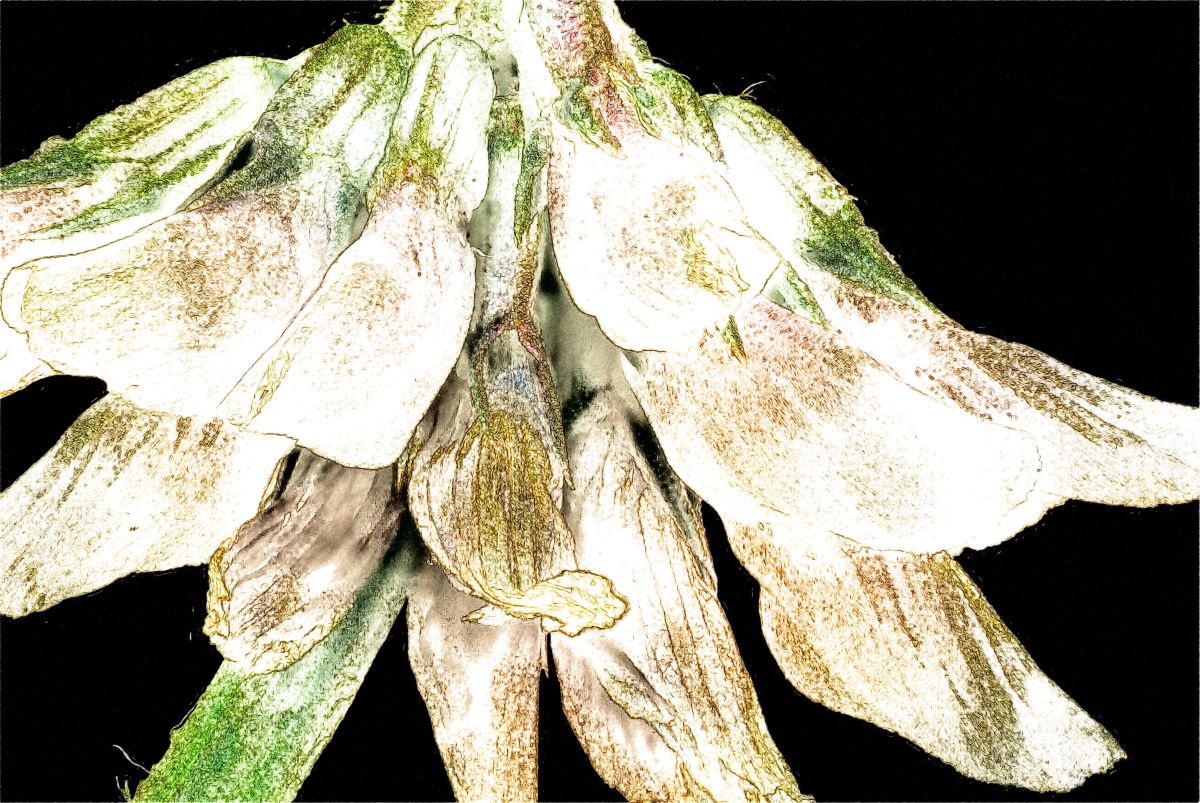
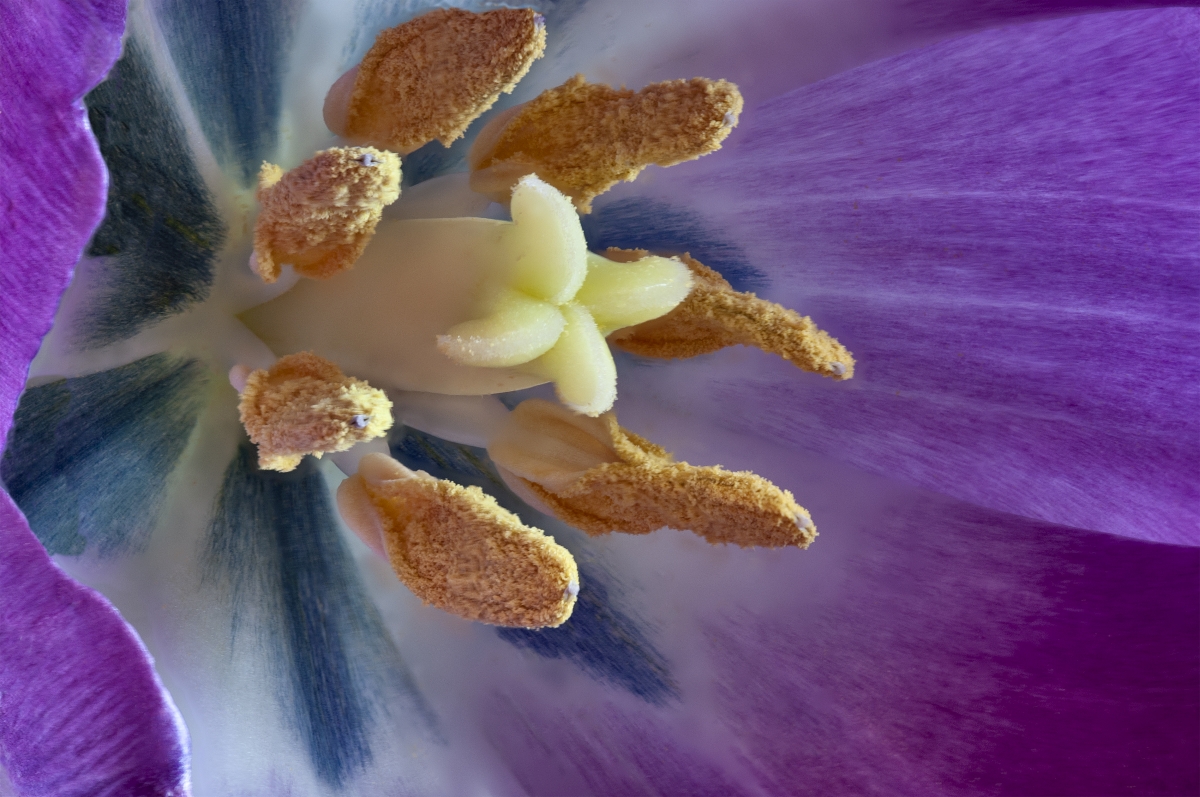
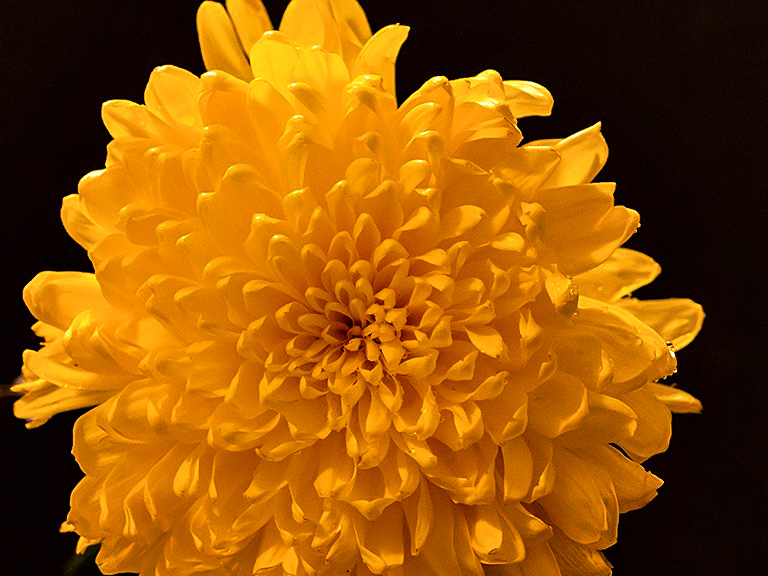
Lovely image, Henry. You probably know that I'm all-in with black backgrounds for flower images, whether they're mono or color - makes the flower the star of the image. Nice post work! |
May 18th |
| 11 |
May 20 |
Comment |
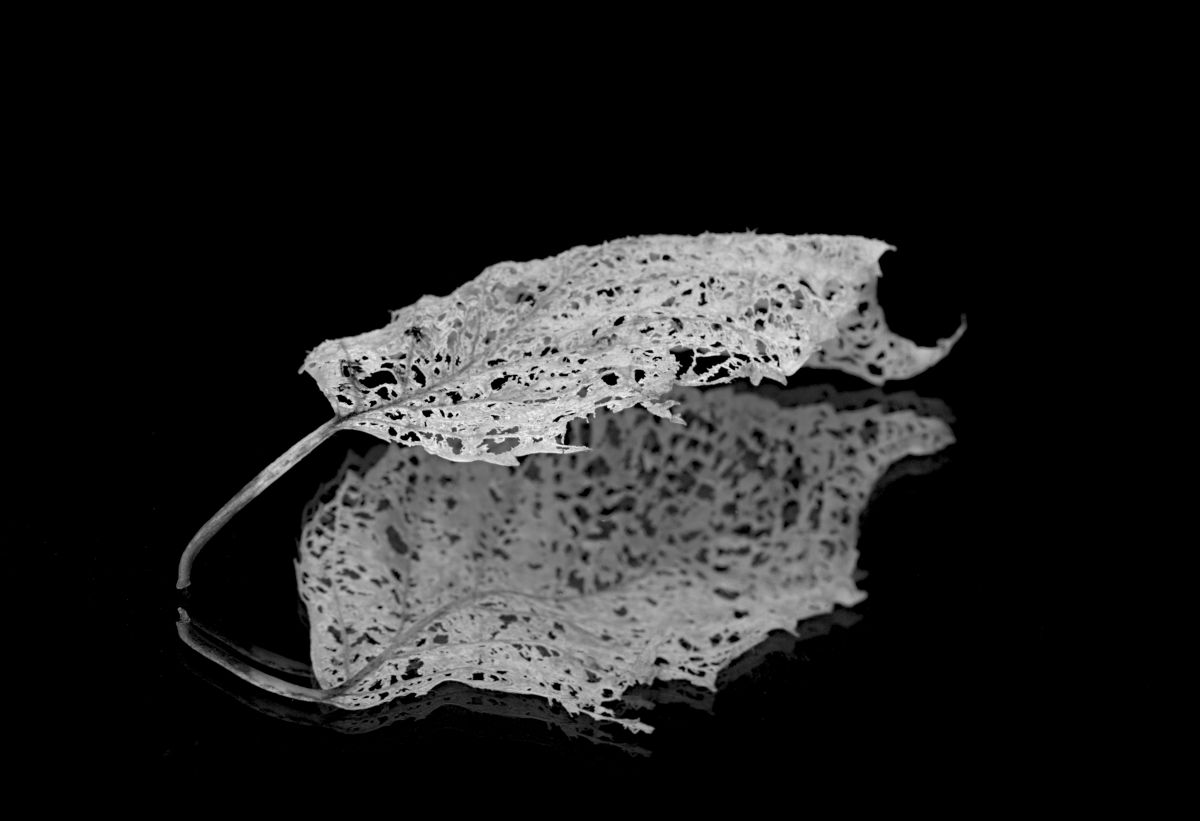
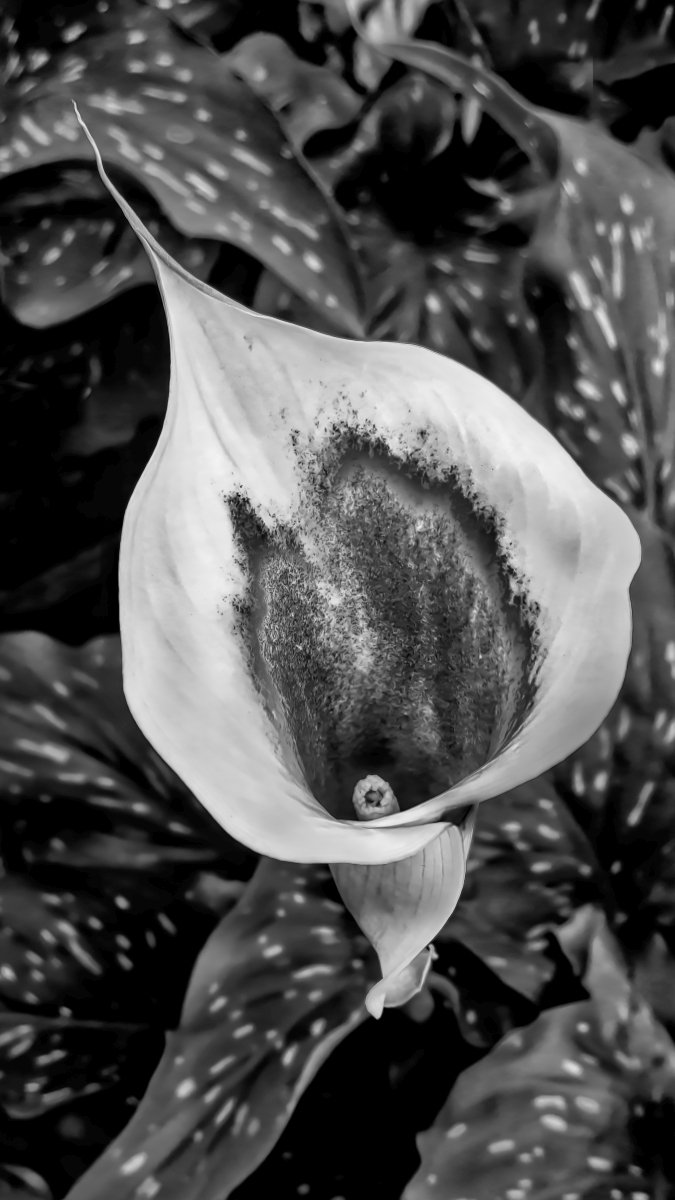
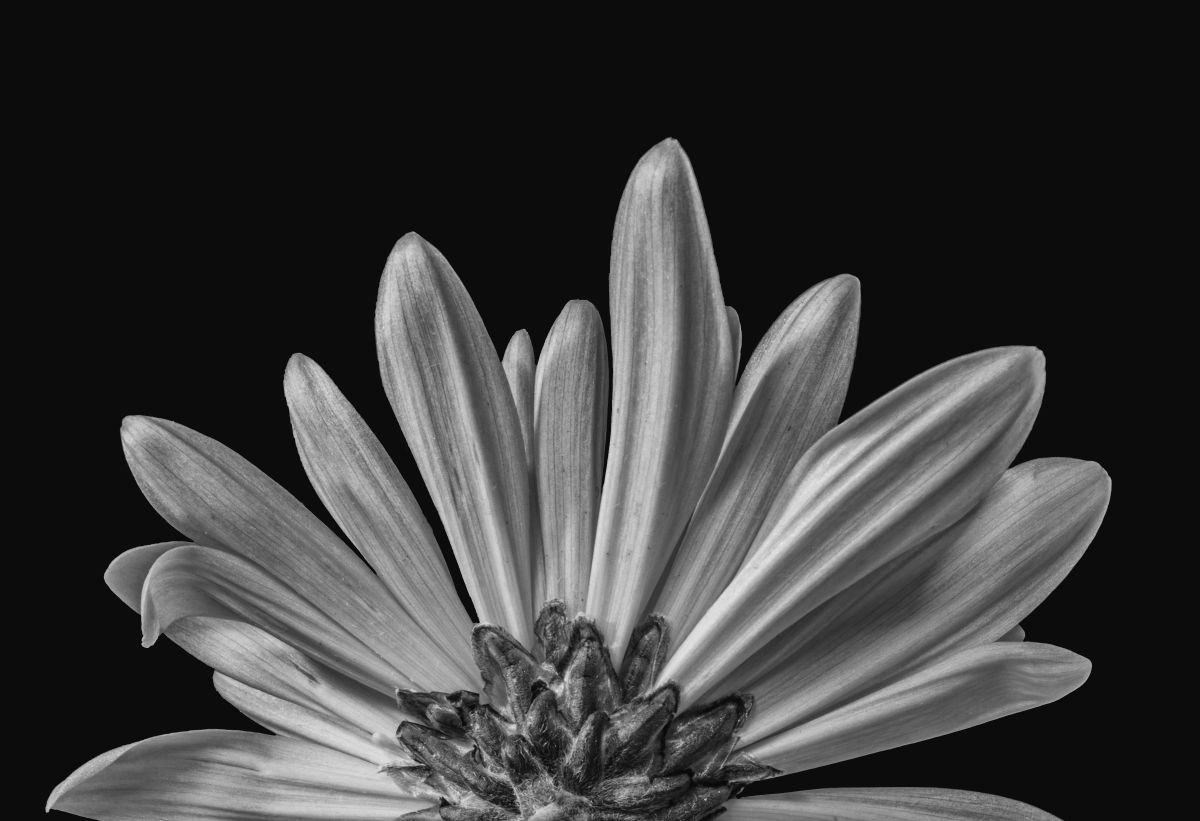
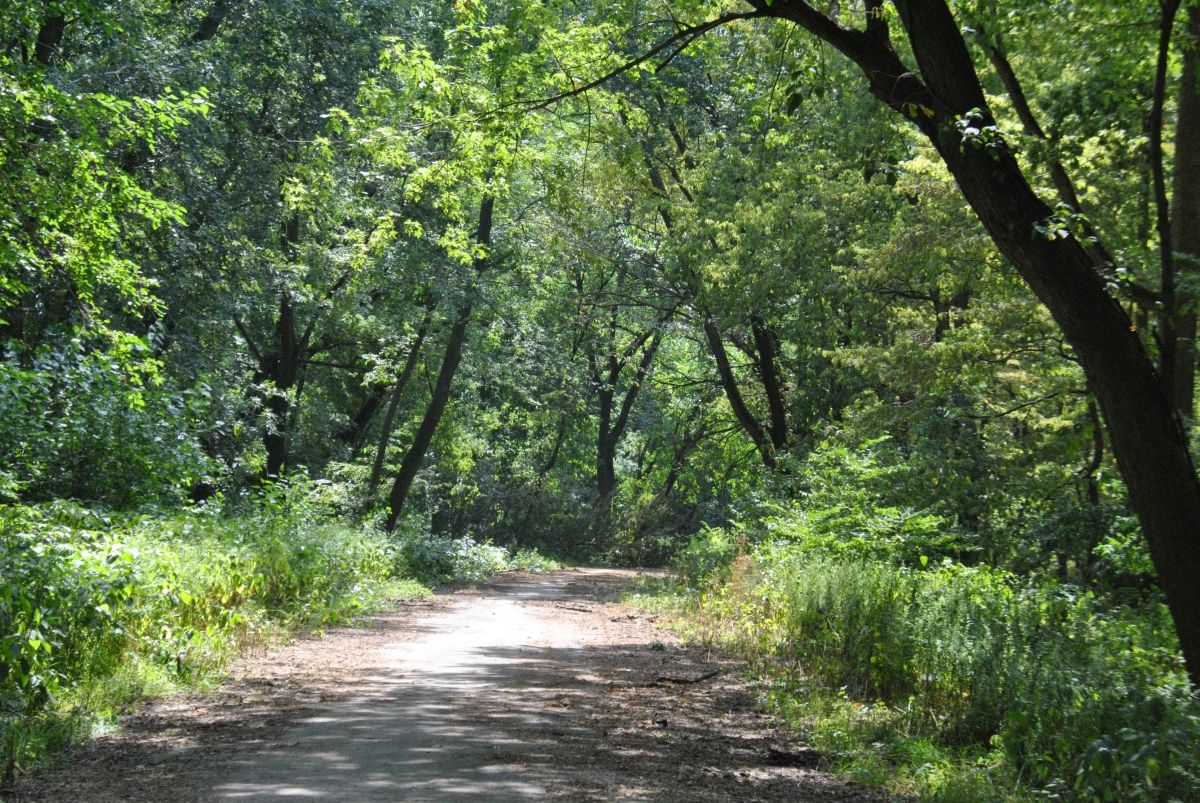
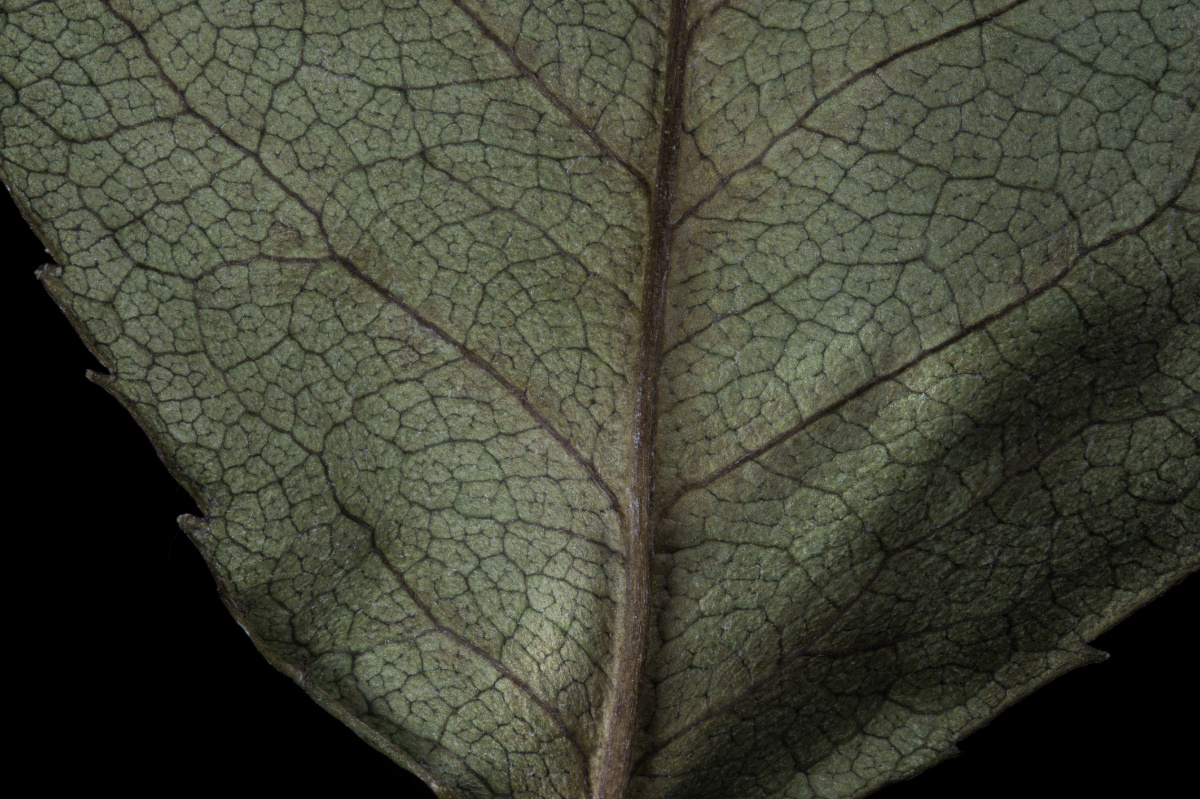
Excellent choice of subject and conversion to mono. Have to agree about the square crop, though I'm not sold on brightening the fern. I think the tonal range is fine as it is. Good capture! |
May 18th |
| 11 |
May 20 |
Comment |
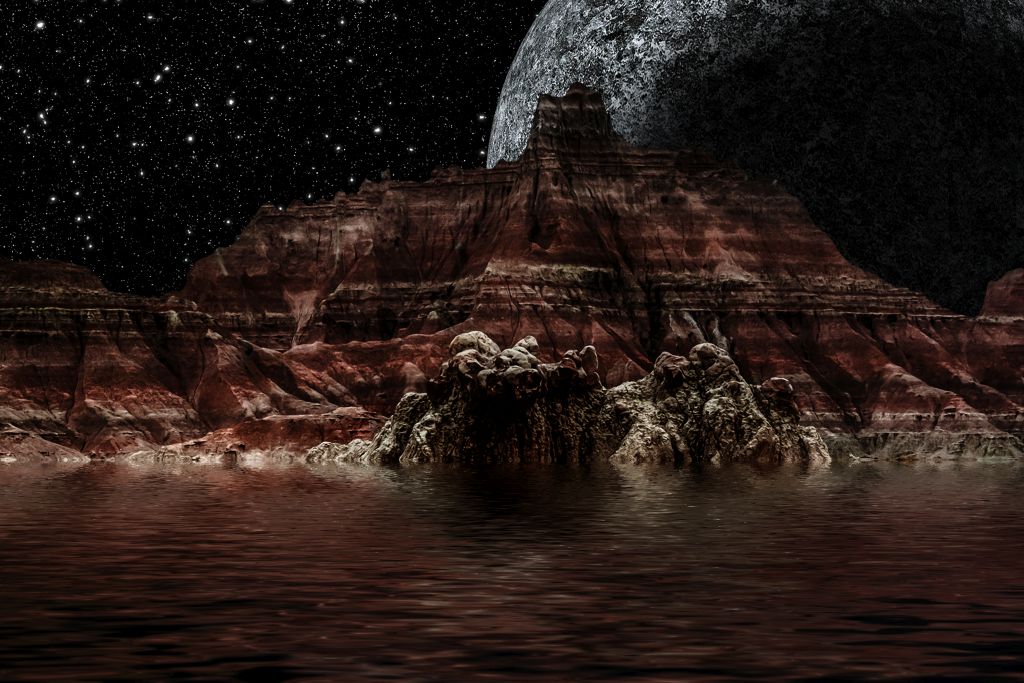
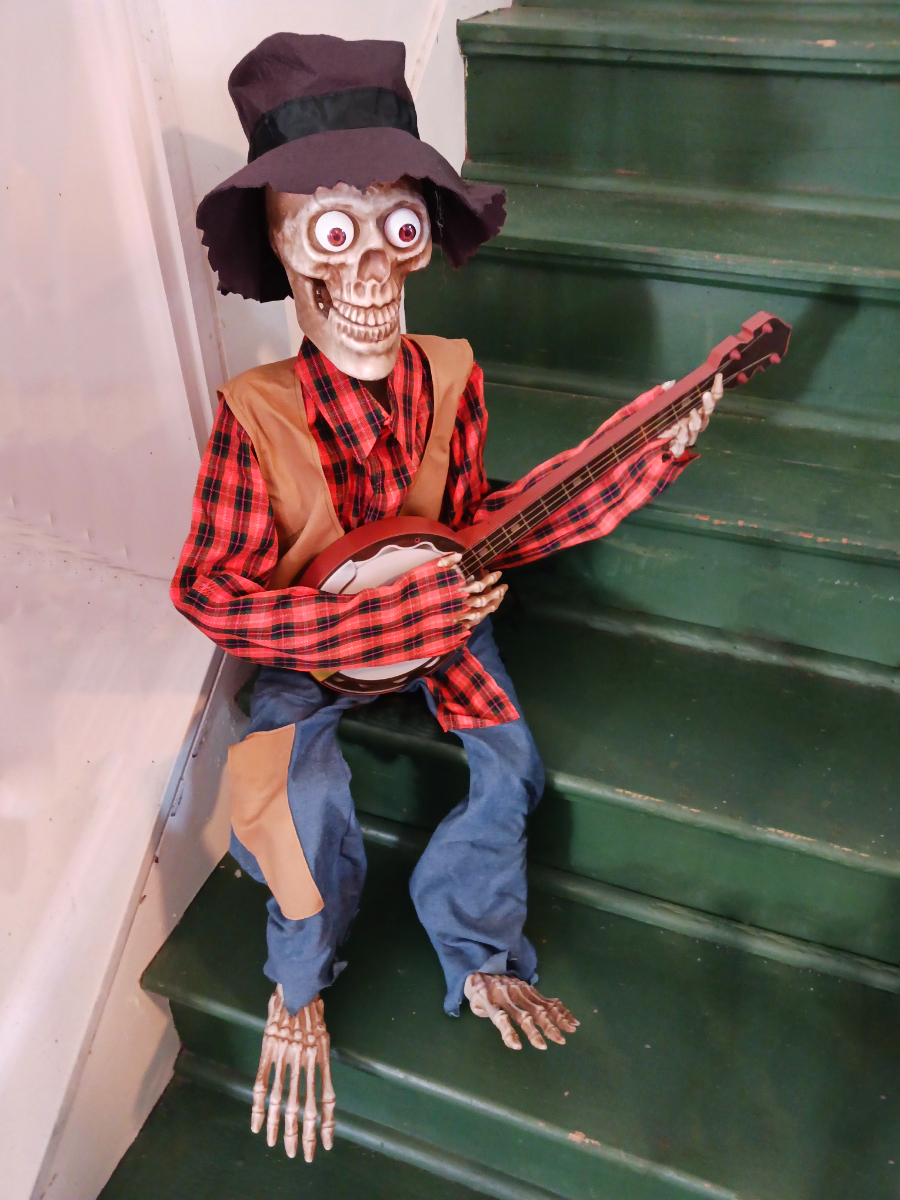
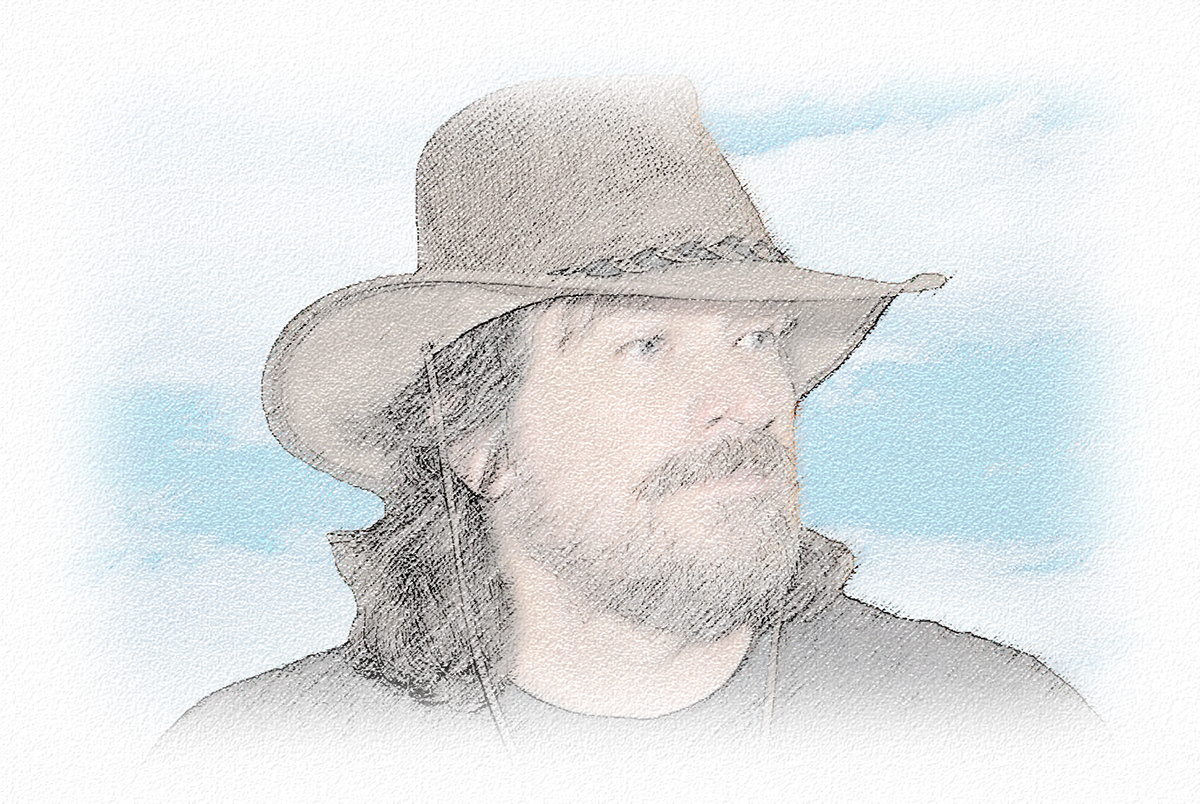
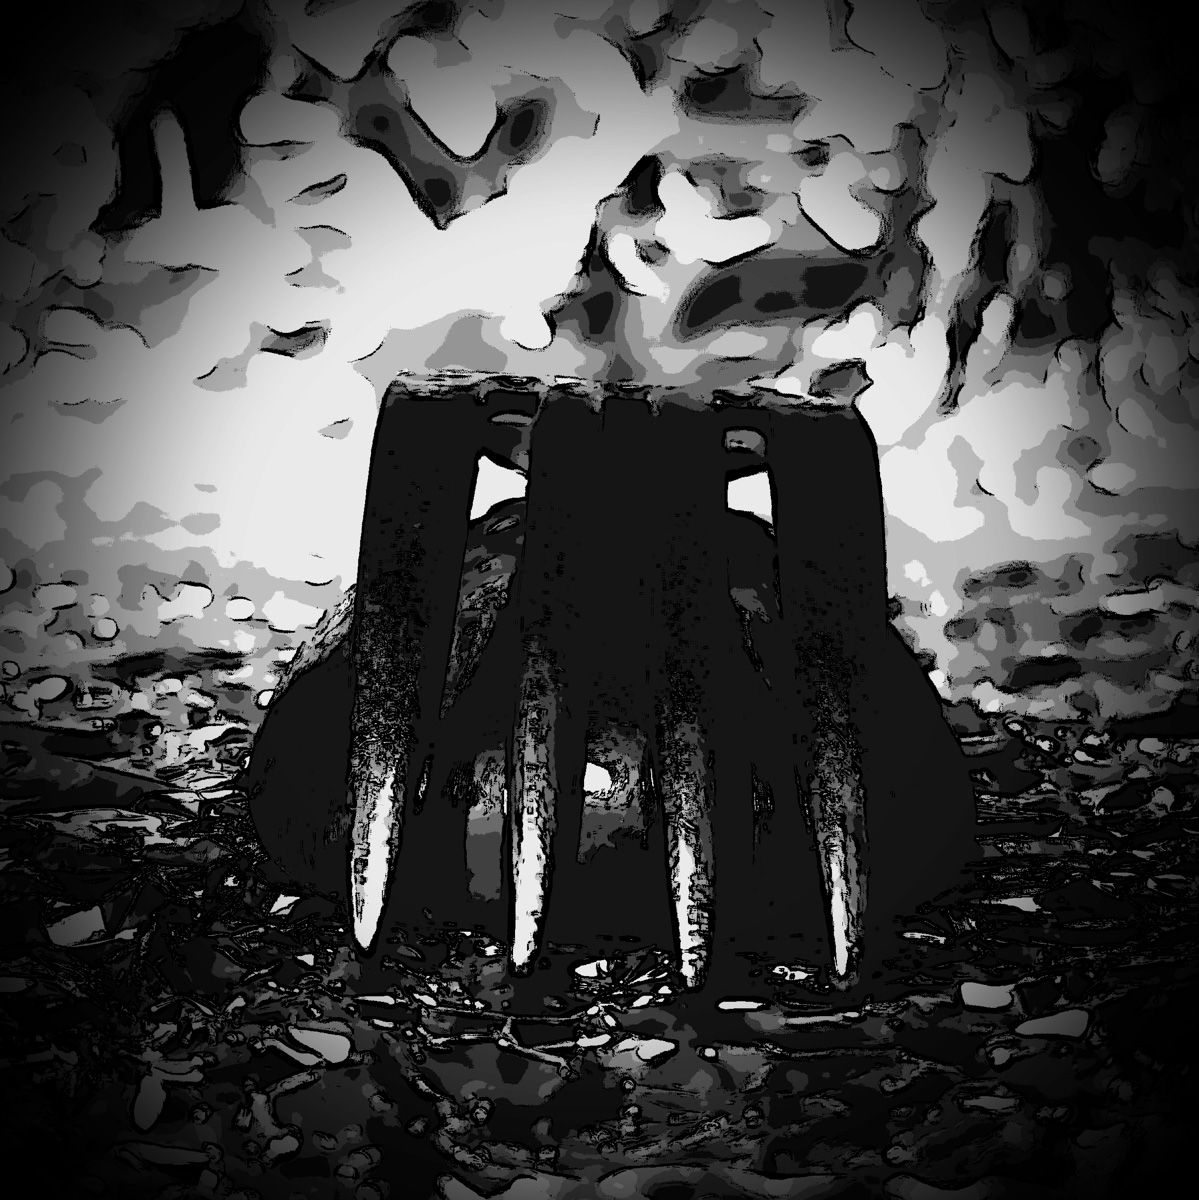
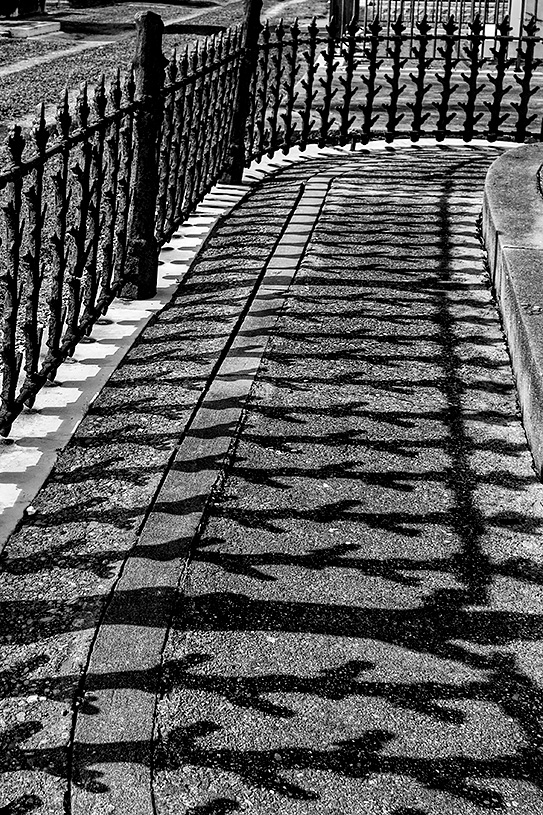
I think these shadows are so cool! As everyone has said, mono is the right choice and helps us to pay attention to the shadows.
Which cemetery is this? We visited many of them when we were in New Orleans and found them so fascinating.
I agree with Allen about the crop and would suggest to go even tighter, since most of the background is fighting for the viewer's attention. Thoughts? |
May 18th |
 |
| 11 |
May 20 |
Reply |
I definitely agree, Allen! |
May 18th |
| 11 |
May 20 |
Comment |
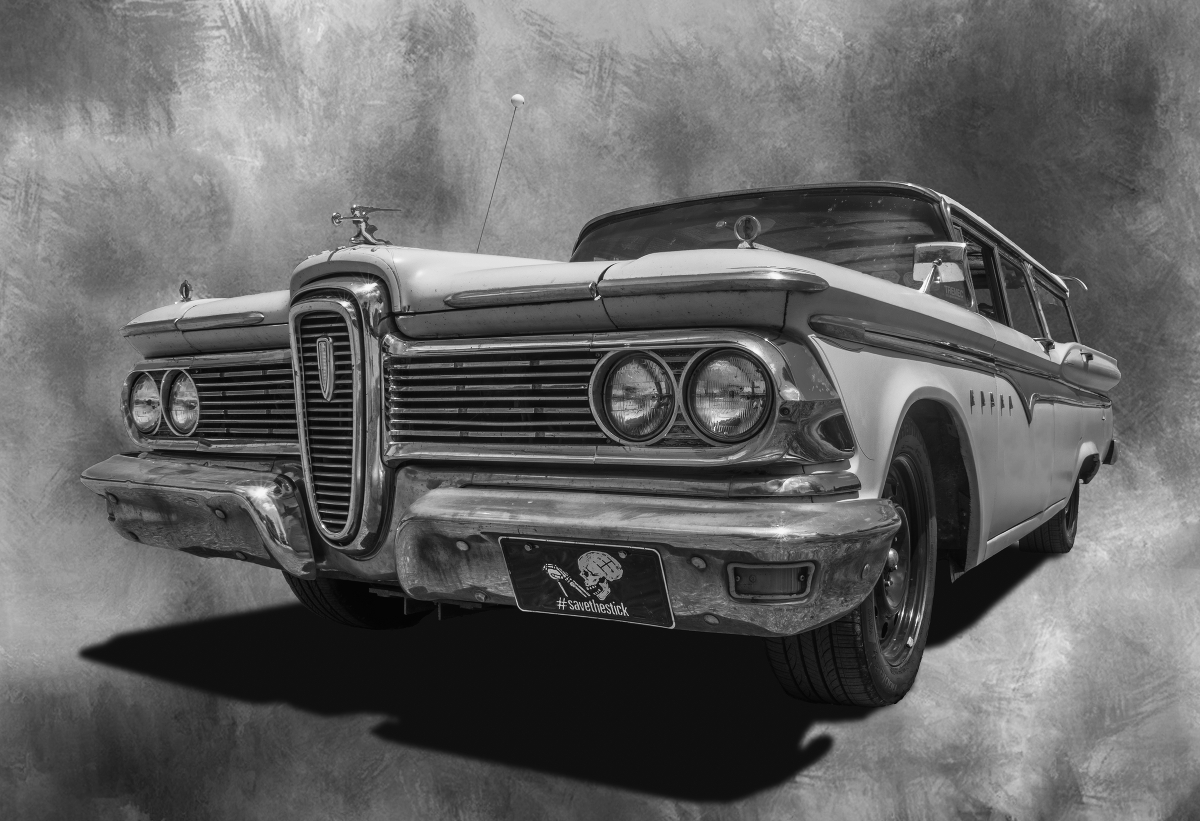
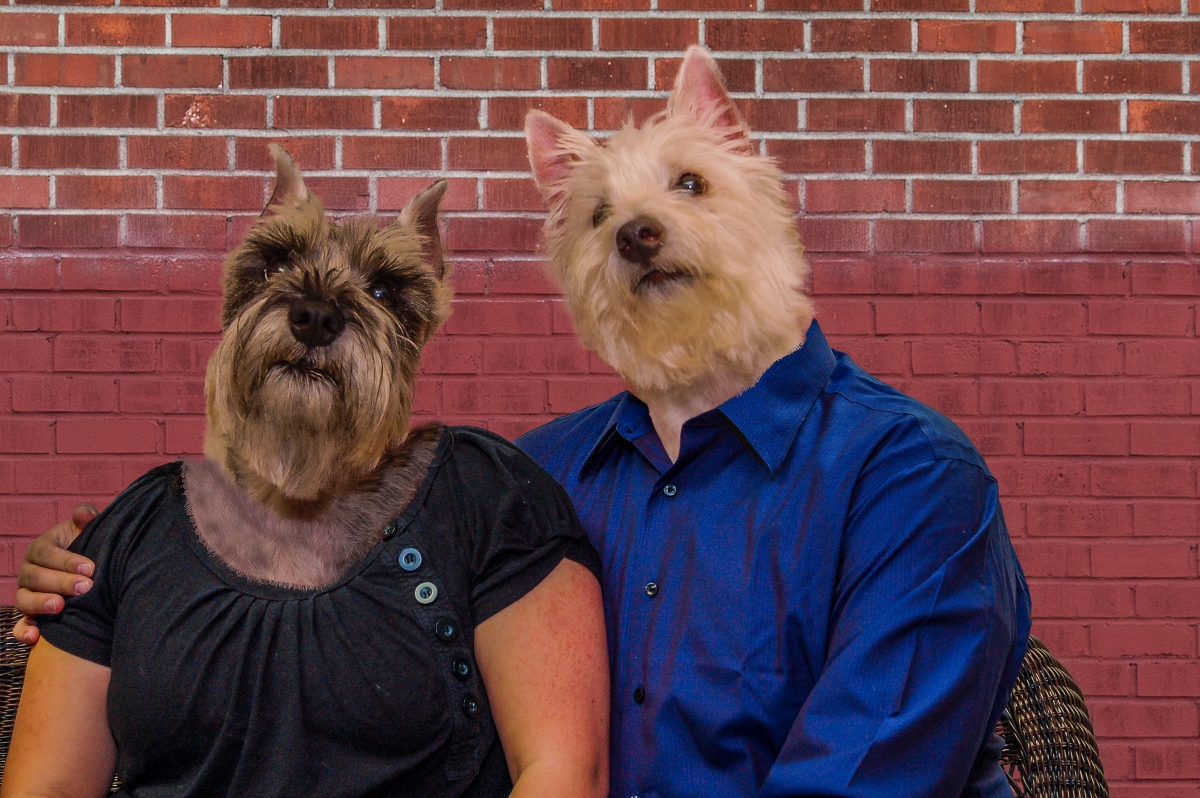
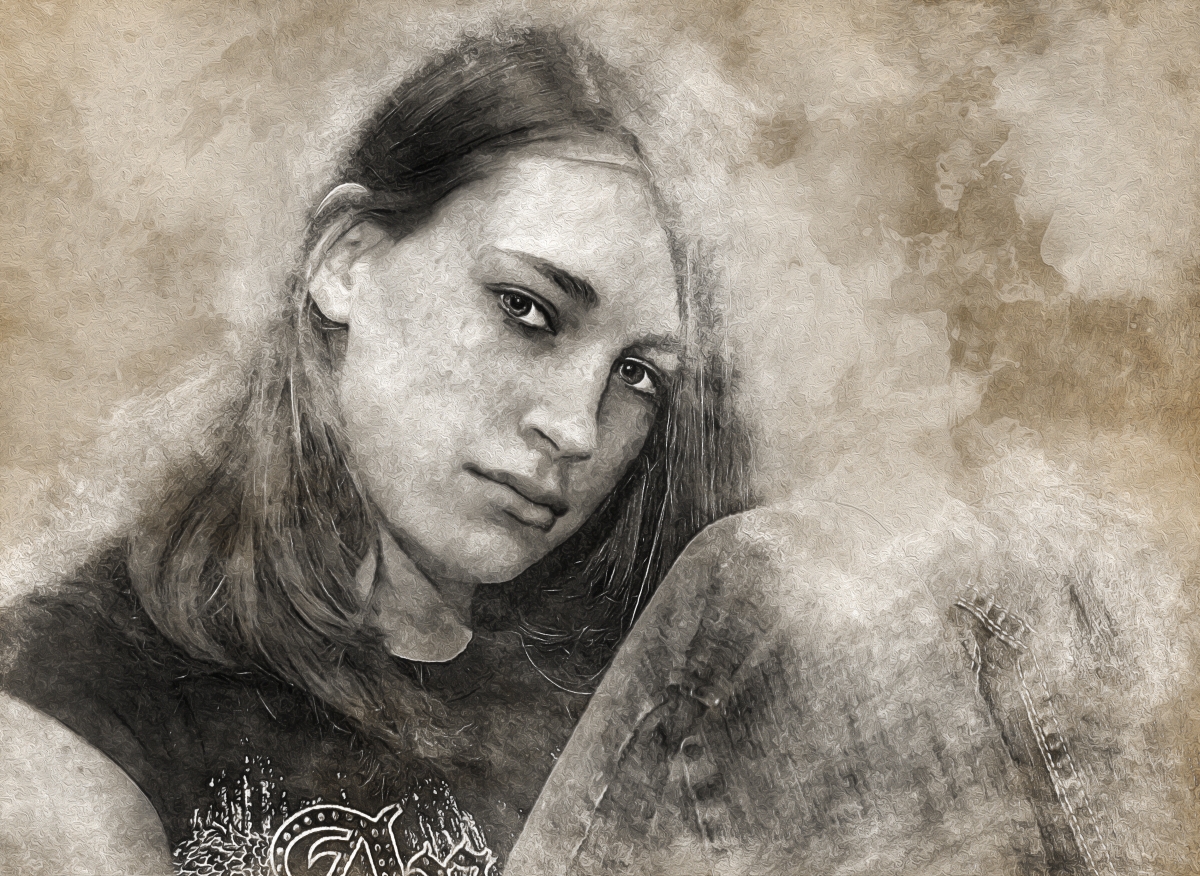
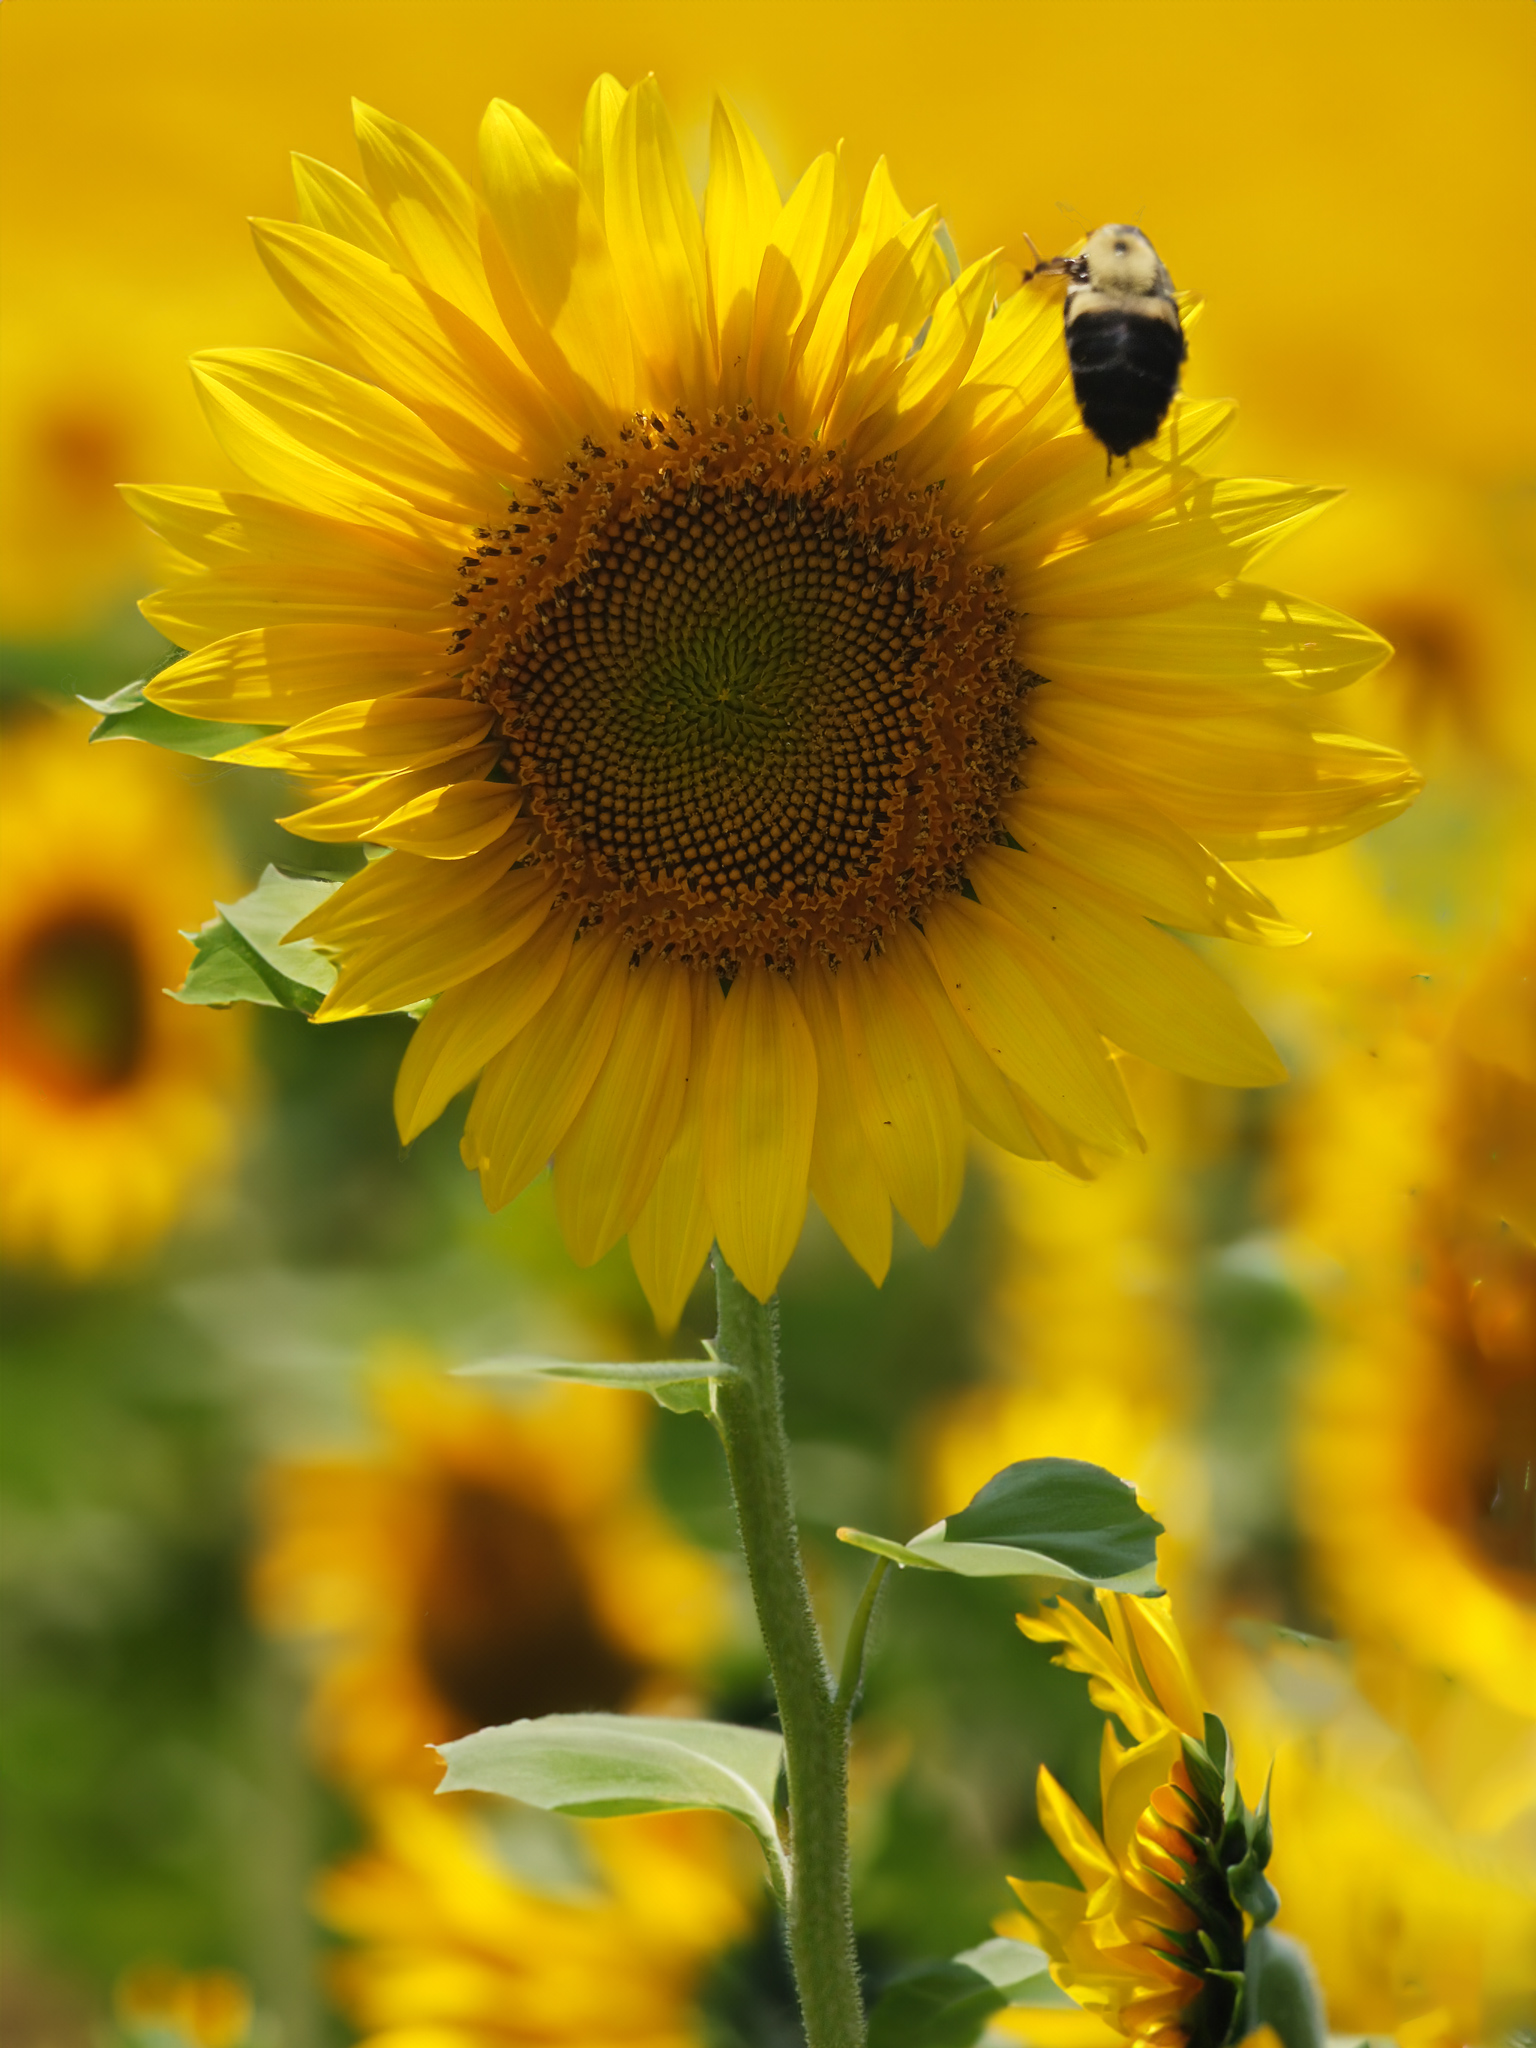
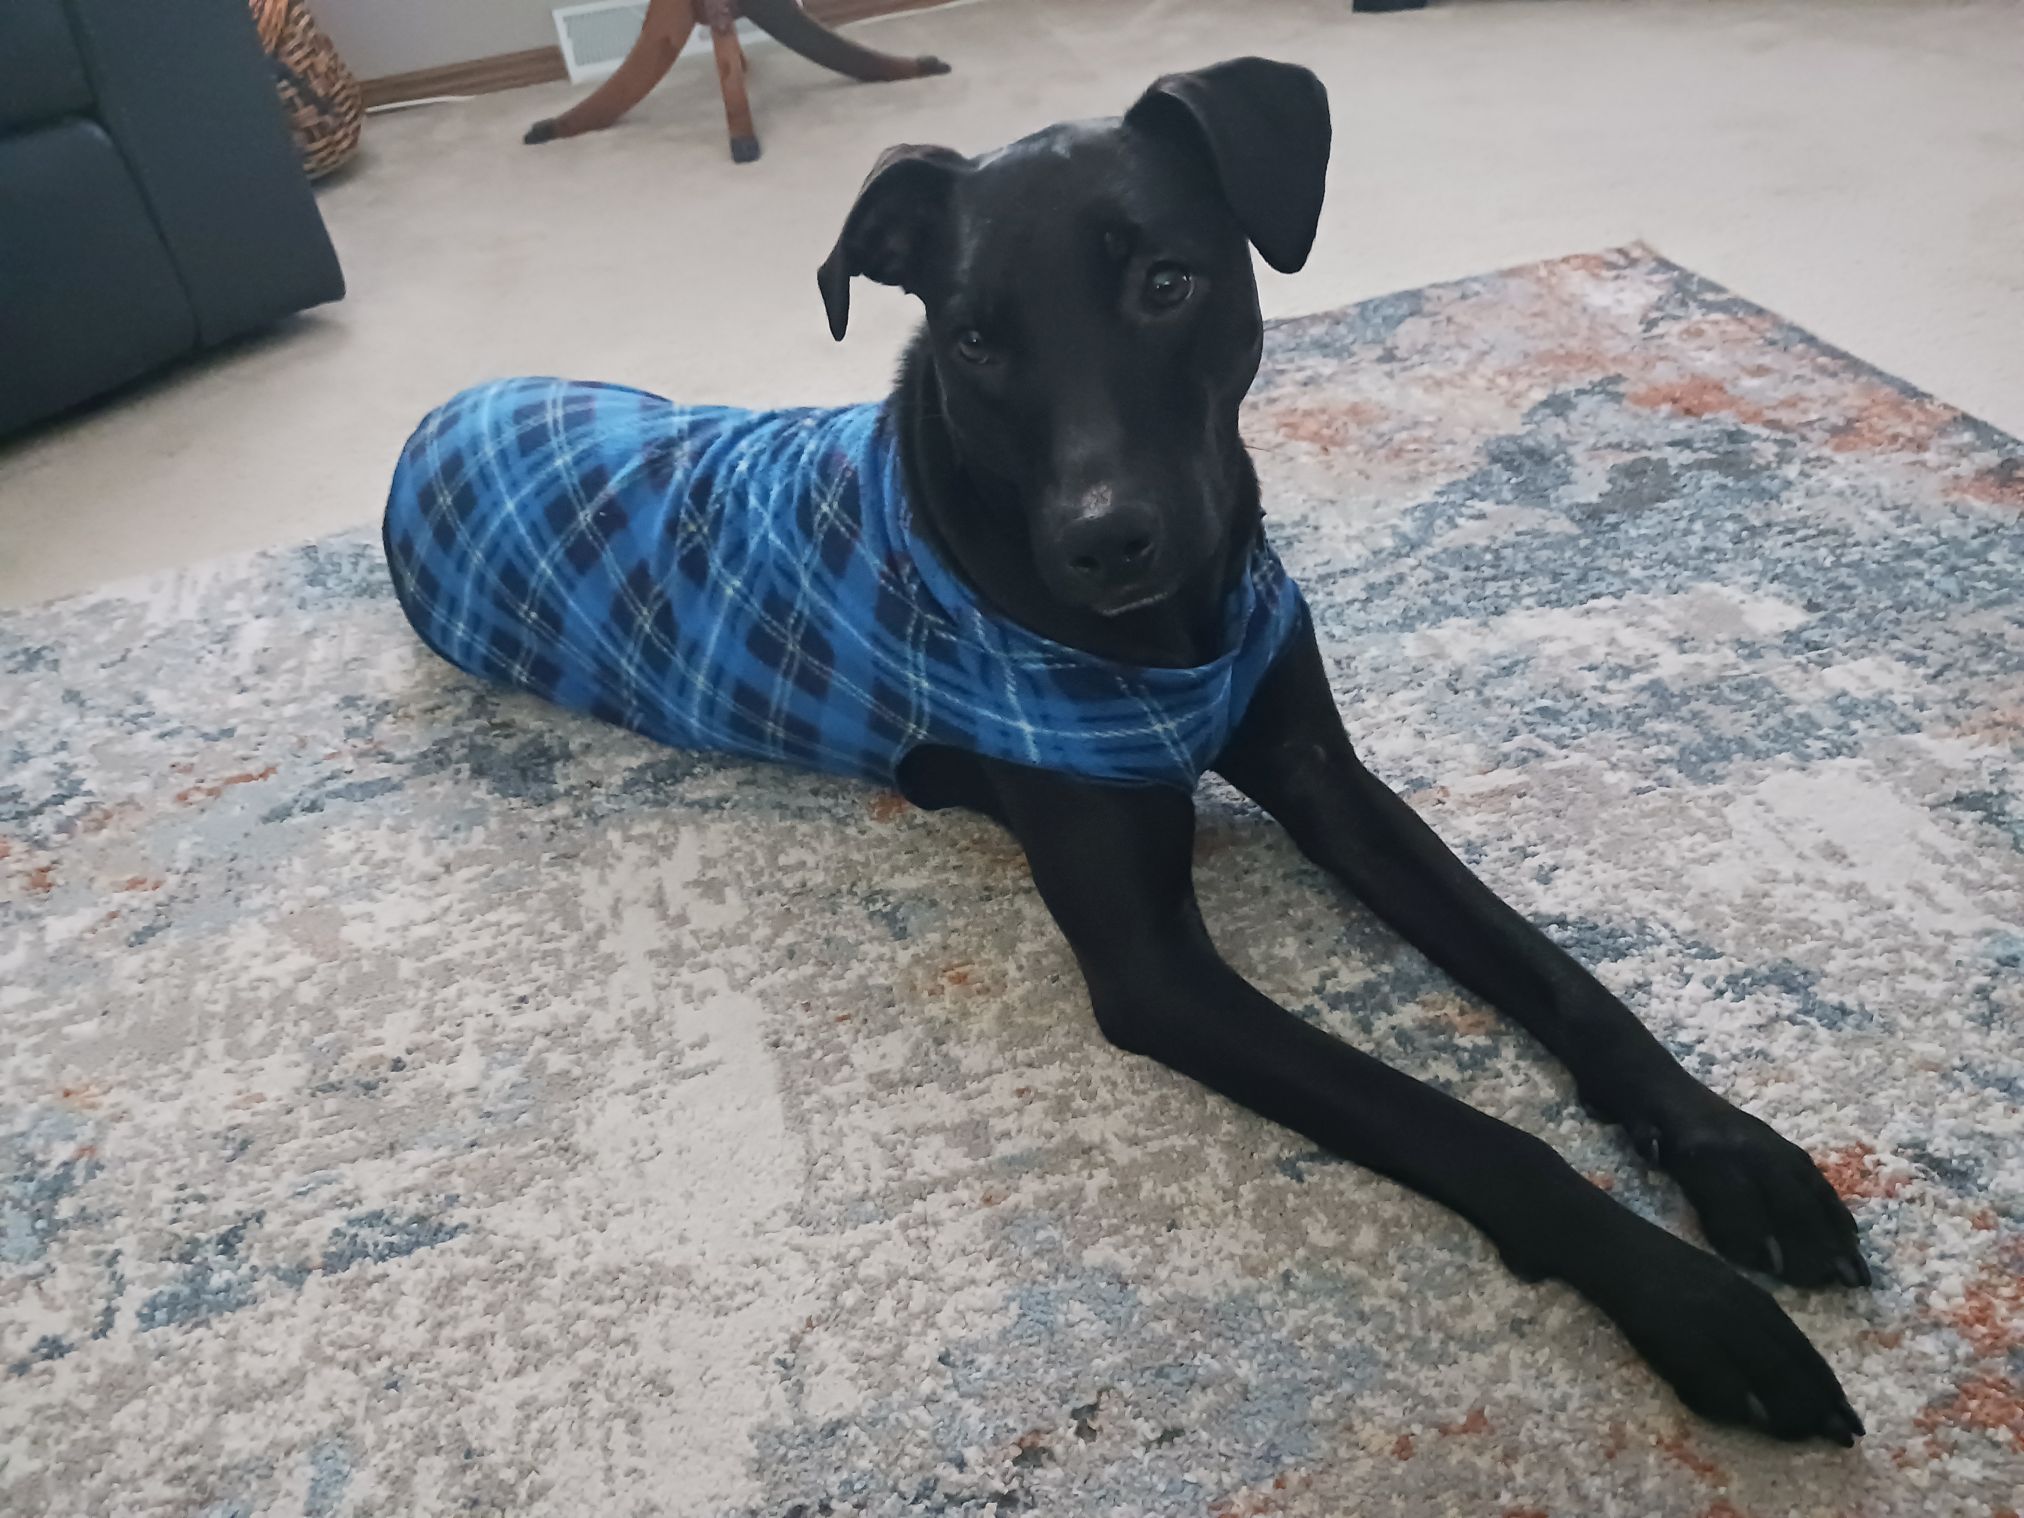
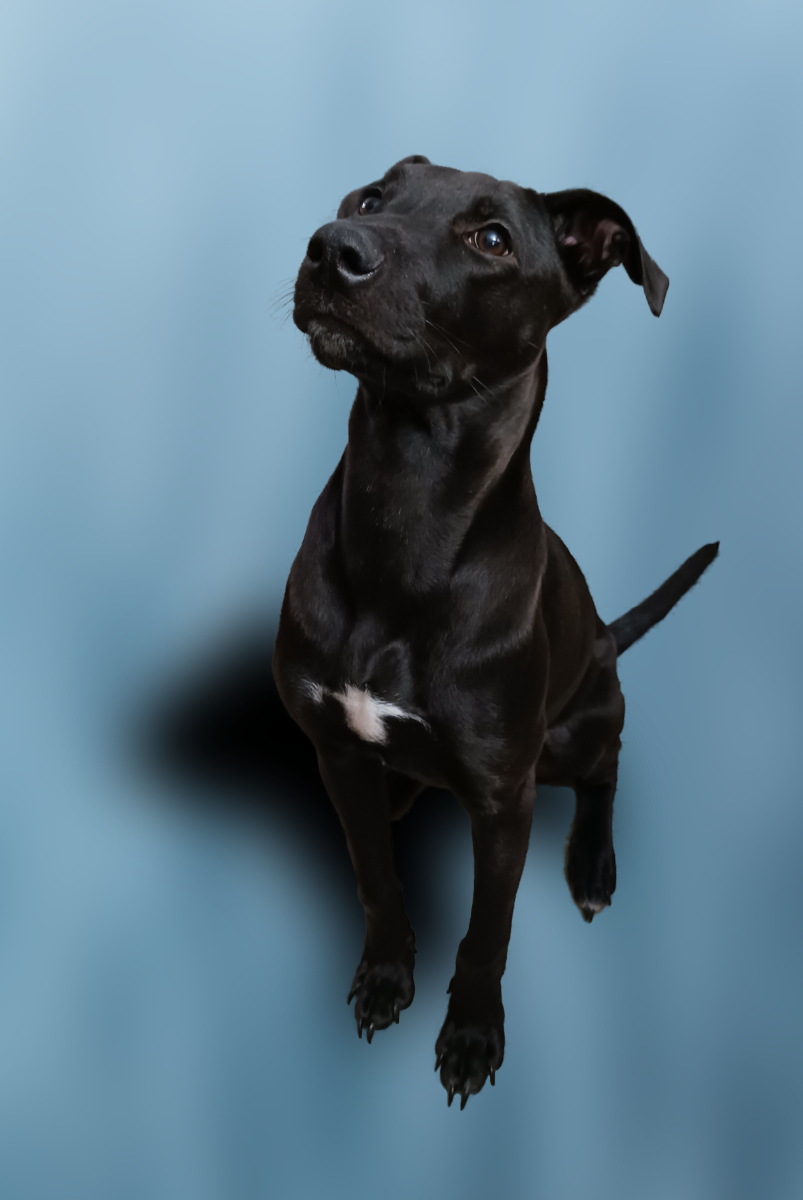
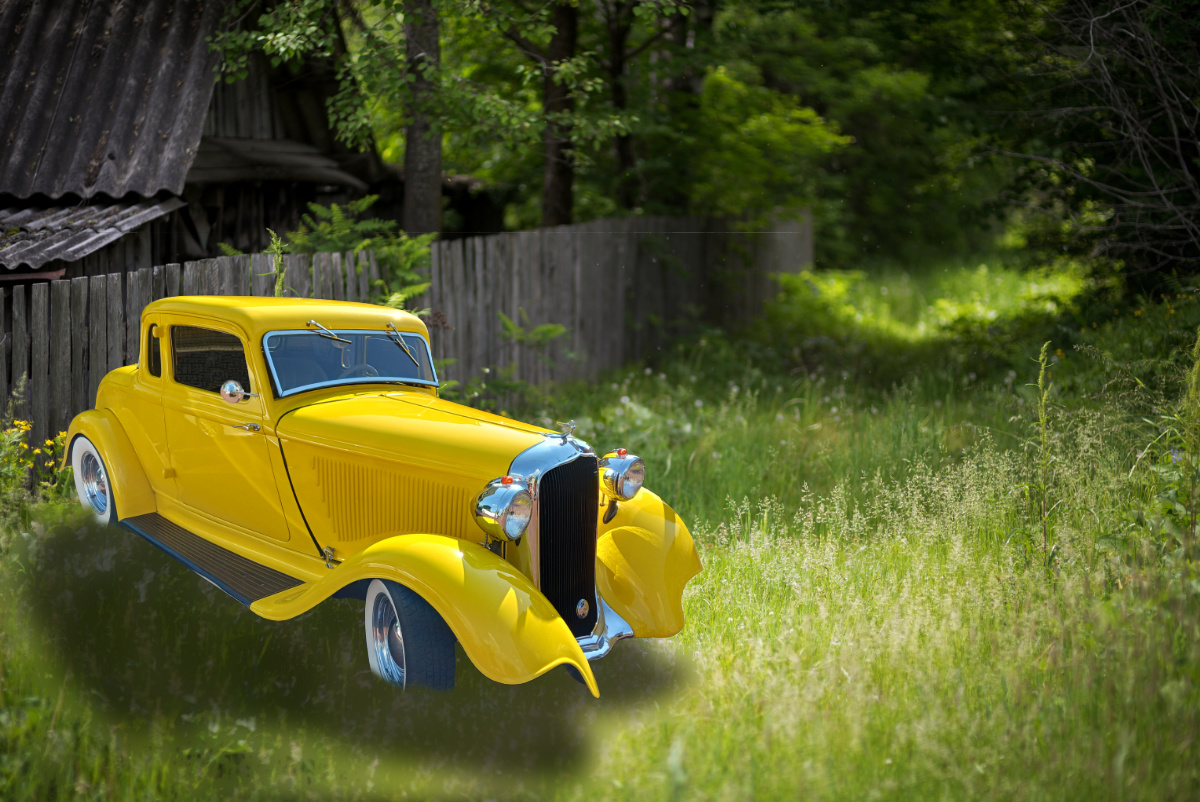
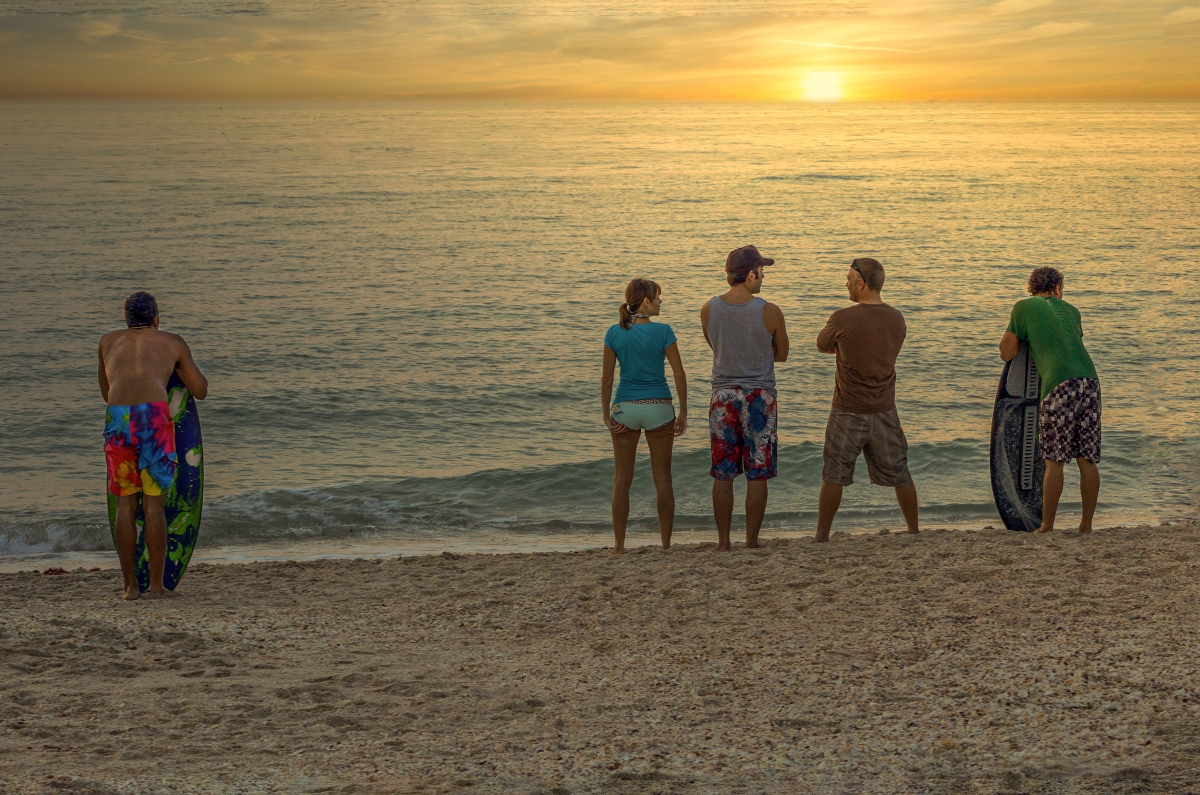
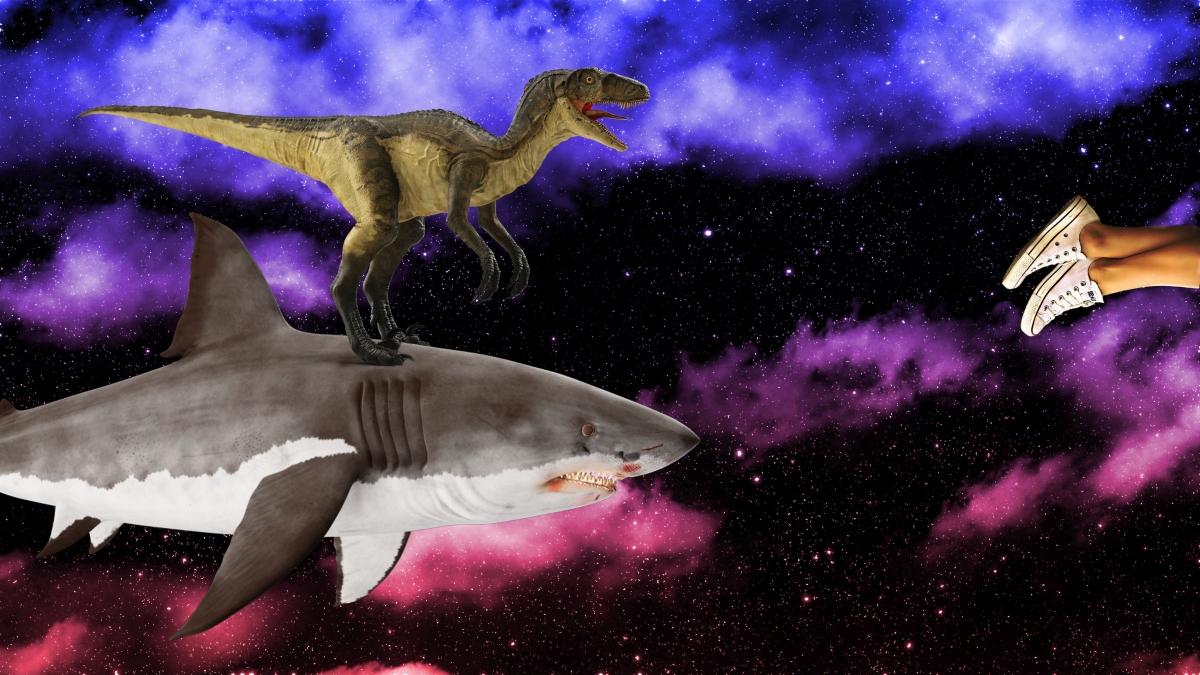
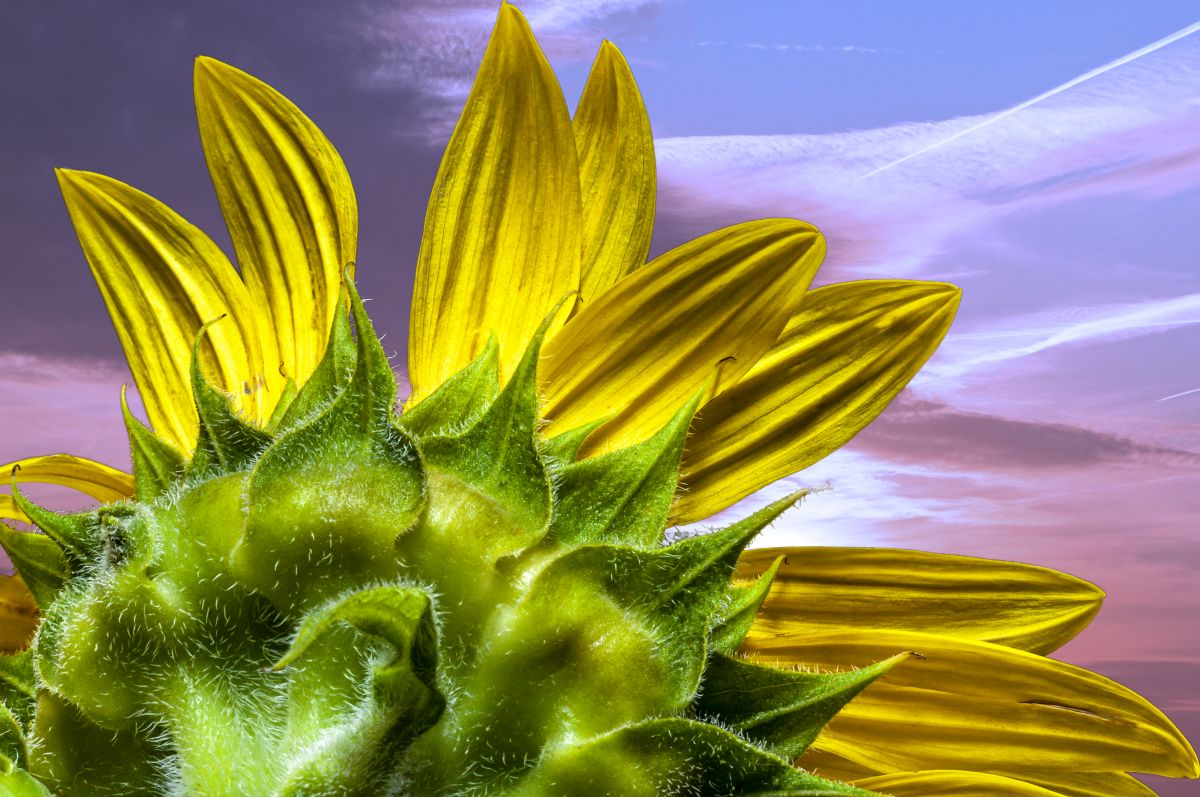
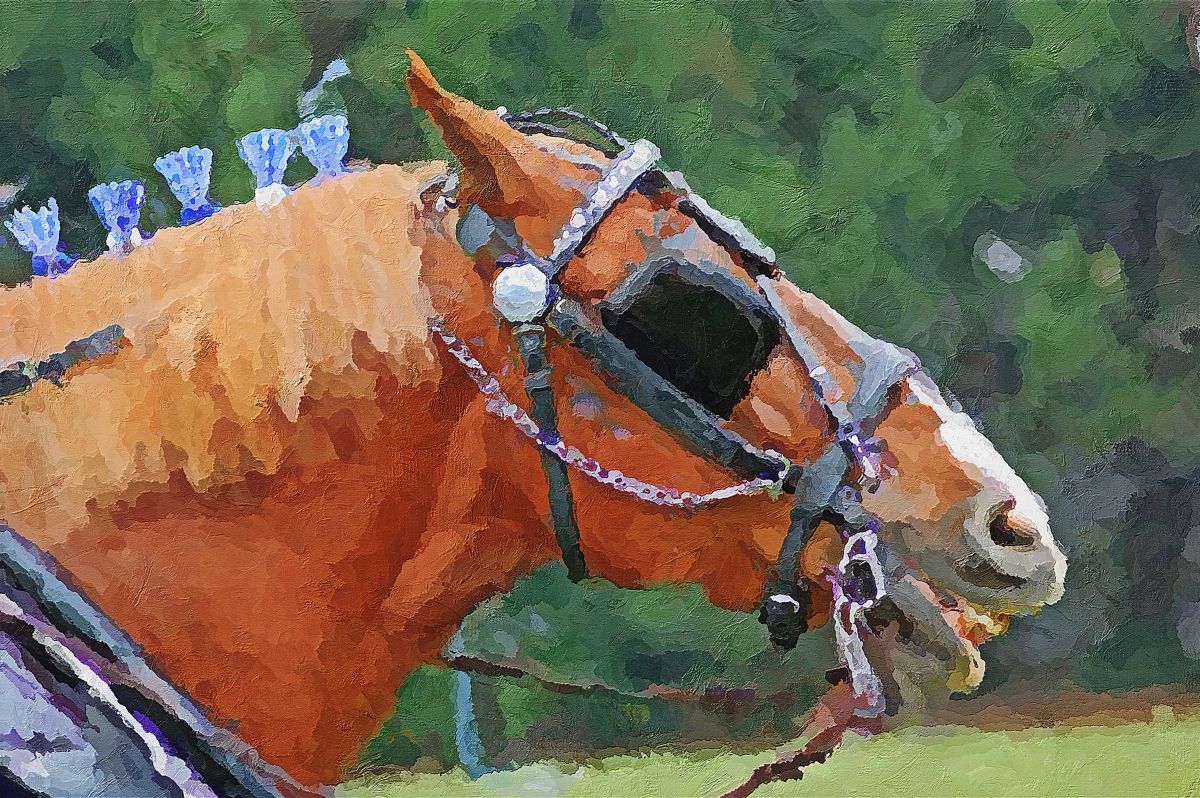
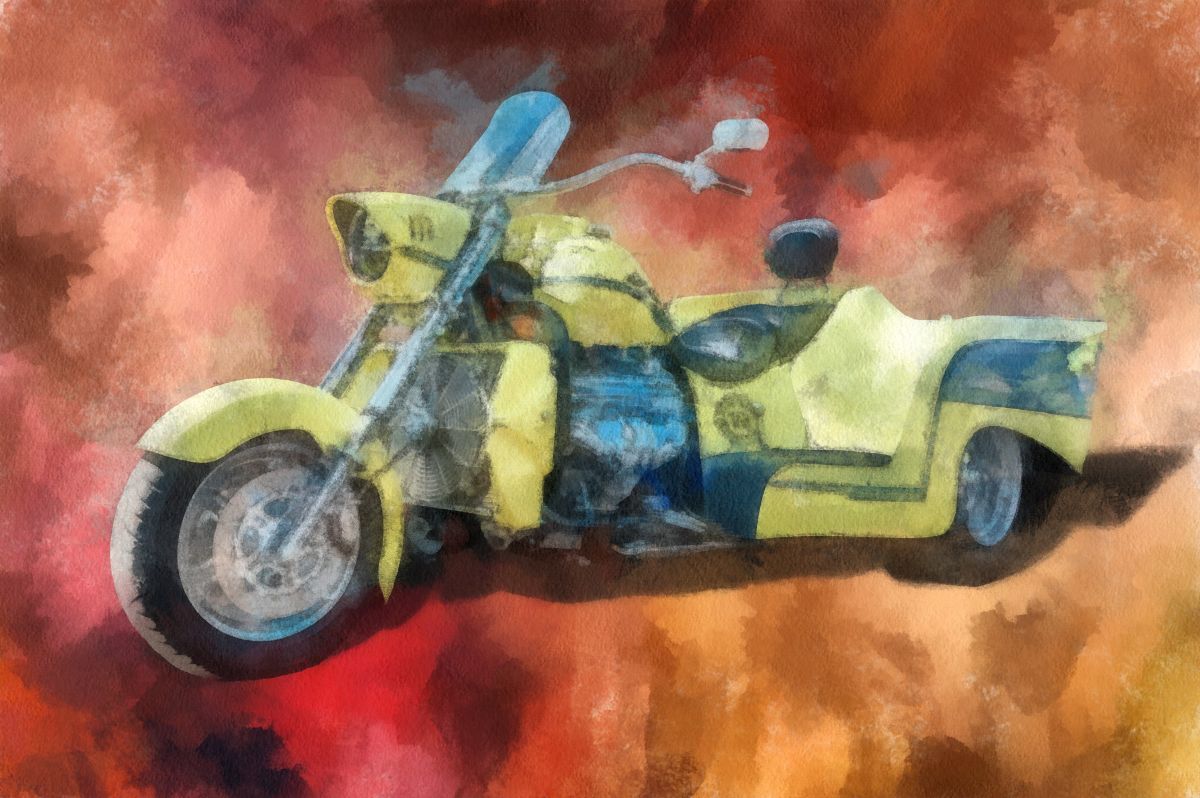
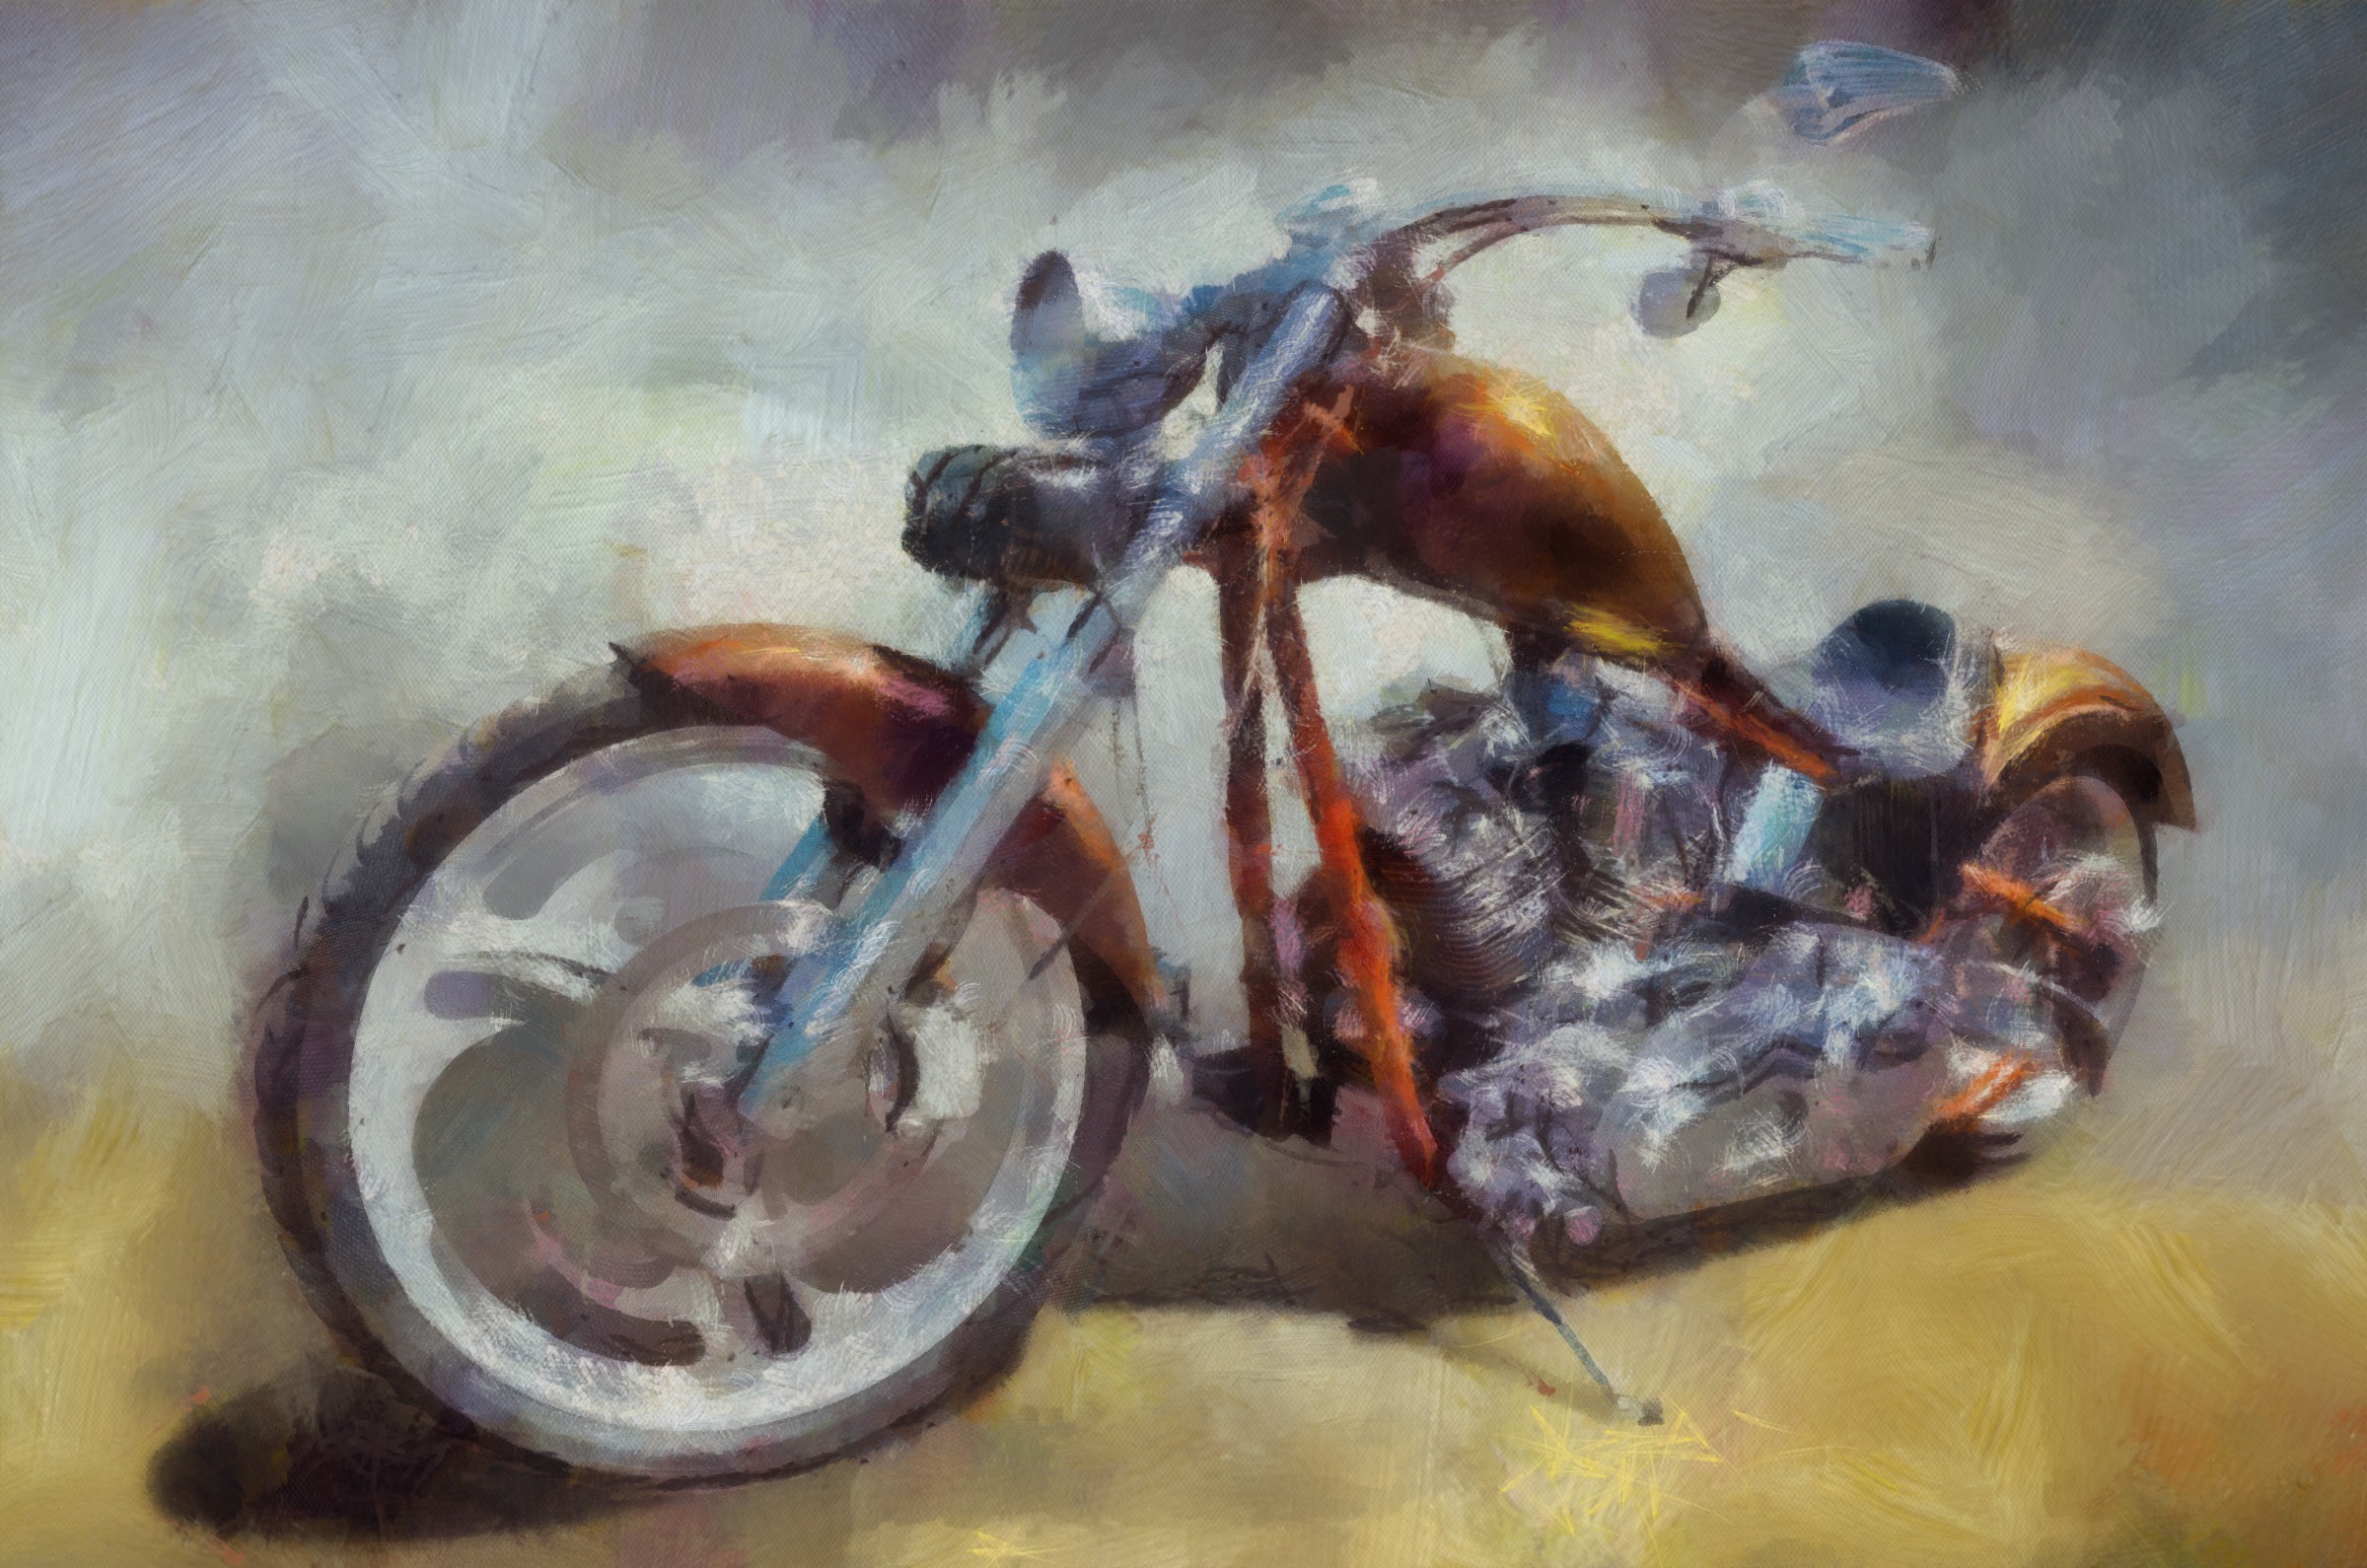
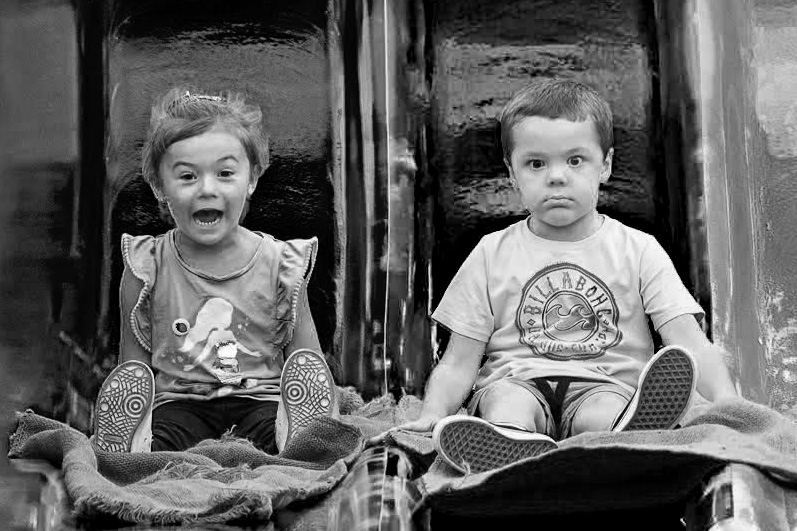
This is so very much fun! I chuckled loudly when it came into view. You're at the perfect angle to freeze the motion and focus our attention on the extremes of expression on the two kids. Marvelous.
I did have an issue with the conversion of the yellow in your result - I found it too bright and kinda swallows up the boy. I played around with various conversions and settled on darkening it to the same tone as the blue slide, which really popped the kids for me. I also cropped in tighter to really focus the viewer's attention on the kids. Thoughts?
|
May 18th |
 |
| 11 |
May 20 |
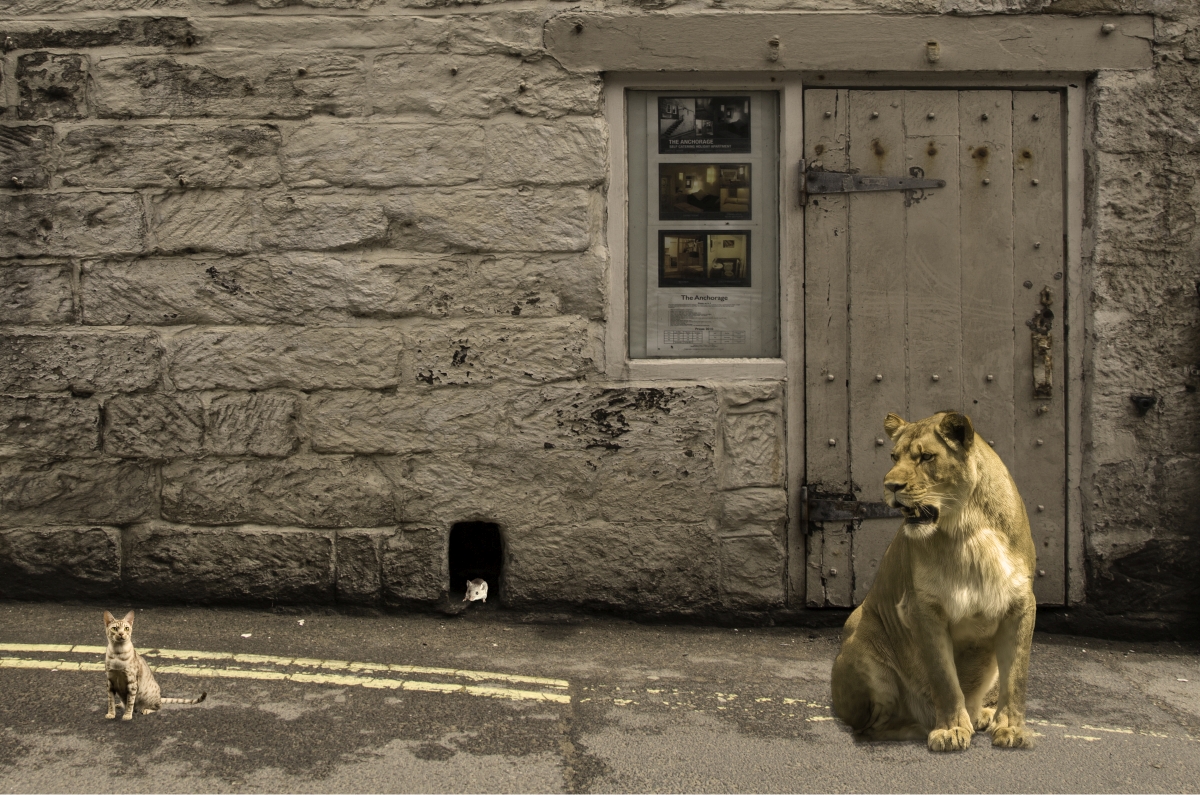
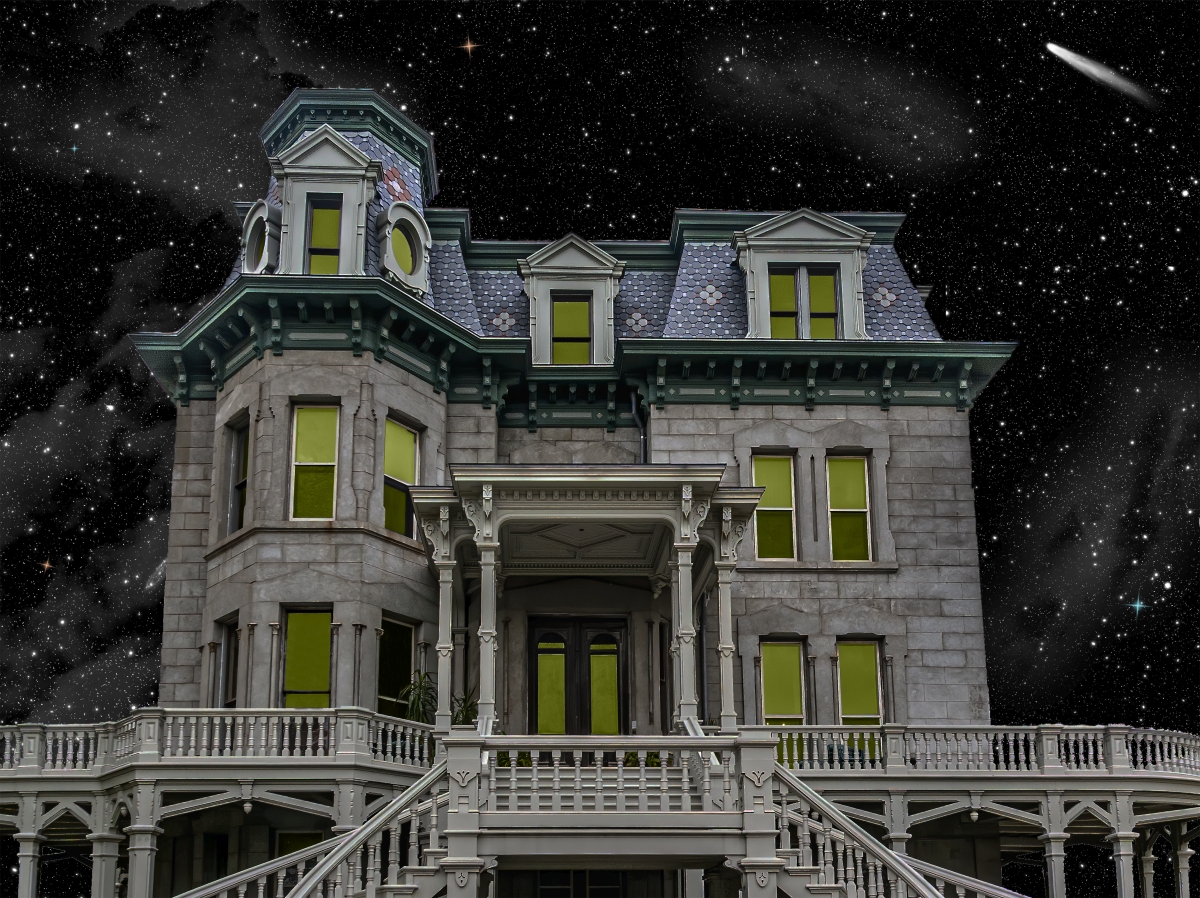
Comment |
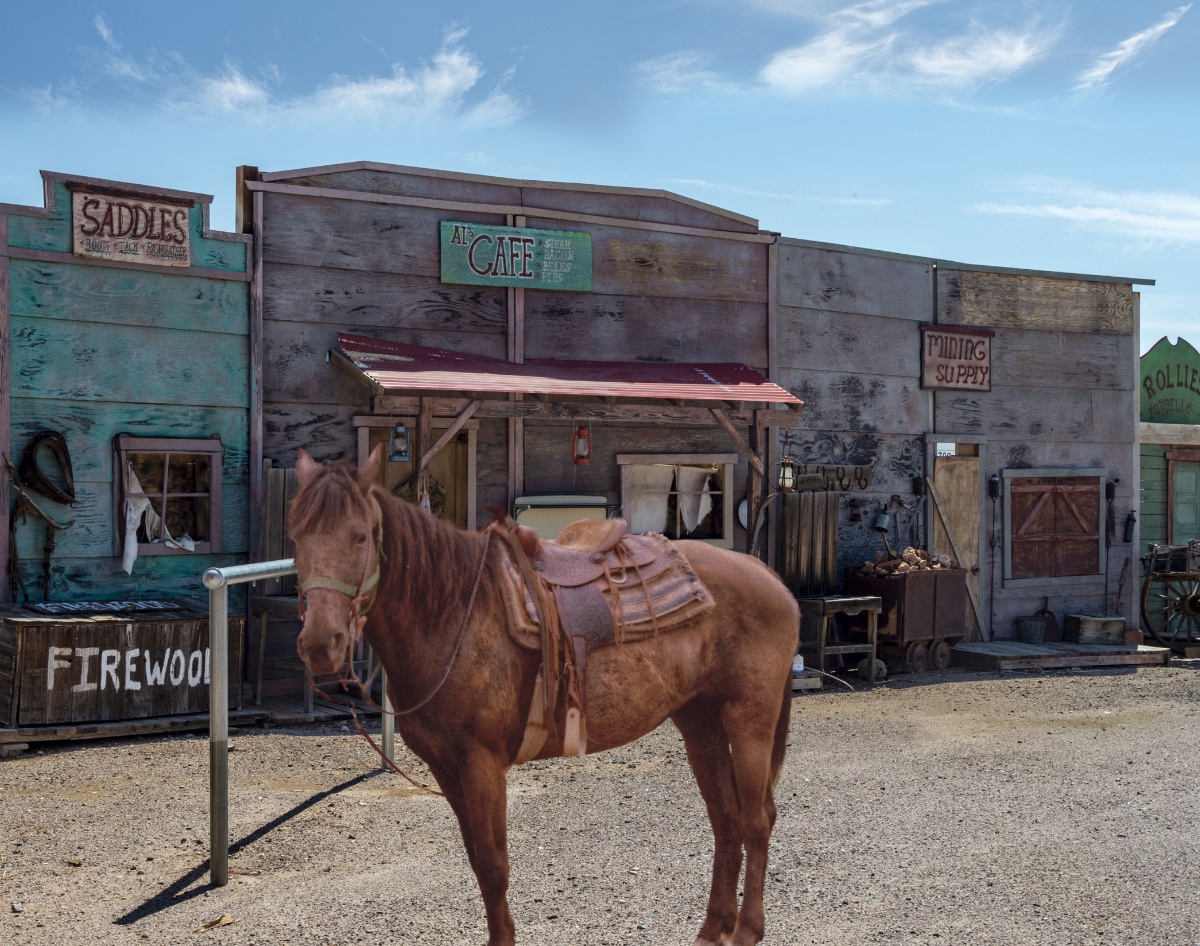
I love this type of image - architecture at an angle. Simple shapes in light and shadow. I think Jim H's rendition is more appealing as it brings out the texture of the wall in deep shadow, though I think he should have confined his adjustment to that dark wall. This type of image requires a lot of subtlety and works best if gradients are applied to broad surfaces like the bright one. This is because no surface like that is actually in one tone - the closer to the viewer, the darker they become, but in a very subtle way. If I get time, I'll demonstrate. |
May 18th |
5 comments - 1 reply for Group 11
|
| 53 |
May 20 |
Reply |
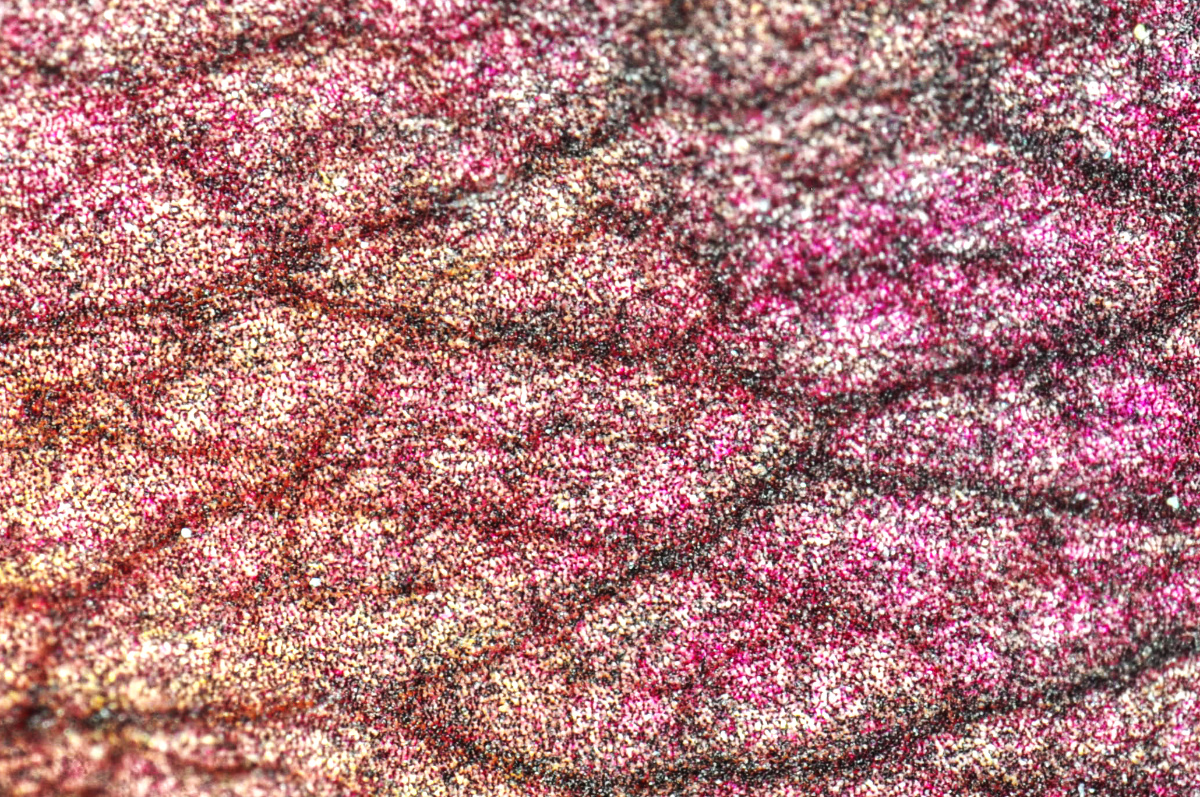
Without the grain, it looks much better - finishes it nicely. |
May 18th |
| 53 |
May 20 |
Reply |
Hmmm . . . It did introduce a lot of noise, especially in the upper right and I found the darkening along the bottom too heavy. What do others think? |
May 18th |
| 53 |
May 20 |
Reply |
I'll check Tadd out, for sure. How about demonstrating your suggestions for us? d;¬{D |
May 18th |
| 53 |
May 20 |
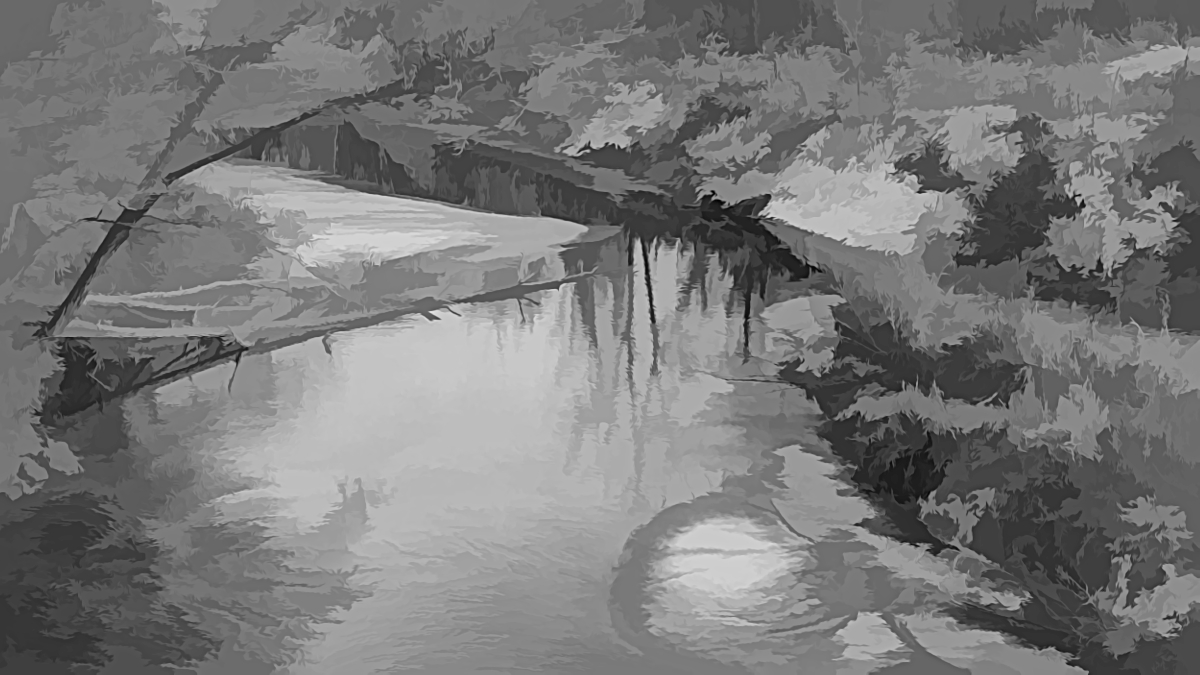
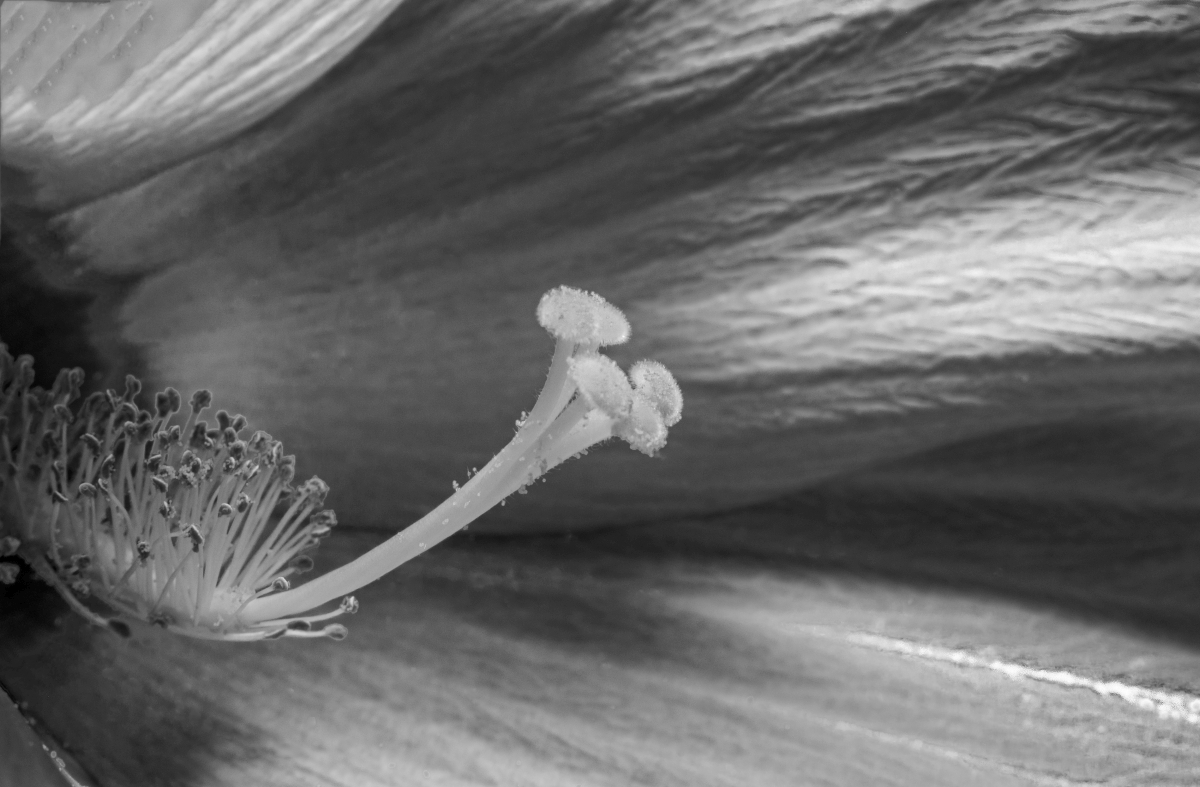
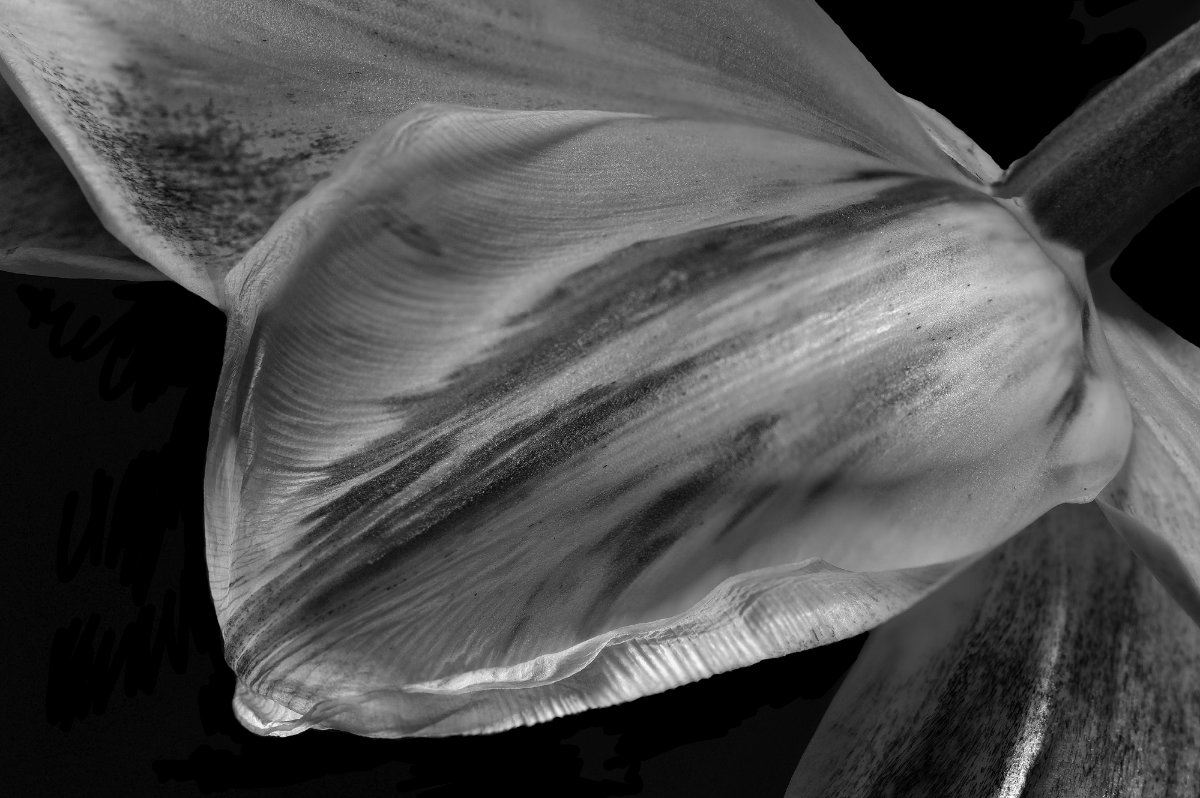
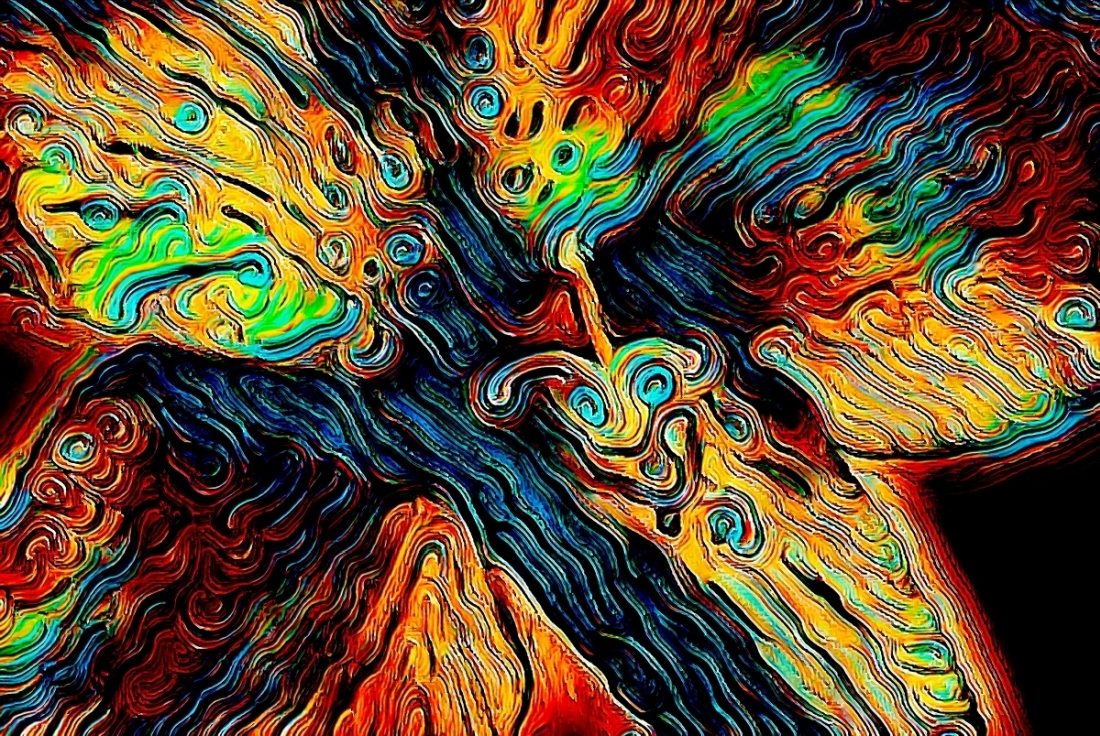
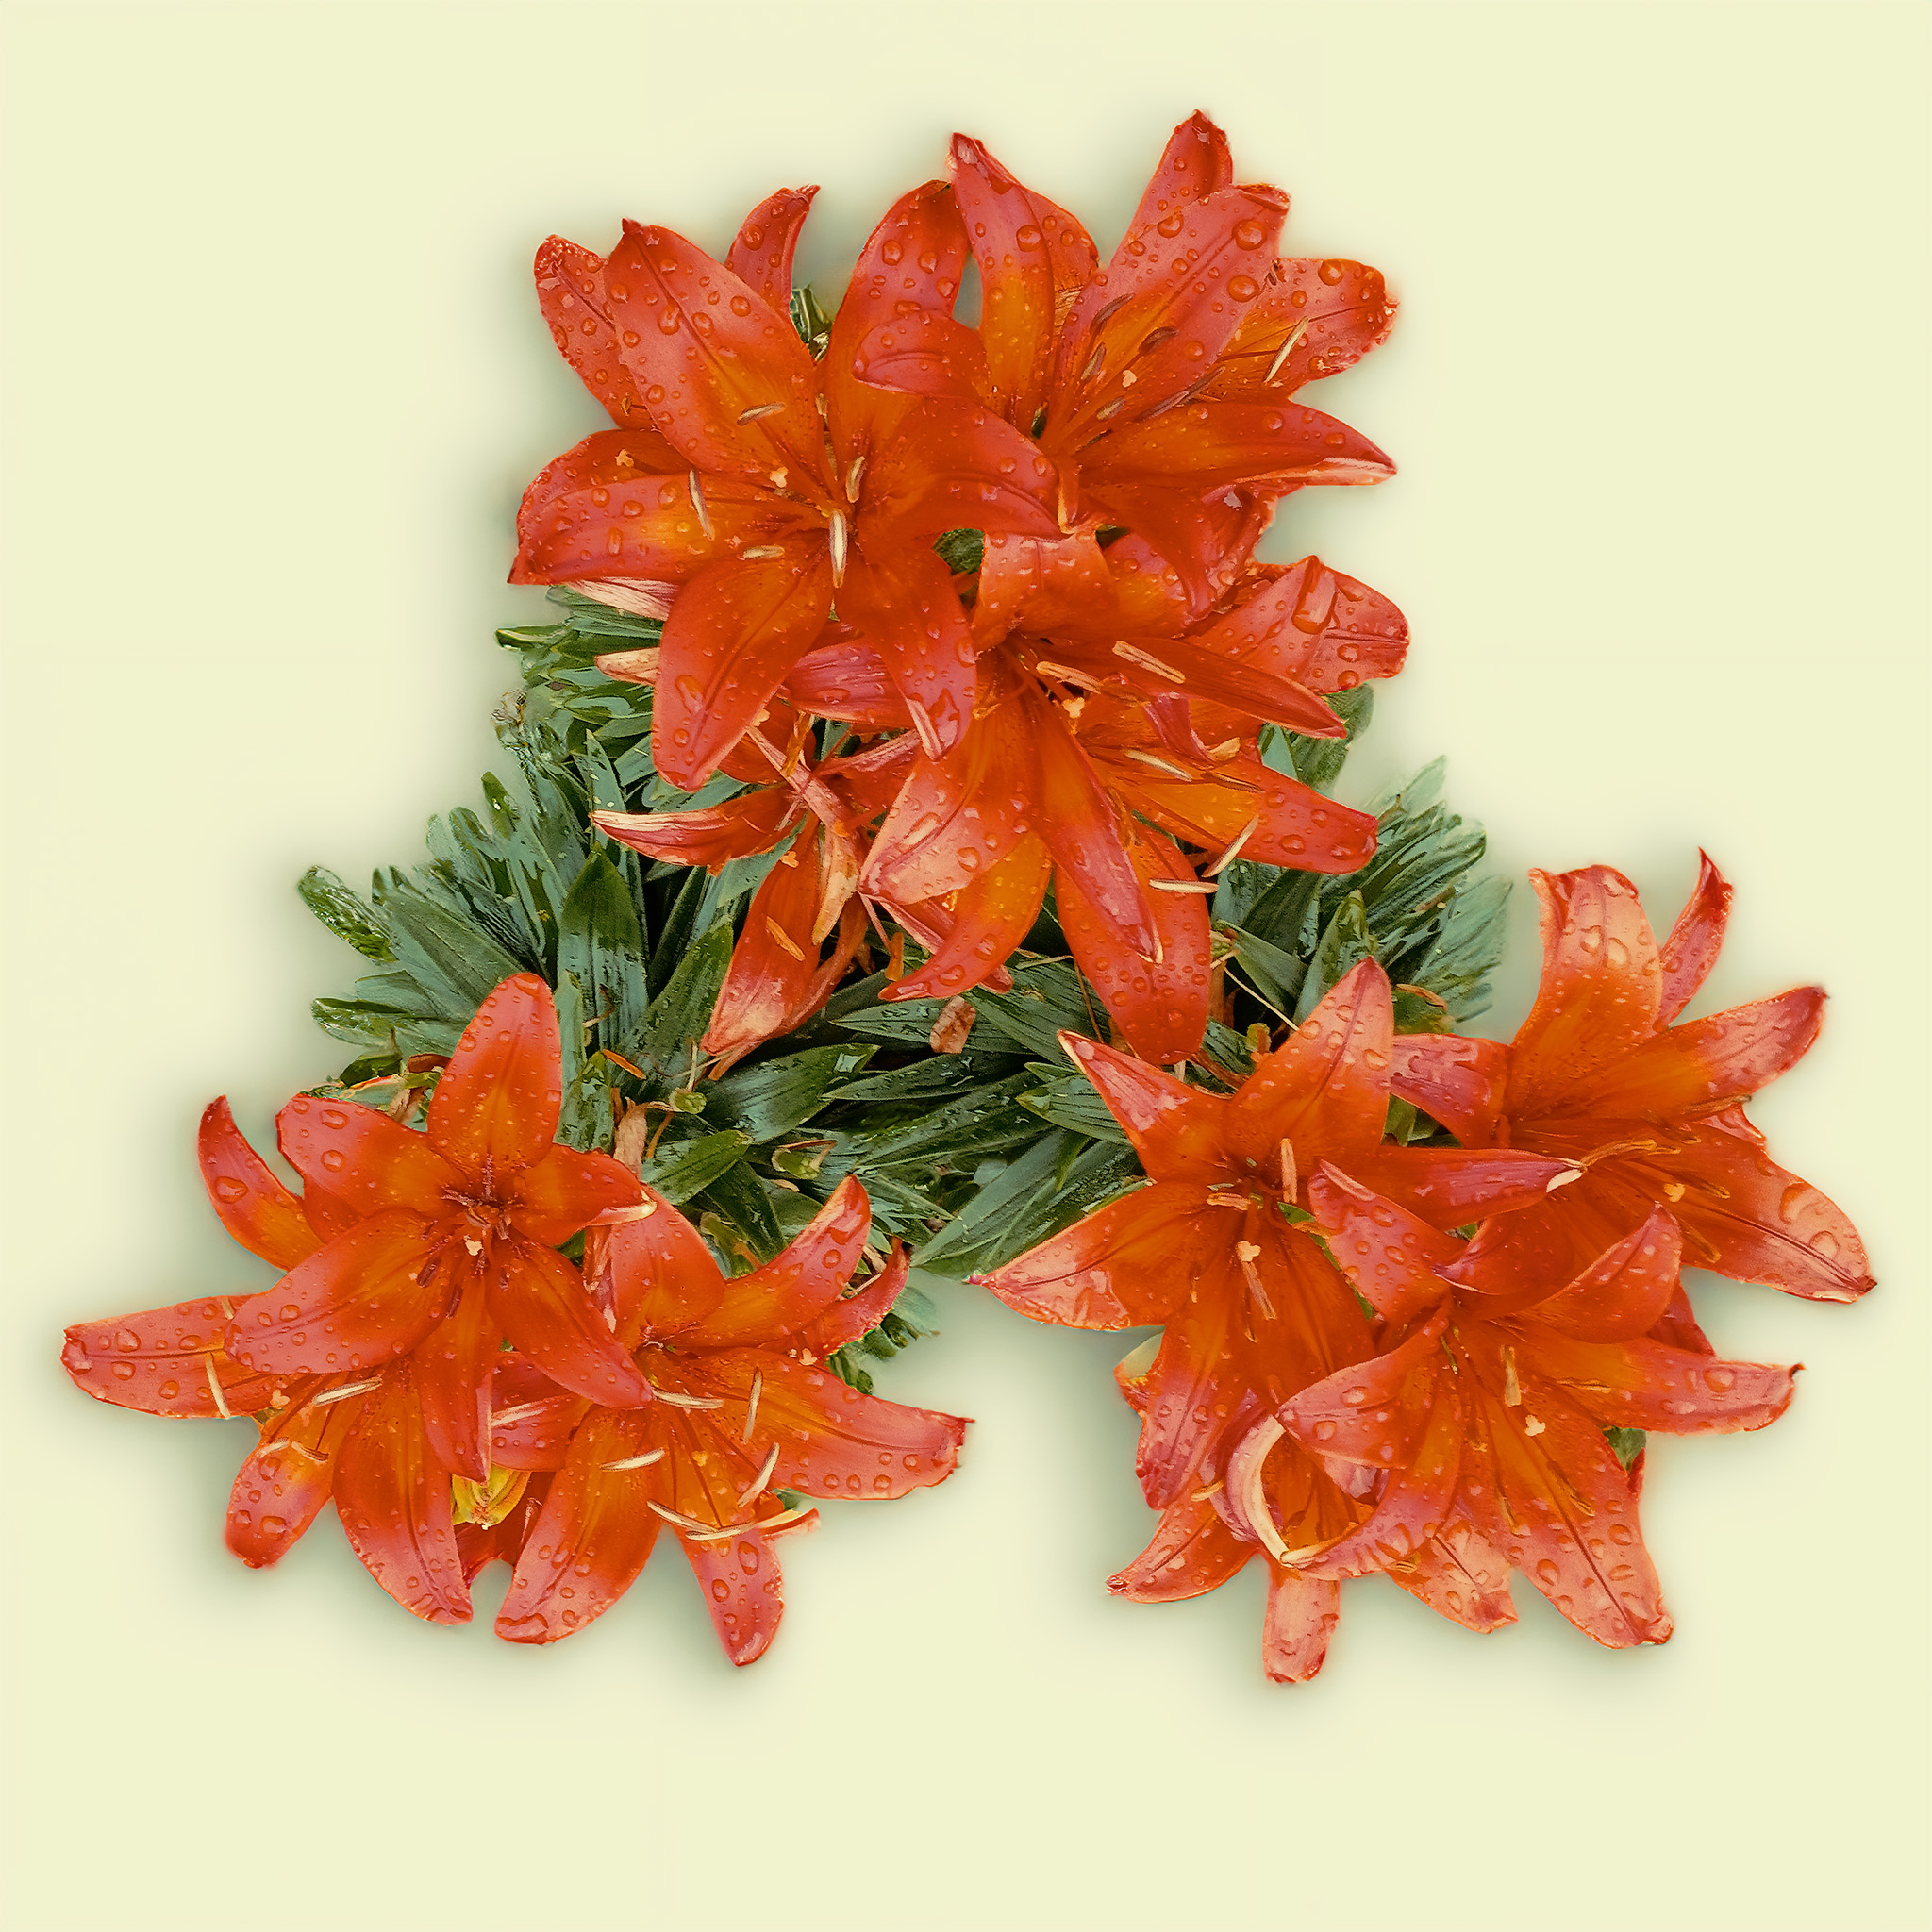
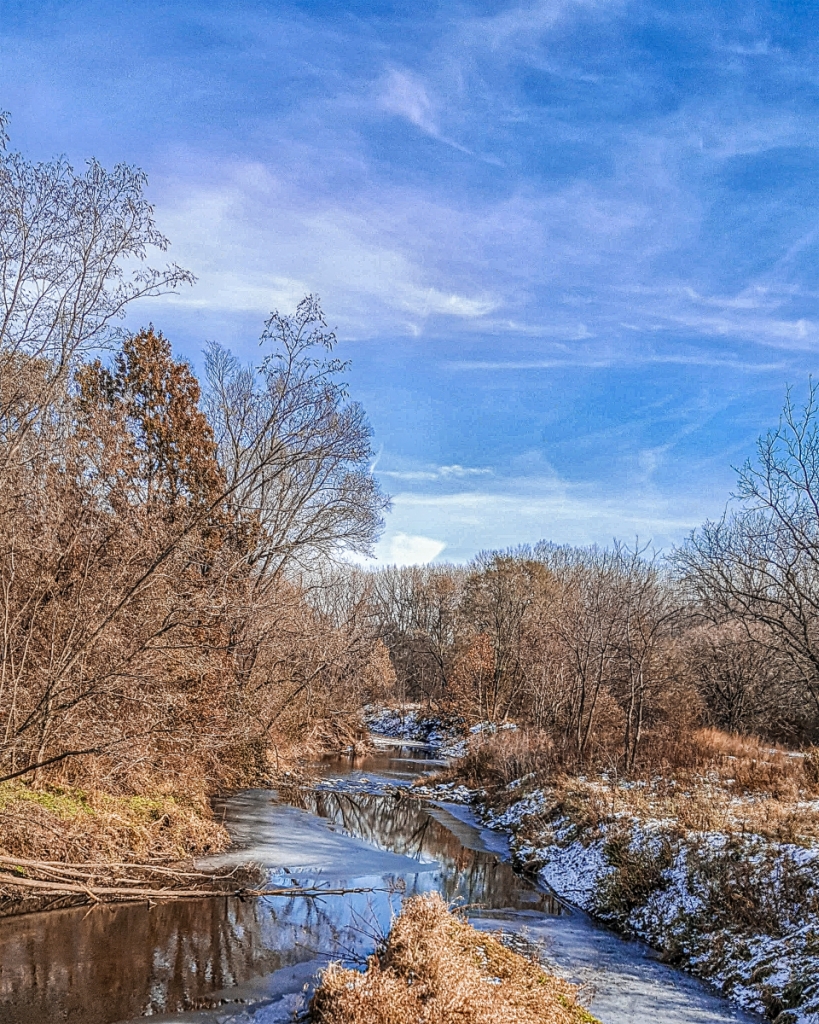
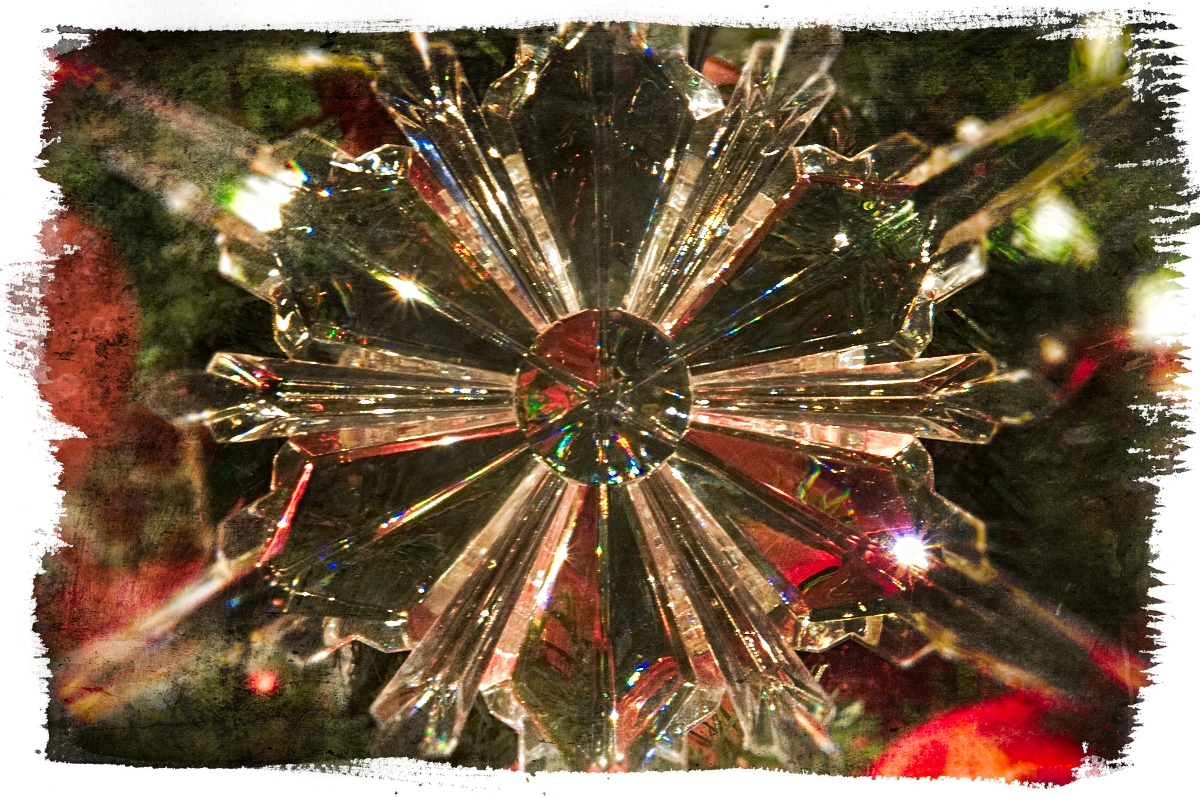
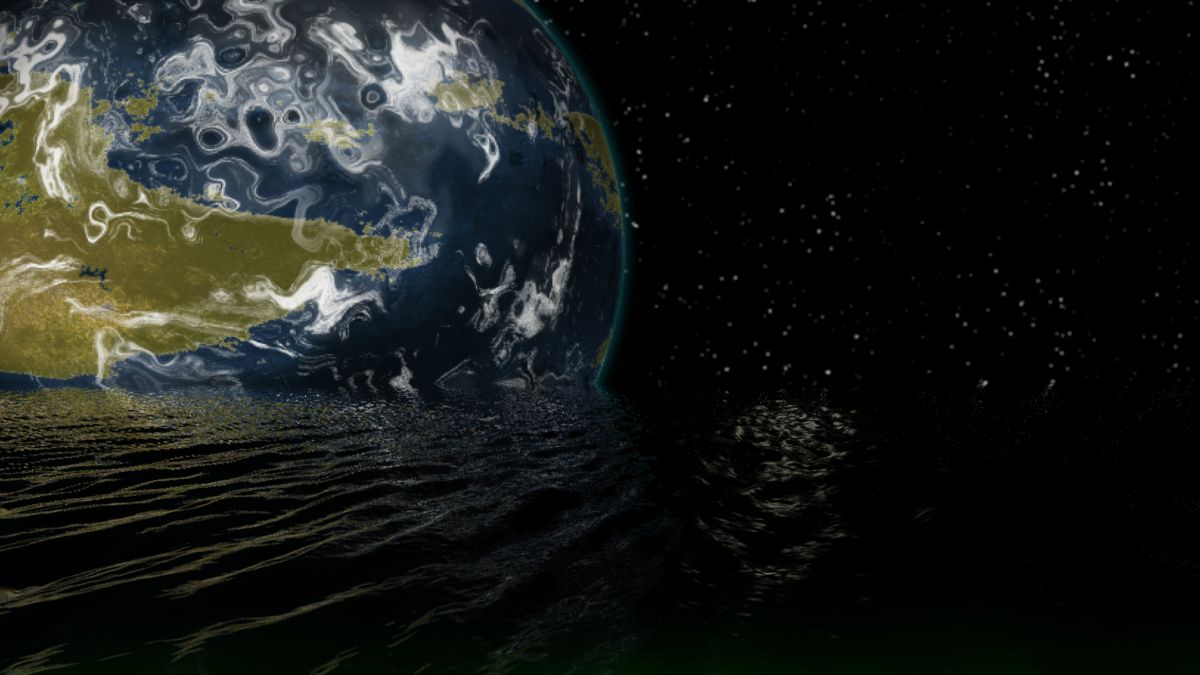
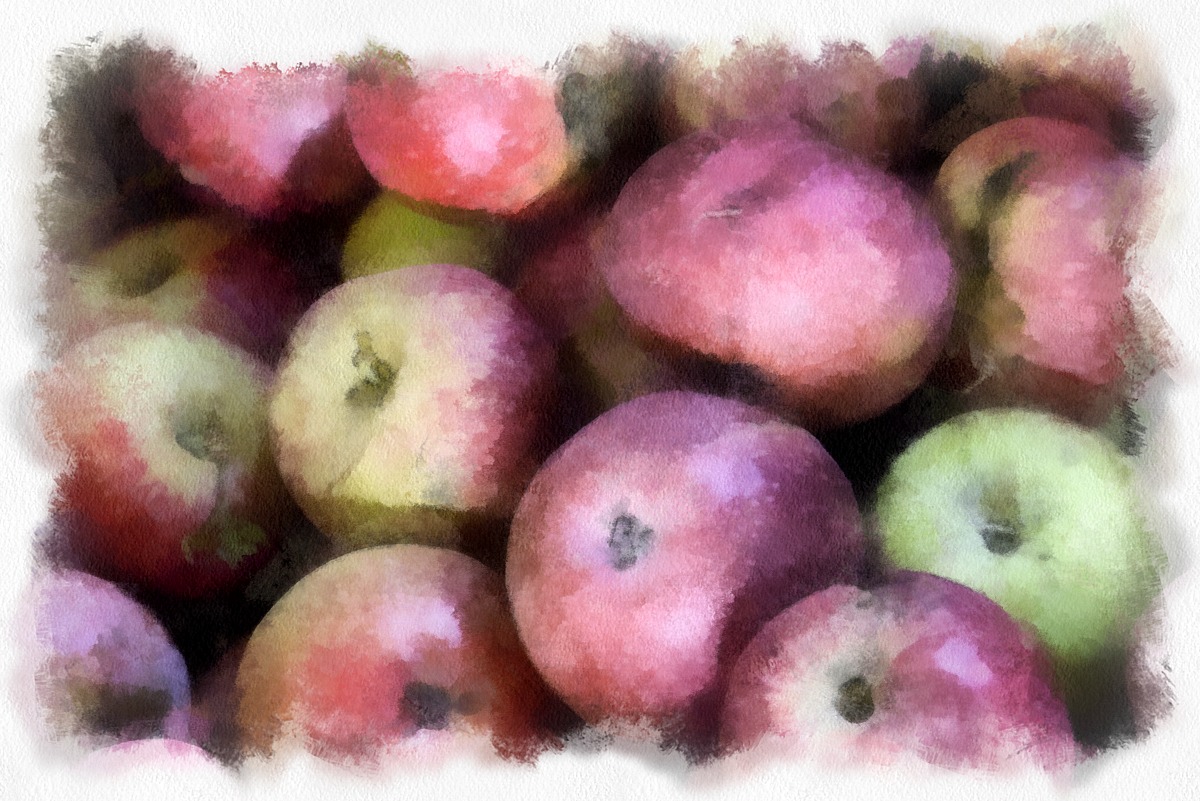
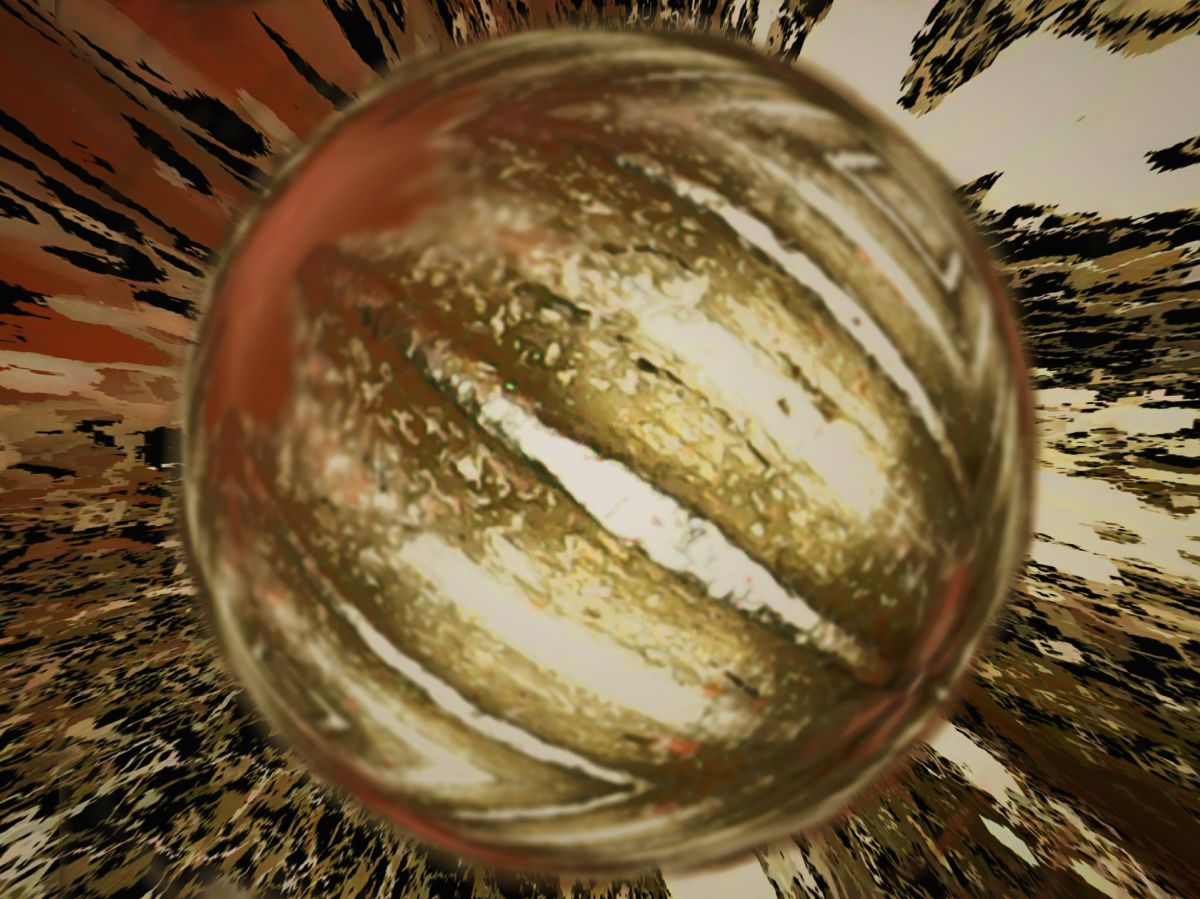
Comment |
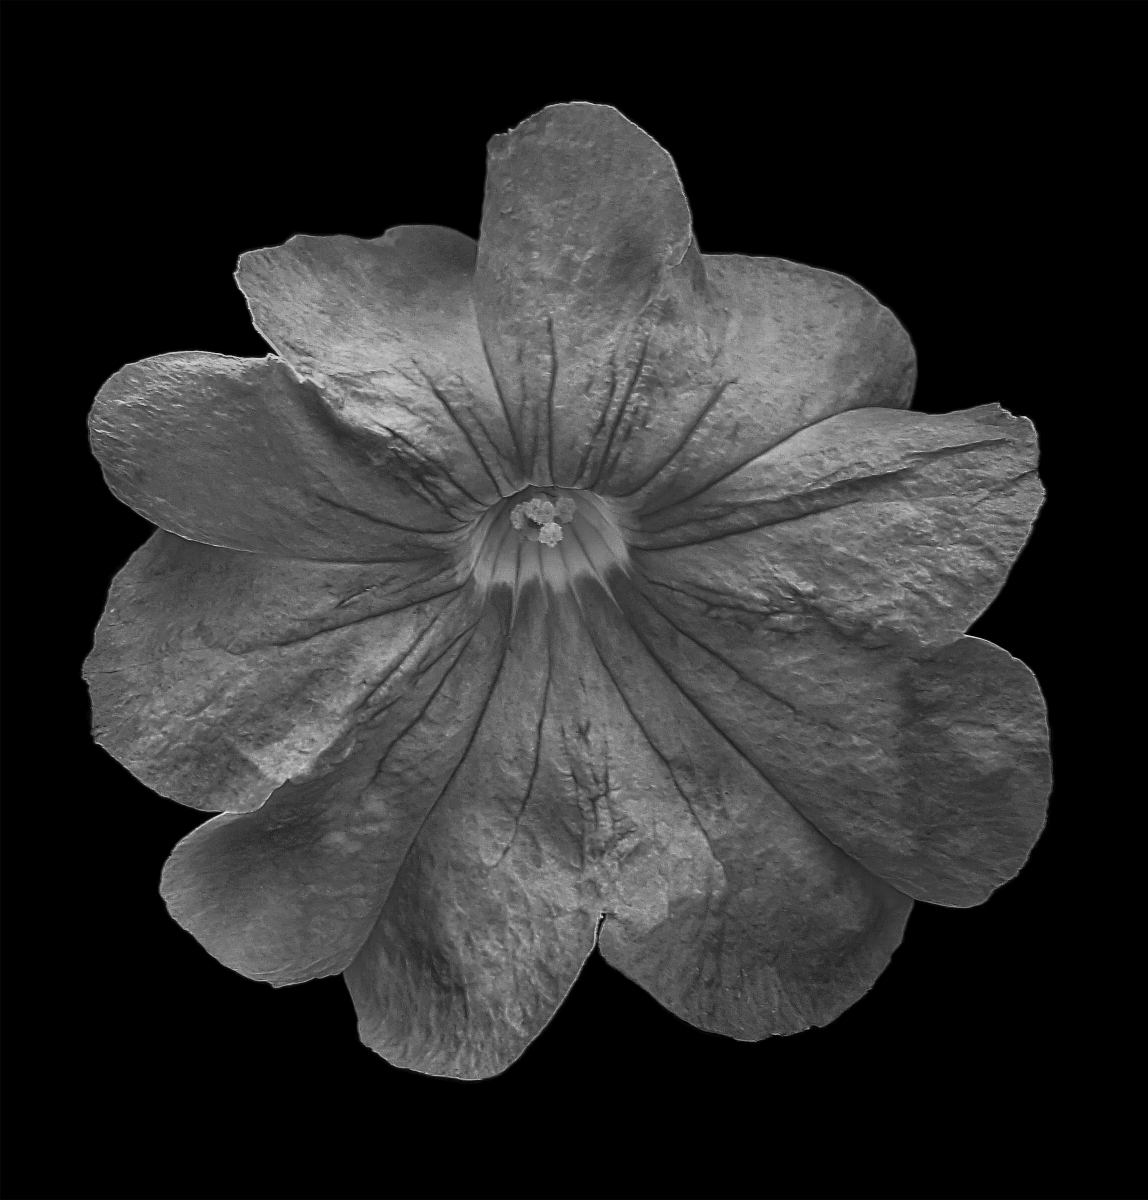
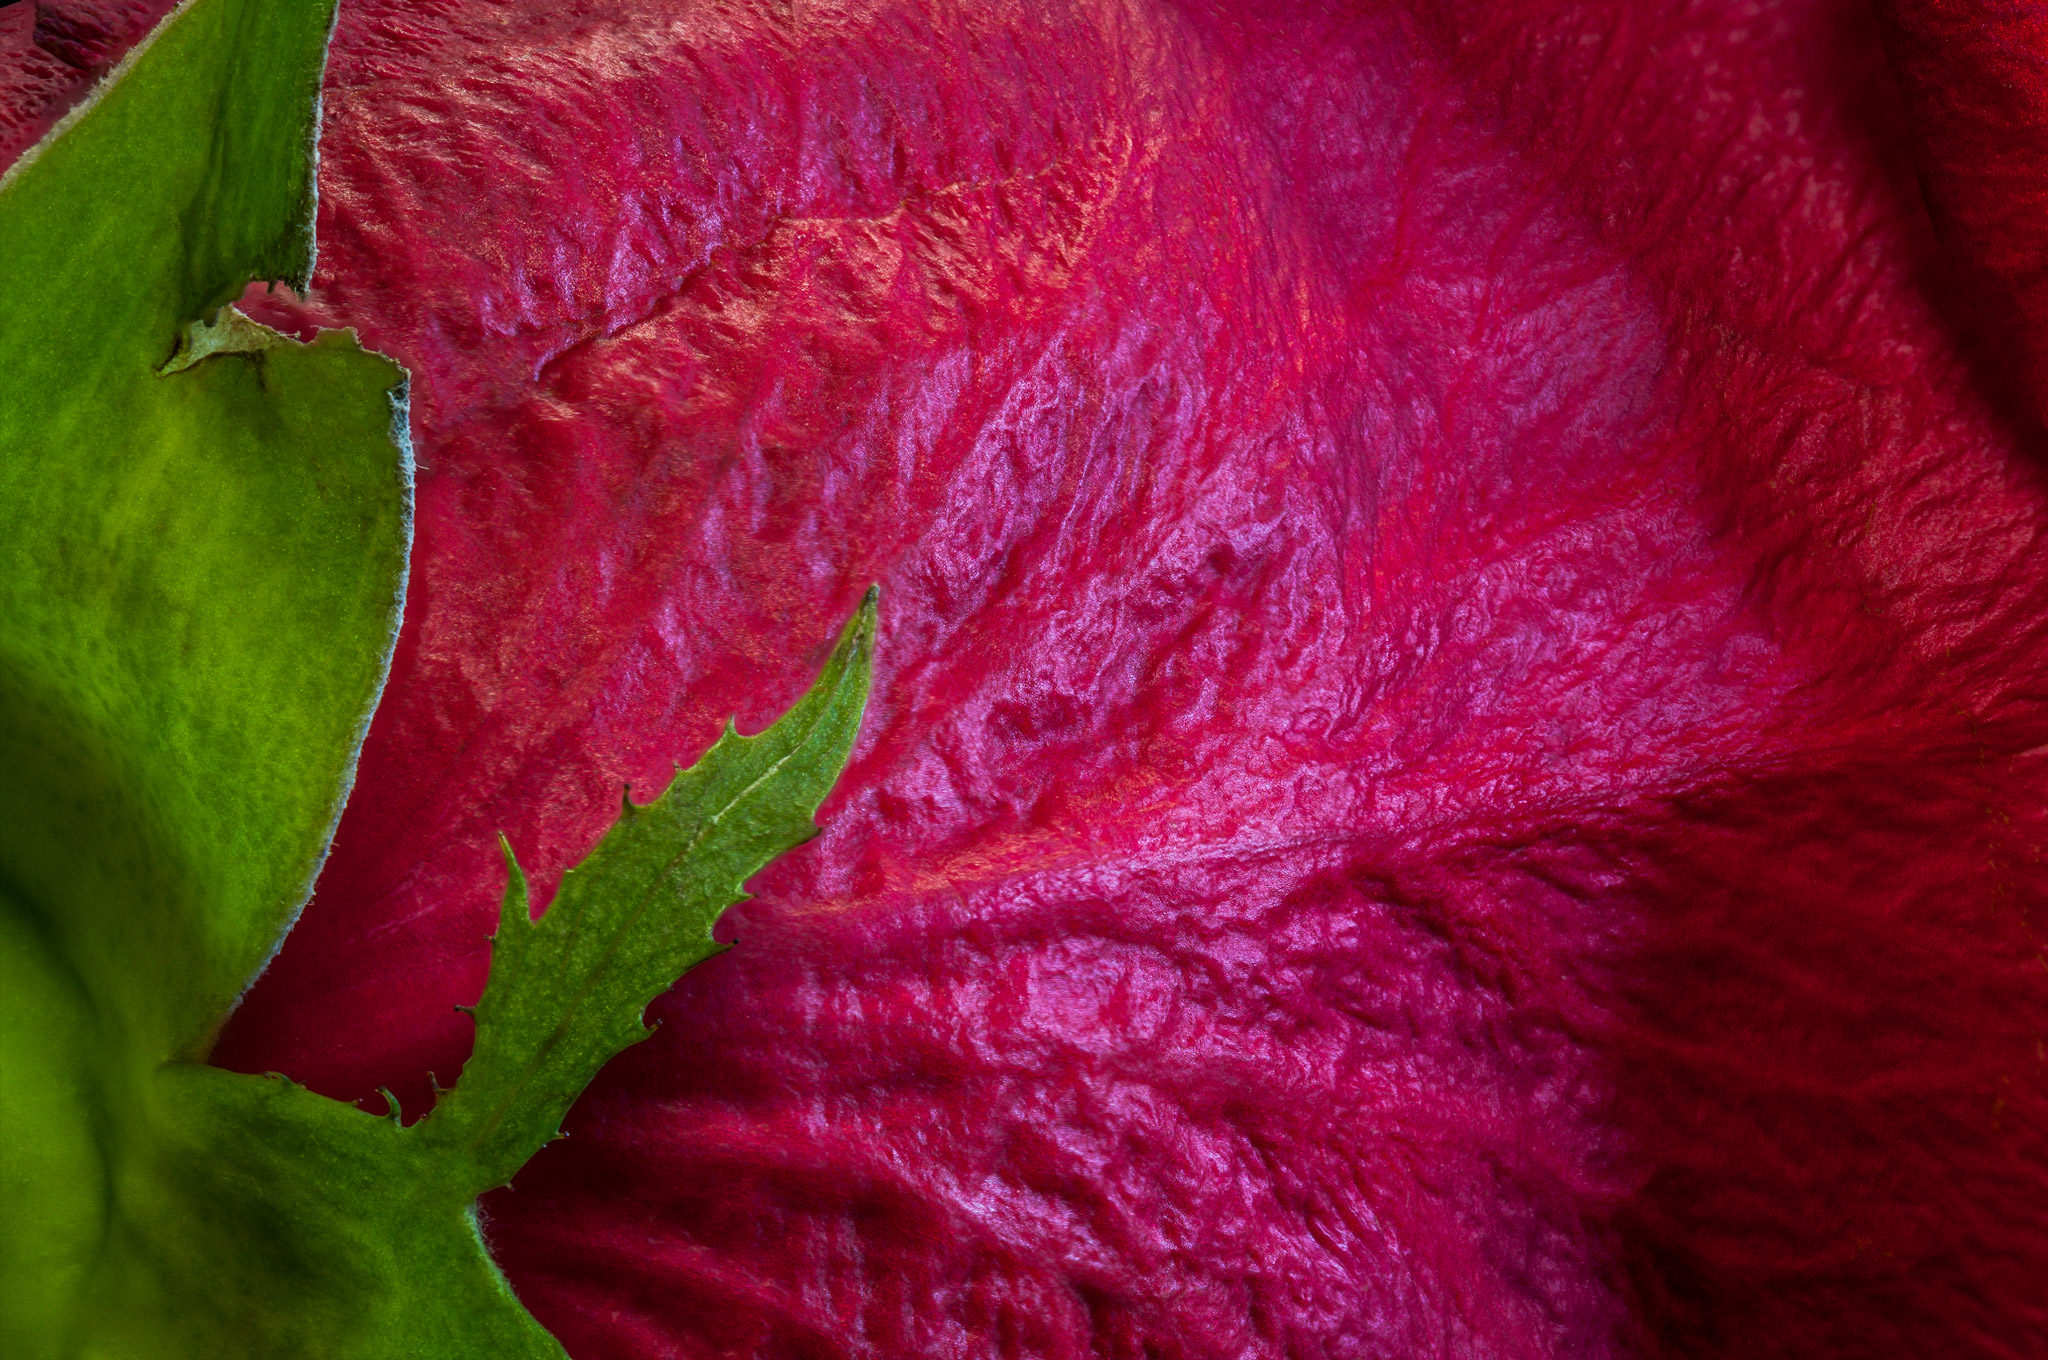
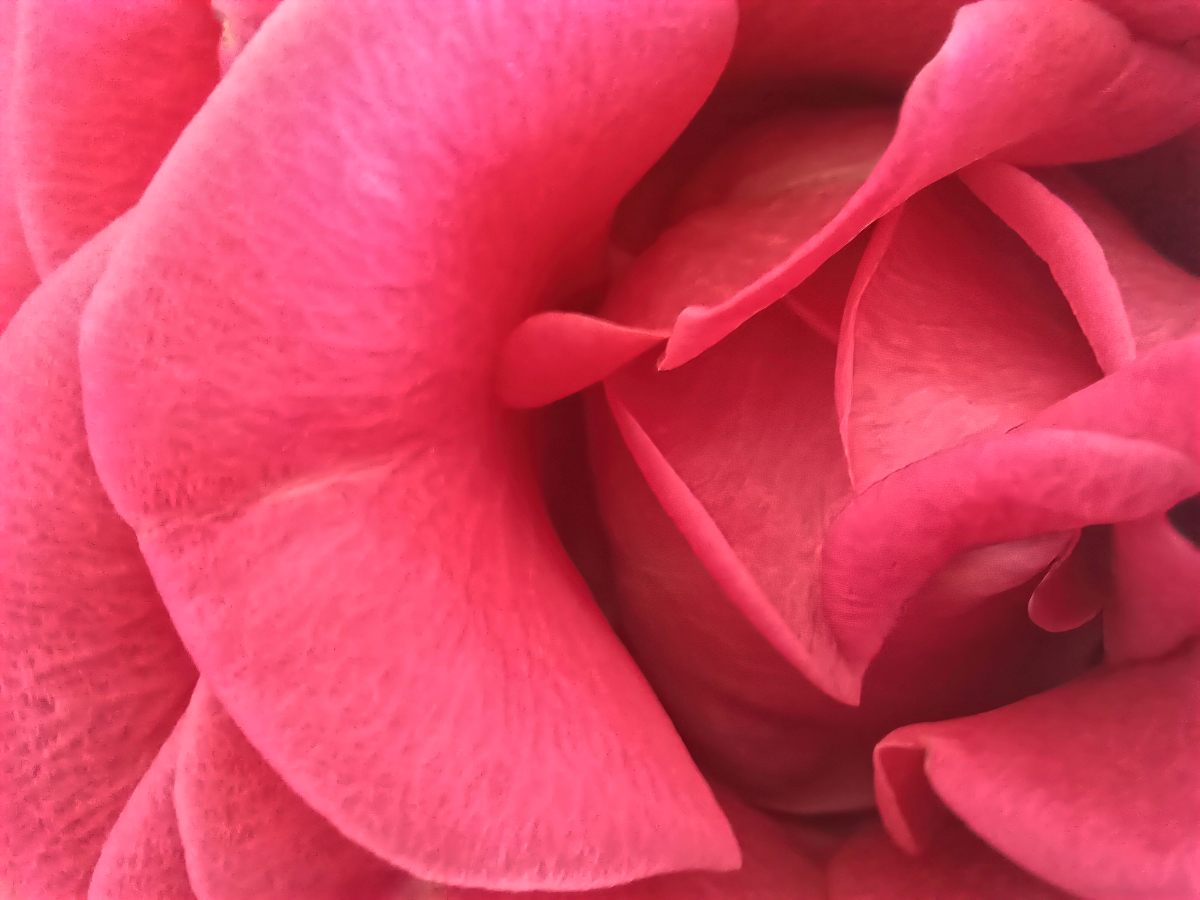
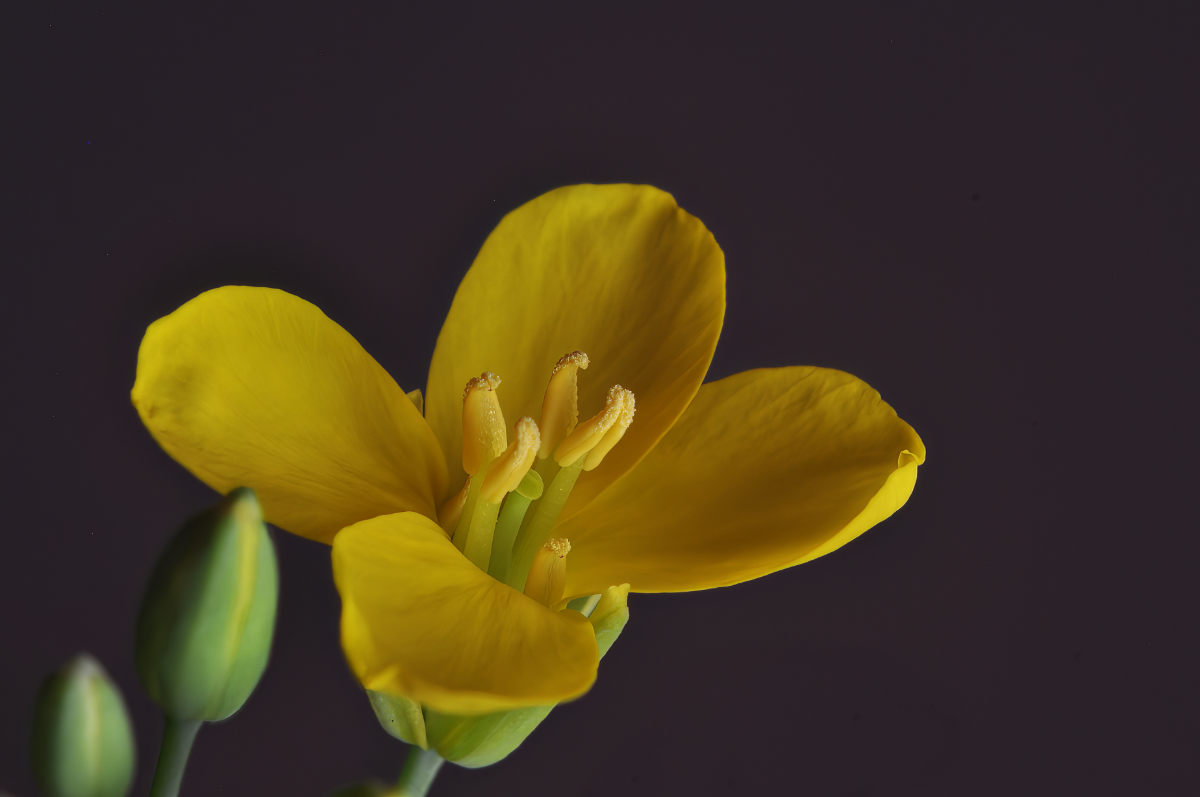
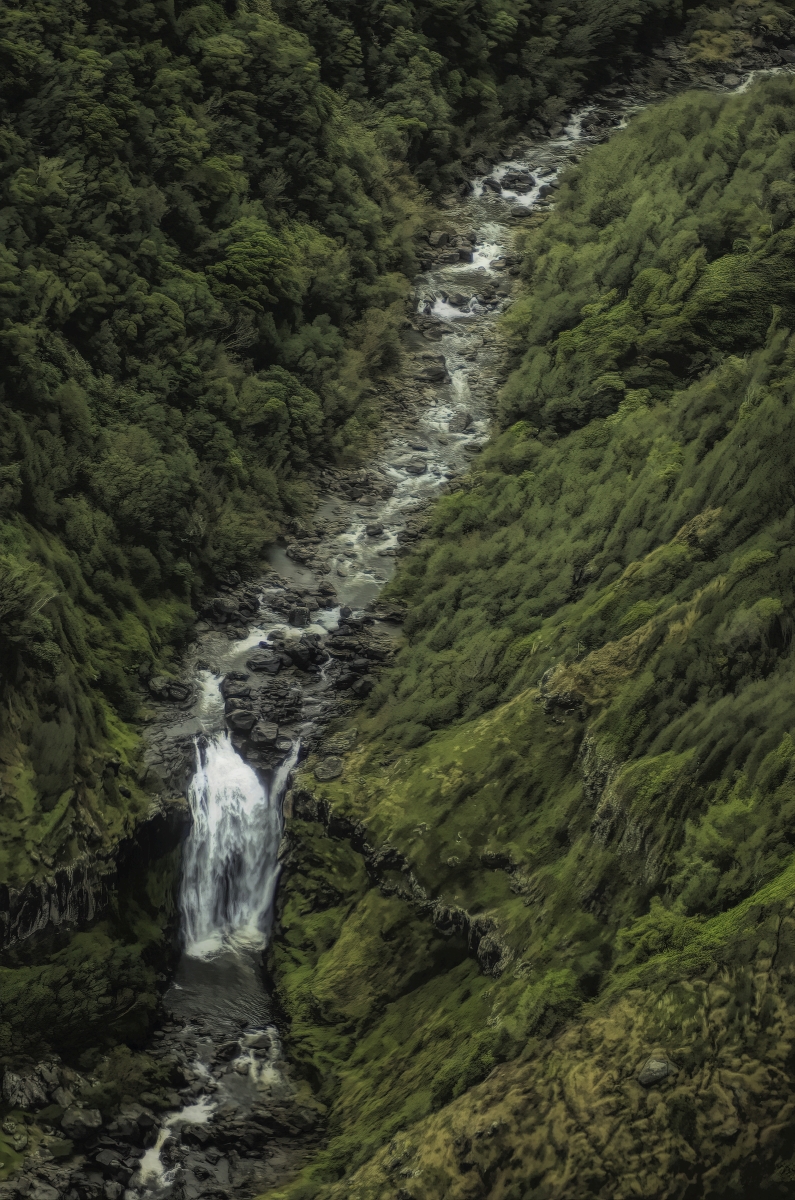
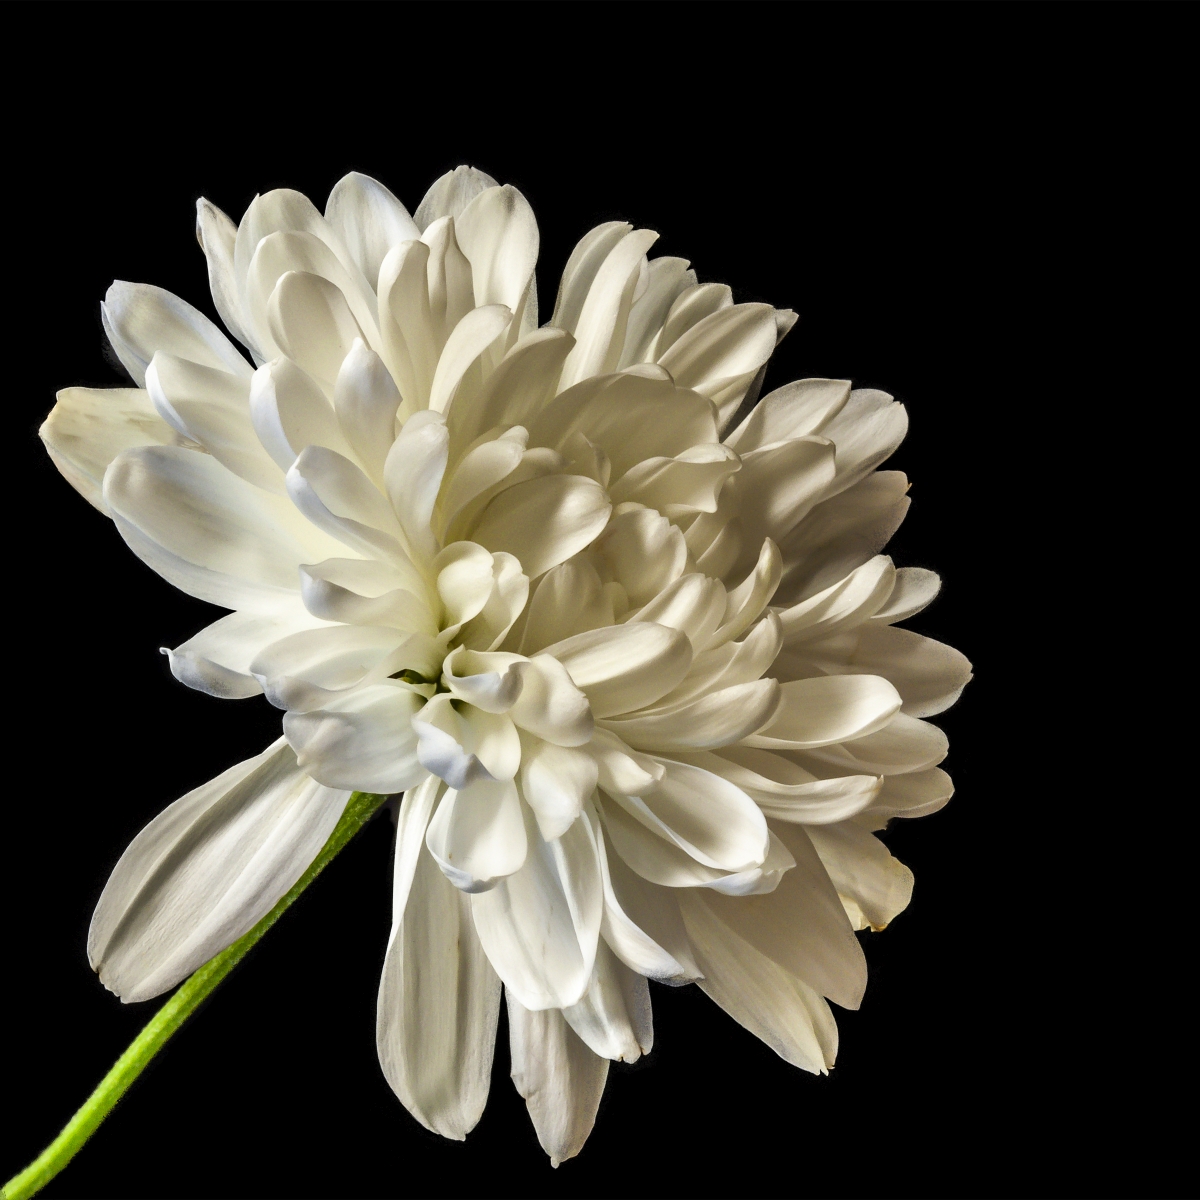
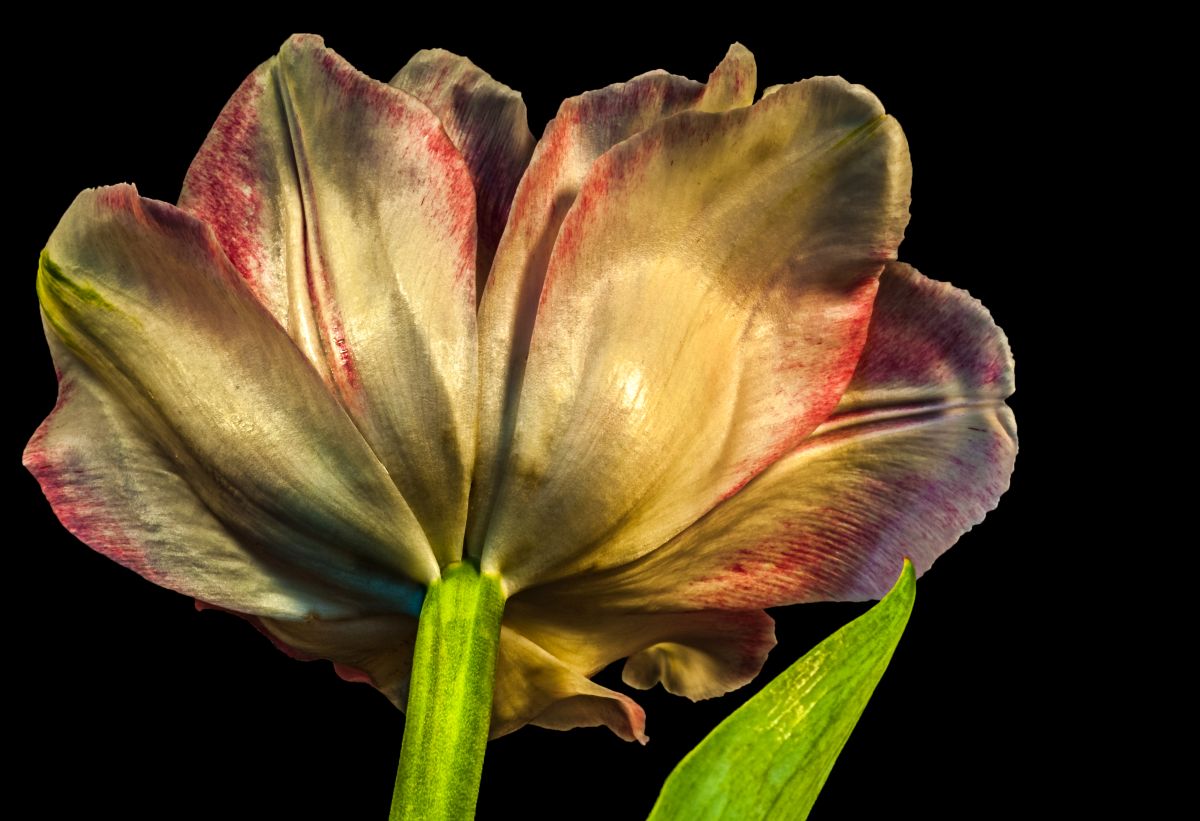
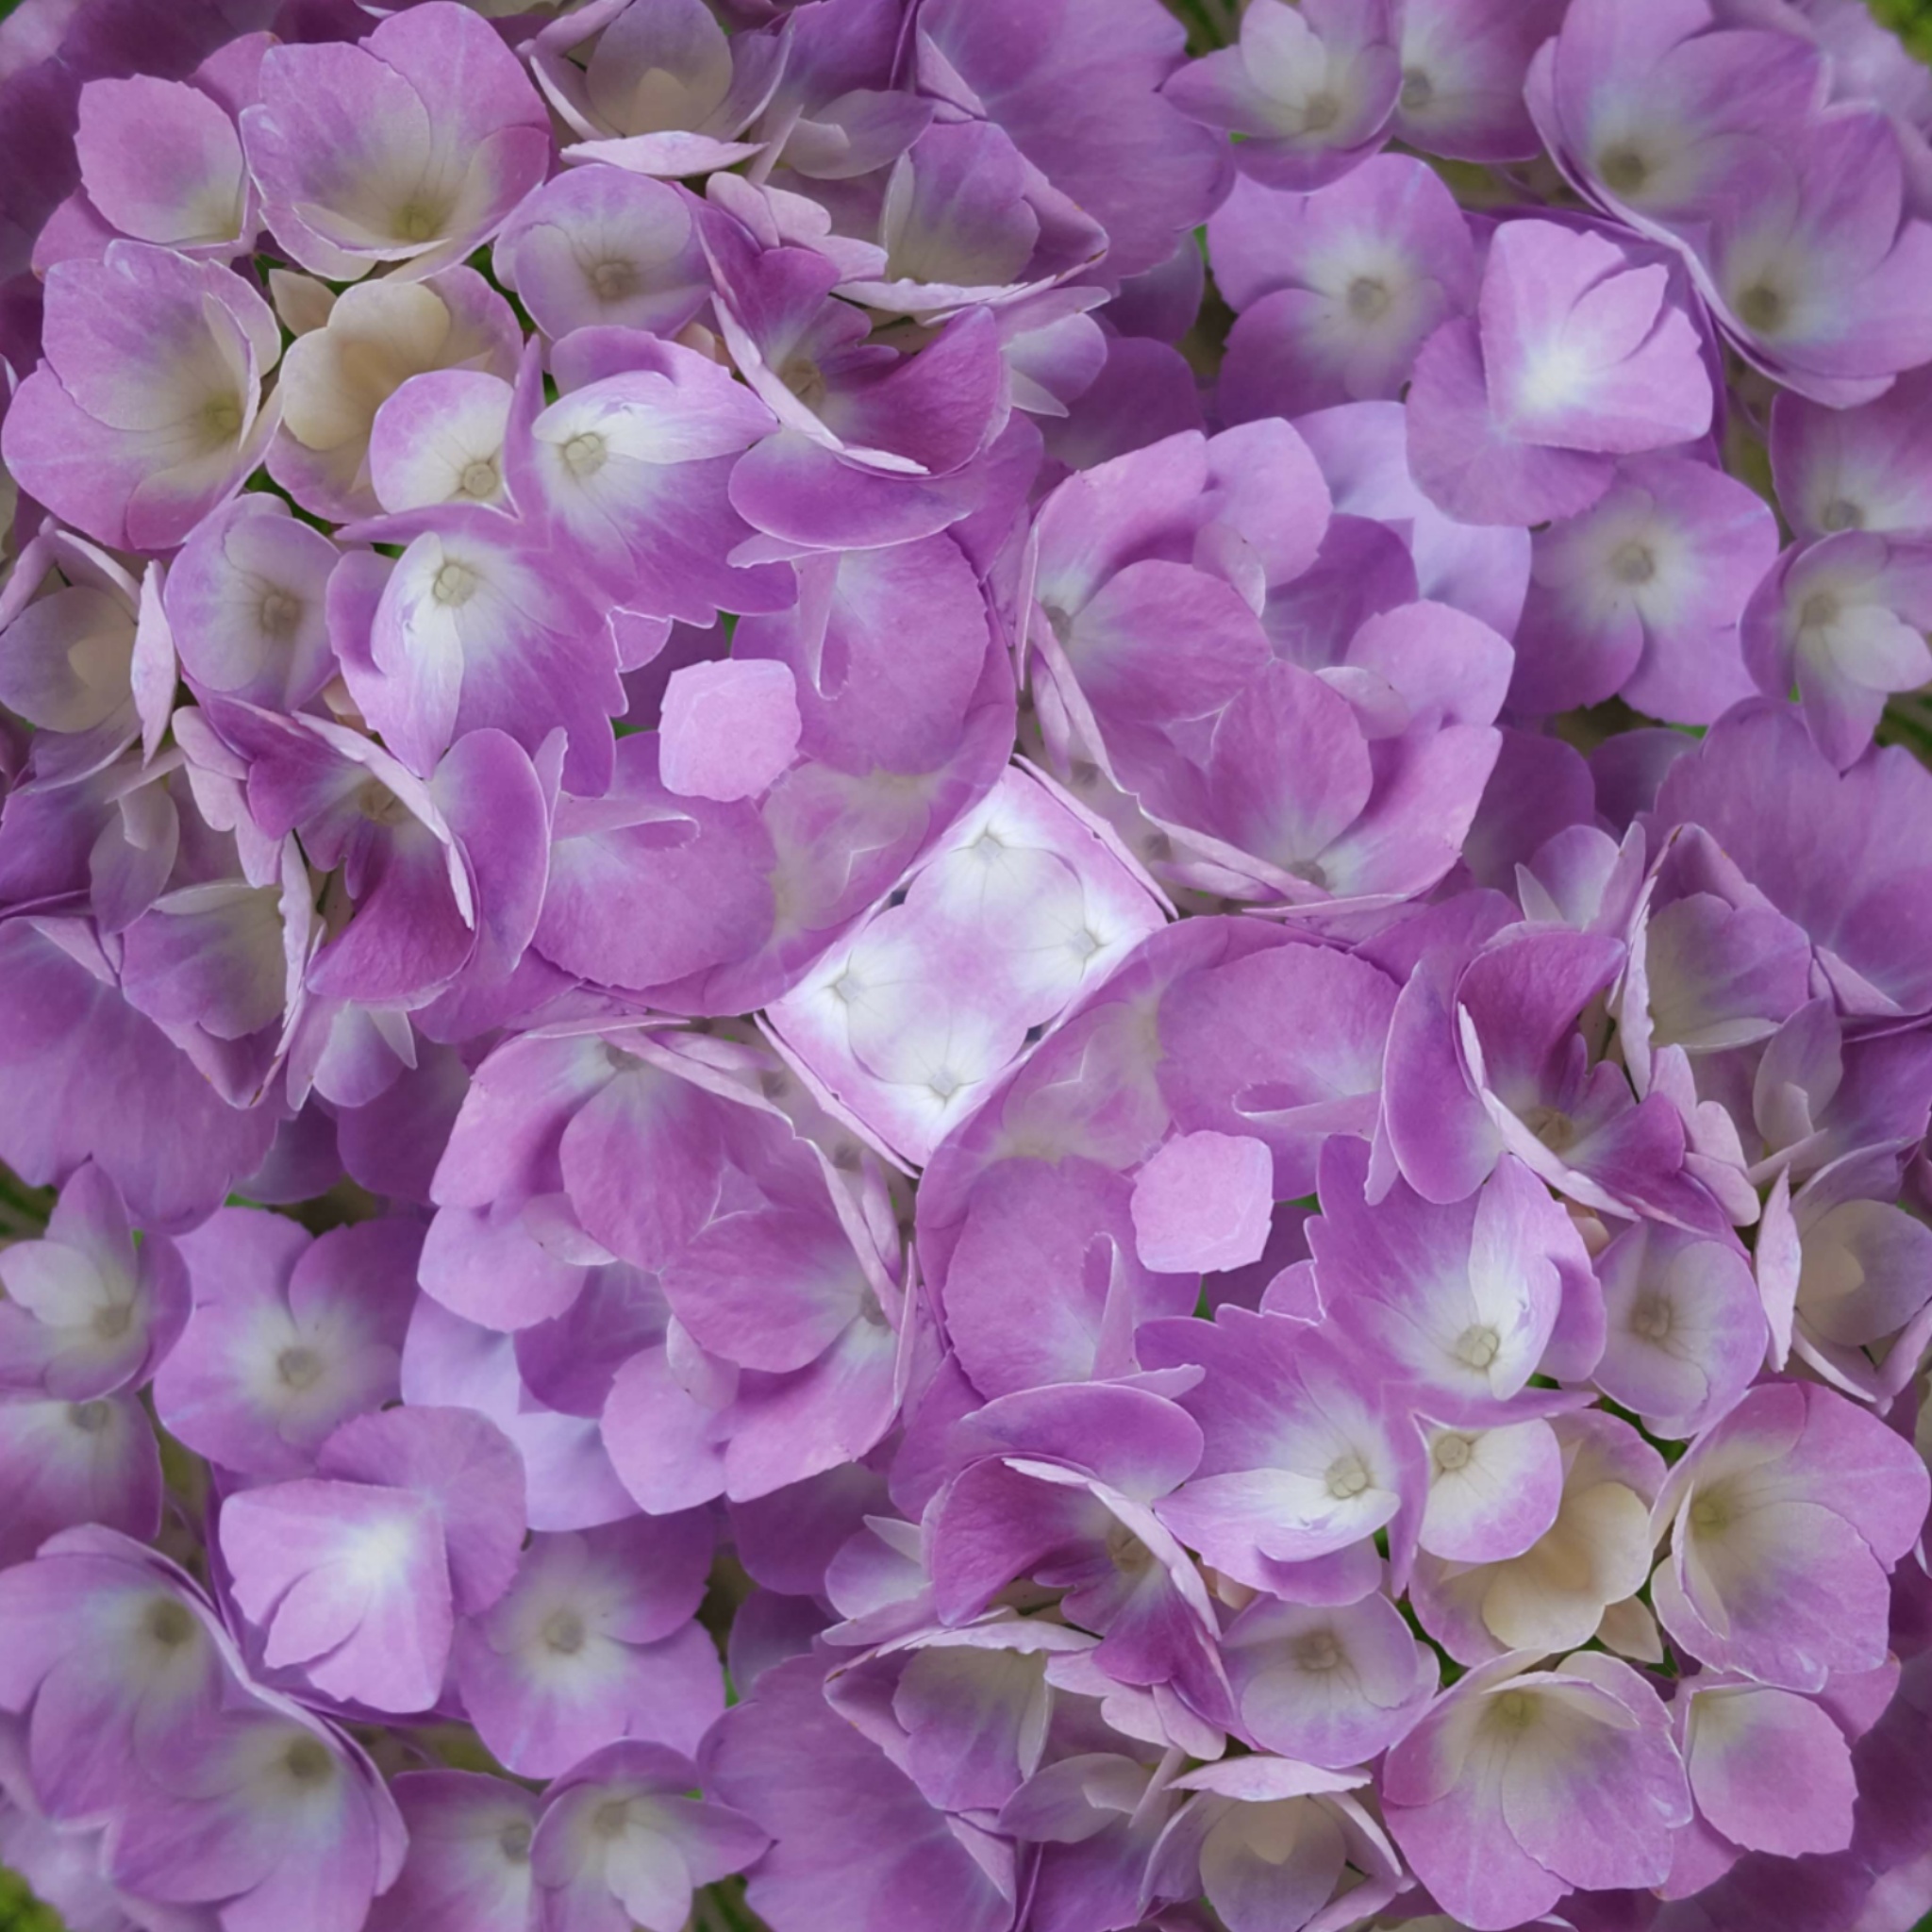
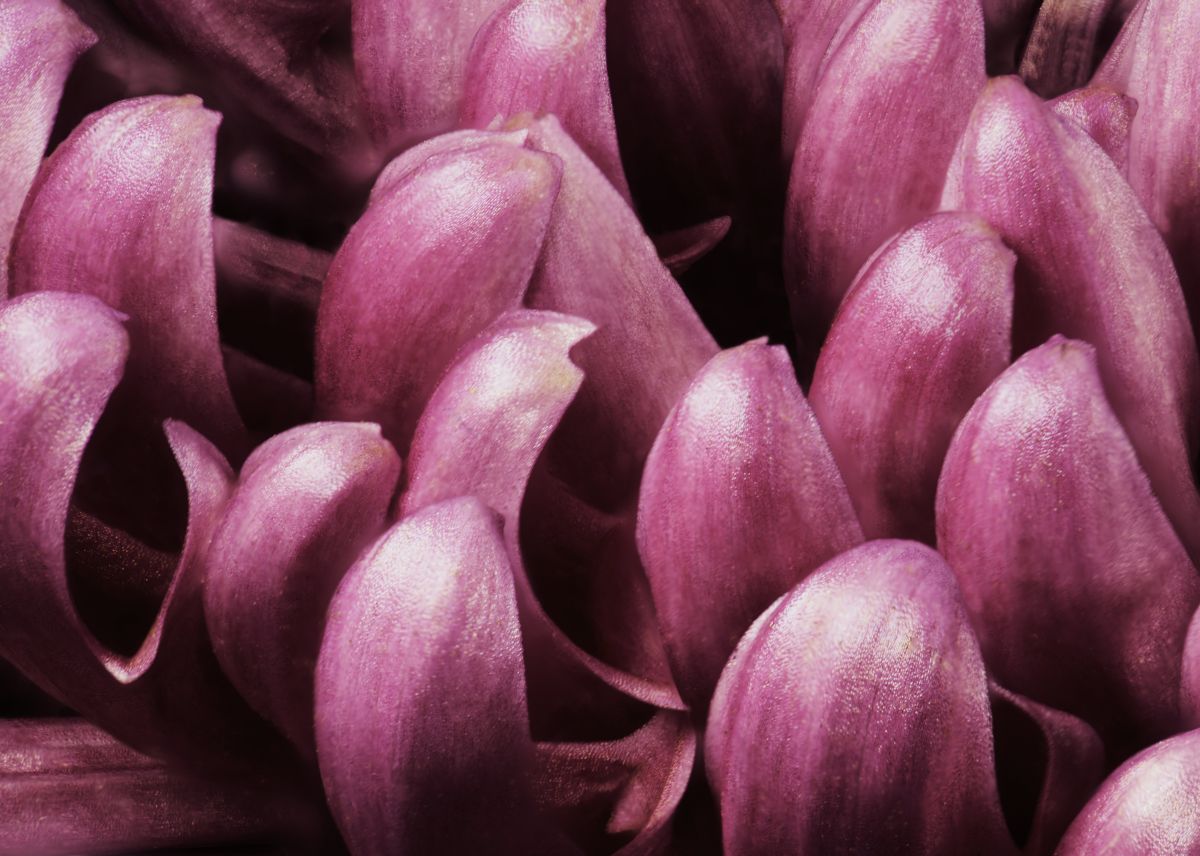
This is simply gorgeous, Arabella! You have turned a humdrum flow pic that was over-exposed into a wall-worthy piece of art. I have no suggestions here except print it and mount it! Bravo! |
May 18th |
| 53 |
May 20 |
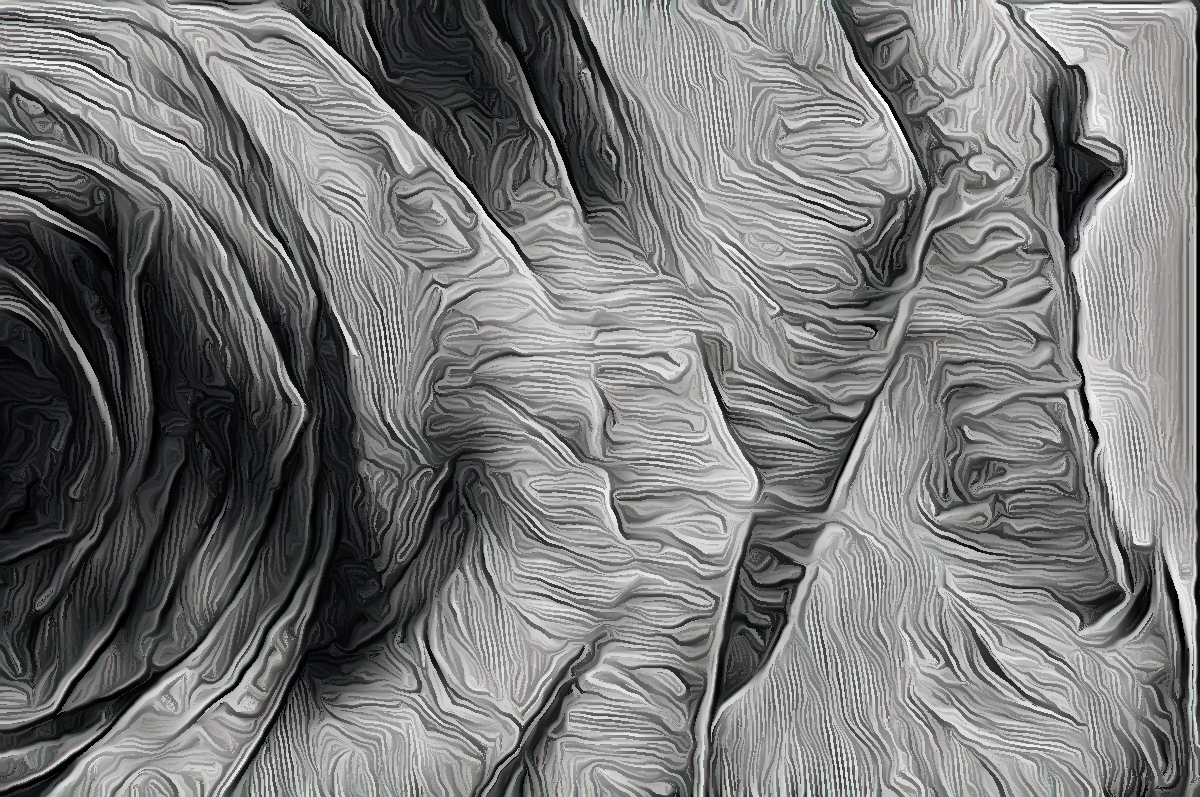
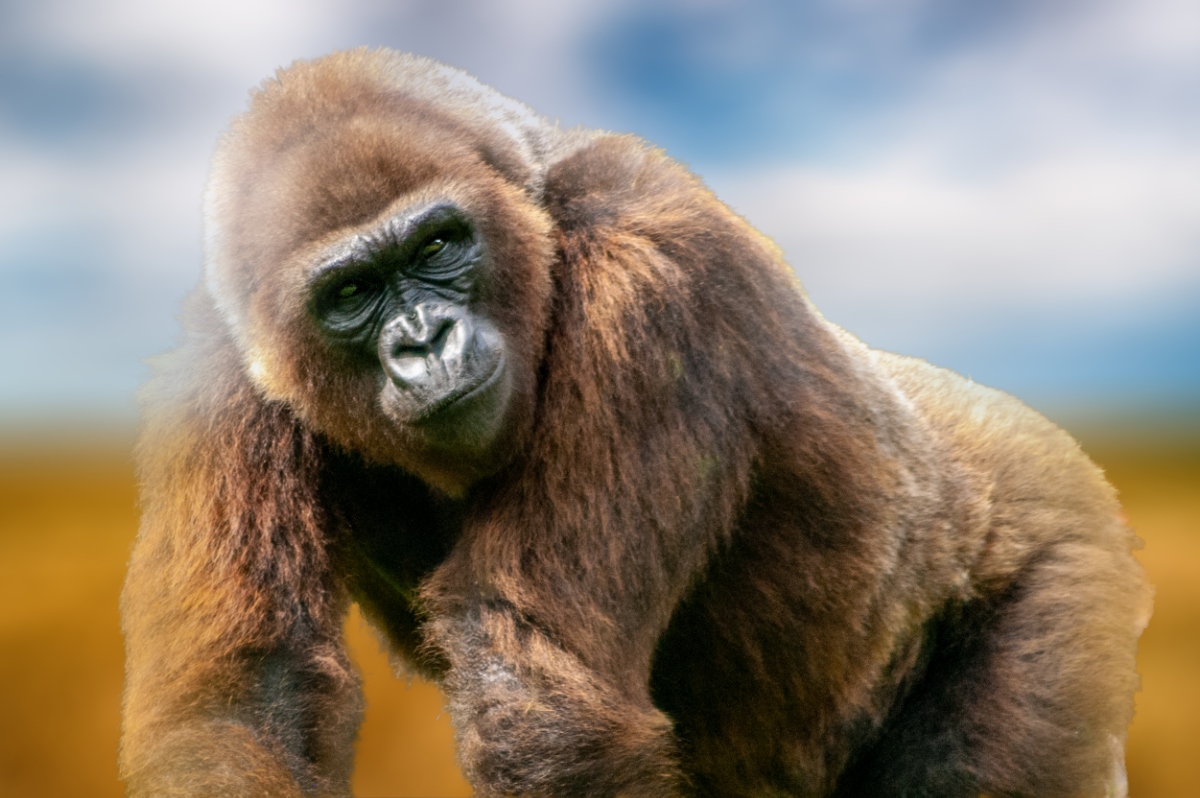
Comment |
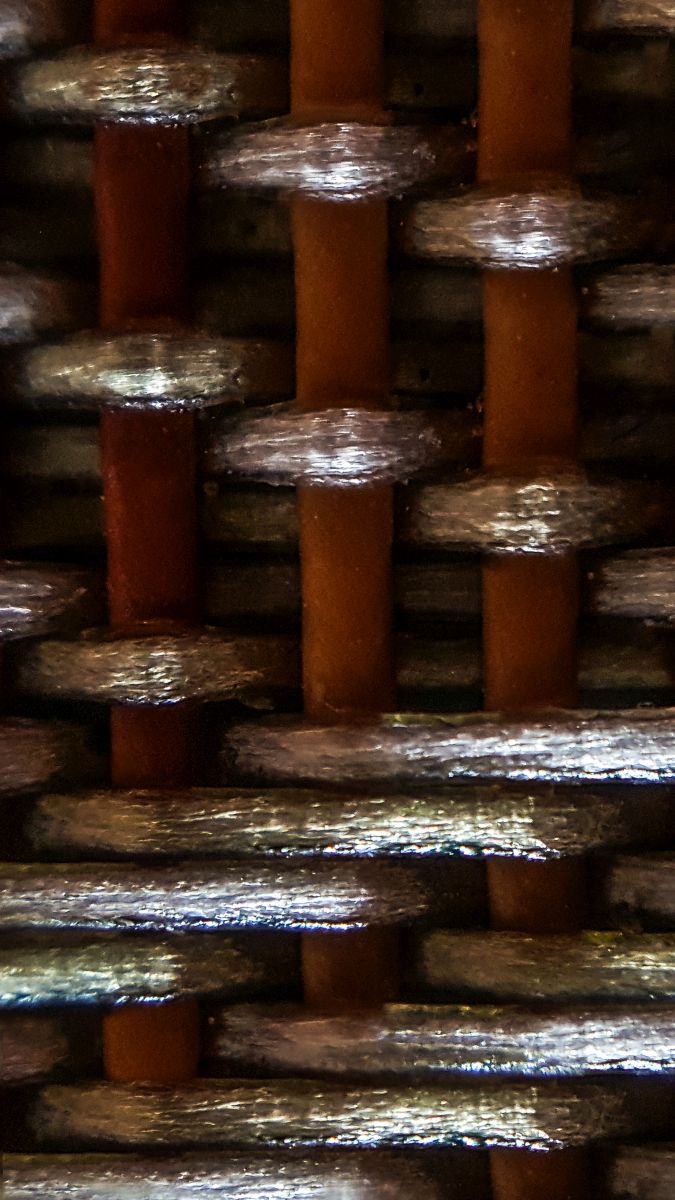
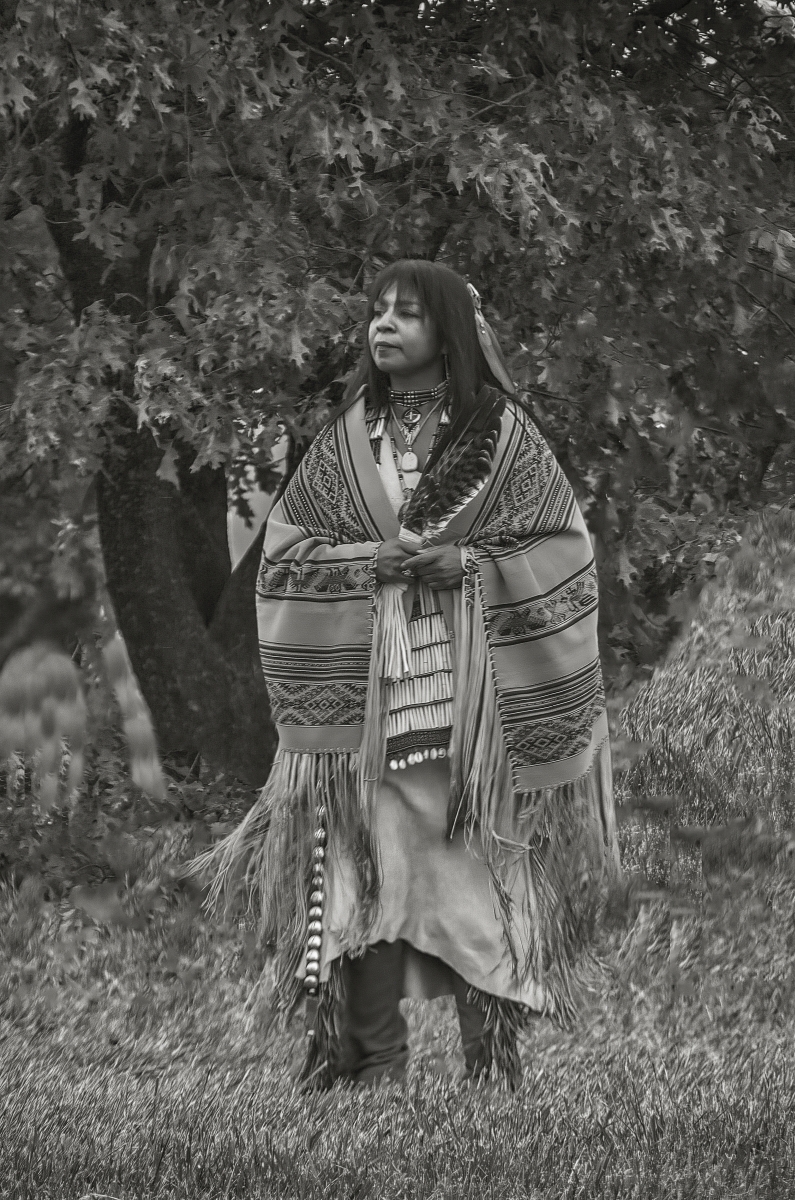
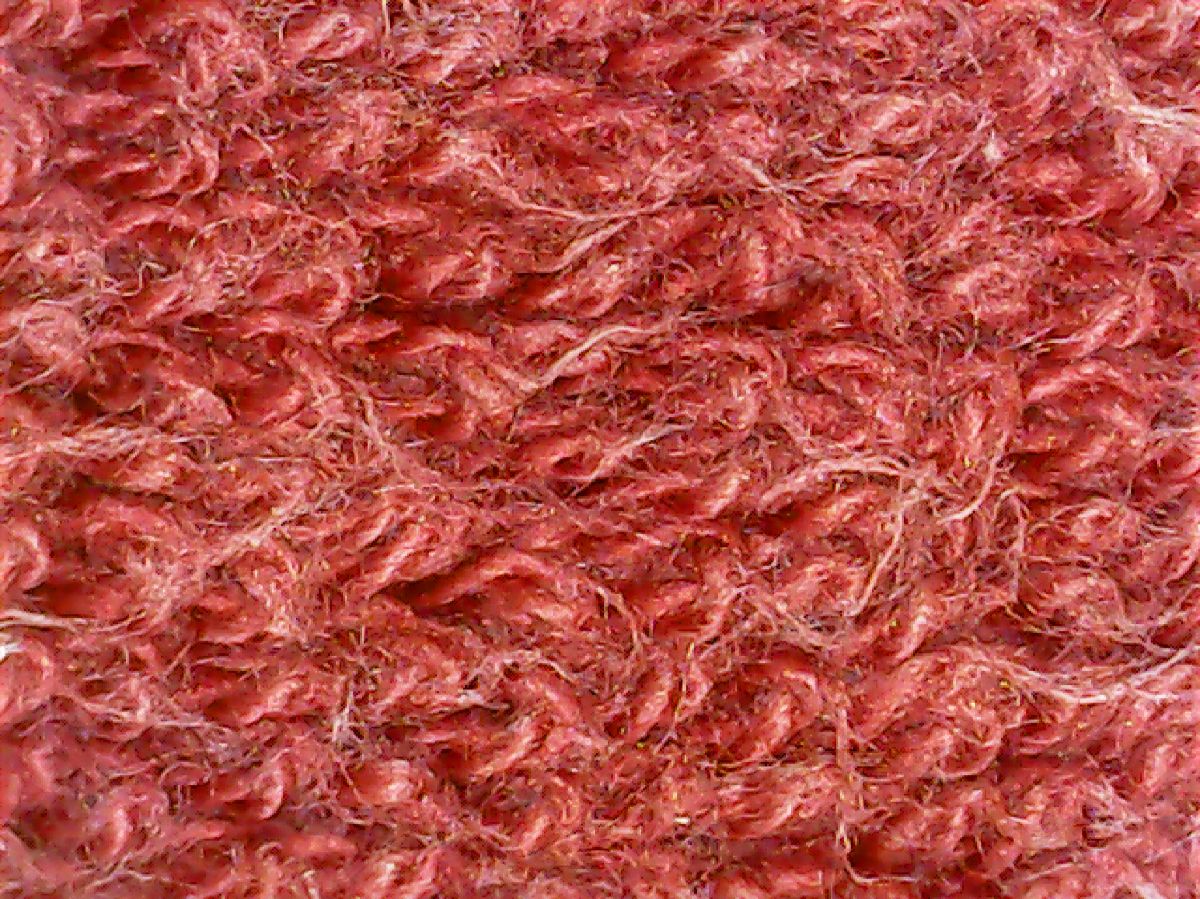
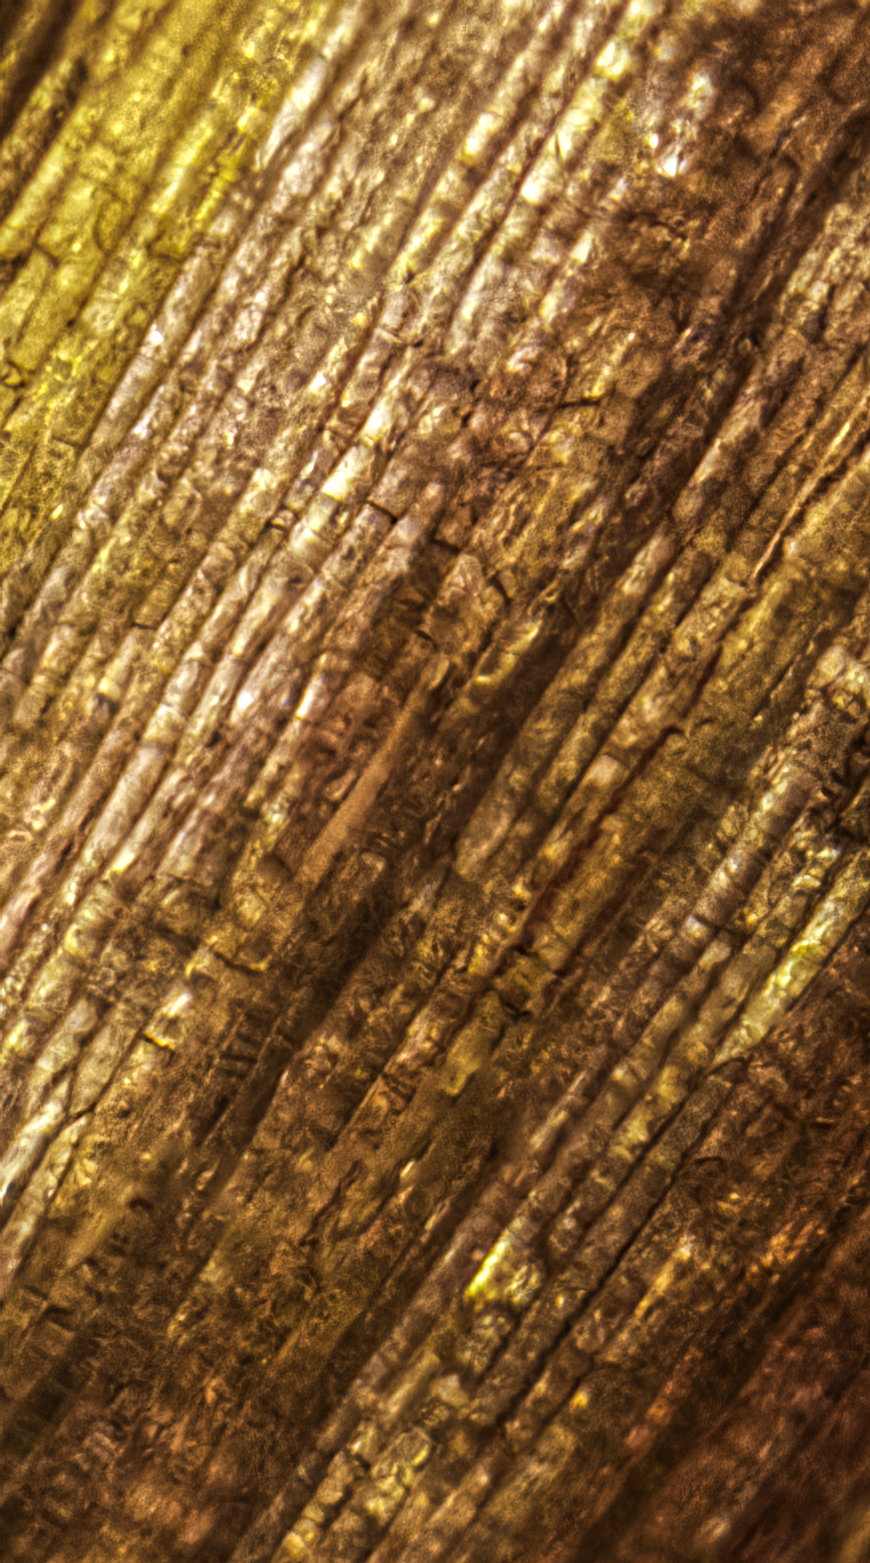
I agree with Rusty - great "hands" image. You isolated the meat of the image with your crop and we can almost feel the wool with your processing. No suggestions from me to make this better. |
May 18th |
| 53 |
May 20 |
Comment |
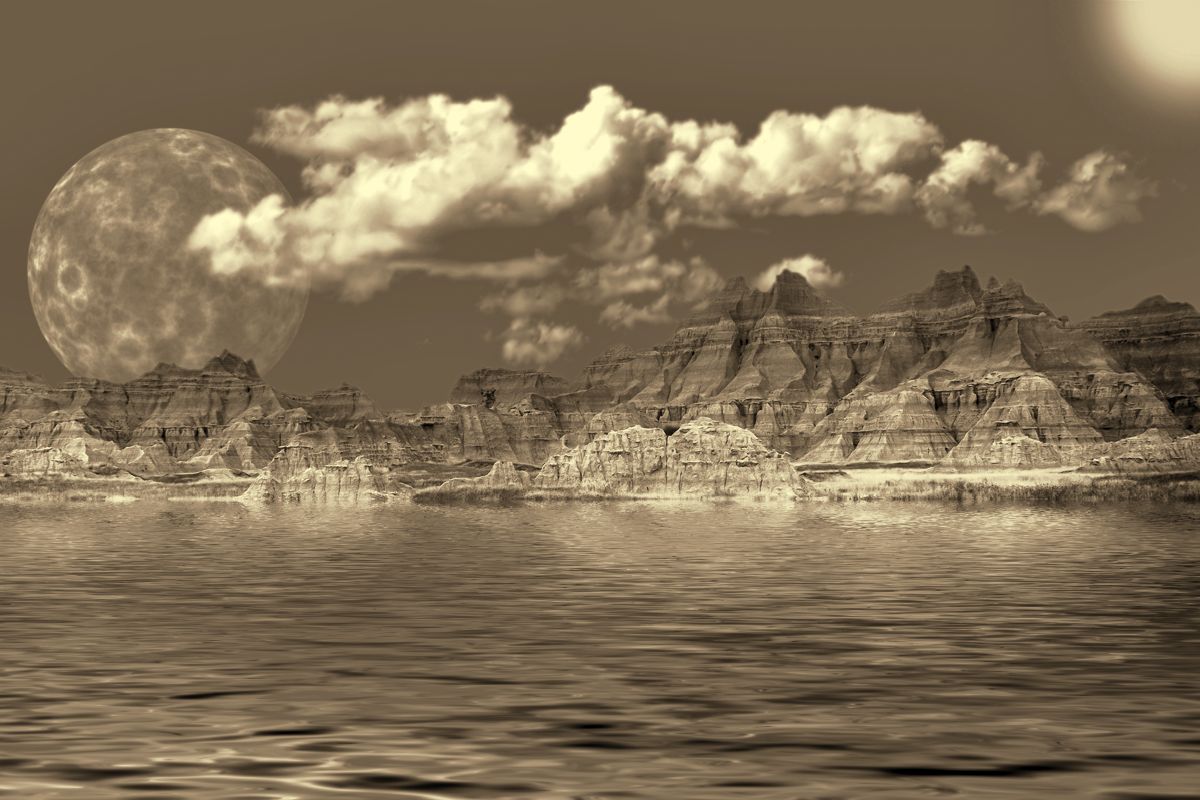
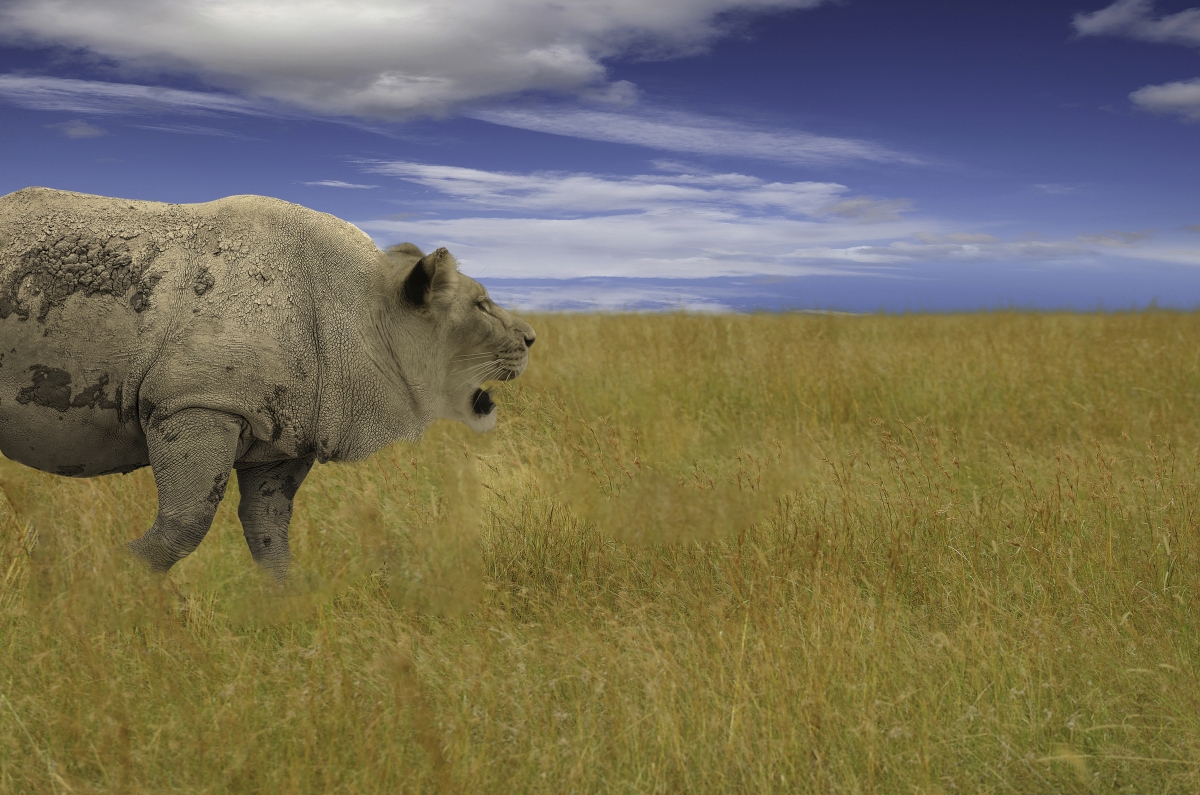
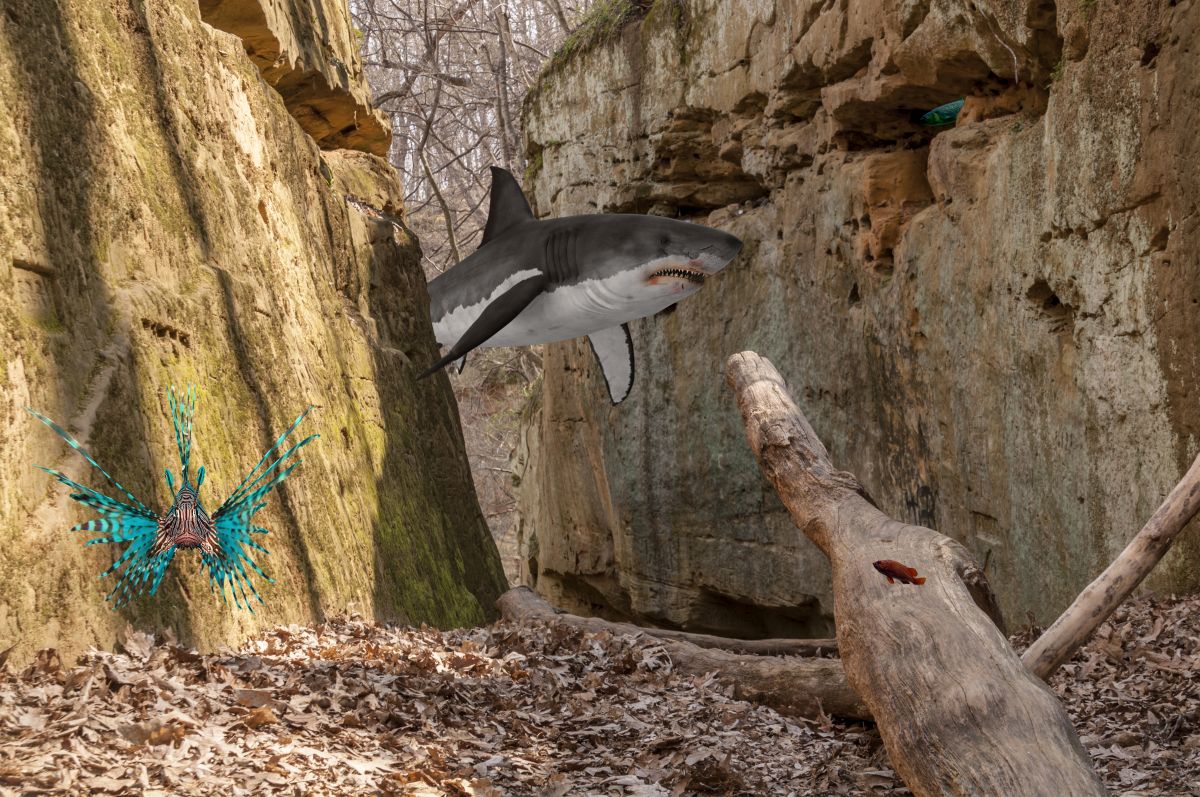
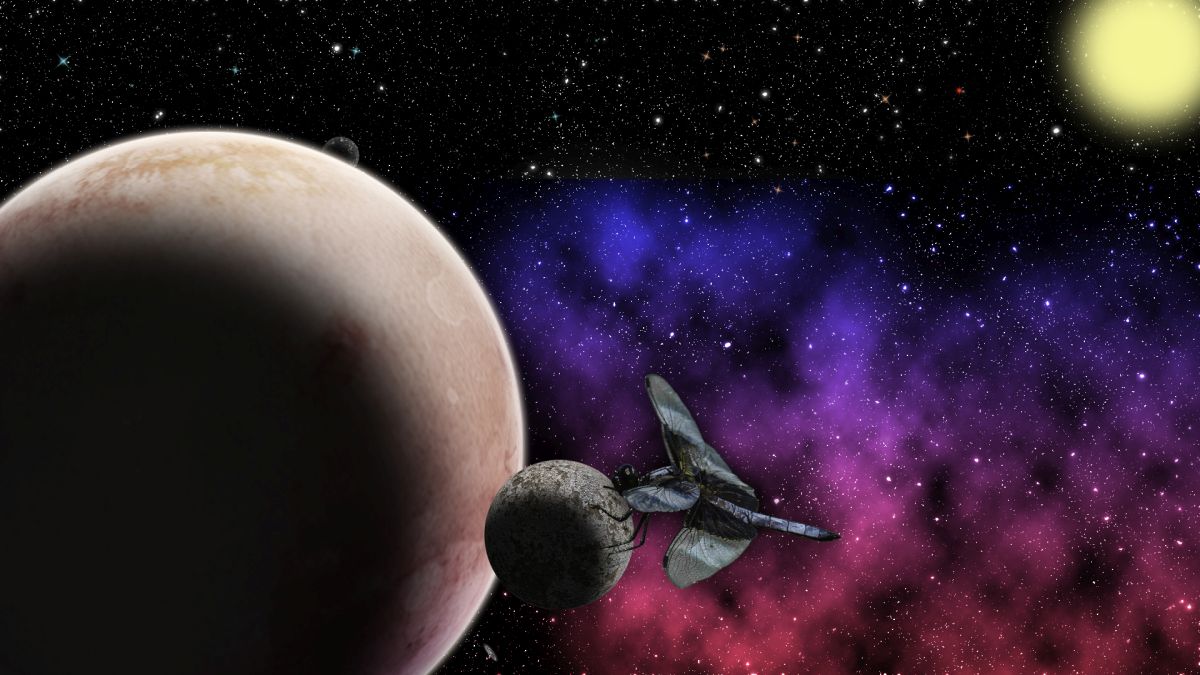
We don't really notice the extra legs because the bison are a secondary subject to the overall scene. To focus our attention on the bison, we would have to somehow destroy the location, either by cropping, vignetting, etc. That would be a mistake in my opinion.
I think your title says it all and the image really tells that story well - makes me tired just thinking about that journey. Well done, and I will probably never get the picture of you taking that shot out of my head. d;¬{D |
May 18th |
| 53 |
May 20 |
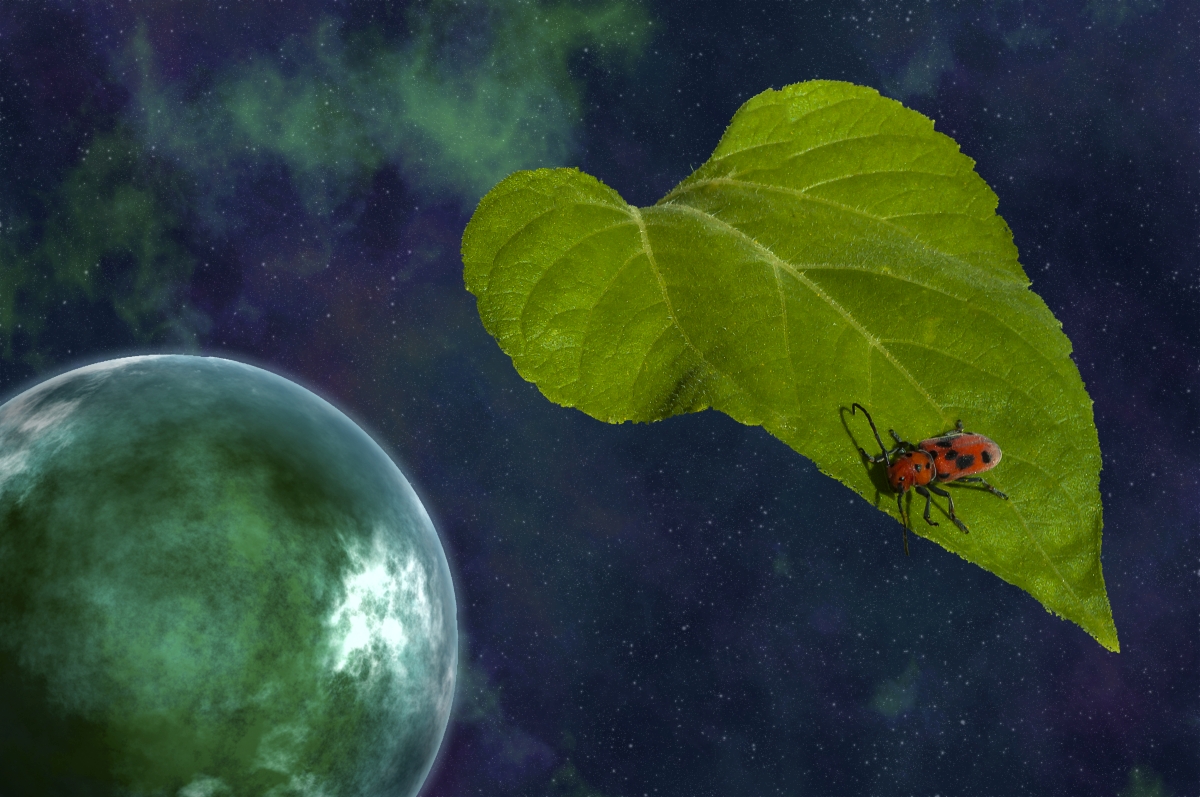
Comment |
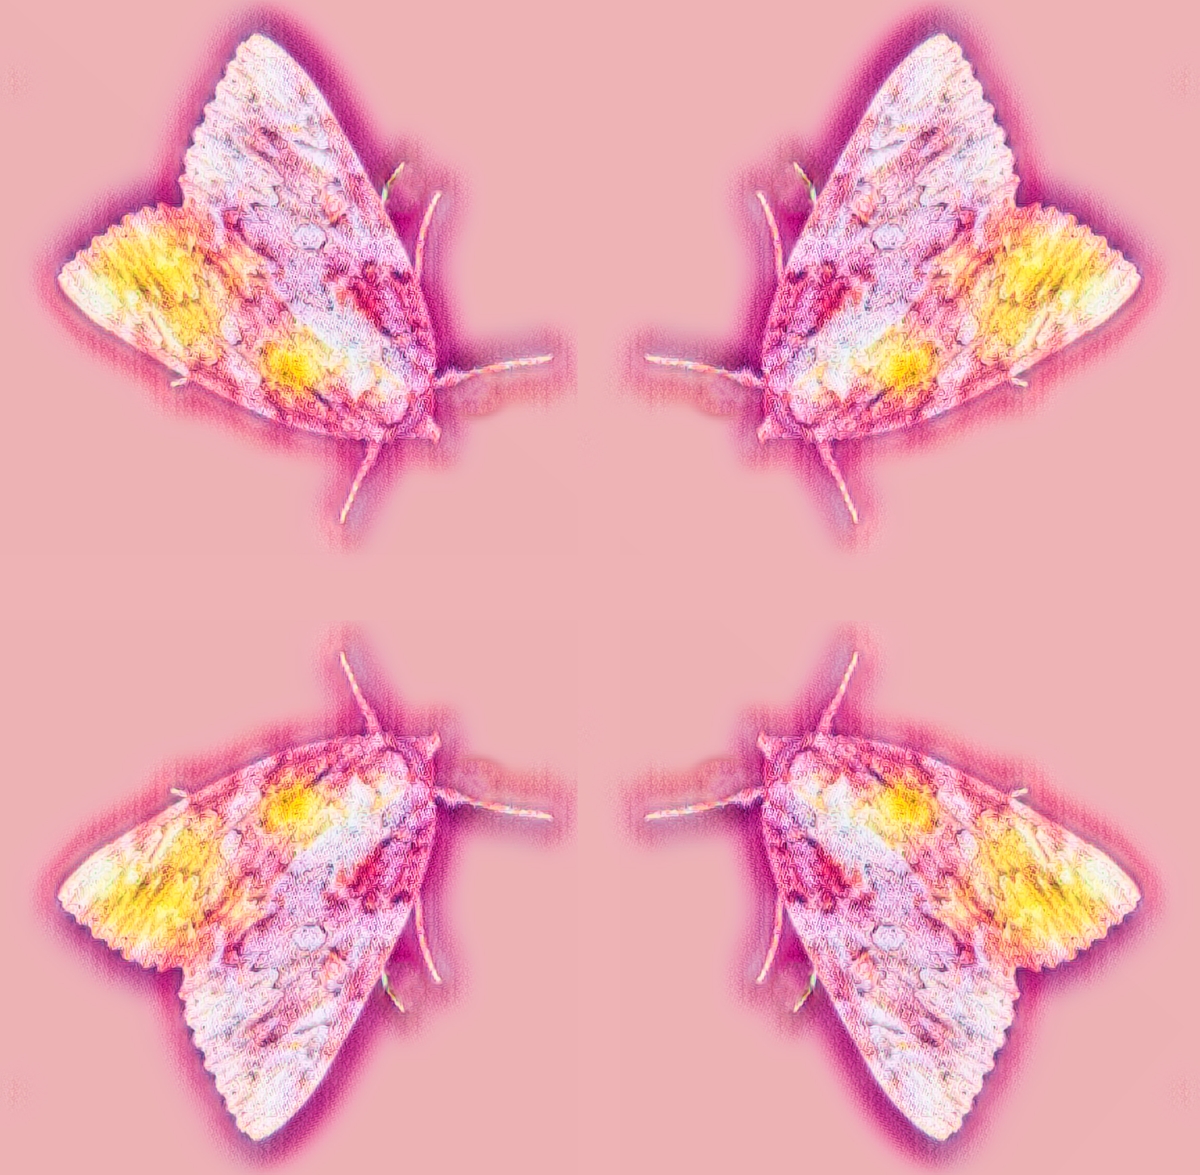
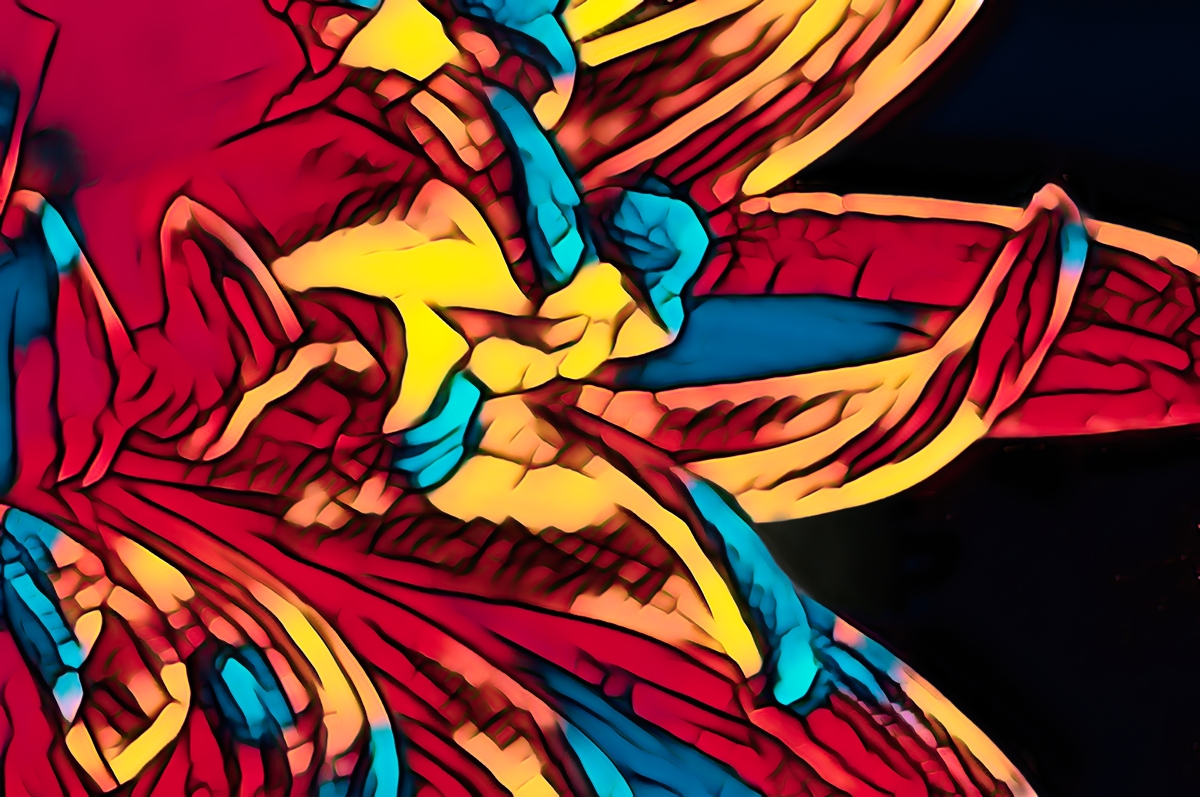
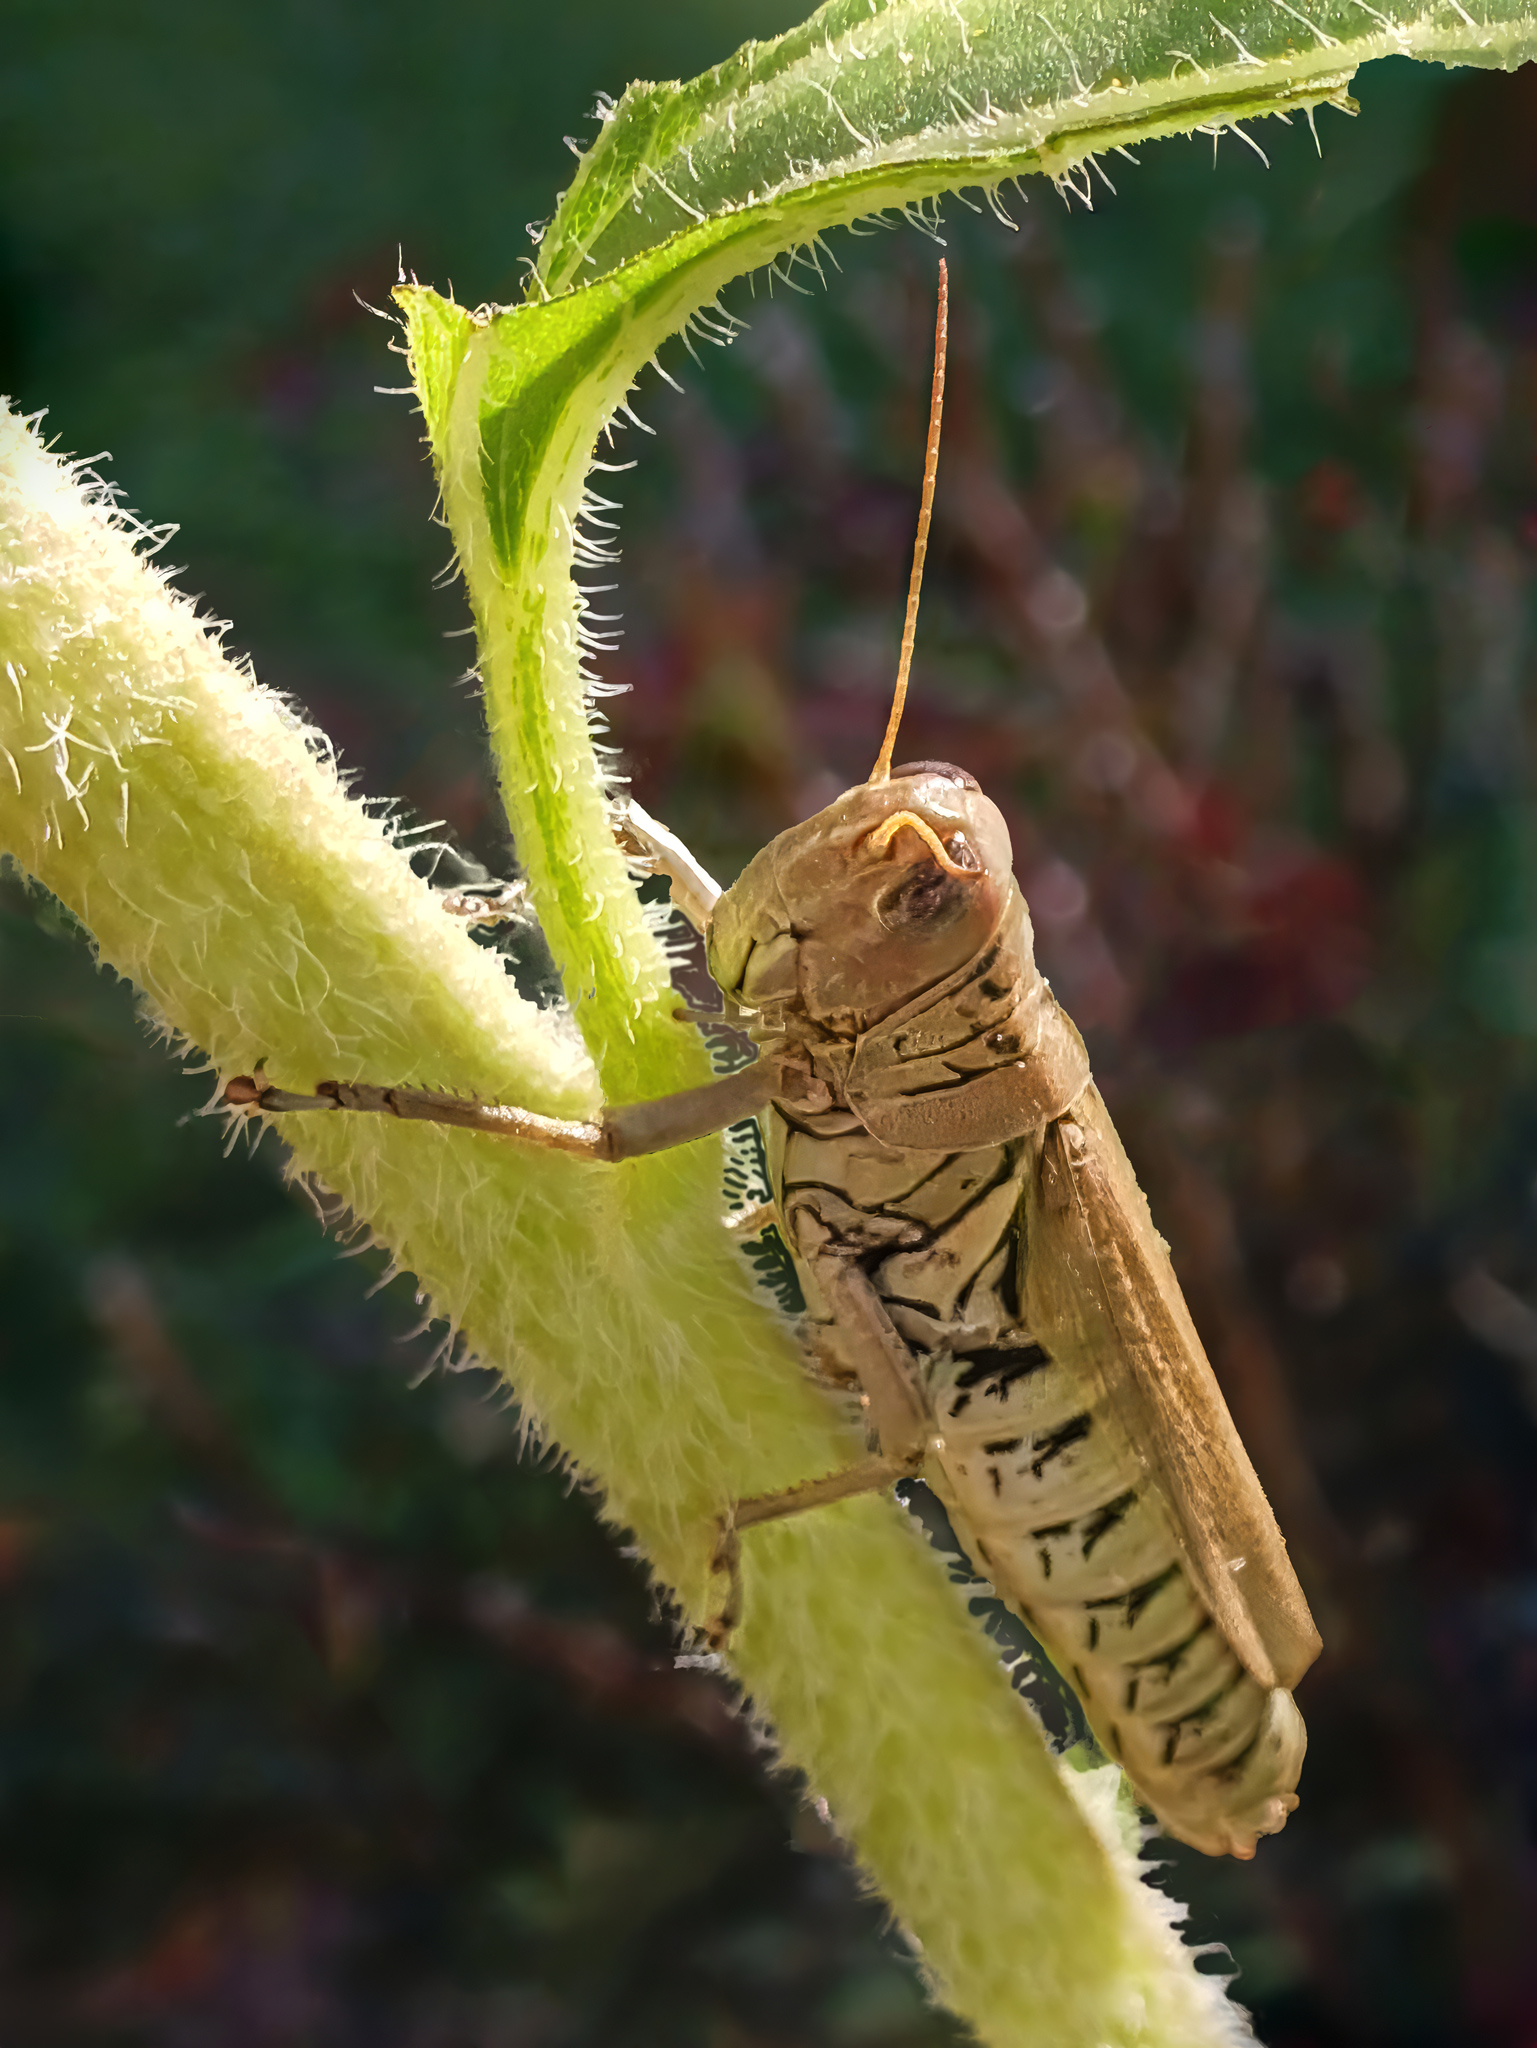
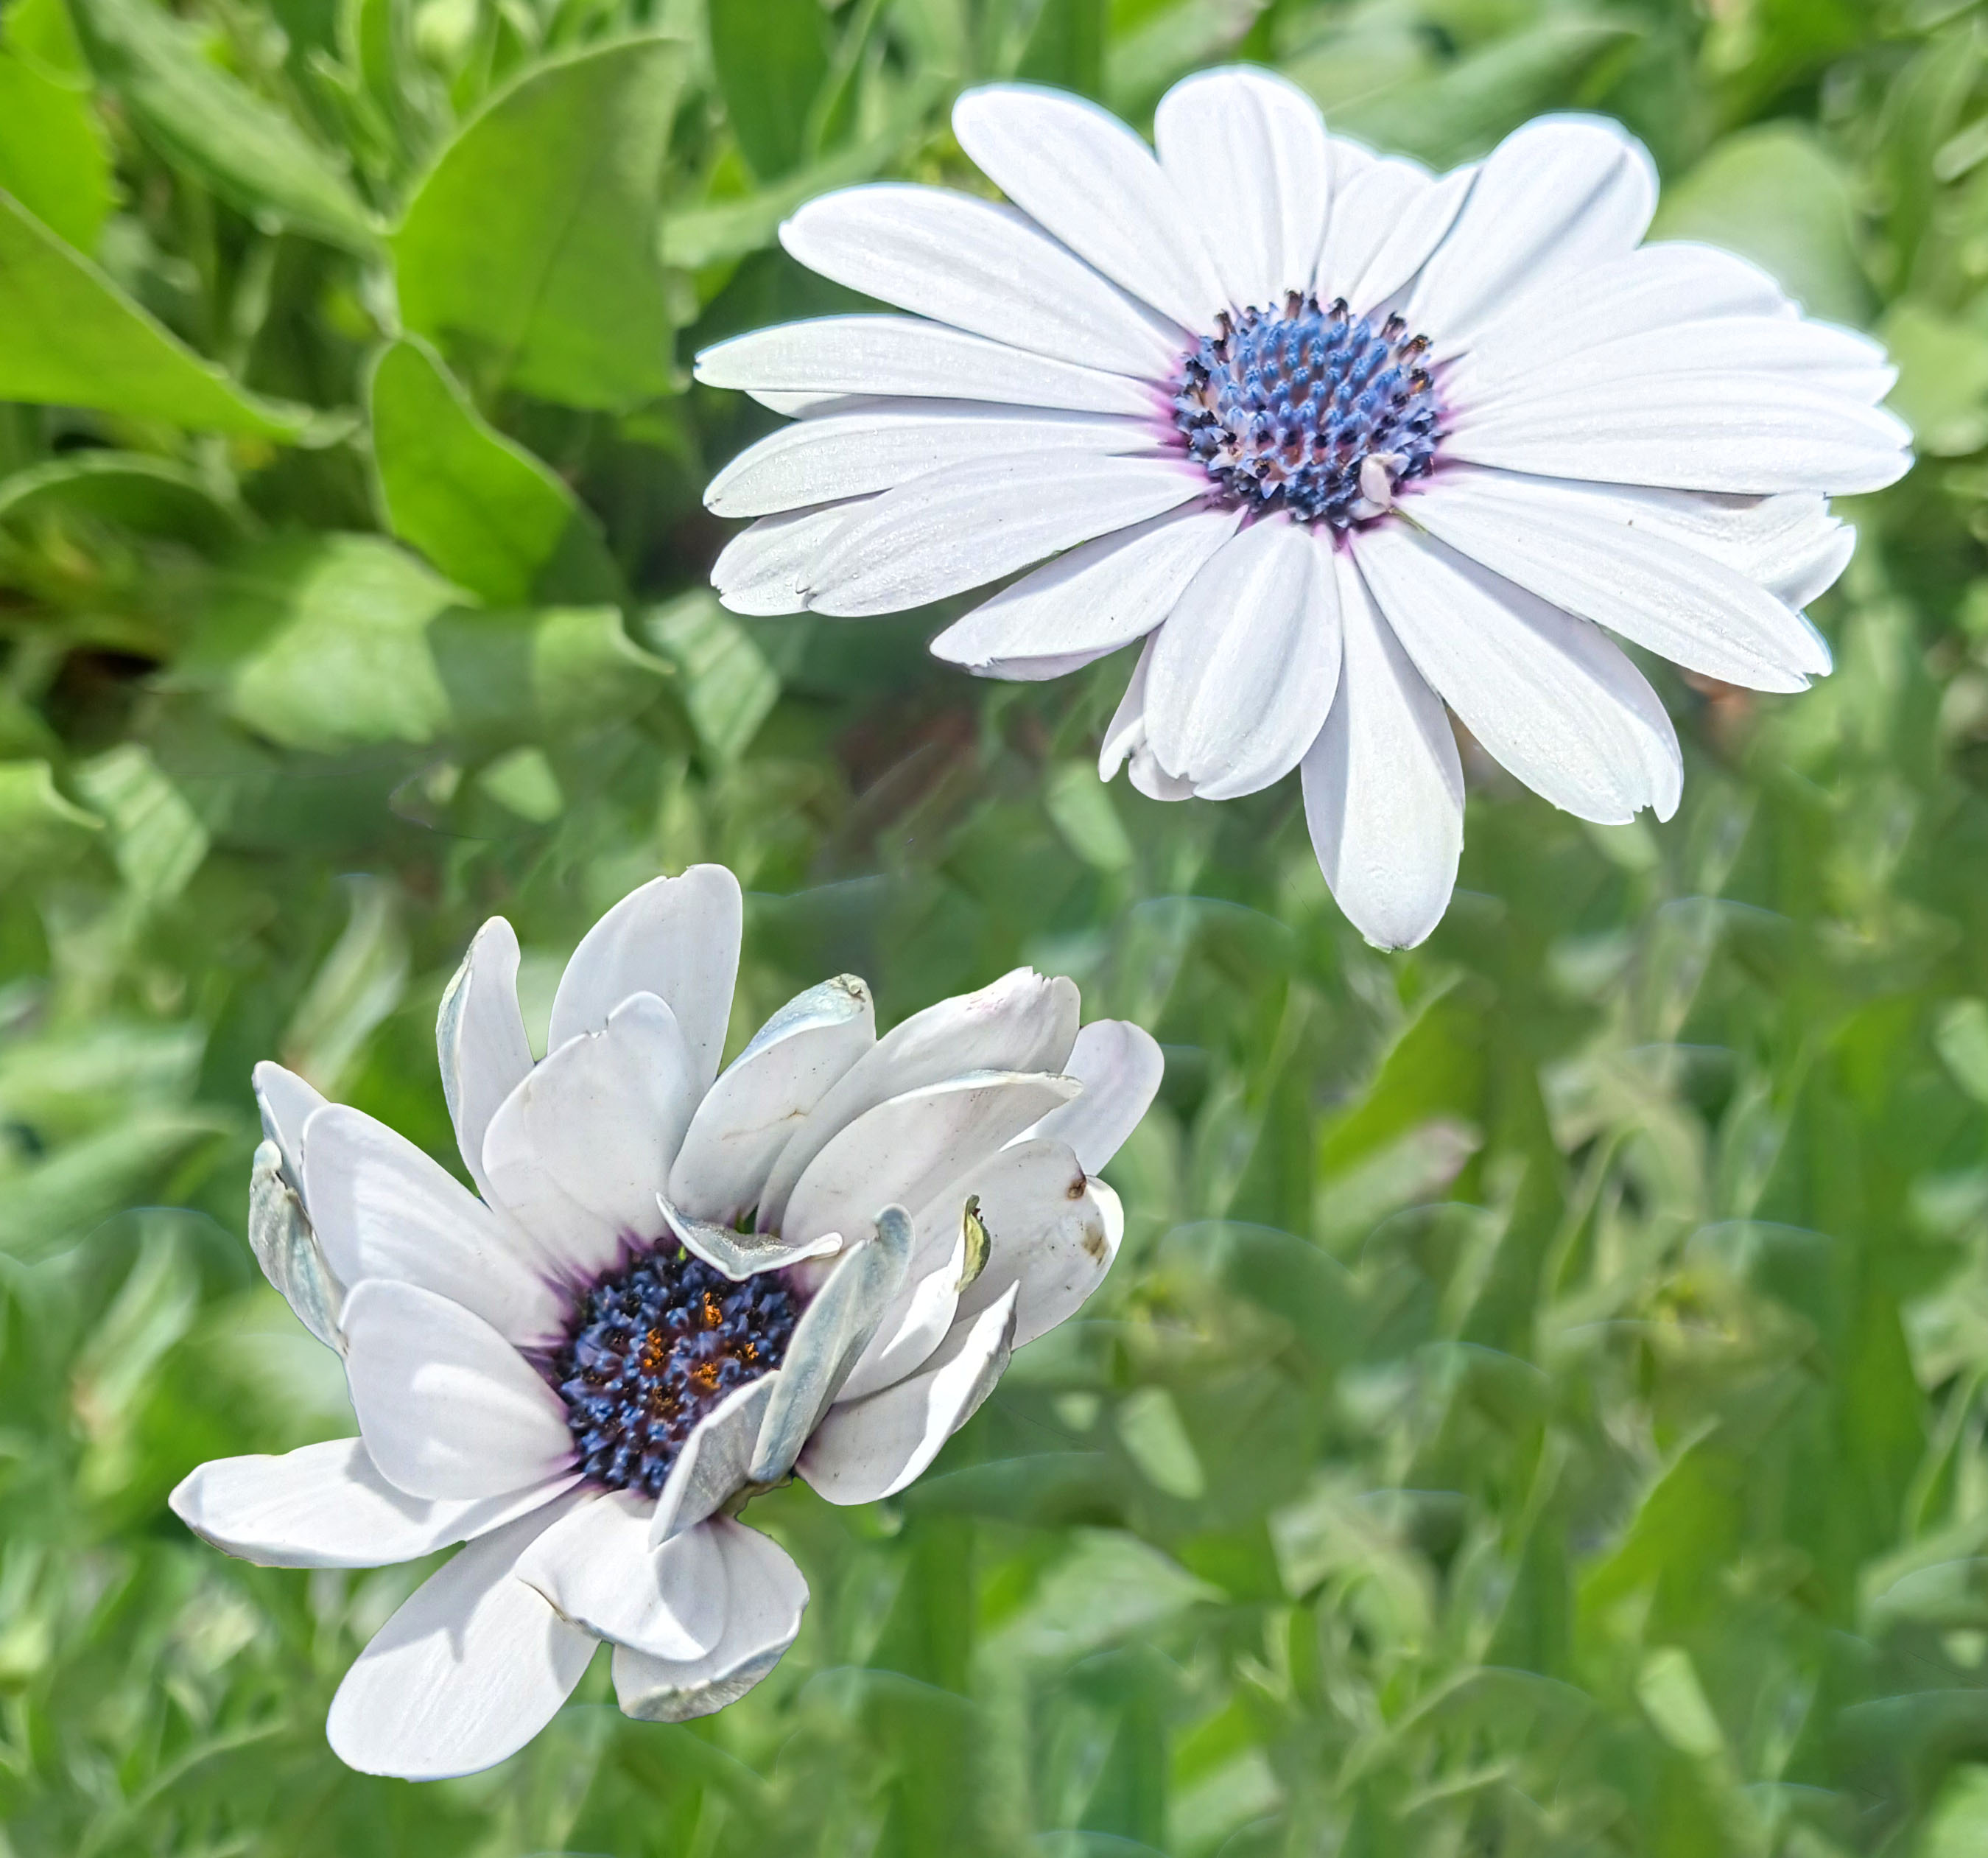
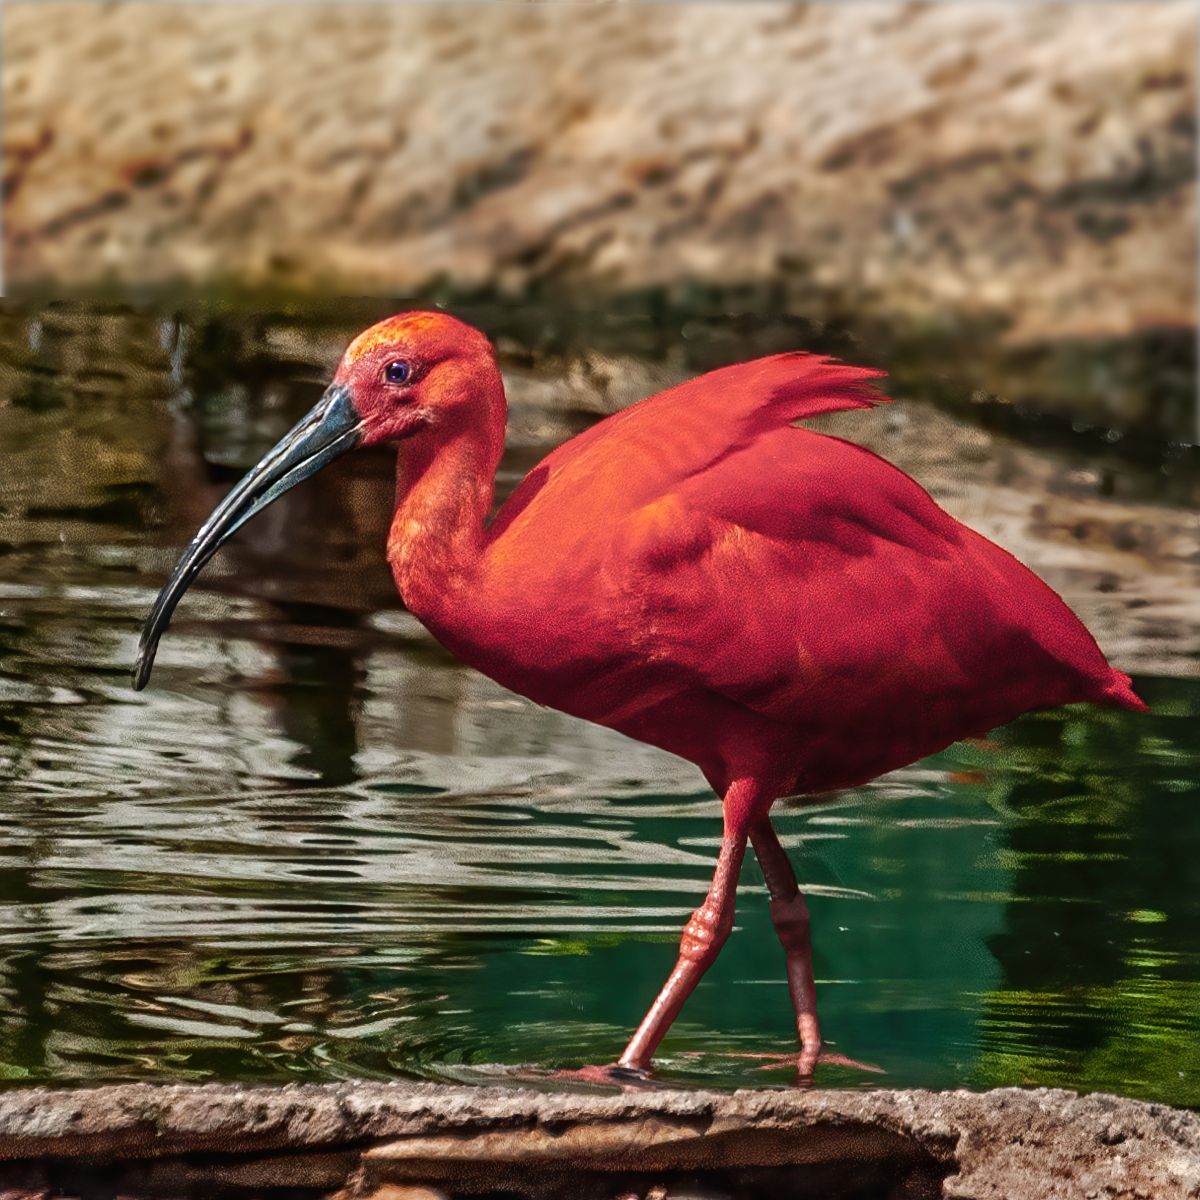
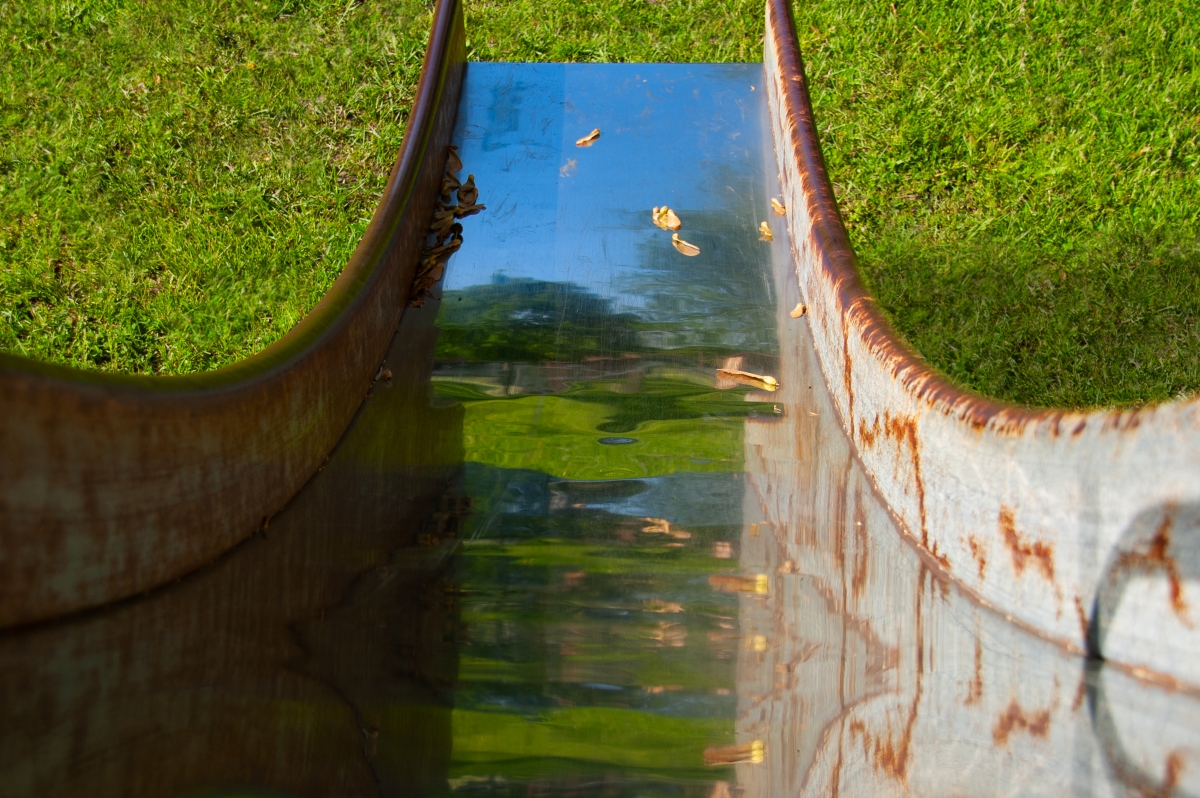
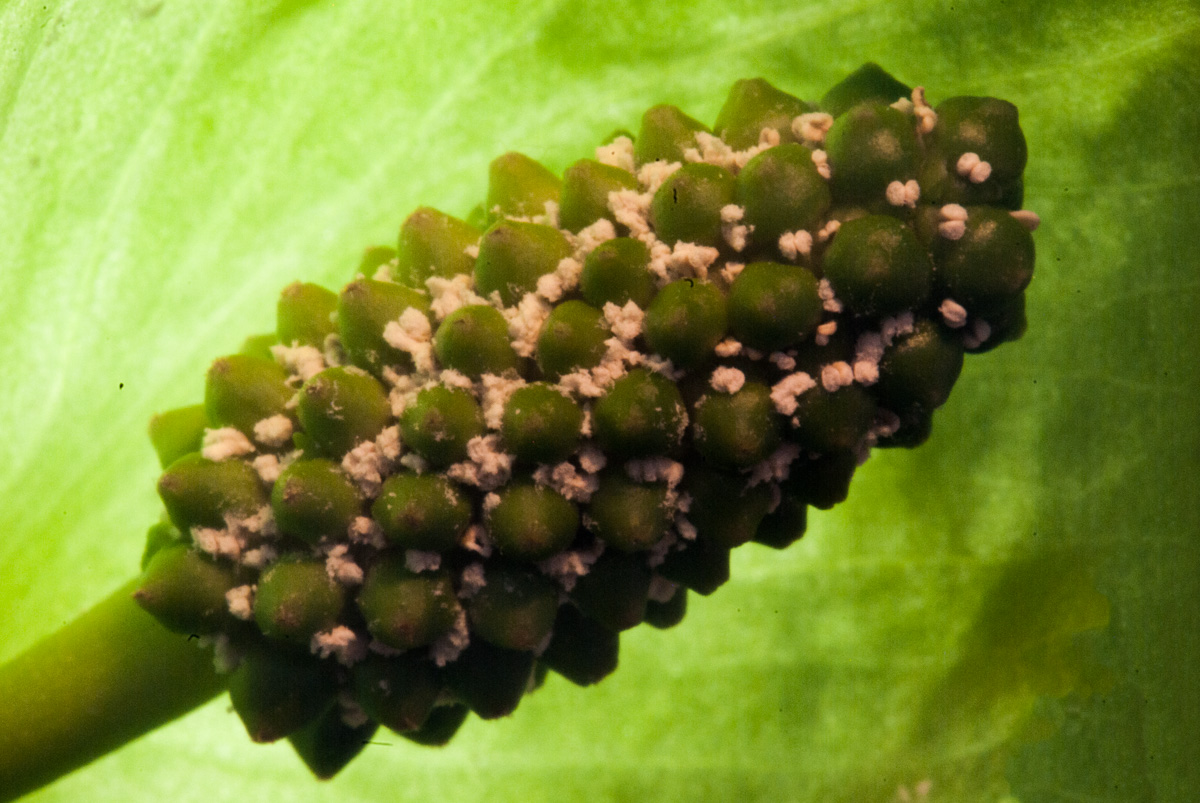
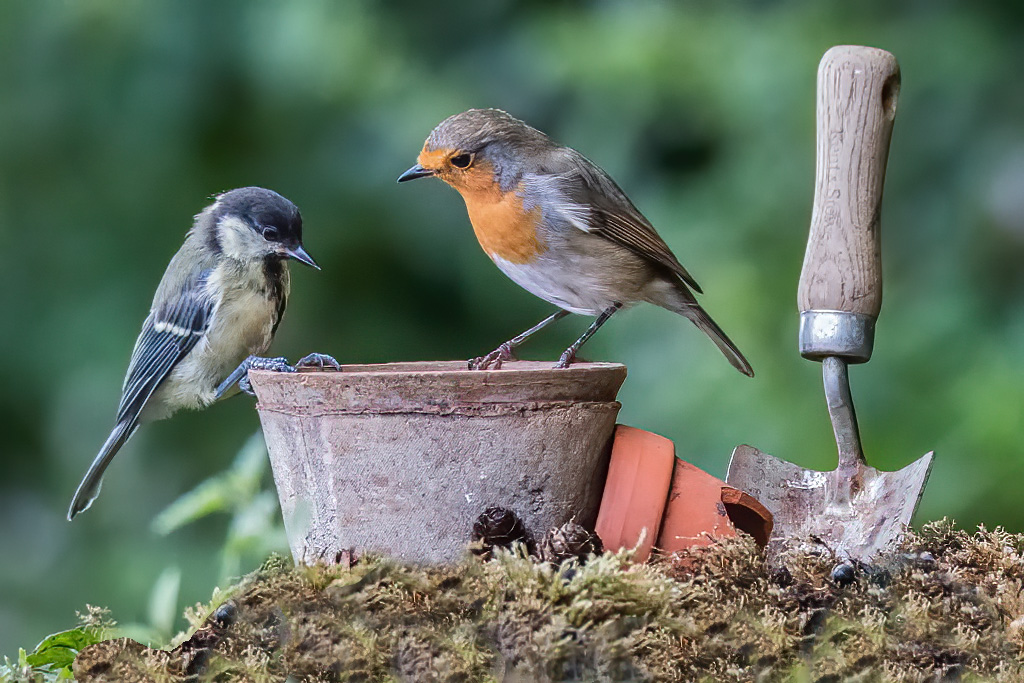
This is an amazing tableau, with the birds in apparent conversation as Rusty said. The birds, pot & trowel pop nicely from the background which is a nice bokeh.
My 2 suggestions are noise reduction and removal of the blurry leaves along the bottom. Here's an example of what I mean: |
May 18th |
 |
| 53 |
May 20 |
Comment |
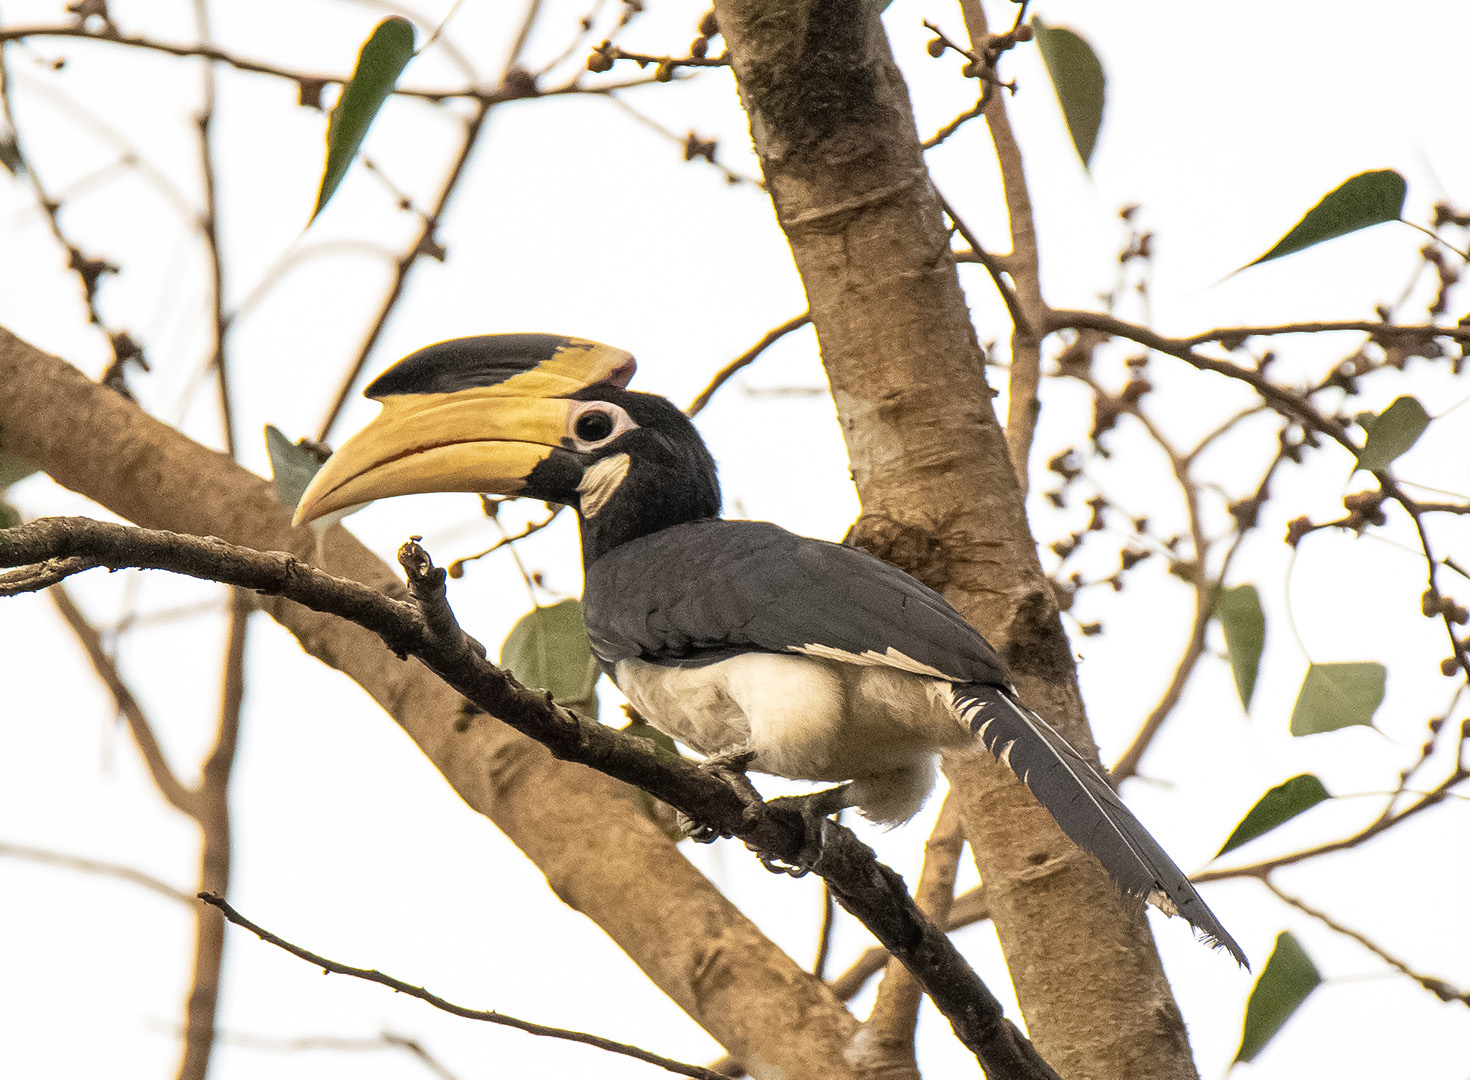
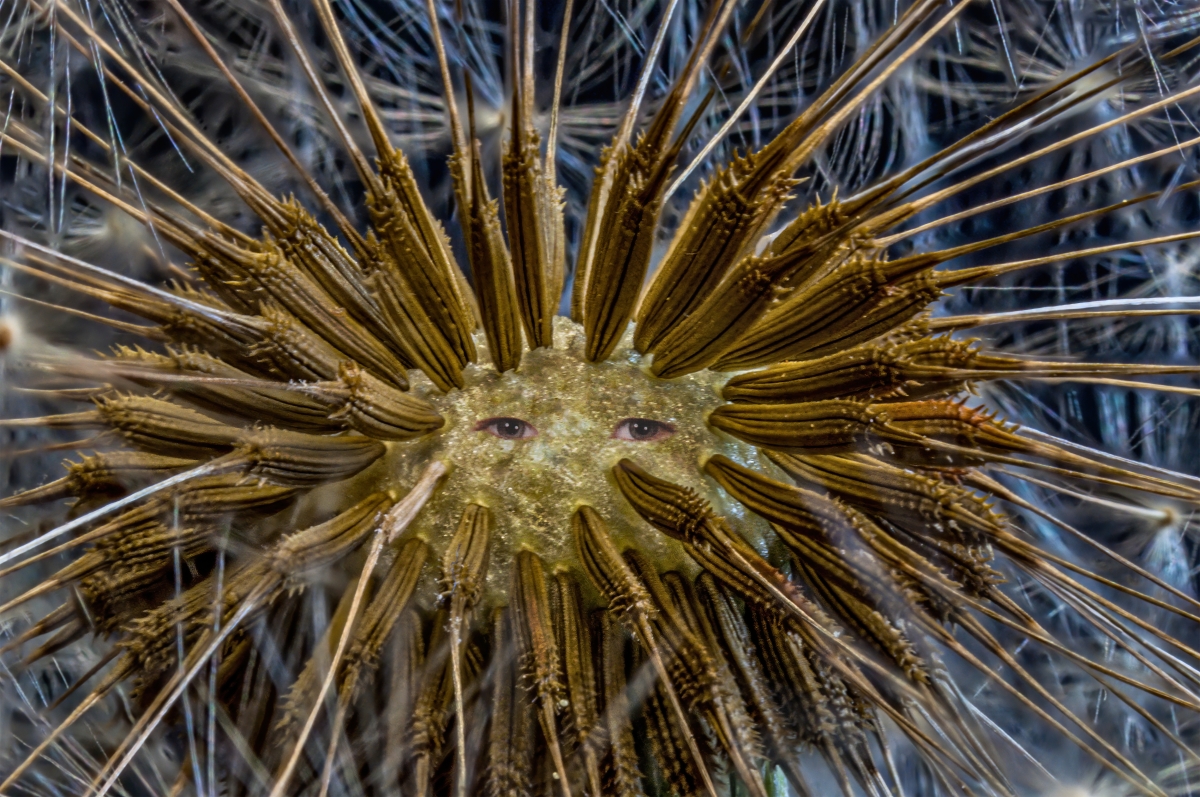
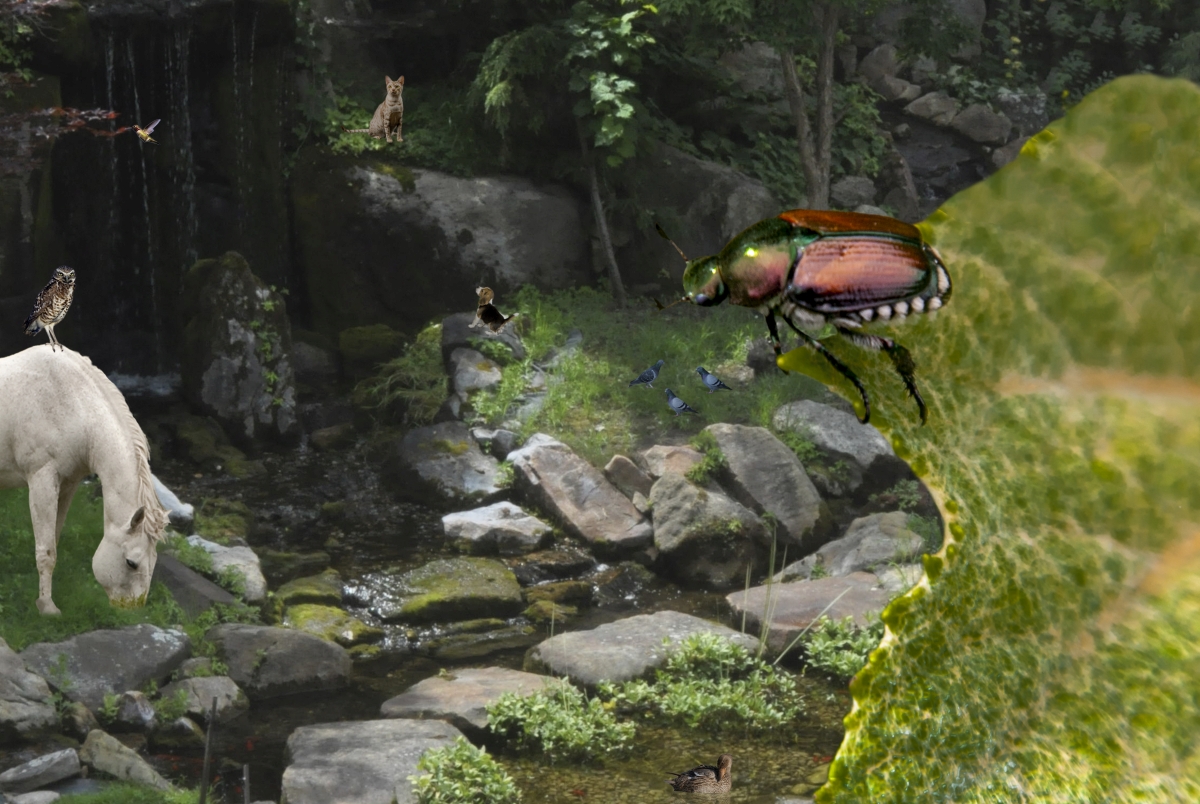
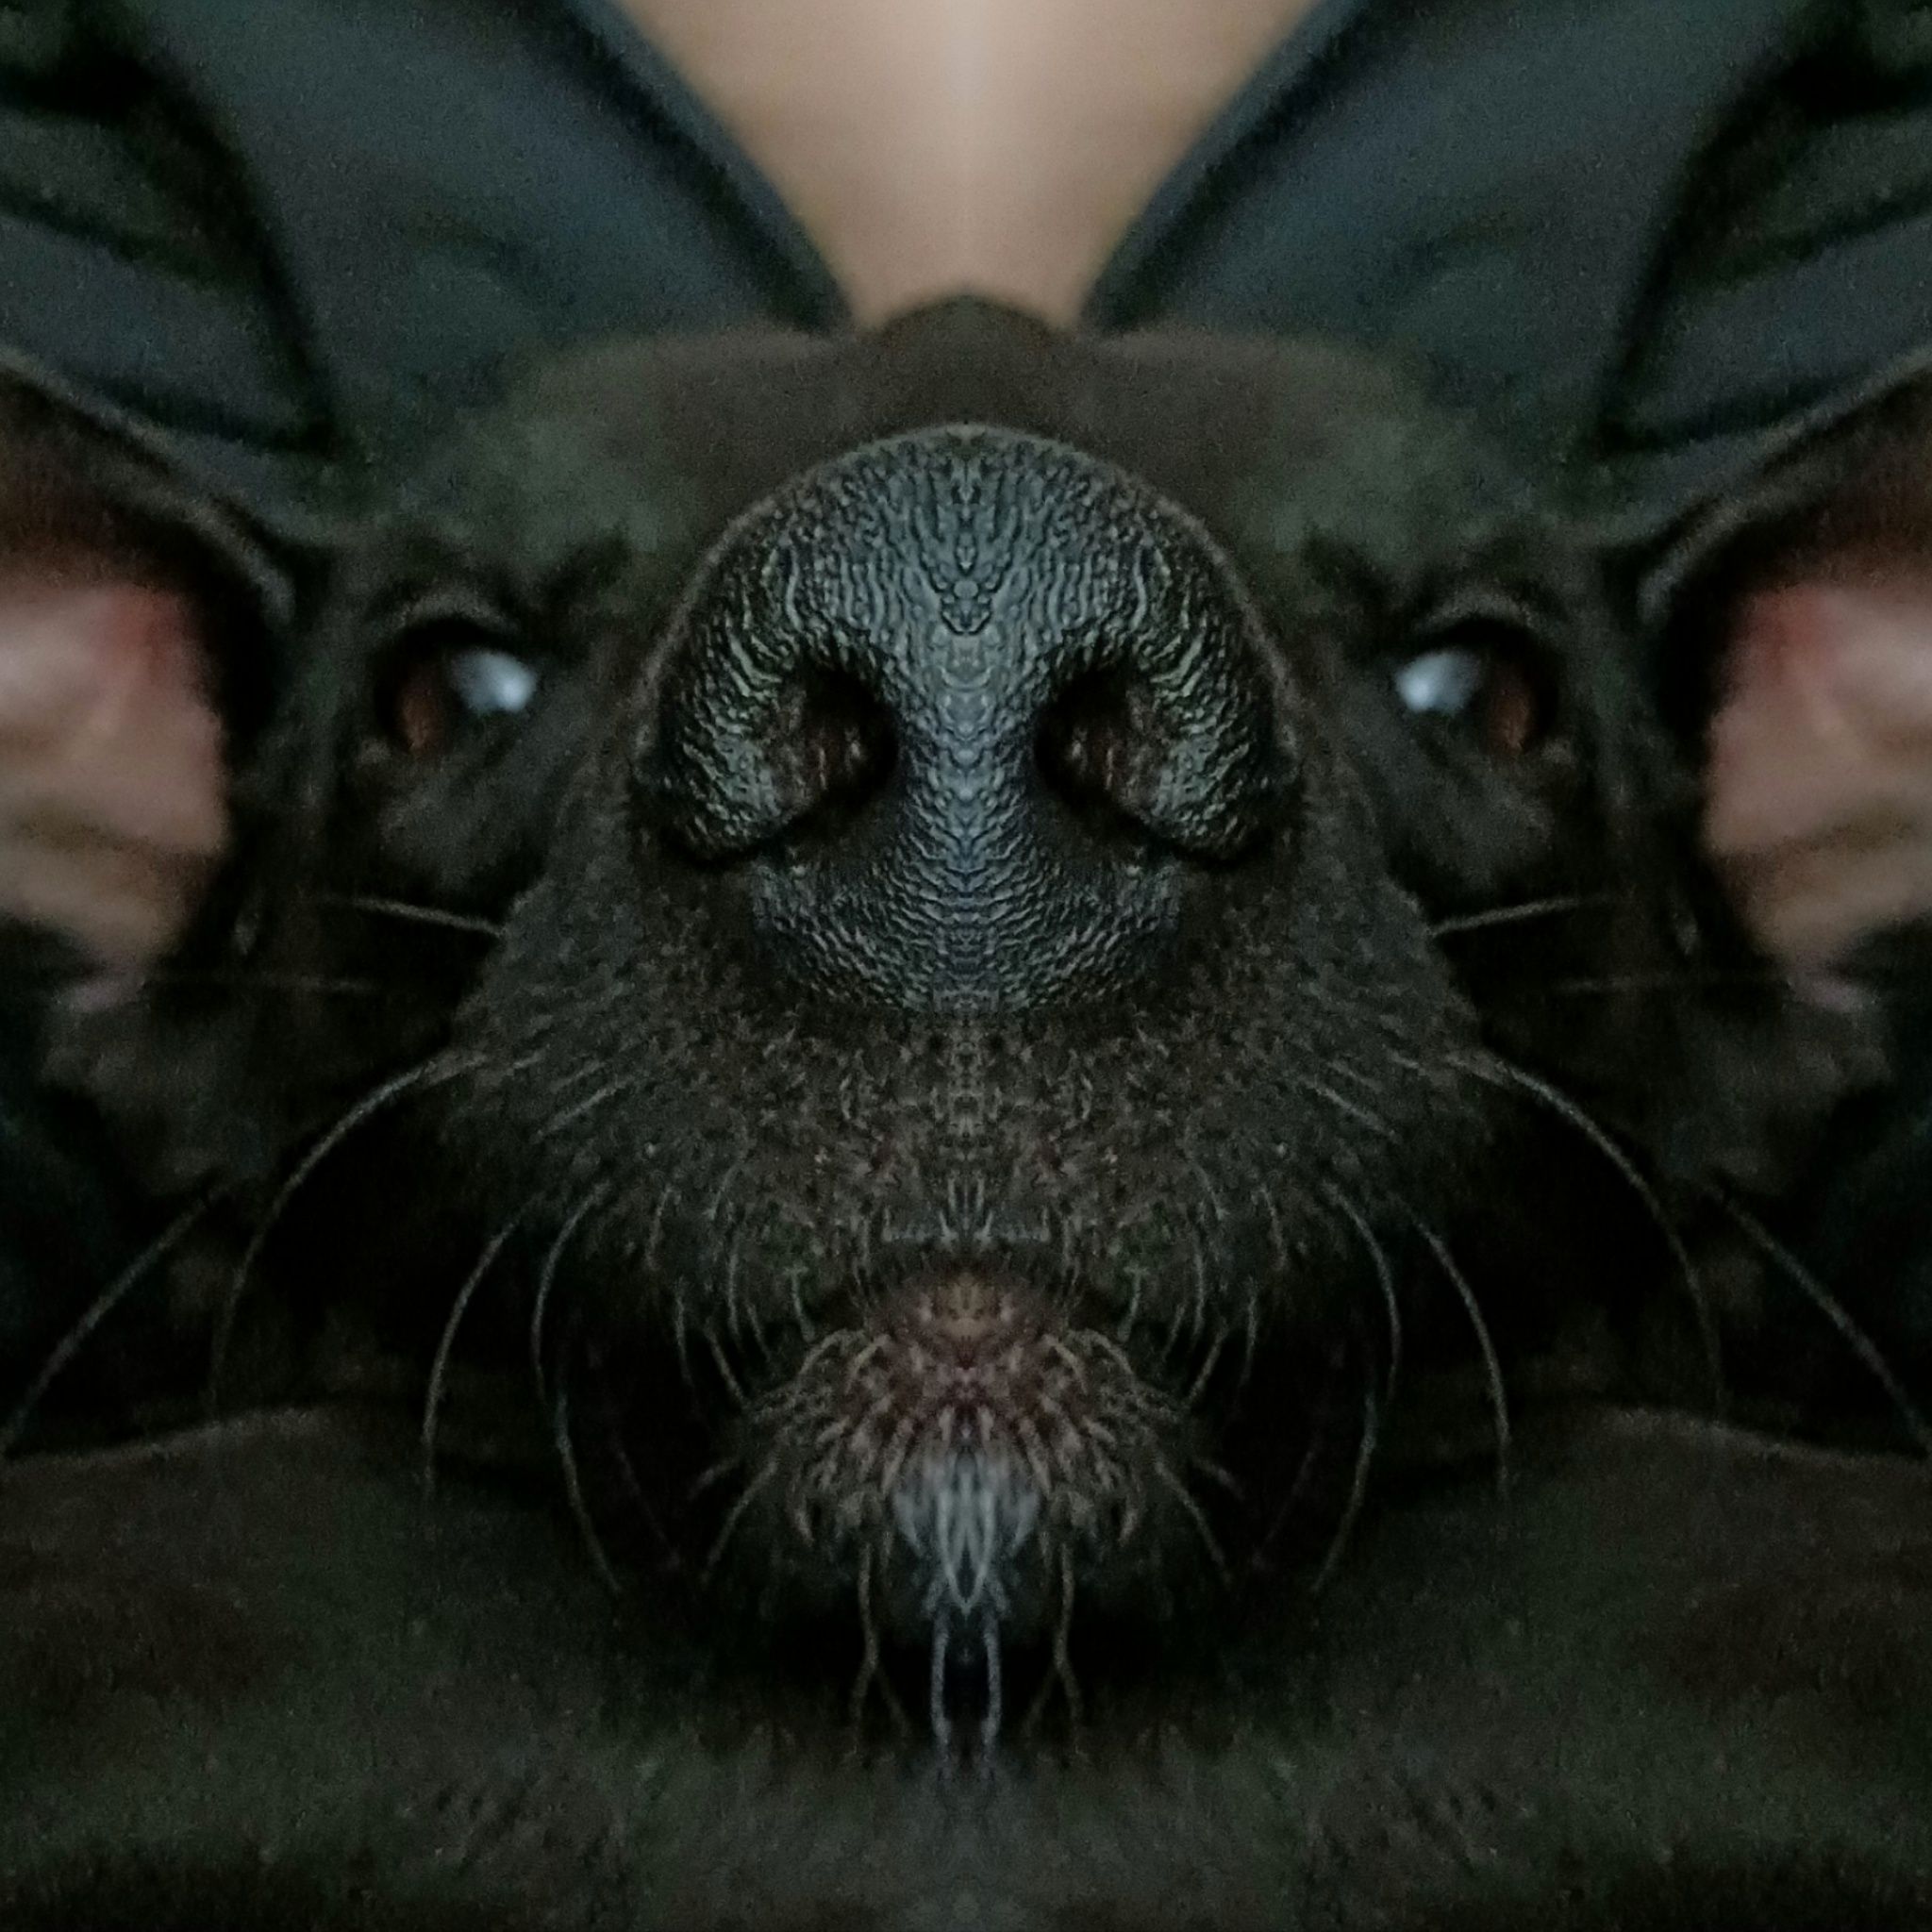
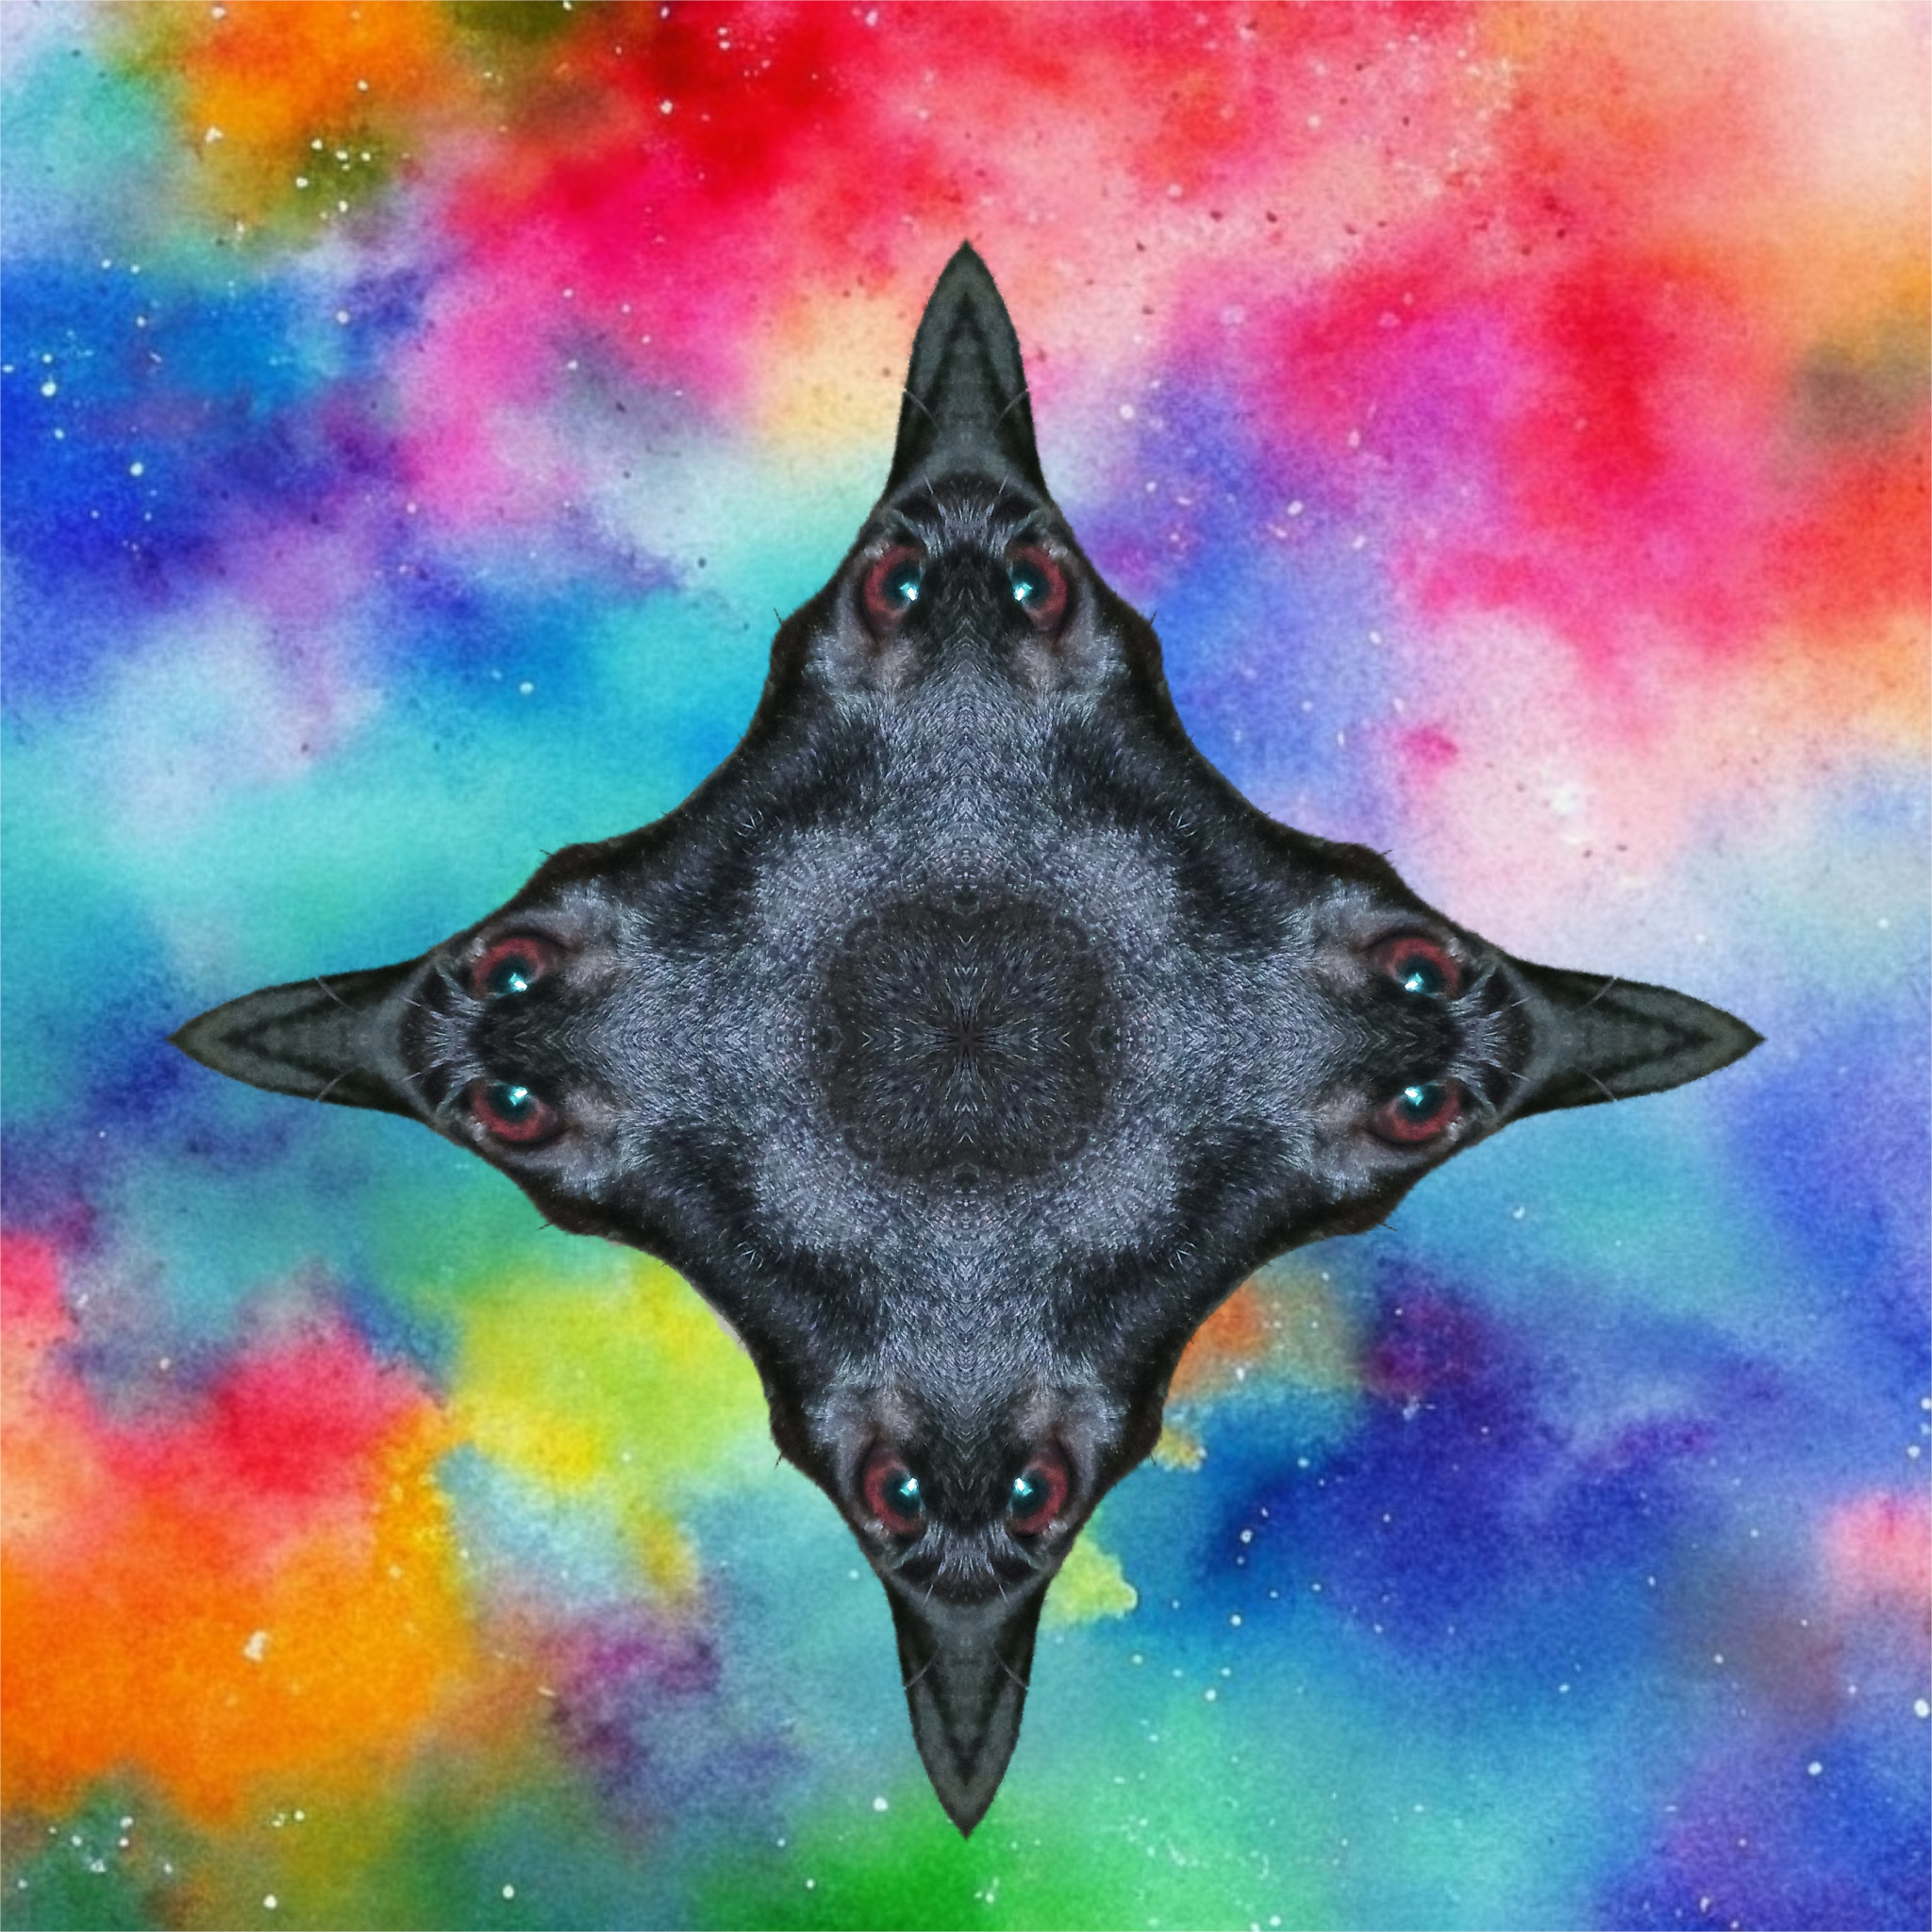
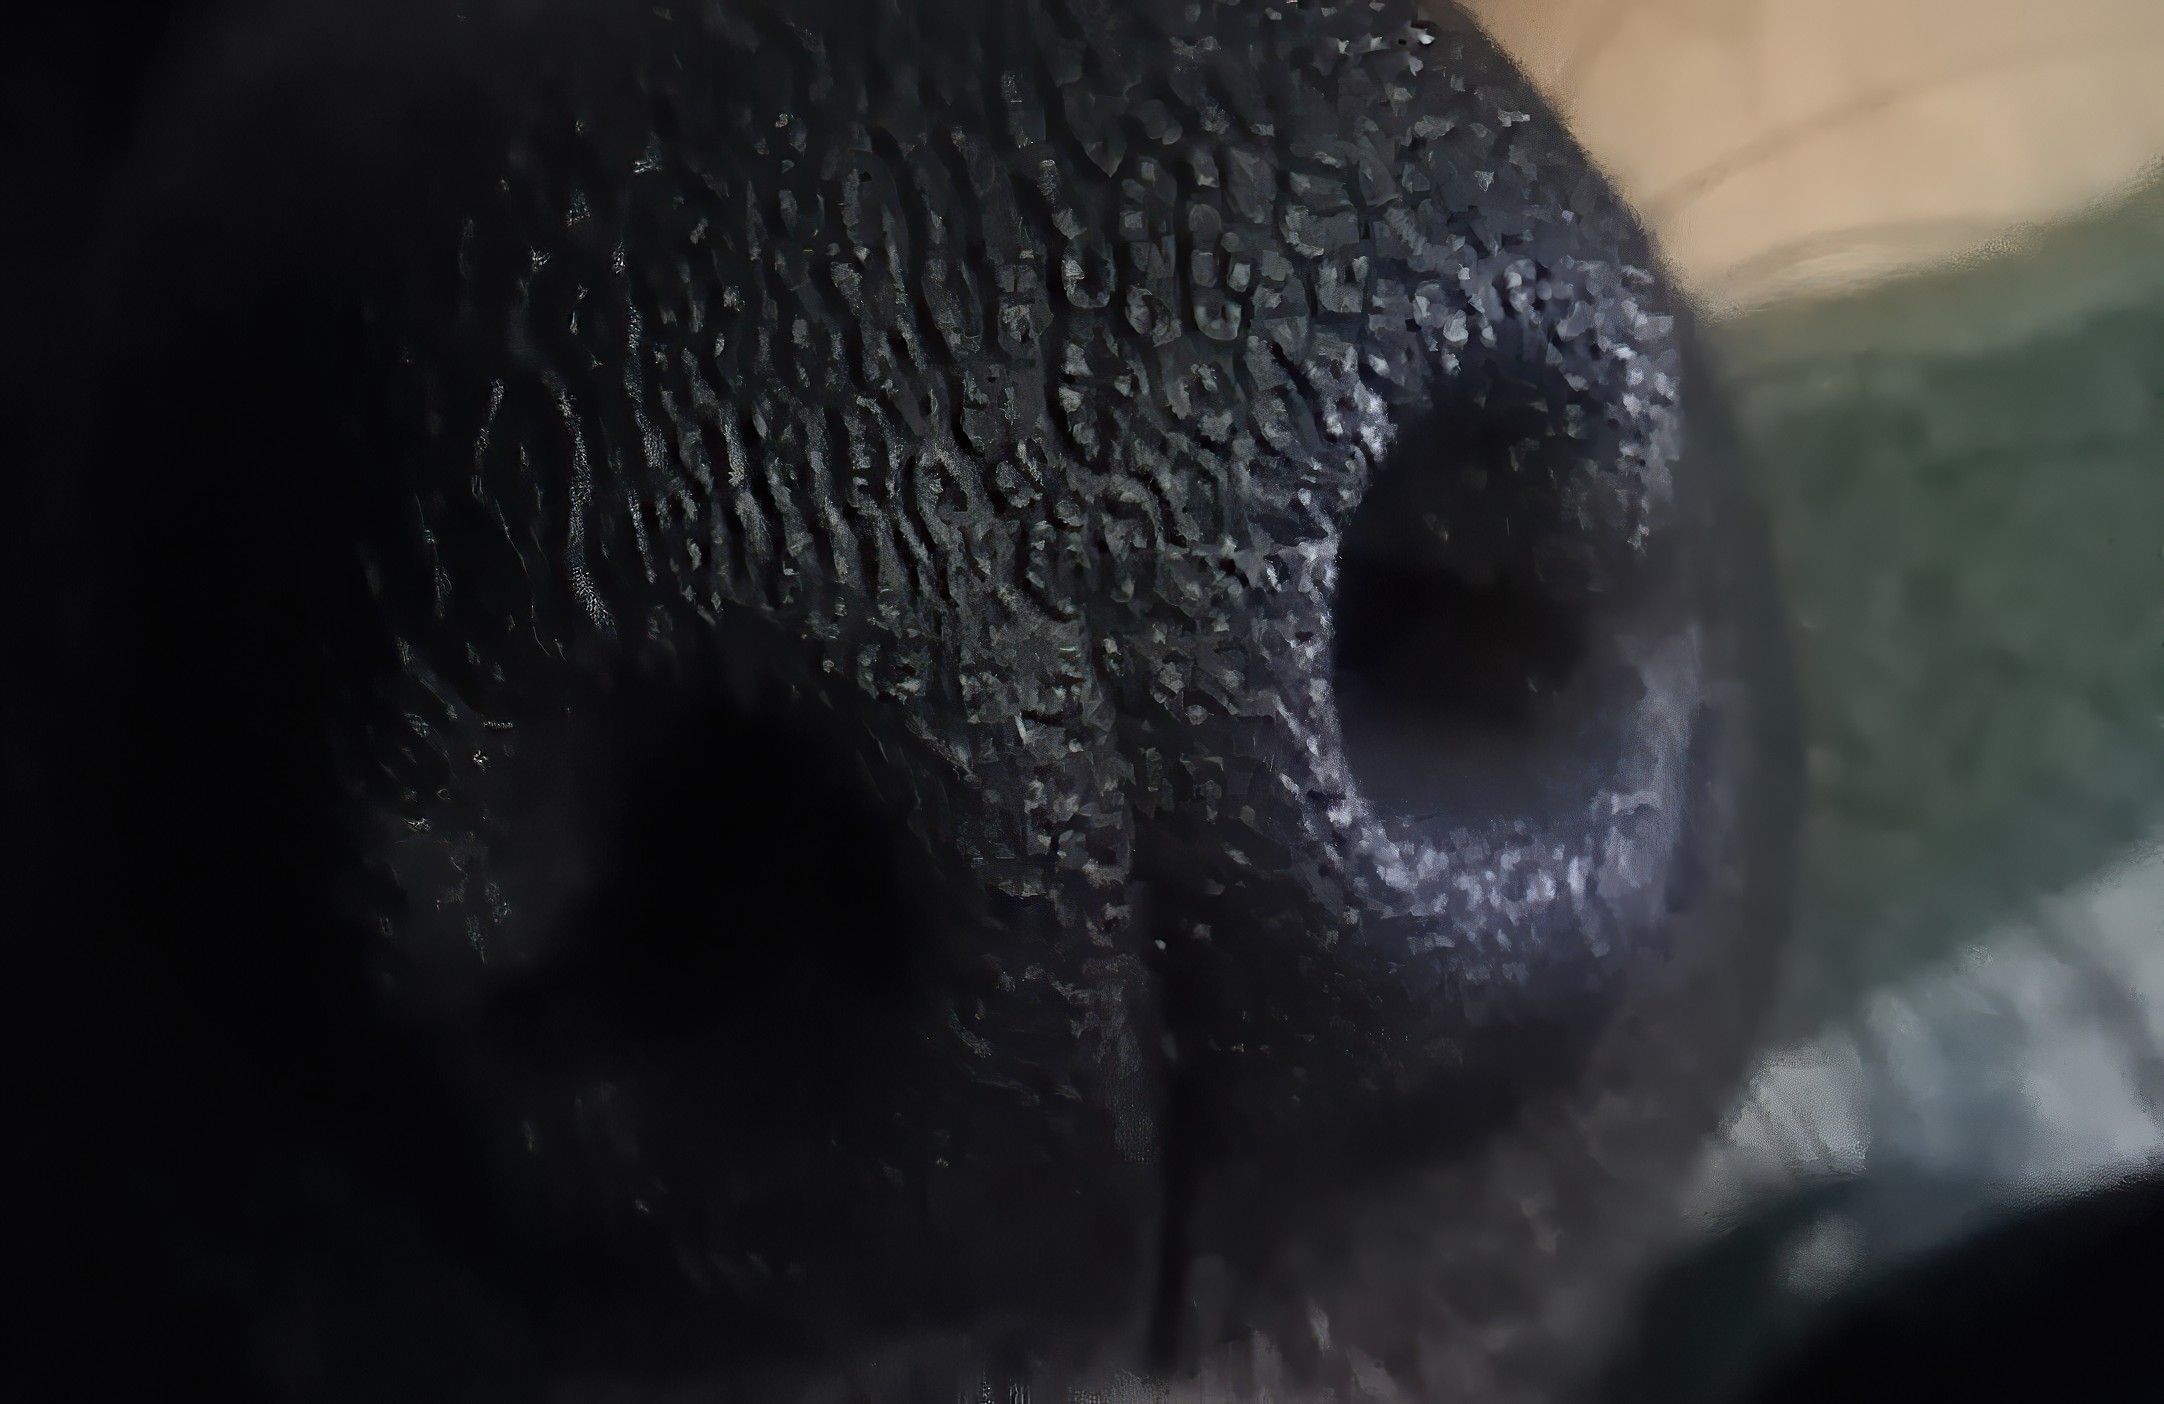
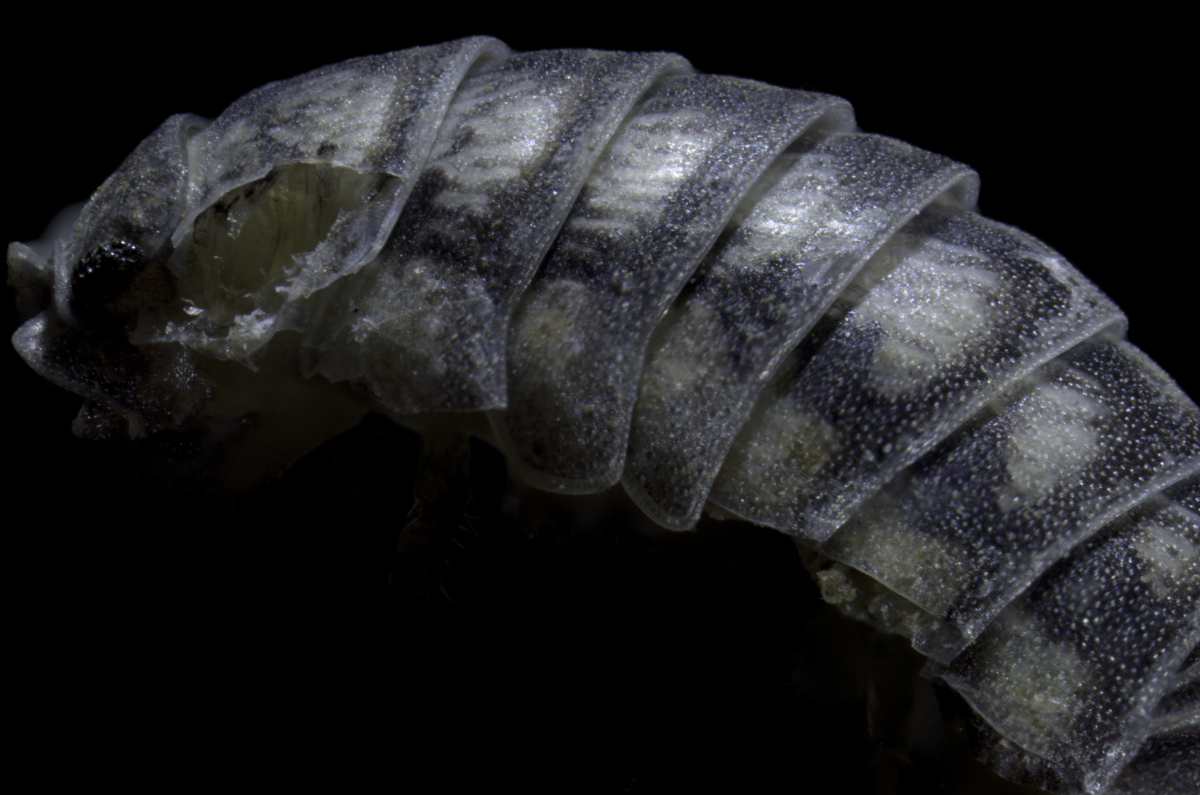
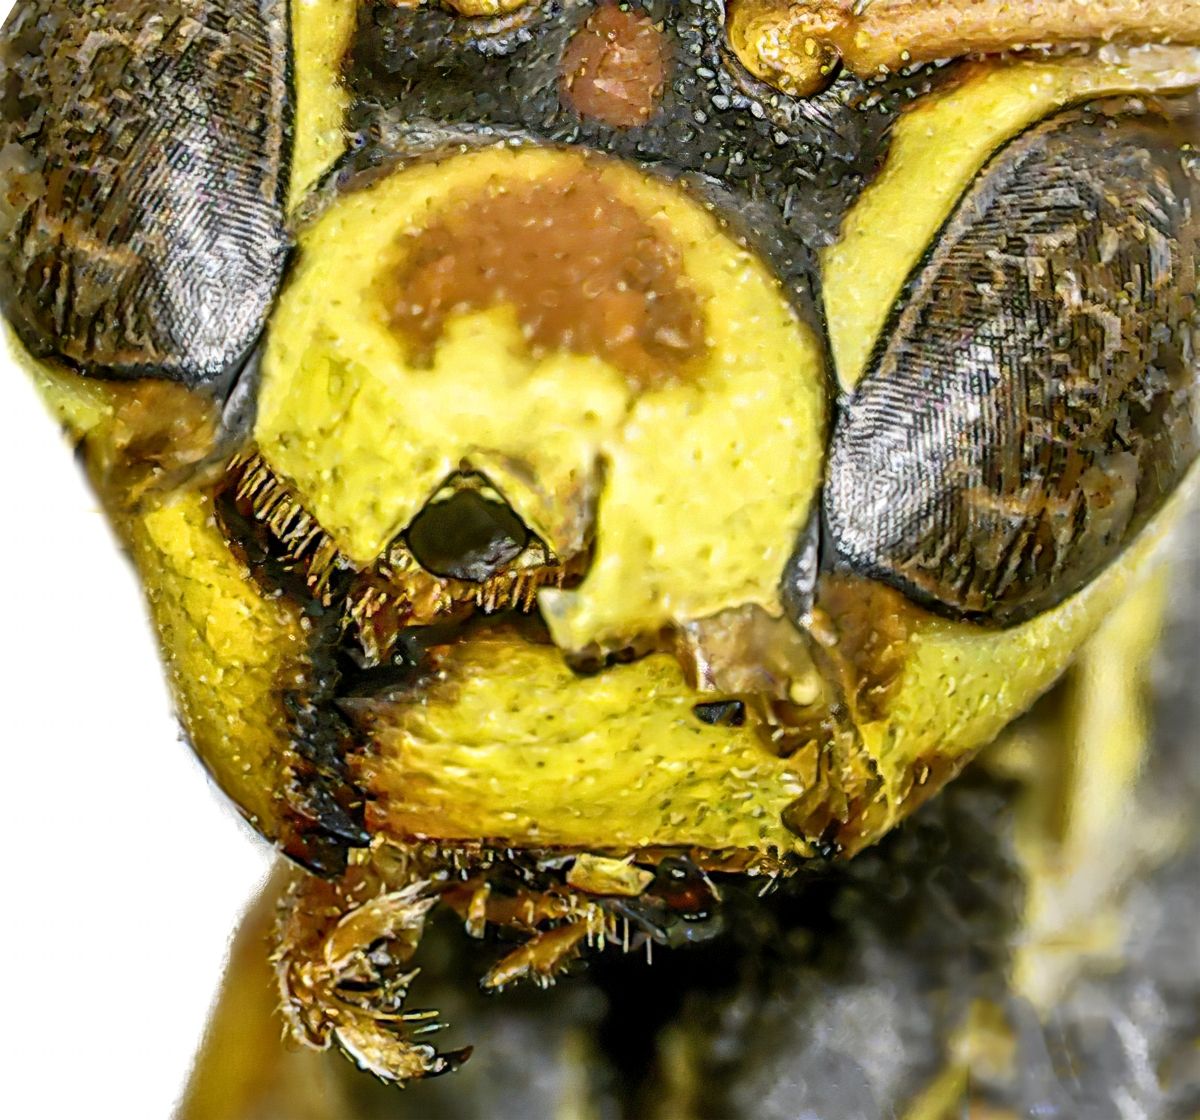
Lucky to be there at the right time! It's unusual to see owls out during the day as they are usually nocturnal.
The addition of a vignette helps to focus on the bird, but there is really too much foliage relative to the owl. By cropping a lot off the right and bottom, even more focus is put on the bird. I also added some contrast and sharpening to help it pop a little more. Thoughts? |
May 18th |
 |
| 53 |
May 20 |
Reply |
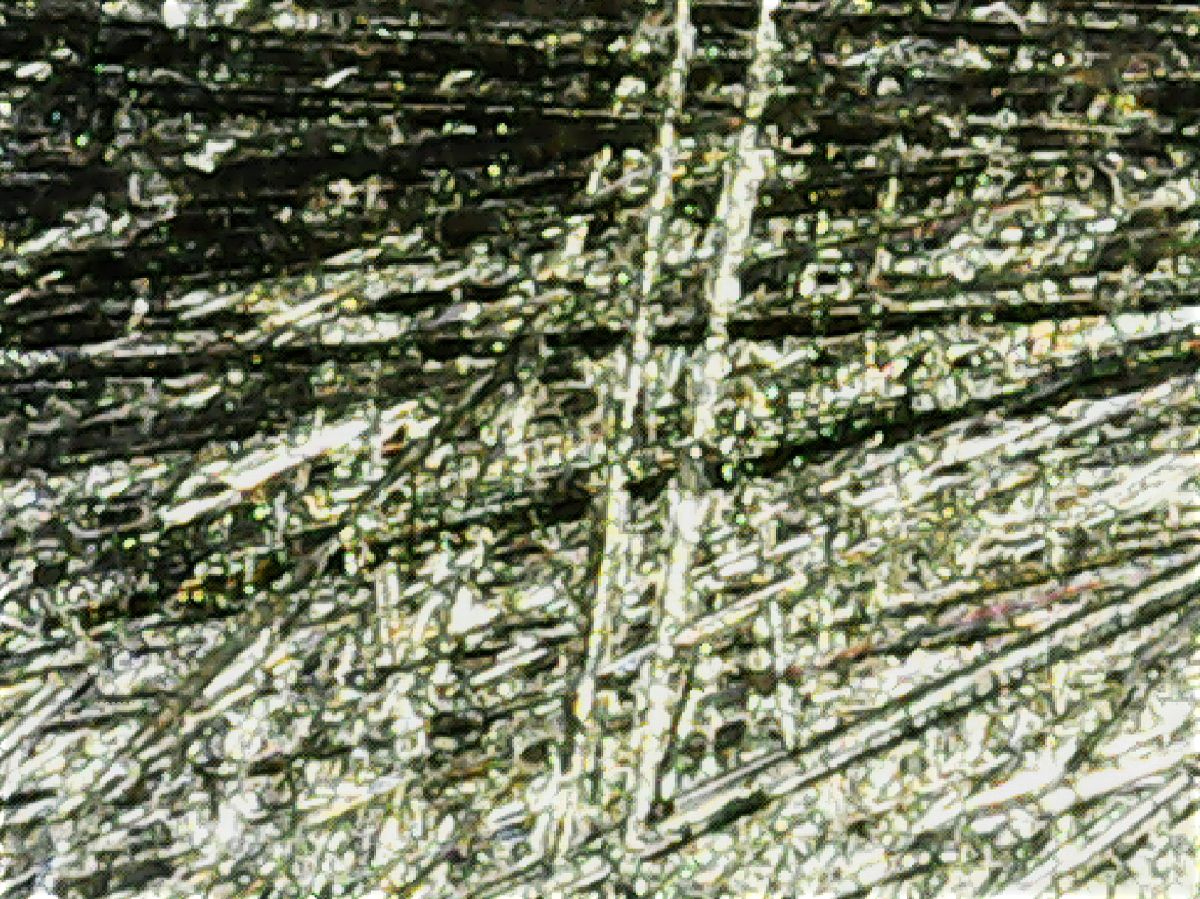
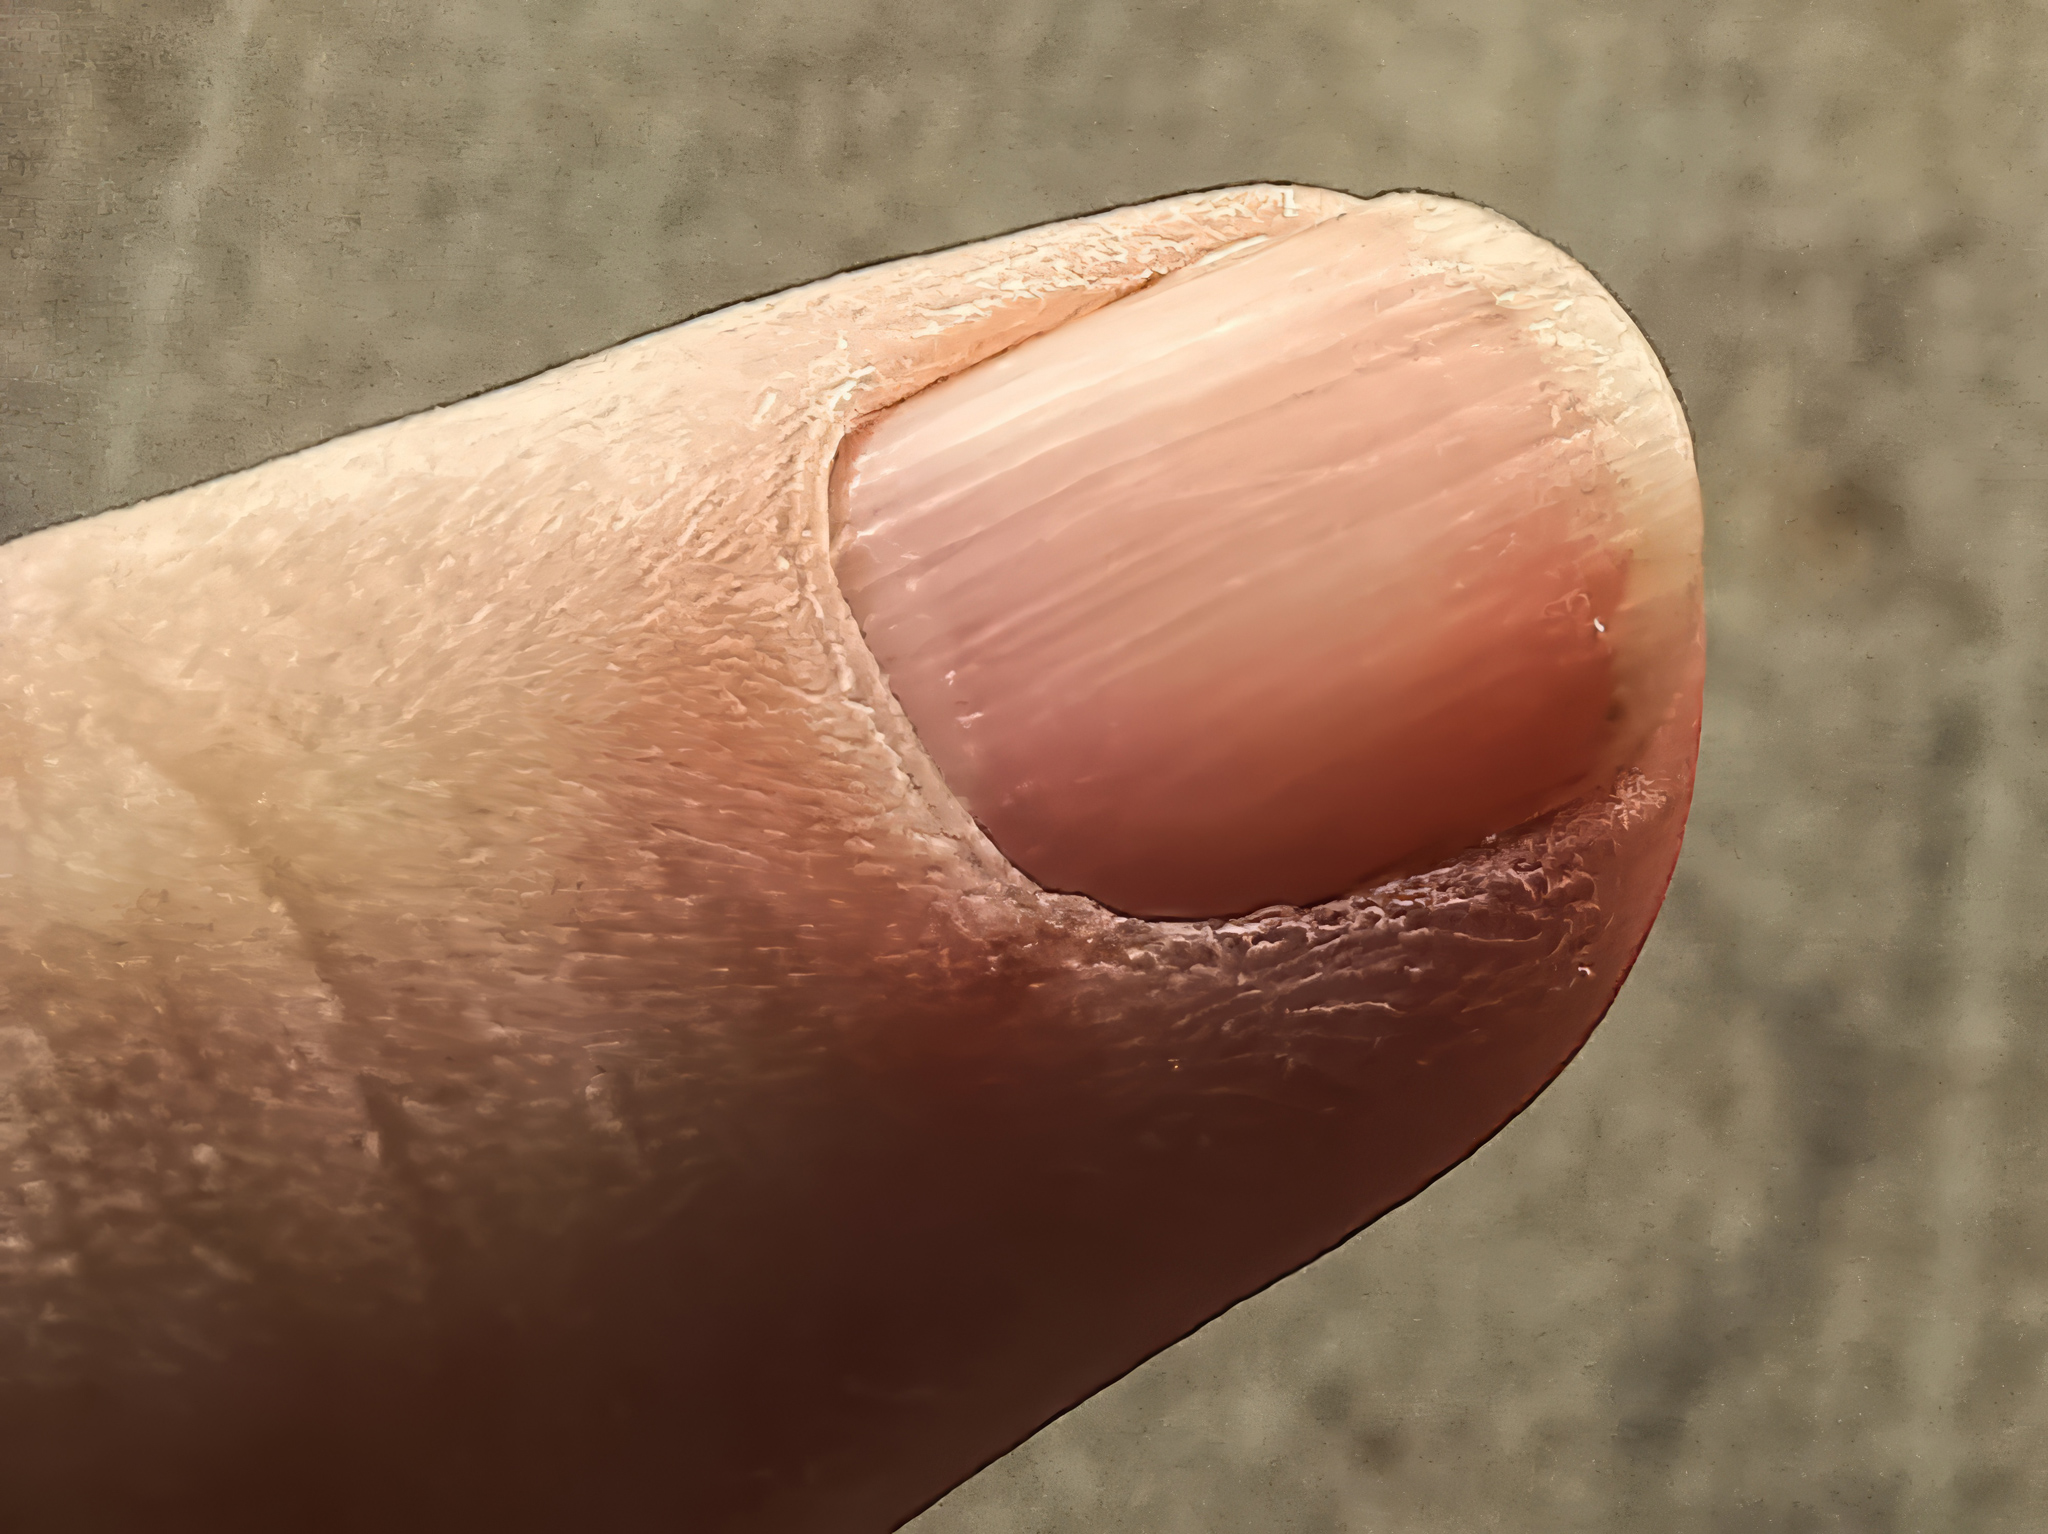
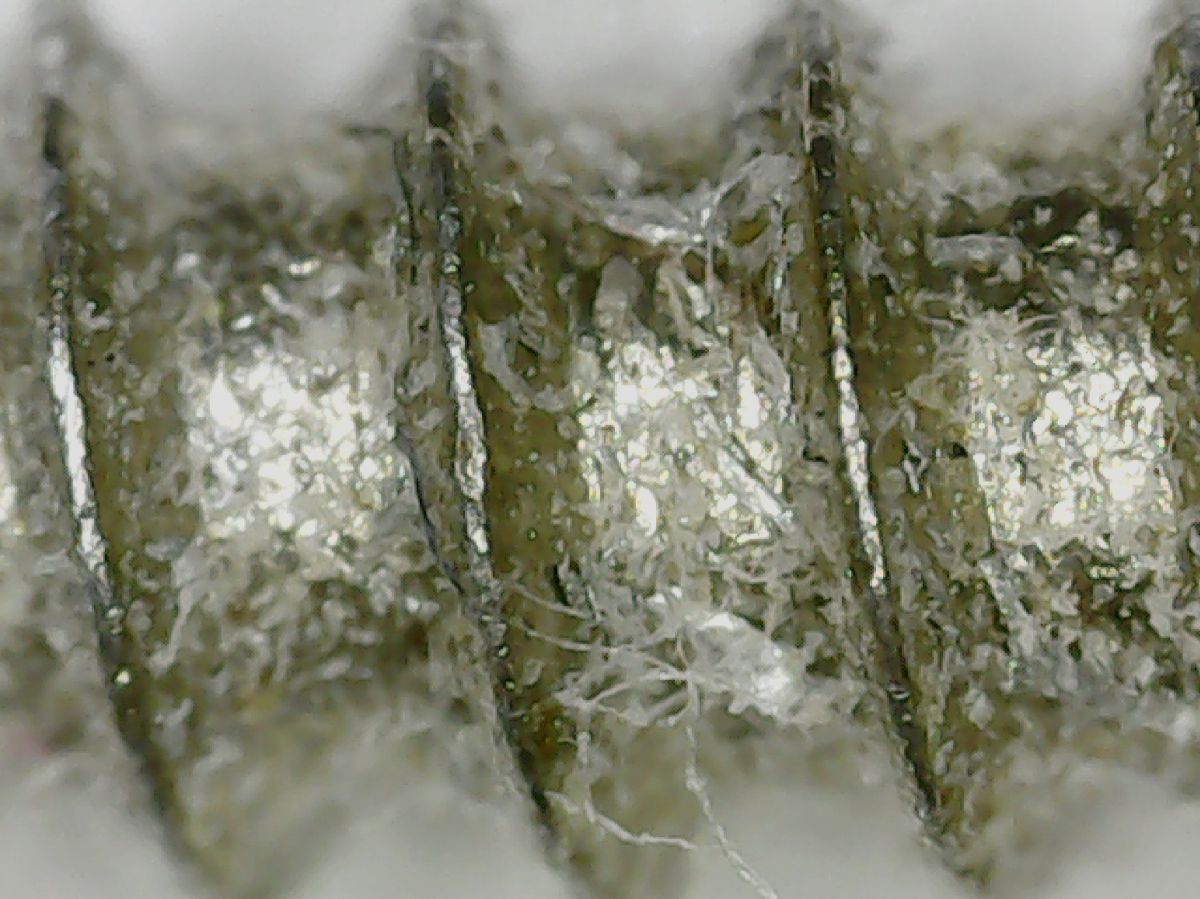
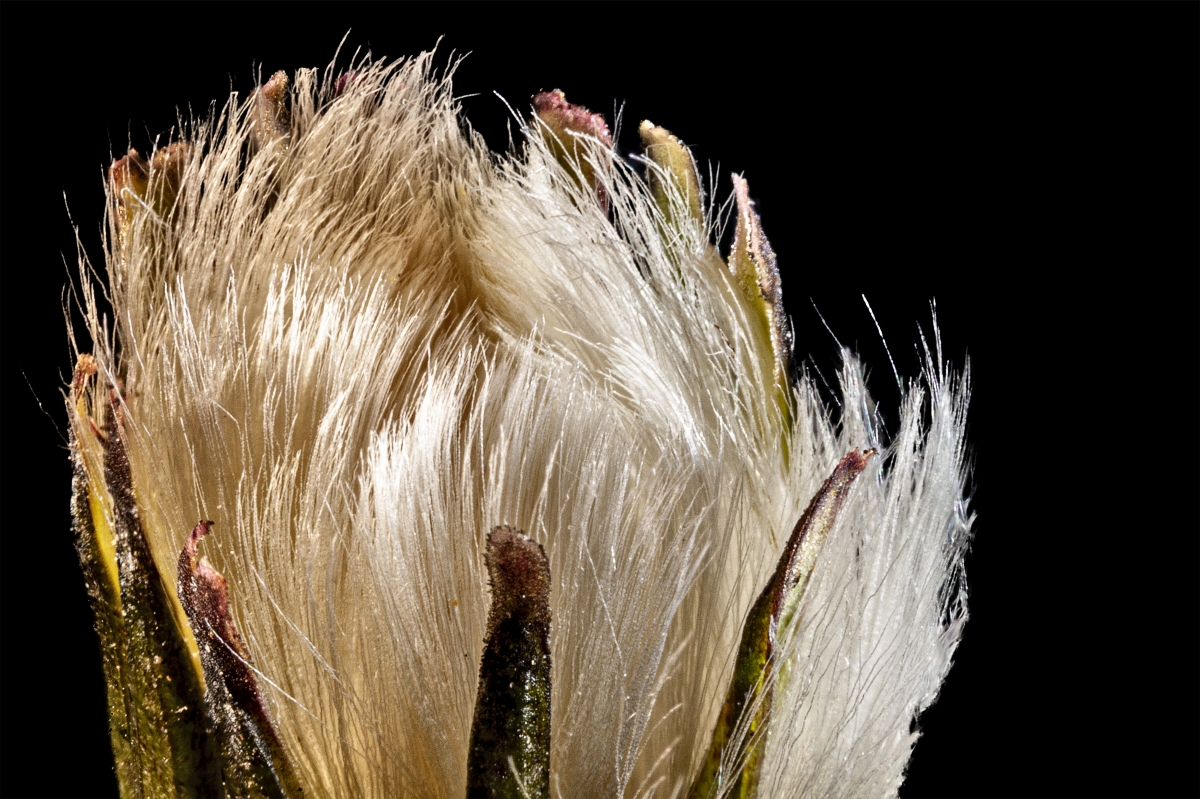
A plane of the word-working variety has a chisel-like blade on its underside that shaves off a thin slice of the wood as it is pushed along.
To me, the shavings were the important part of the image because they are close to translucent and like hair. |
May 18th |
| 53 |
May 20 |
Reply |
No, they were there from someone just trying it out. d:¬{D |
May 7th |
5 comments - 5 replies for Group 53
|
| 95 |
May 20 |
Reply |
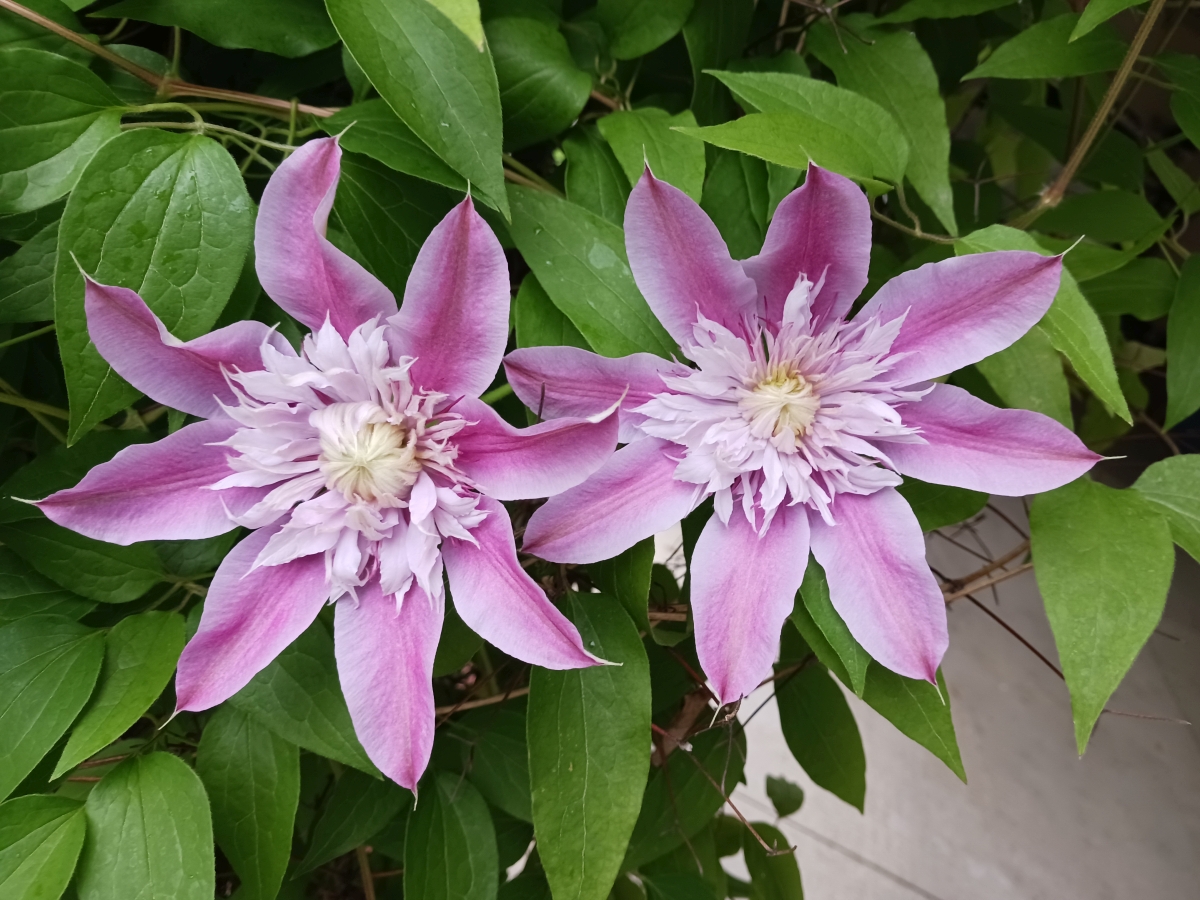
In short, yes. Put simply, the smaller the aperture (higher number), the more depth of field is captured. The trade-off is the loss of light with each smaller aperture, which needs to be compensated for by lowering your shutter speed or raising your ISO. When handheld, it's usually better to increase your ISO, while it's better to lower shutter speed when you're on a tripod. As I've gotten older, I've developed a fair amount of shakiness in my hands, so most of my macro work is on a tripod (actually, most of my captures with my DSLR are, too). |
May 23rd |
| 95 |
May 20 |
Reply |
That's a very sensible approach, Bill. My 2 main lenses are my macro and my 18-200mm and I haven't had the latter on my camera in at least a year. I'm physically not up to a lot of walking, so a lot of photographic opportunities go begging. I take a lot more images with my smartphone than I ever thought I would, but it's always with me, even in places the DSLR wouldn't go. Still, macro has fairly limitless opportunities without leaving my house and yard, so I pretty go without my bag 99% of the time, too. d;¬{D |
May 23rd |
| 95 |
May 20 |
Reply |
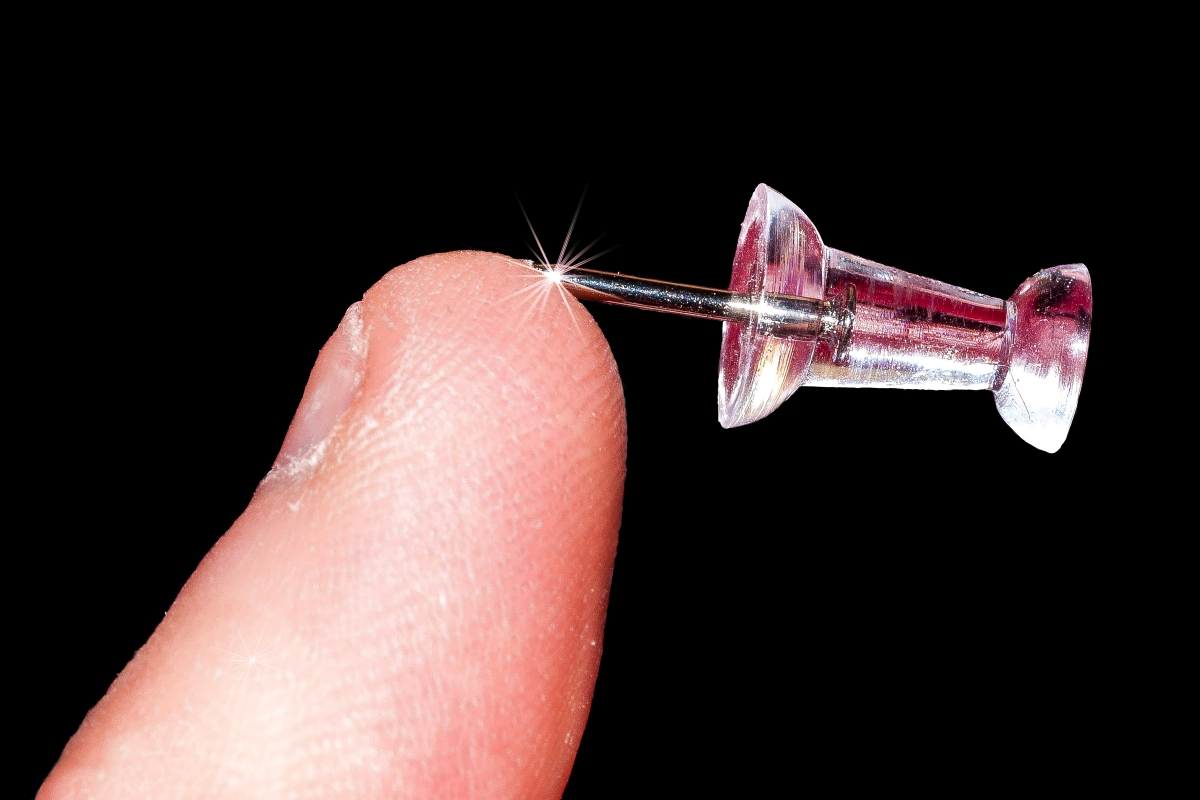
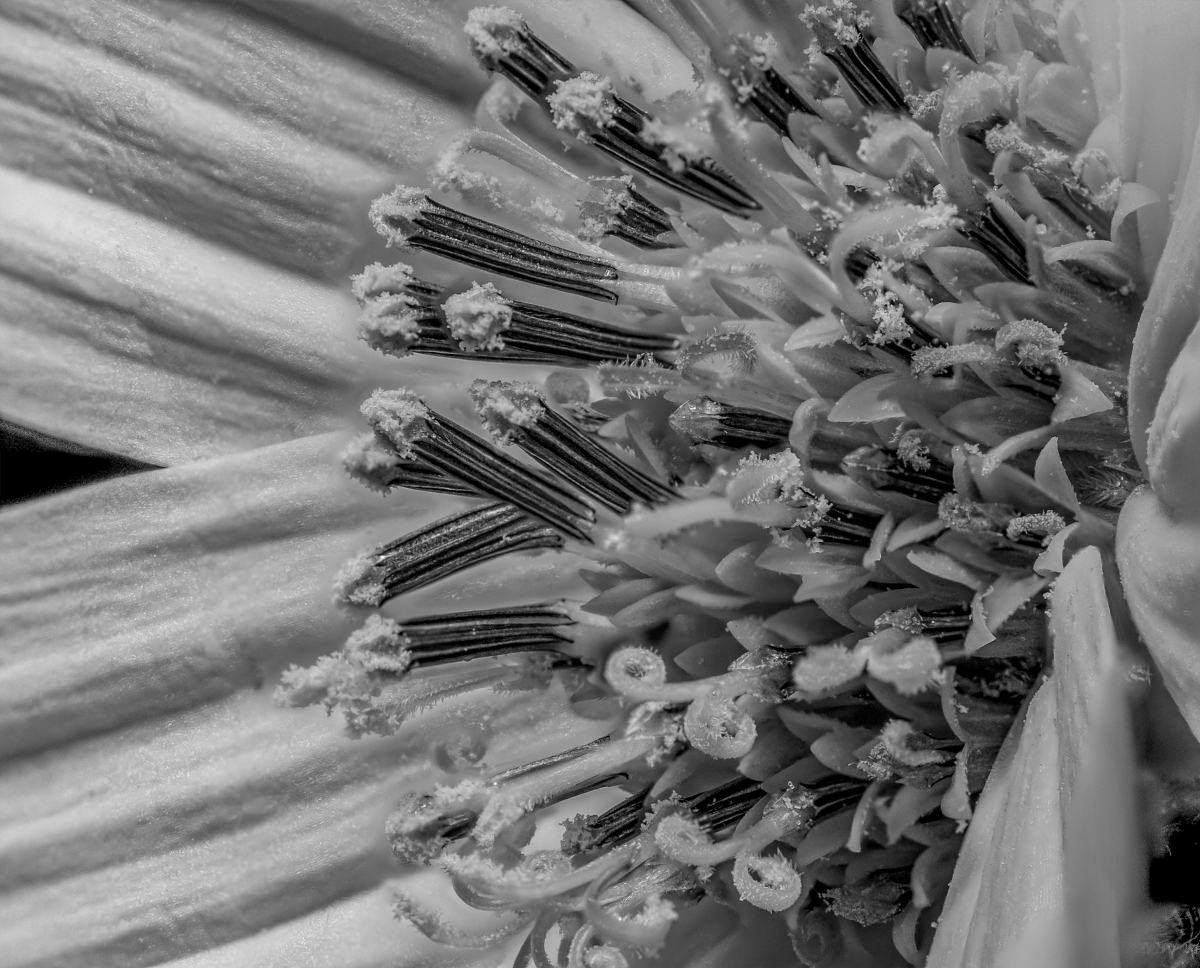
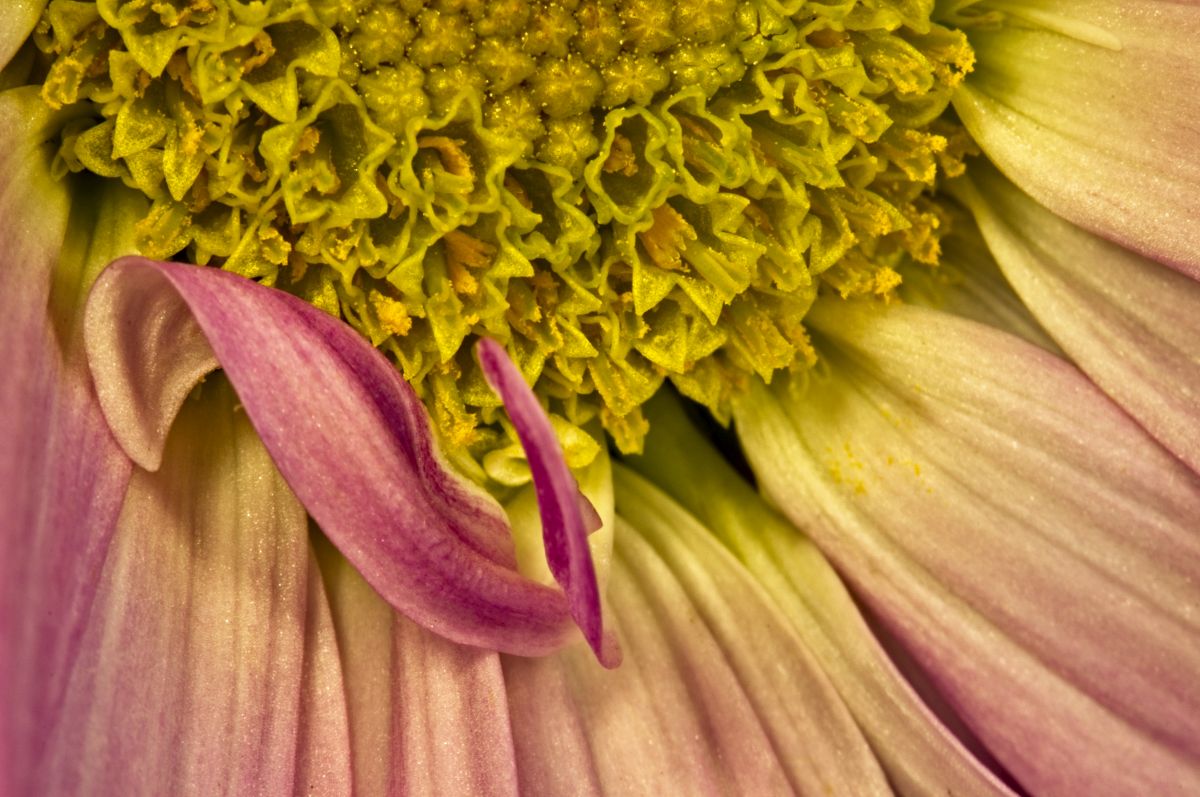
I would avoid Auto ISO like Covid-19. In macro work, especially as we get closer to the subject, we lose light. Since you are using a tripod, set your ISO to 100 and leave it. In this case, ISO 5000 was way too high for the shot and introduced a lot of noise unnecessarily.
If you're shooting handheld, then adjust the ISO to allow you to compensate for any hand-shake so that your shutter speed is at least matched to your focal length. In other words, using the 90mm macro would mean your shutter speed handheld should be 1/90s or faster.
Every lens has a sweet spot - the aperture that has the least diffraction and chromatic aberration. It's usually around F8 to F11 for most lens. If you're going for the maximum detail in one shot, you'll need a smaller aperture - usually 1 or 2 stops up from your smallest aperture. If you want more softness at the edges or in your background, you want a larger aperture, again 1 or 2 stops down from the largest. It's a balancing act.
You also need to shooting in Manual (M) mode, or Aperture Priority (A) at the very least so you have control over the shot and, when on a tripod, you're better off manually focusing as auto-focusing can waste your time and sometimes focus on the wrong thing.
The reason for doing focus stacking is to have your aperture in the sweet spot and still get everything in focus. So you take a series of images, focusing ever deeper into the subject until you have several slices that each contain a part of the subject in focus. These are then merged in a program that is dedicated to that or has the ability to that built-in. Photoshop CC, Affinity Photo & On1 Photo Raw can each accomplish this, though that's not their main purpose. Affinity Photo is probably the best of the 3 and the cheapest interestingly enough. Zerene Stacker and Helicon Focus are the best programs dedicated to merging focus stacking. I use Helicon Focus as it does a good job and is not very expensive. Zerene Stacker is the cream of the crop, but is also quite a bit more expensive. There are free stacker programs out there, but they don't so the best of jobs and are harder to use.
The best thing to start doing is experiment with different aperture and shutter speed combinations and compare the results. You'll quickly start seeing what will work for what purpose. They're digital images and aren't costing your anything but time. d;¬{D |
May 18th |
| 95 |
May 20 |
Comment |
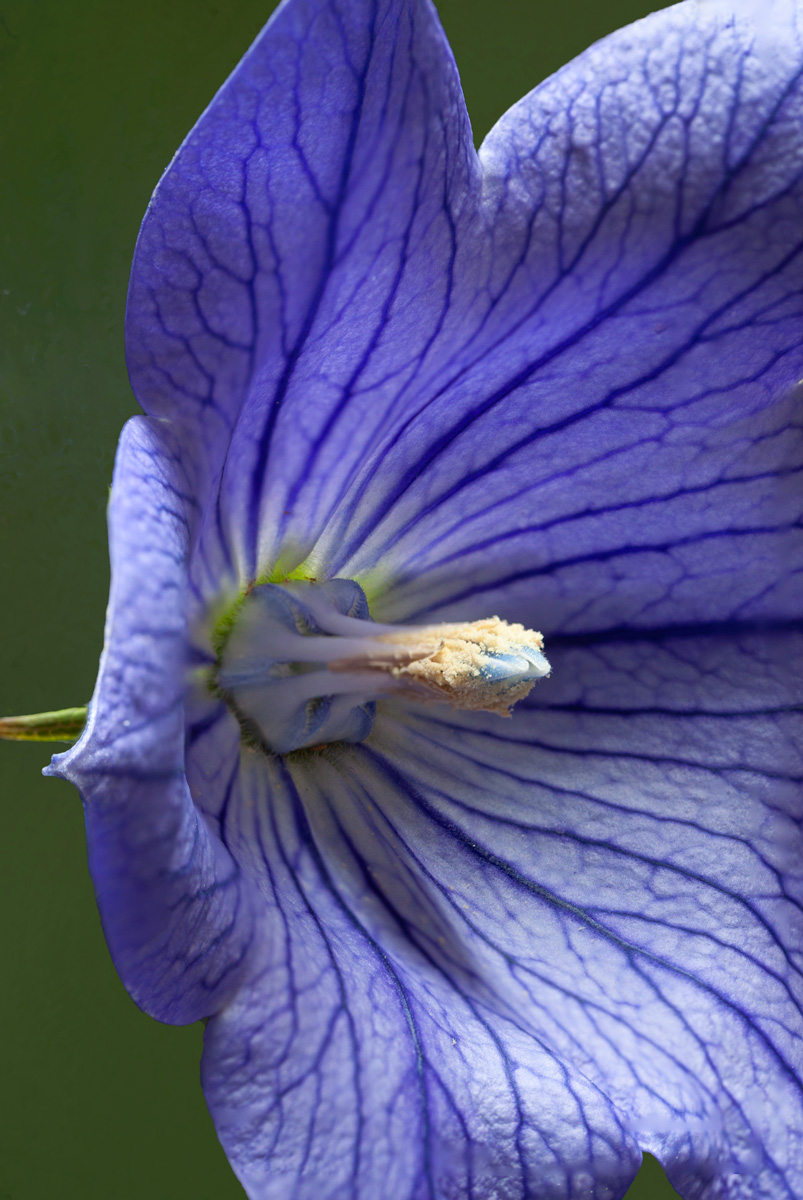
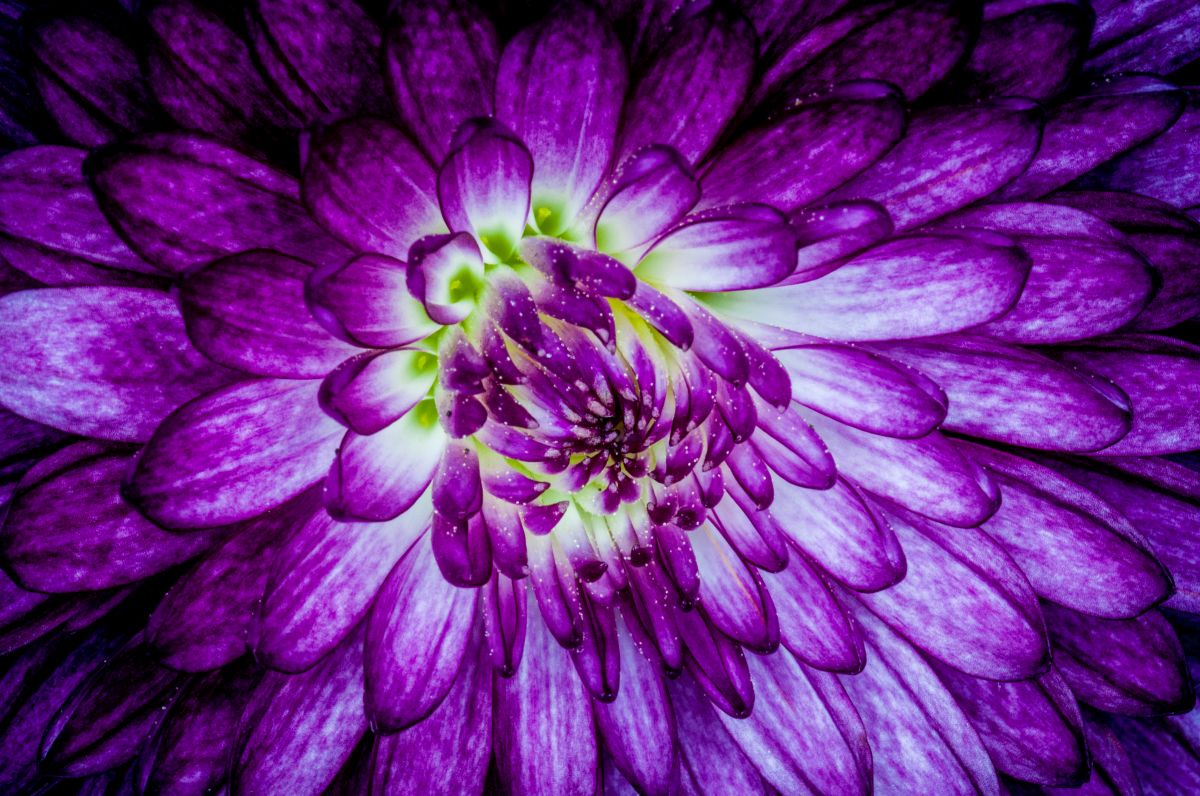
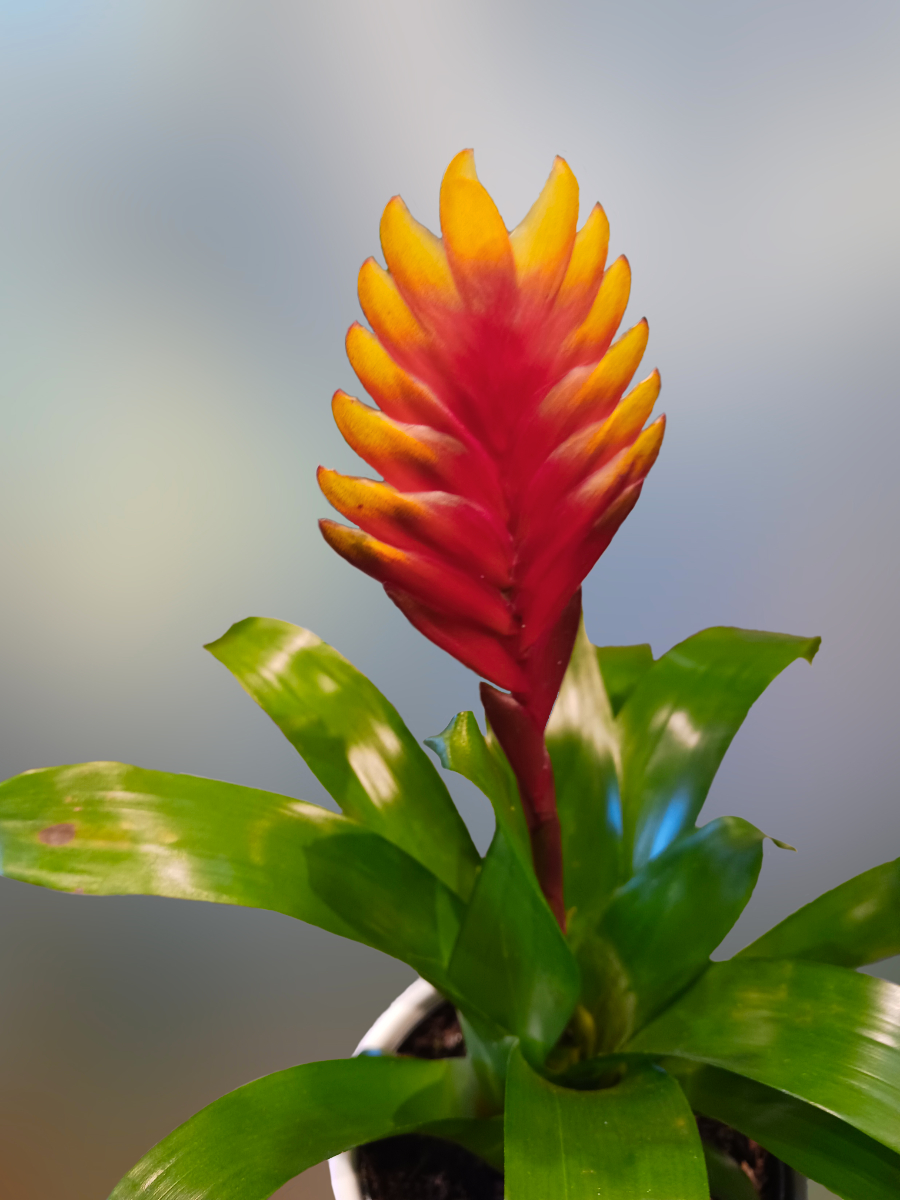
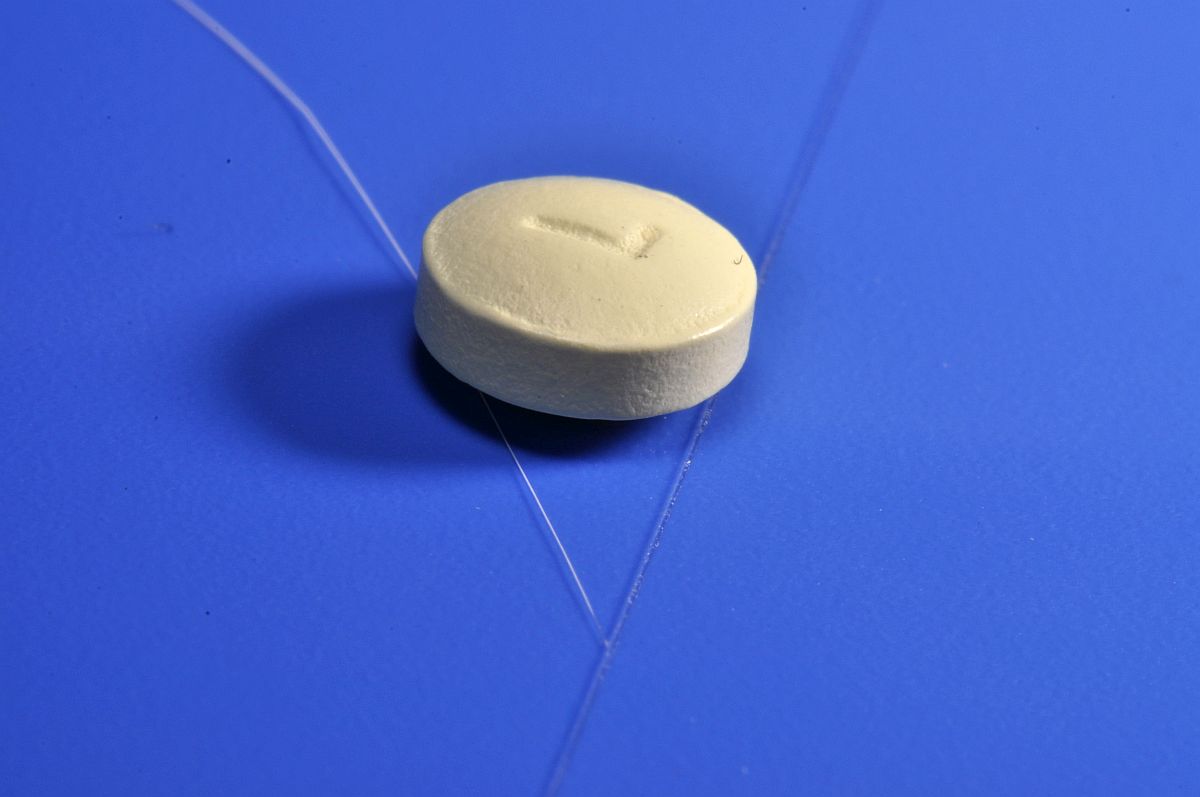
Can you let us know about your camera settings and your post-processing steps? We can better help if have that information. d:¬{D
I took this into Photoshop, did some noise-reduction and added Clarity in Adobe Camera Raw, then added some contrast and sharpening to finish it out. Thoughts? |
May 18th |
 |
| 95 |
May 20 |
Comment |
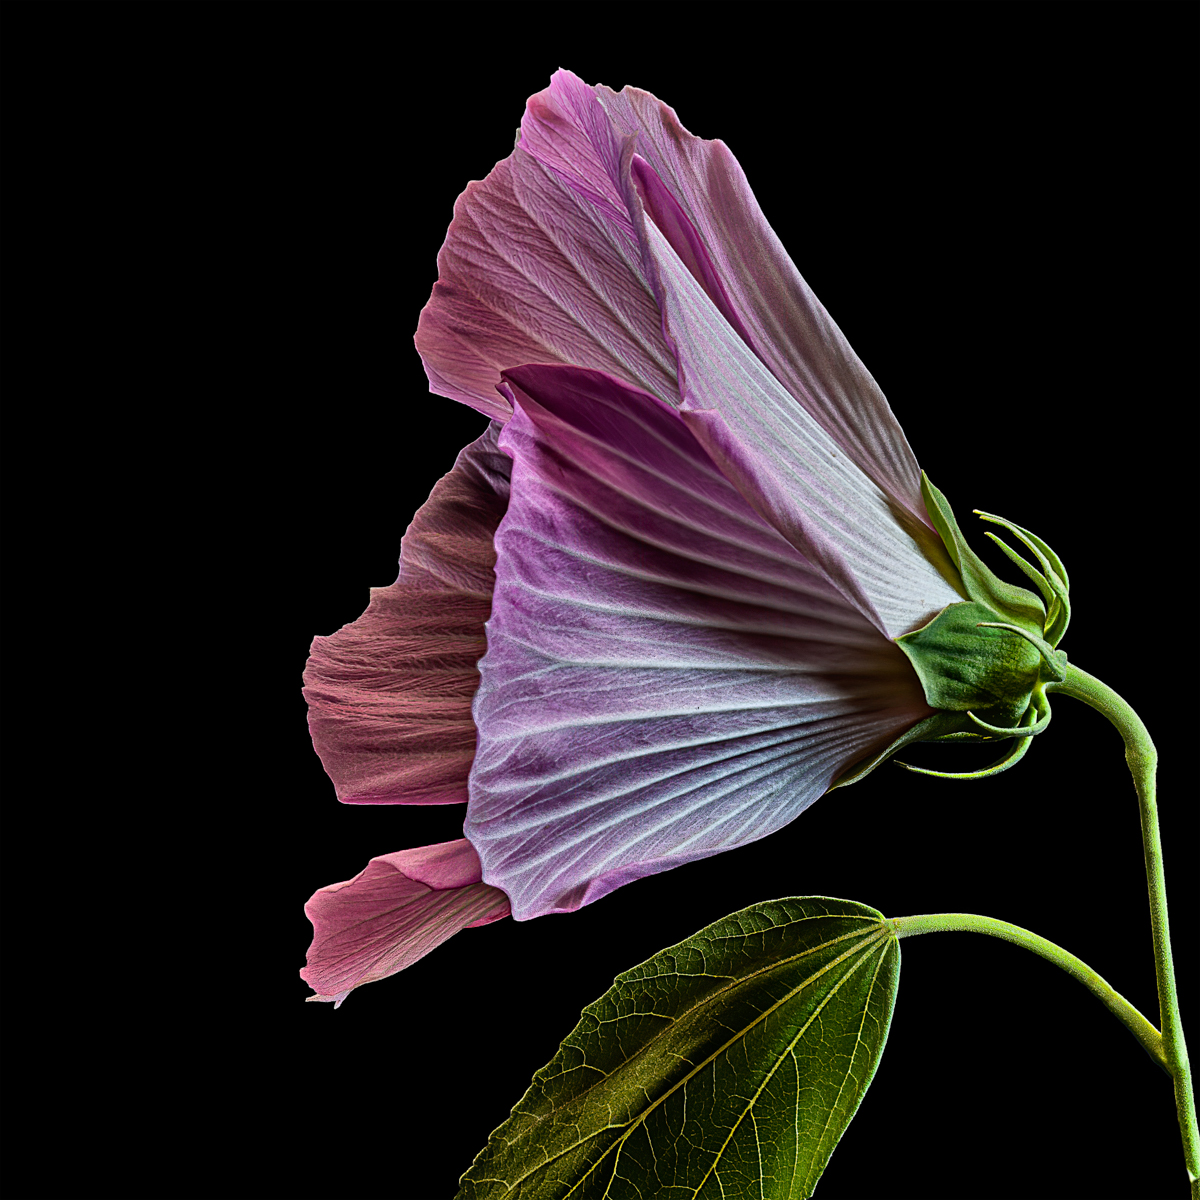
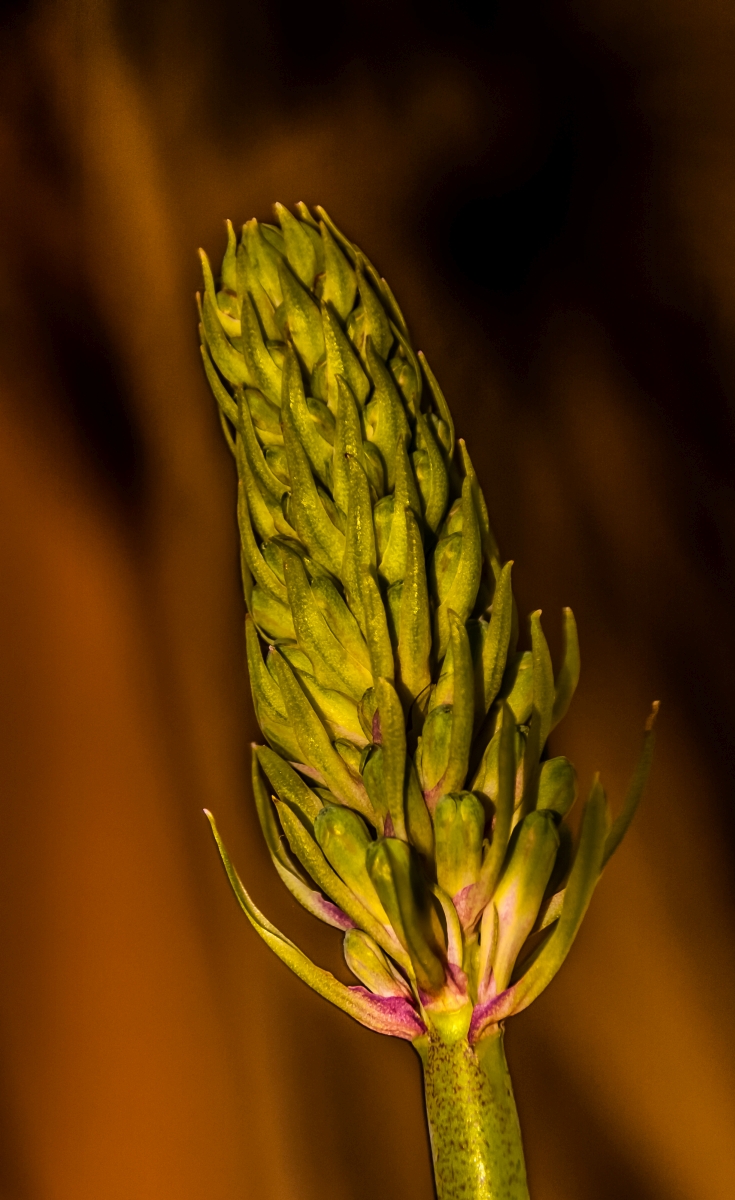
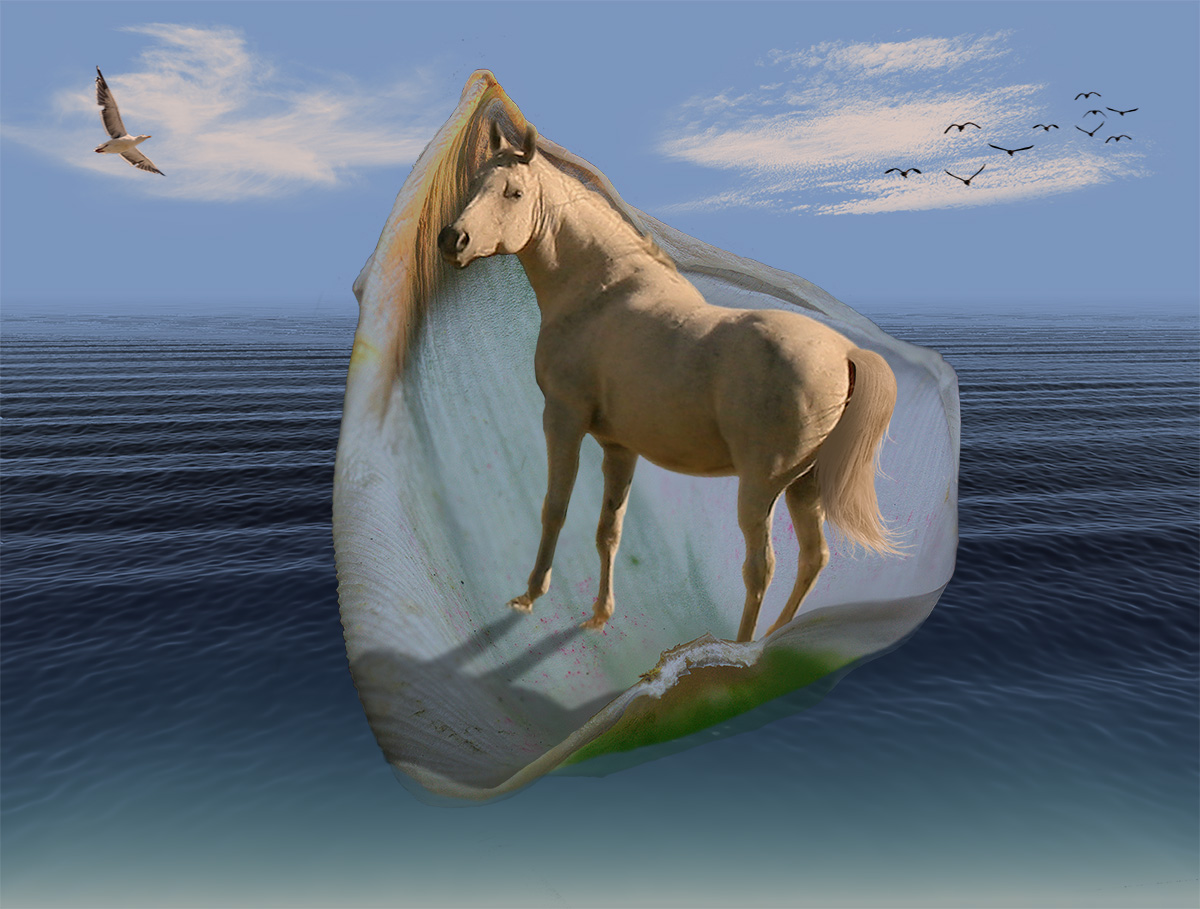
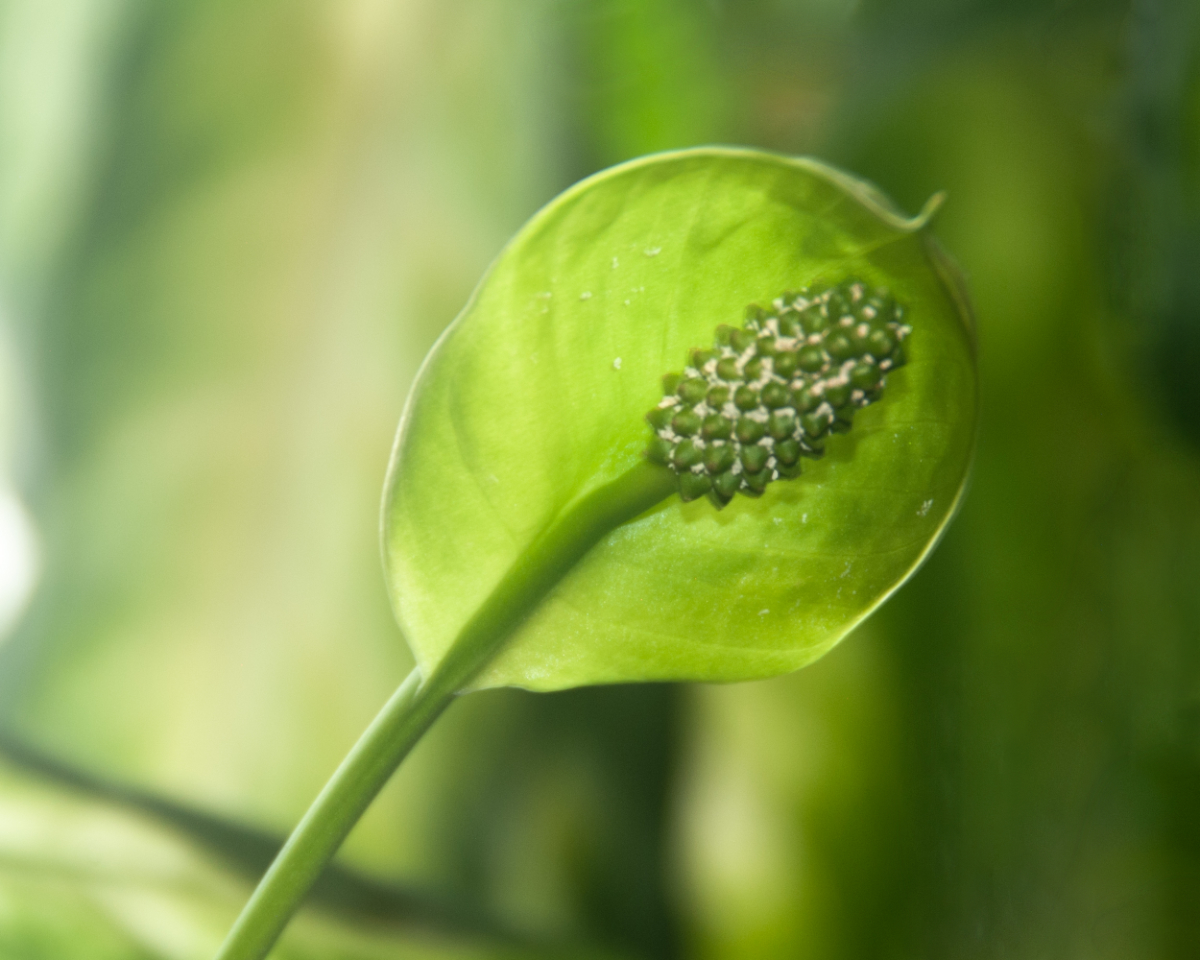
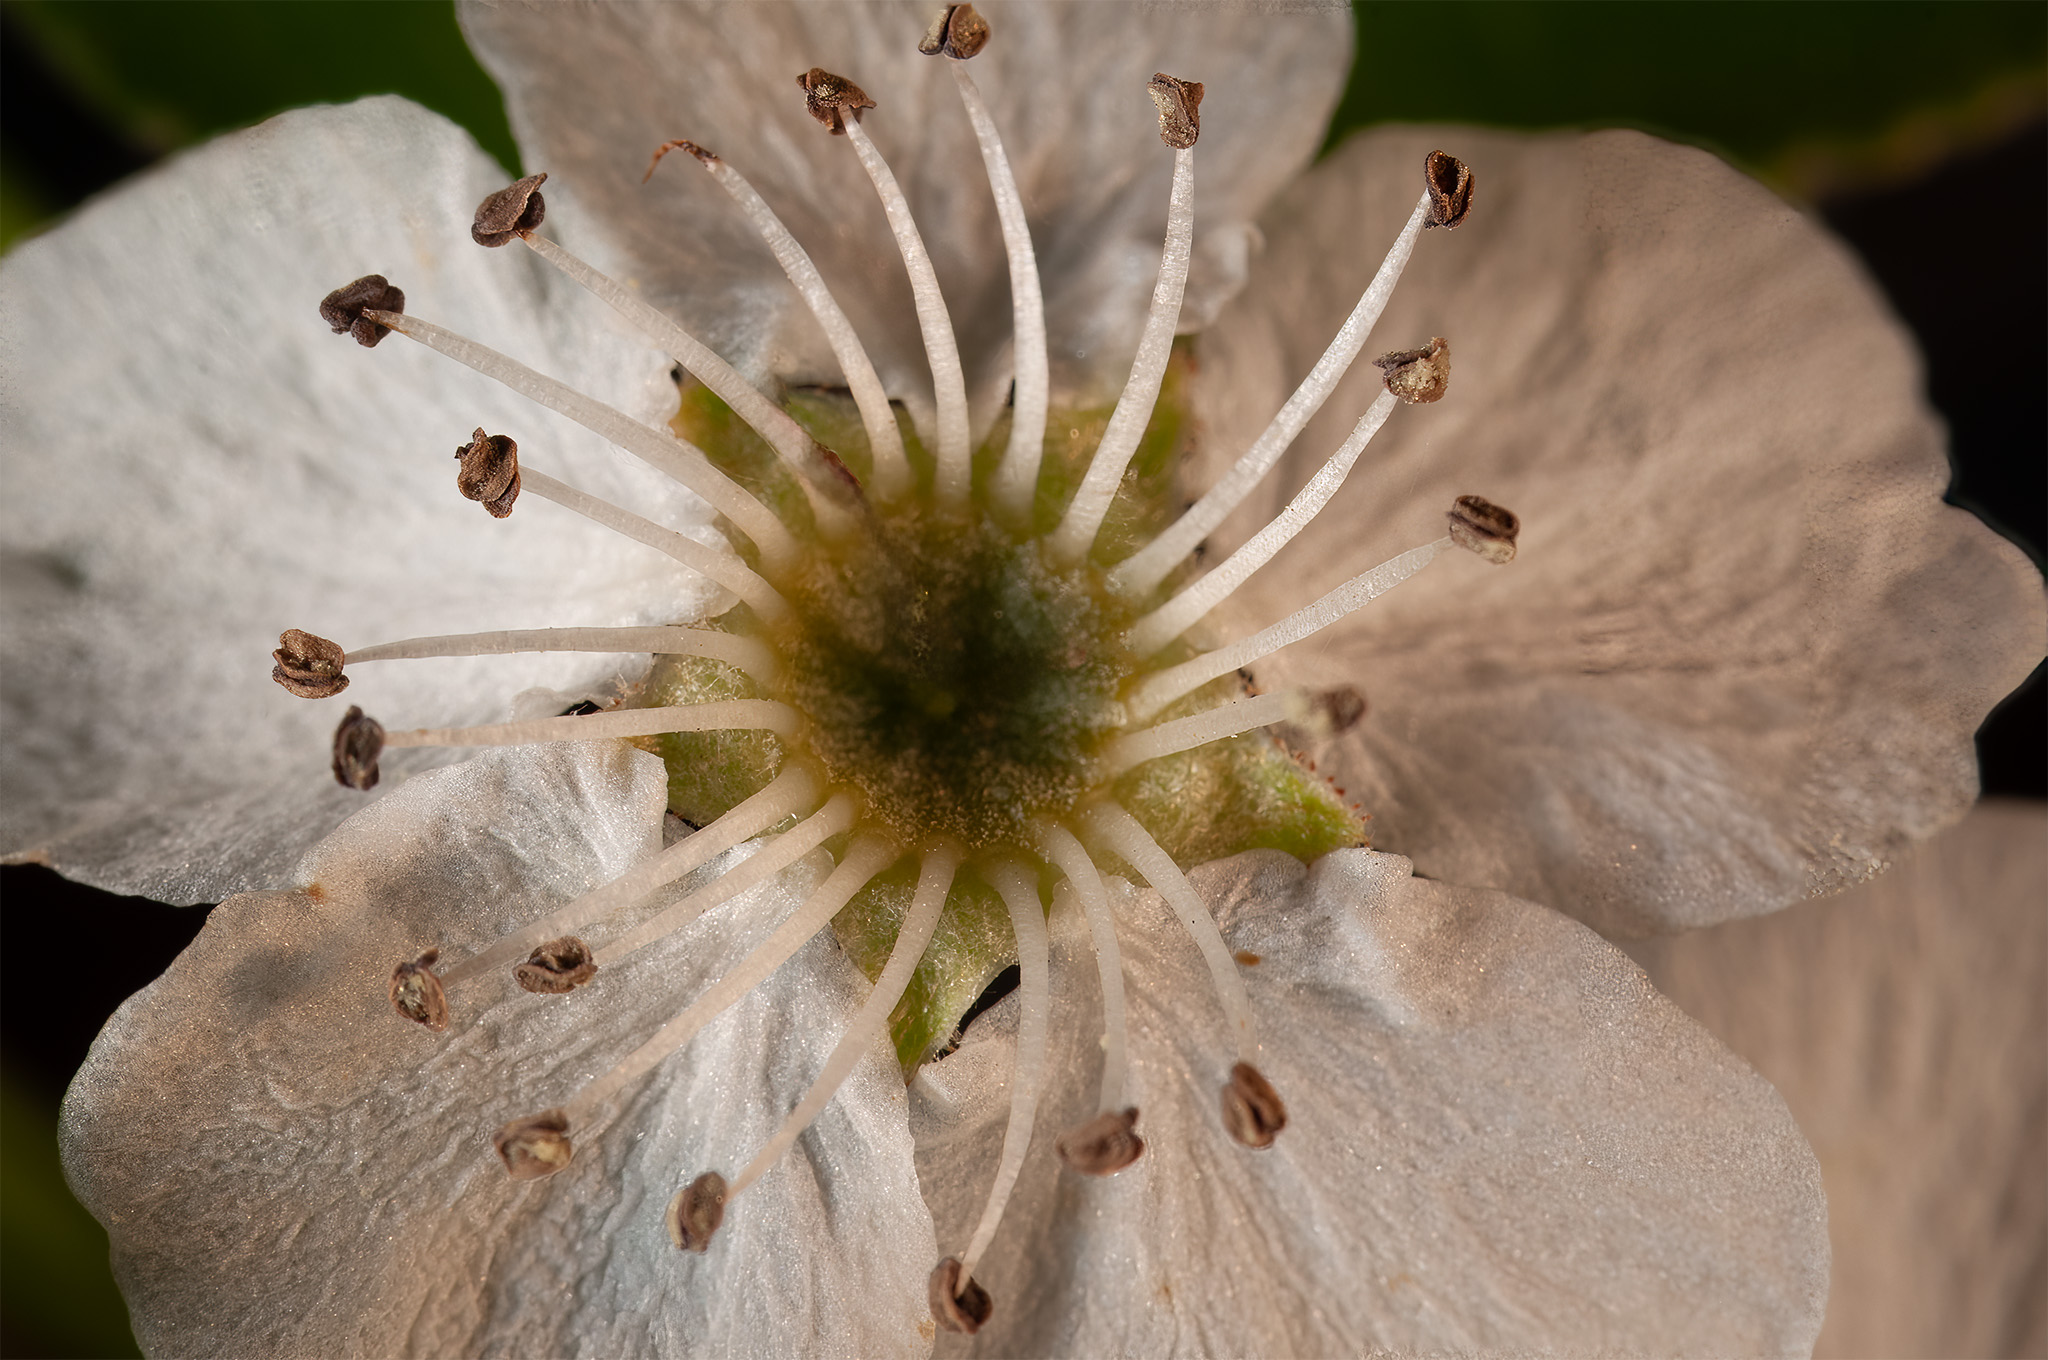
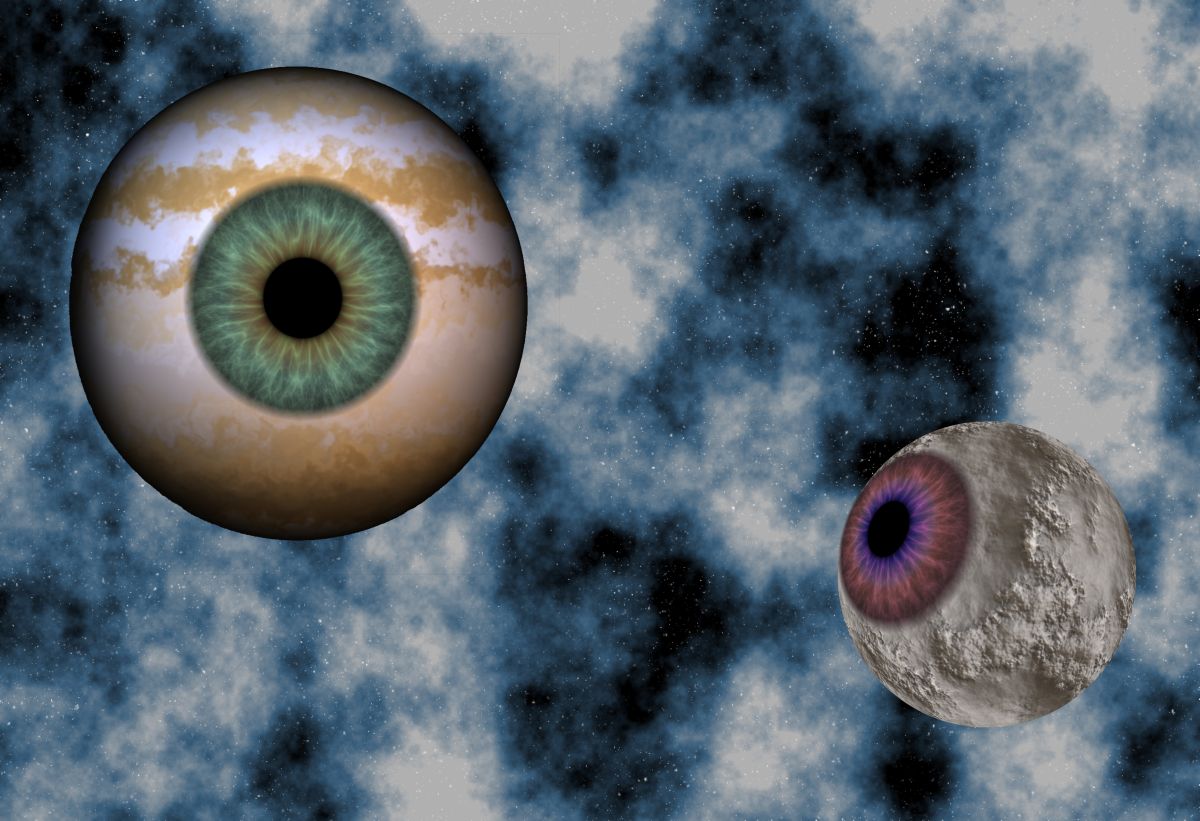
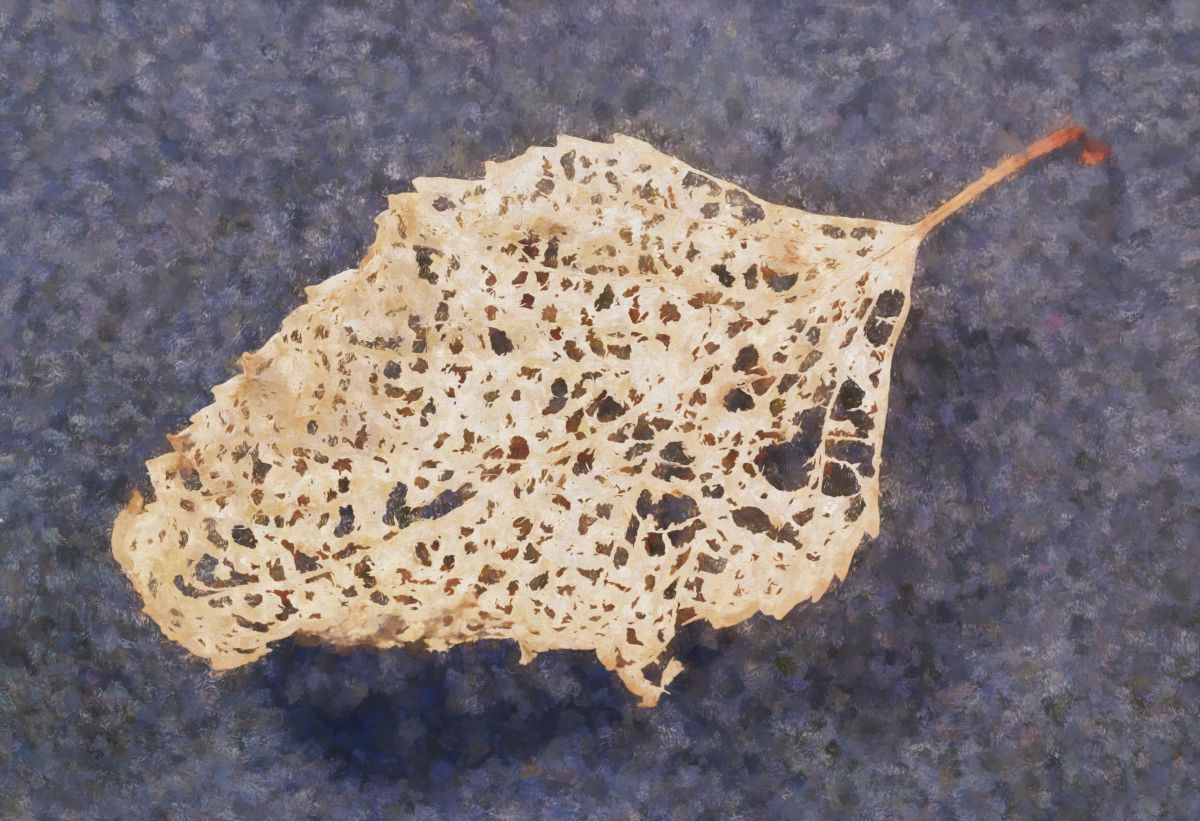
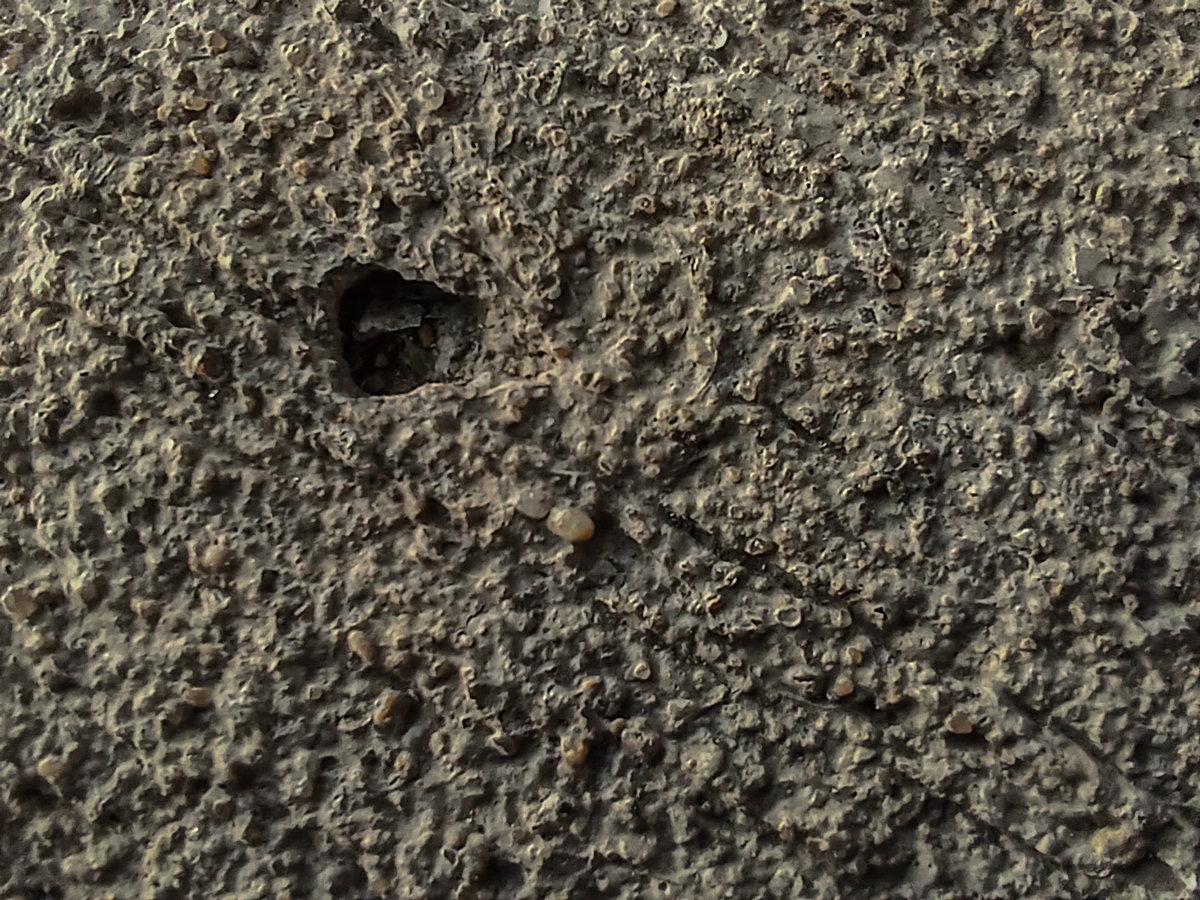
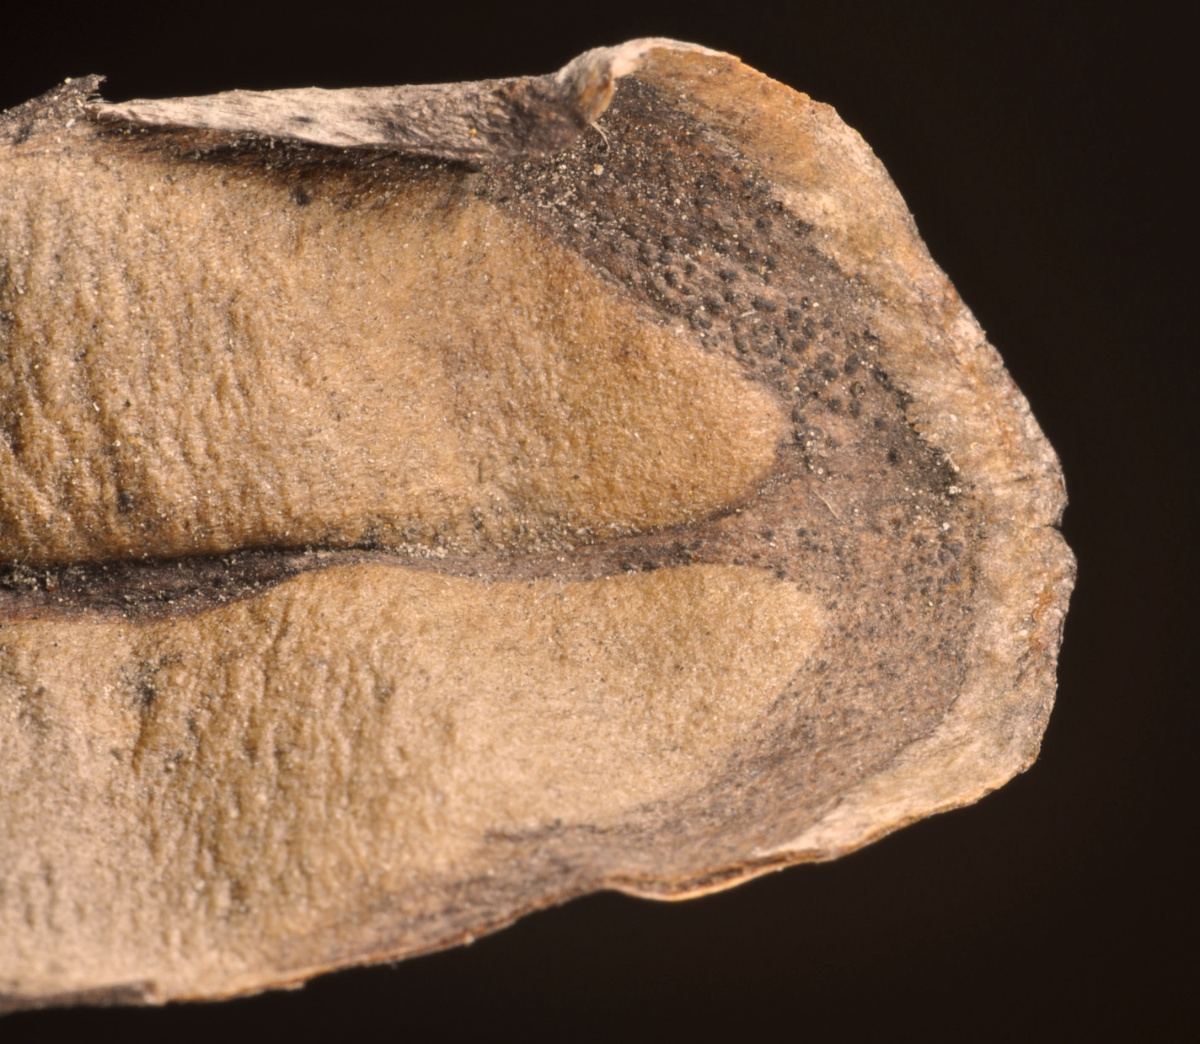
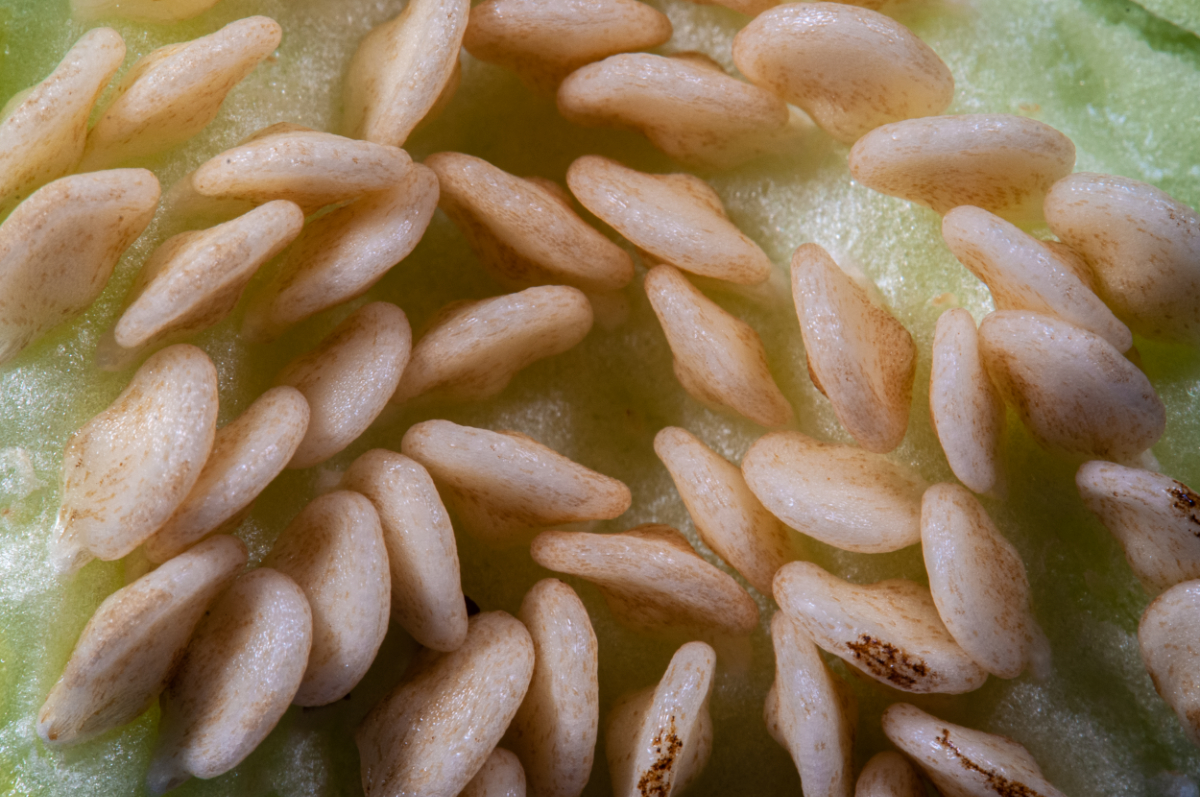
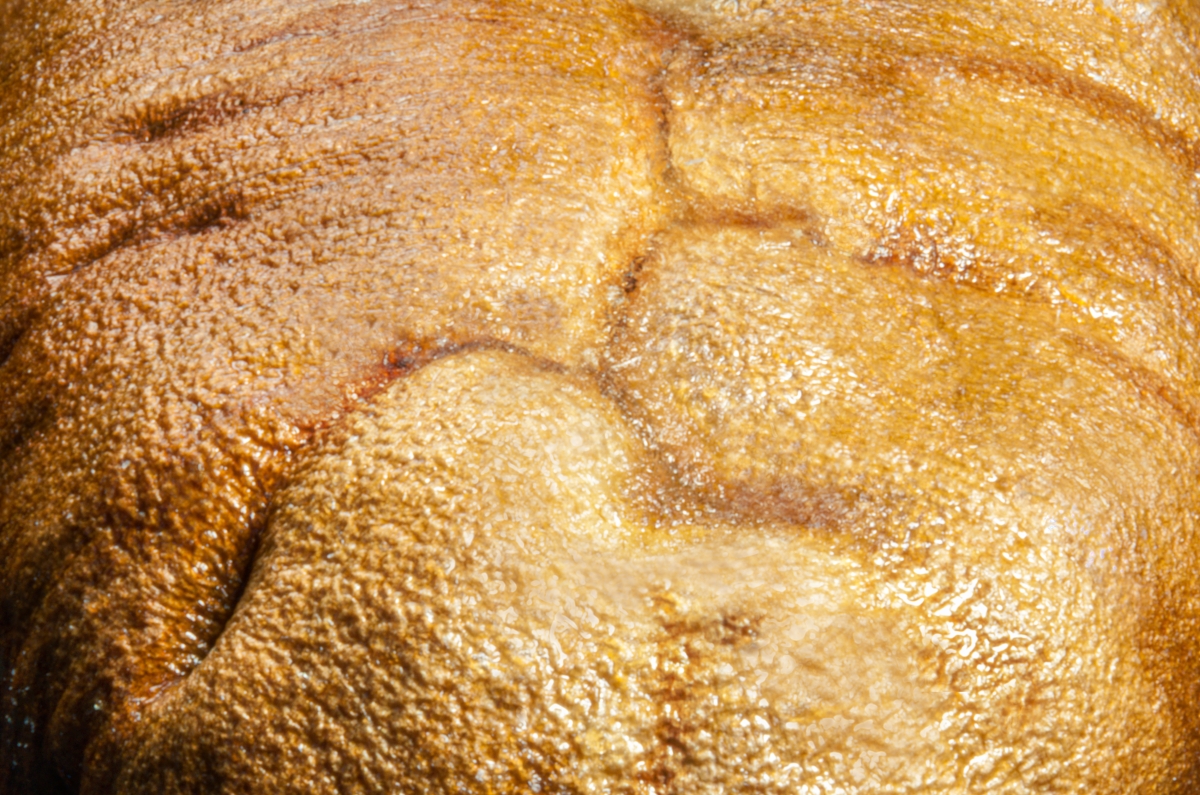
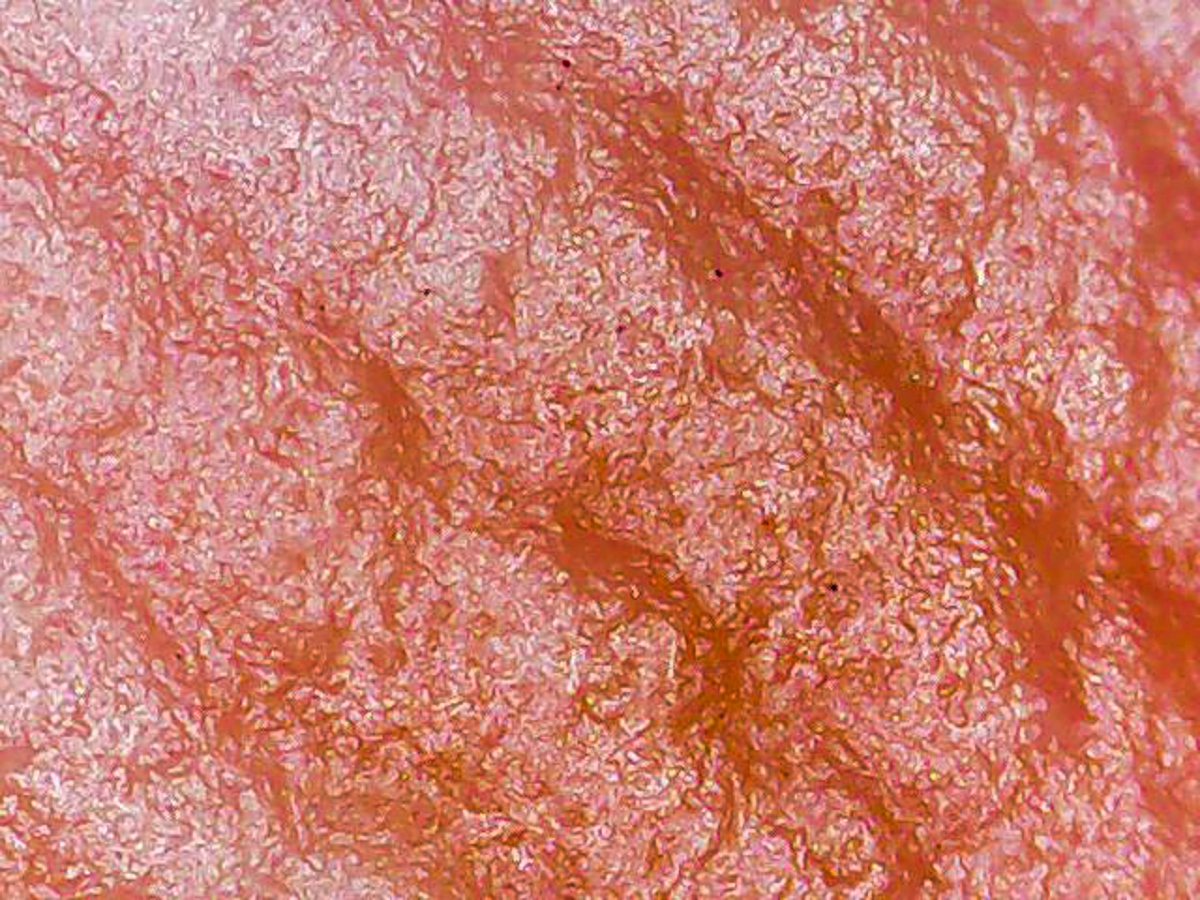
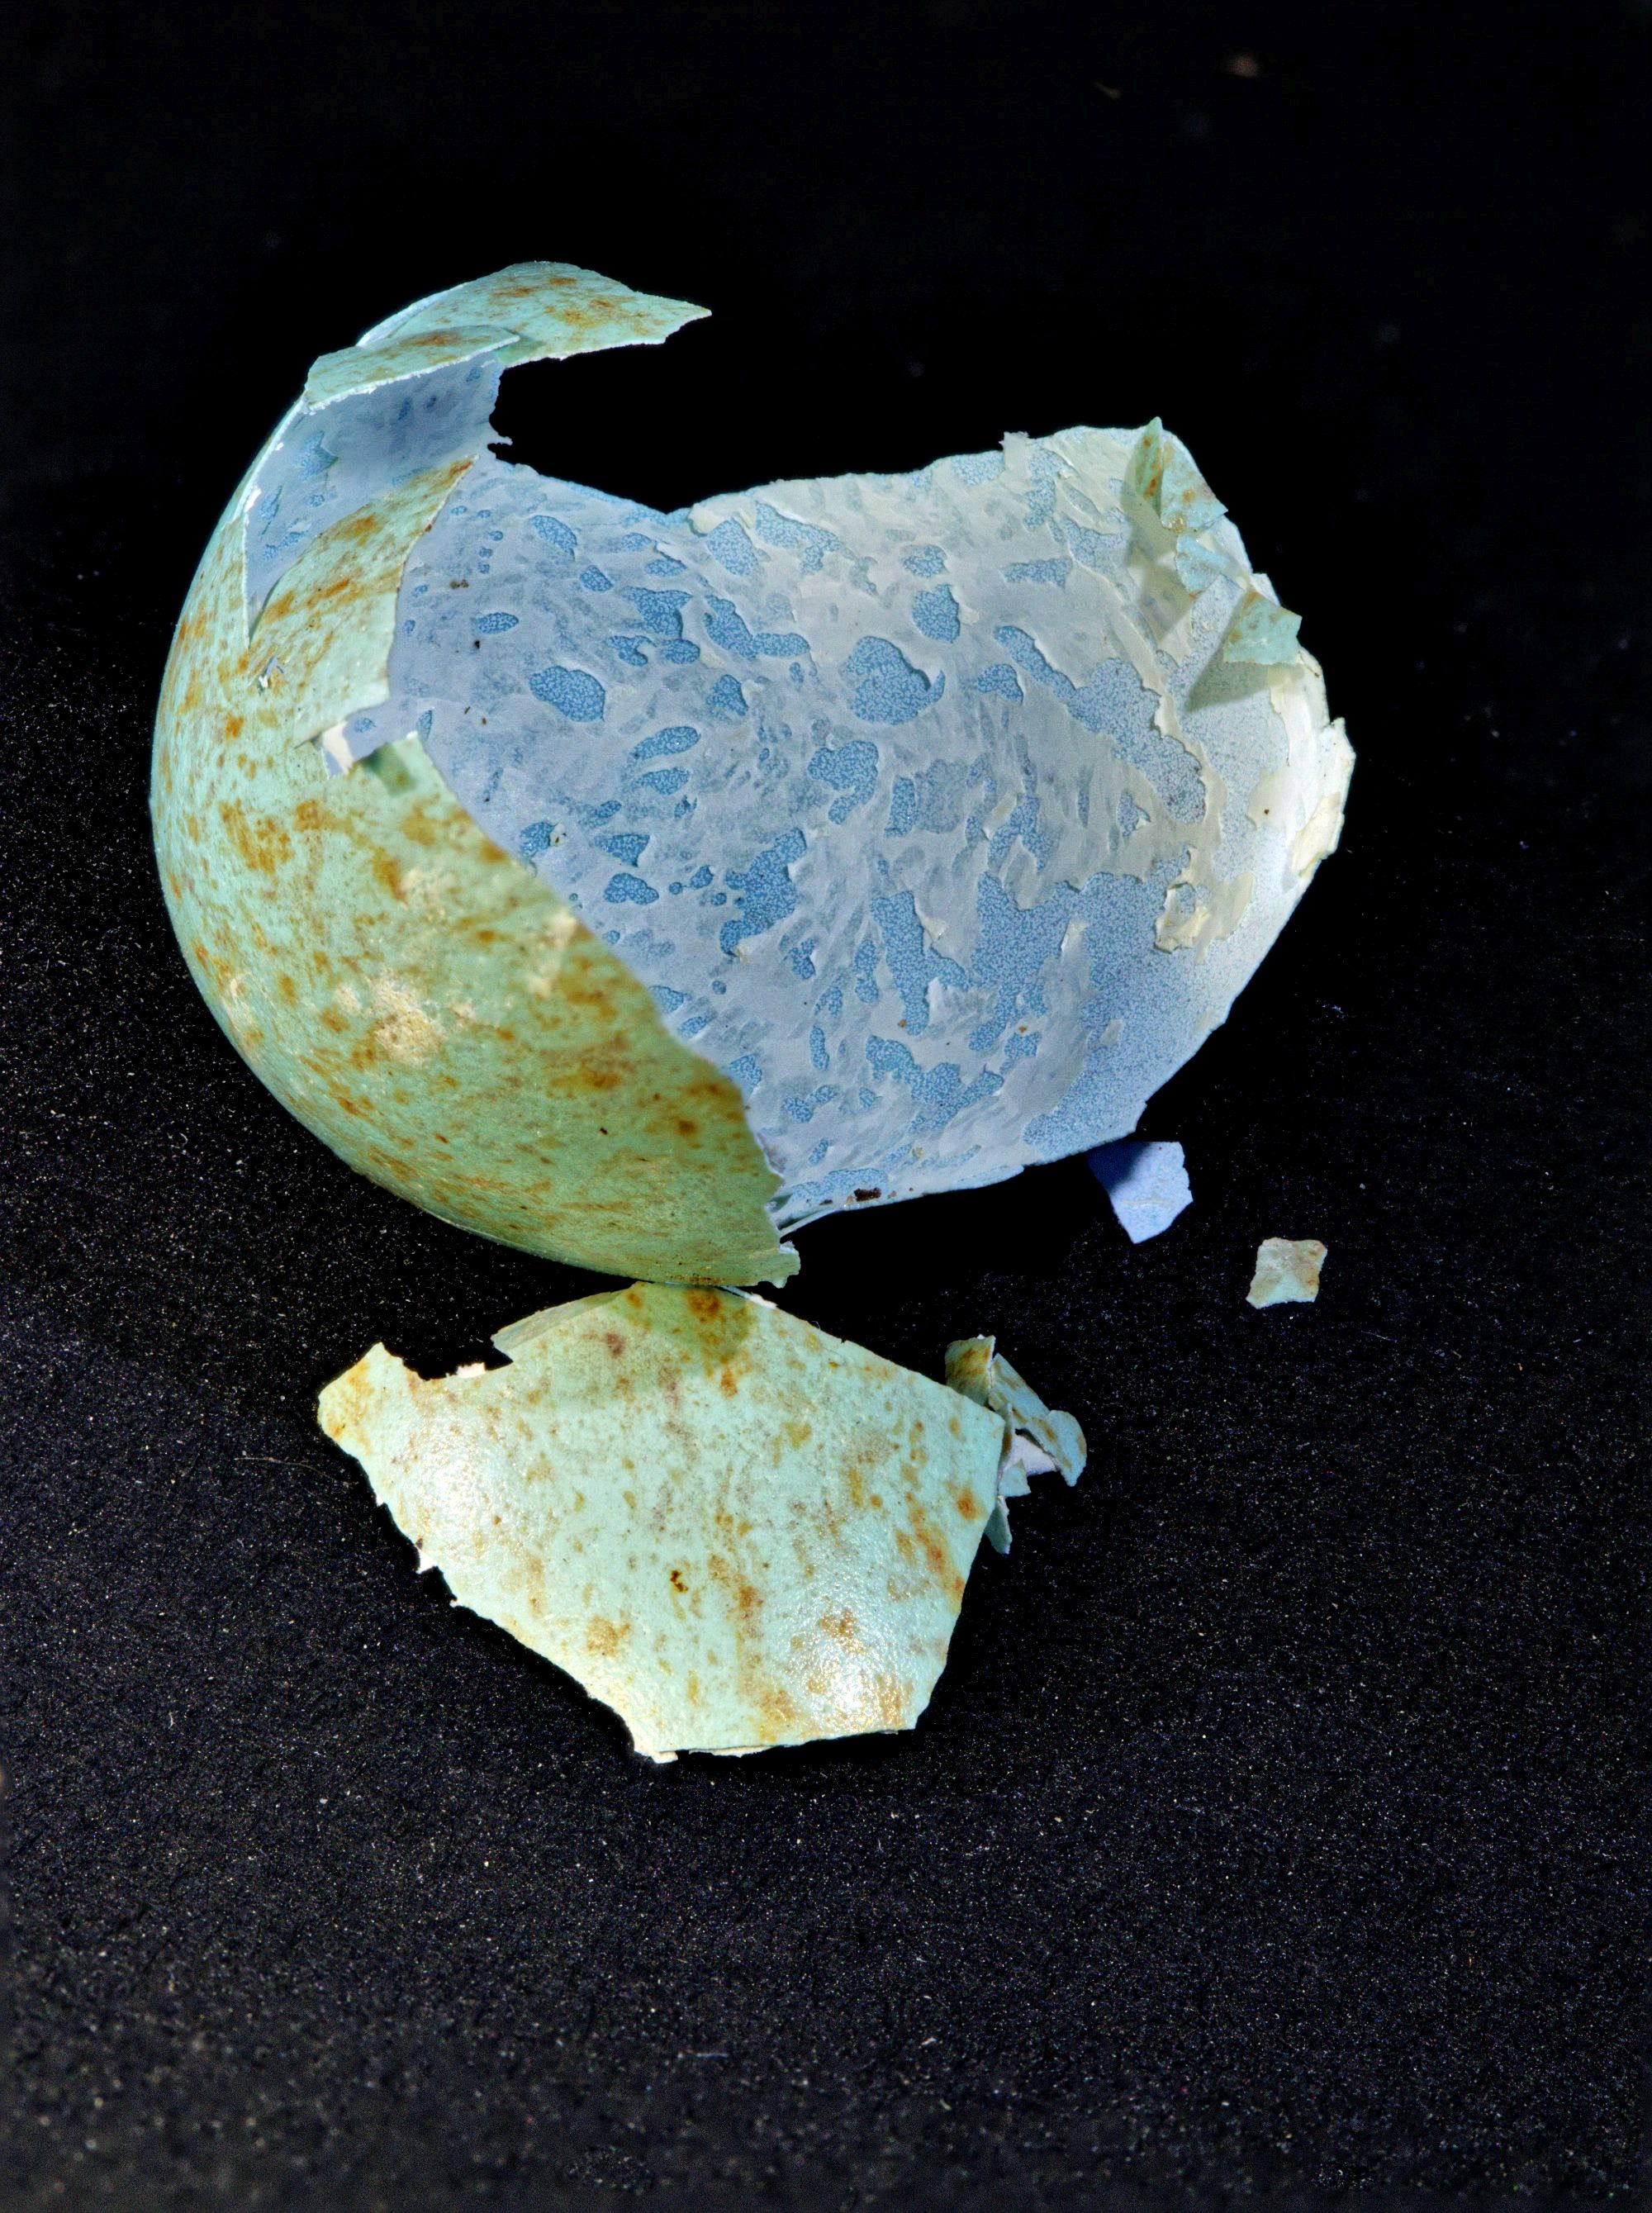
After a search, I find that this type of egg is around 4.3cm x 3cm. Does this track with the shell in this image?
You might consider a few tonal adjustments, such as added contrast, dodging & burning for depth, and a little sharpening to help it pop a bit more. Thoughts? |
May 18th |
 |
| 95 |
May 20 |
Comment |
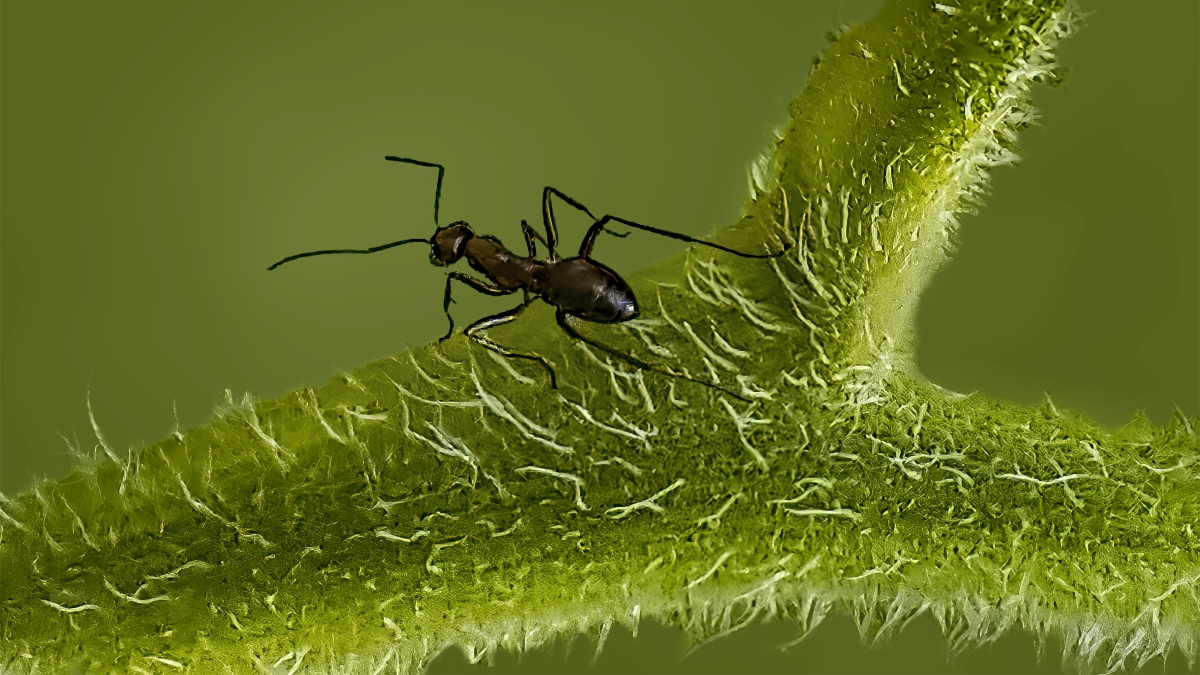
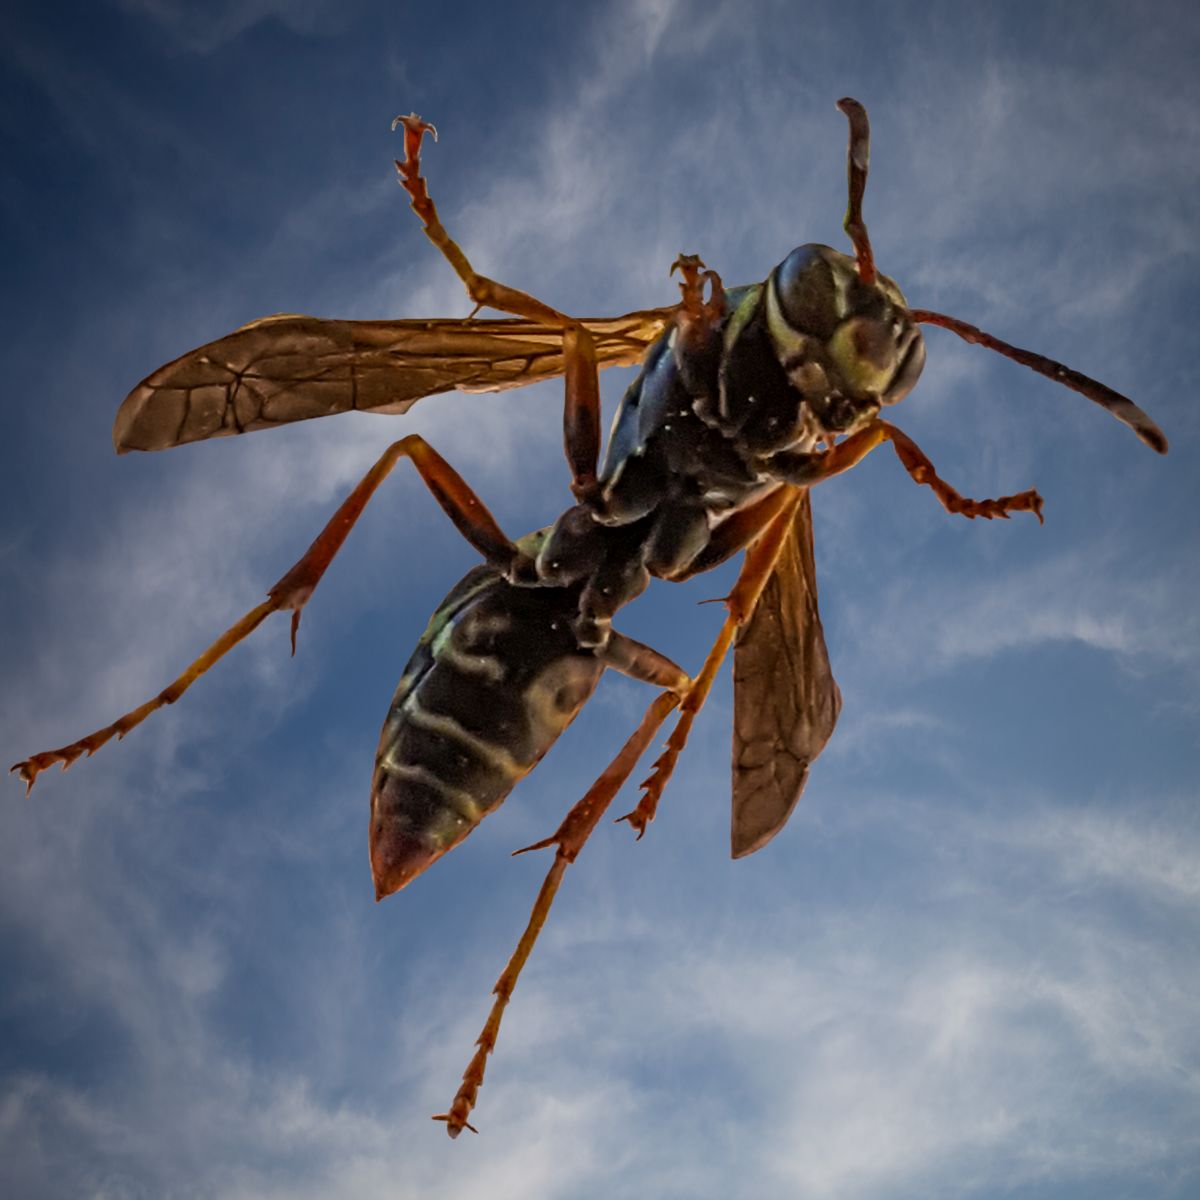
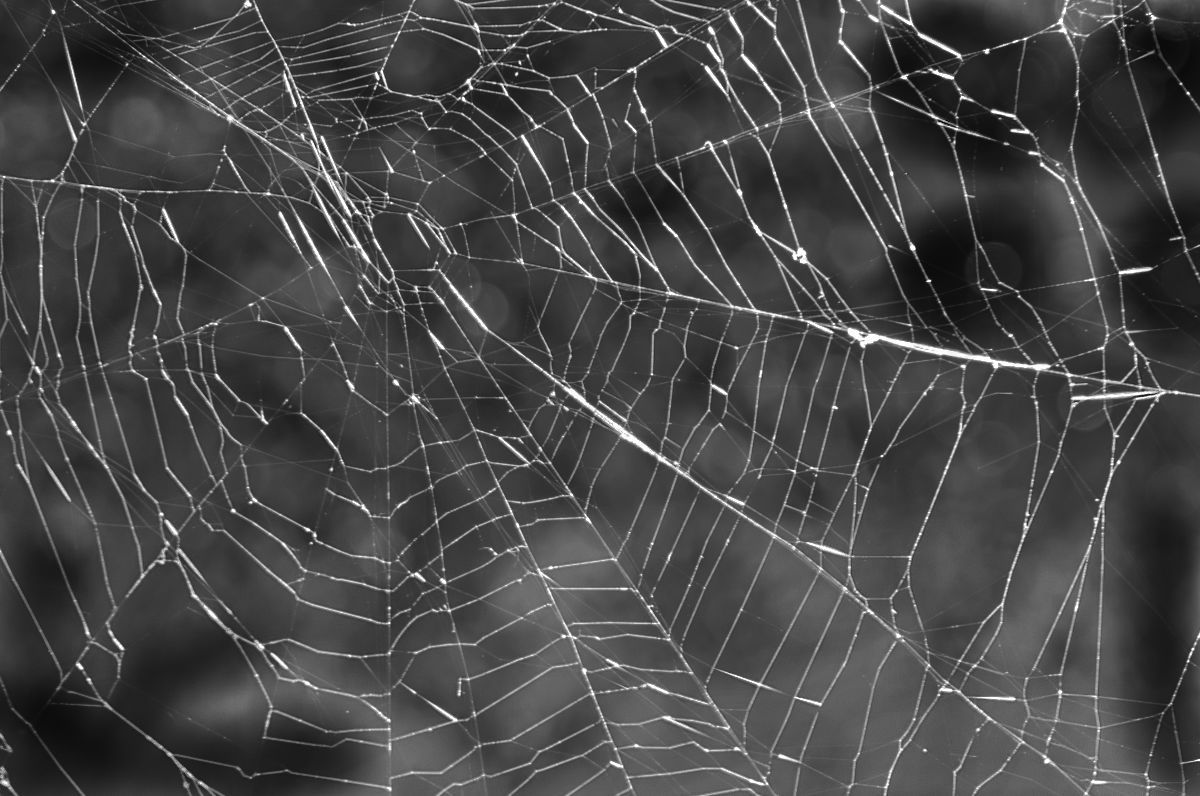
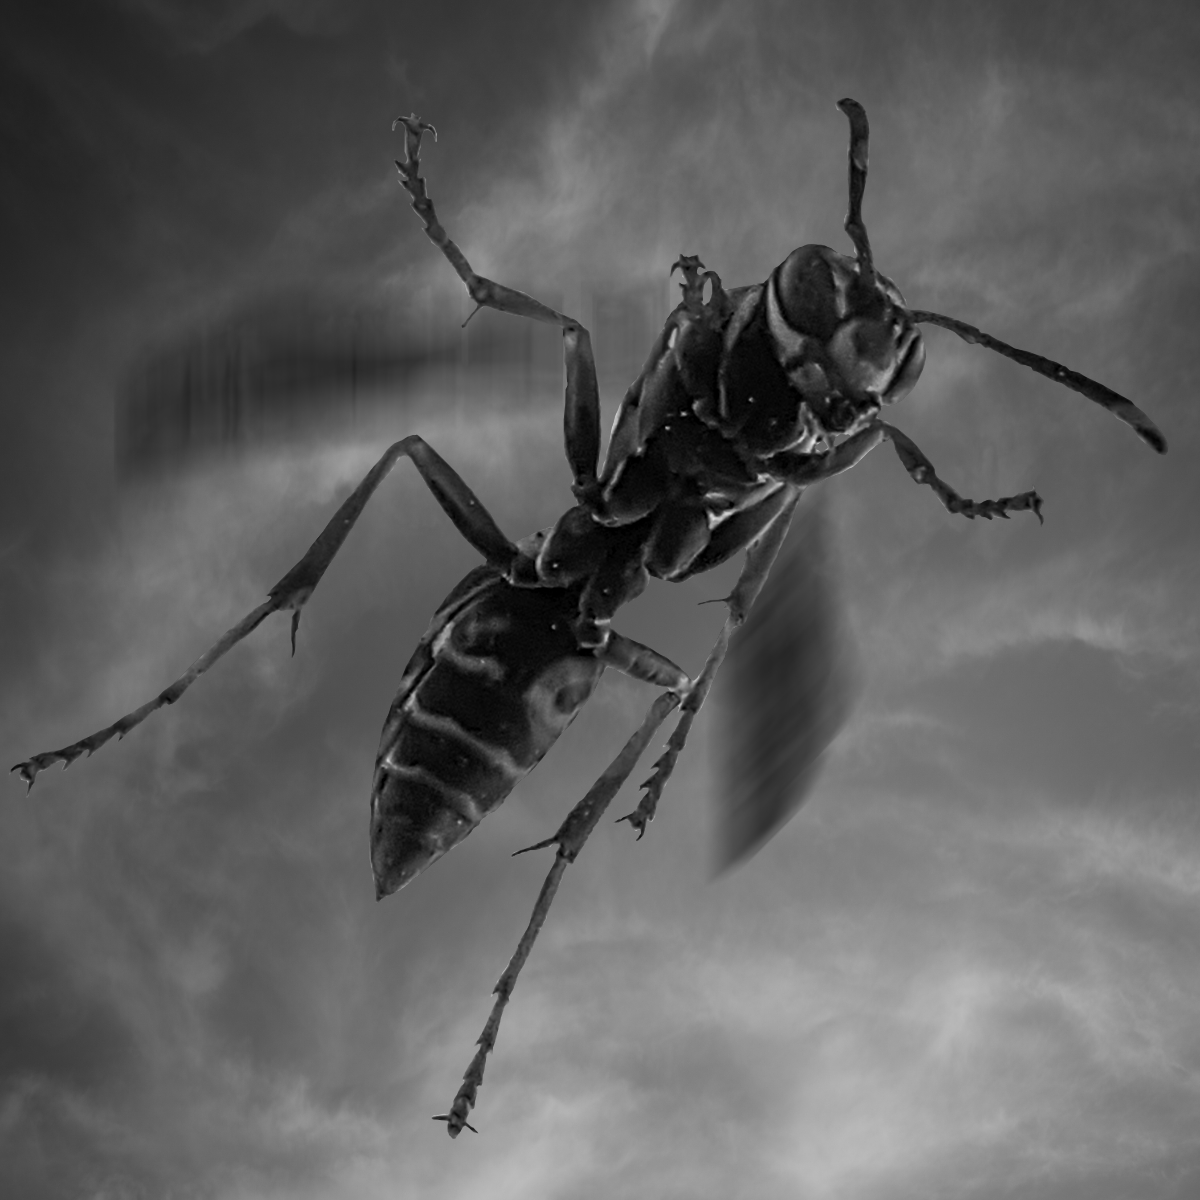
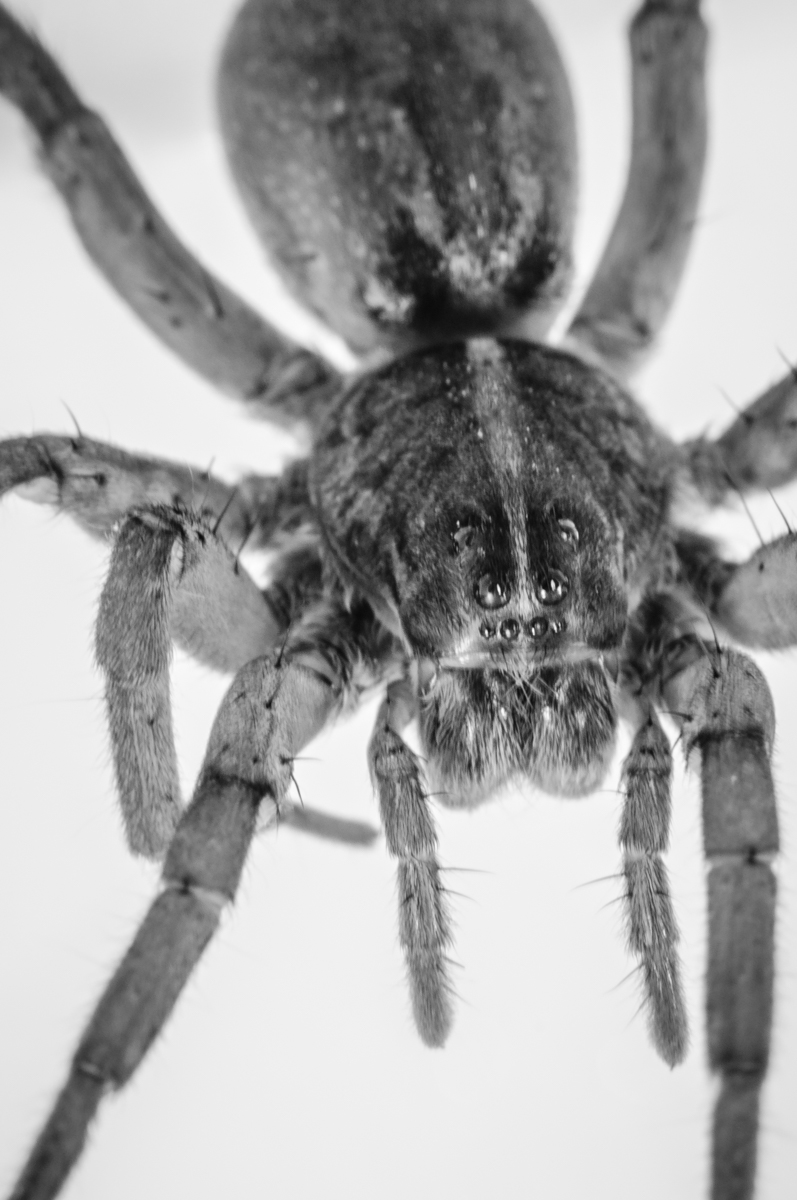
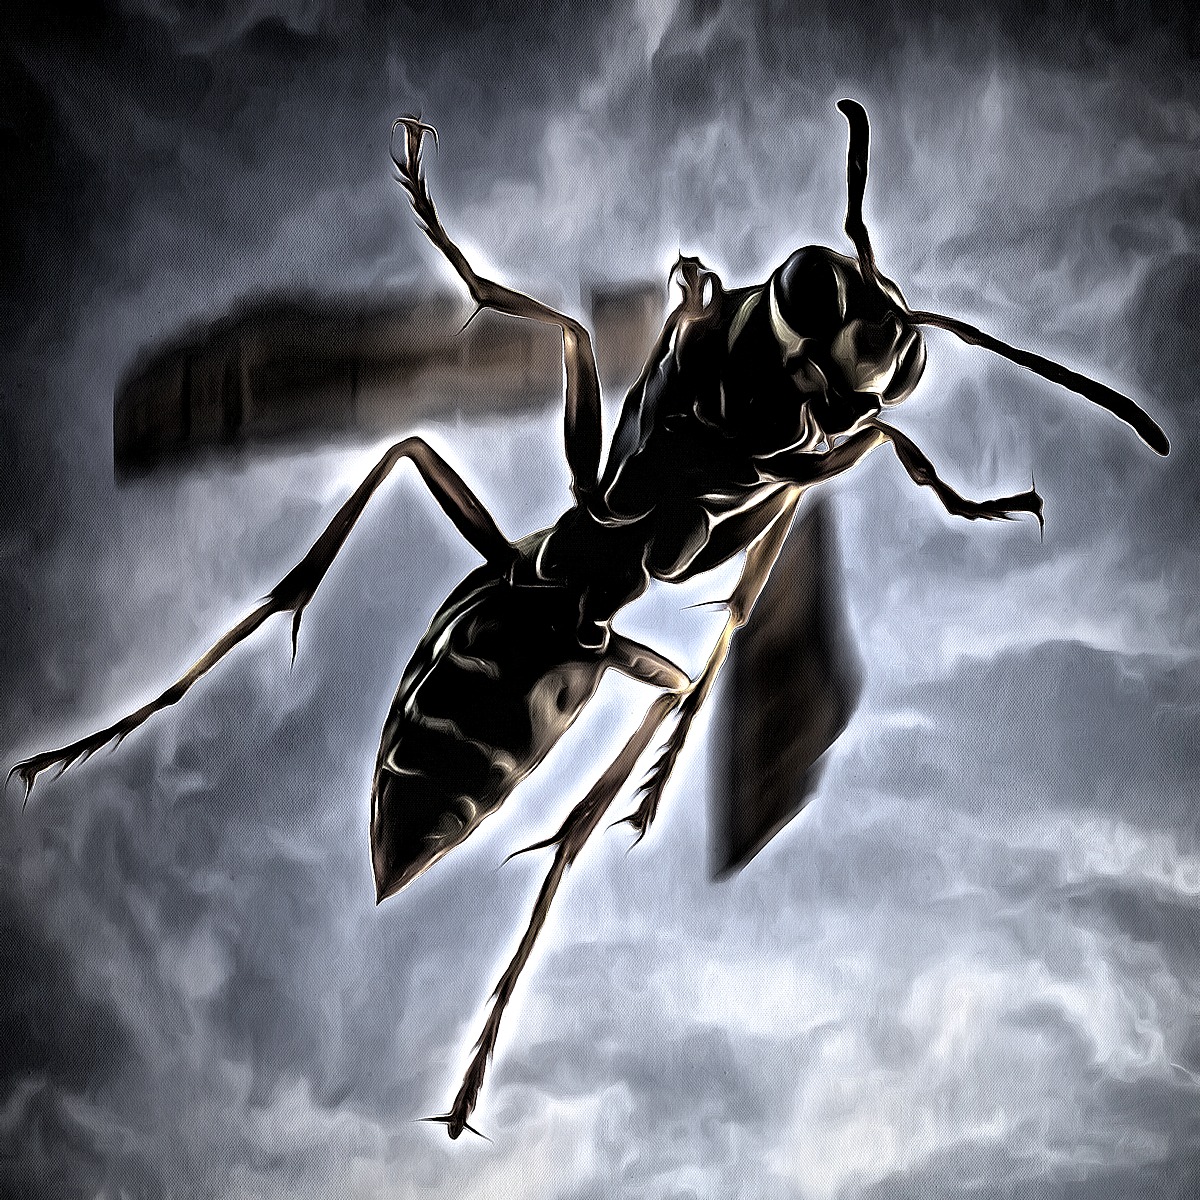
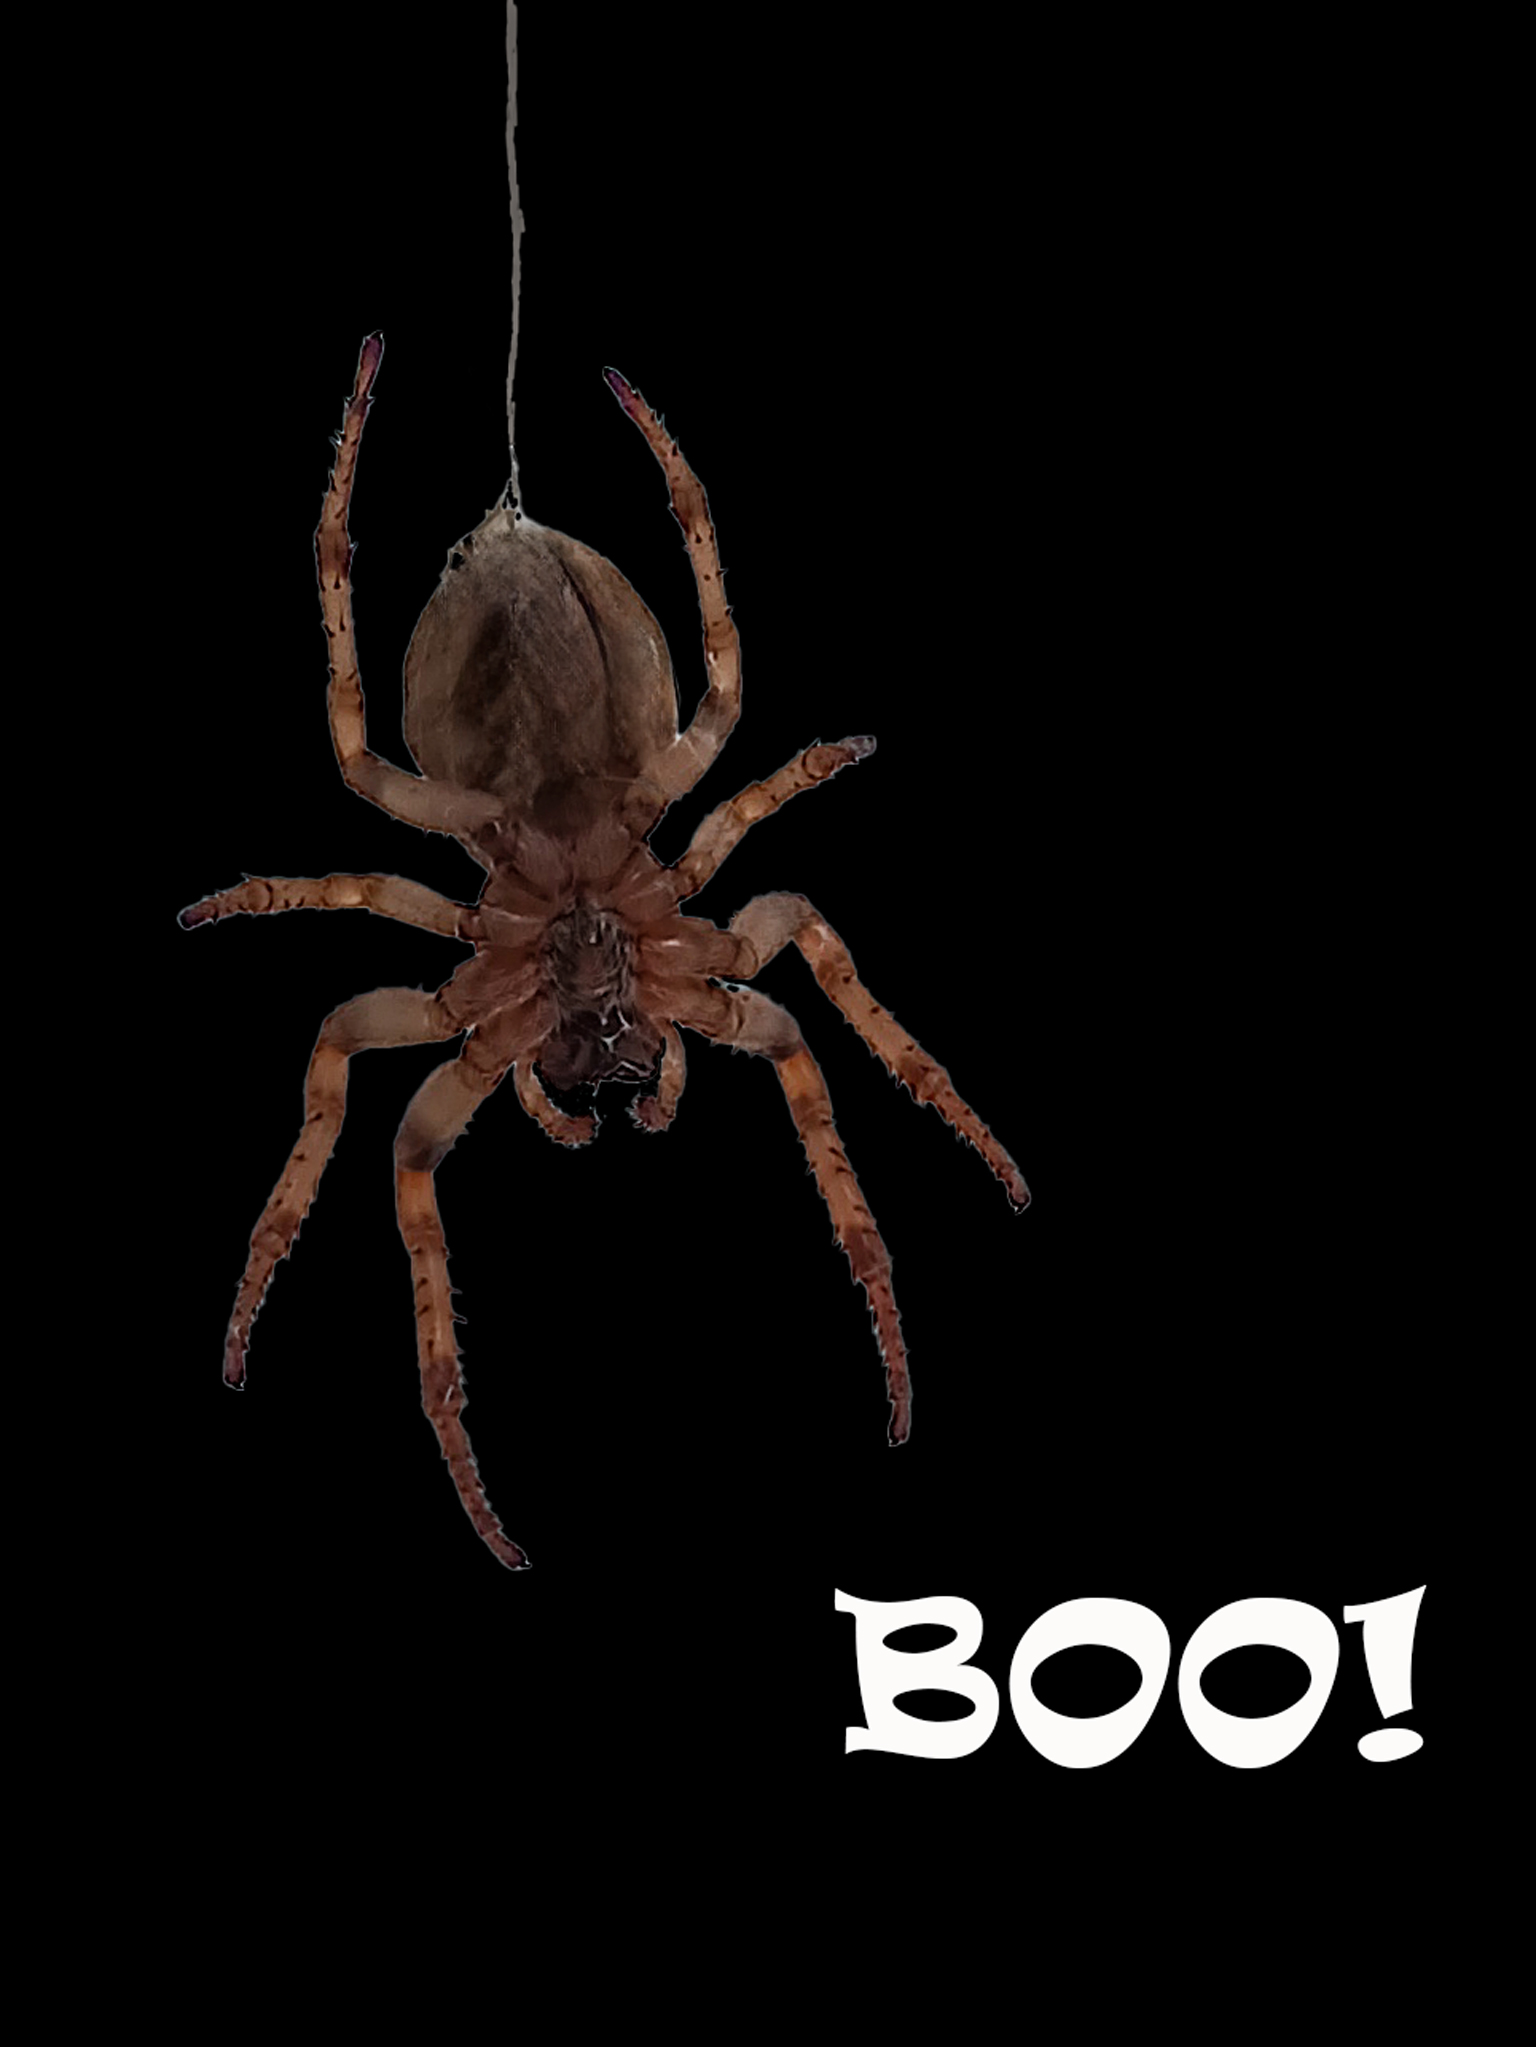
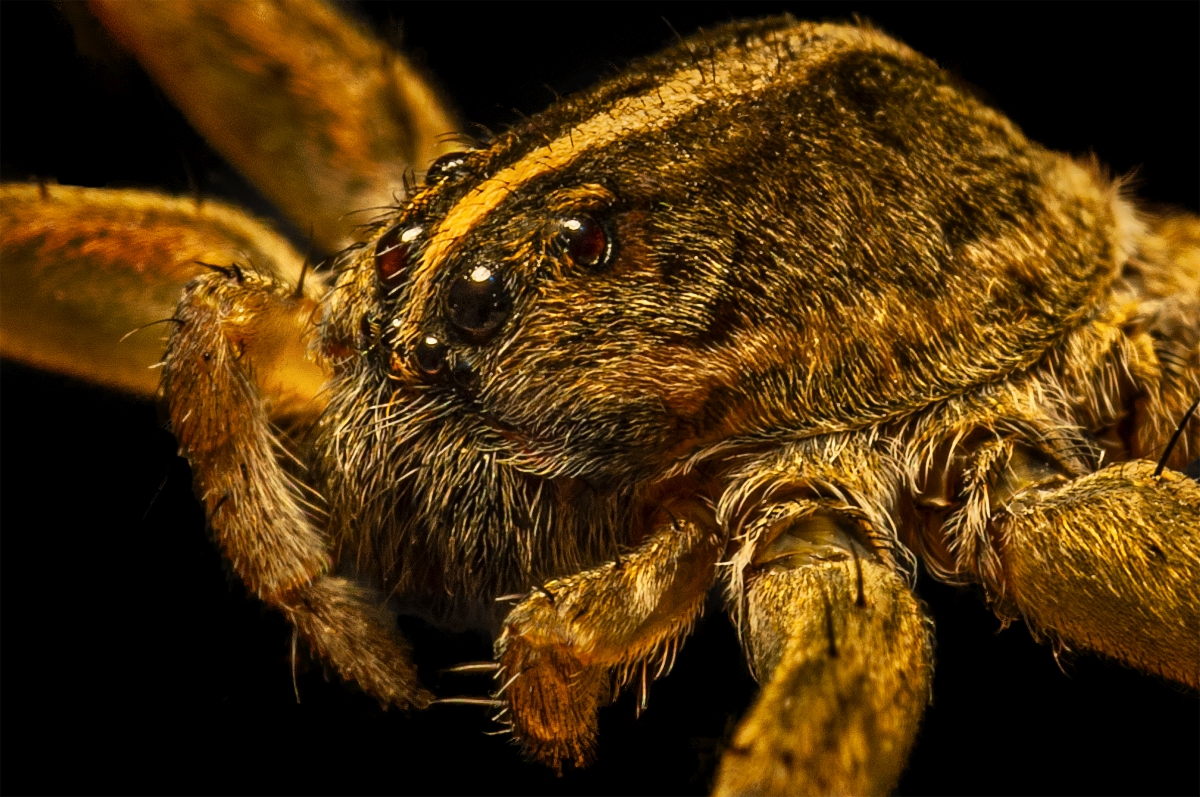
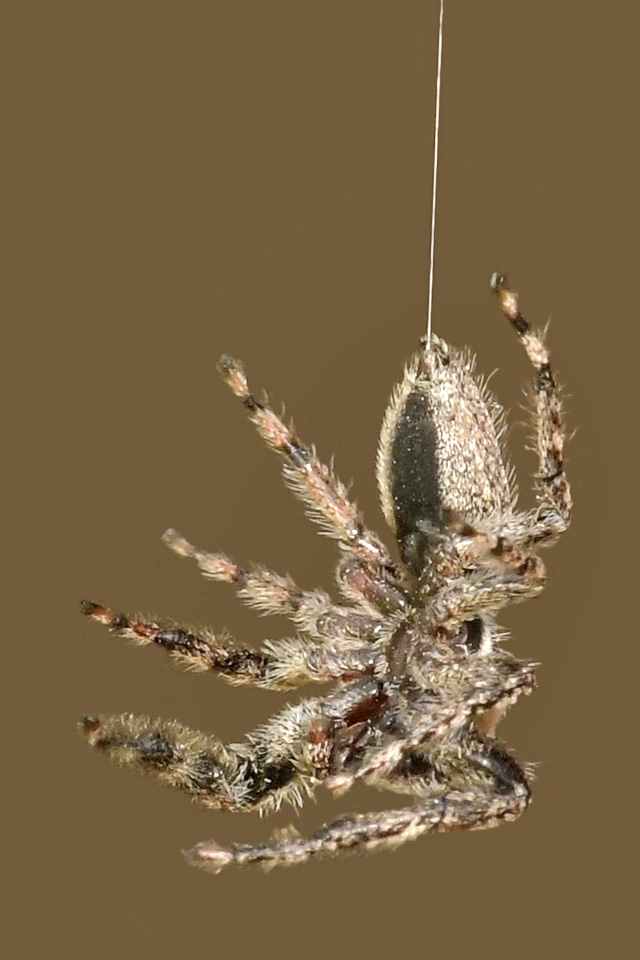
Here's my take on removing the line:
1) Copy the main image layer 2x.
2) Hide the main image layer.
3) On the 2nd copy layer, isolate the spider and silk from the background. I use Topaz ReMask to do the mask work, but any means you employ to mask out the background is fine.
4) On the 1st copy layer, do Filter-Blur-Average Blur
Because of the noise and the area below the line being lighter than the area above the line, it's better (and quicker) to turn the background into one consistent color.
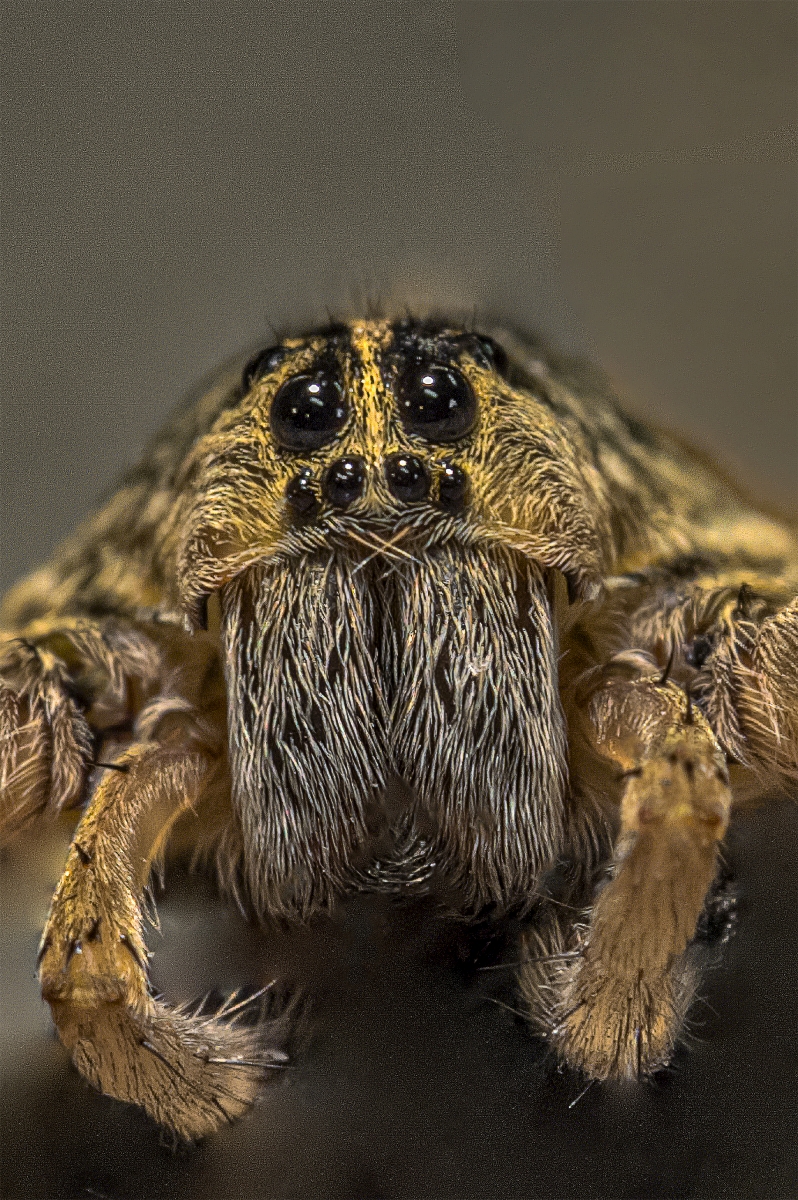
I also cropped this to a 2x3 vertical, and applied a little contrast and sharpening on the spider, What do you think? |
May 18th |
 |
| 95 |
May 20 |
Comment |
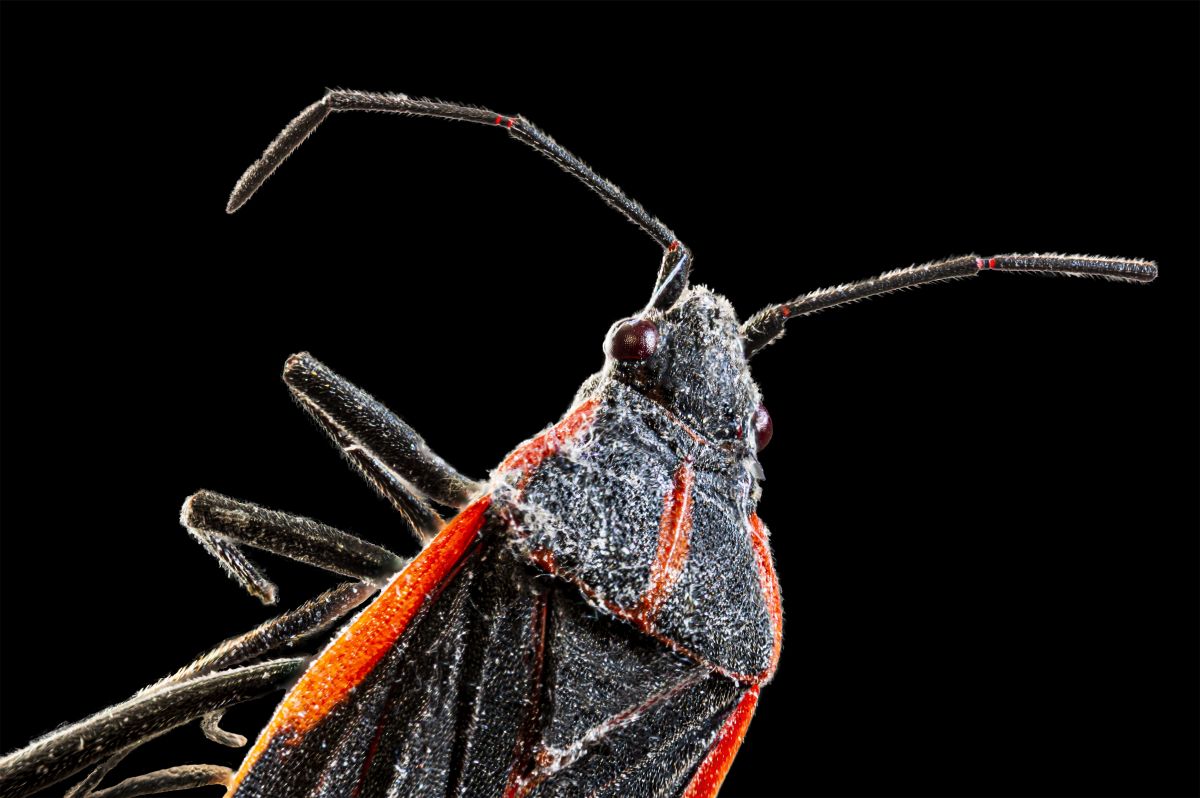
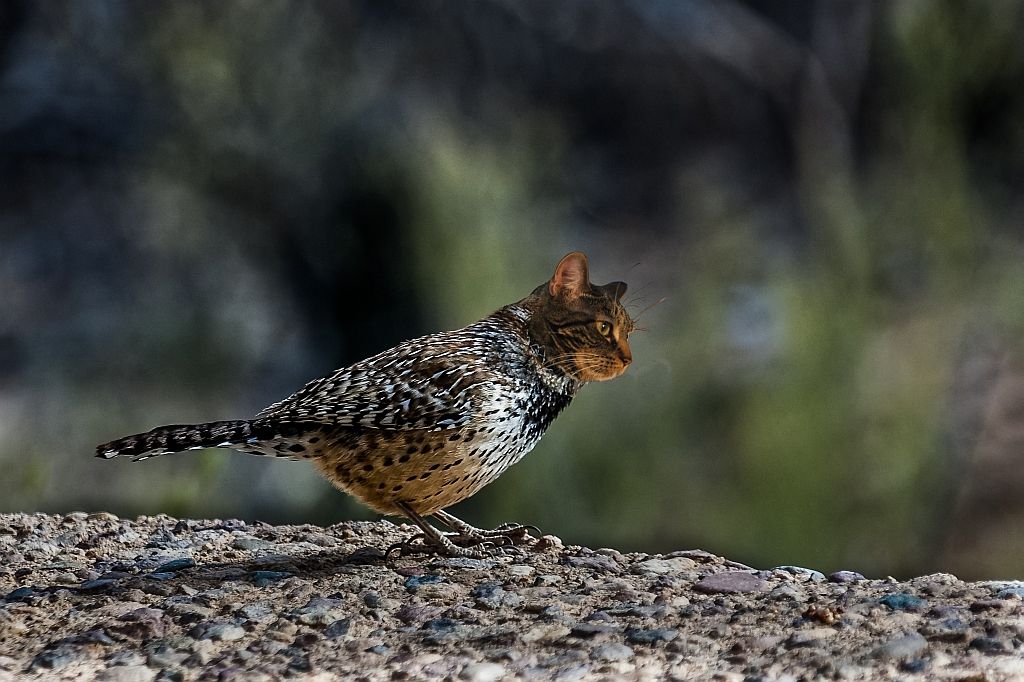
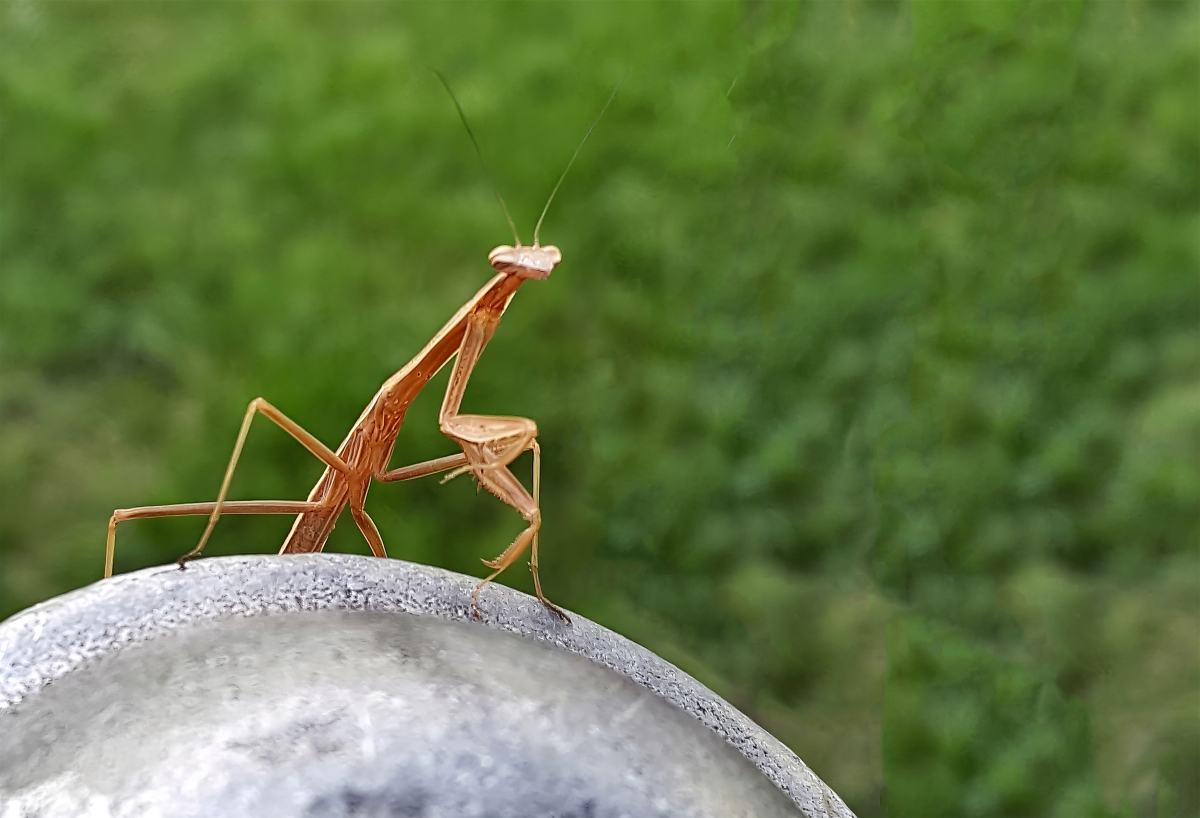
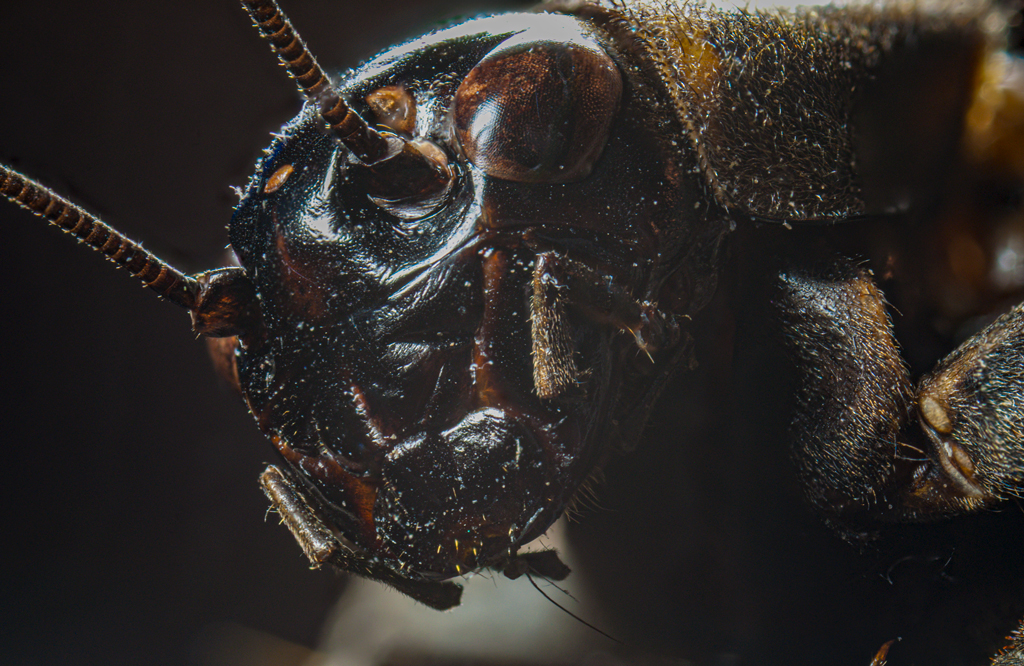
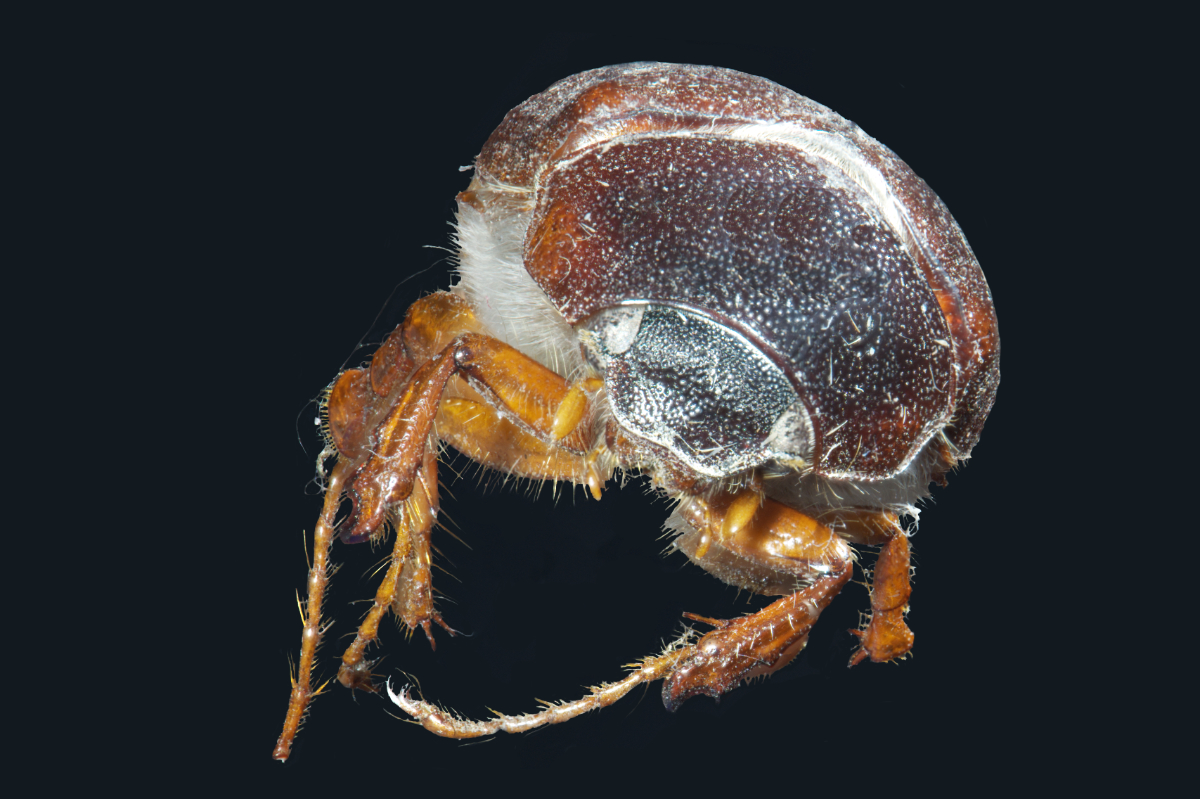
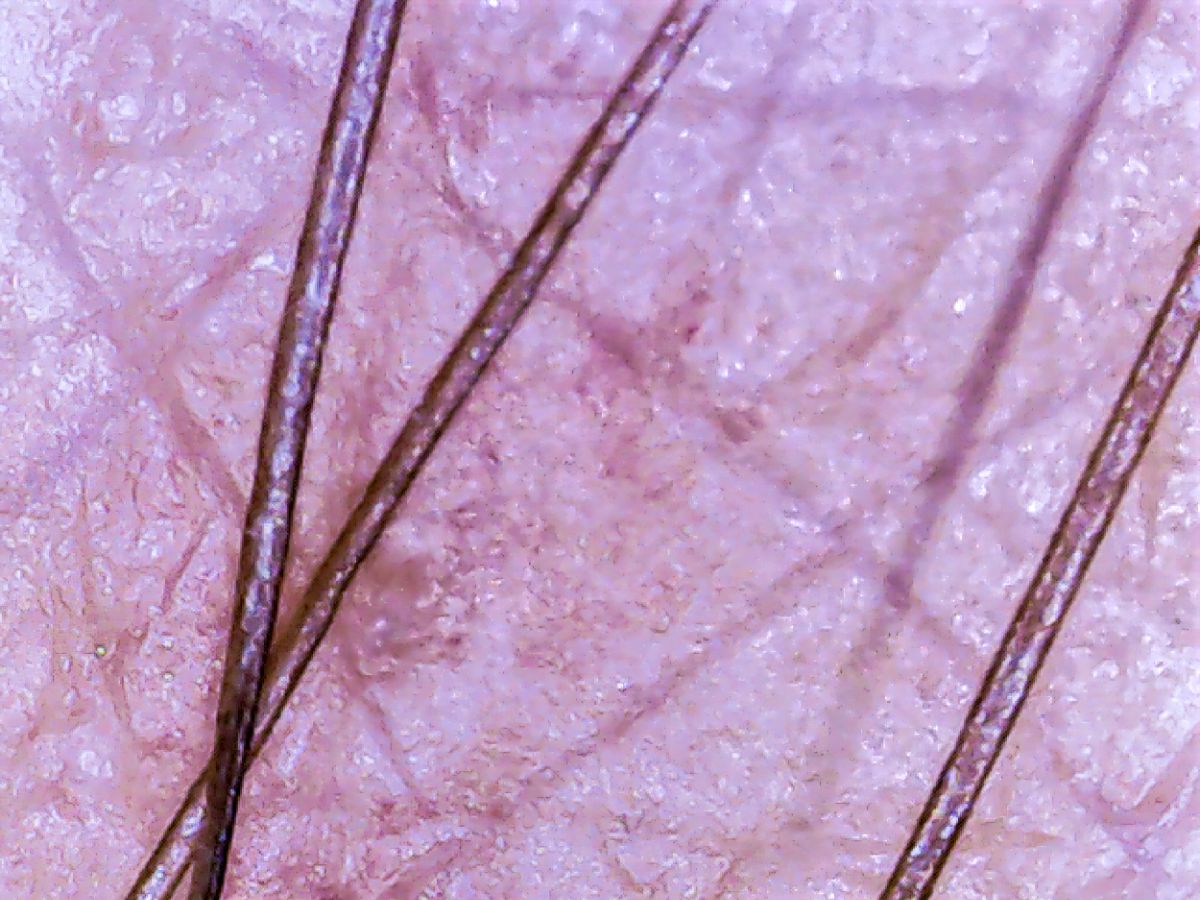
Do you know which kind of spider this is and its approximate size? |
May 18th |
| 95 |
May 20 |
Reply |
I think you did a pretty good job with the correction, Stuart. When correcting something blurry like the line in the instance, it makes things more troublesome, especially when that fuzziness is close to something you want to preserve. I don't know if I'm strong enough in Affinity Photo to attempt that. I guess I'm too accustomed to Photoshop - this old dog is a bit snarly about new tricks. d;¬{D |
May 18th |
| 95 |
May 20 |
Reply |
I'm gradually assembling a more extensive supply of macro gear: reversing ring; bellows; cpl (which Dick was always on me about). Have a couple of LED bendable reading lights and a magnifying filter on the way. Just got a set of step-up and step-down adapters today that will allow me a variety of lens and filter combinations. I think I'm gonna be busy for a while. d;¬{D |
May 7th |
| 95 |
May 20 |
Reply |
Thank you so much, Barbara! |
May 3rd |
4 comments - 6 replies for Group 95
|
14 comments - 12 replies Total
|