|
| Group |
Round |
C/R |
Comment |
Date |
Image |
| 63 |
Jan 25 |
Reply |
You bring up an interesting point, and one that is common to macrophotography. When we magnify items and scenes, the presentation often become more difficult to identify, causing some confusion to the viewer. We know what it is, but this may not be obvious to the viewer (as you experienced with this image). This is why I presented both images in this submission. I think that the main image has more interest and character but is less identifiable. The "before" or "alternate" image is more identifiable but has less 'character'. I was interested if the rest of the group was more comfortable with the alternate presentation. In our macrophotography, we need to keep this issue in mind. How can one keep the view engaged (but making them more comfortable is know what it is they see in the image) our do we stick to more identifiable images. I like the former, with some help in the caption, but you all may take a different tact. What say you all? |
Jan 14th |
| 63 |
Jan 25 |
Comment |
Fascinating image of this ant against a textured leaf. Kudos for both seeing the scene and in your capture. Here the goal was the clan sharp capture of this critter. You accomplished this for the most part, but the legs tend to blur out a bit at the end. Also, there are some halos and odd discoloration (as seen in the greenish-gray area near the end of the bug) present. These can be addressed by making a good selection of the bug and darkening in the blurred areas some (with the selection active). Also, with the inverse of the selection active, one can clone away the blurred edges and clone away the light halos, thereby sharpening up the presentation. Now if this were a nature image submission, this might not be appropriate, but if a clean representation of this bug was the sole goal, this might be effective. I have created a version with these suggestions to illustrate my thoughts. See what you think … |
Jan 14th |
 |
| 63 |
Jan 25 |
Reply |
In case you want to learn a bit more on Focus Stacking, here I provide a link (https://photopxl.com/focus-stacking-and-its-application-within-macro-photography) to an article of mine on Focus Stacking that was published a while ago. |
Jan 6th |
| 63 |
Jan 25 |
Reply |
A humans, our eyes tend to go to the brightest area first, and then to the sharpest areas. We can't help it, it's how we are wired. That being said, we can take advantage of this aspect, by balancing (most often in post processing) the bright areas. In this image the pollen sacks are quite bright, but the stem is a tad brighter (due to the reflection as was noted), and as such we find our gaze falling upon the stem first (as Xiao also noted). Now we know why this happens. If that is not what was desired, then darkening the stem as Pierre suggests is a valid solution. I agree with all that was commented upon earlier, but I thought I would pull the thoughts together so that these concepts could be applied to other images. |
Jan 5th |
| 63 |
Jan 25 |
Reply |
Its an interesting point as to whether a compositional "rule" such as the "rule of thirds" is appropriate in our macro photography.
My thought is that in cases where the subject is the major element, and the vision of the maker is to present us with the wonderful world of the micro-environment, the centered presentation many be appropriate. The positional offset due to this rule, may be less impactful. If the image is more about the subject in a set environment, then the "rule" may be more impactful, and should be considered. Note though that I say "should be considered", as the adoption of this rule is something to try and is not absolute. In the end, whether one applies this to their image or not, should reflect if in doing so, the image is improved or is more impactful.
I absolutely believe that "there are no absolutes in photography".
|
Jan 4th |
| 63 |
Jan 25 |
Reply |
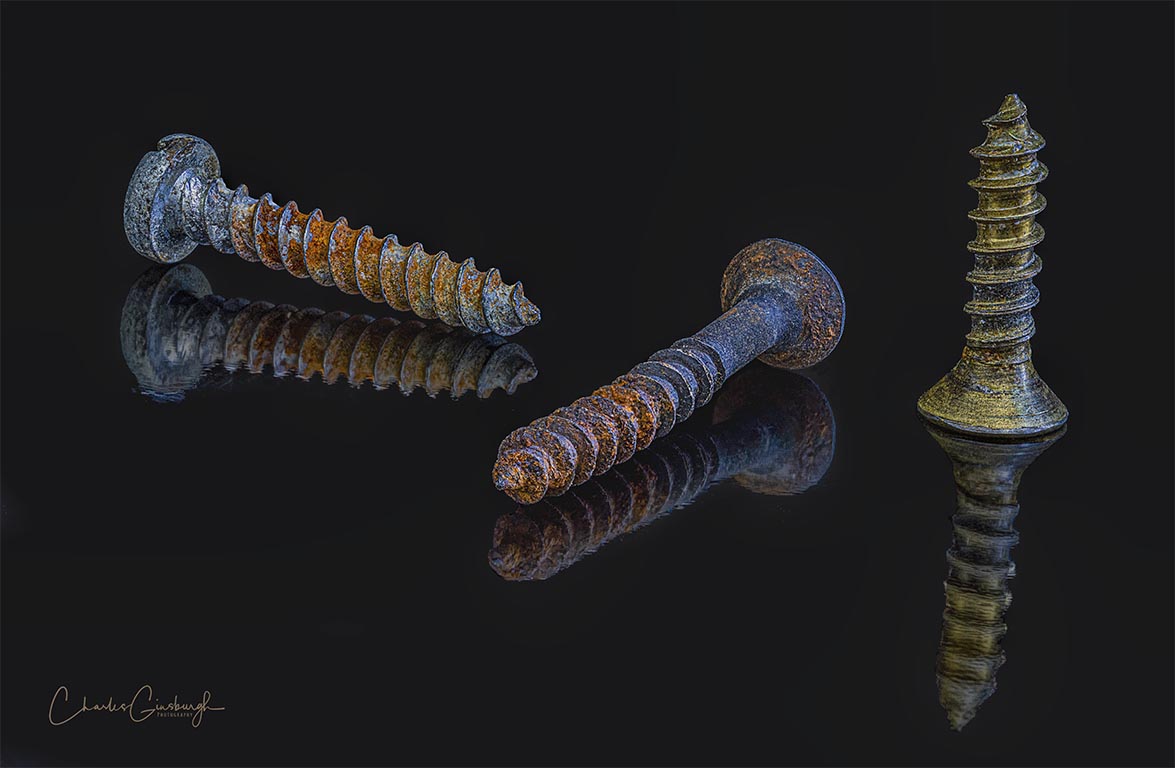
There is always a balance between the contribution of the reflection relative to the subject presentation the reflections come from. That is a balance that each maker needs to establish, according to the makers vision within the image. Often this intensity can be adjusted in post processing (or at least I do so). In this example I do not feel that the reflection overpowers the image or the presentation of the toothpicks, but you may feel otherwise.
I will let Alane address the question regarding the lighting ... |
Jan 3rd |
| 63 |
Jan 25 |
Reply |
You have made some valid points in regard to how the subject looks sitting on the surface. I generally try to add some type of 'surface" to the base the subject sits on, to avoid the "sitting in space" effect, but did not address this point in this image. Here I guess I so fixated upon the actual subject, that I looked past the overall image presentation. In other words, perhaps I saw what I "knew" was there rather than seeing what others would see. I know I have mentioned this in several of my comments, but this goes to show that we all can fall into this trap. Thank you for your observations. |
Jan 3rd |
| 63 |
Jan 25 |
Reply |
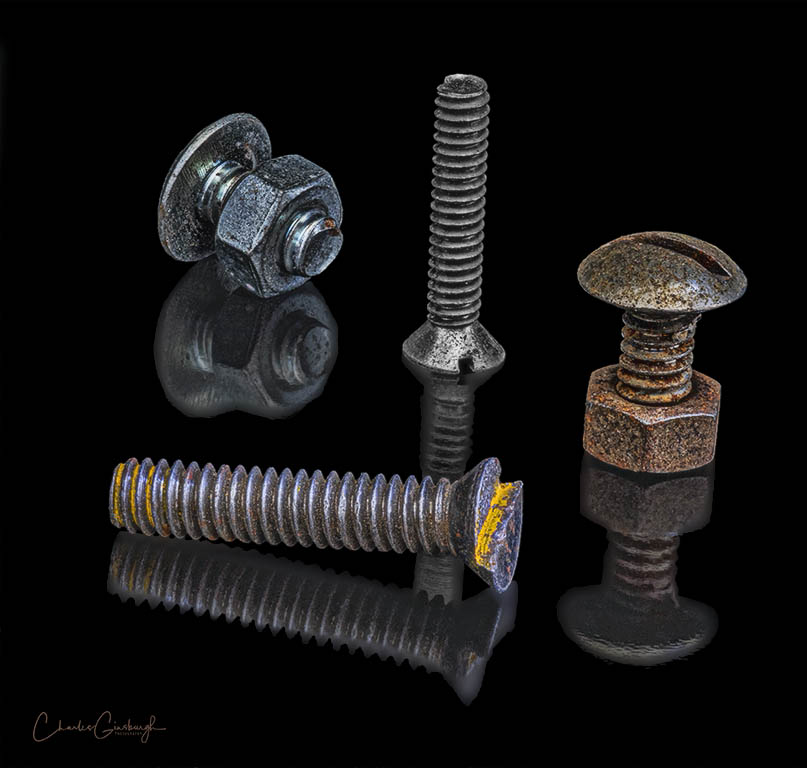
Recently I demonstrated the technique of shooting on a piece of black glass (see past examples of such images), to yield interesting reflections. Several members have started to try this out, and this is but one example of this experimentation. |
Jan 3rd |
| 63 |
Jan 25 |
Reply |
Selective focus is an appropriate path to take as long as one does not allow the deselected areas to become a distraction. This is far more difficult than it sounds since we get invested in the sharp areas of our images, and it is difficult to see the remaining parts as our viewer does.
One of the objectives of our editing can be to mold and influence how our viewers see our images, and that was the objective of my suggested edits. |
Jan 2nd |
| 63 |
Jan 25 |
Comment |
Your abilities as a photographer continue to shine as your images continue to present us with interesting shapes and lines that we might overwise overlook, and "Leaf Design" is no exception. Here we have a wonderful collection of shapes and lines that are both pleasing and interesting. The overlapping nature of these patterns also contributes a sense of depth to the image. Here I might suggest that you try to de-emphasize some of the patterns that are furthest from the camera. There are four edge elements which are really not required (being small and relatively soft). Darkening these elements will clean up the image and make it easier to appreciate the remaining designs. This is a case where "less is more". I have created a version with these suggestions to illustrate my thoughts. See what you think … |
Jan 2nd |
 |
| 63 |
Jan 25 |
Comment |
Great image with effective composition, subject presentation and color. I know that the Canon MP-65 (1x - 5x) macro lens is a difficult lens to work with, so kudos on your effort. With the number of slices you collected (21) with minimal focus adjustment (0.5 mm between each slice) I can see why using the focus rail was important. There were a lot of effective choices employed in creating this image. The only suggestion I might offer is to darken slightly and perhaps increase the contrast of the yellow structure some. To my eye this area appears a bit overexposed and some of the native detail is lost. One might consider a tad bit of sharpening here as well. I have created a version with these suggestions to illustrate my thoughts. Great effort and image. |
Jan 2nd |
 |
| 63 |
Jan 25 |
Comment |
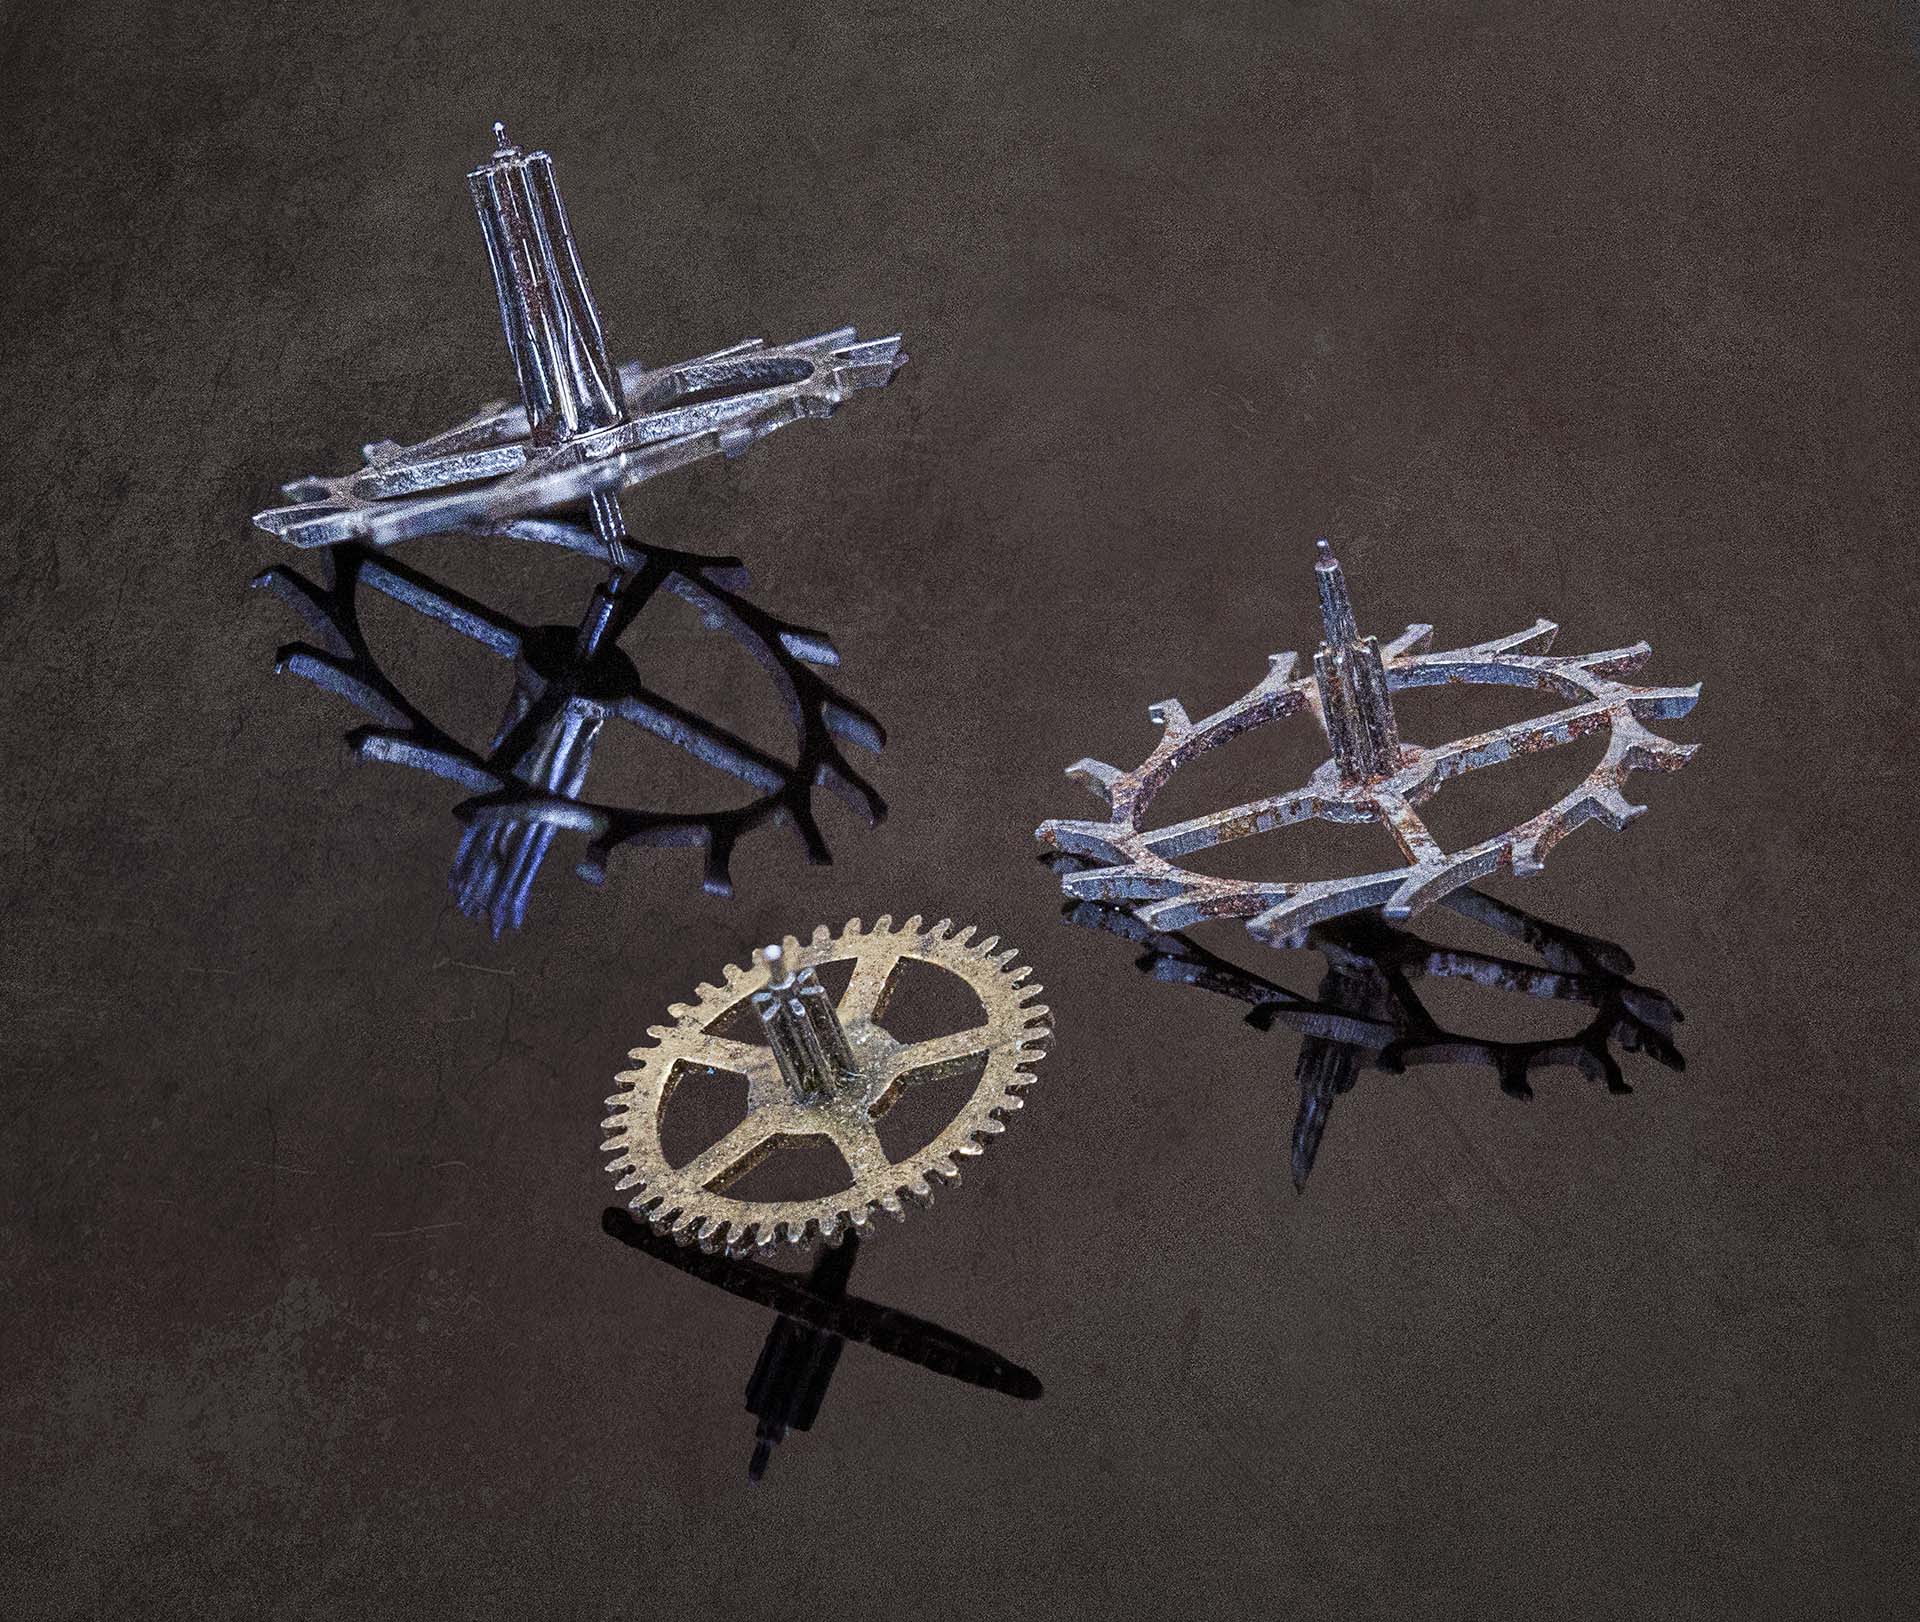
I really like where you are going with this image. Great subject set in an interesting setting. The use of the reflective base was a nice touch. The black vase on a black background was a real challenge and was handled quite well. As presented, this is an exceptional image.
Now let's bring this to the next level. I might add a bit of contrast to the heads and sharpen this area a bit. Also, the subtle terminator line in the background (an essential element here) needs straightening a bit. Also, you might consider lightening the cup surface just a bit to separate it a fraction more from the background. Note that when this was done though, many spots appeared on the cup surface that required some time and effort to remove (the remove tool worked wonders here). Finally, the crop is a bit tight on the top. Here I might suggest expanding your canvas some at he top to give a bit more space. This would balance the distance between the subject and border in the reflection with a similar distance at the top. In examples in which the dark image background might blend into the presentation format, you might also consider adding a thin pinstripe border to separate the image from the background upon presentation. In images such as this, when a dark background is employed, one might consider adding a very subtle glow behind the toothpick heads as well. I have created a version with these suggestions to illustrate my thoughts.
In my experience these types of edits are the 'finishing touches" that bring our images to the next level. I would be happy to set up a time to demonstrate how I might actually make the edits I suggest.
|
Jan 2nd |
 |
| 63 |
Jan 25 |
Comment |
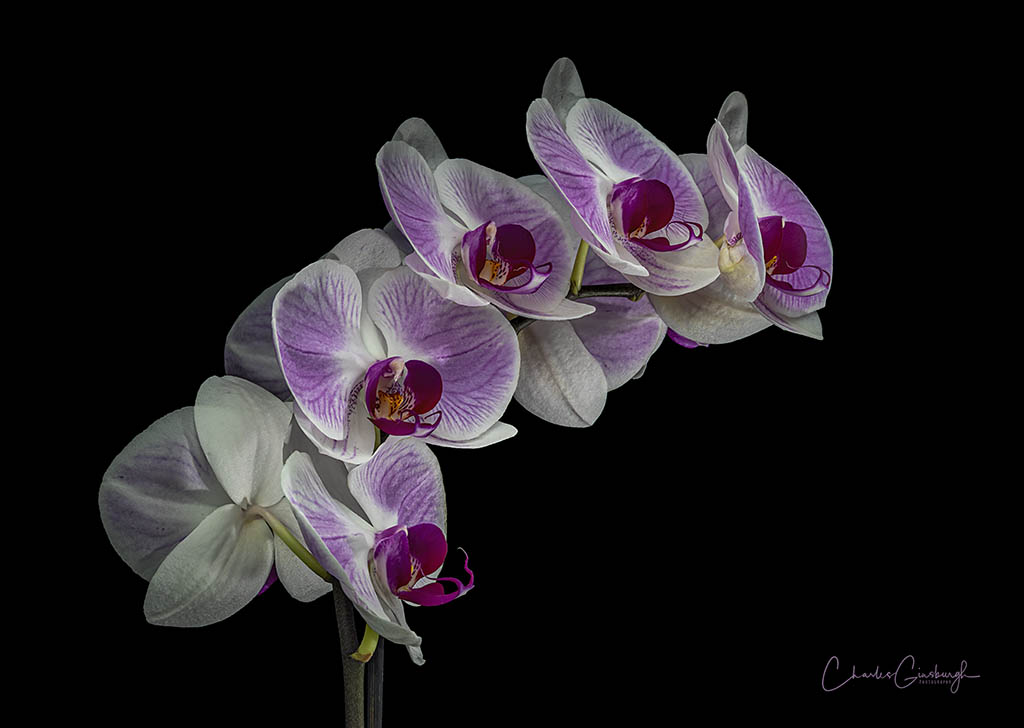
Great Image of this Lilly bloom. The magnification, composition and colors are wonderful within this image. The clarity and presentation of the bloom elements were well done indeed. I can easily get lost in my perusal of the detail here. The only suggestion I might venture may be to darken the background (including the green leaves) slightly to allow a greater separation of the bloom from the surrounds. This is a minor point though. Nicely done! |
Jan 2nd |
| 63 |
Jan 25 |
Comment |
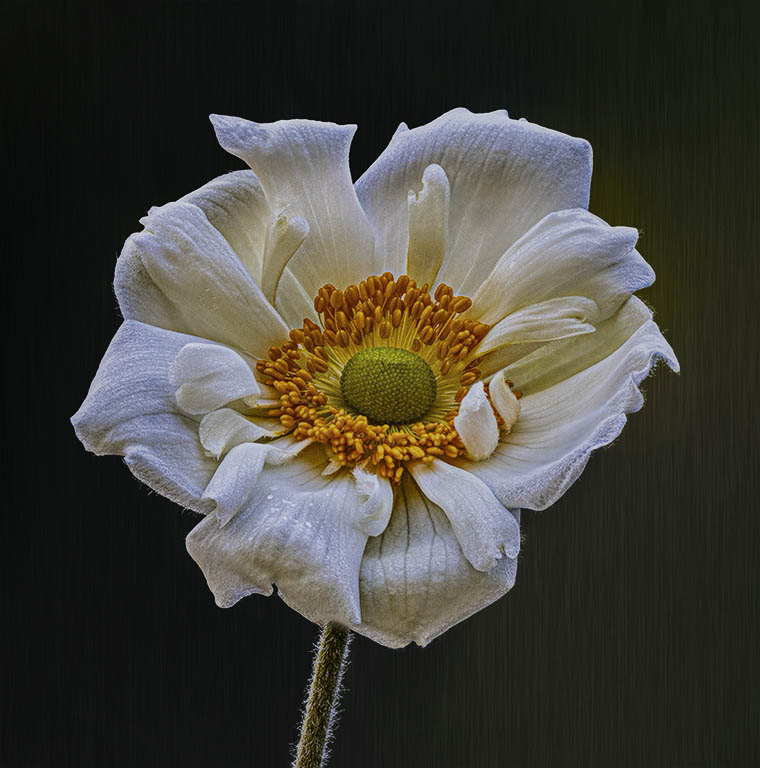
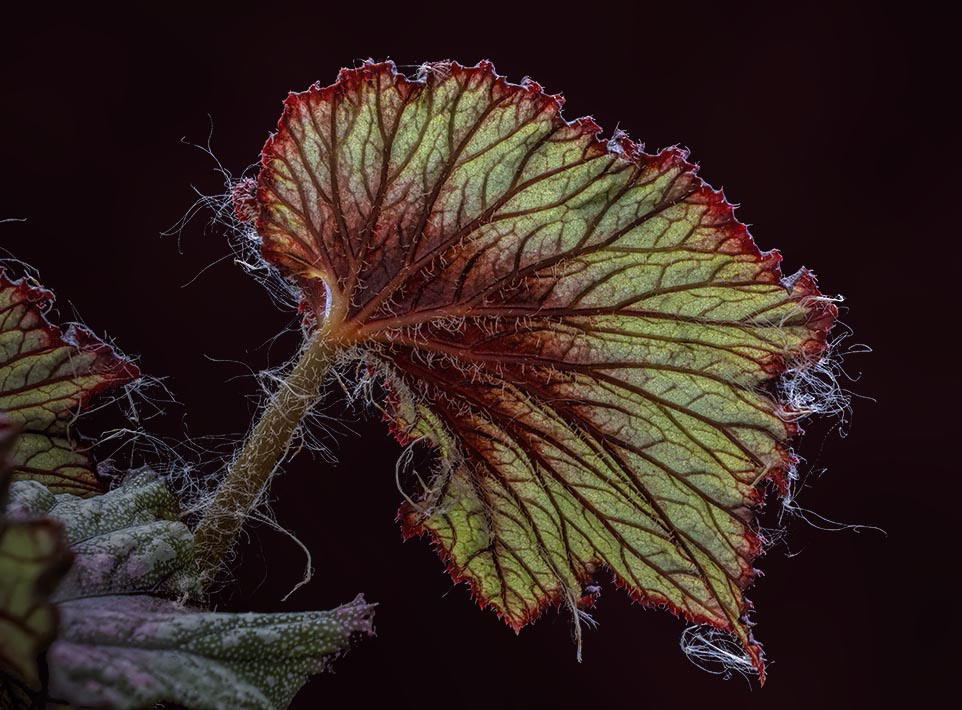
Welcome to the group. I am enjoying your first submission here. Great image of this micro scene. You have a good eye to even see this, setting aside the challenge of capture. I appreciate your sharing with us the starting image so that we can see the decisions you made in crafting the final result. The selective color and focus effectively highlights the saliant elements of this image.
It is unfortunate though that not all of the leaves are in focus. This is one of the challenges in capturing images with this level of magnification. The aperture used (f/16) is just not sufficient to the task, and I suspect that f/20 - f/22 would not help a lot as well. Focus stacking might be needed here to get all front leaves in focus. The parallel leaves with the drops are sharp, but the remaining leaves, less so. To my eye these soft leaves become a bit of a distraction.
Since, in this image we cannot bring back the sharpness here, why not address the 'distraction' quality and de-emphasize them some? Here we might darken and desaturate these elements some such that are less prominent within this presentation. I have created a version with these suggestions to illustrate my thoughts. The essential elements of your vision remain while the distractions are lessened some. See what you think …
|
Jan 2nd |
 |
6 comments - 8 replies for Group 63
|
6 comments - 8 replies Total
|