|
| Group |
Round |
C/R |
Comment |
Date |
Image |
| 63 |
Jun 22 |
Reply |
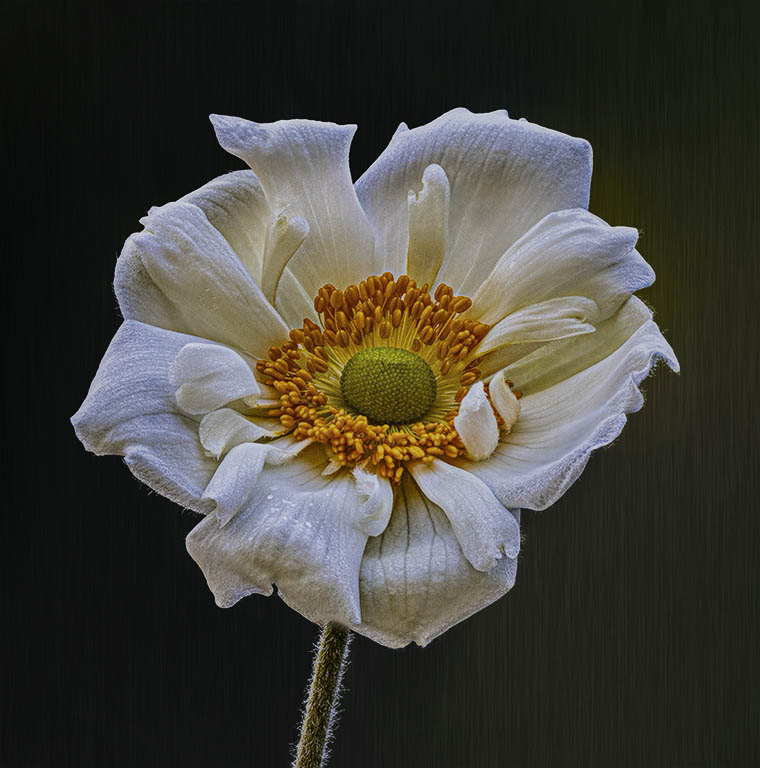
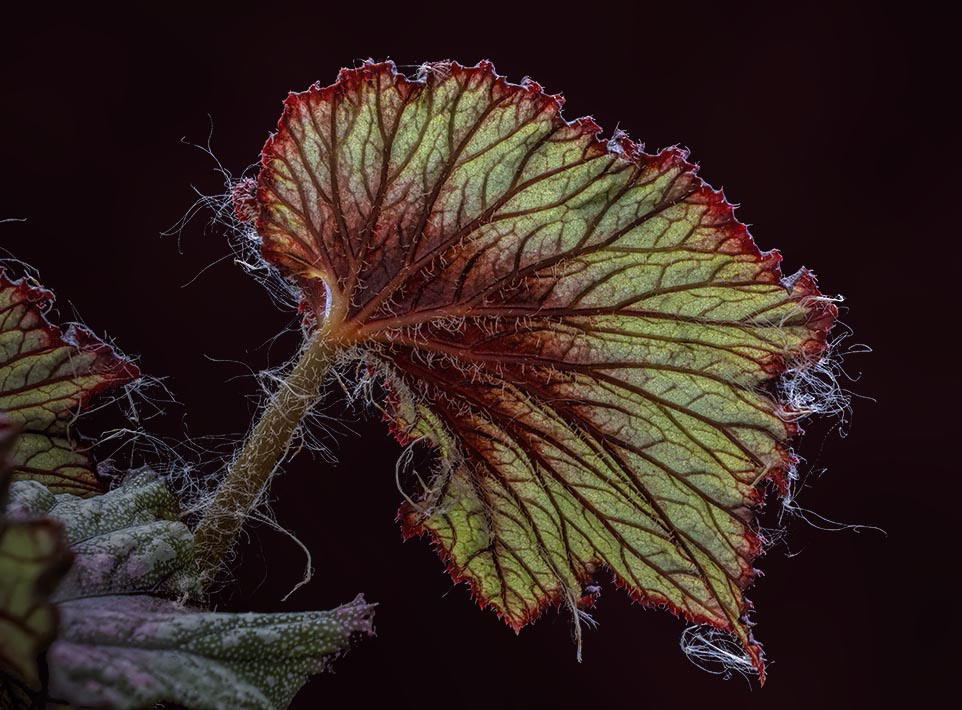
You have touched upon are real important point with your question. The process of focus stacking aids in making everything really sharp, but the down-side can be that it makes everything really sharp, and you may not wish to do that (especially in the backgrounds). In many (most) of my stacked images I select the background in photoshop and edit the background independently from the subject. So I can blur, darken and/or desaturate the background differently from the subject. Sounds easy, but the devil is in the details. In this case when I made the selection to isolate the subject from the background, I needed to exclude all of the individual hairs inherent in the flower, from the background selection / mask, and often none of the automated selection tools are up to the task. It's not uncommon for me to individually paint on a mask to include (or exclude) each hair to ensure that these details are not lost in the edits. Actually, this is not difficult, but it is time consuming and at times tedious (less so when I play music on the computer and have a glass of wine). But for my images, its worth the time and effort, so I do it. I believe that one of the take-home lessons here is that many of the really effective macro shots do not just happen, and that there is a lot of work that goes into "crafting" the image. Rarely is this achieved with only a few clicks of the mouse. It can be deceptive how much effort goes into generating that apparently simple image. |
Jun 22nd |
| 63 |
Jun 22 |
Comment |
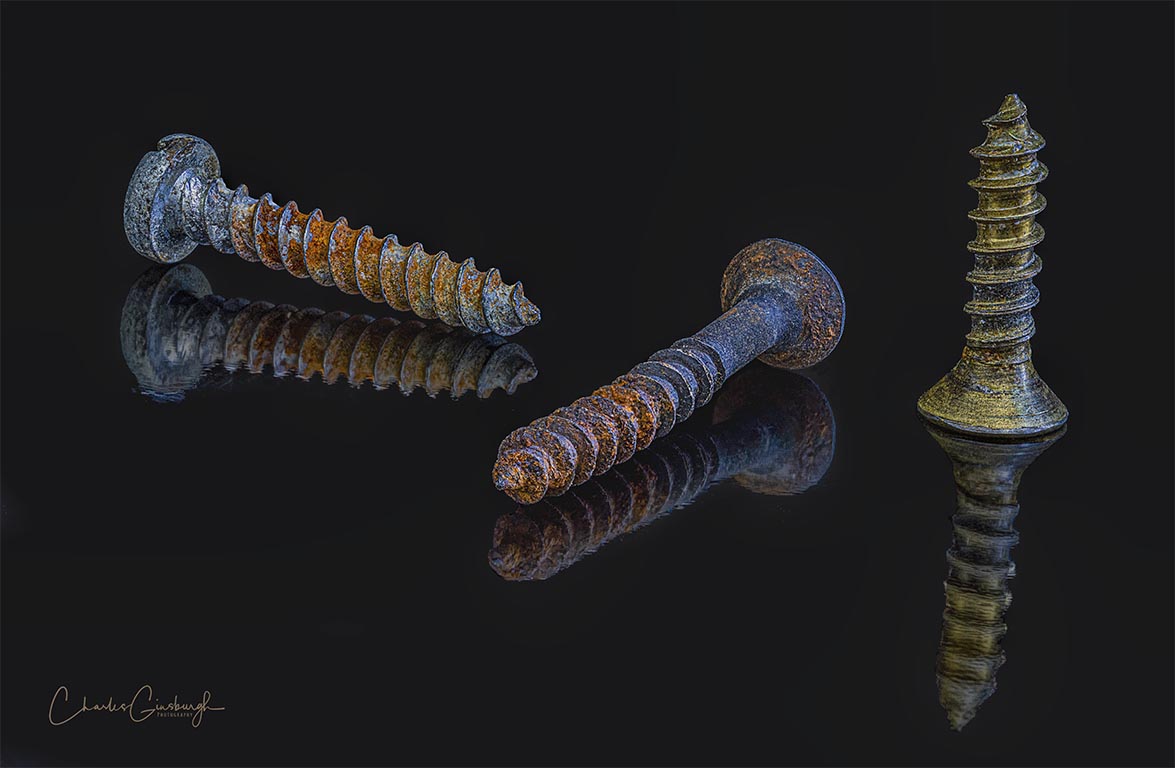
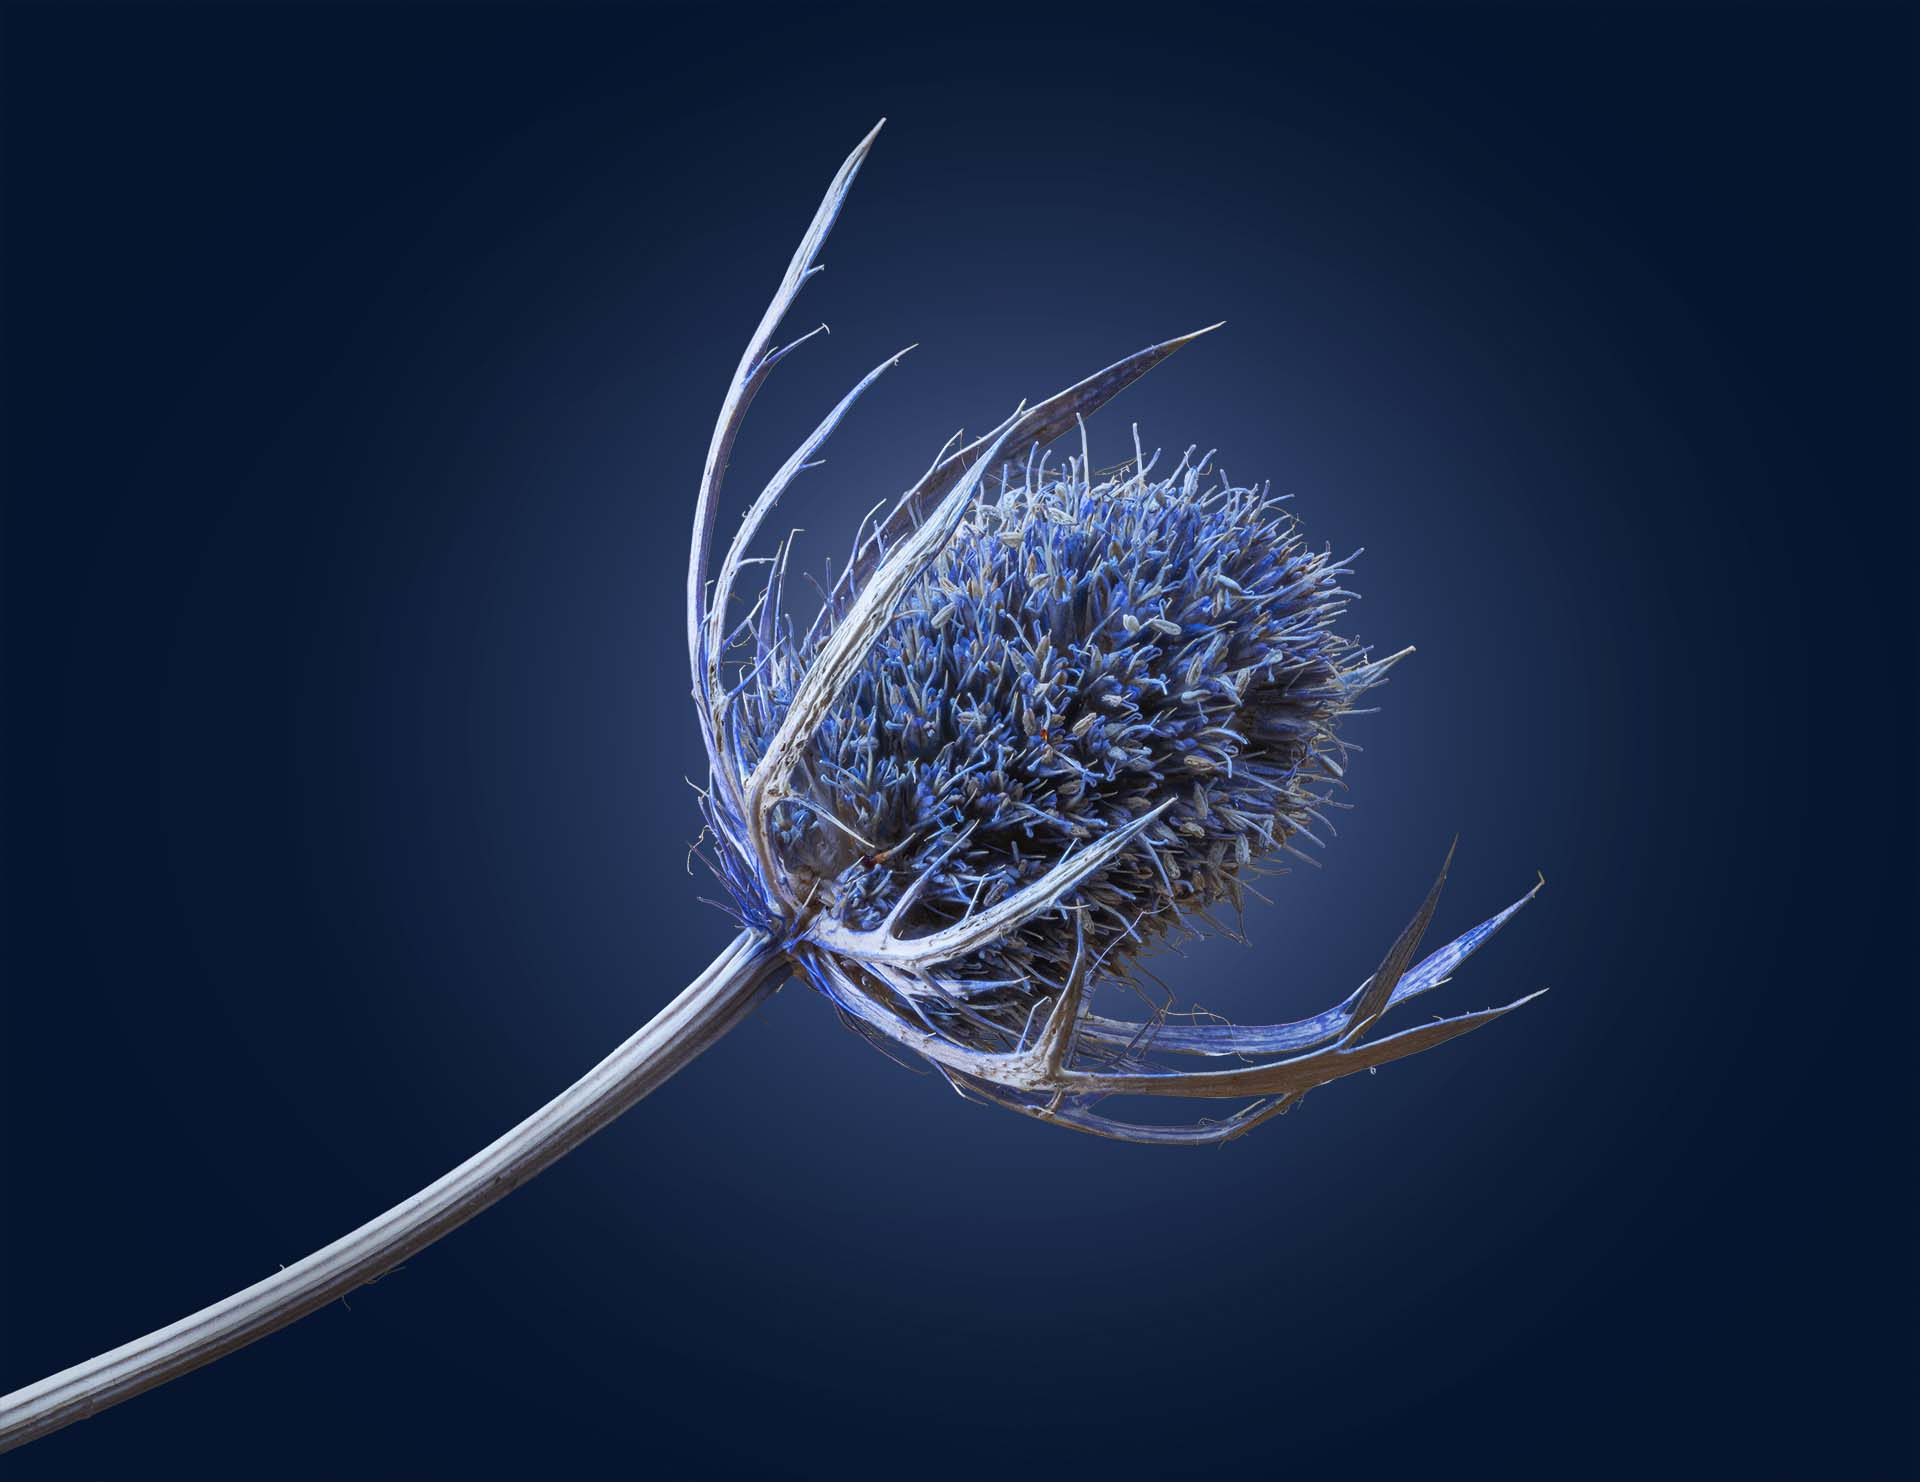
This submission is a wonderful example of an effective and classical composition. The three blooms in diminishing size and clarity is an effective and beautiful motif for presenting these blooms. You did in wonderfully here. Each bloom is as sharp as it needs to be and your exposure was spot-on capturing both the color and fall-off on light within this scene. While some might argue that the crop was not as aggressive as some might want (representing only a slight crop of each subject), taken as a whole I feel that it was effective in this case. I am wondering is expanding the motif noted earlier might be accomplished by darkening the second bloom slightly and the farthest bloom even more. This reseeding emphasis on the blooms may add even a bit more sense of depth to the image. I am not sure if doing this will enhance the image even more, but it might be worth a try to see. Nice Job ! |
Jun 9th |
| 63 |
Jun 22 |
Comment |
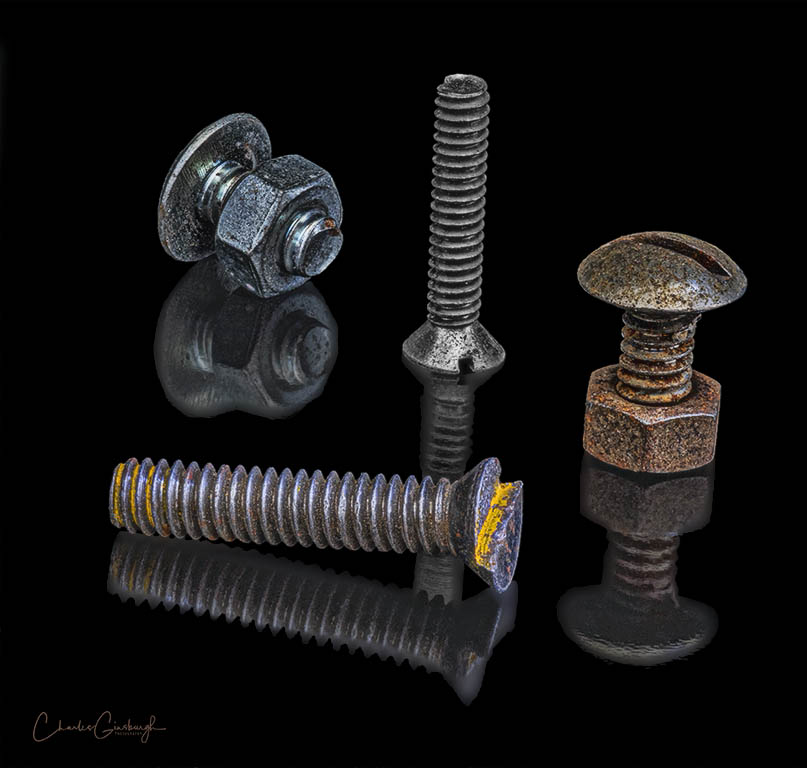
What a striking image of this carnation. As noted earlier, it really does have impact. I am enjoying the clarity and detail of the center part of the bloom and the composition your chose to present the flower. Presenting this on the dark background also was an effective choice. That being said, I find that the outer parts (white edges) of the bloom is a bit "jarring", and my eye is constantly being pulled away from the center of the bloom to the edges where there is less detail (slightly blown out). If possible, I would try to tamp down these bright areas and try to enhance the detail is these areas. It may not be possible in this case though, if these areas are truly overexposed and these is no detail to work with. Finally I find that the stem is too blurry to effectually add to the image. The contrast between the detailed bloom and the overly soft stem detracts from the overall effect (even if darkened). In collecting our focus slices this is not uncommon. When I collect my focus slices and I need to take extra efforts to ensure that my slice collection captures any stems or connecting information. This often results in capturing many more slices, but if you have a sharp stem you can always decide to blur it out to some extent later in the editing. |
Jun 9th |
| 63 |
Jun 22 |
Comment |
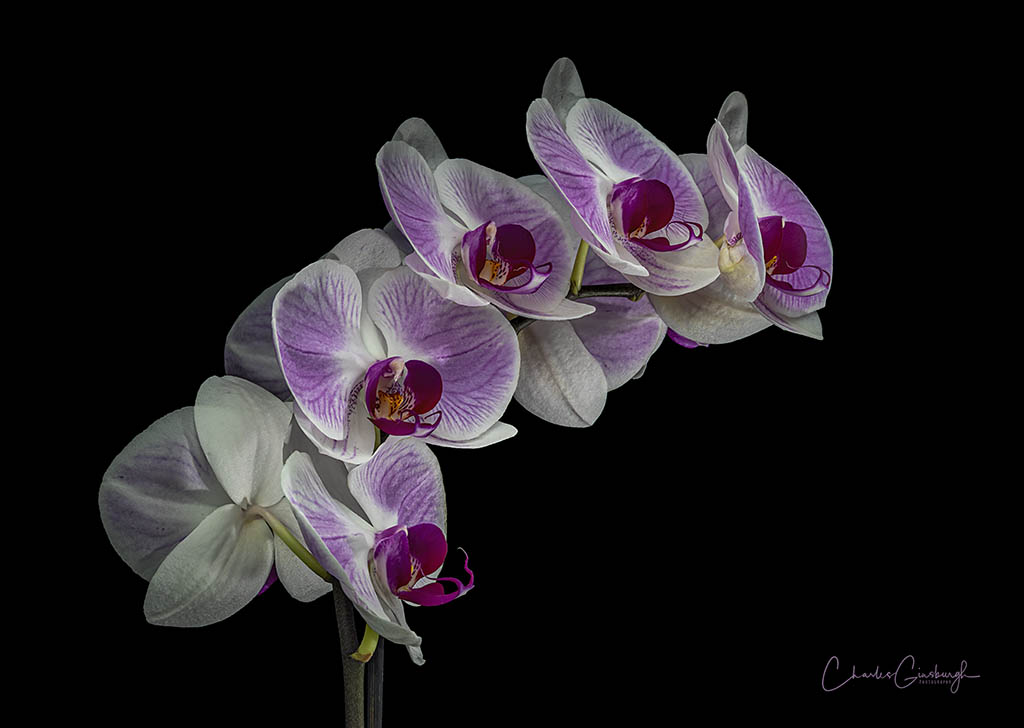
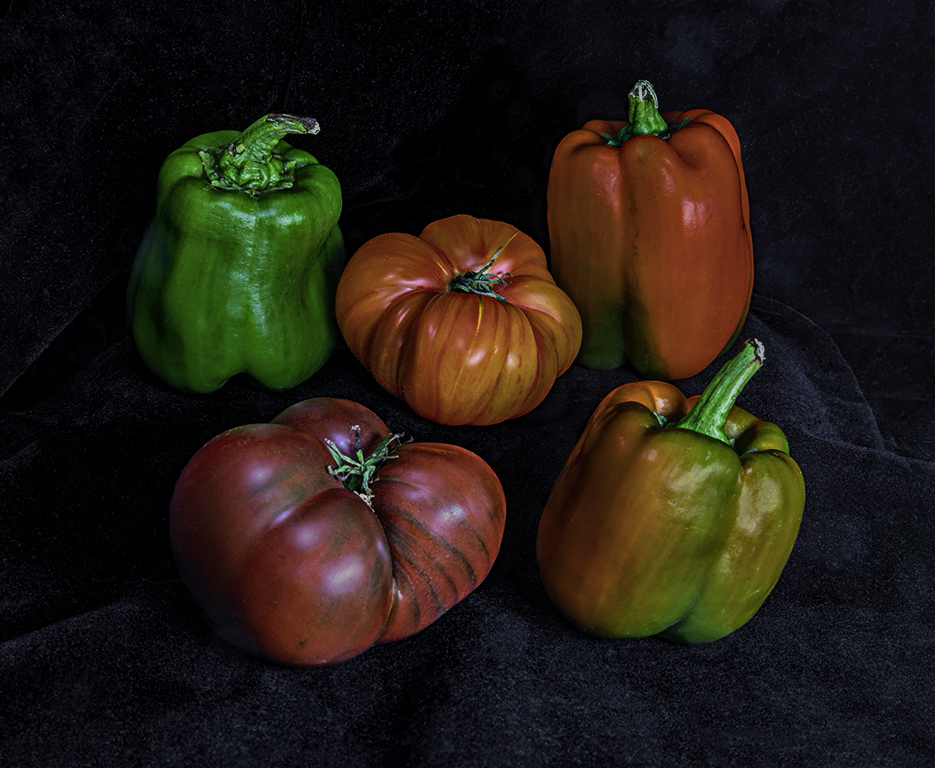
Here you have provided a beautiful image. The subject are clear, sharp, colorful and nicely separated from each other and from the surrounding elements. You chose an effective composition and achieved a great sense of flow upward and to the right. Editing the background to be nearly black effectually highlights the colorful blooms, an effect I am personally partial to. I do see a bit of a rim lighting around the blooms, which is emphasized by the dark background and to my mind is a bit distracting. It is most noticeable as a slight green rim around the base of the blooms, just below the petals and on the petals as well. This is not an artifact, but is does look an bit un-natural (or out of place). I suspect that this is due to light "wrapping around" the subject. I might be tempted to clone out these effects. I would also remove the two bit of plant-life at the lower left corner as these add little to the image. These cloning edits are not difficult but do take a bit of time. I have provided a version of this image where I have done this to illustrate my points. Aside for these points, you have provided a wonderful image. Nice job !
By the way, what is "deadheading" ?
|
Jun 9th |
 |
| 63 |
Jun 22 |
Comment |
Nice classic capture of this bloom head-on. In choosing this approach you really emphasize the swirling nature of the bloom petals. You successfully captured the fall-off of light across the face of the bloom allowing the difference between the inner and outer parts of the petals to really shine. I especially am appreciating the crop, where you left the outer petal intact (furthering the flow of the rose petals) while eliminating much of the distracting background. That being said I do find that the leaf on the lower right tends to compete with your rose somewhat. Here I would be tempted to darken the entire leaf a bit more and perhaps crop upward from the bottom some to de-emphasize this structure even more. Yes, cropping from the bottom will cut off part of this leaf, but in this case that is not be a bad thing since you are trying to de-emphasize this structure. |
Jun 9th |
| 63 |
Jun 22 |
Comment |
I really am enjoying this capture. I especially appreciate how this is less about the spider and more about the spider and how he (or she) exists in it's environment. Lots of detail throughout the image. The spider is a bit centered here, but the leading lines that the background elements generate (perpendicular and leading to the subject) softens that effect some. You are correct in that here there is a lot of noise which unfortunately detracts from the image, so look at the early discussion on the denoise process above. At times this helps, but there are times (especially if you really crop in to make a very small part of the image big) where there is too little information left (resulting in a grainy appearance). In those cases denoise will not help much. It's worth trying here with this image. |
Jun 9th |
| 63 |
Jun 22 |
Comment |
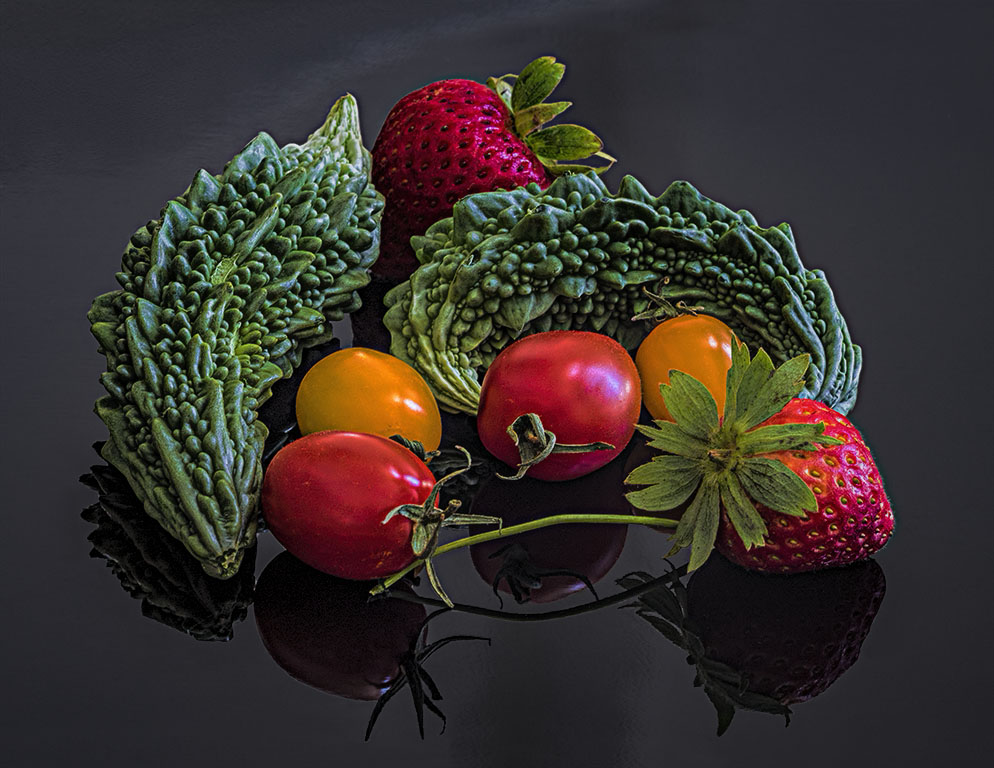
Great image ! Your image really captures the essence of a macro shot, and shows us some natural behavior in a way that we might not otherwise see it. Your subjects are sharp as is the flower element that they are located on. Your background is colorful and soft and sets off the main subjects nicely. In this case I do not mind the centered aspect of your subjects. Here they are the main attraction so a centered position is appropriate in this case. It is a bit difficult to determine which parts of each ant belongs to which (subjects merge together) but the only way here to avoid that is to choose another time to capture the event where each participant was more cleanly separated from another. If I had to find something to change (which is difficult here) perhaps I might remove the small soft bit of a yellow bloom that is located on the lower right near the stem. Also the stamen on one bloom is touching the bottom or so nearly so that it appears so. Here I might correct that by cloning off the tip of the stamen or cropping a bit lower on the bottom. Yes, I know that these are small, minor quibbling points so take them with a "gain of salt". Finally, I would have liked to see a bit more information as to how you collected the shot in your description. Adding the camera settings allows us all to understand your thoughts in trying to collect the shot. |
Jun 9th |
| 63 |
Jun 22 |
Reply |
A quick note on denoise. The denoise process generally has the effect of slightly blurring an image. The heaver the de-noising, the more blurring you might add. So one is always balancing denoise vs. sharpness. One of the best denoise applications that I know of is the Topaz Denoise AI (far better than anything Photoshop has to offer). This can be used as a stand-alone or as a plug-in filter in Photoshop (and perhaps Elements as well). This application does a wonderful job of removing noise without introducing a lot of blur, especially when it applies it's "Artificial Intelligence" (or AI) mode. It gives you several options as to how it does this and how much to apply. In these modes it does a fantastic job in striking an reasonable denoise vs. sharpness balance, far better than I have ever been able to apply manually, and I have tried. Using layers, selections and masks one can also selectively apply denoise to different parts of an image as well. For landscapes I often apply more denoise to the sky than to the rest of the image, all using denoise in layers with selections and masks. |
Jun 4th |
6 comments - 2 replies for Group 63
|
6 comments - 2 replies Total
|