|
| Group |
Round |
C/R |
Comment |
Date |
Image |
| 60 |
Jan 23 |
Reply |
I'm not a wildlife guy, but I do shoot a lot of sports, mostly indoors (or at night), in terrible lighting conditions, so the techniques and settings are pretty similar I think. Your technique seems sound to me, since you can fix a noisy image, but not a blurry one due to low shutter speed. I'm an Auto ISO guy too, for a lot of situations since something has to account for rapid changes in lighting.
I don't know how Canon works, but on everything else I'm intimate with, Exposure Compensation is not functional when in M mode. As I understand the system in Fuji and Nikon, Exp Comp will vary either SS or F Stop (or both) to achieve proper exposure based on metering mode and composition (how bright is the scene actually). And, in both Nikon and Fuji, Expo Comp doesn't actually control Auto ISO. So, if the Canon is the same way, by using Auto ISO and then using Exp Comp to override it (if that's the way it works on Canon), you're really just going into manual ISO. Anyway, bottom line is that I'm just not sure you're getting anything out of Exp Comp in this situation, but I'm not a Canon user (well, I used a 1DX for a season shooting headshots and sports but EVERYTHING was in manual) so would like to get educated. Straighten me out here Boss. |
Jan 25th |
| 60 |
Jan 23 |
Reply |
Uh, interesting. f/9 is the widest aperture? Never heard of it. Then again, what do I know? If so, that was the right choice. But, when you say "I may have tried to stop down to get a better depth of field" (stopping down being an even higher F stop, decreasing the size of the aperture and incoming light, for a deeper depth of field), I'm not sure how that would have helped. Like I said Brother, once you get into the bird biz, you're really limited by equipment. |
Jan 25th |
| 60 |
Jan 23 |
Reply |
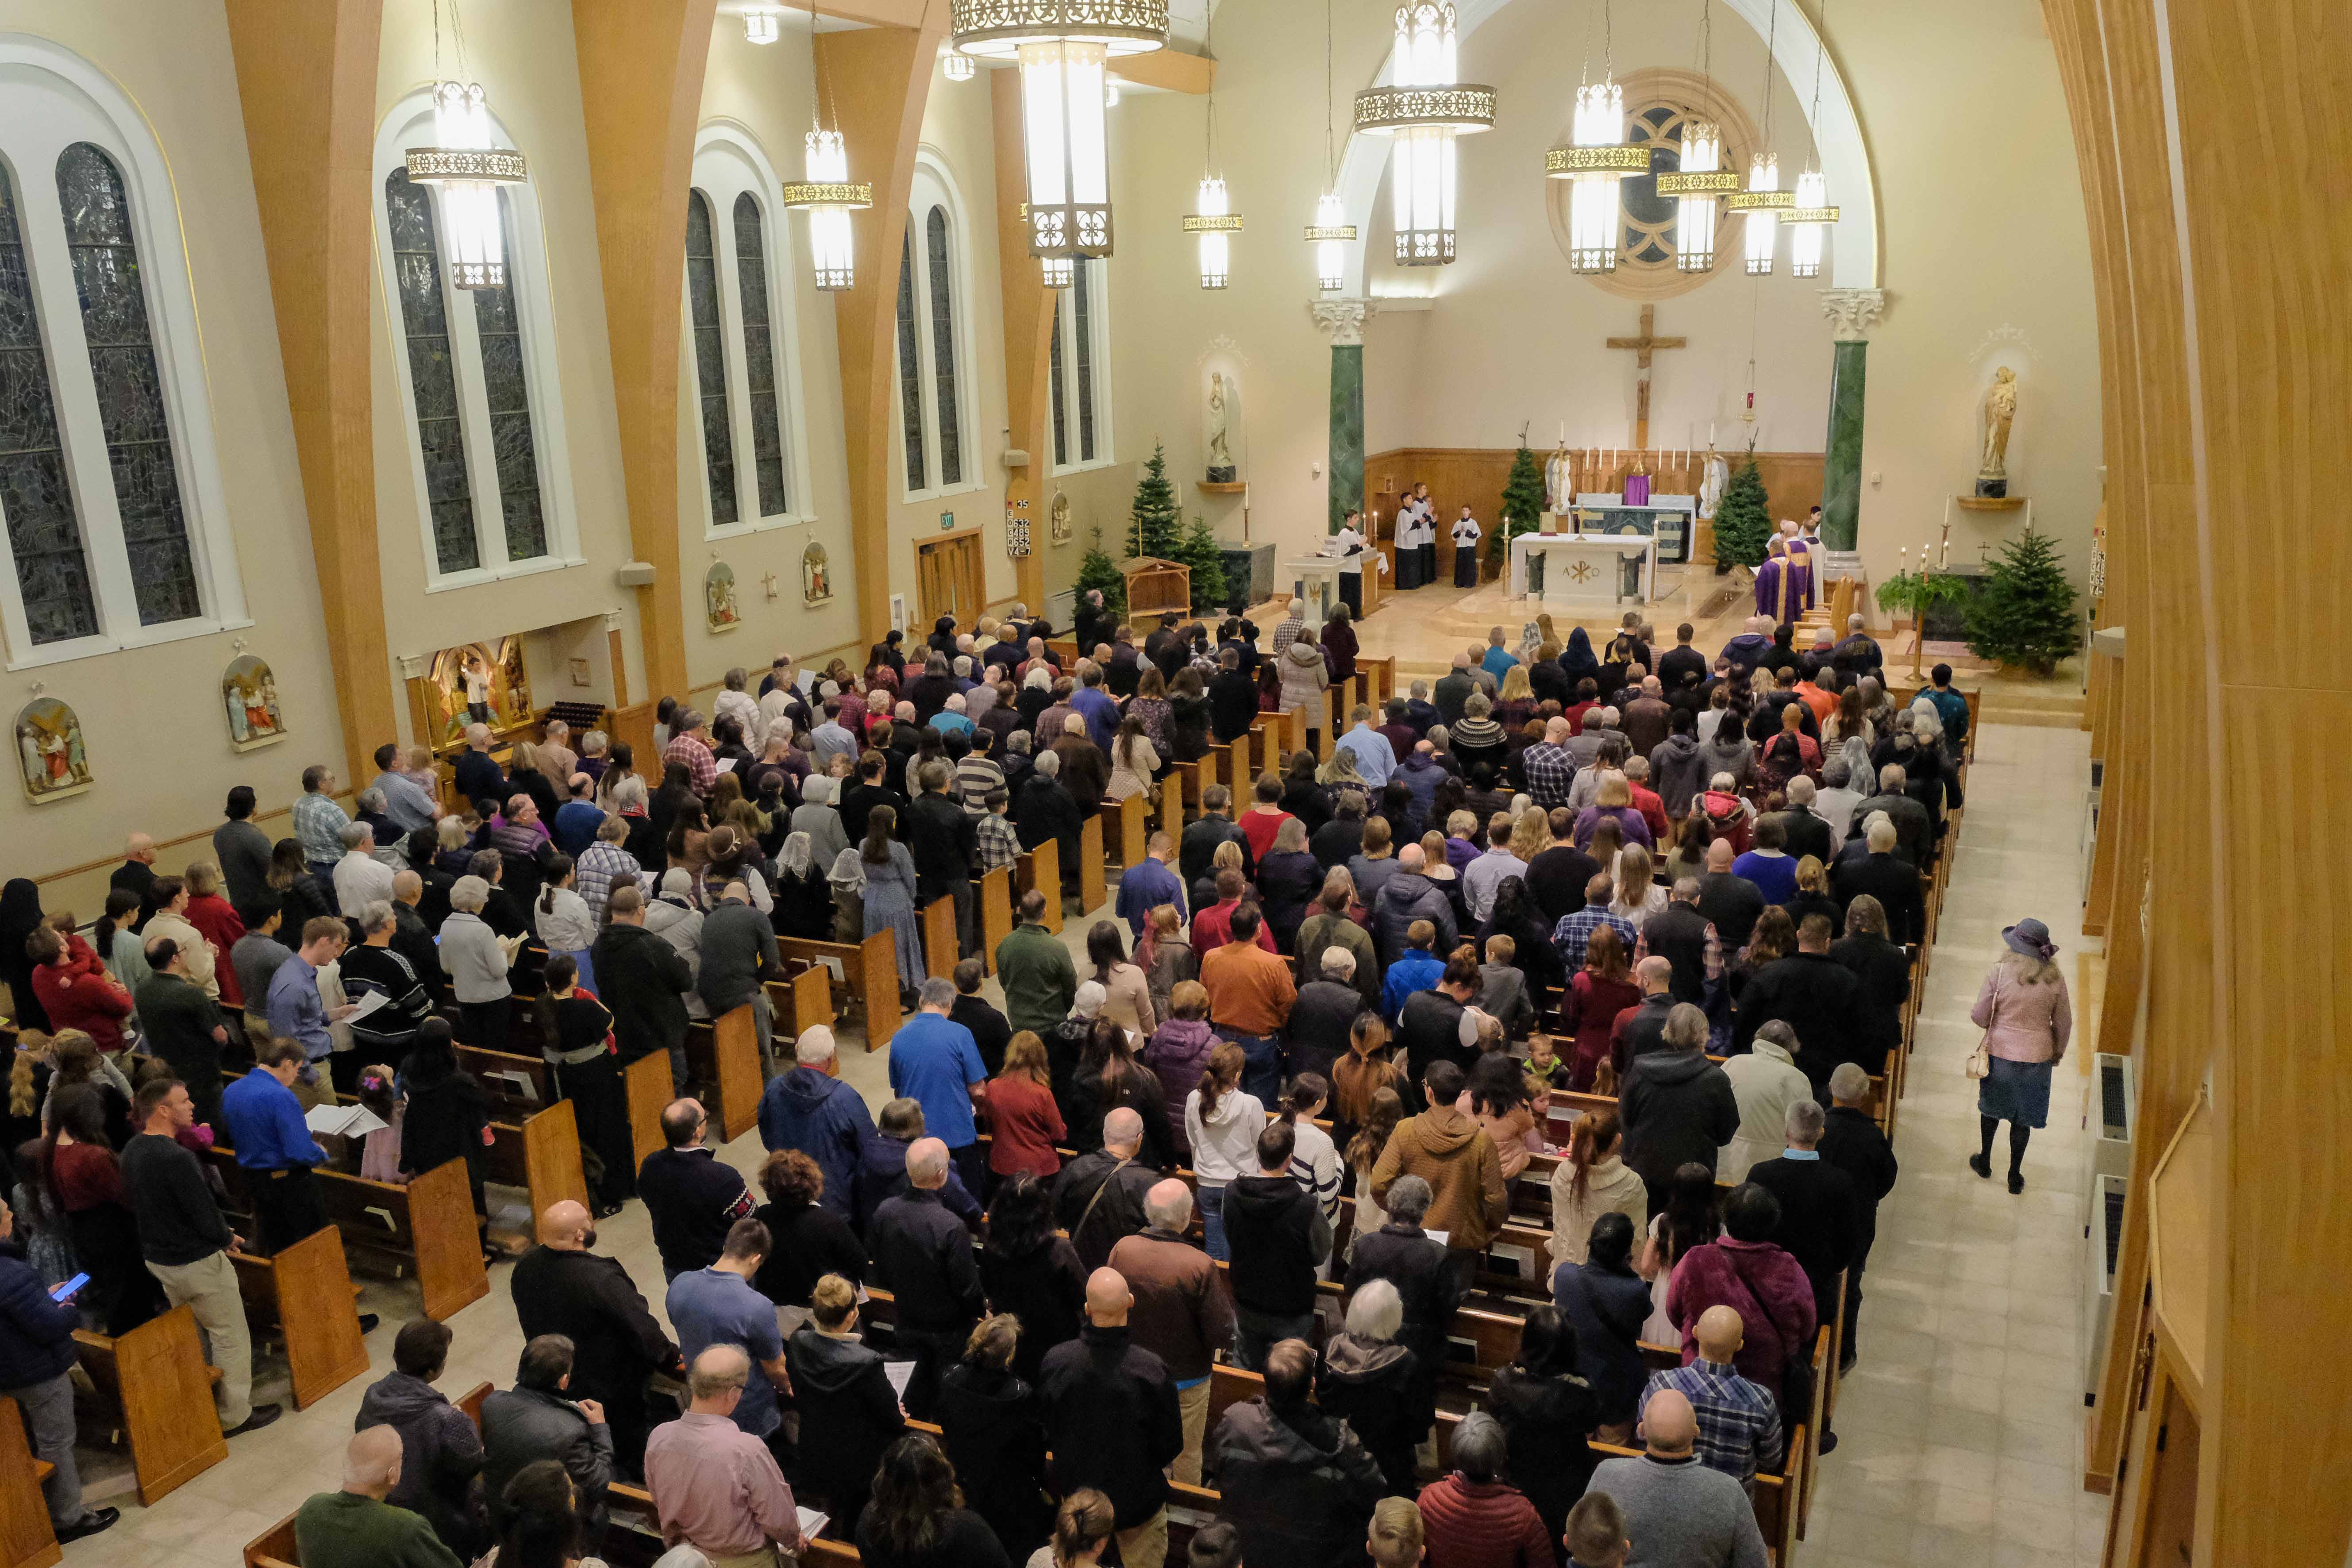
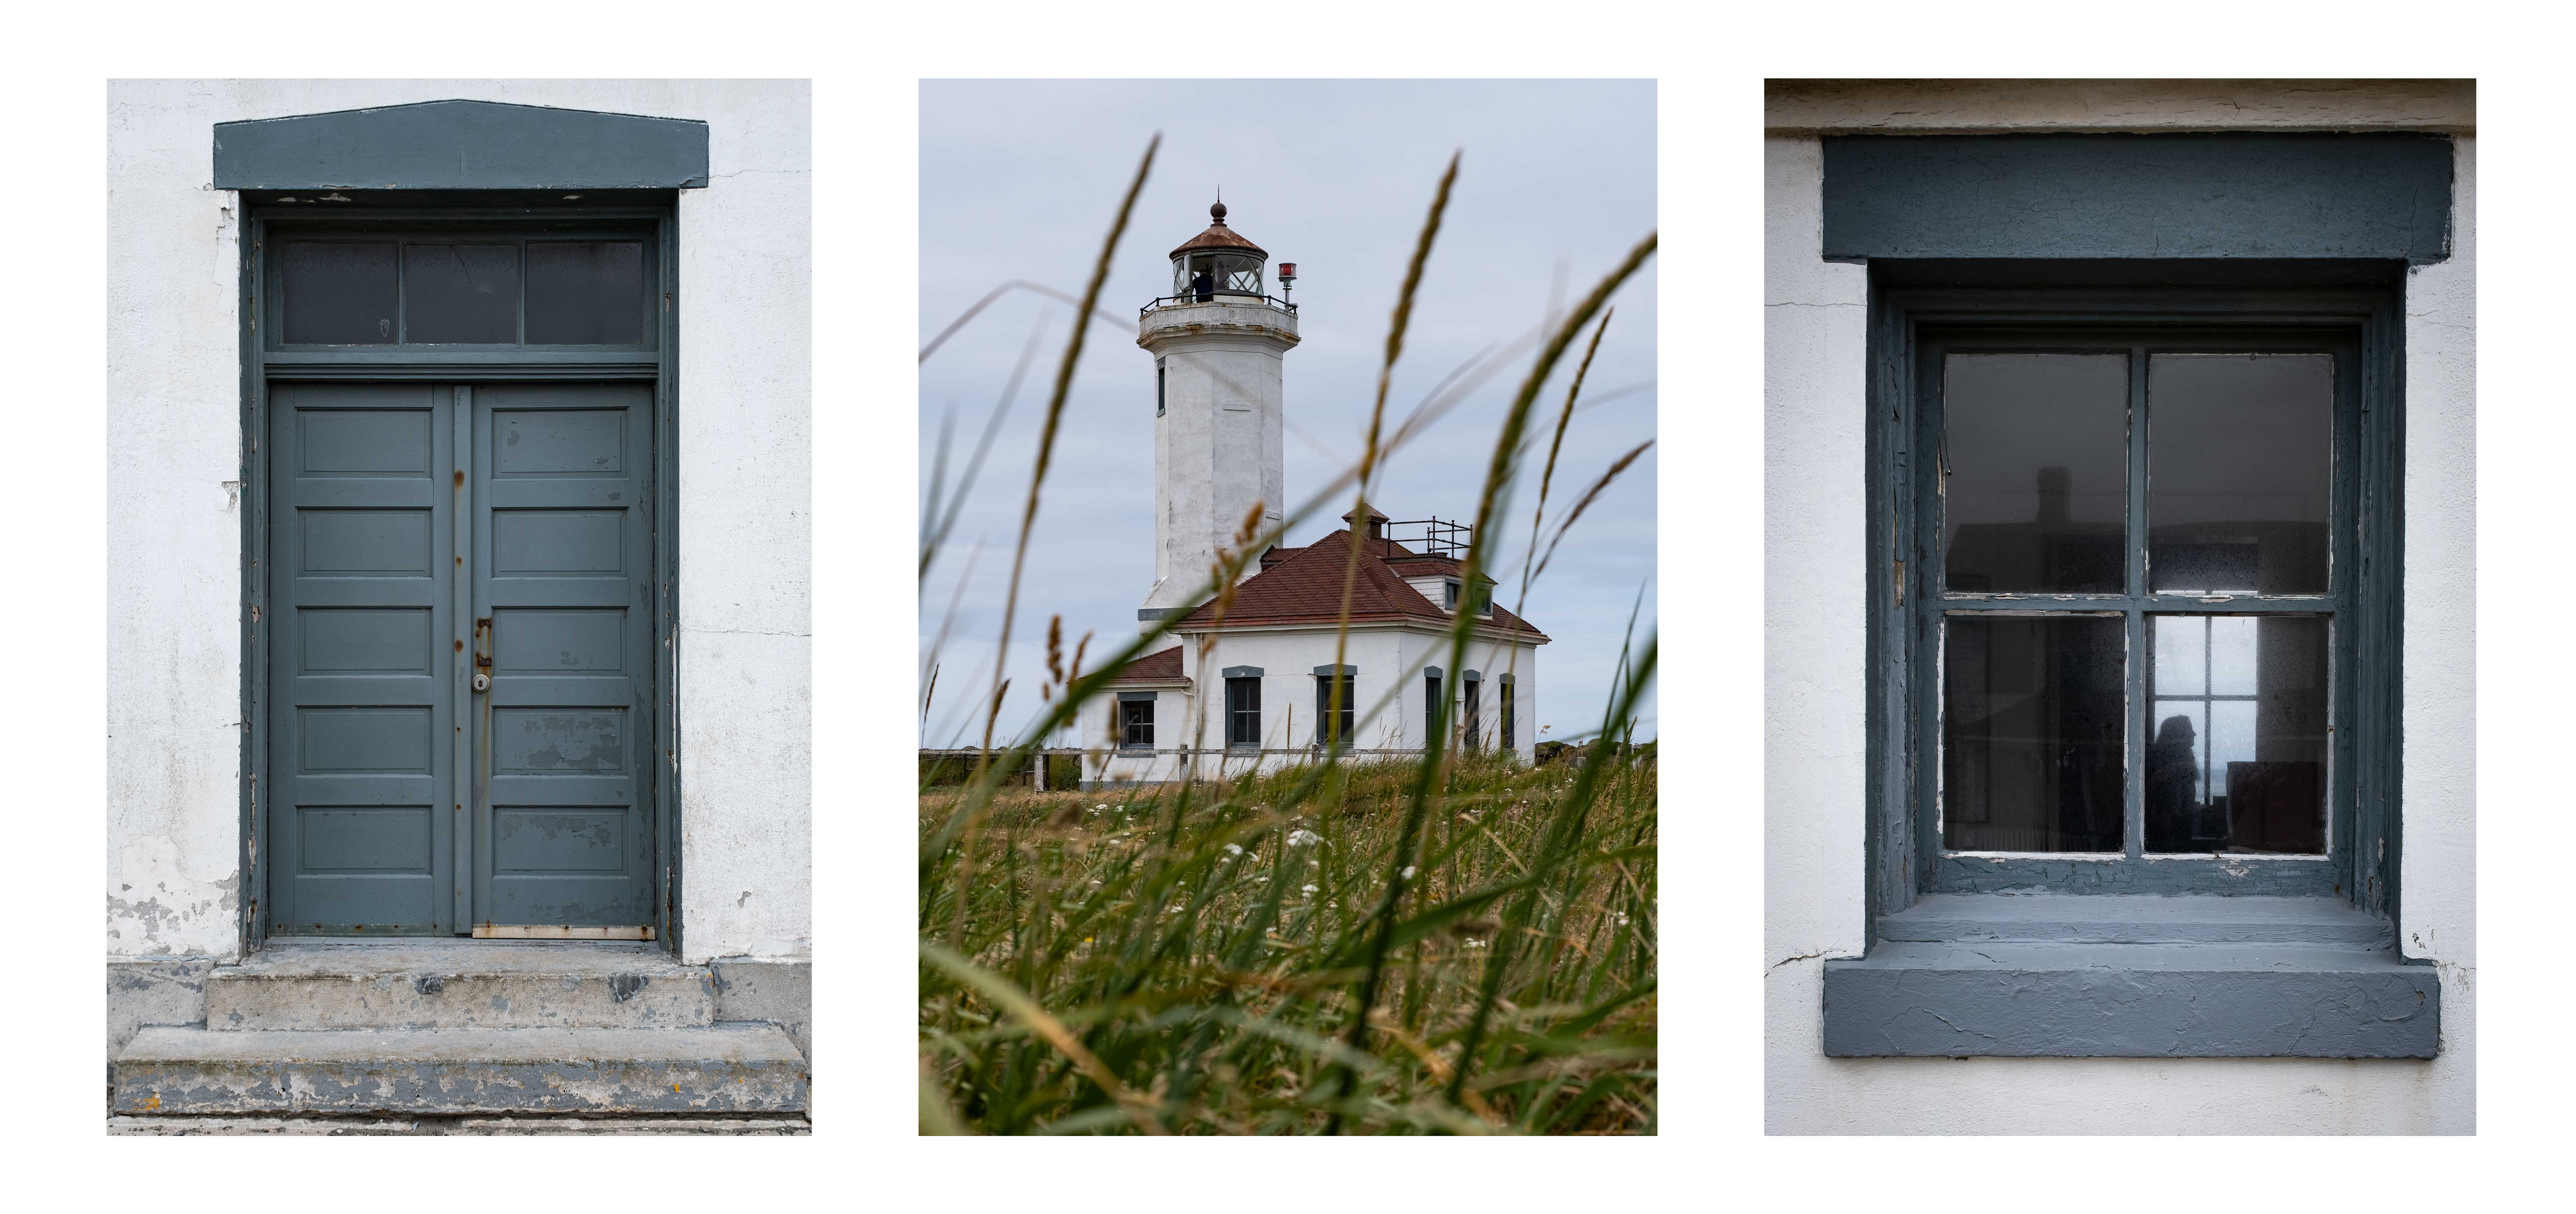
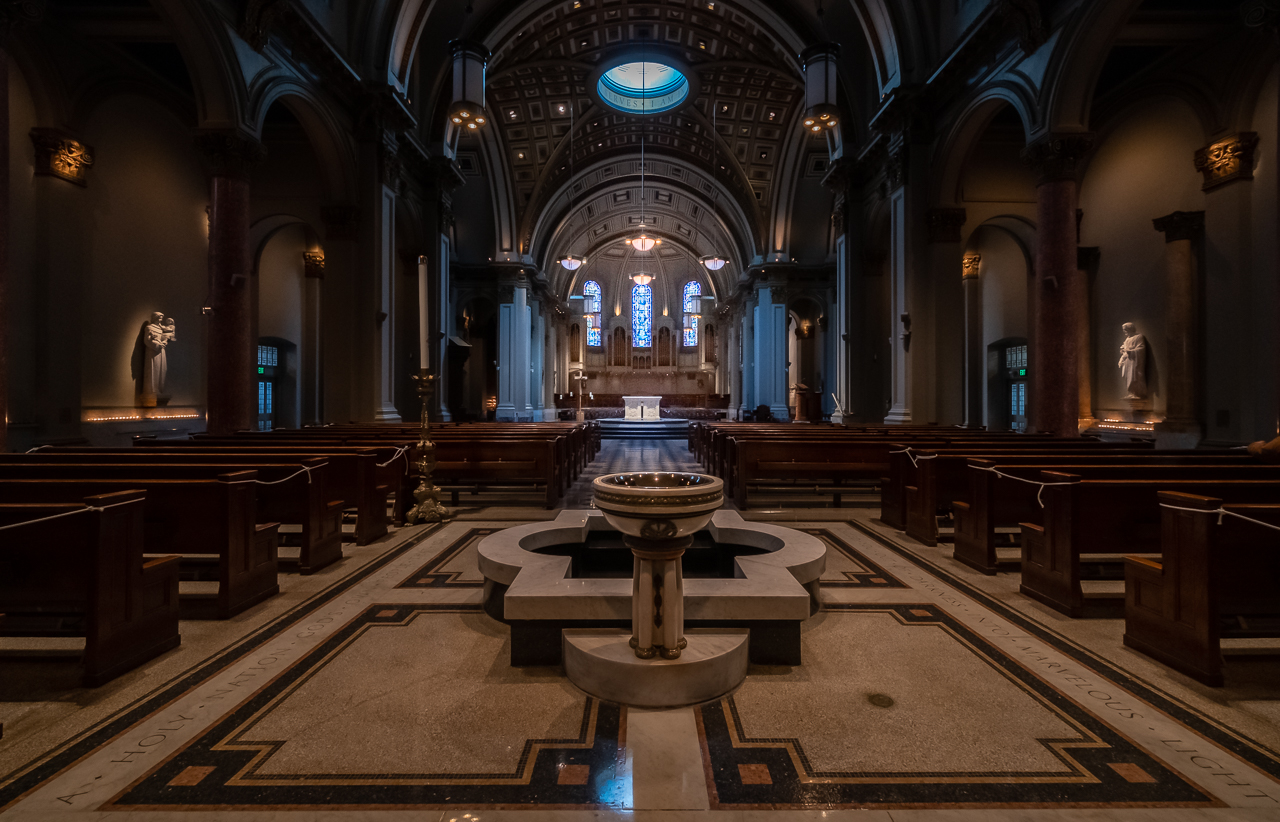
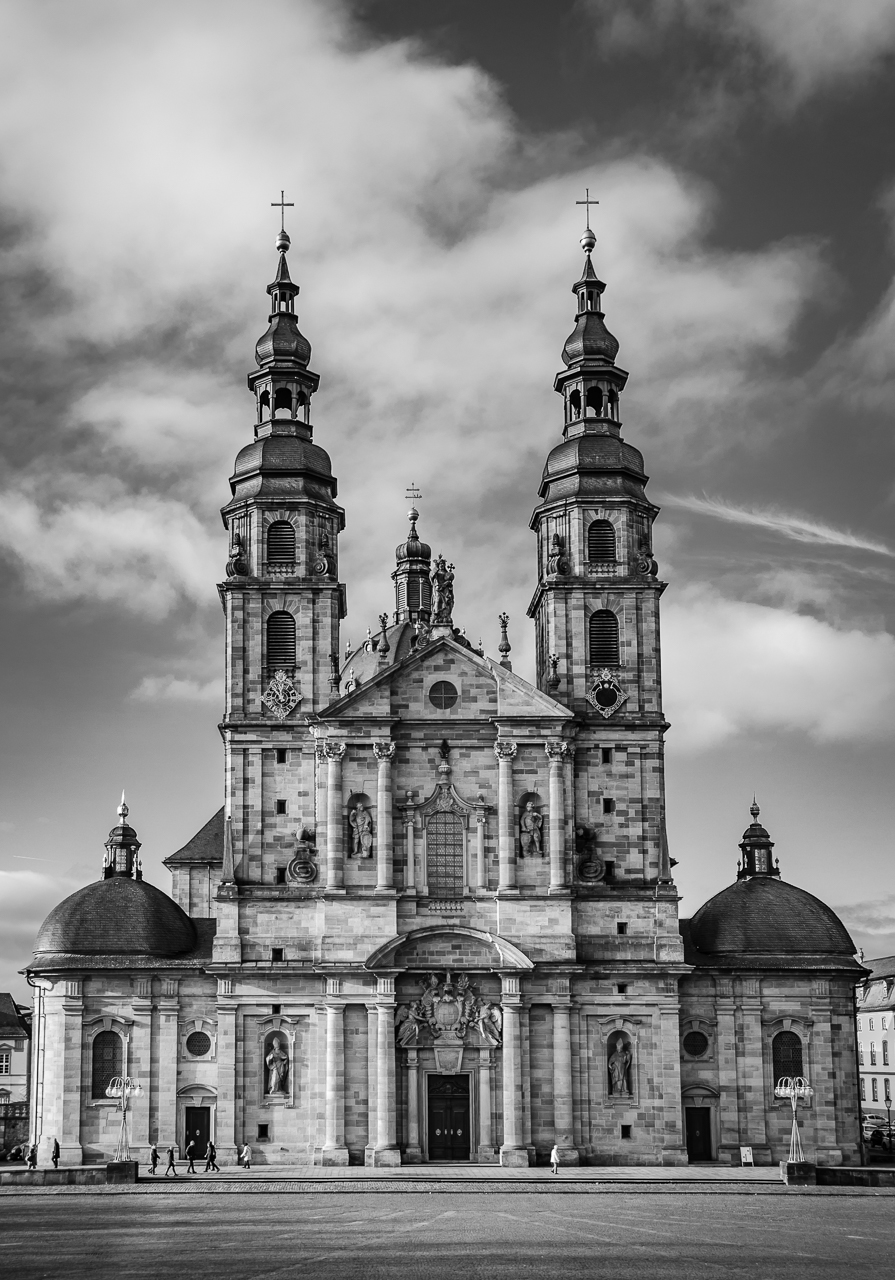
I have many images that for one reason or another, all the lines are not at perfectly at right angles. I think in most cases, the most important thing is to get the vertical stuff vertical (esp. for something like architecture), which is what you've focused on too. You'd think that the Transform tool would be able to fix anything, but my experience says that it's often a one-thing-or-another choice. And, you compound your challenges when use a short focal length, like on a phone.
Which may be what's going on here. It may be an issue of which post you used as a reference. Because your right-most post is closer to the edge, its plumbness is probably going to be most notable. But, due to that lens distortion thing which is a function of short focal length, the posts may not be totally parallel with each other. So, you have to choose one or the other (focus on the tallest one, or one in the center?).
In a case like this, you'd think you could warp and rotate a and squish an image ad-infinitum in the Transform tool (Lightroom), until everything is at right angles, but as I I mentioned earlier, sometimes that's just not the case...for me anyway. I have a photo of a church, looking down the aisle, that I've probably spent 80 hours trying to get right, and it still ain't. |
Jan 19th |
| 60 |
Jan 23 |
Reply |
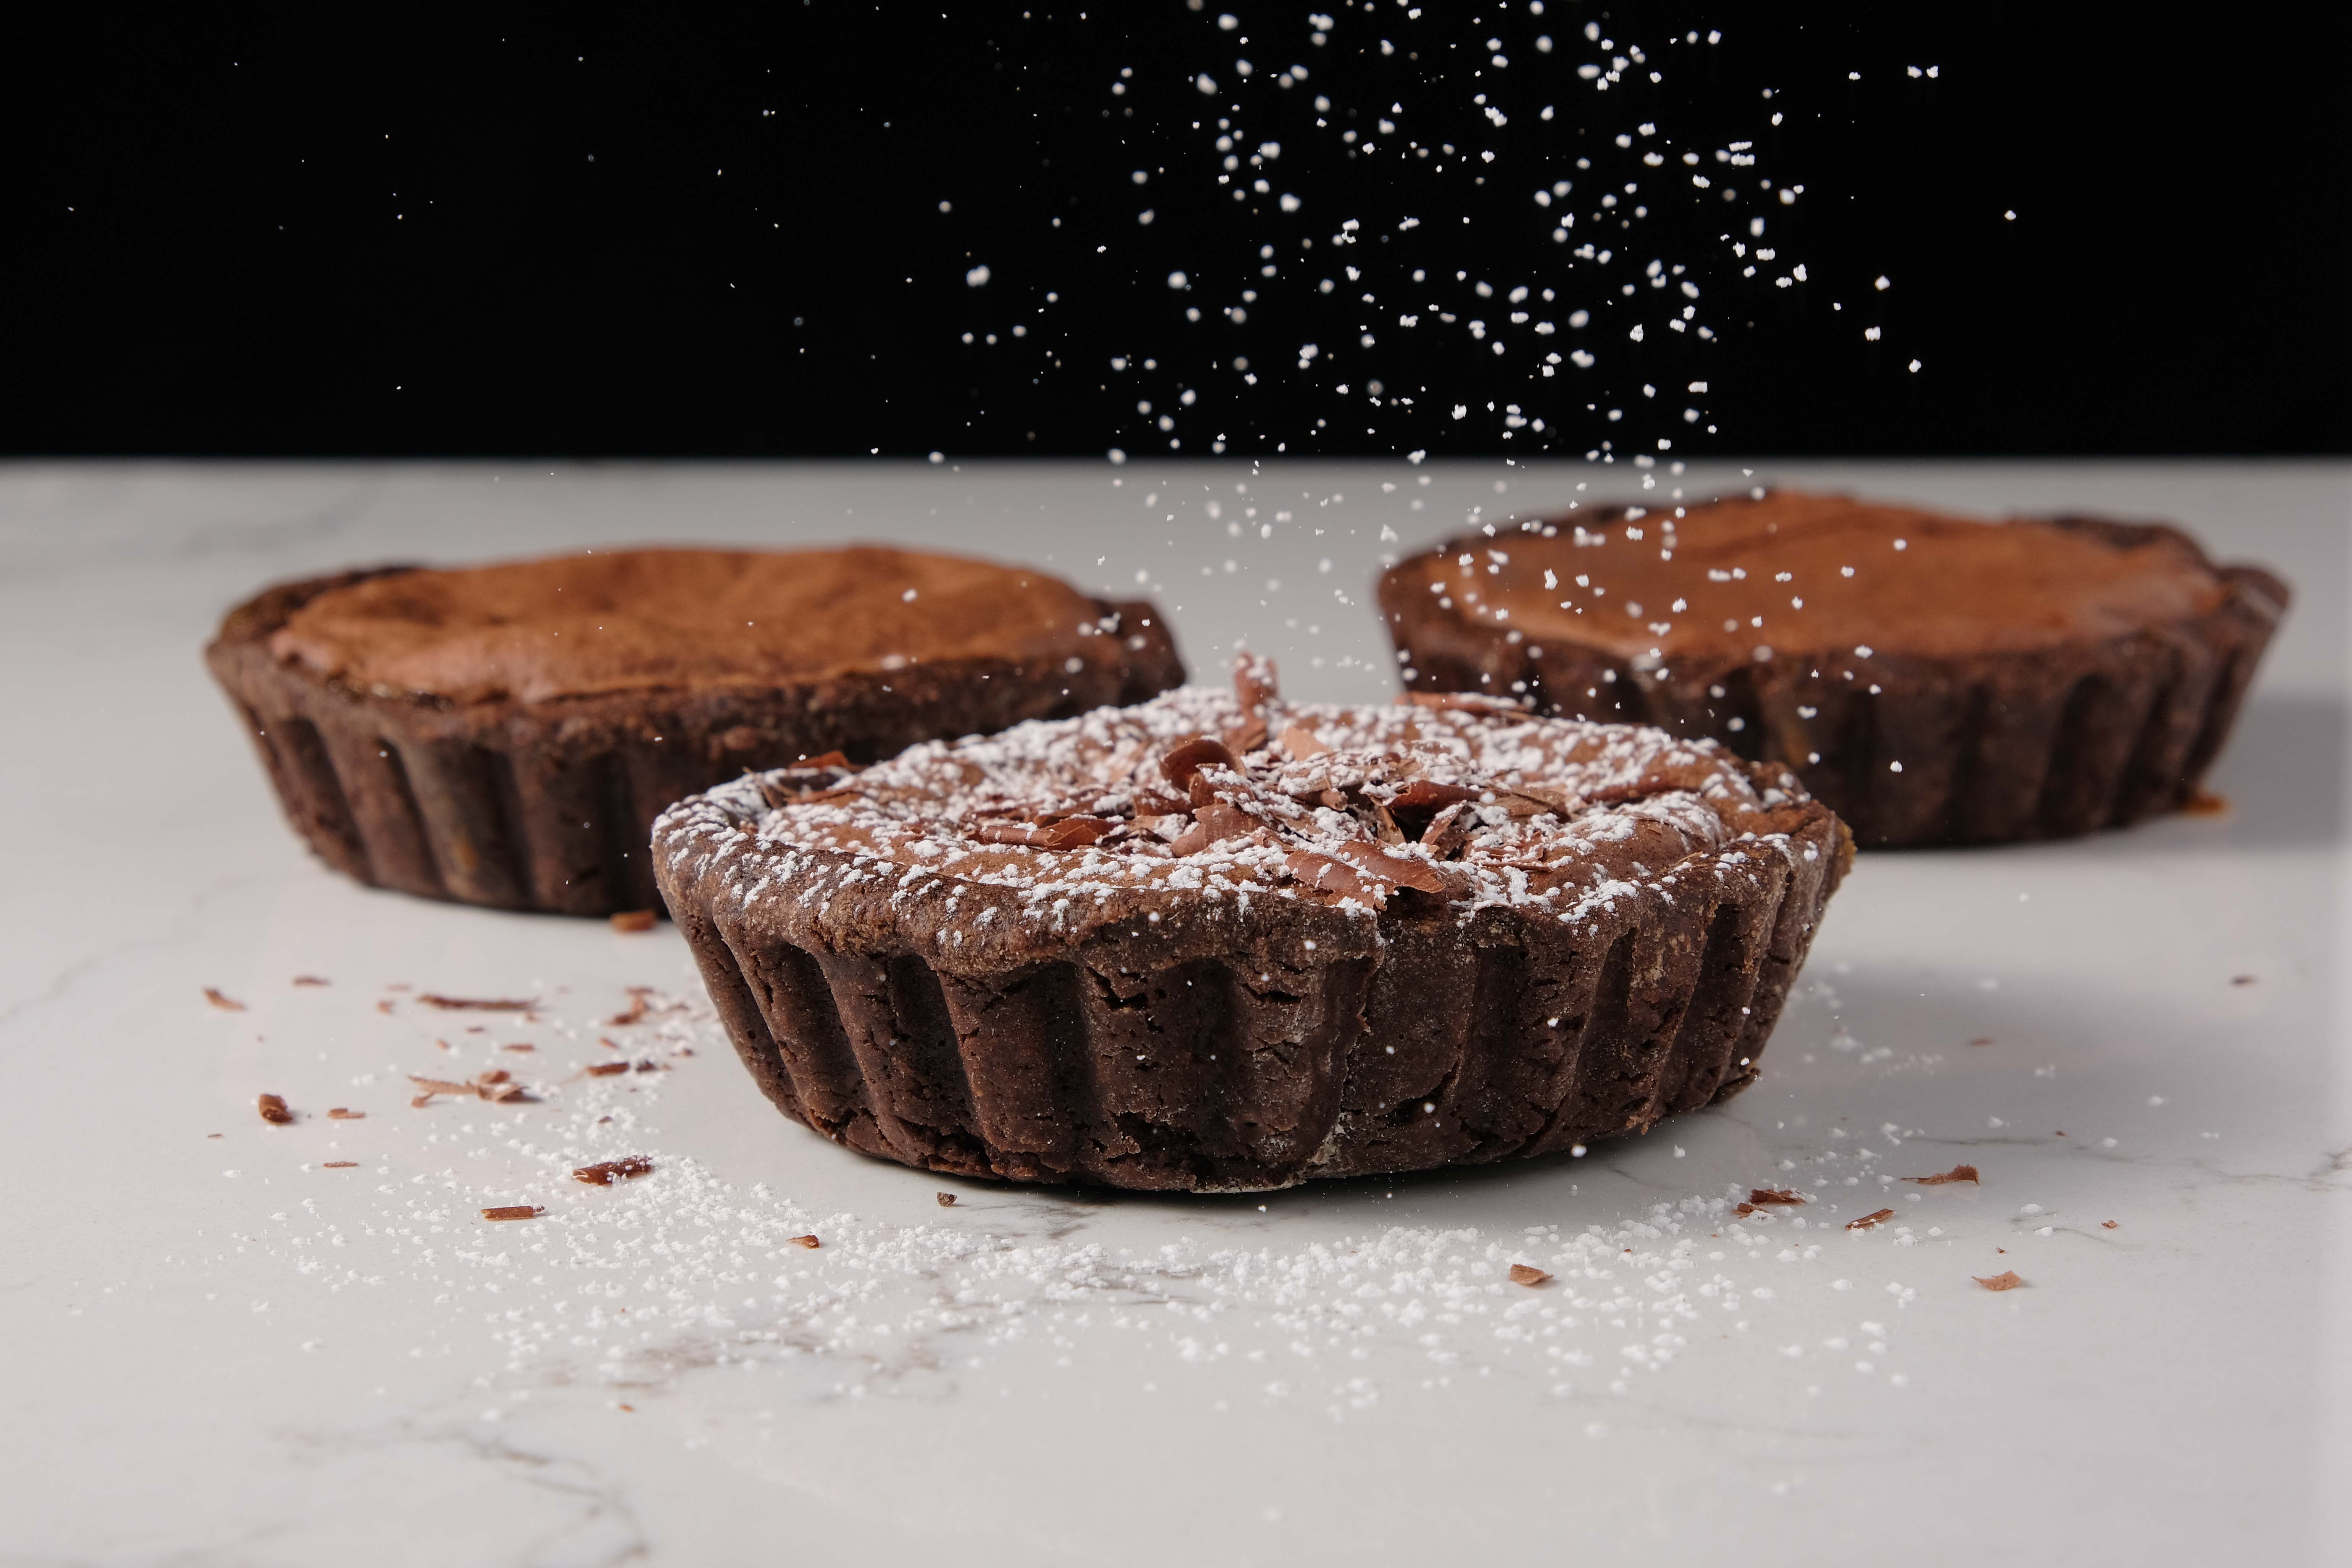
I did have an assistant, but in truth, I'm not sure it made that much of a difference, since it's kind of hard to time someone else's dropping of the powder. From my experience taking water drop photos, and ice dropping in glasses, it seems to work best when I drop and use a remote to release the shutter. It's just easier to get the timing right that way. |
Jan 13th |
| 60 |
Jan 23 |
Comment |
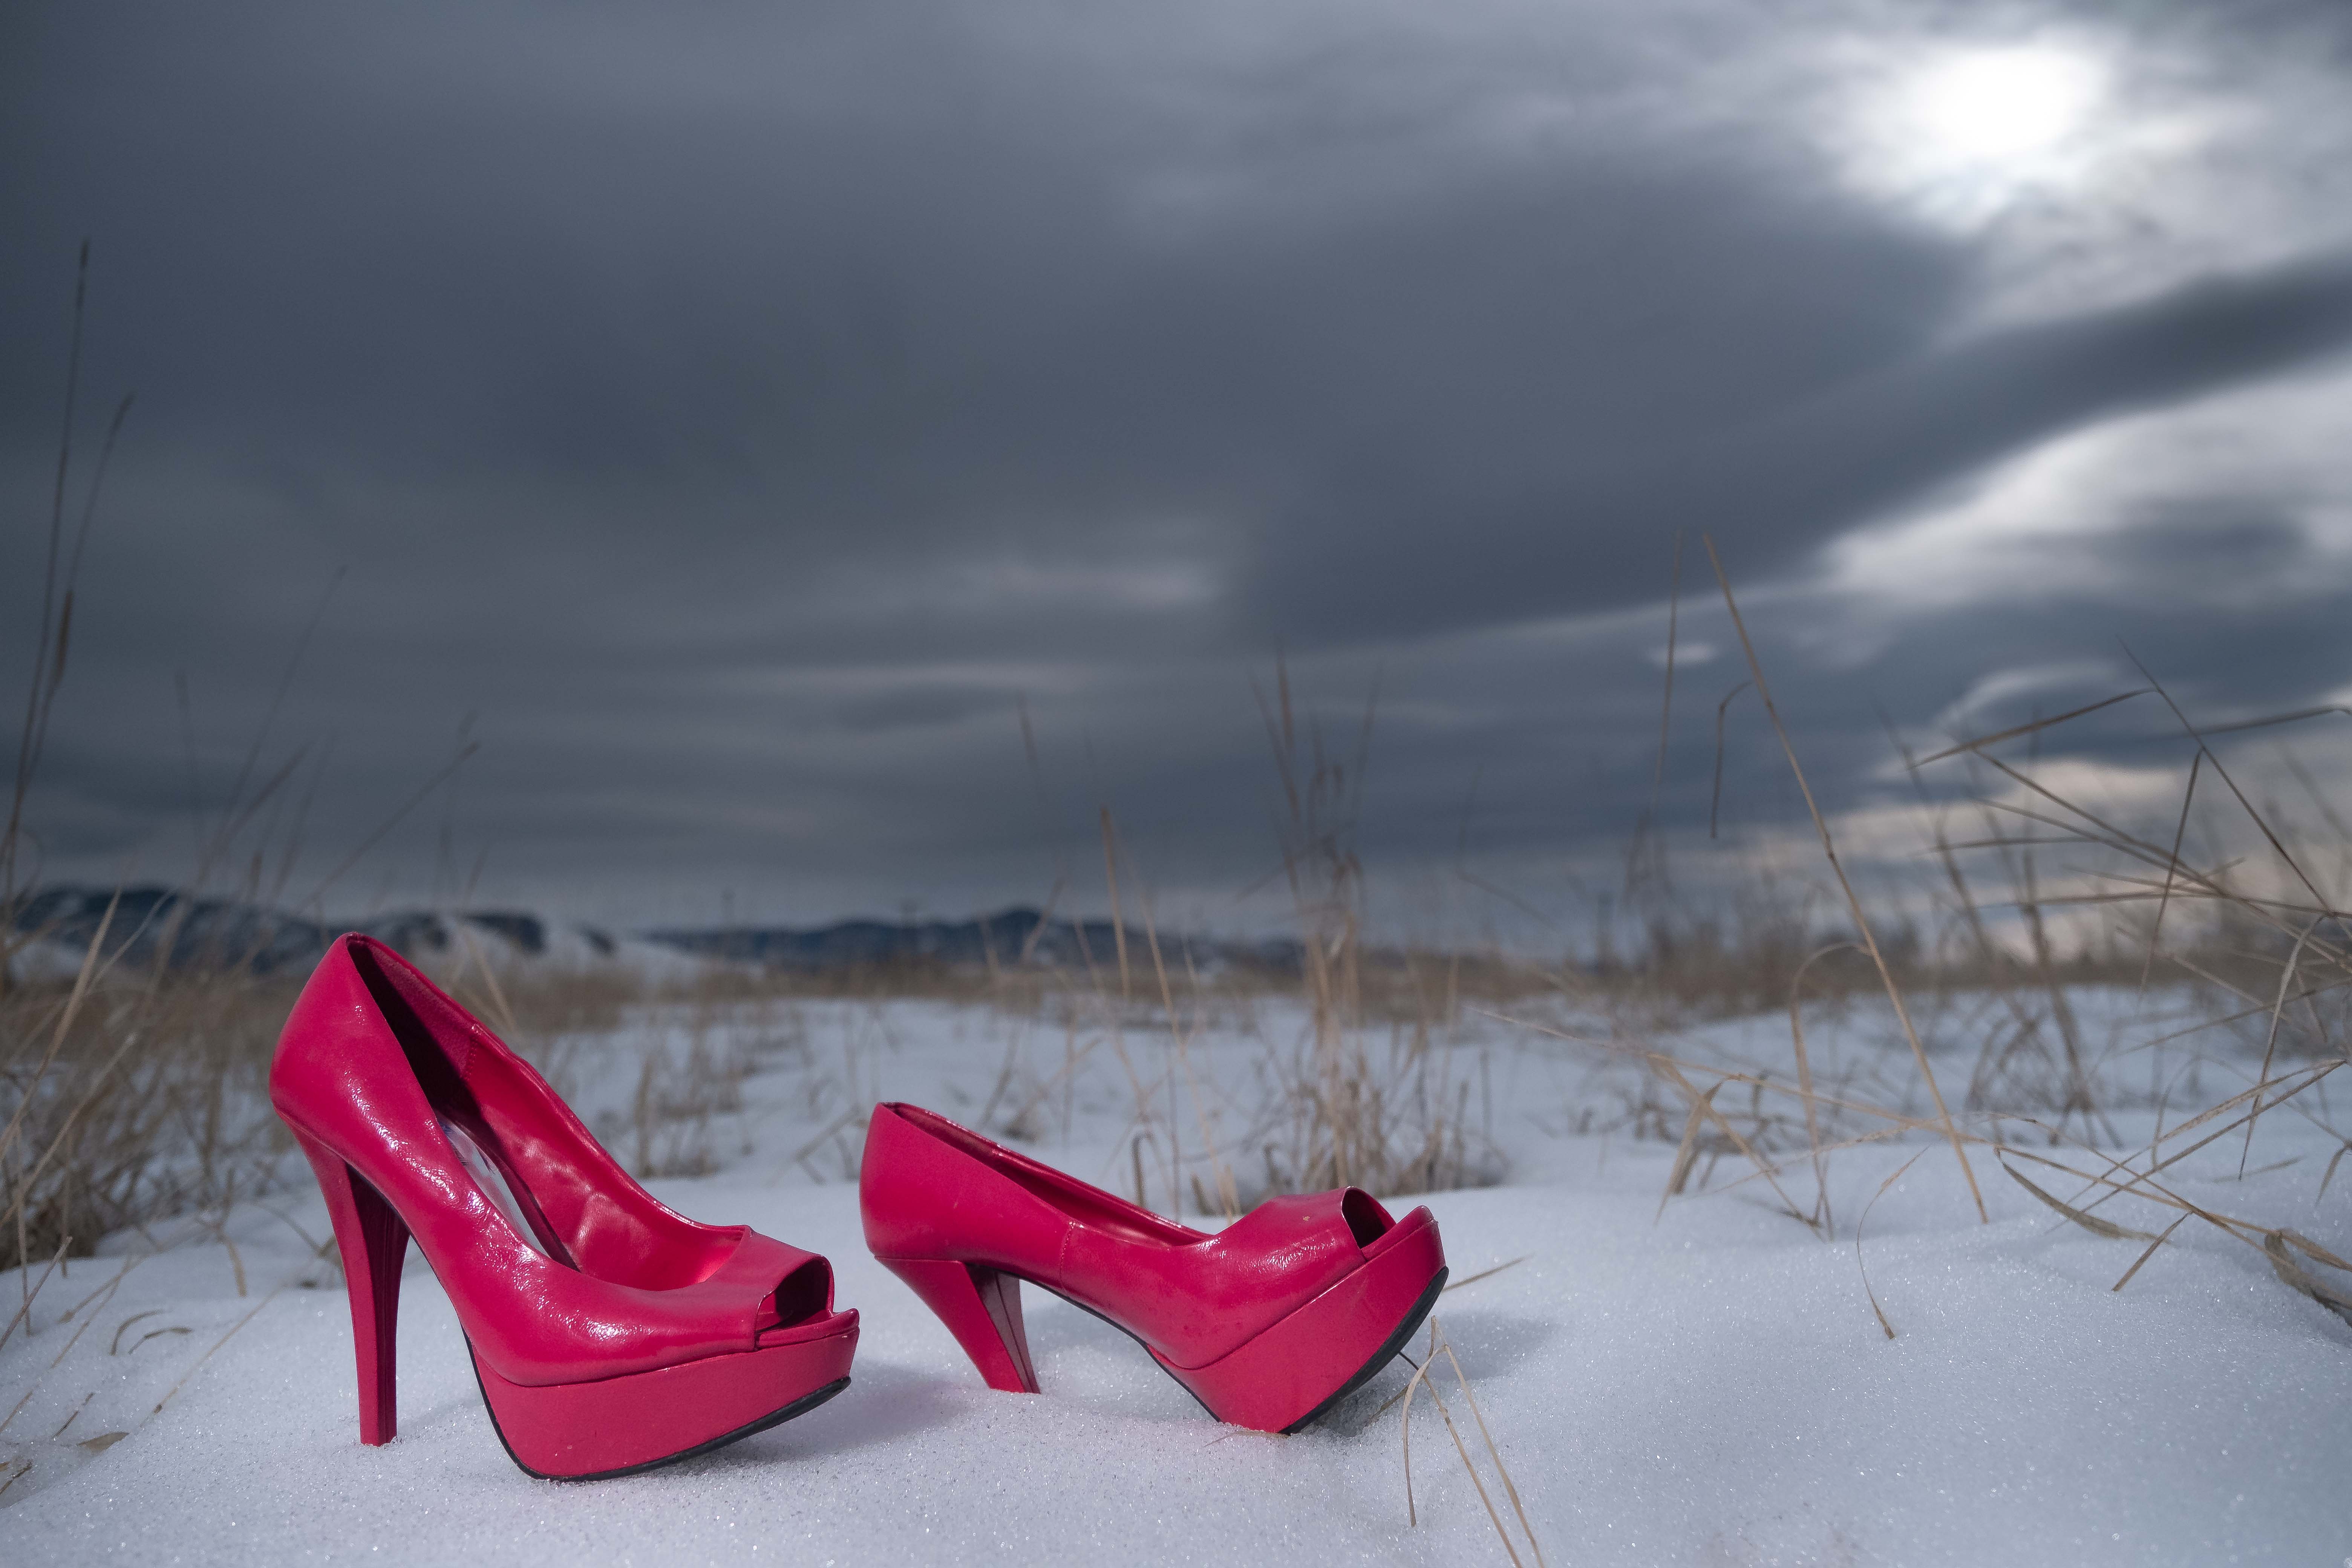
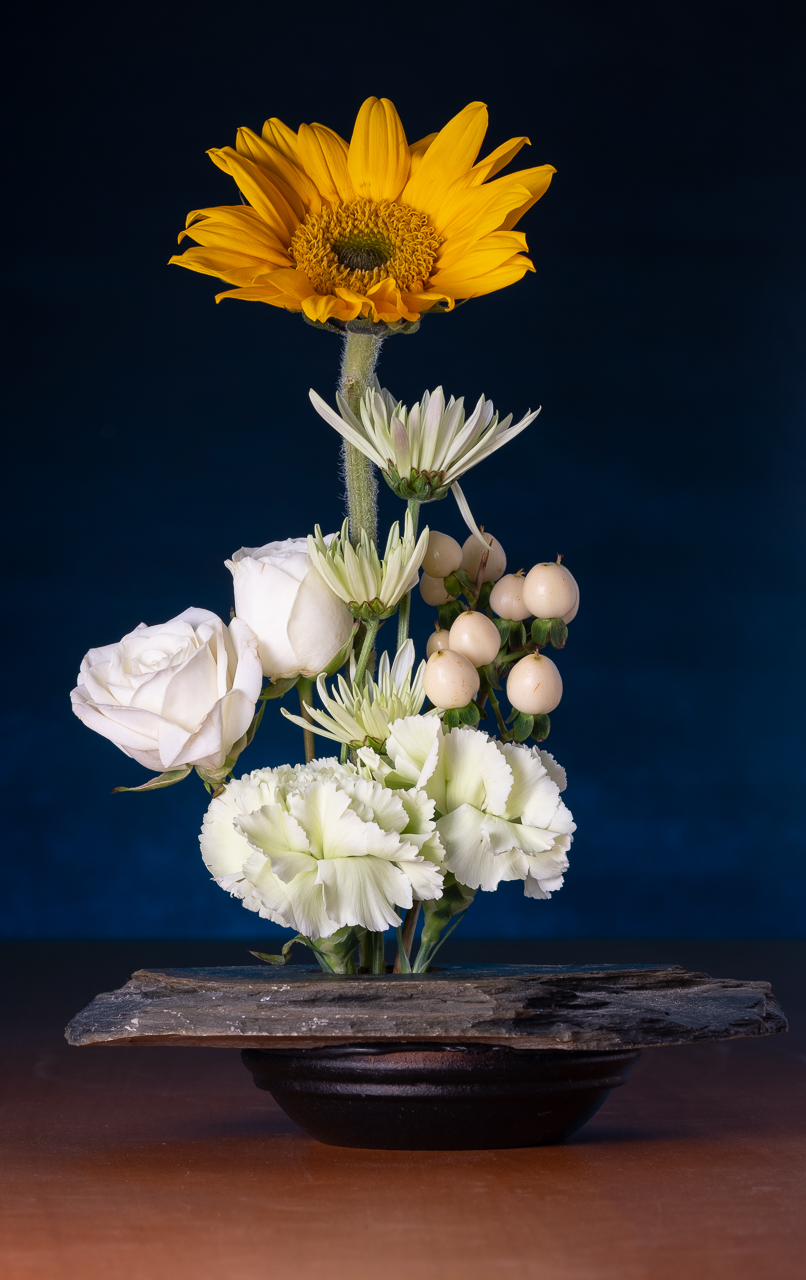
First of all Dean, I want to say that this is the very best "how I made it" submission I've ever seen...including my own. Thanks tons for putting the effort into this. IMHO, this is the real gravy of submitting images because it offers the team the benefit of your thinking, and also presents a jumping off place for discussion. I owe you a cookie. Keep it up.
As to the image, I like it too. You only have about six or seven compositional elements in here (that's a jest) that give the image context and depth. Good on all. I know you know what you're doing.
I have two areas to inquire about though, both of which you may have considered, but which I just have to ask about. 1) the image looks muddy to me. When I see snow I normally want to see white. But, I know that low-contrast is a thing too, so did you consider the dynamic range in the final product? 2) The fence is askew, and my anal retentive, not-stepping-on-the-crack-or-it'll-break-your-mother's-back sensibilities want that fence to be at right angles. Did you consider this?
Anyway, thanks for another month, and thanks for being part of the team. |
Jan 12th |
| 60 |
Jan 23 |
Reply |
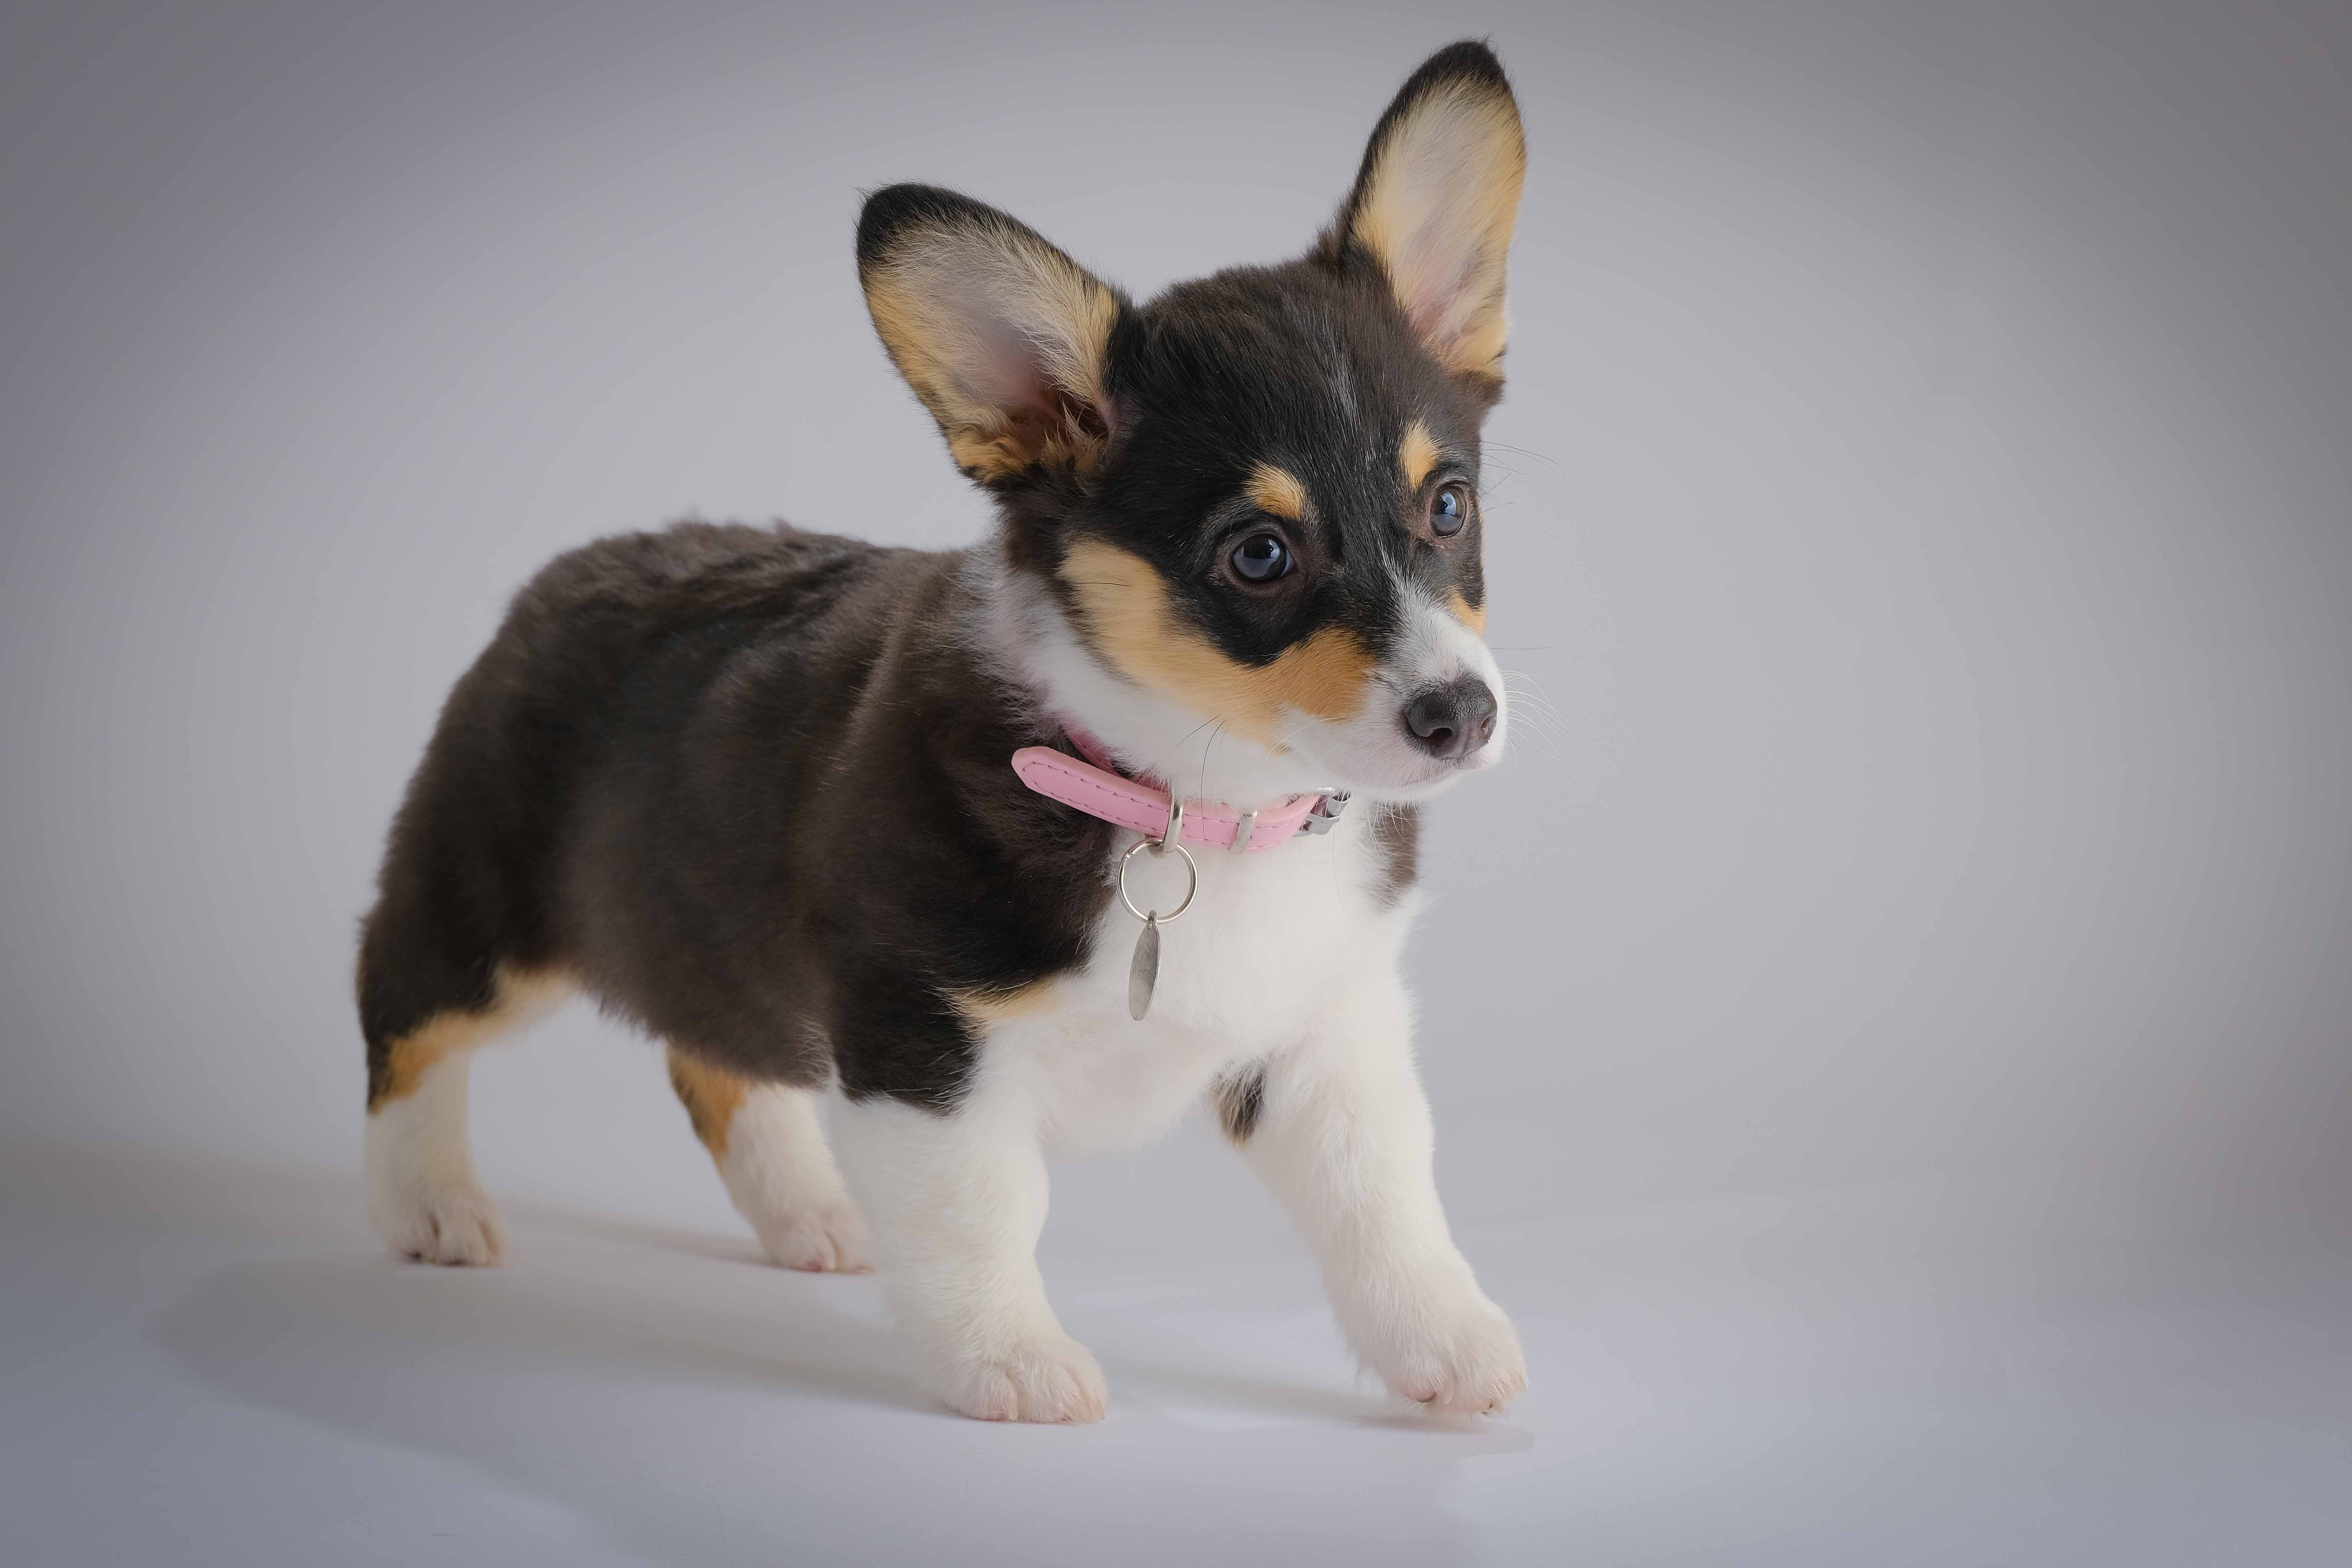
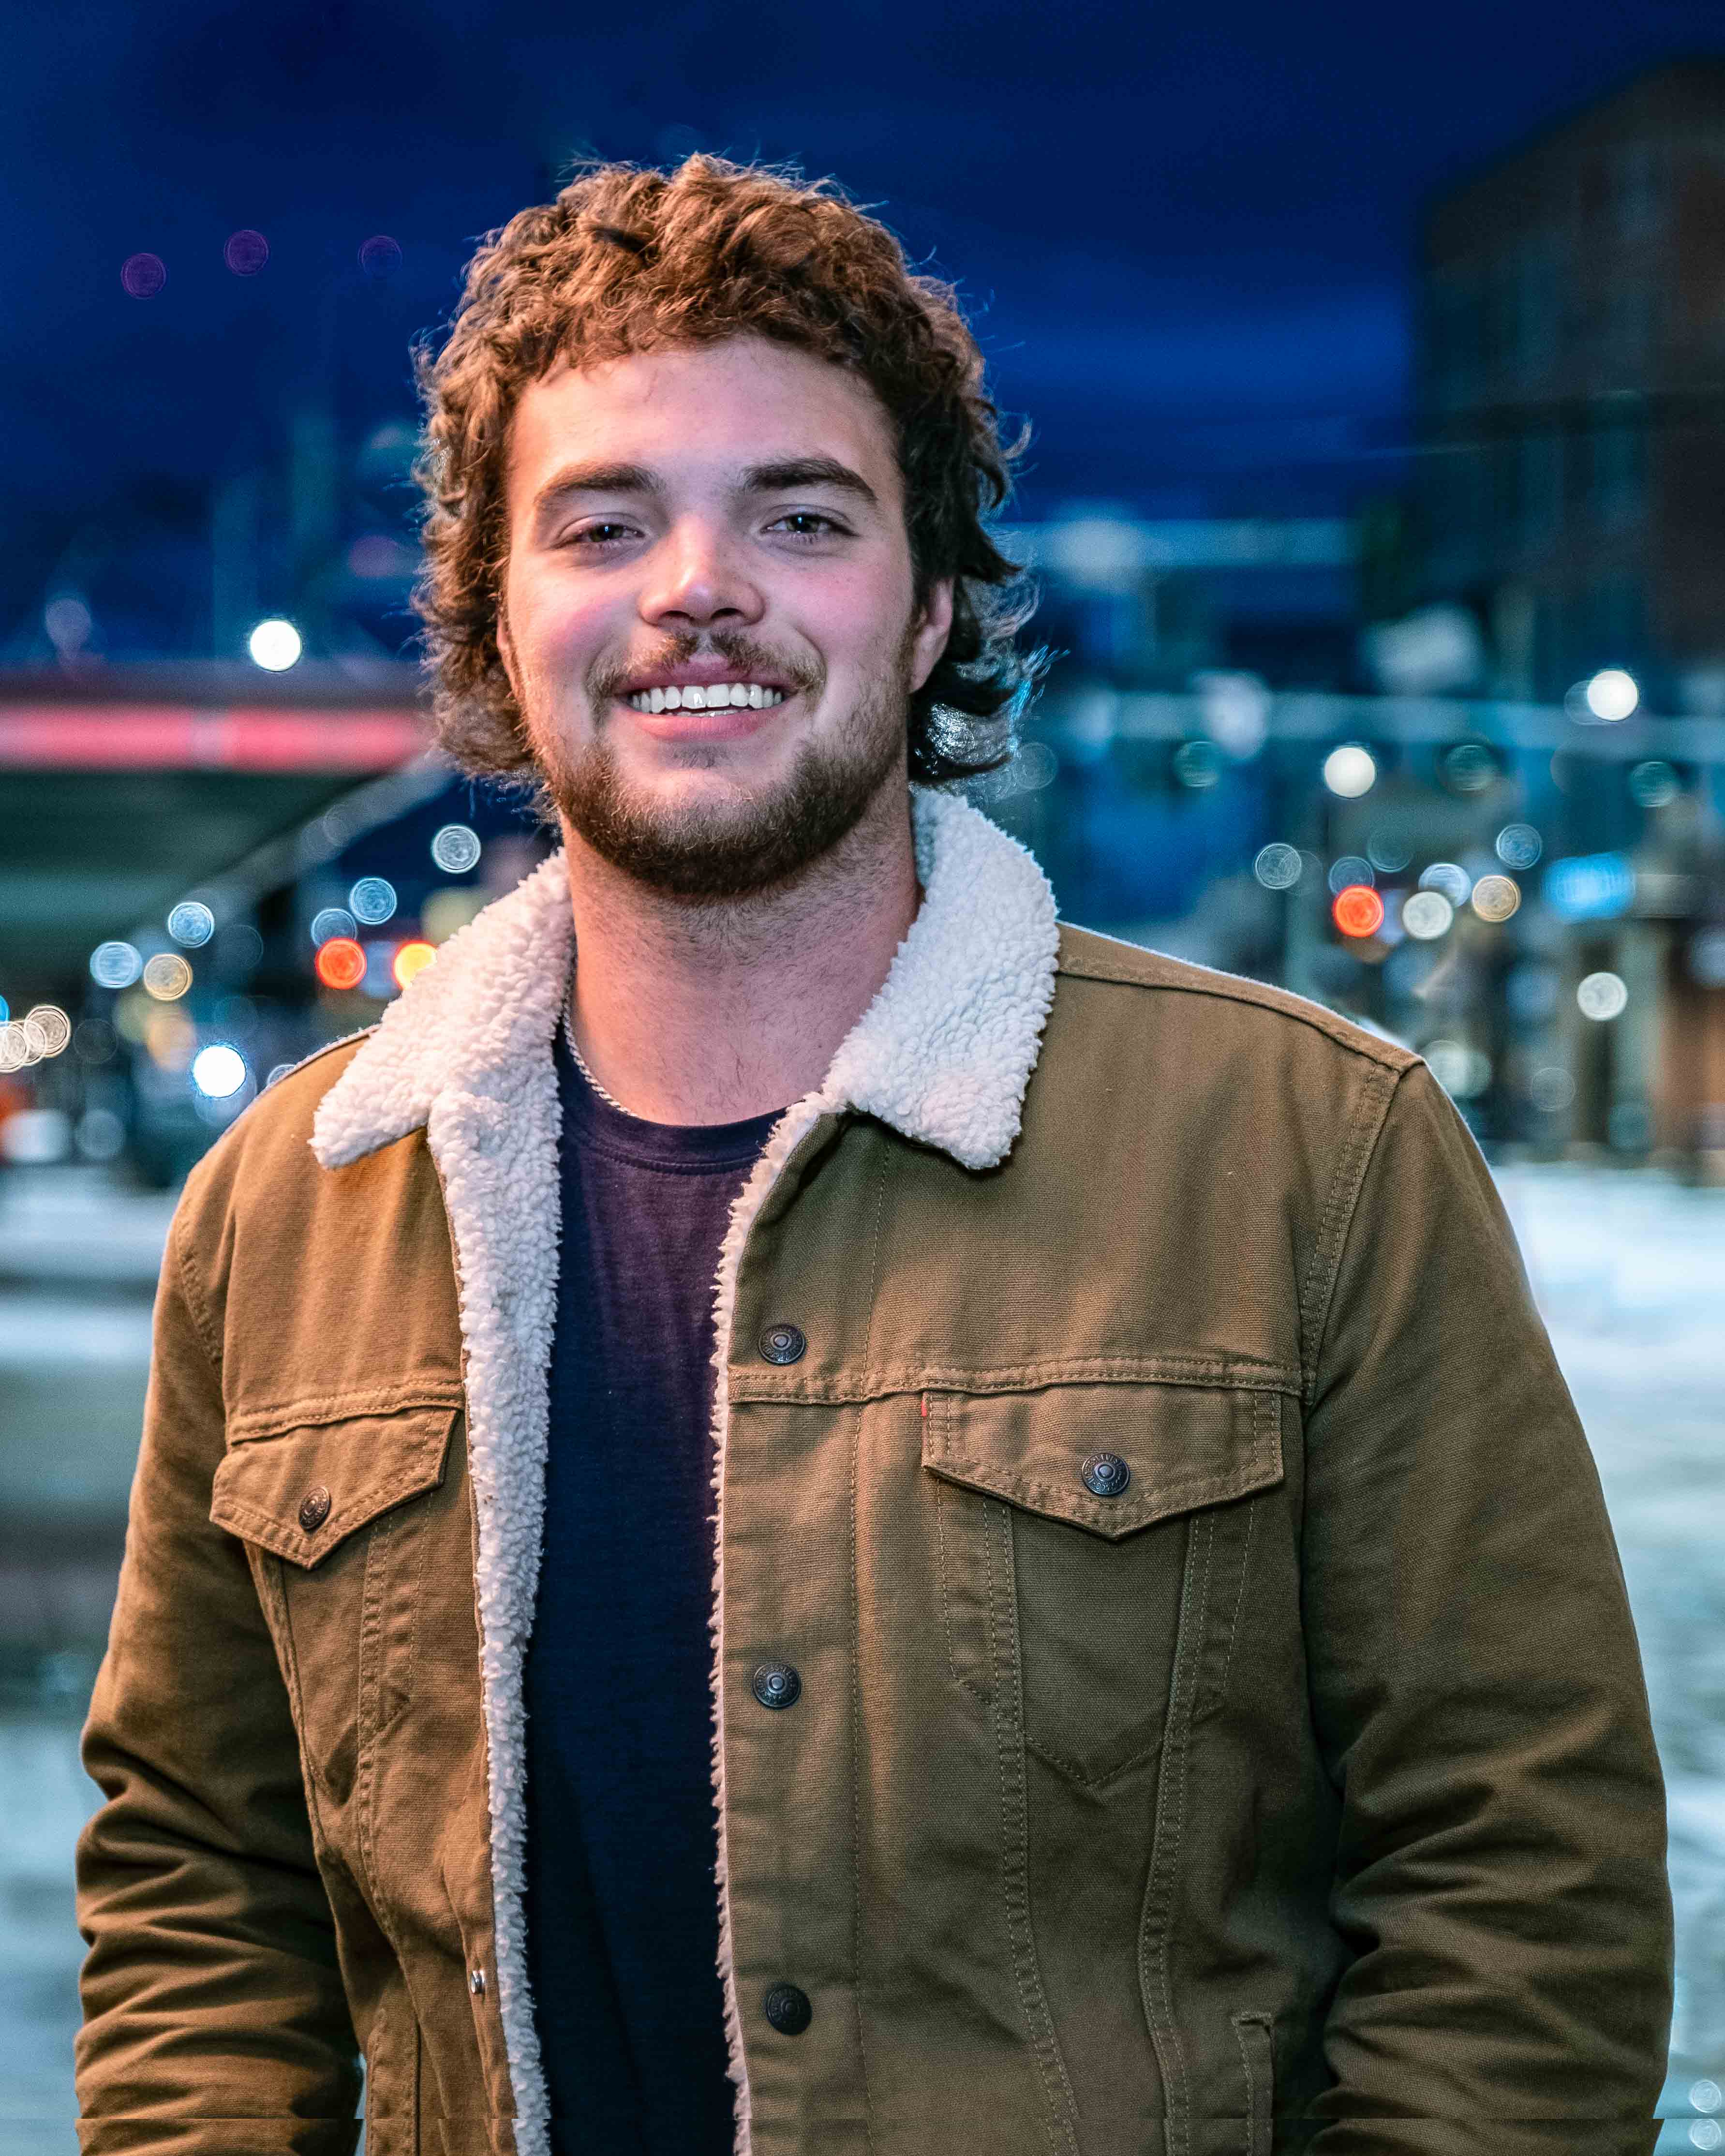
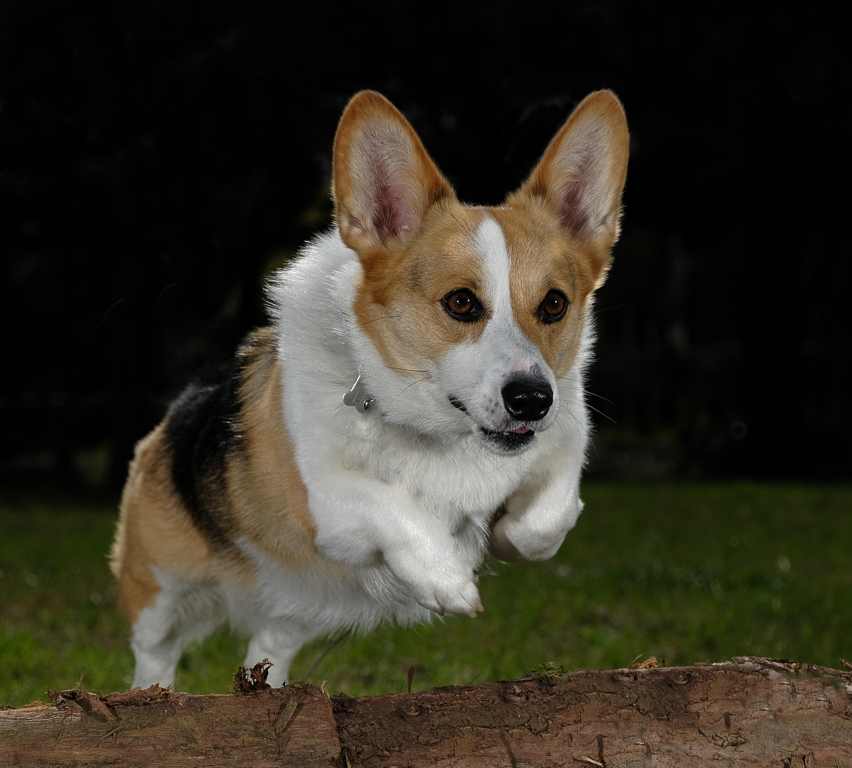
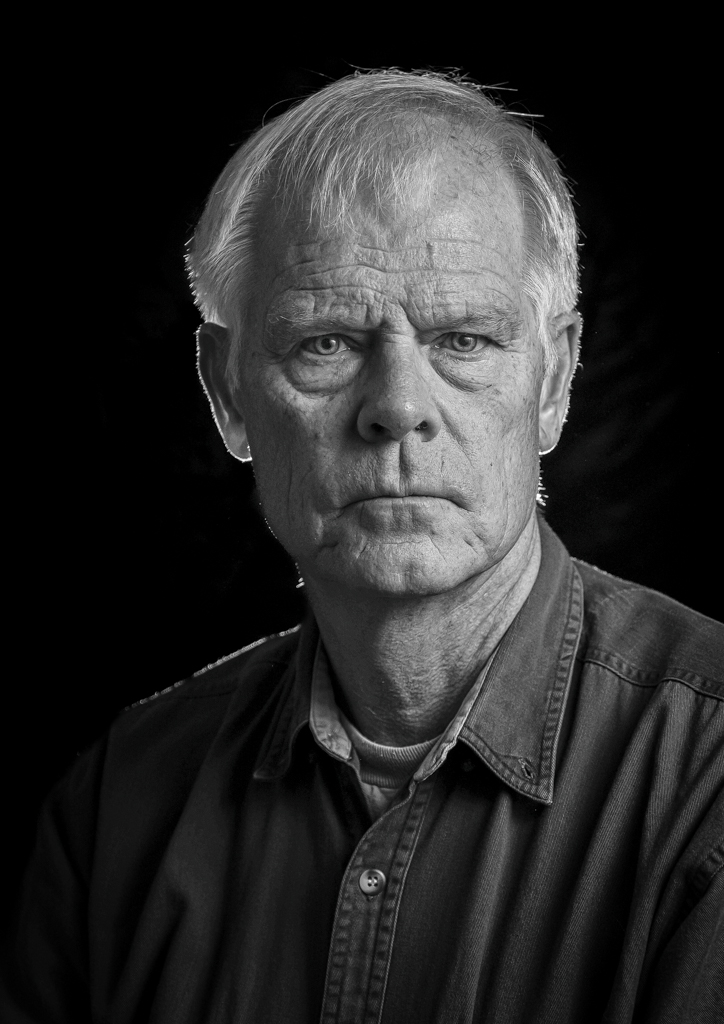
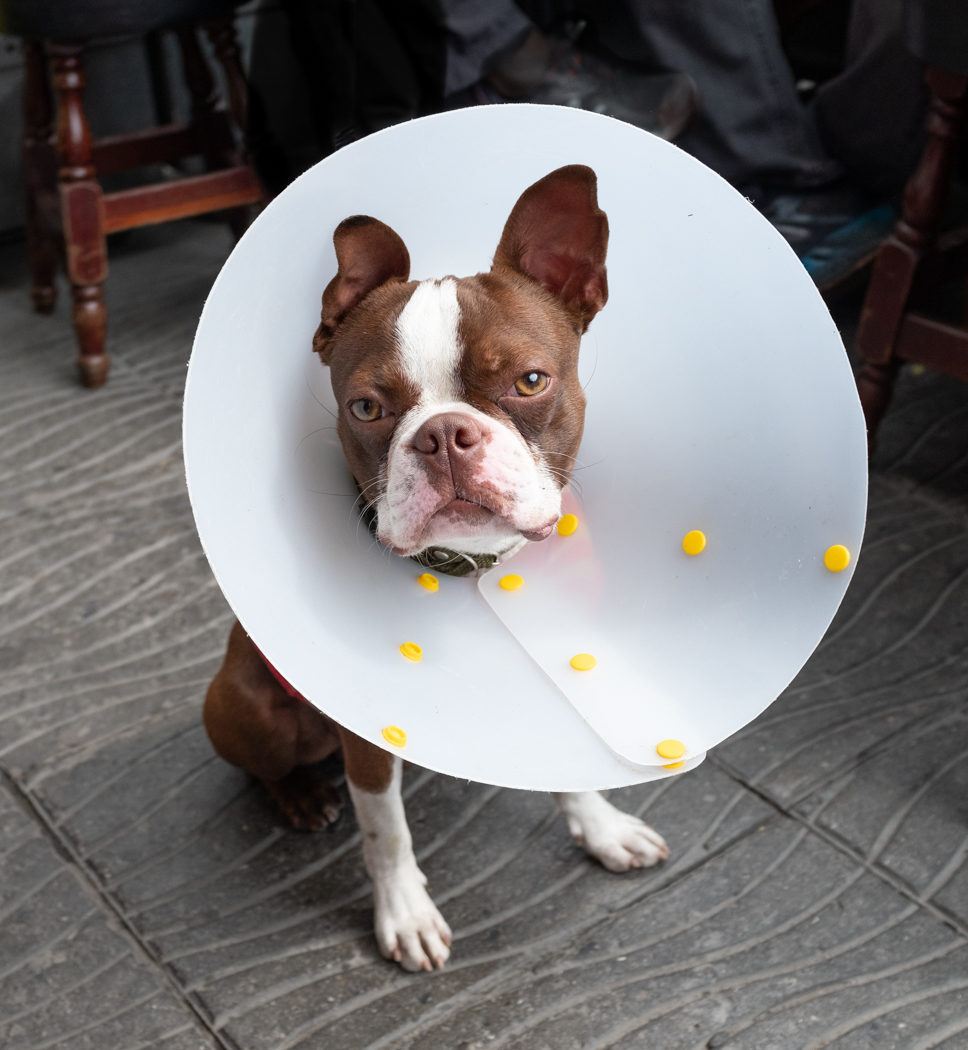
Thank you Ma'am. I wish I'd been able to get a more pleasing, natural background. Unfortunately the location just wasn't that photogenic though. You gotta work with what ya got. Right? |
Jan 8th |
| 60 |
Jan 23 |
Reply |
Very kind Anne. And, to make it worse, they had salted caramel at the bottom too! Ha! ;)
Actually, in hindsight, I wish that I had heated one of these up, broken it in half, and shot the filling oozing out. But, I just didn't think of it. Bad on me. |
Jan 8th |
| 60 |
Jan 23 |
Reply |
Title ideas? Frankly, what you have is just fine IMHO. I don't put much effort into titles personally, since I'm pretty sure that (in PSA at least) images get judged without titles, meaning that you can't/shouldn't rely on them much to convey anything. |
Jan 7th |
| 60 |
Jan 23 |
Reply |
Filter? Not to my knowledge. I think you'd just have to use the normal object removal tools in Ps... or LrC, or whatever. LrC does have a "visualize spots" feature which I think really does work, in the Spot Healing tool. |
Jan 5th |
| 60 |
Jan 23 |
Reply |
Better? Well, different, and sometimes, Yes. So, it's important to understand what a RAW file is. It's the simple, signal data coming off the camera's sensor, uncompressed, and not even viewable. In order to turn that info into a viewable picture, a program has to read it and turn it into an image that's viewable (which is a jpg). There's no noise reduction, and no sharpening, but they're the most complete set of information about what light hit the camera's sensor when you clicked the shutter release. I like to have that in case I get a real winner.
A jpeg is a compressed (meaning data is thrown away), manipulated, sharpened, and denoised interpretation (by the camera's processor, based on the manufacturer's formulas) of the RAW data. JPGs let you denoise, sharpen, enhance shadows and hi lights (or lessen them), amplify colors, manage mid-tones, and some very sophisticated tricks to simulate old film styles...ALL IN THE CAMERA! They give you a much better chance of getting a winning image, right out of the camera, but you do lose data.
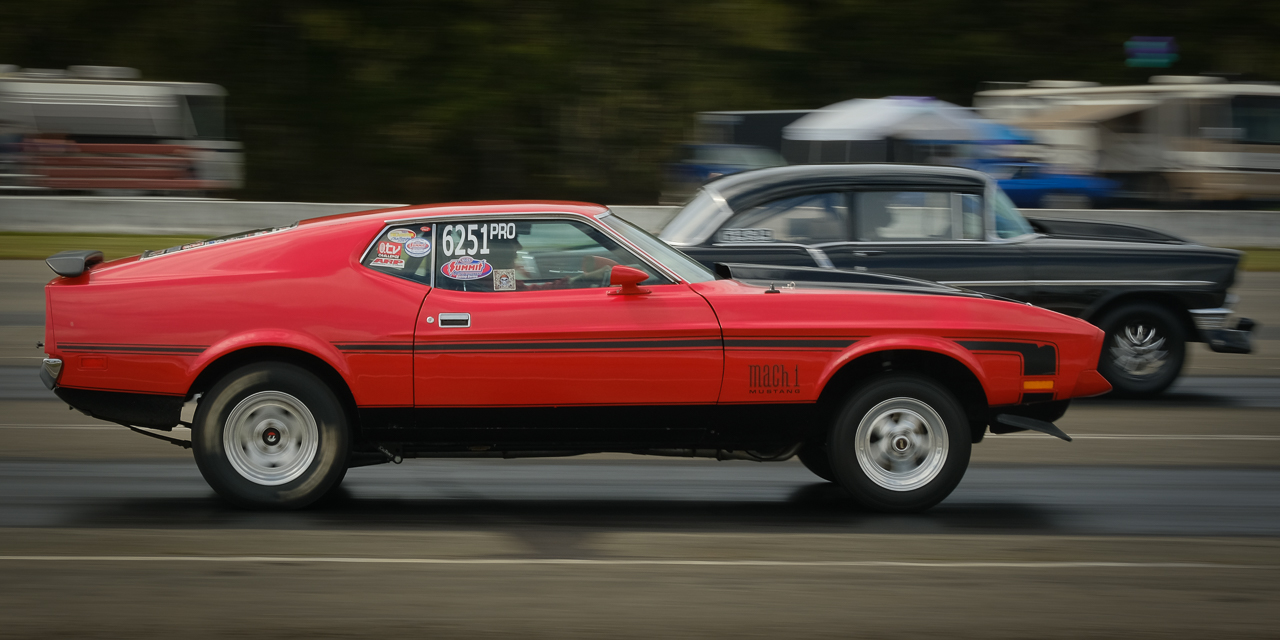
So, I get the best of both worlds by shooting in RAW + JPG. I manage that based on my subject. If I'm shooting race cars, I use Astia. If I'm shooting street photography Acros. If I'm shooting landscape, maybe Pro Neg Hi. And, each of the film simulations let you tweak certain aspects of them.
Now, if you want to try this without switching your file format setting, when you import to LrC, you can always just try messing with the Profile Browser, in LrC (Develop Module, in the basic panel, looks like four squares). If you click in there, and go to Camera Matching, you'll see the same film simulations as your Fuji camera. Thing is, those are Adobe's interpretations of Fujifilm RAW to JPG algorithms, and are not the same as using Fuji hardware to turn Fuji RAW files to Fuji JPG files, in camera. But, you can try it.
And with regard to managing all your settings and switchology, if I had $1 for every time I took a shot with an exposure comp setting from the previous scene, I'd be a rich man. You MUST develop a method for going over everything prior to shooting, in order to catch stuff. I have one that I call The Wipeout, and will explain it and why I call it The Wipeout, if you're interested. |
Jan 5th |
| 60 |
Jan 23 |
Reply |
Ah. 18mm. That's another secret to your success. Not only does that shorter focal length mean that you DoF was deeper (meaning things near and far would be in focus) but it's also a bit of insurance against camera shake (meaning that even hand holding an image at 1/160 can be super sharp). So, good work on both.
As for only using a fraction of your camera's features, I think you can call us all guilty...for multiple reasons:
-modern camera's are SO complex, now that they are really just hand-held computers
-manufacturers pack SO many features into cameras, because they're not really sure which feature set a given customer is going to want. If they built a different camera for the stills shooters, and another for sports shooters, and another for wildlife shooters, and another for video shooters, and another for folks uploading primarily to the web, and another for folks making prints, and another...you get the idea...development costs would never pay off.
The result is that no matter who you are, you only use a portion of the system's capabilities...and that's OK.
If you like B&W, you really should try Fuji's film simulations. They're kind of famous for them. Here's the thing though: they only pertain to jpg images. So, if you shoot ONLY RAW (RAF files on Fuji), they won't work. BUT, if you shoot RAW + JPG, and use a film simulation, then you get the RAW image (unmodified binary data coming off the sensor, which has to have a jpg preview created in order to view it), but you also get a JPG file which has the film simulation baked into it. That's what I do. So, for every image I take, I get a pretty plain looking, RAW image, and a much spicier Fuji JPG image. If the shot's no good, I delete them both. But, very frequently the JPG image (which you can make all sorts of in-camera modifications to) is far more appealing, even after significant post processing. If you'd like more info on how to start experimenting with this, let me know and I'll help you figure it out. |
Jan 5th |
| 60 |
Jan 23 |
Comment |
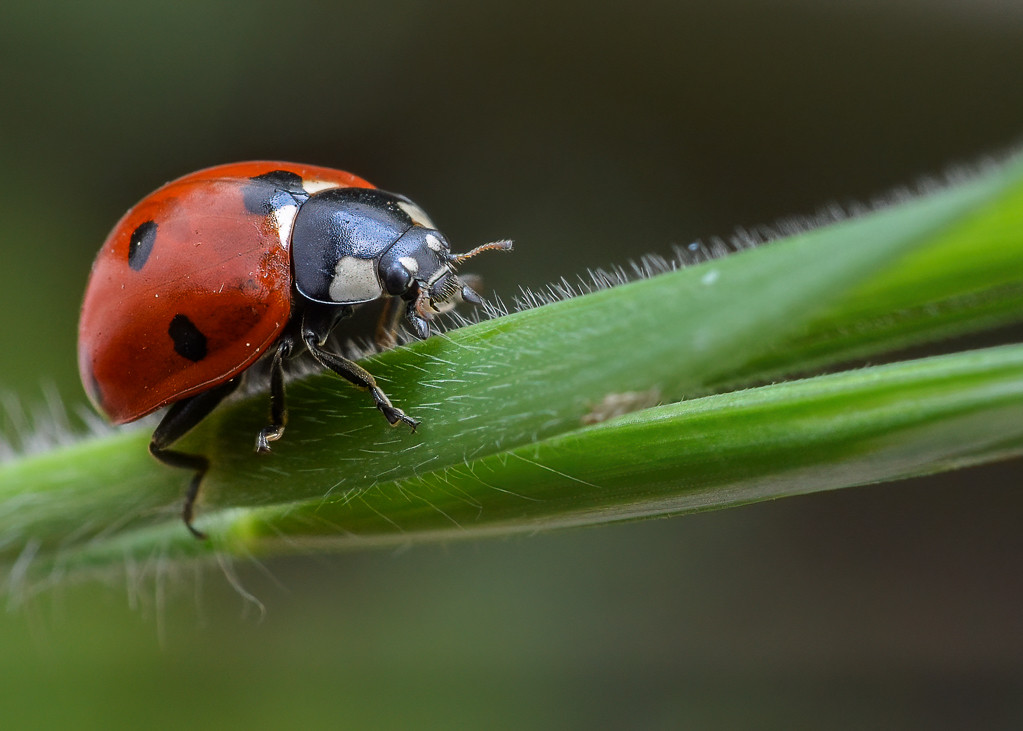
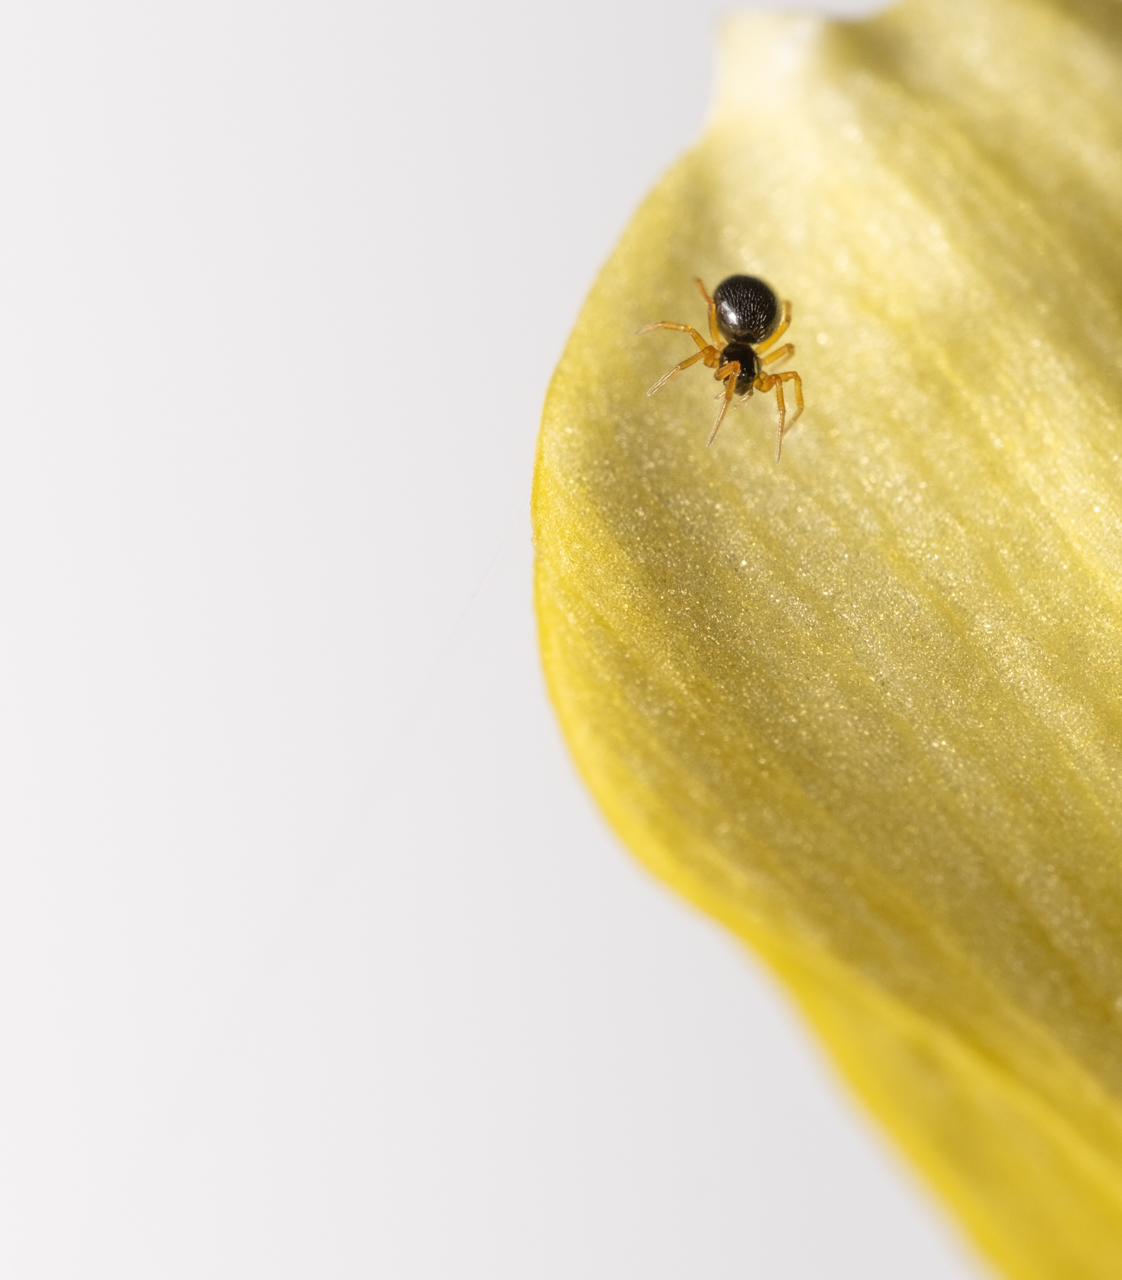
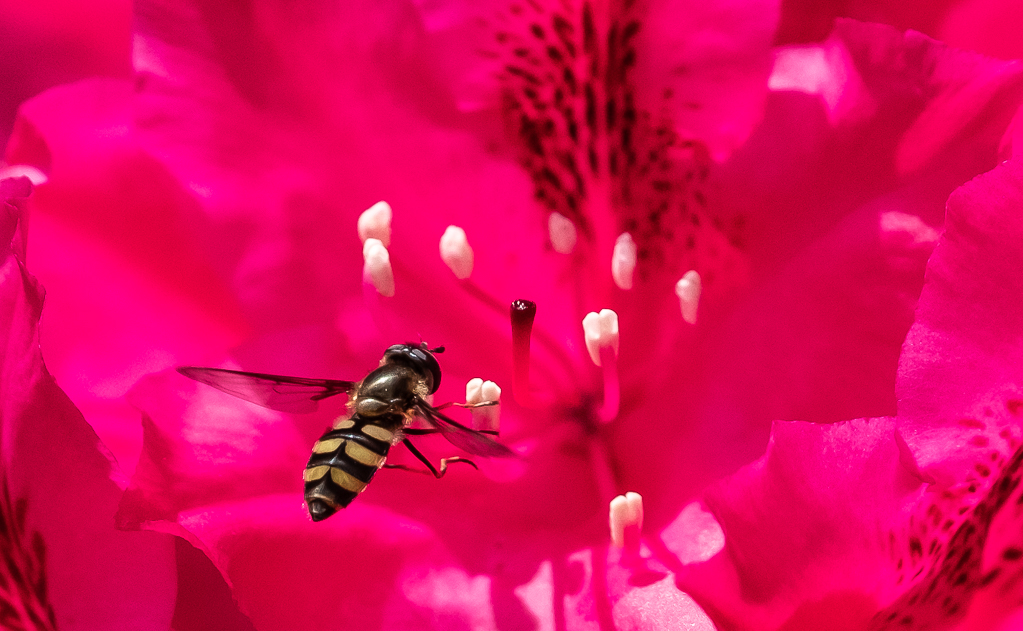
I think ladybird beetles are one of the most charismatic organisms you can possibly capture. Good work. Sharp lines, bright colors, friendly associations. There's no downside.
Are you into macro-in-the-field stuff? If you are, I highly recommend looking up Micael Widdel on Youtube. He has a bunch of great videos.
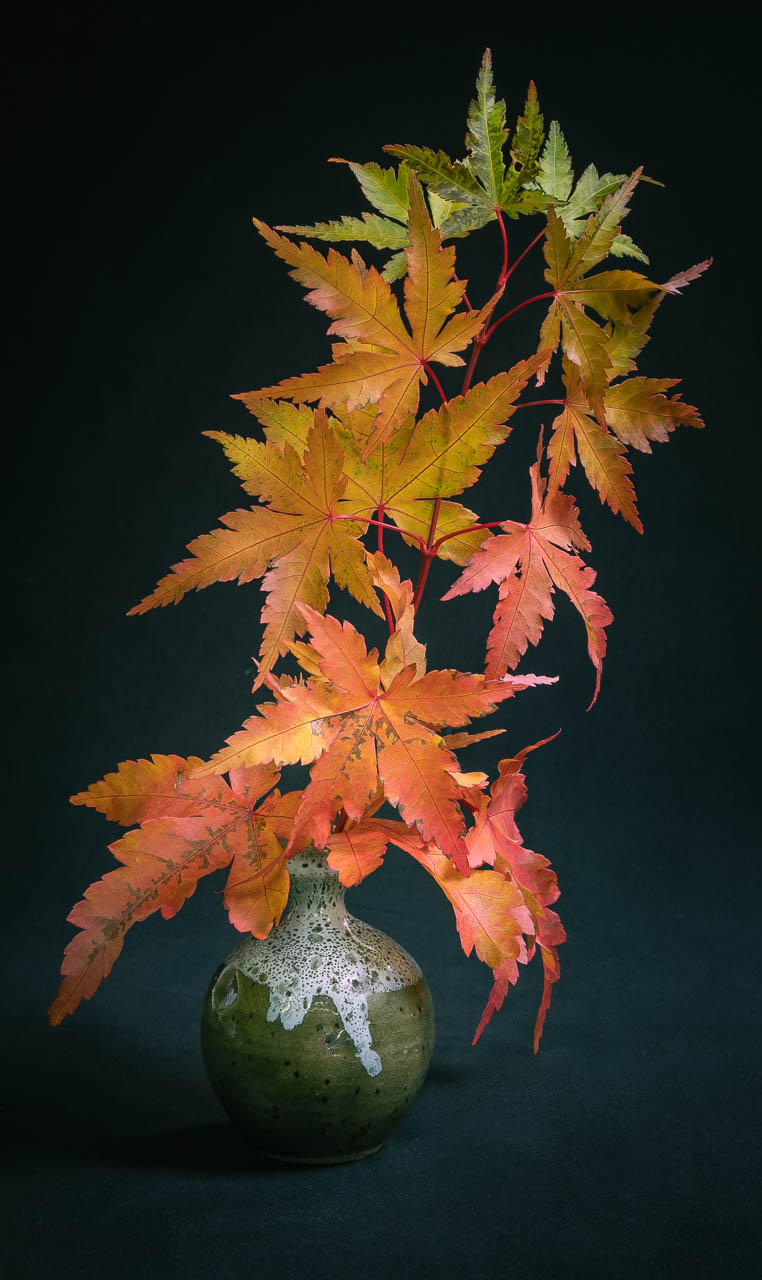
Good colors to my eye. I think the greenish tint to the glass creates a nice complement to the vibrant red of the beetle. Sharp (which is a real accomplishment given the razor thin DoF associated with very close subjects. Good aspect of the bug too. Way too often in nature shots we look at the rear aspect of the animal, which I think significantly detracts from the impact. I think the tiny water droplets on the glass help define the nature of the surface the bug is on, so I don't mind them at all (but would suggest removing the dirt specs).
I really wish there were more bug and less glass here. I mean, that's the point of actual macro (not just close up) photography. But, when using macro equipment (lenses that create an image on the sensor equal in size to the size of the actual subject) you start facing all sorts of other technical challenges. It only gets tougher in the field when everything is moving. Now, having said that, macro is one of my favorite genres. Perhaps my single, favorite photo is also of a ladybug. So, if you have any interest in it at all, I would heartily suggest a deep dive into it. Spring is coming and macro skills really come in handy then. |
Jan 5th |
| 60 |
Jan 23 |
Reply |
Yeah. There's nothing agile about studio work, or artificial lighting. But, OH the things you can do! (But not everything of course.) |
Jan 5th |
| 60 |
Jan 23 |
Reply |
Anne, you write: I'm not sure the sunburst works because of the sun reflected in the water." I don't get it. Can you explain this for me? |
Jan 5th |
| 60 |
Jan 23 |
Comment |
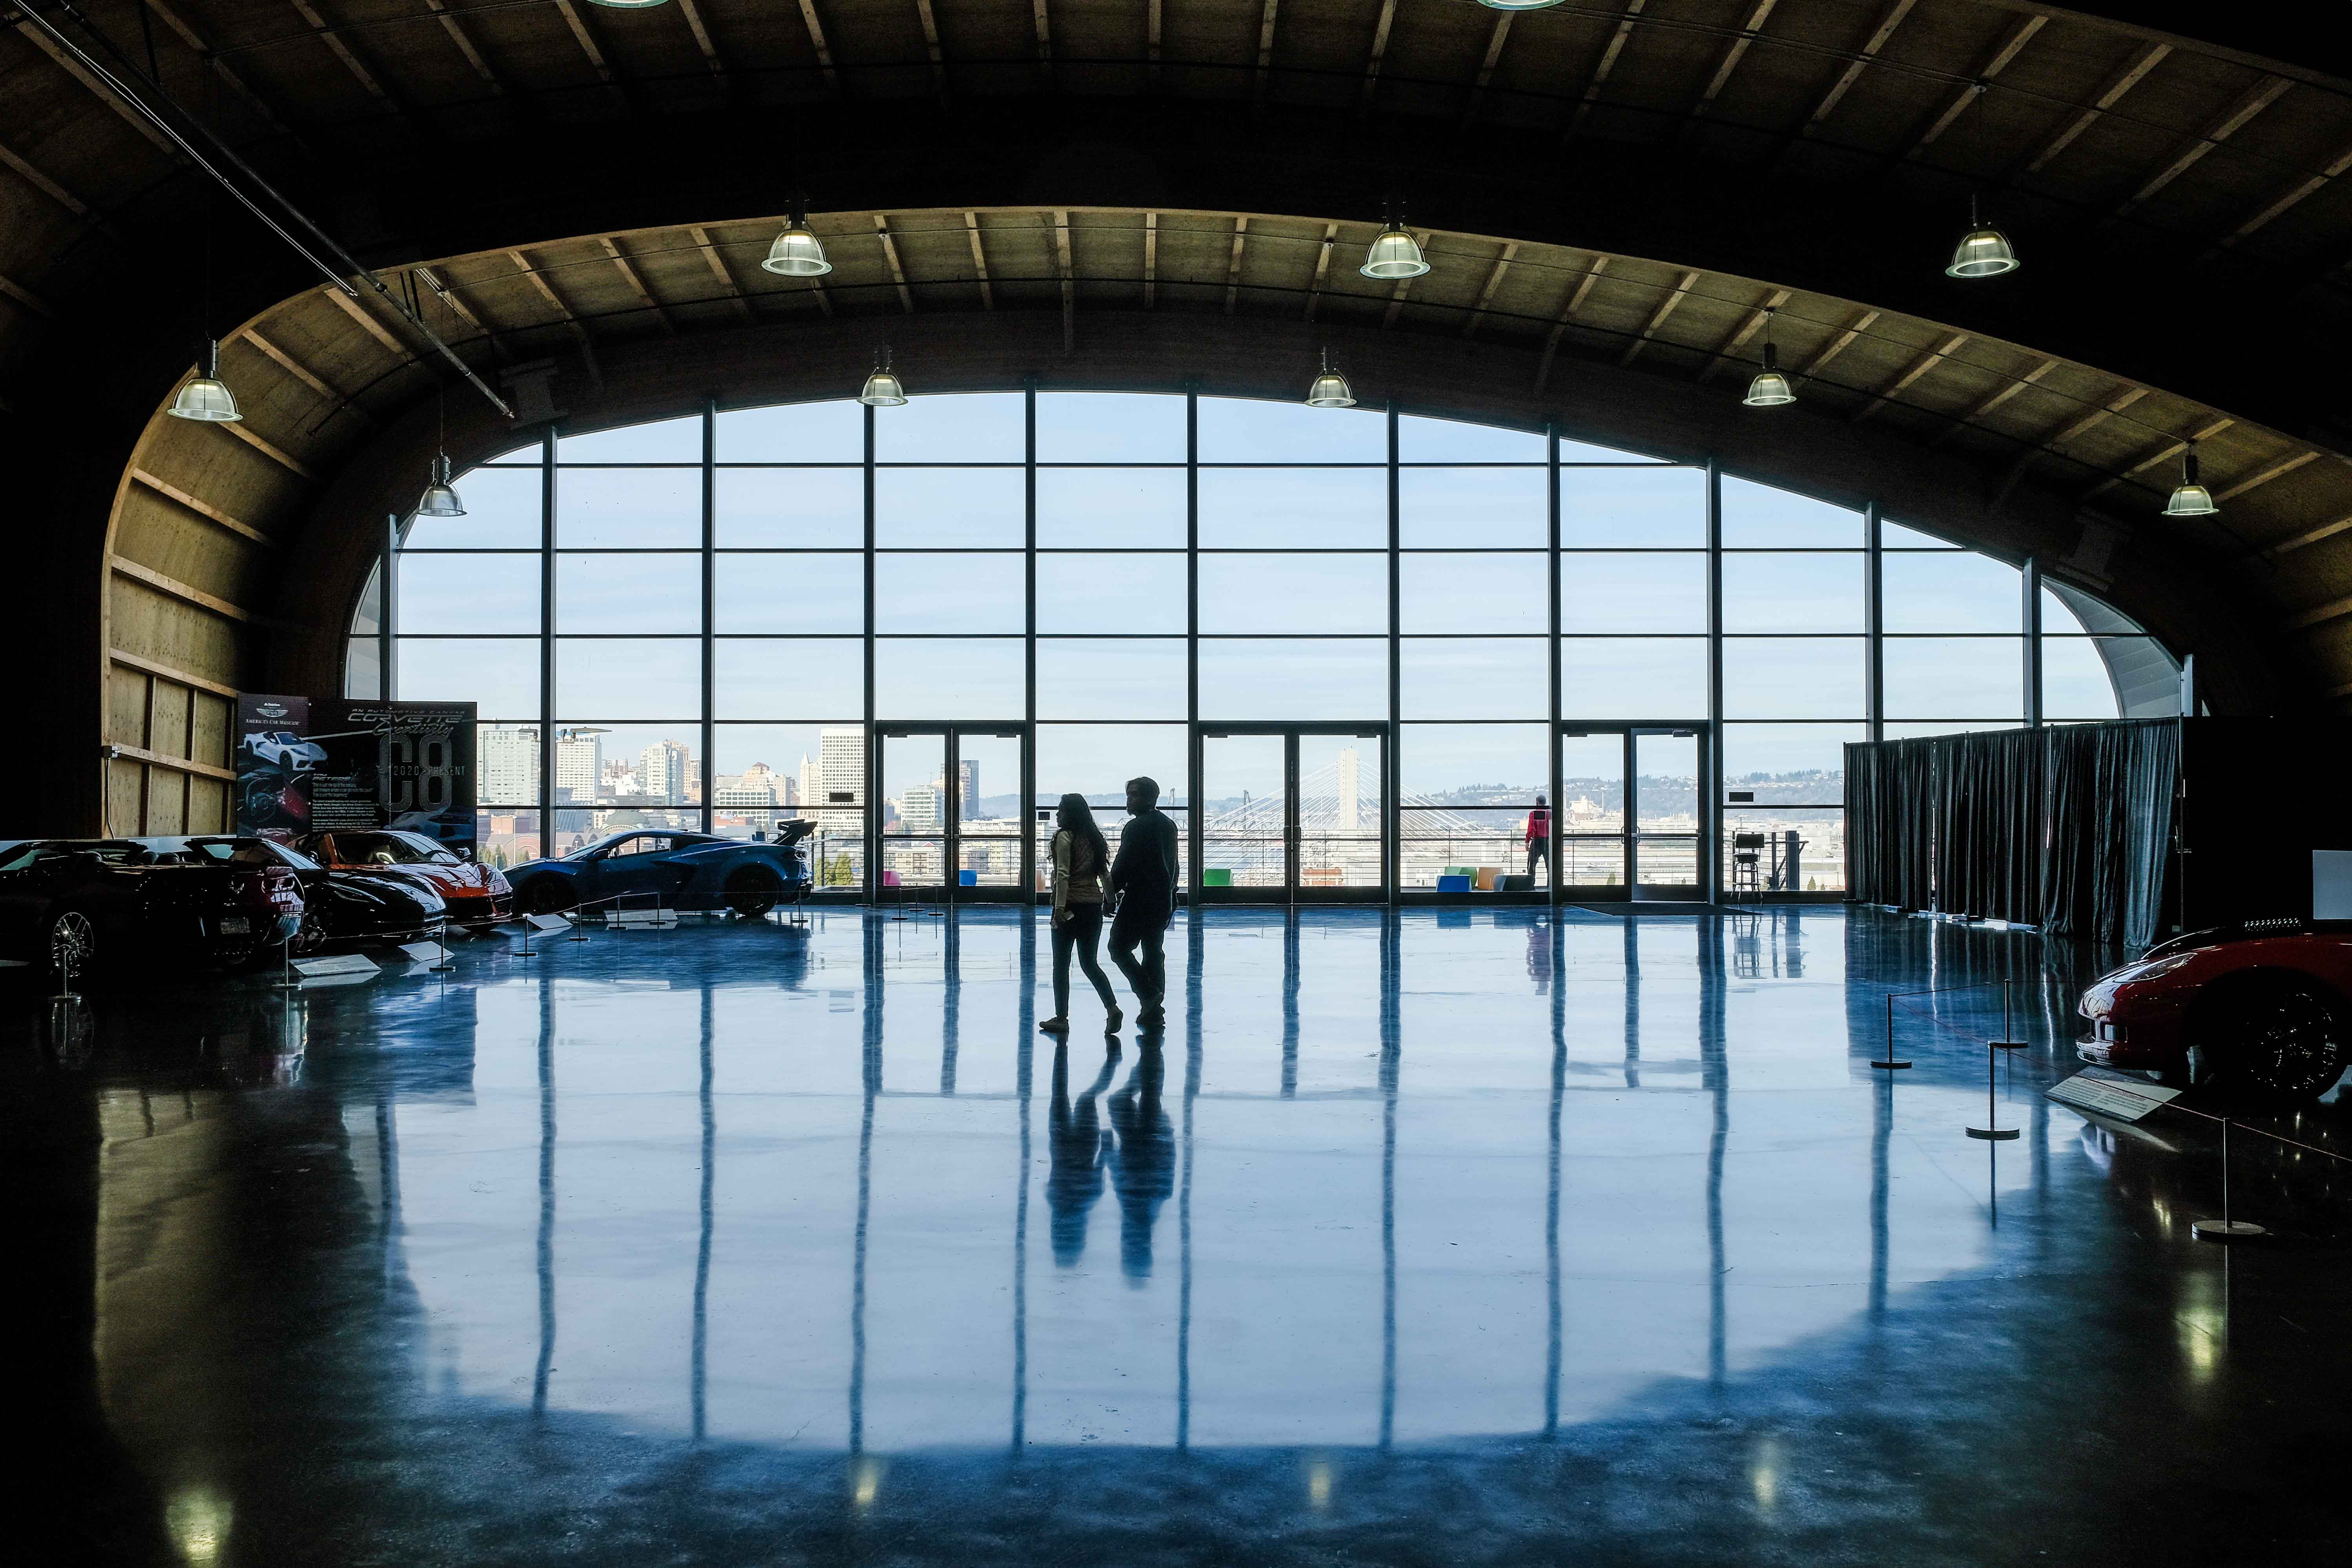
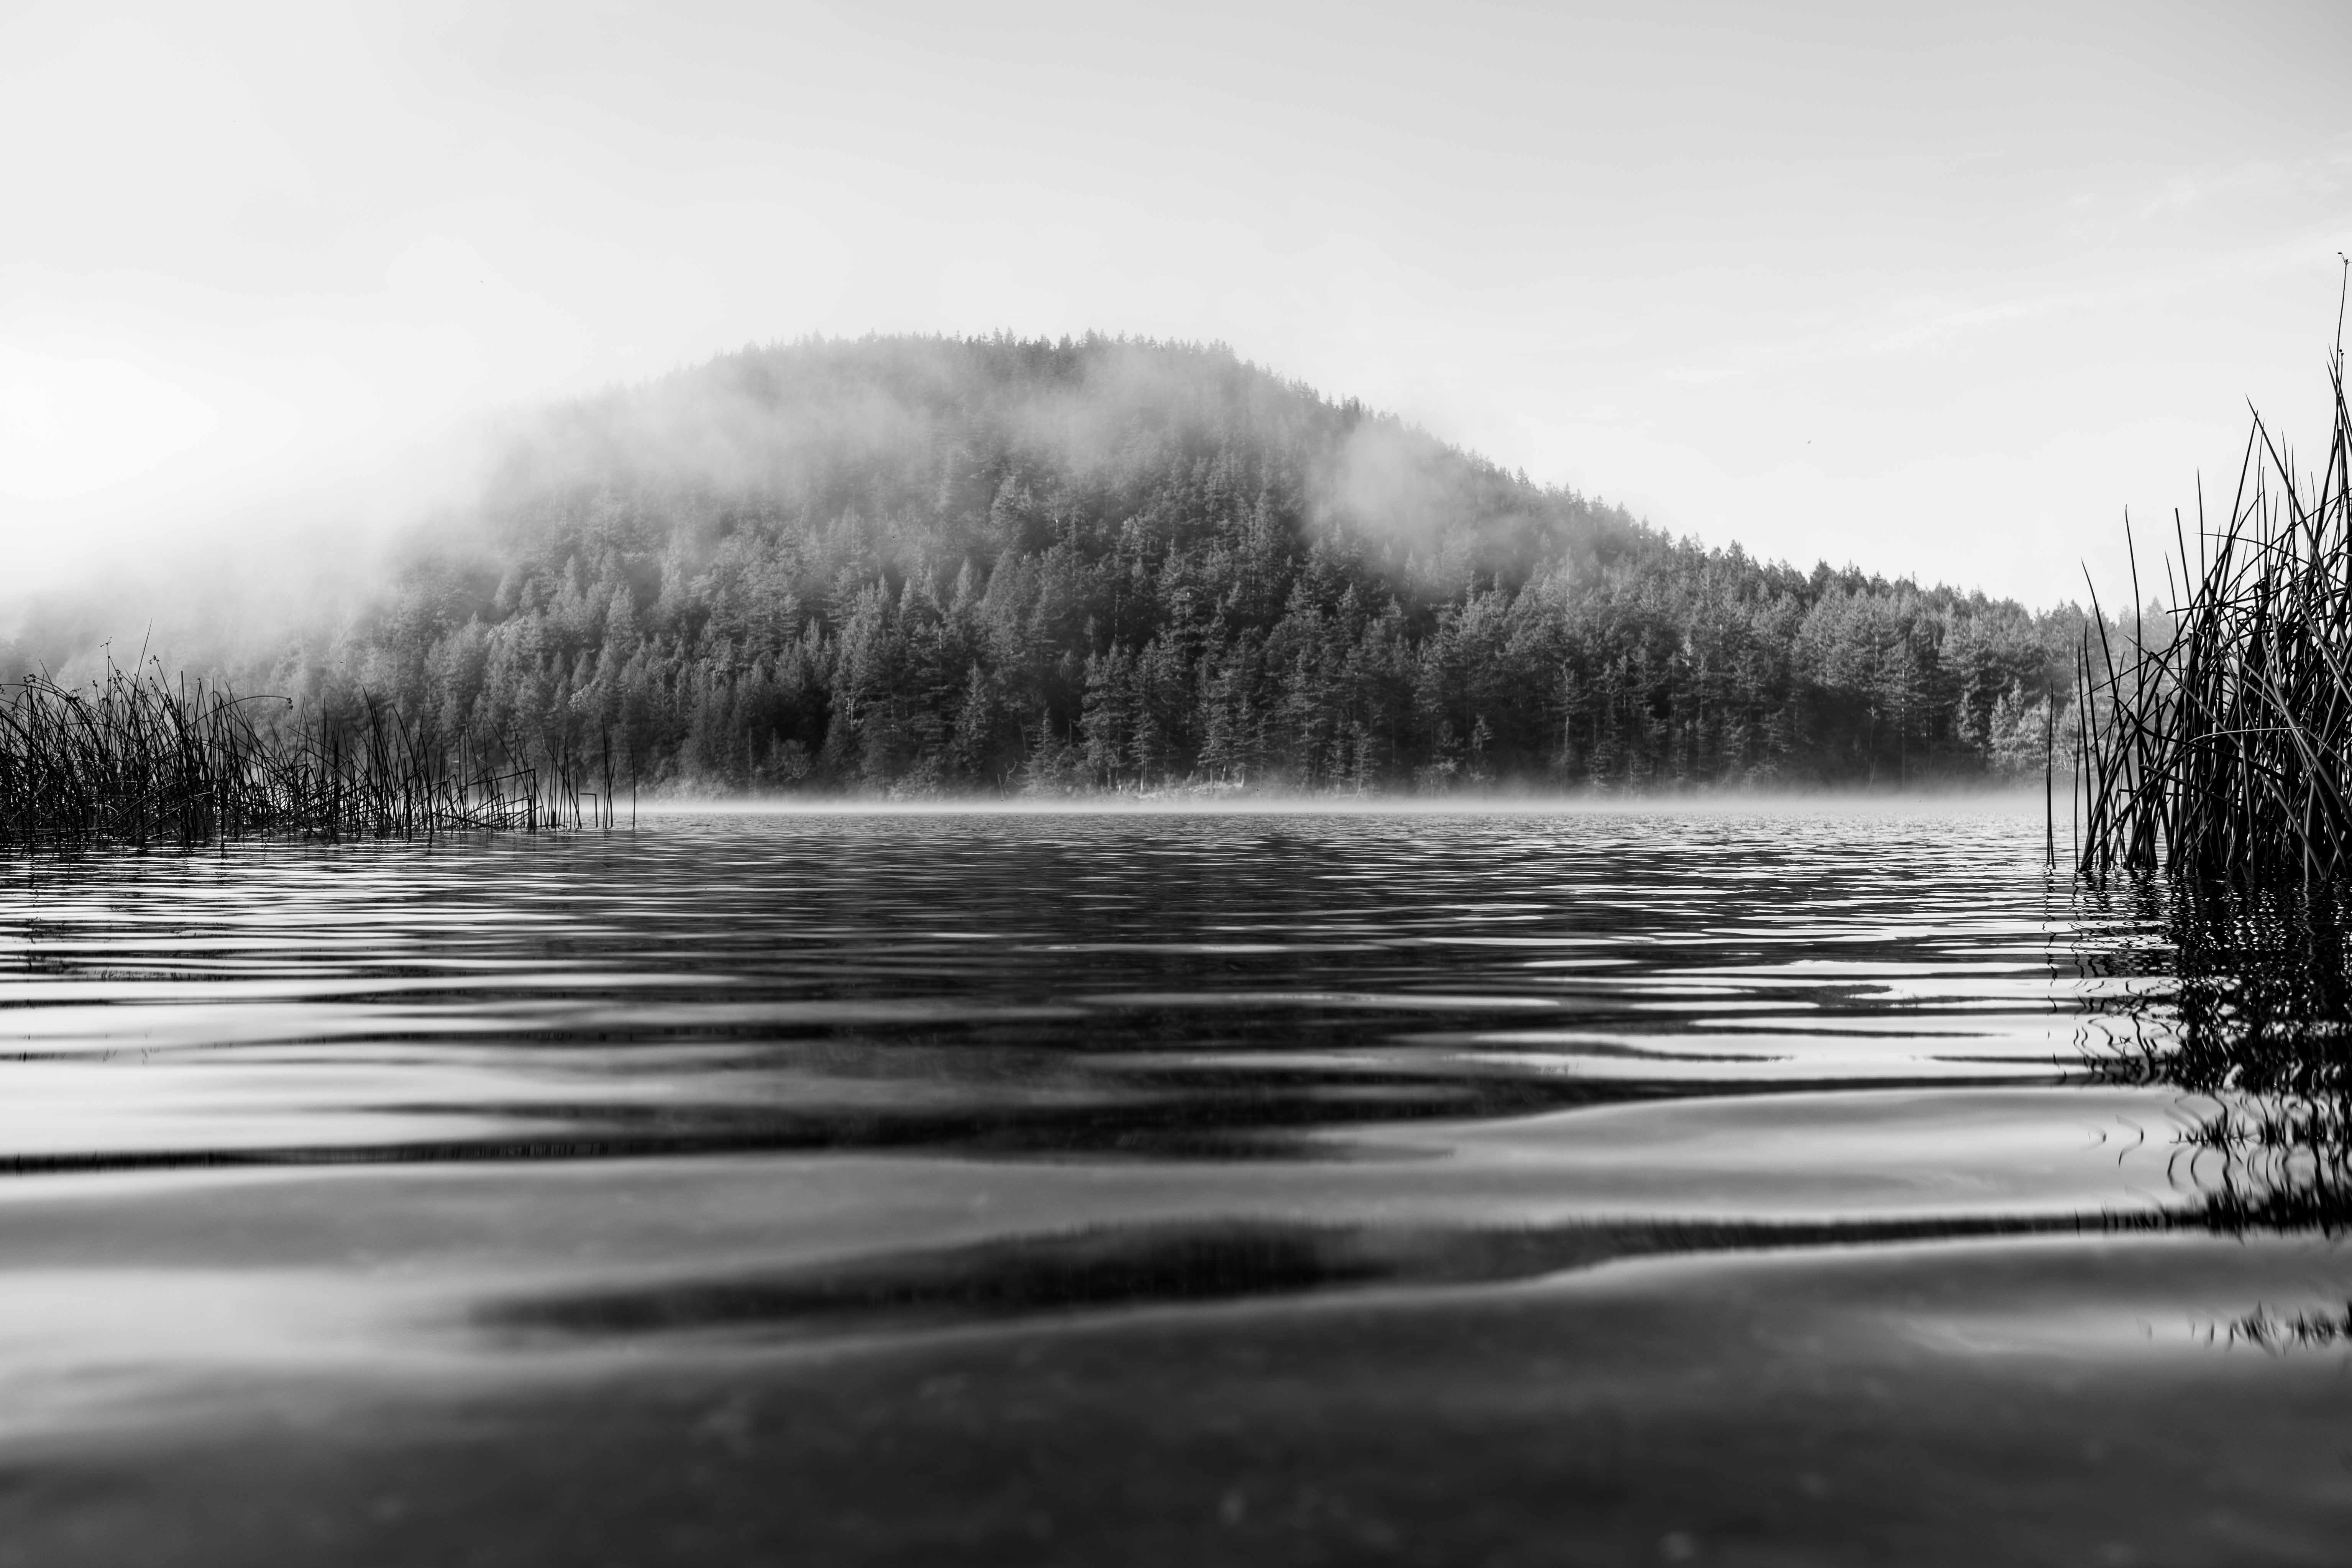
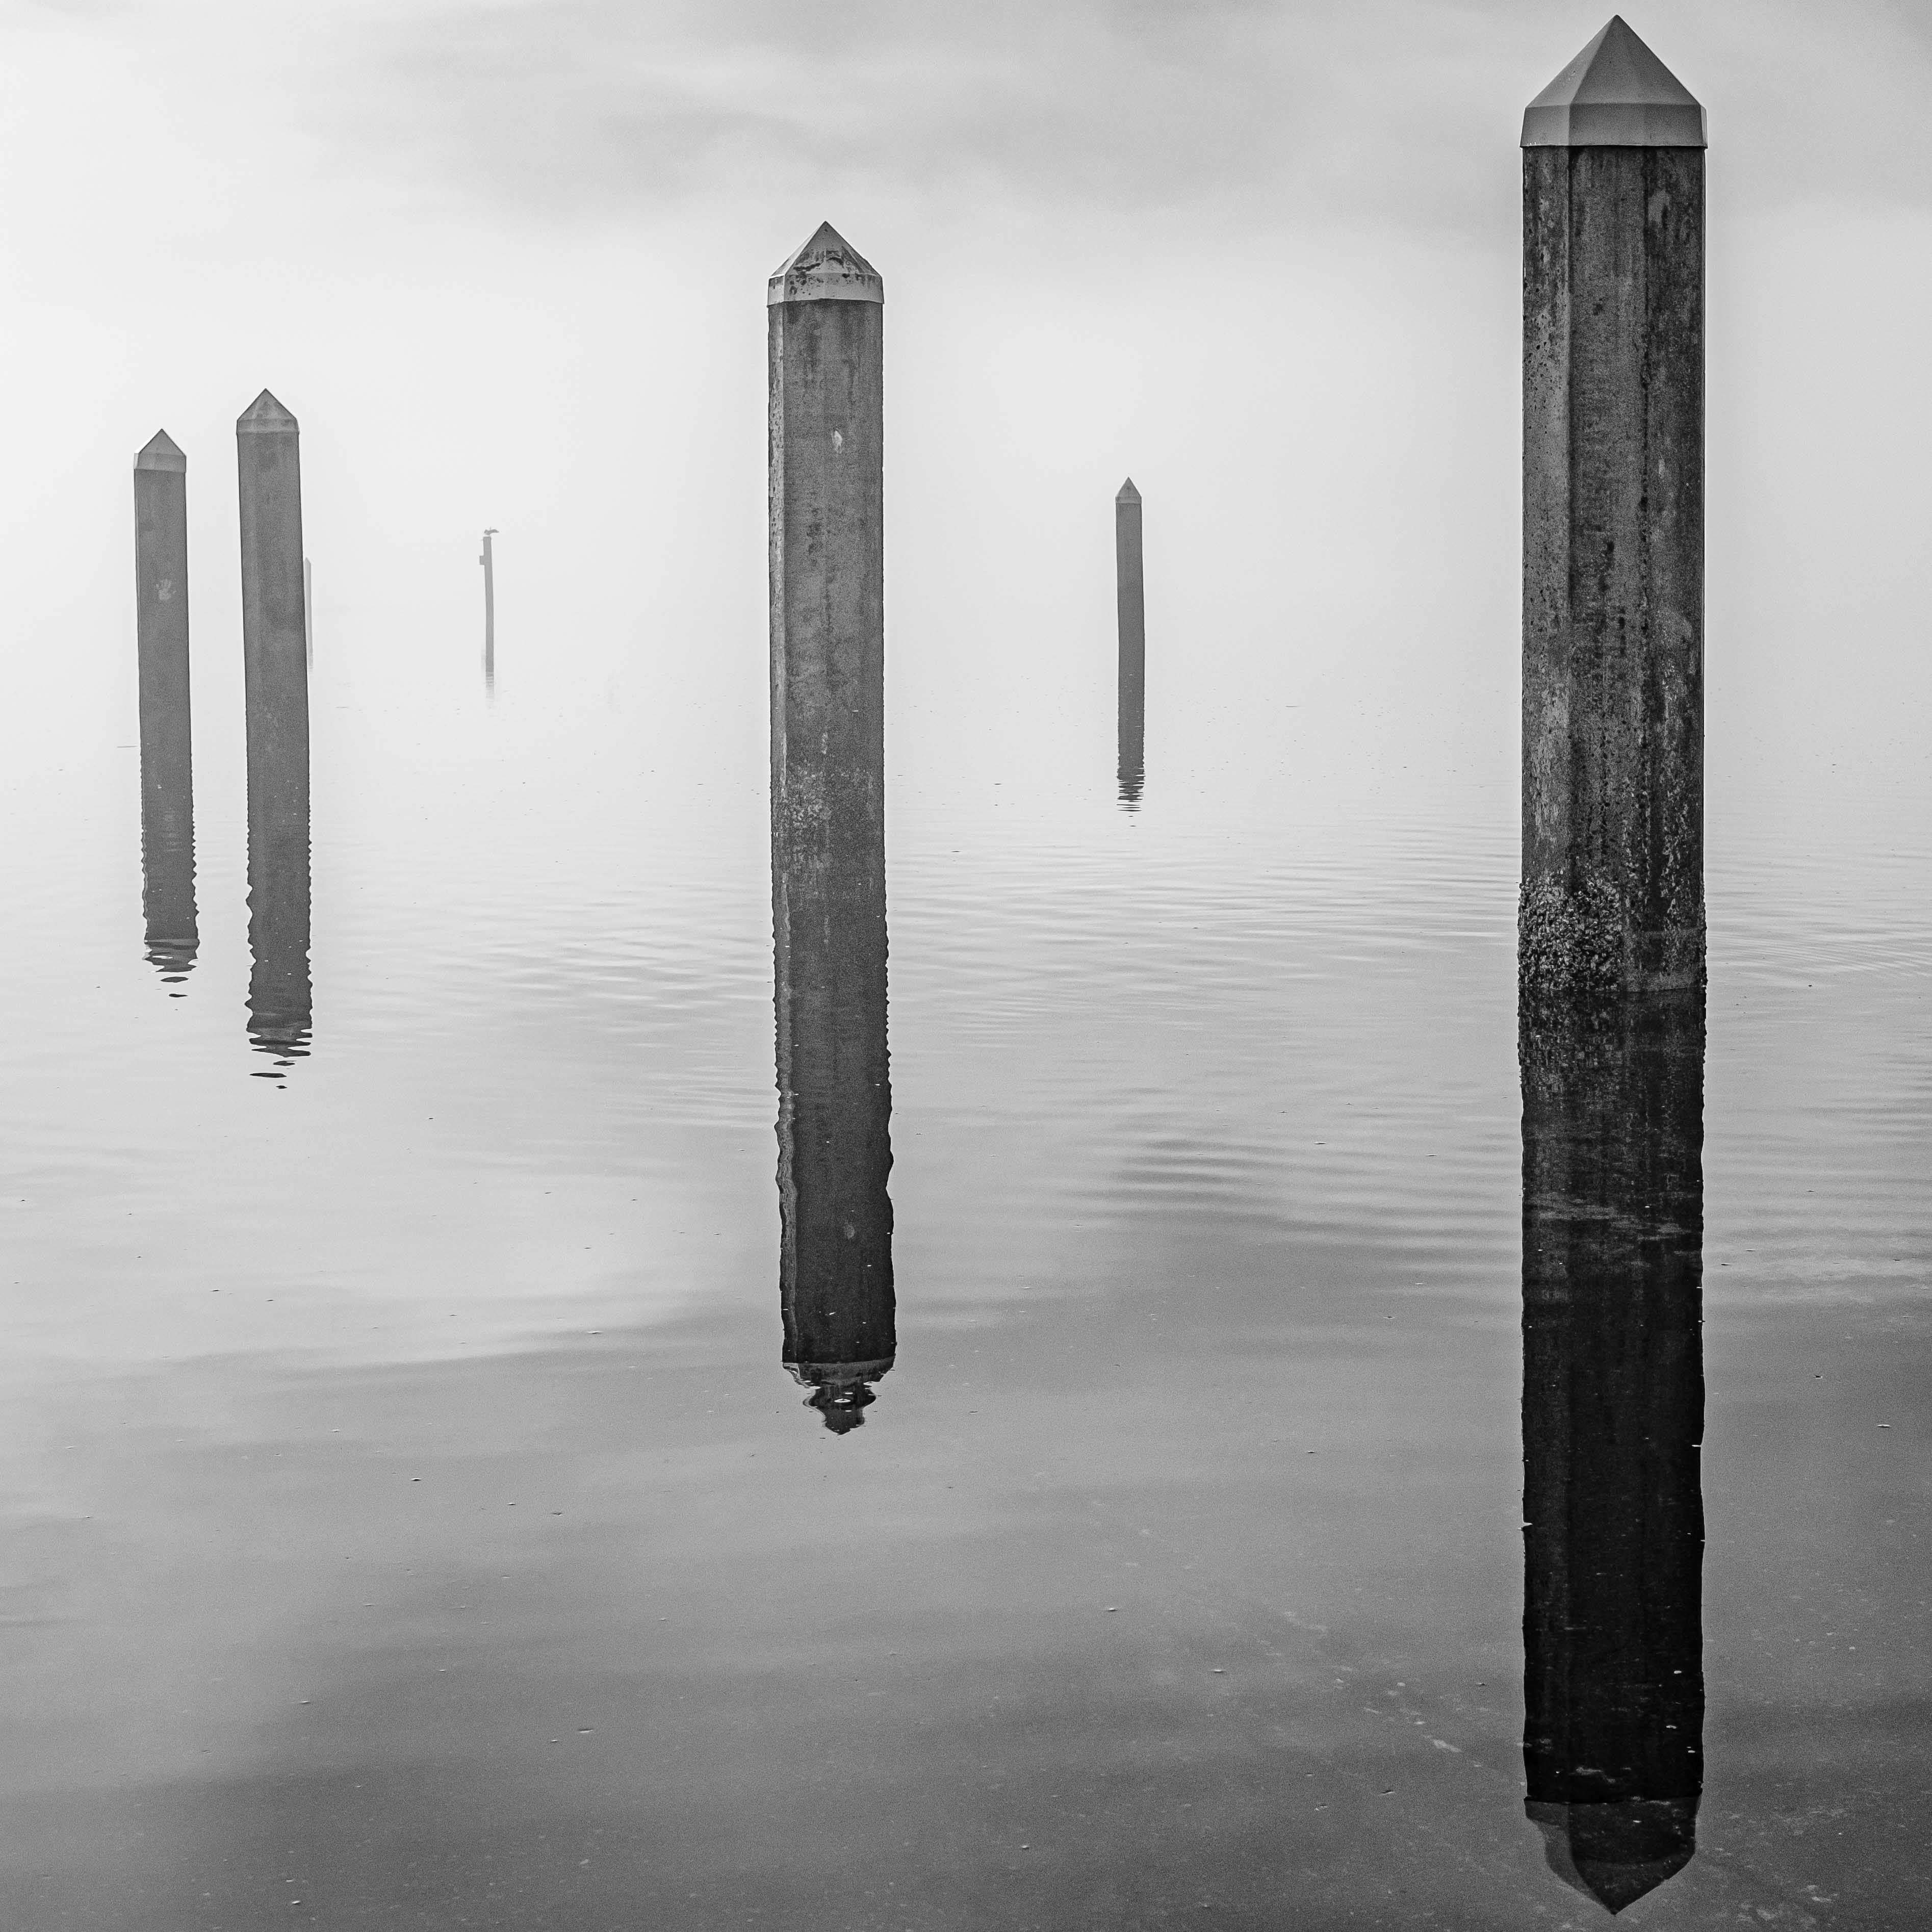
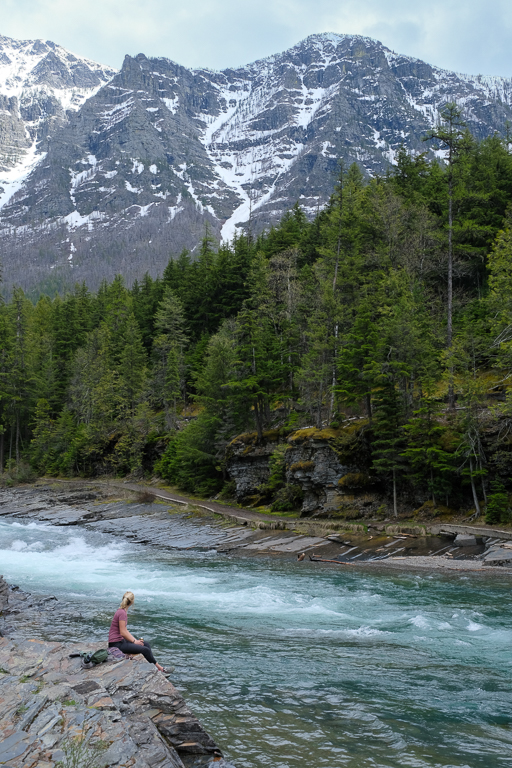
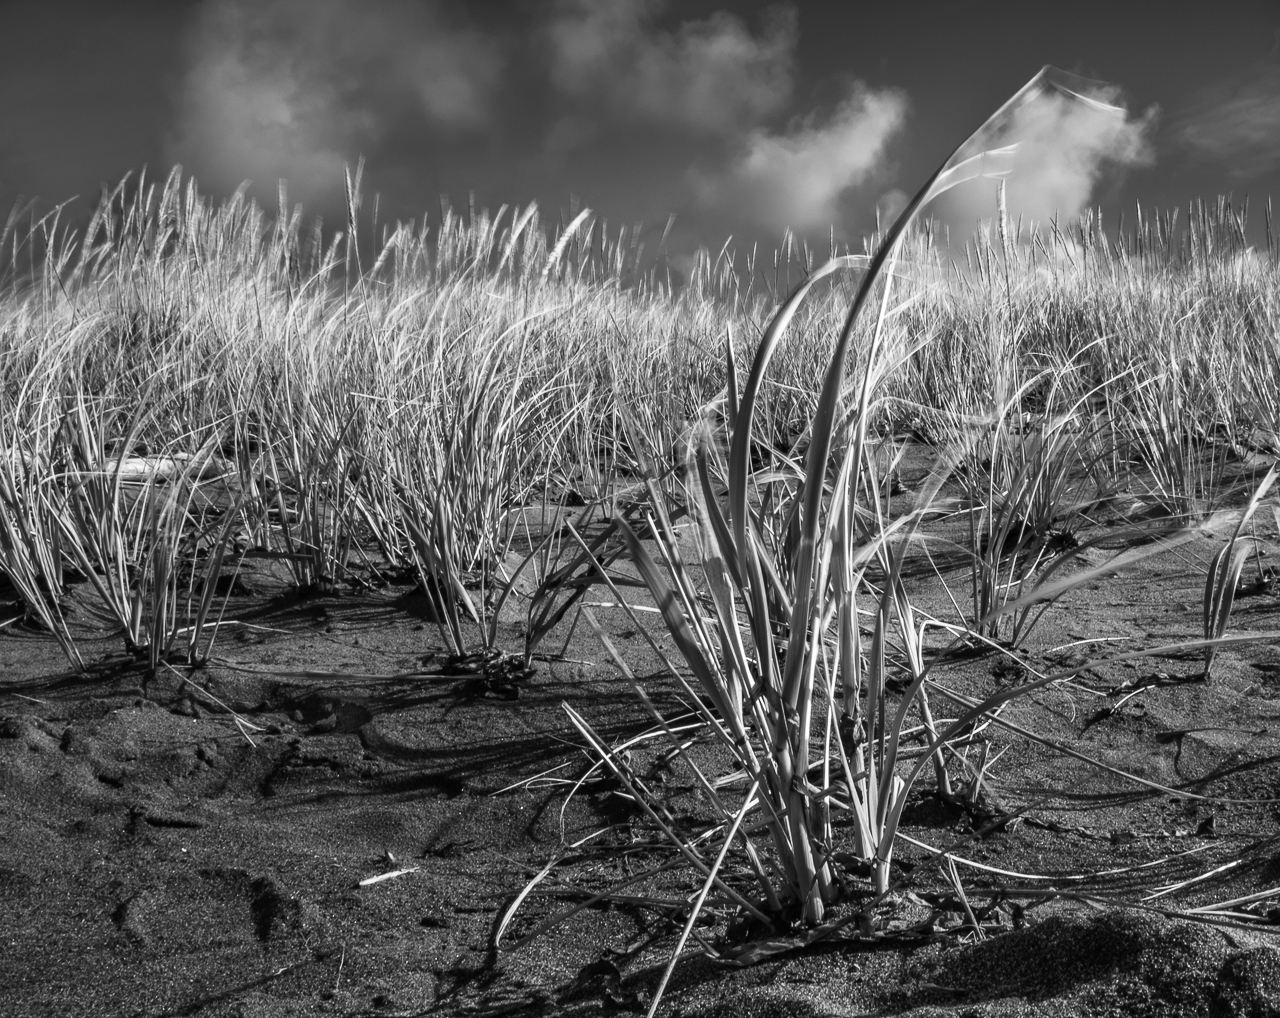
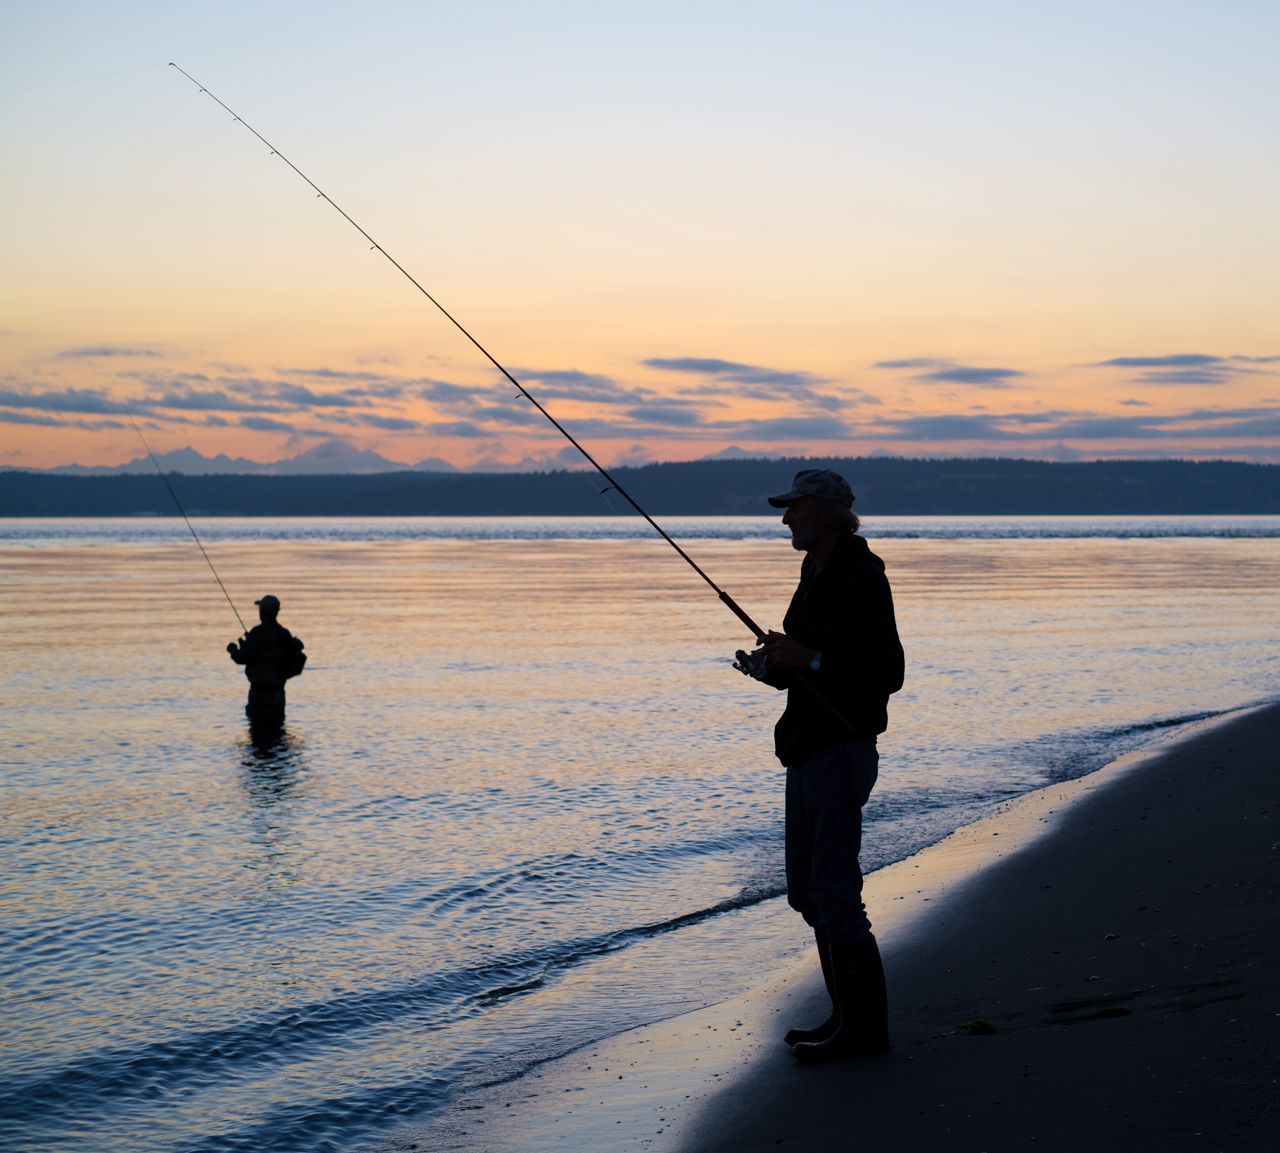
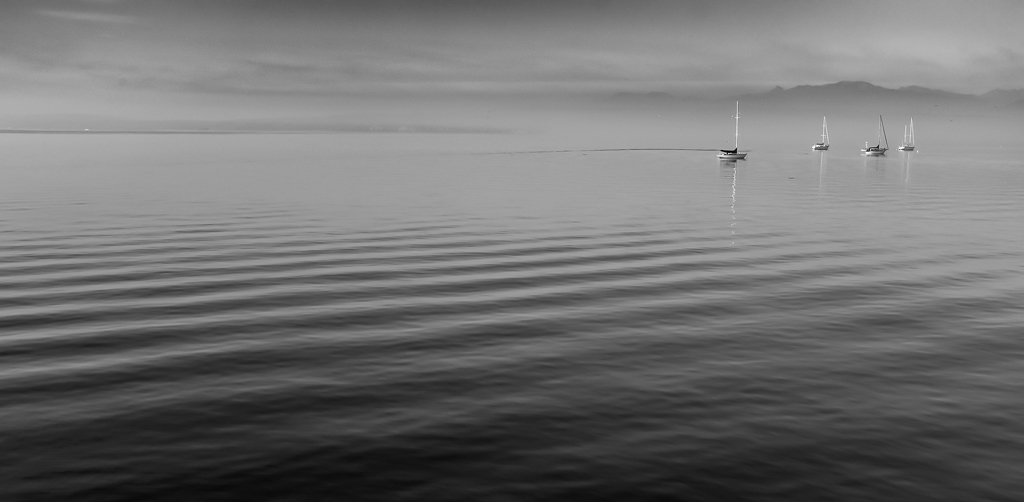
You had me at B&W. Good on you for giving it a shot. If you're not doing it already, I would HIGHLY recommend giving the Fujifilm film simulations a whirl, especially Acros, which is killer for B&W. Nearly as good (IMHO) are the LrC B&W Development Presets (left hand panel) which I frequently use to give myself a head start when I've decided to turn a color image into B&W (I gravitate toward Punch a lot).
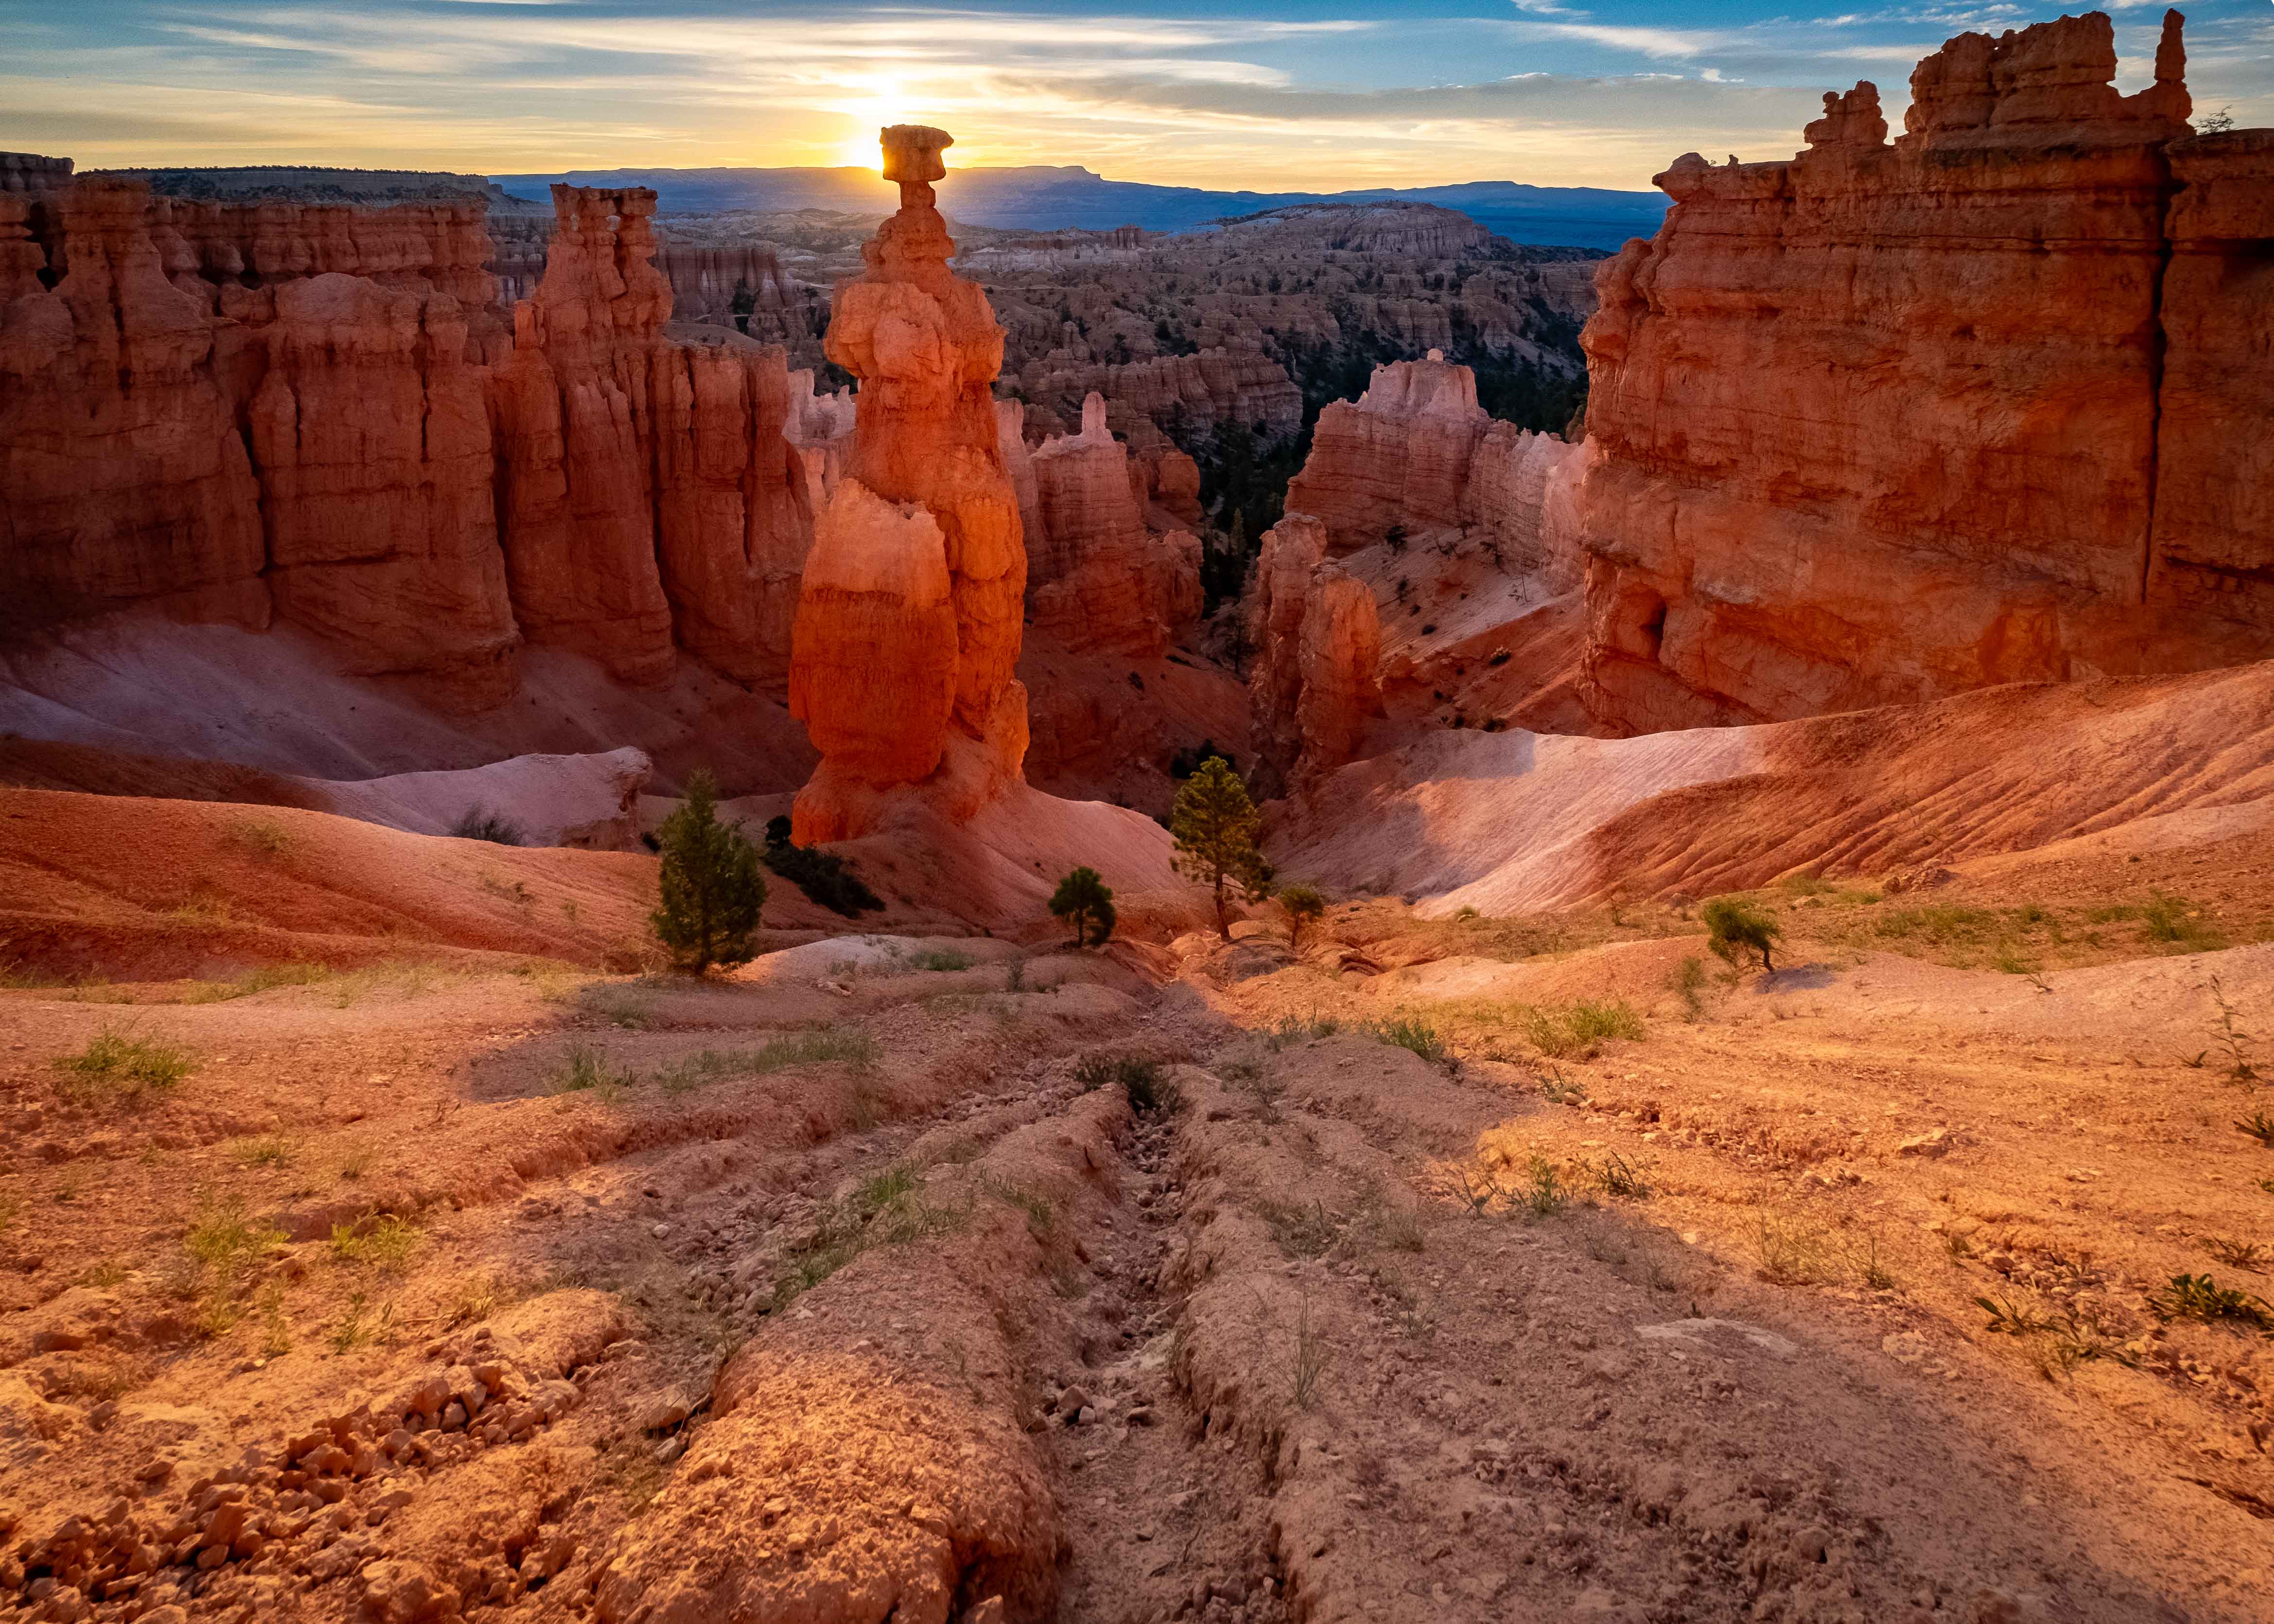
Everything here is quite sharp which I commend you on given the shutter speed (which is not exactly screaming high, but you pulled it off). What focal length did you use? Exposure works, which is a challenge anytime you have the sun in frame, and you use of the tree to reduce the power of the sun is effective. I like the look of the sunslick on the water. It's not blown out, and adds valuable texture to the water's surface.
I have an idea. What are your thoughts re: cropping out the entire top half of the image? Hear me out: it eliminates the sun/starbust, for one thing. Second (and more importantly IMHO), it turns the tree into a frame for the pier, instead of the most prominent aspect of the photo (for me at least). Anyway, just a thought.
Good, technical work here Anne.
|
Jan 5th |
| 60 |
Jan 23 |
Comment |
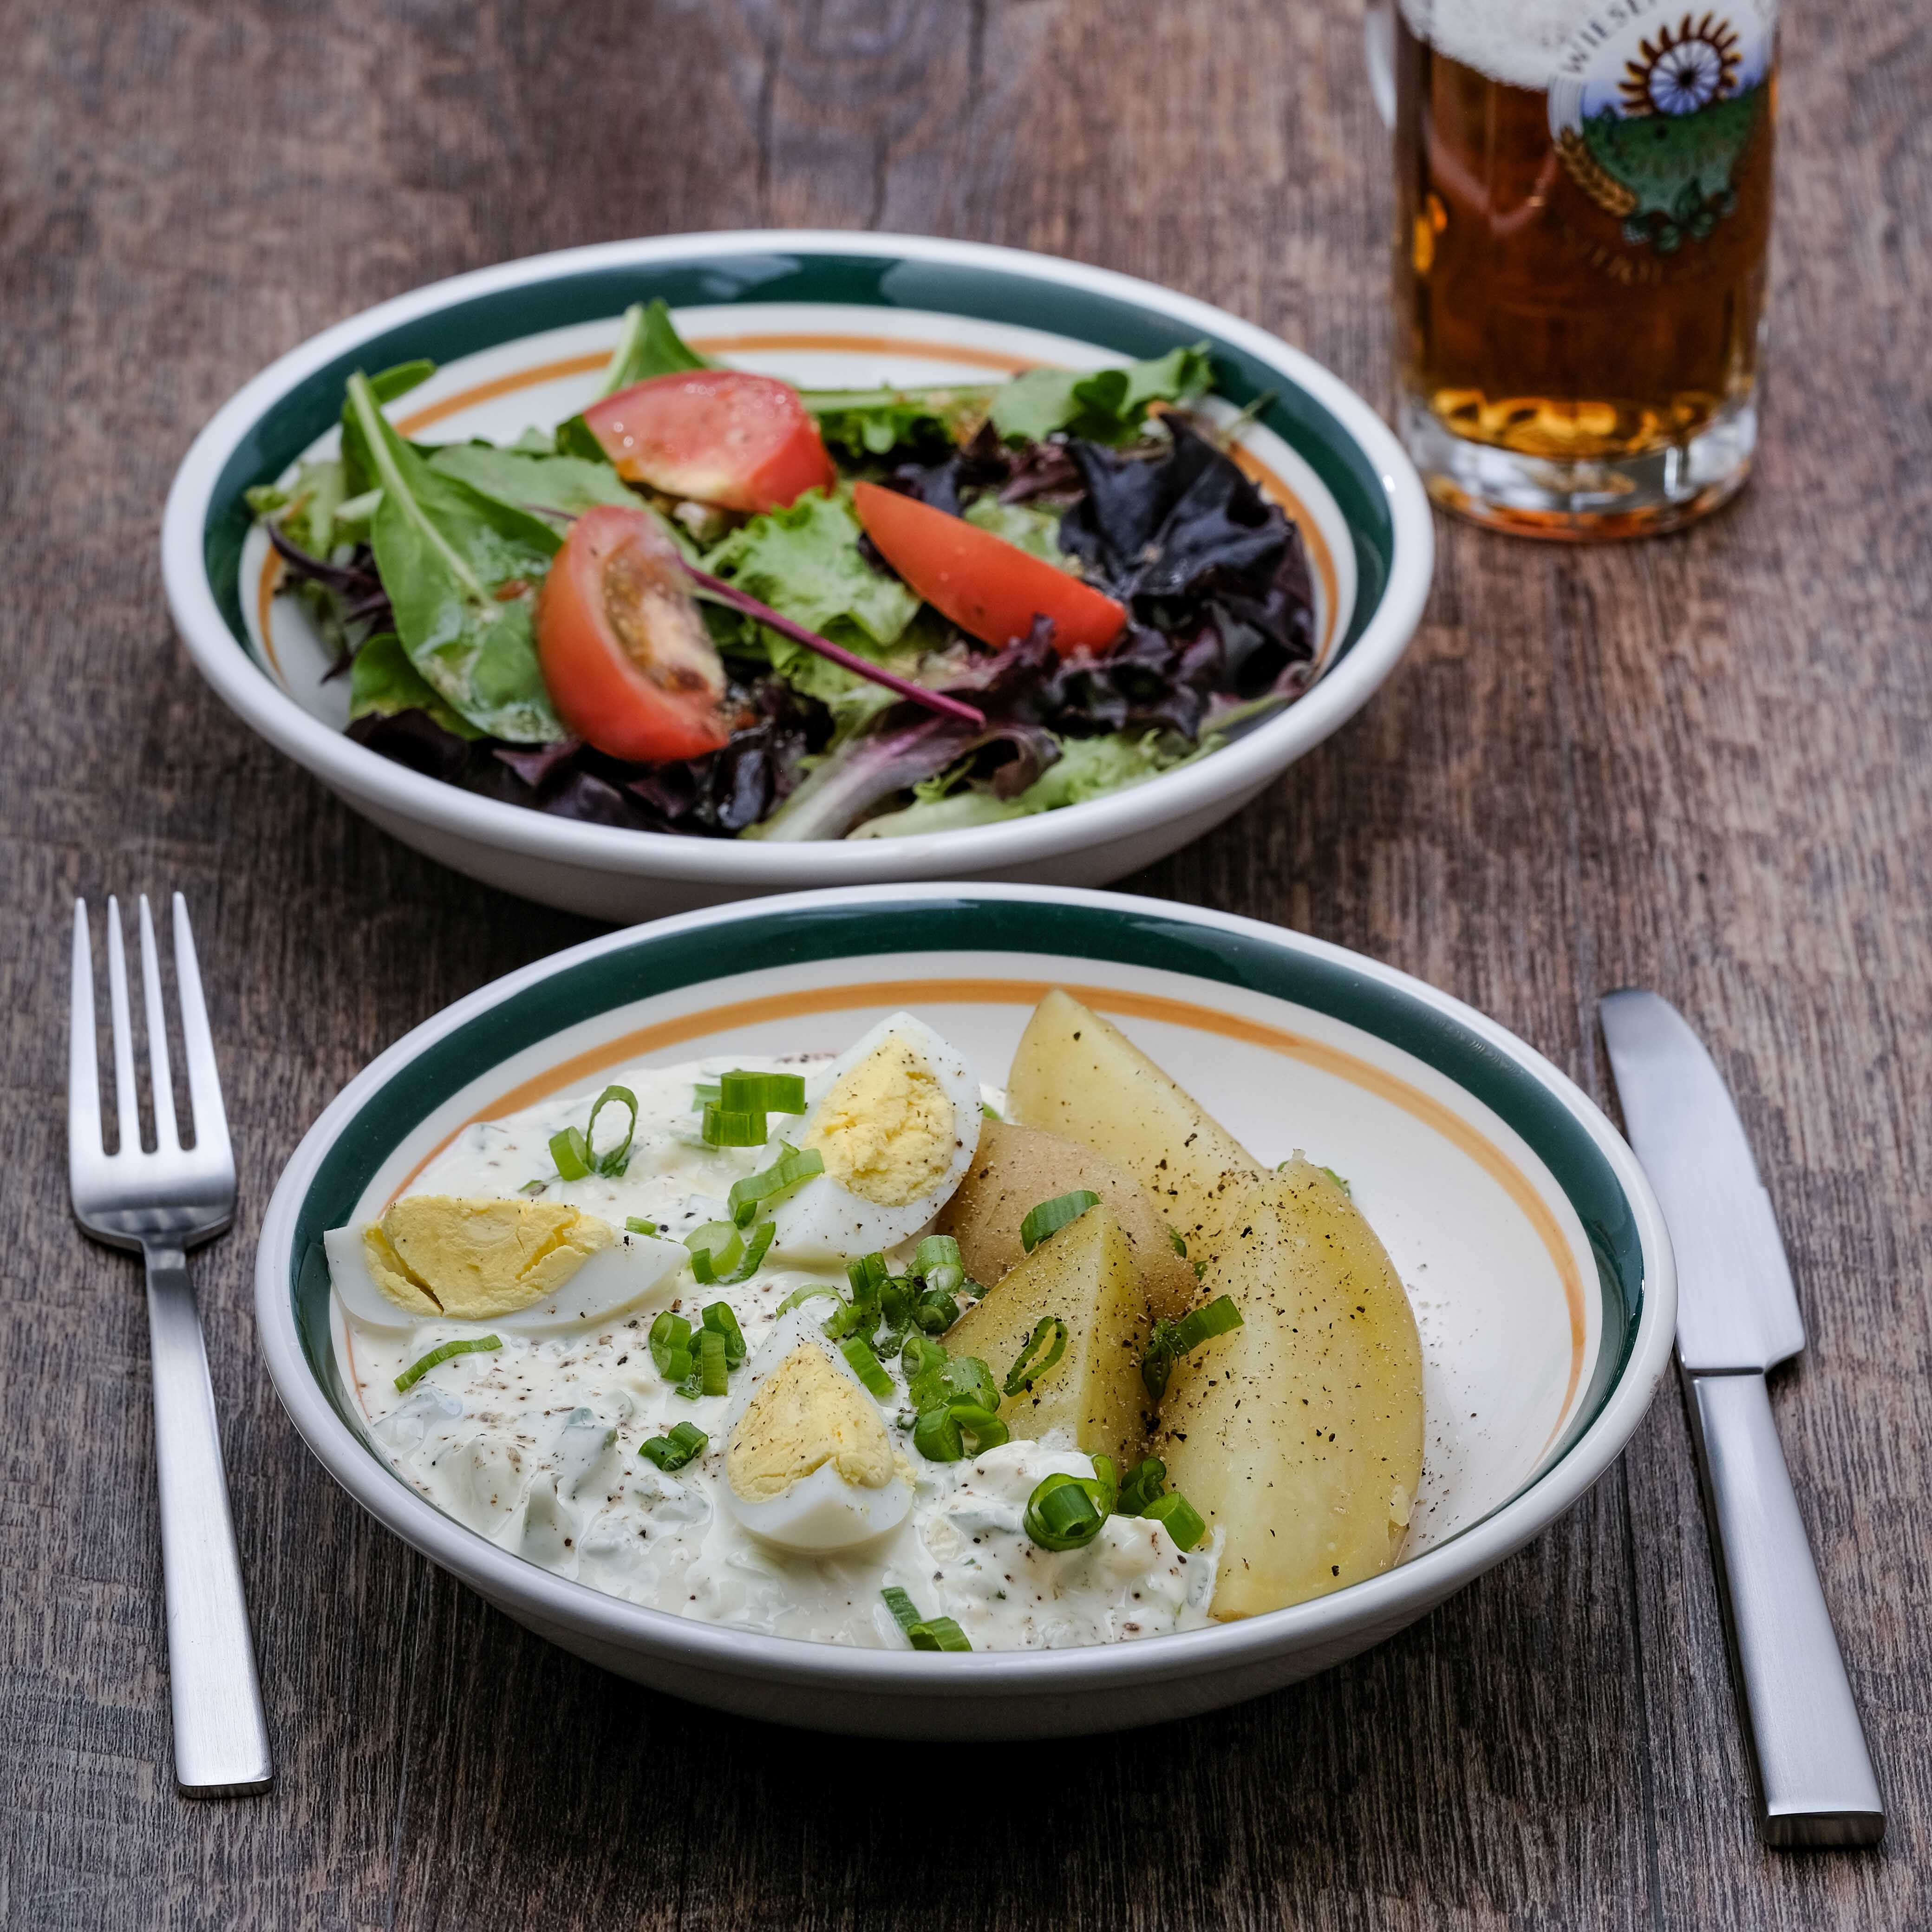
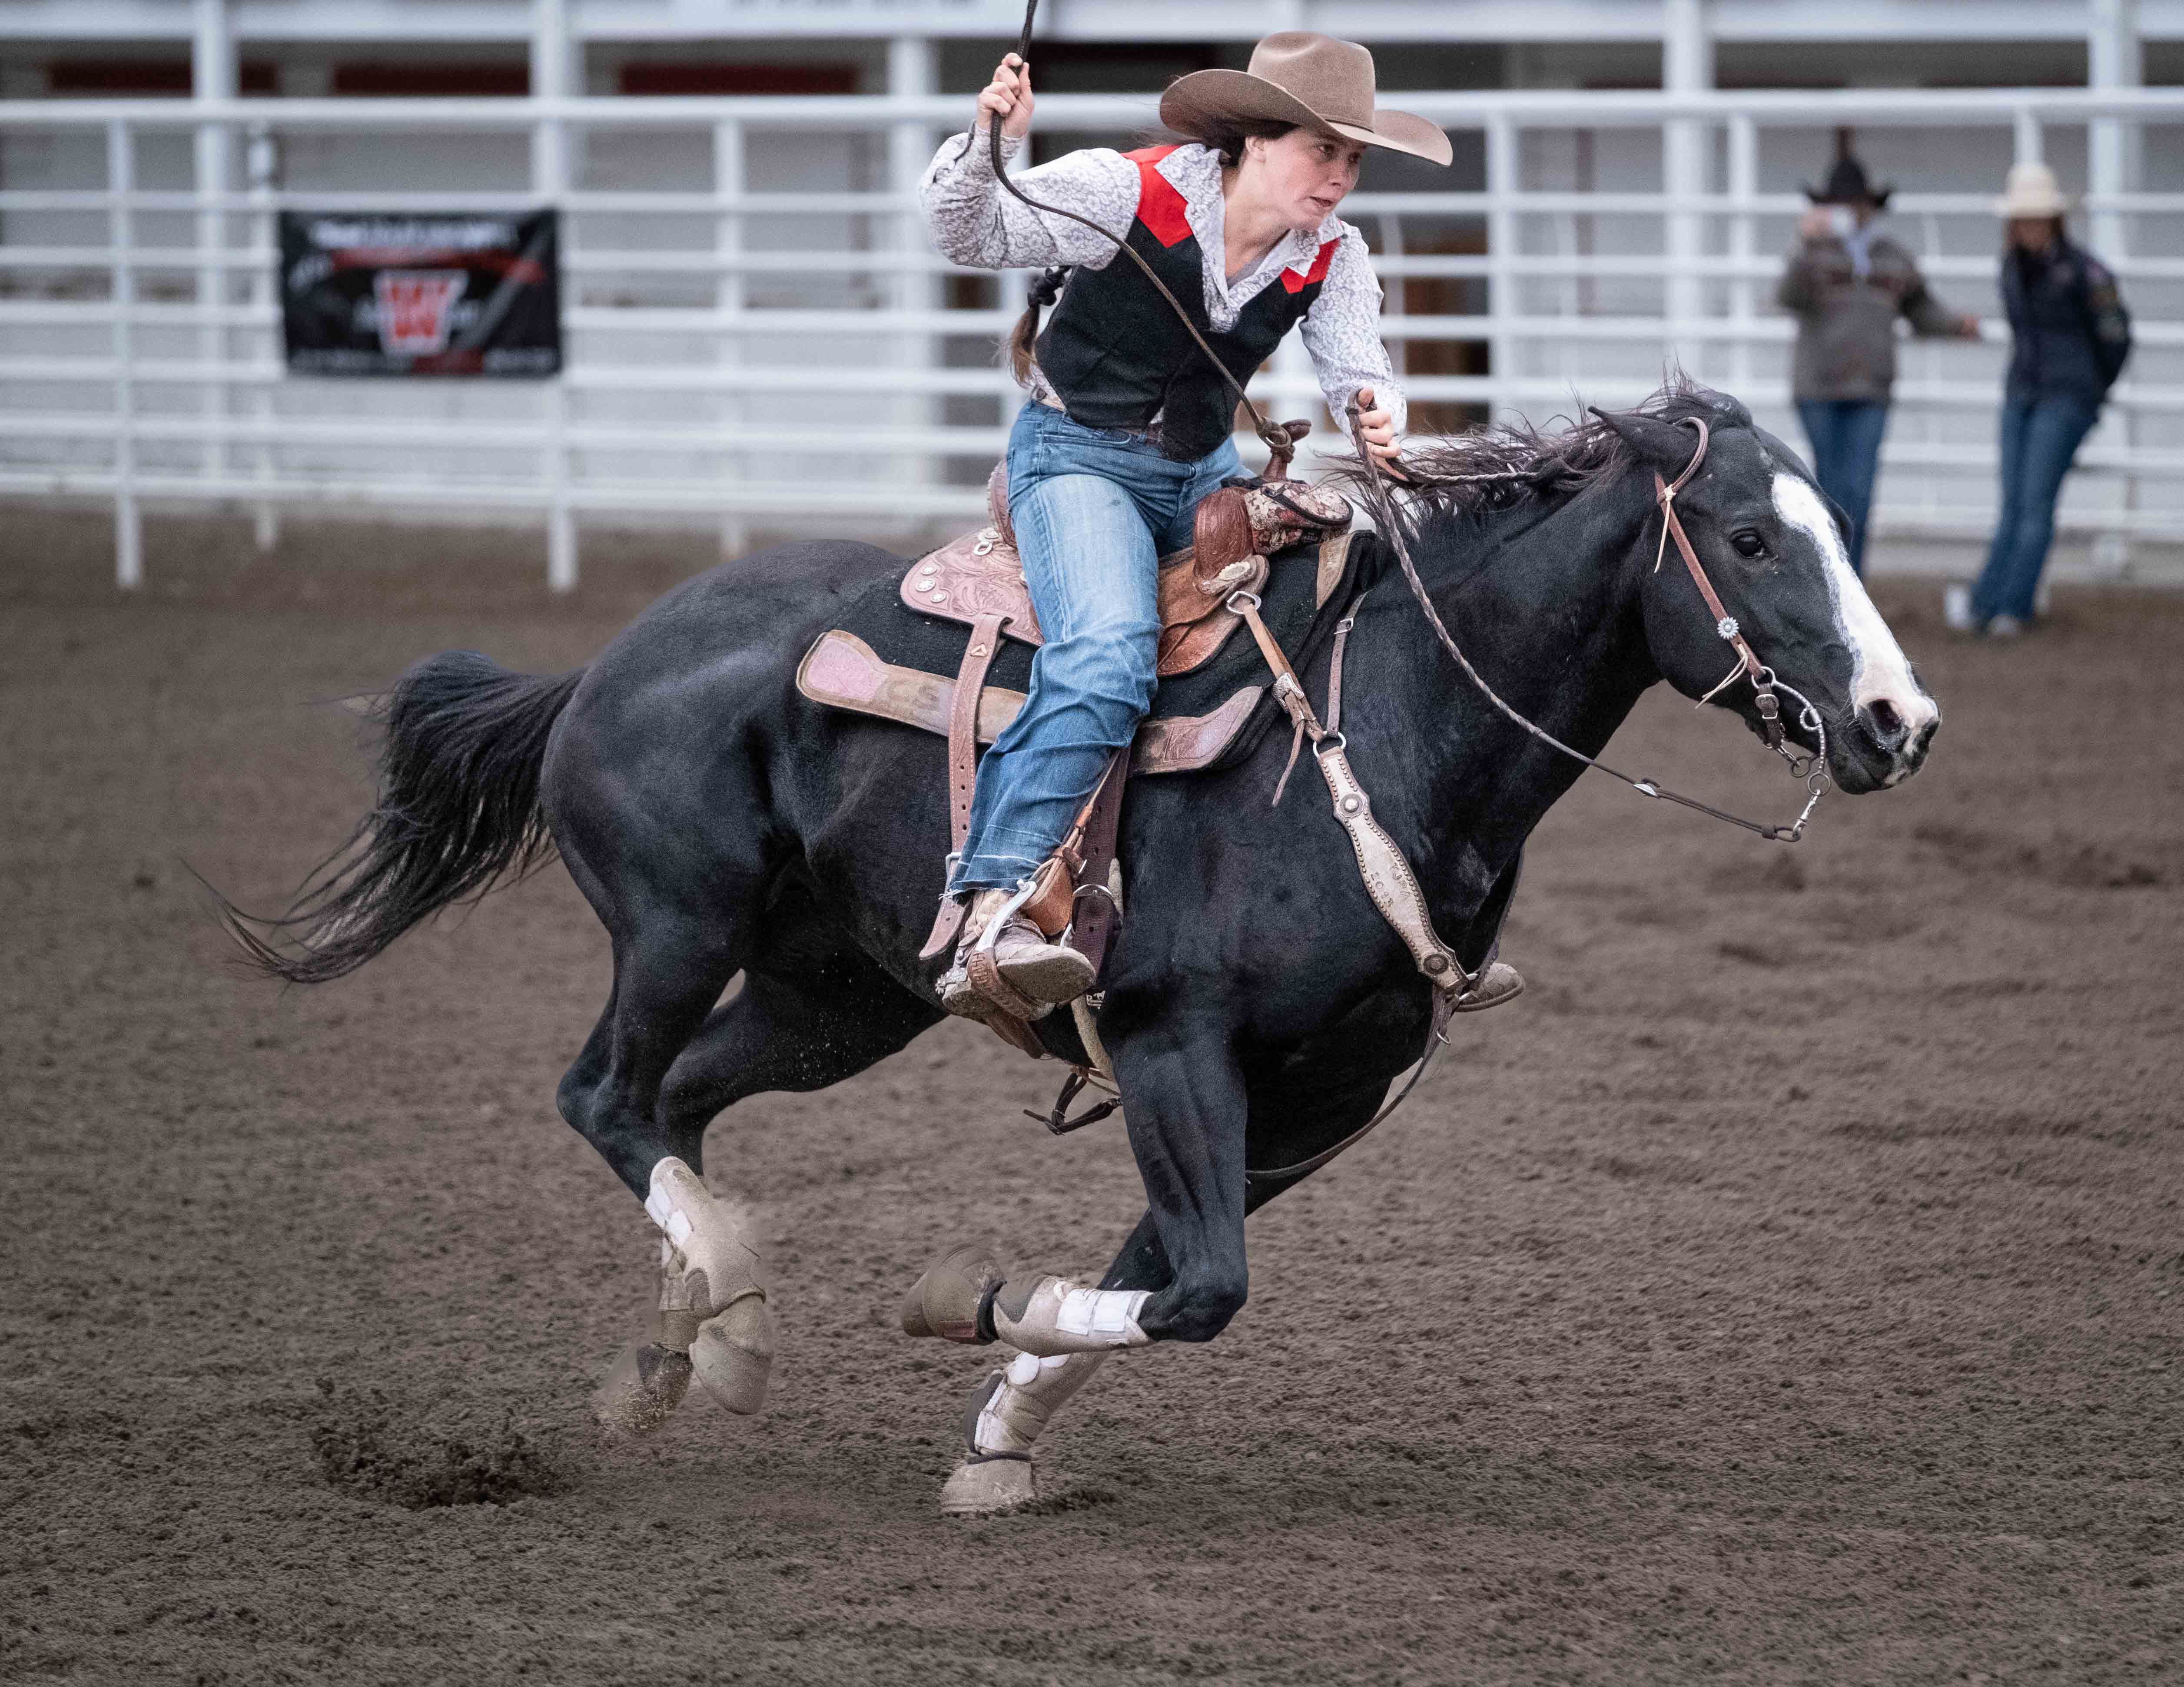
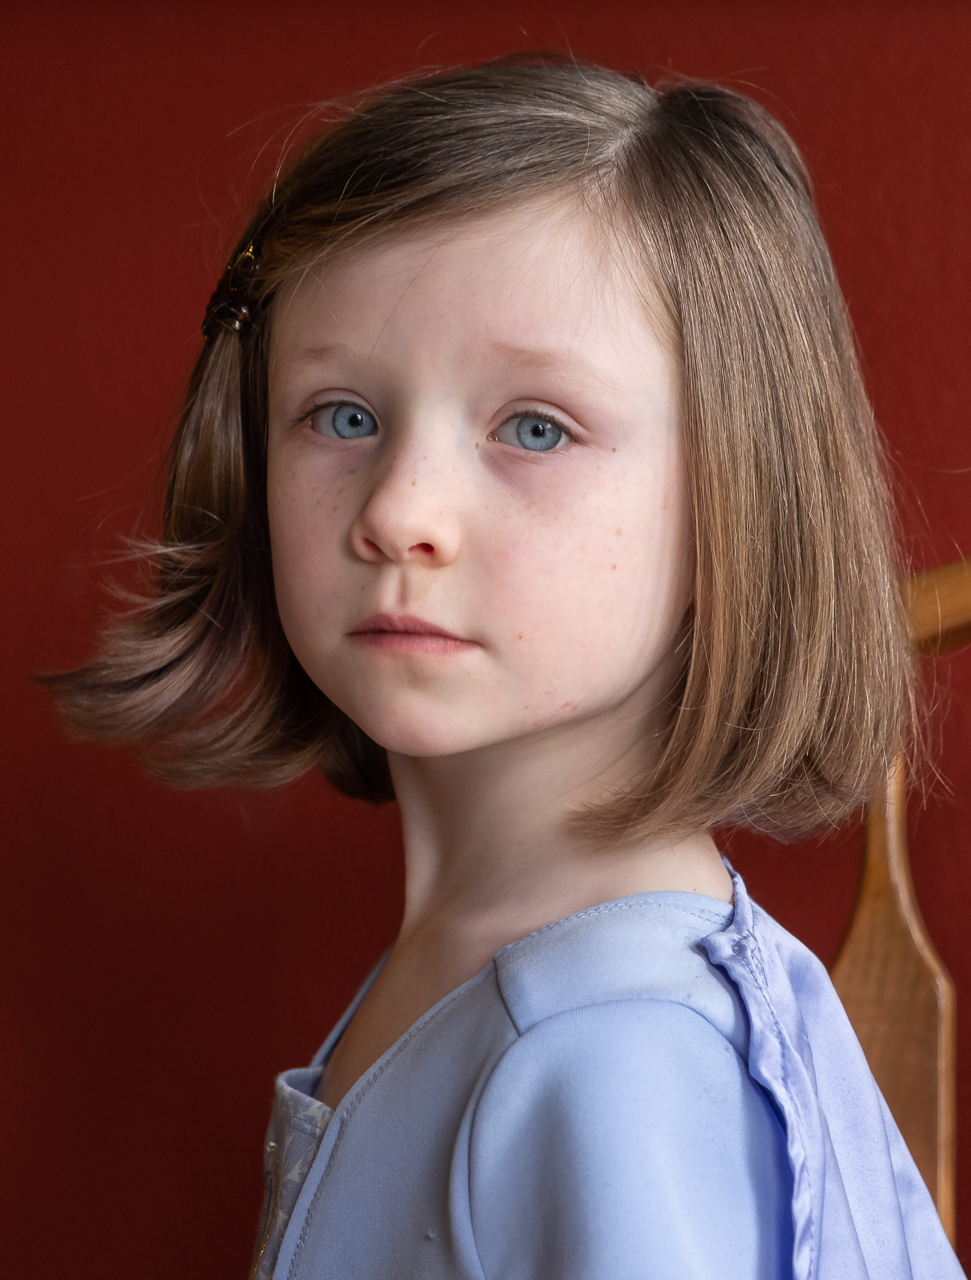
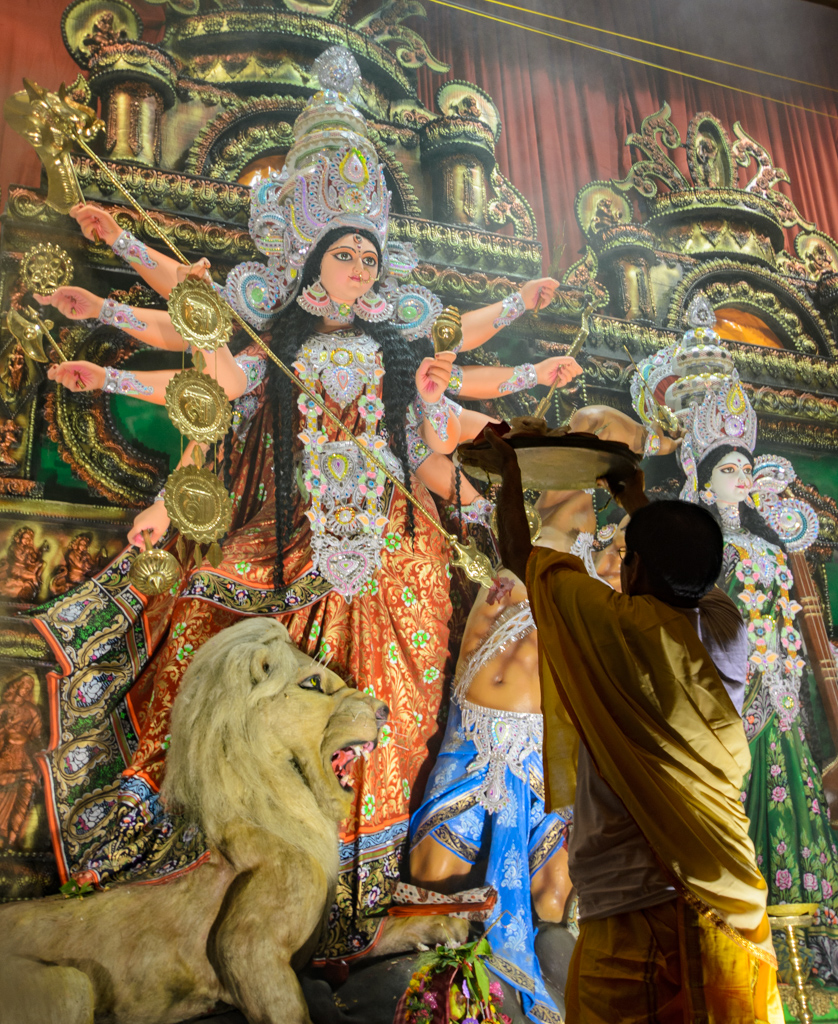
Debbie, I like your colors here, and exposure looks great all the way around, which is no small feat given outdoor/mid day conditions. I think this proves the value of diffuse light. No?
I think I know where you were trying to go with the composition, and the creation of "story" (boy, if I could put that skill in a bottle I'd be a wealthy man). And, I think that having a blurry compositional element can work to do so...but you're really playing with fire when you do (IMHO), because blurring an element (either through motion or DoF) is also what we do to diminish its importance or remove it from the story. That's not to say that it can't be done. So, WRT the composition, I just don't feel there's enough connection to the girl to tell what the story is...but that's just me.
WRT the crop, I suggest cropping square, and getting the girl out of there, if for no other reason that experimentation.
And, last but not least, I have a request. Since we're talking about how a blurry element CAN communicate story, I'd suggest you create an image in which this is the case. I try to post my most recent images, and have urged other folks to do so, because those reflect our current skill levels, which is what we're working with today. I hope that having this particular goal in my, should you accept the challenge, might help you figure out how to put the story making skill in a bottle. |
Jan 5th |
| 60 |
Jan 23 |
Comment |
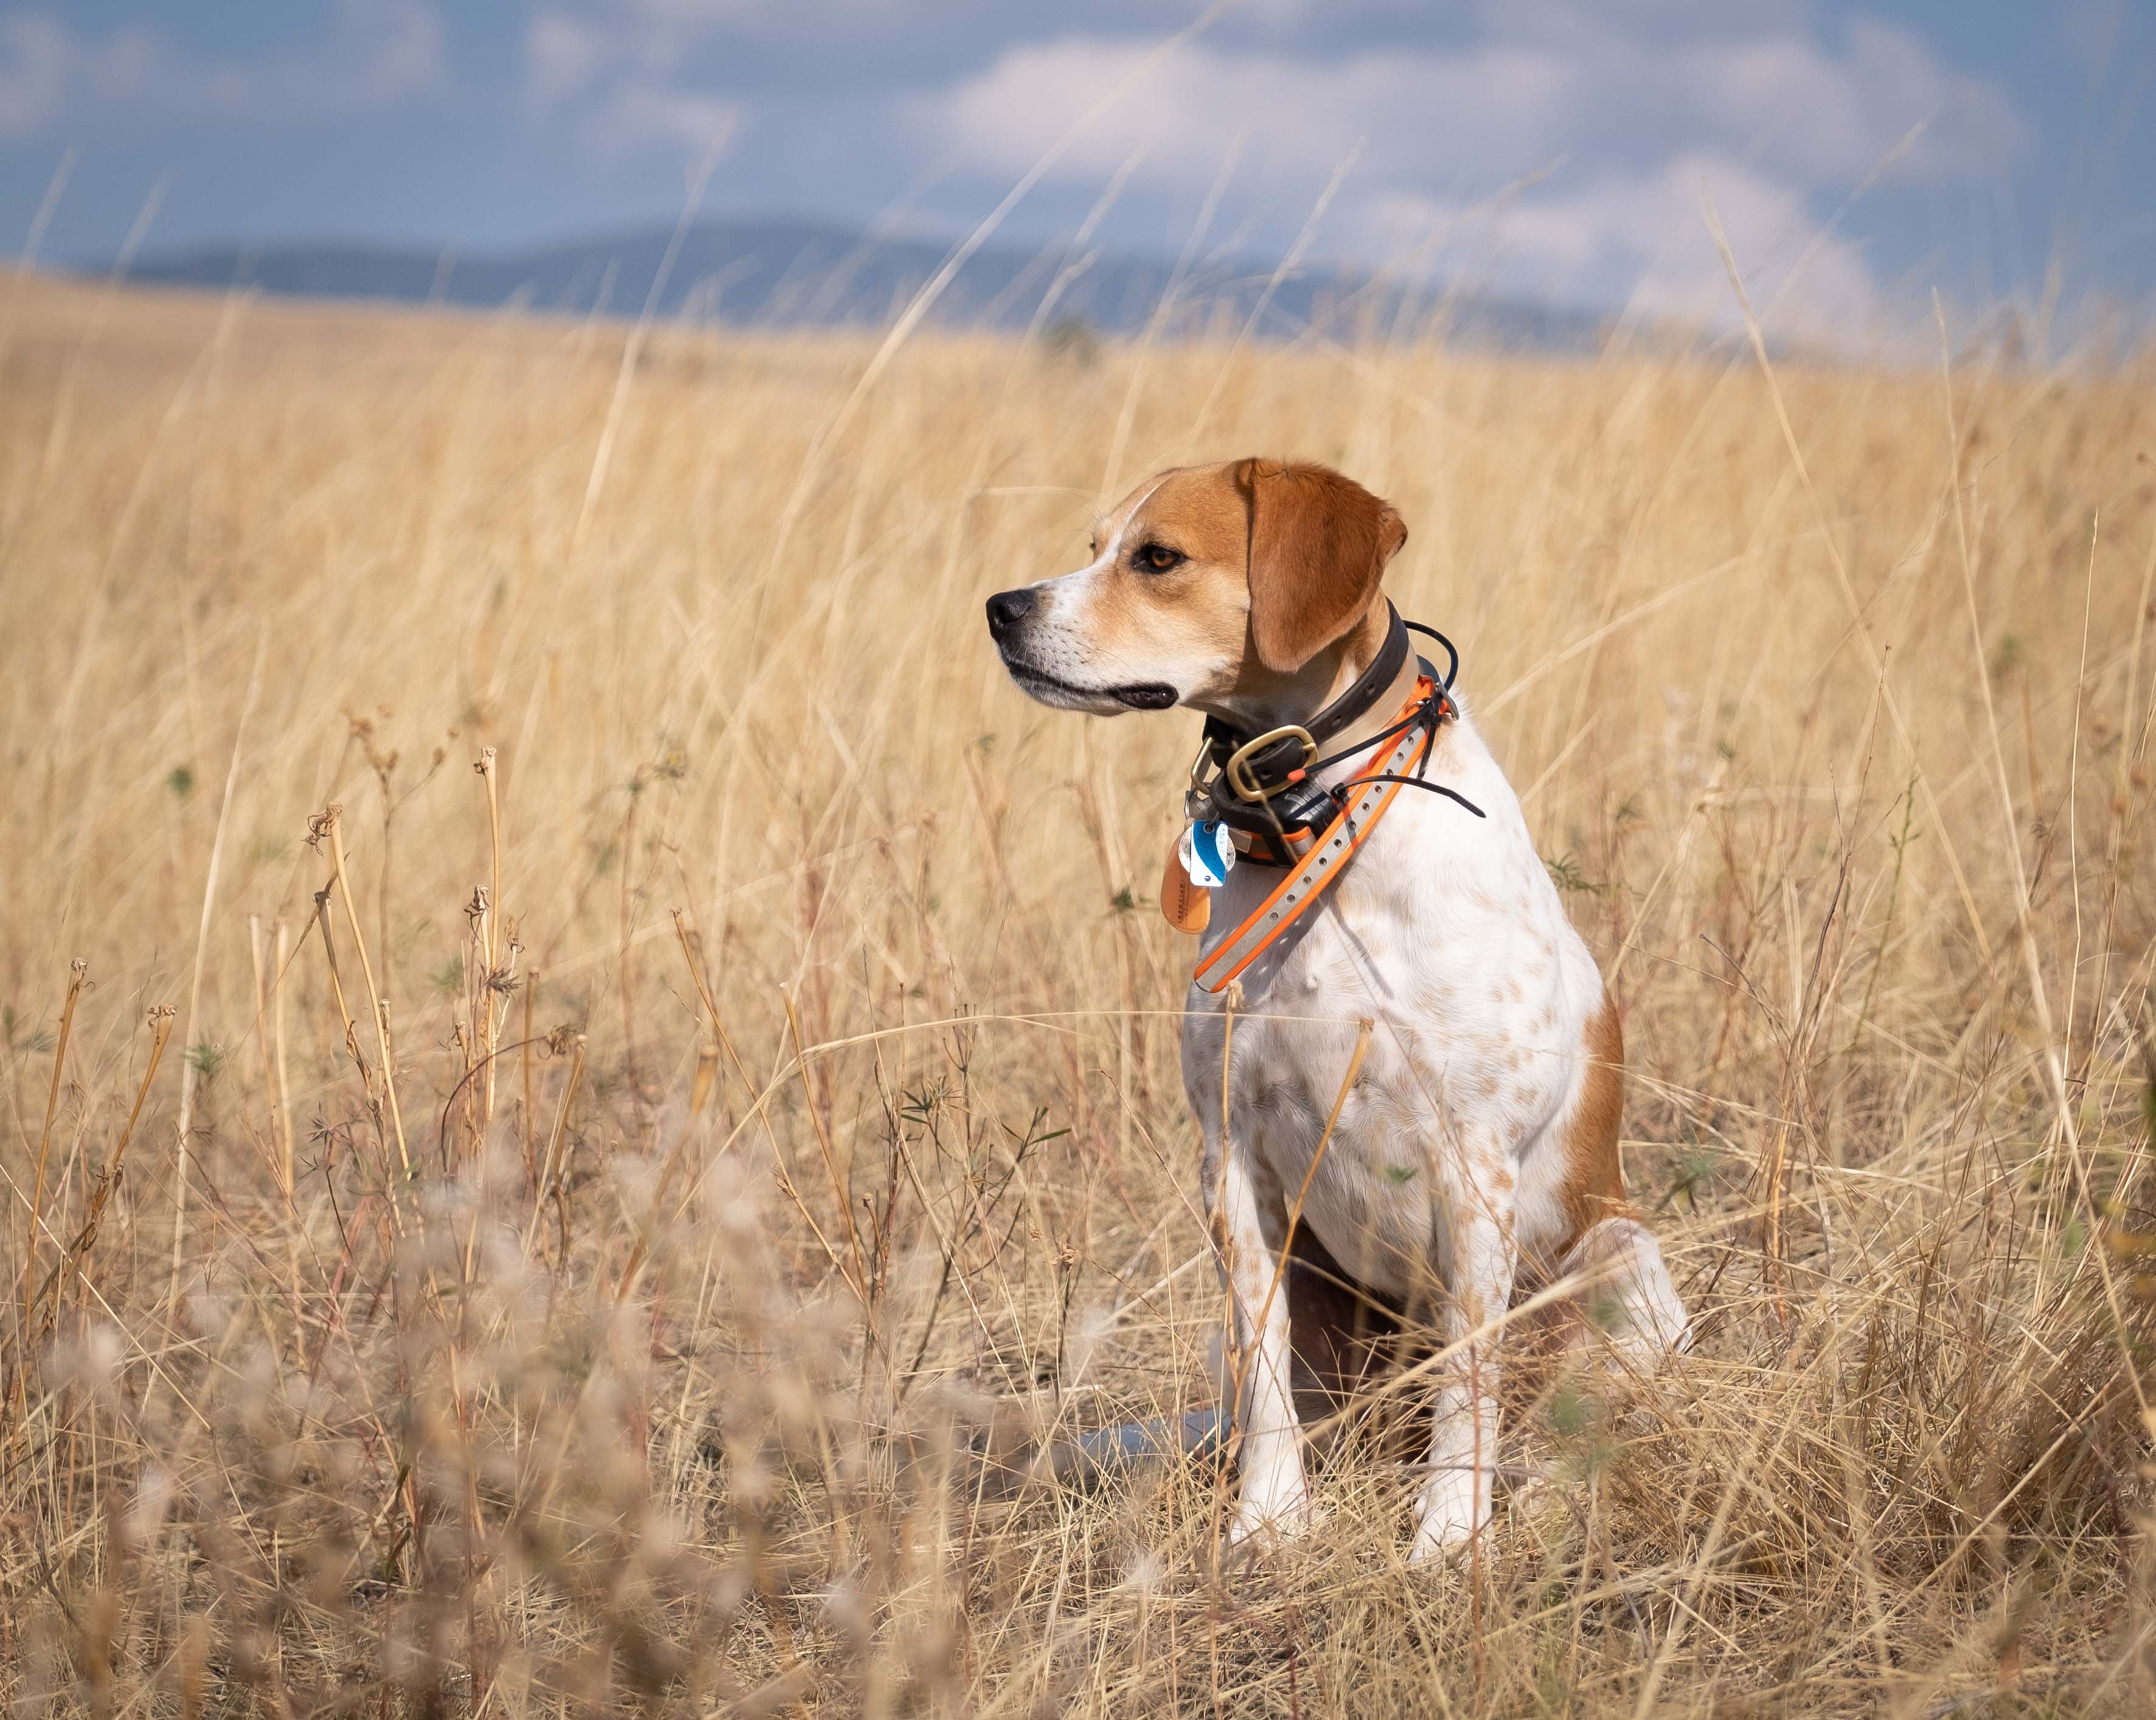
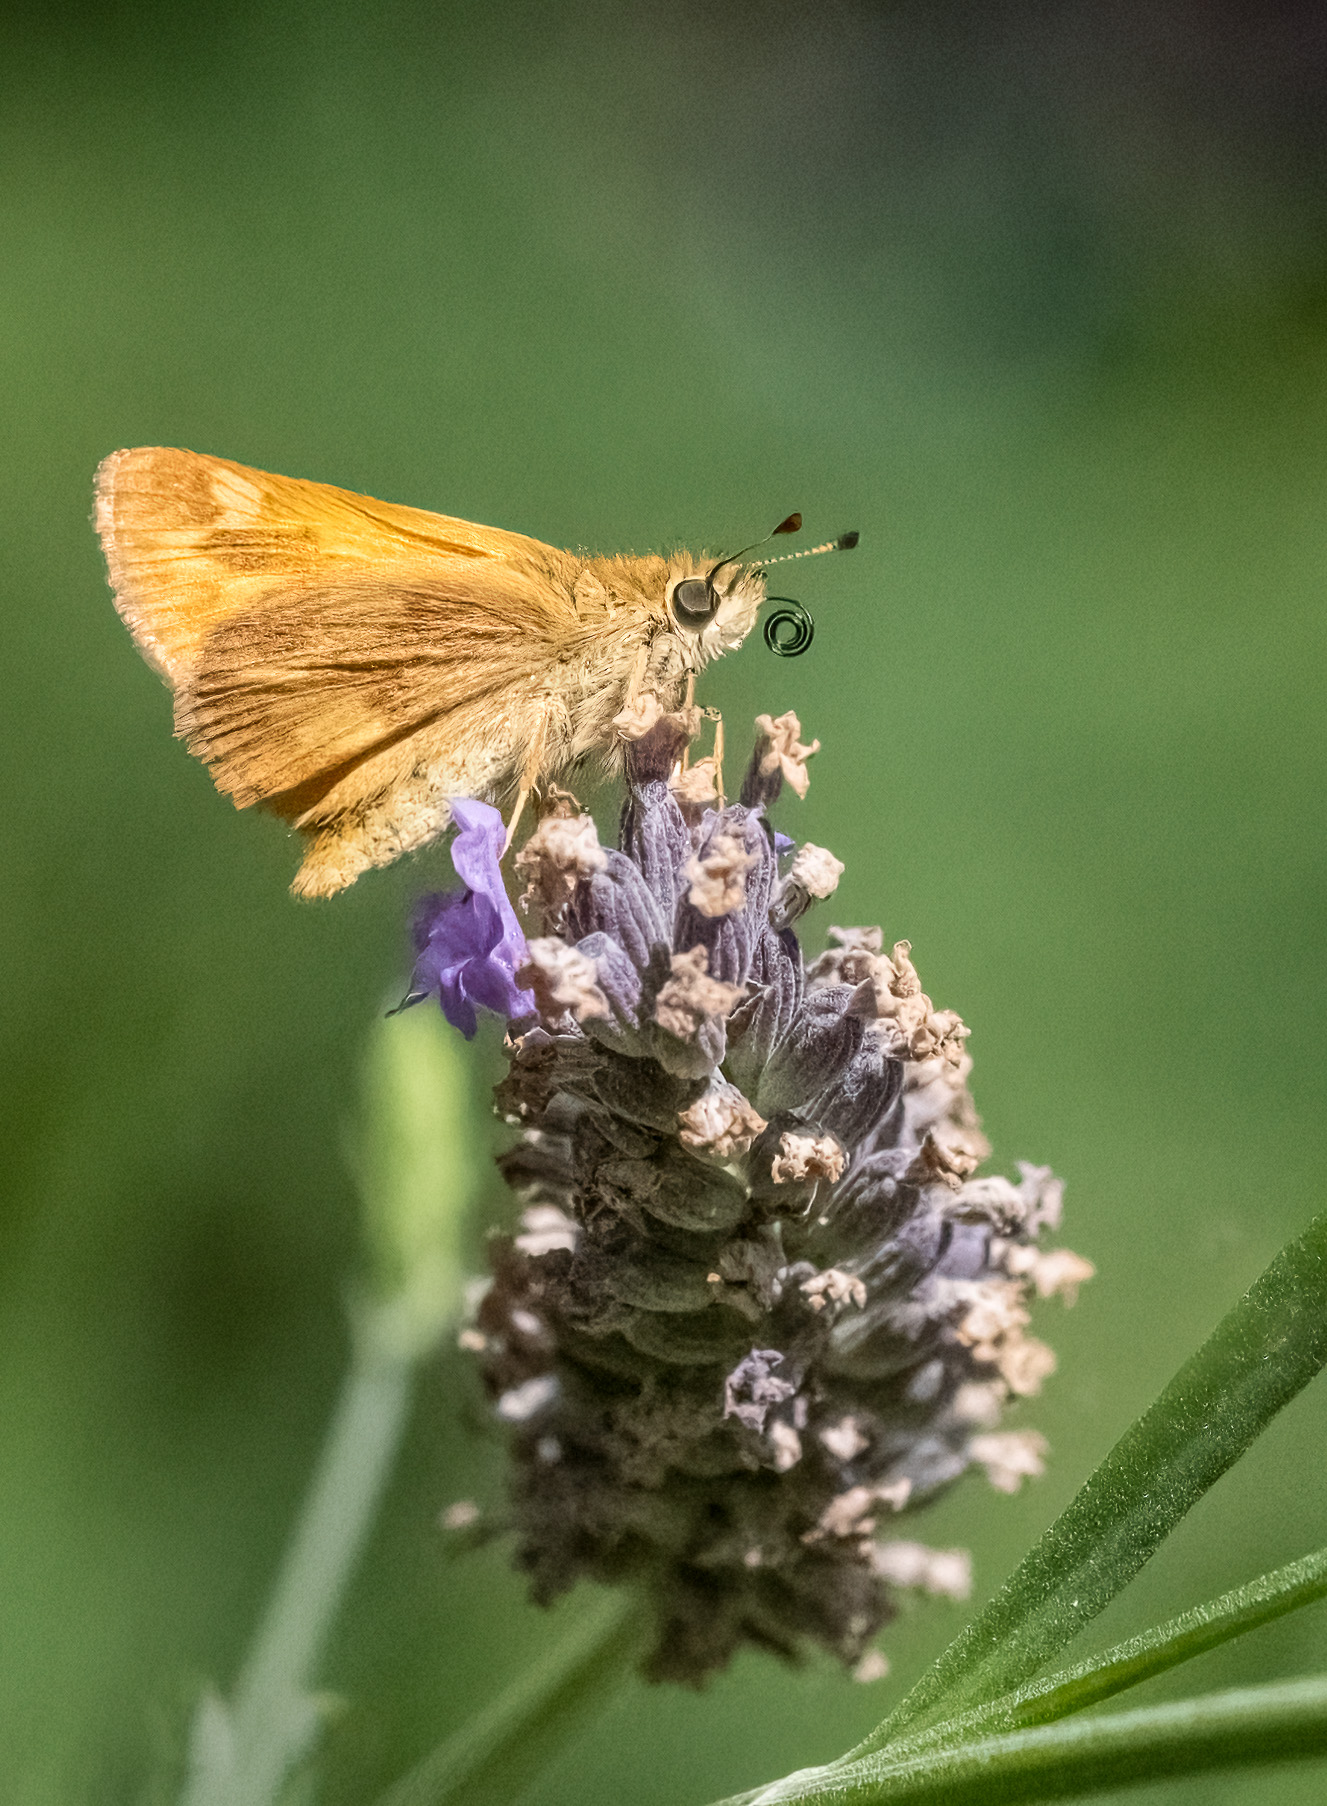
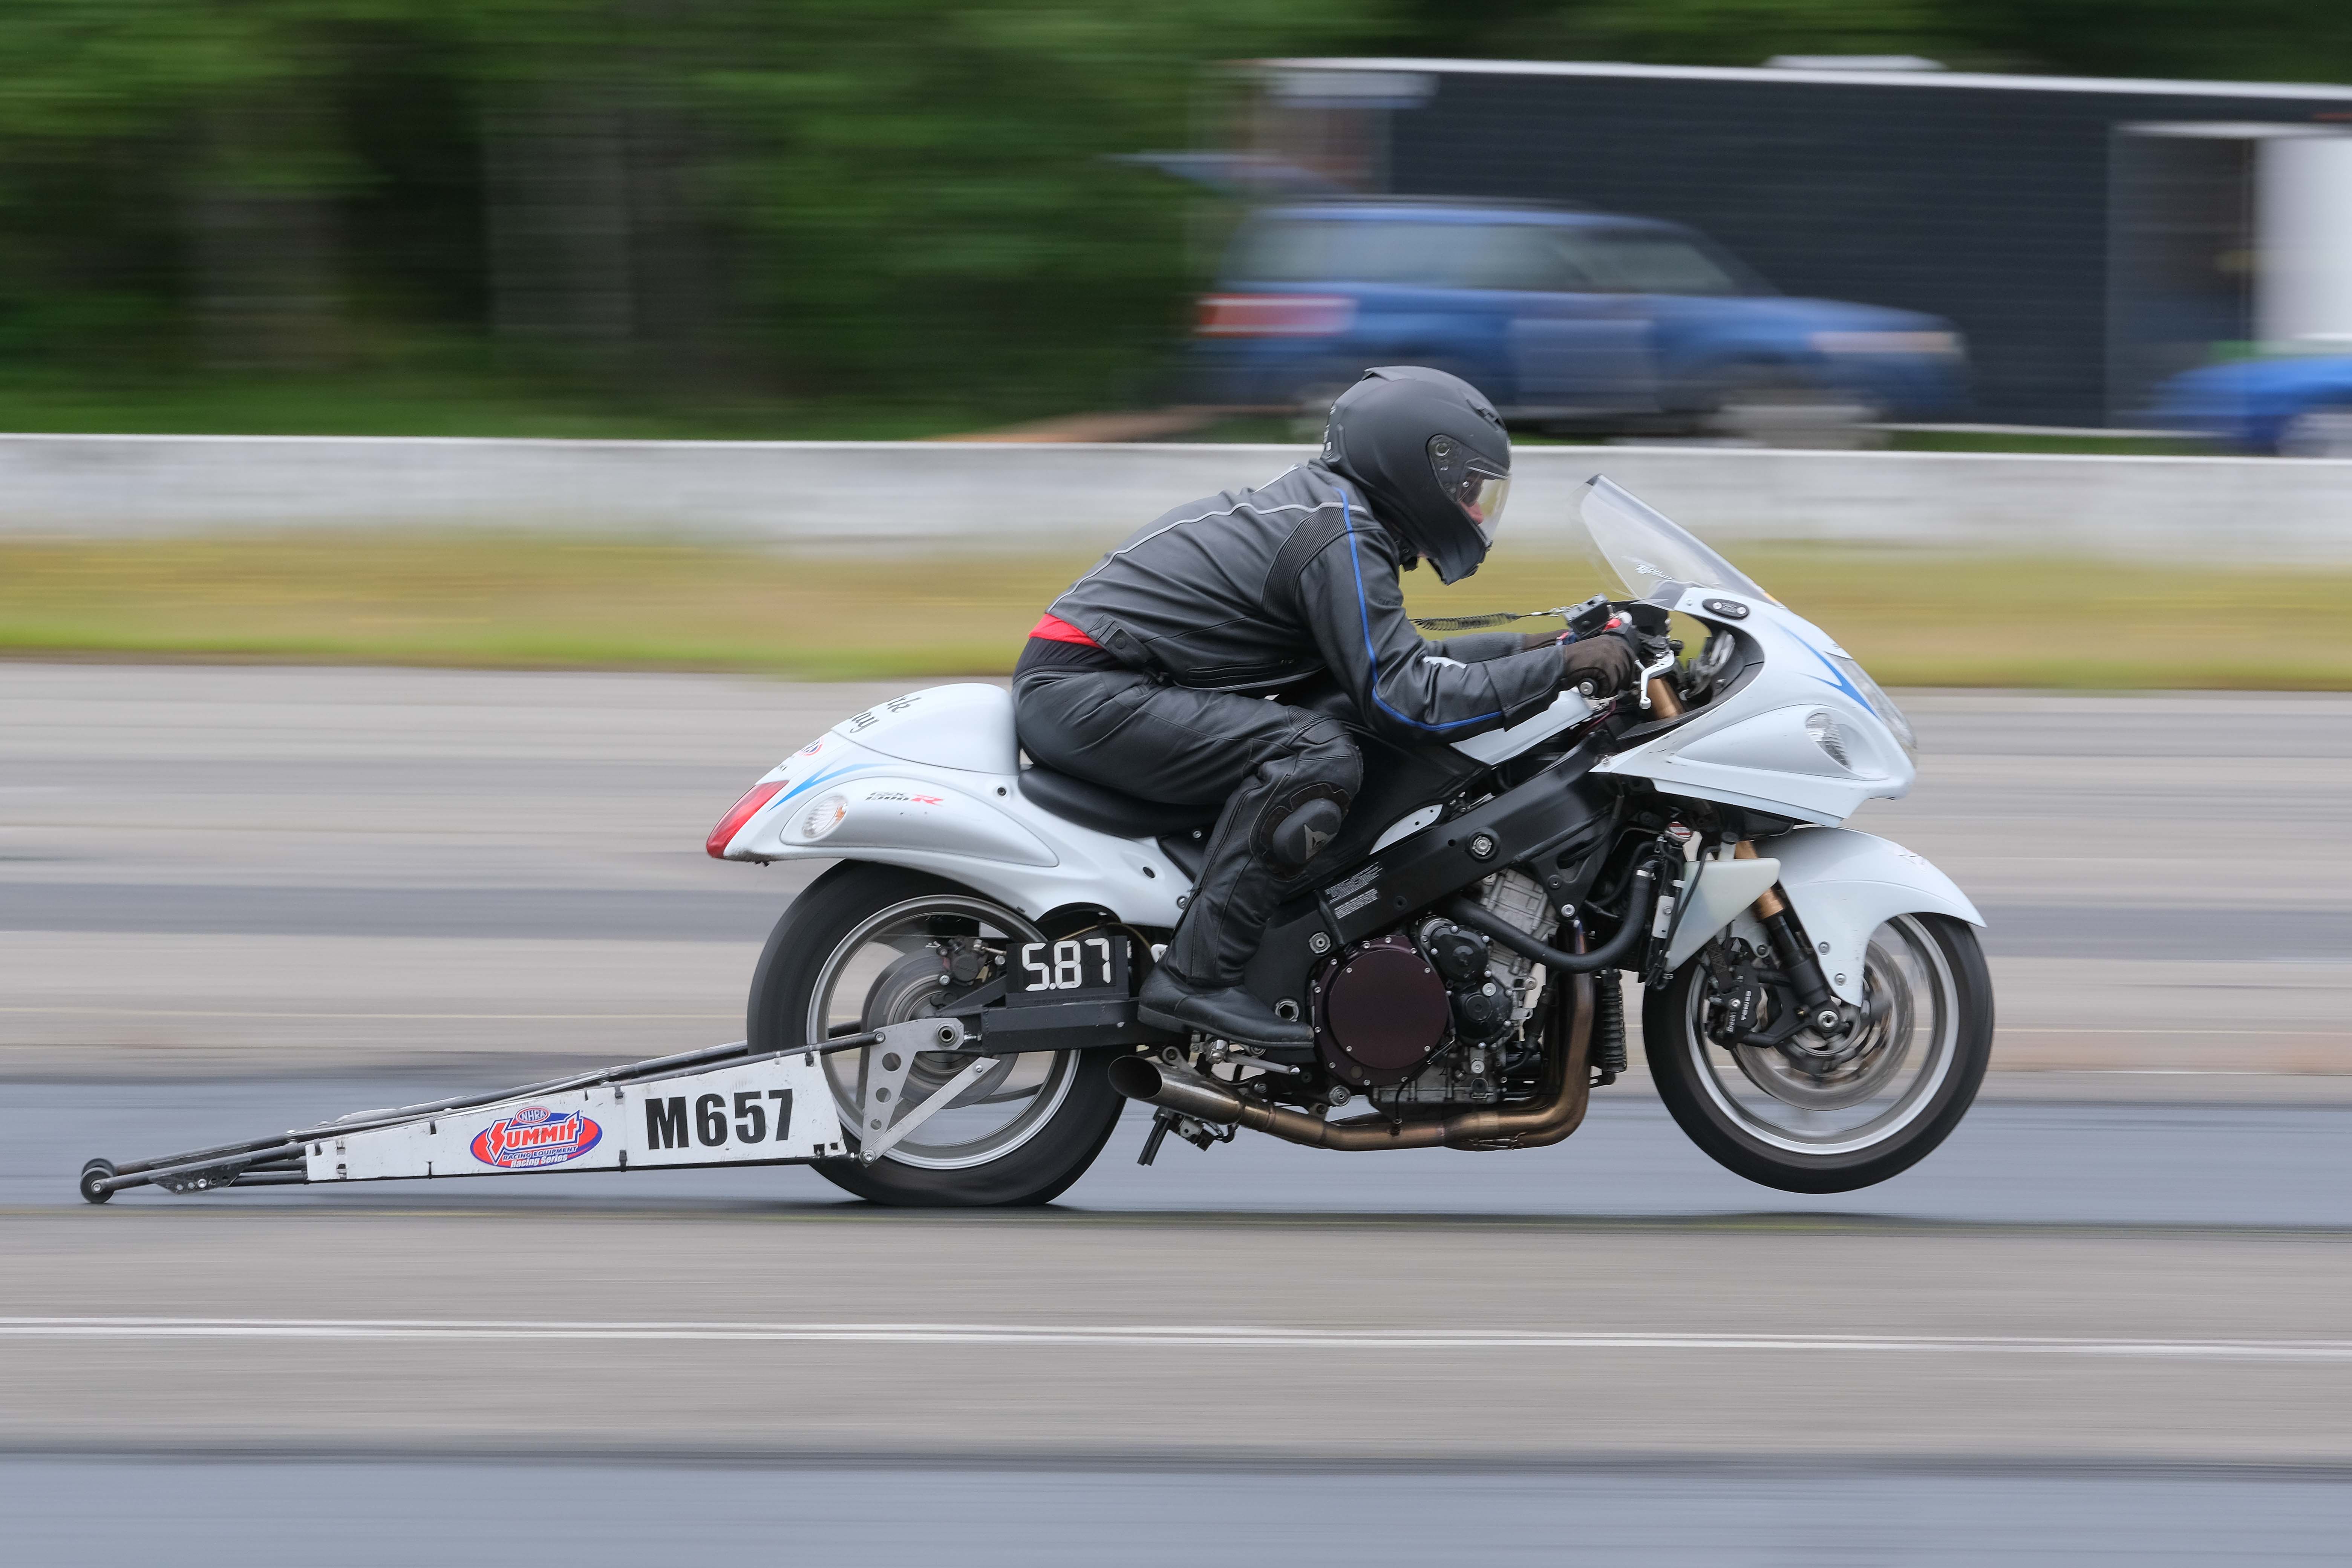
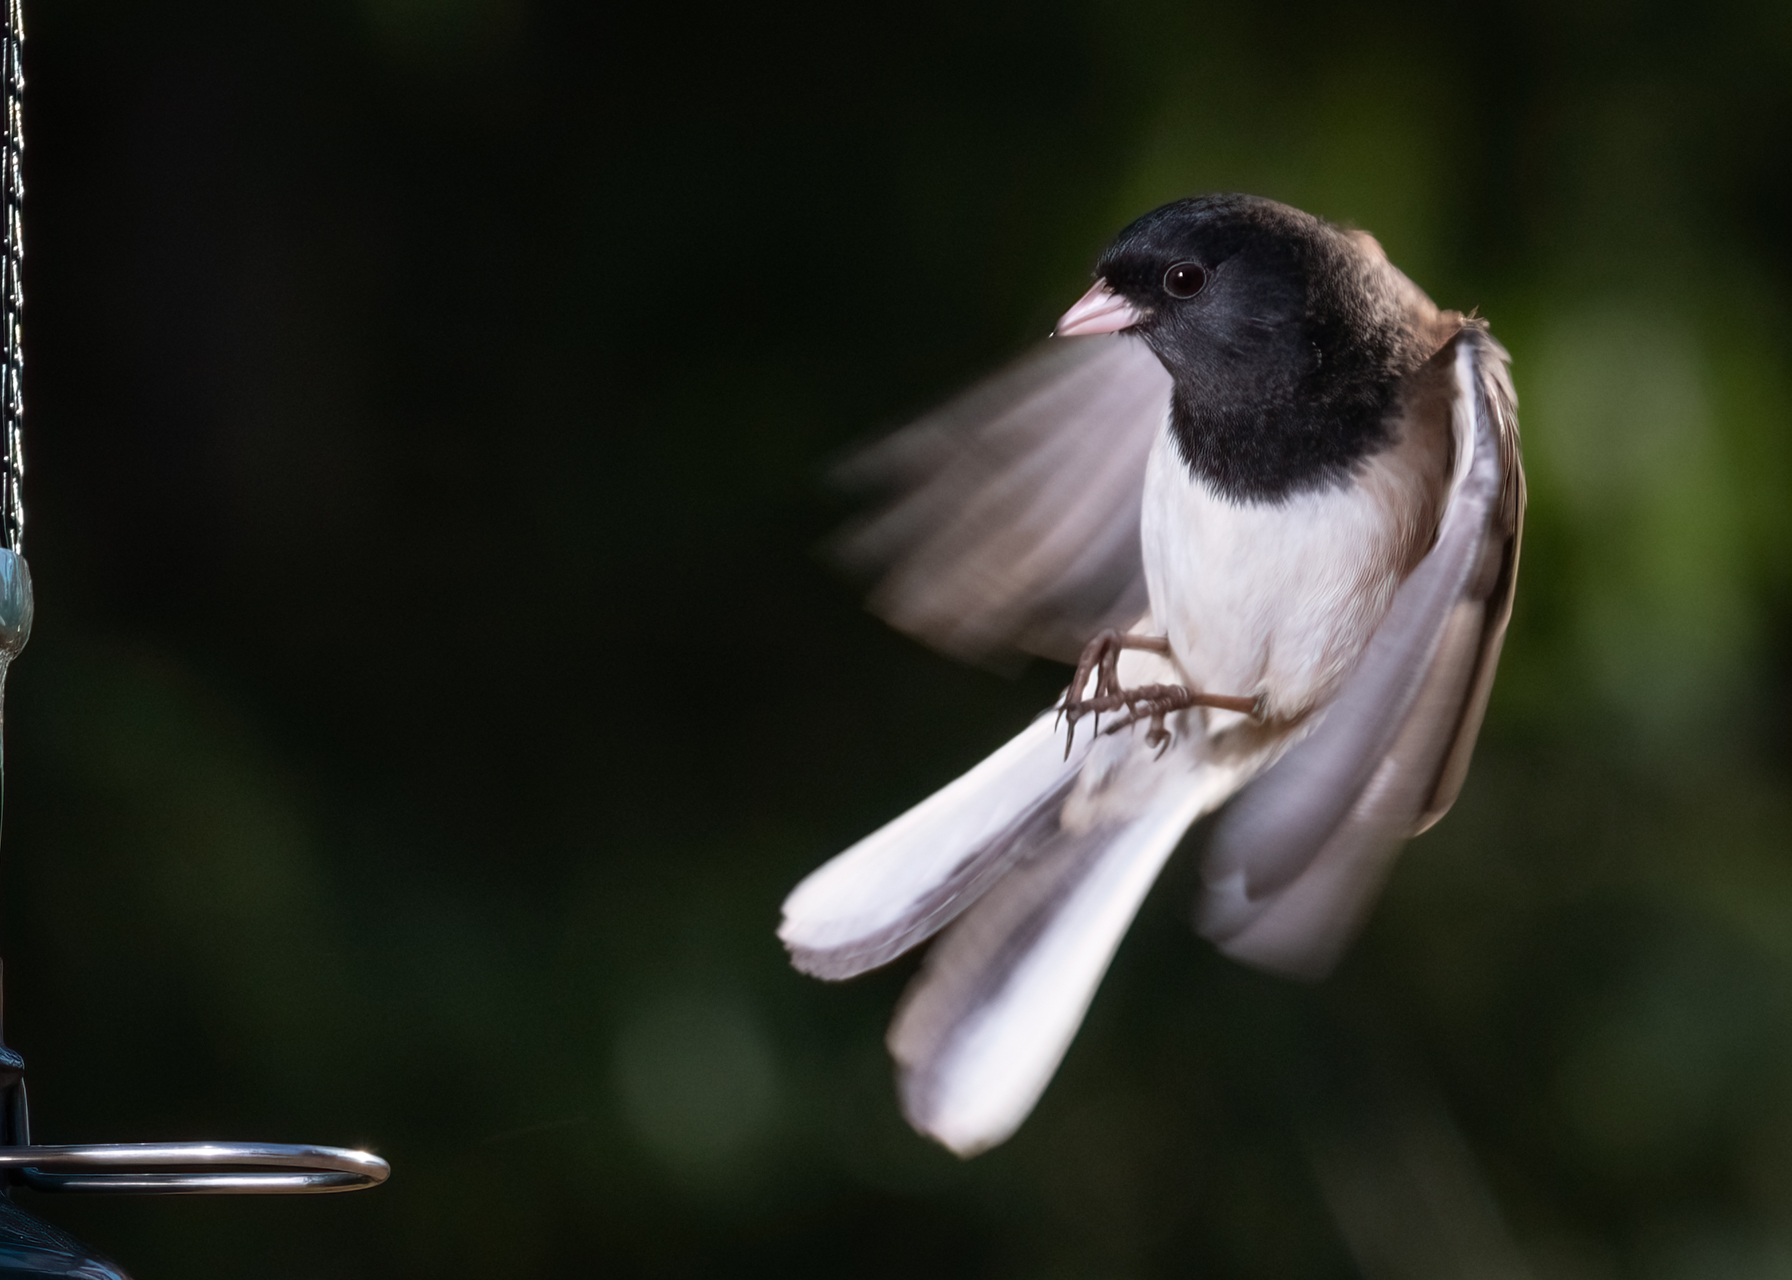
Birds. Now you've done it. You just committed yourself to a life of hypothermia, sunburn, poverty, and frustration. On the up side, there is nothing like a really good bird shot, so I commend your efforts.
Smart man making your ISO work for you. Between post processing noise reduction tools, and in-camera noise reduction tools (probably only available when outputting to jpg), ISOs higher than base just shouldn't be the terrors that we sometimes consider them...IMHO. And, if you want a reasonably sharp images, especially with long focal lengths, you'd better be getting your shutter speed up there as high as you can, as you've done here, which works well to create a sharp image. (Out of curiosity, do you remember what focal length you used?)
Colors look good to me. Point of focus is right on the subject.
This is just me talking, but I feel like the image is a little over-processed, specifically, sharpening. This is easy to do though, in my experience. If I've been unable to fill the frame as much as I'd like when capturing, then have to crop in too much to get the composition I want, the resulting loss of resolution can beg for sharpening to get visual impact back. I know there's gigapixel and Adobe has something similar, but I just have never been able to get the effect I want out of an over-cropped image in post-processing. Hey, what're you gonna do?
Question: Can you tell me about your choice of aperture? |
Jan 5th |
| 60 |
Jan 23 |
Reply |
Hey Dean, what's your technique for the starburst? |
Jan 5th |
| 60 |
Jan 23 |
Reply |
Sorry about that Debbie. I thought I had that squared away but, obviously, I failed. |
Jan 4th |
5 comments - 14 replies for Group 60
|
5 comments - 14 replies Total
|