|
| Group |
Round |
C/R |
Comment |
Date |
Image |
| 40 |
May 19 |
Comment |
Cool Image Jamie, I always like flowers coming out of the darkness! I would suggest bringing up the shadows and blacks in Lightroom a bit to give the flower more definition and dimension and possibly running the sharpening tool over some of the flower petal area in Photoshop. Cool abstract image overall ├░┼Ė╦£┼ |
May 14th |
| 40 |
May 19 |
Reply |
Thank you Prakhar! It actually looks awesome in its frame, the archival ink and paper behind acrylic really made this image come to life in person ├░┼ĖŌĆśŹ |
May 14th |
| 40 |
May 19 |
Reply |
Thank you Henry, the compositing was bit of a challenge on this one because the background image was out of GAMUT and this image was being printed. I had to do a lot of work just to get the background image color corrected so it would print correctly. This is actually why the little triangle in the upper right corner that Andrew pointed out is there, I could not fix it anymore than I did without losing integrity in other areas of the image. |
May 14th |
| 40 |
May 19 |
Reply |
I agree Andrew... That little triangle was actually a lot brighter than you see it. I exposed it down in that corner quit a bit, but it still needs a little more, good eye ├░┼ĖŌĆśŹ |
May 14th |
| 40 |
May 19 |
Comment |
Where do you live Alison? |
May 13th |
| 40 |
May 19 |
Comment |
Hi Prakhar...
You would not blend the two layers using a blend mode you would stack them and use layer masks and paint away the long exposure sky to reveal the correct exposure sky below the main long exposure layer. Does that make sense?
So the base layer would be the long exposure layer and then under that layer you would add the correct exposure layer.
Add a layer mask to the base layer and paint away the sky to reveal the correct exposure layer. This would leave you with the nice long exposure on the water and give a sharp static sky. This is a cool effect on some images I use it a lot.
|
May 13th |
| 40 |
May 19 |
Comment |
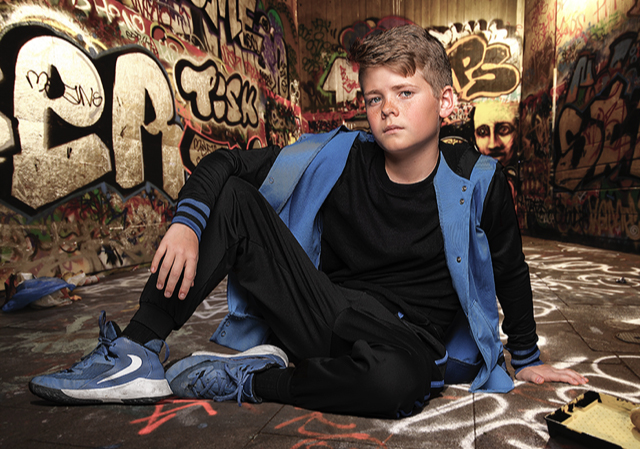
Hi Alison,
I never use a green screen. Green Screens are mostly for video. When doing composite image shooting all you need is a white background or a grey background. Once you have your image on a white or grey background you can then either use BLEND modes in PS or SELECT and MASK the subject out completely and place a different background under them.
The street background image is real. You are correct on the dodge and burn, I played with the light in this image quit a bit to get it right. There was also a good bit of REFINE EDGE done in PS to make sure there is NO HALO effect on the subject edges.
I did grunge up his clothes a bit as well. I used a JOEL GRIMes technique to grunge his clothes up, I rarely even use any kind of presets or filters. I do all of the work myself, much more control. The technique is basically taking three of the original images, combining them into one and playing with the luminosity & color properties of each image. You then overlay a texture or two over the final image and then paint away with soft brush and opacity settings to your liking until you get a grunge up image.
He did get the part, I have quit a few more images of him that went over very well too. The agents loved them and he is being cast in multiple roles now.
The original image was taken with a 45" Octa Box with a Indra 500 Strobe, there was natural light coming in from the right of the image via a garage door in the studio, so really just a one light image. I have another version where I actually changed the color of his clothes to a very light blue, like Carolina Blue which I like better, but this was the final image I printed. It looks incredible on acrylic. |
May 12th |
| 40 |
May 19 |
Comment |
Hi Andrew, very nice image. I read above and see what you were trying to accomplish. For me I would have cropped the women and child out of the image all together and left the viewer wondering what the men were looking at. Either that or content aware removed them in PS. Either way it is a nice image, I love trains too, living in the American West I travel through Colorado, Utah and California quit a bit. There are no shortage of cool freight trains along those routes. I often take drone images of them so I can capture a long line of cars.
Nice image ├░┼ĖŌĆśŹ |
May 9th |
| 40 |
May 19 |
Comment |
Super cool image Prakhar the long exposure captured the falls nicely and gave the clouds a little motion blur as well. One thing I have been trying recently is stacking long exposure images with regular exposure so the in this case the falls would look smooth and the clouds would look more static and defined. Just an idea you may want to try next time. Nice Image ├░┼ĖŌĆśŹ |
May 9th |
| 40 |
May 19 |
Comment |
Very cool technique Alison, I like the fact that there are 5 balls in action. I work with masks quit a bit and it looks like you did an excellent job on this one. Its not easy combining all of these masks and making the image look seamless. Better subject and composition this time. Nice Job ├░┼ĖŌĆśŹ |
May 9th |
7 comments - 3 replies for Group 40
|
7 comments - 3 replies Total
|